

Sunbeam Pedestal Fan with Remote Control - Appliances Online
Sunbeam Pedestal Fan with Remote Control - Appliances Online
Sunbeam Pedestal Fan with Remote Control - Appliances Online

You also want an ePaper? Increase the reach of your titles
YUMPU automatically turns print PDFs into web optimized ePapers that Google loves.
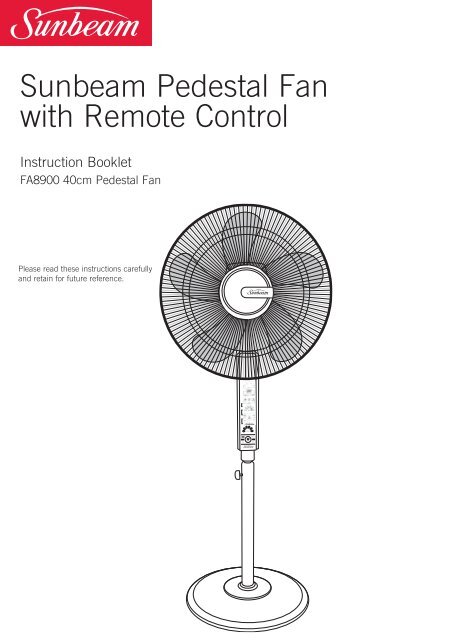
<strong>Sunbeam</strong> <strong>Pedestal</strong> <strong>Fan</strong><br />
<strong>with</strong> <strong>Remote</strong> <strong>Control</strong><br />
Instruction Booklet<br />
FA8900 40cm <strong>Pedestal</strong> <strong>Fan</strong><br />
Please read these instructions carefully<br />
and retain for future reference.
Contents<br />
<strong>Sunbeam</strong>s Safety Precautions 1<br />
Safety Precautions For Your <strong>Pedestal</strong> <strong>Fan</strong> 2<br />
Locating Your <strong>Pedestal</strong> <strong>Fan</strong> 3<br />
Features of Your <strong>Pedestal</strong> <strong>Fan</strong> 4<br />
Parts Identification 5<br />
Assembling Your <strong>Pedestal</strong> <strong>Fan</strong> 6<br />
<strong>Remote</strong> <strong>Control</strong> 8<br />
Using Your <strong>Pedestal</strong> <strong>Fan</strong> 9<br />
Care And Cleaning 12<br />
Important instructions – retain for<br />
future use.
<strong>Sunbeam</strong>’s Safety Precautions<br />
<strong>Sunbeam</strong> is very safety conscious when<br />
designing and manufacturing consumer products,<br />
but it is essential that the product user also<br />
exercise care when using an electrical appliance.<br />
Listed below are important precautions for the<br />
safe use of an electrical appliance.<br />
• Read carefully and save all the instructions<br />
provided <strong>with</strong> an appliance.<br />
• Always turn the power off at the power outlet<br />
before you insert or remove a plug. Remove<br />
by grasping the plug - do not pull on the cord.<br />
• Turn the power off and remove the plug<br />
when the appliance is not in use and before<br />
cleaning.<br />
• Do not use your appliance <strong>with</strong> an extension<br />
cord unless this cord has been checked<br />
and tested by a qualified technician or<br />
service person.<br />
• Always use your appliance from a power<br />
outlet of the voltage (A.C. only) marked<br />
on the appliance.<br />
• This appliance is not intended for use by<br />
persons (including children) <strong>with</strong> reduced<br />
physical, sensory or mental capabilities, or<br />
lack of experience and knowledge, unless they<br />
have been given supervision or instruction<br />
concerning use of the appliance by a person<br />
responsible for their safety.<br />
• Children should be supervised to ensure that<br />
they do not play <strong>with</strong> the appliance.<br />
• The temperature of accessible surfaces may be<br />
high when the appliance is operating.<br />
• Never leave an appliance unattended while<br />
in use.<br />
• Do not use an appliance for any purpose<br />
other than its intended use.<br />
• Do not place an appliance on or near a hot gas<br />
flame, electric element or on a heated oven.<br />
• Do not place on top of any other appliance.<br />
• Do not let the power cord of an appliance hang<br />
over the edge of a table or bench top or touch<br />
any hot surface.<br />
• Do not operate any electrical appliance <strong>with</strong><br />
a damaged cord or after the appliance has<br />
been damaged in any manner. If damage is<br />
suspected, return the appliance to the nearest<br />
<strong>Sunbeam</strong> Appointed Service Centre<br />
for examination, repair or adjustment.<br />
• For additional protection, <strong>Sunbeam</strong><br />
recommend the use of a residual current<br />
device (RCD) <strong>with</strong> a tripping current not<br />
exceeding 30mA in the electrical circuit<br />
supplying power to your appliances.<br />
• Do not immerse the appliance in water<br />
or any other liquid unless recommended.<br />
• <strong>Appliances</strong> are not intended to be operated<br />
by means of an external timer or separate<br />
remote control system.<br />
• This appliance is intended to be used in<br />
household and similar applications such<br />
as: staff kitchen areas in shops, offices and<br />
other working environments; farm houses; by<br />
clients in hotels, motels and other residential<br />
type environments; bed and breakfast type<br />
environments.<br />
If you have any concerns regarding the performance and use of your appliance,<br />
please visit www.sunbeam.com.au or contact the <strong>Sunbeam</strong> Consumer Service Line.<br />
Ensure the above safety precautions are understood.<br />
1
Safety Precautions For<br />
Your <strong>Pedestal</strong> <strong>Fan</strong><br />
• Do not use outdoors.<br />
• Do not run the cord of the fan under<br />
carpeting. Do not cover the cord <strong>with</strong> throw<br />
rugs, runners or other floor coverings.<br />
Arrange the cord away from traffic areas so<br />
that it will not be tripped over.<br />
• Do not use this fan in the immediate<br />
surrounds of a bath, shower, laundry area<br />
or swimming pool.<br />
• Be sure the fan is placed on a dry, even<br />
surface. Do not use on soft surfaces, such<br />
as beds, where opening may become<br />
blocked.<br />
• When operating <strong>with</strong> the oscillation<br />
function, do not place the fan in a position<br />
that may restrict or impede its movement.<br />
• Keep your fan away from heat sources,<br />
corrosive gases and avoid direct sunlight.<br />
• This fan is only to be used <strong>with</strong> the base<br />
fitted and in good condition.<br />
• Disconnect the power plug before<br />
dismantling, assembling or before cleaning.<br />
• Always unplug the fan when not in use.<br />
• The fan must not be used if the guards are<br />
damaged in any way.<br />
• Do not insert or allow foreign objects to<br />
enter any ventilation or exhaust openings<br />
as this may cause electric shock or fire, or<br />
damage to the fan.<br />
• Never insert fingers or any other objects<br />
through the guards whenever the power<br />
plug is connected, especially while<br />
running.<br />
• Avoid touching mobile parts of the fan.<br />
• Do not attempt to move your fan whilst<br />
it is operating. If your fan needs to be<br />
moved, please ensure that it is turned off<br />
and you use the carry handle on top of the<br />
pedestal.<br />
• When disposing of the fan at the end of its<br />
useful life, follow local regulations.<br />
• Do not coil the power cord too tightly<br />
around the air cooler, as this may damage<br />
the cord.<br />
2
Locating Your <strong>Pedestal</strong> <strong>Fan</strong><br />
1. Always locate your fan on a level surface.<br />
2. Your pedestal fan should be located in a<br />
dry, cool, well ventilated location. Keep<br />
your fan away from heat sources, corrosive<br />
gases and avoid direct sunlight.<br />
3. Do not attempt to move your pedestal fan<br />
whilst it is operating. If your fan needs to<br />
be moved, please ensure that it is turned<br />
off and you use the carry handle on top of<br />
the fan.<br />
3
Features Of Your <strong>Sunbeam</strong><br />
<strong>Pedestal</strong> <strong>Fan</strong><br />
Metal Grille<br />
Easily assembled, 50cm secure grille.<br />
Plastic <strong>Fan</strong> Blades<br />
5 blades to effectively move the air about<br />
your room.<br />
<strong>Control</strong> Panel<br />
Simply press the on/off button to turn the<br />
unit on. Use the other buttons to select wind<br />
mode, timer, speed and oscillation functions.<br />
Solid Base<br />
Makes your pedestal fan secure.<br />
4
Parts Identification<br />
9<br />
10<br />
1 2 3 4 5 6 7 8<br />
11<br />
1. Locking Screw<br />
2. Front Guard<br />
3. Guard Clip<br />
4. Guard Ring<br />
5. Blade Knob<br />
6. <strong>Fan</strong> Blade<br />
7. Guard Interlocking Nut<br />
8. Rear Guard<br />
9. Front Motor Cover<br />
10. Rear Motor Cover<br />
11. Screw<br />
12. Extension Tube<br />
13. Height Adjustment Knob<br />
14. Stand<br />
15. Base<br />
16. <strong>Control</strong> Panel<br />
16<br />
12<br />
13<br />
14<br />
15<br />
5
Assembling Your <strong>Pedestal</strong> <strong>Fan</strong><br />
1. Unpack all the components from the box.<br />
2. Unfasten the interlocking nut and blade<br />
knob from the front of the motor<br />
(See Figure 2) and place to one side.<br />
5. Open the front guard clip and attach the<br />
fan blade grill <strong>with</strong> the “UP” word (which<br />
appears on the inside of the grill), the<br />
<strong>Sunbeam</strong> logo should be straight. Push the<br />
round edges of the grill firmly together <strong>with</strong><br />
the back grill and lock the clip. Using a<br />
Phillips head screwdriver, tighten the screw<br />
provided. See Figure 3.<br />
Figure 1<br />
3. Attach the rear fan blade grill and ensure it<br />
is in the correct orientation <strong>with</strong> the “UP”<br />
and the two holes aligned at the top<br />
(See Figure 1). Firmly screw on the<br />
interlocking nut.<br />
4. Mount the fan blade onto the motor shaft;<br />
and fasten the blade knob firmly by turning<br />
in an anti-clockwise direction.<br />
See Figure 2.<br />
Figure 3<br />
Figure 2<br />
6
Assembling Your <strong>Pedestal</strong> <strong>Fan</strong> (continued)<br />
Connecting The Base<br />
1. Locate the moulded securing knob.<br />
2. Insert the lower extension shaft firmly into<br />
the base and attach the moulded securing<br />
knob to the underside of the base and<br />
tighten. (Refer Figure 1).<br />
Figure 1 Figure 2<br />
Attaching the body and base<br />
1. Remove the screw from the upper fan<br />
shaft. Place to one side.<br />
2. Insert the upper fan shaft onto the lower<br />
extension shaft and insert the screw and<br />
firmly tighten. Ensure the stand body is<br />
completely interlocked <strong>with</strong> the base.<br />
(Refer Figure 2).<br />
7
<strong>Remote</strong> <strong>Control</strong><br />
<strong>Remote</strong> control<br />
Operates <strong>with</strong>in 8 metres of the<br />
<strong>Pedestal</strong> <strong>Fan</strong>.<br />
<strong>Fan</strong> speed button<br />
Choose from 3 speed settings,<br />
low medium or high.<br />
Wind Mode<br />
You have a choice of 2 Nature or<br />
Sleep airflow types.<br />
When used in nature mode, the<br />
fan speed is randomly adjusted,<br />
giving the feeling of a natural<br />
breeze.<br />
When set to Sleep Mode the<br />
fan speed decreases after 30<br />
minutes from high to medium,<br />
then medium to low. When used<br />
<strong>with</strong> the timer, will ultimately<br />
switch the unit off.<br />
Oscillation<br />
Your pedestal fan oscillates 70°,<br />
distributing cool air throughout<br />
the room.<br />
Preset/Timer<br />
The preset timer allows you to<br />
set your pedestal fan to turn<br />
on/off after 1,2,4 or 8 hours.<br />
Using the remote control<br />
1. Point the remote towards the control panel<br />
on the front of the pedestal to operate.<br />
Inserting or changing the batteries<br />
1. Slide the rear cover off the remote control<br />
unit.<br />
2. Insert the 2 AAA batteries provided <strong>with</strong> your<br />
pedestal fan.<br />
3. Replace the rear cover.<br />
8
Using Your <strong>Pedestal</strong> <strong>Fan</strong><br />
1. Place the pedestal fan on a flat level surface<br />
2. Adjust the height by turning the height<br />
adjustment knob, located on the lower<br />
extension shaft.<br />
Note: Ensure the knob is tightened firmly at all<br />
times. Insert the plug into a 230/240 V power<br />
outlet and turn the power on.<br />
3. Press the on/off button on the fan or the<br />
remote control. The fan will start at ‘medium’<br />
speed for 3 seconds then automatically<br />
change to ‘low’ speed.<br />
Selecting a fan speed<br />
1. To select a fan speed simply press the<br />
‘speed’ button, on either the fan or remote<br />
control, repeatedly to select the desired<br />
speed from the 6 settings available.<br />
The LED lights indicate the graduated speed<br />
on the dial below.<br />
• If you will not be using the fan for a length of<br />
time, it is advisable to turn the power off at<br />
the wall socket and unplug the power cord.<br />
9
Using Your <strong>Pedestal</strong> <strong>Fan</strong> (continued)<br />
Oscillation<br />
Press the oscillation button to choose from<br />
three options of wind direction:<br />
horizontal direction<br />
vertical direction<br />
wave or figure 8 direction<br />
To turn oscillation off, press the oscillation<br />
button again.<br />
Timer<br />
Pre-set to turn on<br />
To pre-set the timer to turn the fan on, place<br />
the fan in “standby” mode (on at the power<br />
outlet but off on the fan) press the preset/timer<br />
button and select the required time (in half<br />
hour increments up to 2 hours, then hourly up<br />
to 10 hours). When the preset time is reached,<br />
the fan will switch ON automatically.<br />
Note: The time must be set when the preset<br />
indicator blinks 3 times. The selected time is<br />
set once the blinking has ceased.<br />
Pre-set to turn off<br />
To pre-set the time to turn the fan off, press<br />
the preset/timer button to switch to timer<br />
mode. Press the timer button once to set the<br />
desired time for the fan to cease operating.<br />
When this set time is reached, the fan will<br />
switch OFF automatically. The timing intervals<br />
are the same as to turn the fan on. Press timer<br />
button again to switch back to preset mode.<br />
Note: You may also pre-set your fan to turn off<br />
whilst in stand by mode.<br />
10
Using Your <strong>Pedestal</strong> <strong>Fan</strong> (continued)<br />
WIND MODES<br />
Press the mode button to select the desired<br />
airflow type in sequence:<br />
Stand mode<br />
The <strong>Fan</strong> will operate at the selected speed.<br />
Sleep mode<br />
Is identical to Soft mode <strong>with</strong> the advantage<br />
that the set fan speed gradually decreases<br />
every 30 minutes.<br />
Soft mode<br />
The fan will gradually change the speed for a<br />
more natural airflow. This speed provides an<br />
extra level of comfort by simulating the natural<br />
rise and fall of the wind over time and can be<br />
used on any speed setting.<br />
11
Care and Cleaning<br />
• Ensure that your pedestal fan is switched<br />
off and disconnected from the power outlet<br />
before cleaning.<br />
• Carefully wipe your fan using a clean<br />
soft cloth. Do not use abrasive cleaners<br />
or brushes to clean the fan as these will<br />
scratch and damage the surface<br />
• Take care that excessive dust does not build<br />
up in or around the motor body. Use a dry<br />
soft brush or vacuum cleaner to remove it.<br />
• Do not allow the motor or other electrical<br />
components to be exposed to water.<br />
• Always store your fan in a cool dry place<br />
when not in use, preferably in the original<br />
box.<br />
12
2 Year Replacement Guarantee<br />
In the unlikely event that this appliance develops any malfunction<br />
<strong>with</strong>in 2 years of purchase (3 months commercial use) due to<br />
faulty materials or manufacture, we will replace it for you<br />
free of charge.<br />
Should you experience any difficulties <strong>with</strong><br />
your appliance, please phone our customer<br />
service line for advice on 1300 881 861 in<br />
Australia, or 0800 786 232 in New Zealand.<br />
Alternatively, you can send a written claim<br />
to <strong>Sunbeam</strong> at the address listed below.<br />
On receipt of your claim, <strong>Sunbeam</strong> will<br />
seek to resolve your difficulties or, if the<br />
appliance is defective, advise you on how<br />
to obtain a replacement or refund.<br />
Your <strong>Sunbeam</strong> 2 Year Replacement<br />
Guarantee naturally does not cover misuse<br />
or negligent handling and normal wear and<br />
tear.<br />
Similarly your 2 Year Replacement Guarantee<br />
does not cover freight or any other costs<br />
incurred in making a claim. Please retain<br />
your receipt as proof of purchase.<br />
The benefits given to you by this guarantee<br />
are in addition to your other rights and<br />
remedies under any laws which relate to the<br />
appliance.<br />
Our goods come <strong>with</strong> guarantees that cannot<br />
be excluded under the Australian Consumer<br />
Law and under the New Zealand Consumer<br />
Guarantees Act.<br />
In Australia you are entitled to a<br />
replacement or refund for a major failure and<br />
for compensation for any other reasonably<br />
foreseeable loss or damage. You are also<br />
entitled to have the goods repaired or<br />
replaced if the goods fail to be of acceptable<br />
quality and the failure does not amount to<br />
a major failure.<br />
Should your appliance require repair or<br />
service after the guarantee period, contact<br />
your nearest <strong>Sunbeam</strong> service centre.<br />
For a complete list of <strong>Sunbeam</strong>’s authorised<br />
service centres visit our website or call:<br />
Australia<br />
www.sunbeam.com.au<br />
1300 881 861<br />
Units 5 & 6, 13 Lord Street<br />
Botany NSW 2019 Australia<br />
New Zealand<br />
www.sunbeam.co.nz<br />
0800 786 232<br />
26 Vestey Drive, Mt Wellington<br />
Auckland, New Zealand
Need help <strong>with</strong> your appliance?<br />
Contact our customer service team or visit<br />
our website for information and tips on<br />
getting the most from your appliance.<br />
In Australia<br />
Visit www.sunbeam.com.au<br />
Or call 1300 881 861<br />
In New Zealand<br />
Visit www.sunbeam.co.nz<br />
Or call 0800 786 232<br />
is a registered trademark.<br />
Made in China.<br />
Due to minor changes in design or otherwise,<br />
the product may differ from the one shown in this leaflet.<br />
© Copyright. <strong>Sunbeam</strong> Corporation Limited 2012.<br />
ABN 45 000 006 771<br />
Units 5 & 6, 13 Lord Street<br />
Botany NSW 2019 Australia<br />
Unit 3, Building D<br />
26 Vestey Drive<br />
Mt Wellington Auckland<br />
New Zealand<br />
<strong>Sunbeam</strong> Corporation is a division of GUD Holdings Ltd. 6/12


