LANTEK User Manual - Ideal Industries
LANTEK User Manual - Ideal Industries
LANTEK User Manual - Ideal Industries

Create successful ePaper yourself
Turn your PDF publications into a flip-book with our unique Google optimized e-Paper software.
Chapter 3<br />
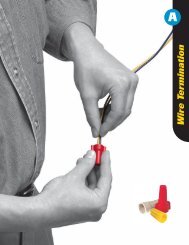
Structured Cable Field Calibration and Testing<br />
USING JOBS TO STORE TEST RESULTS<br />
The <strong>LANTEK</strong> tester can store cable test results under separate Job names. You can<br />
create Jobs, assign any name to them, and store test results on a Job-by-Job basis.<br />
By using Jobs, you can logically group and store test results in a descriptive manner<br />
You can set up a separate Job for each floor in a building, each building on a campus,<br />
each customer, or for any other user-defined classification.<br />
To create a New Job:<br />
1. Select Stored Results on the Ready screen. Press ENTER. At this point, you will<br />
see a list of all the jobs which are currently available. If you have never created a<br />
Job, the list will be empty.<br />
2. To create a new Job select . The Job Options screen appears.<br />
3. Press the ARROW keys to select New Job. Press ENTER. The New Job screen<br />
appears.<br />
4. Type a name into the text field on the New Job screen using the alphanumeric<br />
keyboard. Press a key a second or third time to select the second or third<br />
character on the key. Press the RIGHT ARROW key or wait a few seconds to<br />
advance to the next character position.<br />
5. After entering the name, press ENTER, returning to the Job Options screen where<br />
you can Access Job information, Delete Jobs, Rename Jobs, make a Job the current<br />
Job, or create more Jobs. The new active job name is displayed at the top left<br />
corner of the display.<br />
SAVING CURRENT AUTOTEST RESULTS<br />
The maximum individual Autotest results of 500 TIA CAT 6 with graphs or 30,000 plus<br />
without graphs can be stored in the <strong>LANTEK</strong> internal tester memory and accessed<br />
later using the Test Results menu. Autotest results can be saved immediately following<br />
the test.<br />
‣ Only overall passed Autotests can be automatically saved.<br />
‣ The entire set of test results is saved as one file.<br />
‣ Test results are automatically saved if the AutoSave preference is enabled. Refer<br />
to Setting Preferences.<br />
‣ Test names are automatically assigned to completed tests. If a different name is<br />
desired, a test can be named manually using the ‘Rename’ selection.<br />
To manually save Autotest results (AutoSave Disabled):<br />
1. Press SAVE. The Test Saved screen will be displayed for a brief period, showing<br />
the name the test is saved under.<br />
2. If the current name already exists, a warning screen appears asking you to<br />
overwrite the currently existing file or rename the results to another file or new file<br />
name.<br />
3. Press NO to exit and return to the previous screen without performing a save<br />
operation. Press YES to overwrite the existing file.<br />
4. Select to rename the current test. The Save Test screen will appear with a<br />
new name option.<br />
5. Press ENTER to accept the change and return to the Test Results screen.<br />
3-15