You also want an ePaper? Increase the reach of your titles
YUMPU automatically turns print PDFs into web optimized ePapers that Google loves.
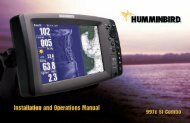
HDS-5, HDS-7,<br />
HDS-5m & HDS-7m<br />
<strong>Operation</strong> <strong>Manual</strong>
Copyright © 2011 Navico<br />
All Rights Reserved<br />
<strong>Lowrance</strong>® and Navico® are registered trademarks of Navico.<br />
Fishing Hot Spots® is a registered trademark of Fishing Hot Spots Inc.<br />
Navionics® is a registered trademark of Navionics, Inc.<br />
NMEA 2000® is a registered trademark of the National Marine Electronics<br />
Association.<br />
Points of Interest Data in this unit are by infoUSA, copyright©<br />
2001-2010, All Rights Reserved. infoUSA is a trademark of<br />
infoUSA, Inc.<br />
Additional mapping data: copyright© 2010 by Transas Ltd.; Copyright©<br />
2010 by Maptech Inc.<br />
Navico may find it necessary to change or end our policies, regulations<br />
and special offers at any time. We reserve the right to do so without<br />
notice. All features and specifications subject to change without notice.<br />
Software updates for your unit<br />
Occassionally check the <strong>Lowrance</strong> website for free software upgrades for<br />
your unit. Go to www.lowrance.com for the software upgrades. Select the<br />
Downloads option from the grey menu bar near the top of the <strong>Lowrance</strong><br />
website homepage. The Downloads screen will appear. Select Products<br />
Software Updates from the list on the left side of the screen. The Products<br />
Software Updates screen will appear. Scroll through the Product list and select<br />
your unit to download the software update.<br />
IMPORTANT NOTE ABOUT RESTRICTED OPERATION<br />
OUTSIDE OF THE AMERICAS<br />
Units designed for sale in the Americas will have limited Language and Units<br />
functionality outside of a zone defined as 30 degrees West longitude on the<br />
East and the International Date Line on the West. Language options will be<br />
restricted to English (US) only and Units will be restricted to non-metric<br />
measures.<br />
Units sold with Enhanced US Basemap, Nautic Insight, Lake Insight or Insight<br />
USA units are impacted and will not have this functionality outside of the<br />
defined region. Units sold with WorldWide Basemap will function without<br />
these restrictions.
Contents<br />
Table of contents<br />
Introduction........................................................................................ 4<br />
Getting Started.................................................................................. 6<br />
Turning on the Unit...................................................................................... 6<br />
Setup wizard............................................................................................... 6<br />
Keypad........................................................................................................ 6<br />
Backlight..................................................................................................... 6<br />
Cursor......................................................................................................... 6<br />
Language.................................................................................................... 7<br />
Menus......................................................................................................... 7<br />
Selecting Chart Data ................................................................................. 8<br />
Selecting a Fishing Mode........................................................................... 8<br />
Entering Letters in Text Boxes.................................................................... 9<br />
Restore Defaults......................................................................................... 9<br />
Pages................................................................................................ 10<br />
Pages Screen........................................................................................... 10<br />
Data Overlay............................................................................................. 11<br />
Configuration menu.................................................................................. 14<br />
Sonar Page (Sonar units only).................................................................. 15<br />
Chart Page................................................................................................ 15<br />
Radar Page (optional)............................................................................... 16<br />
Info Page................................................................................................... 16<br />
Utilities...................................................................................................... 21<br />
Displaying Combo Pages......................................................................... 23<br />
Sonar <strong>Operation</strong> (HDS-5 & 7 only)................................................ 26<br />
Viewing Sonar History.............................................................................. 26<br />
Sonar Menu.............................................................................................. 27<br />
Sonar Options...........................................................................................30<br />
1
Contents<br />
Palette....................................................................................................... 31<br />
Measure Distance..................................................................................... 33<br />
Log Sonar Data......................................................................................... 33<br />
Chart <strong>Operation</strong>............................................................................... 36<br />
Chart menu............................................................................................... 37<br />
Waypoints.................................................................................................38<br />
Routes.......................................................................................................44<br />
Trails.......................................................................................................... 48<br />
Measuring Distances on Chart page........................................................ 50<br />
Search by Coordinates............................................................................. 51<br />
Find Chart item......................................................................................... 51<br />
Map Orientation........................................................................................ 52<br />
Look Ahead............................................................................................... 52<br />
Chart categories....................................................................................... 53<br />
2D and Shaded Relief ..................................................................... 53<br />
Navionics.................................................................................................. 55<br />
Radar <strong>Operation</strong> (optional)............................................................ 58<br />
Radar menu.............................................................................................. 59<br />
Adjust menu.............................................................................................. 59<br />
Guard Zones.............................................................................................64<br />
Radar Overlay........................................................................................... 65<br />
Settings Menu.................................................................................. 66<br />
Chart Settings Menu................................................................................. 75<br />
Sonar Settings (HDS-5 &7)...................................................................... 78<br />
<strong>Manual</strong> Mode............................................................................................ 79<br />
Fishing Modes ......................................................................................... 80<br />
Installation Menu....................................................................................... 81<br />
Keel Offset................................................................................................ 81<br />
Radar Settings Menu (optional)................................................................ 85<br />
Fuel........................................................................................................... 96<br />
2
Contents<br />
Alarms..................................................................................................... 100<br />
Units........................................................................................................ 101<br />
Network................................................................................................... 102<br />
Vessels (only available if connected to AIS receiver)............................. 108<br />
Simulator................................................................................................. 110<br />
Specifications: HDS-5/5m & HDS-7/7m.........................................113<br />
Unit Care..........................................................................................114<br />
Troubleshooting..............................................................................115<br />
Index................................................................................................ 123<br />
3
Introduction<br />
Introduction<br />
About this manual<br />
Thank you for purchasing from <strong>Lowrance</strong>, the industry leader in marine technology.<br />
This manual documents how to adjust features and options in your display unit. The<br />
information in each section follows the same sequence as your display unit’s menus.<br />
If you would like information on how to get the most out of your unit, visit our web<br />
site, www.lowrance.com; click on the Support tab and select Tips and Tutorials.<br />
HDS-5/7 and HDS-5m/7m<br />
The Sonar <strong>Operation</strong> section and all other sonar references, only apply to the HDS-5<br />
and HDS-7 sonar/GPS combo units. Sonar references do not apply to the HDS-5m<br />
and HDS-7m GPS only units.<br />
<strong>Manual</strong> Conventions<br />
When you are instructed to press a button in this manual, the button will be shown<br />
in all caps and bold text like — Menu, Exit, Enter, etc. If you are instructed<br />
to select an item from a menu, the item to be selected will be listed in bold like —<br />
Brightness, Key beeps, etc.<br />
For example: Press Menu, select Language and press Enter.<br />
WARNING: When a GPS unit is used in a vehicle, the<br />
vehicle operator is solely responsible for operating the<br />
vehicle in a safe manner. Vehicle operators must maintain<br />
full surveillance of all pertinent driving, boating or<br />
flying conditions at all times. An accident or collision resulting<br />
in damage to property, personal injury or death<br />
could occur if the operator of a GPS-equipped vehicle<br />
fails to pay full attention to travel conditions and vehicle<br />
operation while the vehicle is in motion.<br />
<strong>Lowrance</strong> Customer Service<br />
US (800) 324-1356<br />
Canada (800) 661-3983 or (905) 629-1614<br />
4
Introduction<br />
<strong>Lowrance</strong> HDS-5/7 & HDS 5m/7m<br />
ZOUT: Zoom out to see more of the map with less detail<br />
ZIN: Zoom in to see less of the map with more detail<br />
MOB: Pressing ZOUT and ZIN at the same time will set a man overboard waypoint<br />
KEYPAD: move the<br />
cursor, scroll through<br />
menus, adjust features,<br />
view sonar/GPS history<br />
EXIT: cancels<br />
entries, closes<br />
menus & windows;<br />
toggles between<br />
cursor position and<br />
chart location on<br />
Chart page<br />
ENTER: confirms<br />
menu selections;<br />
shortcut key for<br />
functions like saving<br />
a waypoint at cursor<br />
position<br />
PAGES: opens Pages<br />
menu; hold down the<br />
Pages key to switch<br />
active panels when<br />
viewing combo pages<br />
MENU: opens<br />
context &<br />
settings menus<br />
LIGHT/POWER:<br />
controls backlight<br />
level & turns the<br />
unit on/off<br />
WPT/FIND: saves a waypoint<br />
at current position; accesses<br />
searching tools<br />
MMC/SD Card slot: insert<br />
MMC/SD and high-detail<br />
mapping cards here<br />
5
Getting Started<br />
Getting Started<br />
Turning on the Unit<br />
Press the Power/Light key to turn on the unit. To turn off the<br />
unit, press the Power/Light key, select Power Off and press<br />
Enter.<br />
Setup wizard<br />
The Setup wizard will appear when unit is turned on<br />
for the first time. To choose your own settings, do not<br />
run the setup wizard. To restart the Setup wizard, restore<br />
defaults.<br />
Keypad<br />
This unit’s keypad can be used in two ways. Pressing the arrow<br />
symbols on the keypad will move the cursor in the corresponding<br />
direction on the screen and allow you to scroll through menus.<br />
Keypad<br />
Backlight<br />
Tap the Light/Power key to make adjustments to the backlight<br />
level and open the Backlight Menu. To turn on Night Mode from<br />
the menu, highlight Night Mode and press enter. Night mode<br />
optimizes the display for low light conditions.<br />
Cursor<br />
Use the unit’s keypad to move the cursor around the display, select onscreen objects,<br />
highlight data items and view sonar history. Press Exit to remove the cursor from<br />
the screen.<br />
6
Getting Started<br />
Language<br />
Selects language used for menus, text boxes and messages.<br />
To select a language:<br />
1. Press Menu twice.<br />
2. Select System and press ENTER<br />
3. Highlight Language and press ENTER.<br />
4. Use the keypad to select a language and<br />
press ENTER.<br />
Menus<br />
This unit has a Settings menu, a Pages screen and several context<br />
menus. The Settings menu provides access to the settings menus for<br />
the three main operation modes: Sonar, Chart and Radar. The Settings<br />
menu is accessed by pressing MENU twice.<br />
The Pages screen allows you to select a page to be shown on the<br />
display. Utilities are also accessed from the Pages screen. Press the<br />
PAGES key to select a page.<br />
Each page has its own context menu which allows you to access<br />
functions for that page. Context menus are accessible only when its<br />
corresponding page is displayed. The Sonar Menu, for example, will<br />
only be available when the Sonar Page is on the display. To access a<br />
context menu, select the desired page and press the MENU key.<br />
Settings<br />
menu<br />
Pages screen<br />
Sonar menu<br />
Chart menu<br />
Radar menu<br />
Closing Menus<br />
Press the EXIT key to close a menu. Repeatedly pressing EXIT will close all menus,<br />
taking you back to the main screen.<br />
7
Getting Started<br />
Selecting Chart Data<br />
This unit supports <strong>Lowrance</strong> and Navionics map<br />
data. Chart data is selected from the Chart Settings<br />
menu.<br />
To select Chart data:<br />
1. Press Menu twice.<br />
2. Highlight Chart and press Enter.<br />
3. Select Chart Data and press enter.<br />
4. Select the desired map data option and press enter.<br />
Selecting a Fishing Mode<br />
Fishing modes enhance the performance of your unit by providing preset packages<br />
of sonar settings geared to specific fishing conditions.<br />
To select a fishing mode:<br />
1. Press Menu twice.<br />
2. Select Sonar and press enter.<br />
3. Highlight Fishing Mode and press enter.<br />
4. Select the desired fishing mode and press<br />
enter.<br />
Fishing<br />
Mode<br />
Depth Settings Palette<br />
General Use ≤1,000 ft 50% Ping speed Bottom brown/ blue background<br />
Shallow Water ≤ 60 ft 75% Ping speed bottom brown/white background<br />
Fresh Water ≤ 400 ft 50% Ping speed bottom brown/white background<br />
Deep Water ≥ 1,000 ft 50% Ping speed Deep Blue<br />
Slow Trolling ≤ 400 ft 50% Ping speed Bottom brown/white background<br />
Fast Trolling ≤ 400 ft Lower chart speed Bottom brown/white background<br />
Clear Water ≤ 400 ft 50% Ping speed Bottom brown/white background<br />
Ice Fishing<br />
≤ 400 ft<br />
Settings optimized to reduce interference from<br />
other sonar units<br />
8
Getting Started<br />
Entering Letters in Text Boxes<br />
This unit has some features and functions that may<br />
require you to enter data in a text box.<br />
To enter data in a text box:<br />
1. Highlight the text box and press ENTER.<br />
A keyboard will appear on the screen.<br />
2. Use the keypad to highlight the first<br />
character and press ENTER. Repeat<br />
this step until all characters have been<br />
entered.<br />
3. Highlight OK and press enter.<br />
Keypad button controls<br />
uppercase & lowercase<br />
Keyboard window<br />
Restore Defaults<br />
The Restore Defaults command switches the unit back to the settings it had when<br />
you purchased it (default).<br />
To Restore Defaults:<br />
1. Press Menu twice.<br />
2. Select System and press enter.<br />
3. Highlight Restore Defaults and press Enter.<br />
4. Select each item you want to restore or<br />
delete and press Enter.<br />
5. Select OK and press Enter.<br />
9
Pages<br />
Pages<br />
With Chart selected, unit will<br />
display a full chart screen<br />
Page icons<br />
rotate around<br />
the circular<br />
Pages menu<br />
Combo<br />
display<br />
options<br />
allows you<br />
to display a<br />
split screen<br />
Page Icons<br />
Chart icon rotated to center of<br />
page; has blue border indicating<br />
it is the selected page option<br />
Pages Screen<br />
Consists of page icons that scroll horizontally around the Pages menu. To view the<br />
pages screen, press the Pages key.<br />
Selecting Pages<br />
Pressing the keypad left or right will move the page icons around the menu. To<br />
select a page, move the desired page icon to the center of the screen.<br />
When selected, the page name will be highlighted in blue at the top of a list of<br />
combo display options. Its icon, will be framed by a blue border below the list. To<br />
display the page, press ENTER.<br />
NOTE: Hold down the Pages key to switch active panels<br />
when viewing combo pages.<br />
10
Pages<br />
Data Overlay<br />
Data overlay is information you can display on top<br />
of the page screen, allowing you to customize each<br />
page with desired data.<br />
Data Overlay menu<br />
Every page option has its own Data Overlay menu. The menu allows you to edit,<br />
add or remove overlay data from the display. To access Data Overlay menu, select<br />
a page option and press menu.<br />
Edit Overlay menu<br />
Accesses data overlay options for all the unit’s page screens.<br />
To access Edit Overlay menu:<br />
1. Select Edit data overlay from the Data overlay<br />
menu and press Enter.<br />
2. Press menu. The Edit overlay menu will<br />
appear.<br />
Edit Mode<br />
When a gauge is added to the display it will be shown in edit mode. Analog and<br />
bar gauges are shaded in blue when they are in Edit Mode. Digital Gauges will be<br />
shown with a blue border.<br />
Analog gauge in edit<br />
mode<br />
Digital gauge in edit mode<br />
11
Pages<br />
Move or Placing a Gauge<br />
The Move gauge command allows you to move data overlay to any position on the<br />
screen. When you use the Place gauge command, the gauge will be locked in its<br />
current position.<br />
To move/place a gauge:<br />
1. Press the Enter key when the gauge is in edit<br />
mode. Four directional arrows will appear.<br />
2. Use the keypad to move the gauge into the desired<br />
location.<br />
3. Press Enter to place the gauge.<br />
Select Data<br />
Used to select data that will be shown on the data overlay display. When selecting<br />
data you first will open a main data category and then choose data to be displayed<br />
from the a data subcategory.<br />
Select data menu<br />
Time subcategory<br />
Type<br />
Switches data overlay display between analog, digital and bar gauge formats,<br />
provided the format is appropriate for the selected data type.<br />
To change the gauge type:<br />
1. With the gauge in edit mode, press Menu.<br />
2. Select Configure and press Enter.<br />
3. Select Type and press Enter.<br />
12
Pages<br />
Time in digital format<br />
Size<br />
Time in analog format<br />
Selects the size of the data overlay display. Data overlay can be displayed in four<br />
sizes.<br />
With the gauge in edit mode (shaded in blue) press the Zoom out key to increase<br />
overlay size; press the Zoom in key to decrease overlay size.<br />
Small digital gauge<br />
Large analog gauge<br />
Limits<br />
Controls the number scale used on data overlay gauges and<br />
selects warning thresholds.<br />
Changing the limits on an analog or bar gauge removes<br />
unnecessary numbers from the gauge, making them easier<br />
to read. Warnings help you stay within selected warning<br />
thresholds.<br />
Limits are configured by inputting analog or bar gauge limits<br />
in the Limits text boxes — minimum and maximum. Warnings<br />
thresholds are entered in the Low and High text boxes.<br />
Configuration<br />
Limits menu<br />
13
Pages<br />
Configuration menu<br />
Allows you to Add/Remove sources and adjust Bezel, Caption<br />
and Invert Text Settings. Other configuration menu options are<br />
covered previously in the section.<br />
To access the Configuration menu, highlight Configuration on<br />
the Edit Overlay menu and press enter.<br />
Bezel<br />
Caption<br />
Invert Text<br />
Configuration Settings<br />
Adds a bezel to the data overlay gauge, making it easier to<br />
see against certain backgrounds<br />
Allows you to add/remove data label from gauge<br />
Changes appearance of data overlay text<br />
Add Source<br />
Displays the same type of data from different sources on the same analog gauge.<br />
If, for example, you have multiple engines, you could select port engine RPM as your<br />
data type and then display starboard engine RPM using the Add source command.<br />
Both data sources could be displayed simultaneously on an analog gauge with two<br />
needles; one dedicated to each source.<br />
To add a source:<br />
1. Select Add source from the Edit Overlay menu<br />
and press Enter.<br />
2. Highlight a category and press Enter. A list of<br />
subcategories will appear.<br />
3. Select the desired subcategory and press<br />
Enter.<br />
Add Source menu<br />
To remove add source data:<br />
1. Highlight Remove source on the Edit overlay<br />
menu and press Enter.<br />
2. Select the source you want to remove and press<br />
Enter.<br />
Showing RPM from<br />
two engines.<br />
14
Pages<br />
Sonar Page (Sonar units only)<br />
Displays the water column moving from<br />
right to left on your unit’s screen. On the<br />
right side of the screen, the Amplitude<br />
Scope bar previews echoes about to appear<br />
on the display.<br />
The sonar page supports multiple splitscreen<br />
views and 14 color palette settings. Sonar<br />
display options are covered in more detail<br />
in the Sonar <strong>Operation</strong> section.<br />
On the Sonar Page you can:<br />
• Move the cursor to any location on the screen to get a depth reading<br />
• Show fish echoes as fish symbols with fish depths<br />
• Adjust Range to view only desired portion of the water column<br />
To access the Sonar Page, use the keypad to highlight Sonar on the Pages menu and<br />
press ENTER.<br />
Chart Page<br />
Consists of a Map that moves in real time<br />
as you move. By default, the map is shown<br />
from a birds-eye view with North at the top<br />
of the screen.<br />
This page has three map orientation options<br />
(North Up, Track Up & Course Up) and<br />
two ways to view the map: 2D and Shaded<br />
Relief (only available on select models).<br />
The cursor is used to scroll the map, select<br />
objects and find the distance between objects. The Chart page is covered in more<br />
detail in the Chart <strong>Operation</strong> section.<br />
On the Chart Page you can:<br />
• Save Waypoints<br />
• Find points of interest (POI)<br />
• Navigate routes; navigate to cursor and waypoints<br />
To access the Chart page, use the keypad to highlight Chart on the Pages menu and<br />
press ENTER to access the Chart Page.<br />
15
Pages<br />
Radar Page (optional)<br />
Displays the PPI (Position Plan Indicator)<br />
screen, Range Rings and the cursor.<br />
The PPI can be shifted to show more of a<br />
desired portion of the screen (Look Ahead,<br />
Center & Offset) and the color palette<br />
can be changed to show returns in white,<br />
yellow, black or green. The radar page<br />
is covered in more detail in the Radar<br />
<strong>Operation</strong> section.<br />
On the Radar Page you can:<br />
• Overlay compass data, range rings and EBL/VRMs on display<br />
• Choose screen orientation from Head Up, Course Up & North Up<br />
• Make radar targets more visible via Target Expansion<br />
Use the keypad to highlight Radar on the page screen and press ENTER to access<br />
the Radar Page.<br />
NOTE: You will only be able to see the Radar page if your unit<br />
is connected to a radar.<br />
Info Page<br />
Consists of multiple gauges — Analog, Digital<br />
and Bar — that can be customized to display<br />
selected data. Customizing the info page allows<br />
you to monitor several types of desired data at<br />
the same time.<br />
On the Info Page you can:<br />
• Select data to be displayed in analog gauge or digital formats<br />
• Change the page layout using one of three templates<br />
• Select the range (scale) of analog gauges<br />
To access the Info Page, use the keypad to select Info on the pages screen and press<br />
enter.<br />
16
Pages<br />
Info menu<br />
Controls Info page data, page layout and data display format<br />
selection. To access the Data menu, press Menu while on the<br />
Info page.<br />
Dashboards<br />
Layout templates that are customized with selected data and saved for on-the-water<br />
viewing. You can customize a different layout template for each dashboard or add<br />
custom data to the same layout template and save it as a different dashboard each<br />
time.<br />
Vessel layout Navigation Layout Angler Layout<br />
NOTE: You can toggle through the dashboard templates on the<br />
screen by pressing the keypad left/right.<br />
Edit<br />
Used to select information displayed on the Info page. To switch the screen to Edit<br />
Mode, select Edit from the Info menu and press enter. The active gauge will be<br />
shaded in blue (analog) or surrounded by a blue border (digital and bar).<br />
17
Pages<br />
To edit gauge display:<br />
1. Use the keypad to select the gauge you want to<br />
edit and press enter. The Select Info menu will<br />
appear.<br />
2. Use the keypad to select a data category and press<br />
enter. A list of subcategories will appear.<br />
3. Select the desired subcategory and press<br />
enter.<br />
4. Press Menu. The Edit Info menu will appear.<br />
5. Select Save and press enter.<br />
GPS category<br />
Ground Speed<br />
subcategory<br />
Editing data on an analog<br />
gauge<br />
Editing data on a digital gauge<br />
Edit Info menu<br />
Changes Info Page gauge data, allowing you to display desired<br />
data on analog, digital and bar gauges. It also controls gauge<br />
limits.<br />
To access the Edit Info menu, switch the screen to Edit mode<br />
and press menu.<br />
To select info:<br />
1. Highlight Select Info from the Edit Info menu and press enter. The<br />
Select Info menu will appear.<br />
2. Use the keypad to select the desired category and press enter. A<br />
list of subcategories will appear.<br />
3. Select the desired subcategory and press enter.<br />
18
Pages<br />
To add source:<br />
1. Select Add Source from the Edit Info menu<br />
and press enter.<br />
2. Use the keypad to select the desired category<br />
and press enter. A list of subcategories will<br />
appear.<br />
3. Select the desired subcategory and press<br />
enter.<br />
To remove a source:<br />
1. Highlight Remove Source from the Edit Info menu and press enter.<br />
The Remove data-source window will appear.<br />
2. Select the source you want to remove and press enter.<br />
To Configure Limits:<br />
1. Highlight Configure Limits on the Edit Info menu<br />
and press enter. The Configure Limits menu<br />
will appear.<br />
2. Select the desired text box and press enter.<br />
3. Use the keypad to enter the desired limit or<br />
warning threshold.<br />
4. Select OK and press enter.<br />
NOTE: The Limits portion of the Configure Limits menu will<br />
only be shown when configuring analog gauge limits.<br />
19
Pages<br />
Change Layout<br />
Controls the gauge layout of dashboard templates and customized dashboards. That<br />
allows you to select a desired gauge layout template for all dashboards.<br />
To change layout:<br />
1. Highlight the desired dashboard and press<br />
enter.<br />
2. Select Change Layout from the Info menu and<br />
press enter.<br />
3. Use the keypad to choose a gauge layout<br />
template and press enter.<br />
Add Dashboard<br />
Allows you to customize and save multiple dashboard templates. Desired data can<br />
be added to the gauges on each dashboard, allowing you to create custom dashboards<br />
for a variety of fishing conditions. You can even use the same gauge layout template<br />
for each dashboard.<br />
When you have created all desired dashboards, press the keypad left/right to toggle<br />
through your dashboards.<br />
To add a dashboard:<br />
1. Select Add Dashboard from the Info menu and press enter. The<br />
Change Layout menu will appear.<br />
2. Select the desired gauge layout and press enter. Refer to the<br />
previous Edit segment to customize the dashboard.<br />
20
Pages<br />
To remove dashboards:<br />
1. Select the number of the dashboard you want to<br />
delete from the numerical dashboard list.<br />
2. Highlight Remove Dashboard and press enter.<br />
A confirmation message will appear.<br />
3. Select Delete and press enter.<br />
Numerical<br />
dashboard list<br />
Settings<br />
Opens the Settings menu. Settings information is covered in detail in the Settings<br />
menu section.<br />
Utilities<br />
Allows you to set alarms, view sonar logs and access other system settings.<br />
To access Utilities:<br />
1. Use the keypad to center the utilities icon on<br />
the screen.<br />
2. Scroll down the list of utilities until the desired<br />
option is highlighted.<br />
3. Press ENTER.<br />
Utilities Icon<br />
Utilities<br />
Waypoints,<br />
Routes/Trails<br />
Find<br />
Alarms<br />
Vessels<br />
Sun/Moon<br />
Trip Calculator<br />
Files<br />
Access Waypoint, Route and Trails screen; covered in<br />
the Chart <strong>Operation</strong> Section<br />
Search for POIs, Vessels, Coordinates, Trails, Waypoints<br />
and Routes; covered in Chart <strong>Operation</strong> Section<br />
Access alarm history, status and change settings<br />
View status and messages from vessels in the area<br />
Displays time when sun and moon will rise/set<br />
Keeps running tally/total of engine hours<br />
Access, copy and delete data files and sonar logs<br />
21
Pages<br />
Copying a screenshot<br />
Copy File screen<br />
Data files/Sonar logs<br />
To copy data files/sonar logs:<br />
1. Highlight Files from the Utilities menu and press enter.<br />
2. Select the desired File category and press the keypad to the right. A<br />
list of subcategories will appear.<br />
3. Select a subcategory and press the keypad to the right. Highlight<br />
the desired data file/sonar log.<br />
4. Press Menu. Highlight Copy and press enter. The Copy File<br />
screen will appear.<br />
5. Select a place to copy the file, like an MMC card. Press enter.<br />
To delete data files/sonar logs:<br />
1. Highlight Files from the Utilities menu and press enter.<br />
2. Select the desired File category and press enter. A list of<br />
subcategories will appear.<br />
3. Select a subcategory and press enter.<br />
Highlight the desired data file/sonar log.<br />
4. Press Menu, select Delete and press enter.<br />
A confirmation message will appear.<br />
5. Select Yes and press enter.<br />
22
Pages<br />
Info selected as combo<br />
display option<br />
GPS/Info combo page<br />
Displaying Combo Pages<br />
You can display multiple pages at the same time by scrolling the desired page’s<br />
icon to the center of the screen and then choosing a secondary page from the list of<br />
combo page display options.<br />
To display a combo page:<br />
1. Use the keypad to select the first page for the combo<br />
display. This is the primary page, which will be<br />
displayed in the left panel.<br />
2. Select another page from the primary page’s combo<br />
display list. This is the secondary page. It will be<br />
displayed in the right panel.<br />
3. Press Enter. The selected combo page will be<br />
displayed.<br />
Primary page<br />
Selecting an Active Panel<br />
When combo pages are displayed only one panel<br />
can be active at a time. The panel outlined with an<br />
orange border is the active panel. You will only<br />
be able to access the context menu of the active<br />
panel. Pressing the Menu key will open the active<br />
panel’s context menu.<br />
To switch the active setting to the other panel, hold<br />
down the Pages key for 1 second.<br />
Secondary<br />
page<br />
Chart panel is active as<br />
shown by the orange border<br />
23
Pages<br />
Displaying Multiple Panels (Sonar units only)<br />
Multiple panels can be displayed by setting up a combo display using a page that<br />
supports the Split feature. By displaying multiple panels, you can view more<br />
information on the screen at one time.<br />
Step 1: Select sonar split screen<br />
Step 2: Choose page from<br />
combo display options list<br />
To display multiple panels:<br />
1. Select a Split view for the sonar page. (Accessing the Split feature<br />
is covered in detail in the Sonar<br />
section.)<br />
2. Press the Pages key and use<br />
the keypad to center the Sonar<br />
icon on the screen.<br />
3. Use the keypad to select Info<br />
Page from the combo page<br />
display list. Press Enter. The<br />
combo page will be displayed<br />
with the Sonar split view on the<br />
left; the Info page on the right.<br />
Flasher, normal sonar and the<br />
info page shown on a multi-panel<br />
display.<br />
Adjust Panel Sizes<br />
Controls the size of panels when combo pages or<br />
multi-panels displays are in use. Adjusting the size<br />
of the panels, allows you to emphasize the panel<br />
you want to see more clearly.<br />
Panels can only be adjusted left/right, so<br />
the panels on the side with the split view<br />
can not be adjusted vertically.<br />
Adjust panel sizes selected<br />
on the Data Overlay menu<br />
24
Pages<br />
Moving panel cursor left/right will change the size<br />
of each panel<br />
Adjusting panels on combo page<br />
(Sonar/Info combo shown)<br />
Adjusting panels on multi-panel display<br />
(Sonar/Info combo shown)<br />
To adjust panel sizes:<br />
1. With the combo page or multi-panel display on the screen, press<br />
the Pages key.<br />
2. Press menu. Highlight Adjust Panel Sizes from the Data Overlay<br />
menu and press enter.<br />
3. Press the keypad left/right to adjust the panels to a desired size and<br />
press enter.<br />
25
Sonar<br />
Sonar <strong>Operation</strong> (HDS-5 & 7 only)<br />
Water column<br />
Surface clutter<br />
Temperature Graph<br />
Fish Arches<br />
Range<br />
scale<br />
Cursor depth<br />
Depth<br />
Line<br />
Brush<br />
Water depth, water<br />
temp and cursor<br />
coordinates<br />
Colorline<br />
To access the Sonar Page:<br />
1. Press the Pages key.<br />
Blue sonar history bar; reviews<br />
recent sonar history<br />
2. Use the keypad to select Sonar and press ENTER.<br />
Cursor<br />
Cursor<br />
Amplitude Scope<br />
— shows amplitude<br />
of real-time sonar<br />
echoes<br />
Blue sonar history bar<br />
Viewing Sonar History<br />
You can review your recent sonar history<br />
by moving the cursor to the left until the<br />
screen starts to move in reverse.<br />
To resume normal operation, move the<br />
cursor all the way to the right of the<br />
screen or press Exit.<br />
26
Sonar<br />
Sonar Menu<br />
Accesses features ranging from Auto Sensitivity and Depth<br />
Range to Frequency and Stop Sonar.<br />
From the Sonar Page, press MENU to access the Sonar<br />
Menu.<br />
Sonar Menu<br />
Sensitivity<br />
Controls the level of detail shown on the display. Increasing Sensitivity will show<br />
more detail on the screen; decreasing Sensitivity displays less. Too much detail will<br />
clutter the screen. Conversely, desired echoes may not be displayed if Sensitivity is<br />
set too low.<br />
Sensitivity set to 60 percent<br />
Sensitivity set to 80 percent<br />
NOTE: By default, Sensitivity is set to auto mode. You may<br />
have to turn off Auto Sensitivity to set sensitivity to a desired<br />
level. Auto Sensitivity is covered in more detail later in this<br />
section.<br />
Auto Sensitivity<br />
Keeps sensitivity at a level that works well under<br />
most conditions, reducing the need for adjustments.<br />
You can make minor changes to sensitivity with Auto<br />
Sensitivity turned on, but you will have to turn it off<br />
to make significant adjustments.<br />
Auto Sensitivity can be turned on/off by selecting Auto Sensitivity from the Sonar<br />
menu and pressing ENTER.<br />
27
Sonar<br />
Colorline<br />
Distinguishes strong sonar echoes from<br />
weak sonar echoes. That makes it easier for<br />
you to distinguish fish or structure from the<br />
bottom.<br />
Wide yellow hard<br />
sonar return<br />
Reddish-blue soft<br />
sonar returns<br />
A hard return will be shown as a wide, bright<br />
yellow line, whereas a soft return will be a<br />
narrow reddish-blue line.<br />
Range<br />
Range set to 60 feet<br />
Used to select the section of the water column —<br />
from surface to bottom — shown on the display.<br />
When there is a portion of the water column you<br />
want to focus on, select a range from the Depth<br />
Range menu that includes the desired area.<br />
The values on the Range menu determine the depth<br />
shown on the display. If you selected 20m from the<br />
range menu the unit will display 0-20m of the water<br />
column, regardless of the water depth. There are<br />
21 depth ranges, including automatic and custom<br />
settings. The automatic setting will set the range from the water surface to water<br />
depth.<br />
Frequency<br />
This unit supports three transducer frequencies; two of which are supported by your<br />
transducer. 200 kHz has the highest sensitivity and best target discrimination in<br />
shallower water; 83 kHz offers a wider cone angle for greater water coverage and<br />
50 kHz provides the best depth penetration. You can view both available frequencies<br />
at the same time by setting up a sonar split screen.<br />
Split<br />
Adjusts the configuration of sonar page display using one of four options: No Split,<br />
Zoom, Bottom Lock and Flasher. <br />
28
Sonar<br />
Zoom display Bottom Lock Flasher Display<br />
• No Split — displays full sonar screen<br />
• Zoom — splits display with a zoomed-in panel on the left (press<br />
Zoom key to increase zoom) and a normal sonar view on the right<br />
• Bottom Lock — splits the display with a 2X zoom on the left; a normal<br />
sonar view on the right. Keeps the bottom on the screen at all times.<br />
• Flasher — splits the display with a flasher-style sonar on the left; a<br />
normal sonar view on the right<br />
Stop Sonar<br />
Pauses the sonar chart, allowing you to get a closer look at sonar echoes.<br />
Adjust<br />
Sensitivity and Colorline can also be adjusted from the Sonar menu by using the<br />
Adjust command.<br />
To Adjust Sensitivity and Colorline:<br />
1. Highlight Adjust on the Sonar menu and press ENTER. Press the<br />
keypad up/down to select the Sensitivity or Colorline scrollbar.<br />
2. Press the keypad left/right to make adjustments.<br />
3. Press Exit.<br />
29
Sonar<br />
Custom — Upper and Lower Limits<br />
Controls not only the depth range (lower limit), but<br />
also lets you choose the upper limit. So, instead of<br />
a selecting a range that includes the water surface,<br />
you can choose upper and lower limits anywhere<br />
along the water column.<br />
To set Upper and Lower Limits:<br />
1. Select Range and press ENTER.<br />
2. Highlight Custom and press ENTER.<br />
The Upper and Lower Limit window<br />
will appear.<br />
Upper limit is 15’ (4.5m); lower<br />
limit is 65’ (19m).<br />
3. Select the Upper or Lower Limit dialog box. Press ENTER. The<br />
numerical keypad will appear.<br />
4. Use the keypad to enter the desired value in the corresponding<br />
upper or lower limit dialog box. Press ENTER.<br />
5. Repeat Steps 3 and 4 to input the desired limit in the other dialog<br />
box.<br />
Ping Speed<br />
Ping Speed controls the rate the transducer uses to<br />
send sonar waves into the water. A higher ping speed<br />
will yield the best results when you are moving across<br />
the water at a high rate of speed or fishing from a dock. The reverberation of too<br />
much ping speed can cause interference on the screen.<br />
When using two units on your boat, lowering the ping speed of one of the units will<br />
prevent interference (cross-talk) caused by one transducer detecting pings from the<br />
other transducer. The default setting is suitable for most conditions. Highlight Ping<br />
Speed on the Sonar menu and press the keypad left/right to make adjustments.<br />
Sonar Options<br />
Adjusts display settings and the configuration of the display.<br />
The Sonar Options menu allows you to split the screen<br />
between two sonar views, change the color of the display,<br />
use Fish ID and add graphical elements to screen that will<br />
enhance your sonar experience.<br />
To access the Sonar Options menu, select Sonar Options<br />
from the sonar menu and press ENTER.<br />
30
Sonar<br />
To select a Split option:<br />
1. From the Sonar Options menu,<br />
highlight Split and press ENTER.<br />
The Split menu will appear.<br />
2. Use the keypad to select the desired<br />
option and press ENTER.<br />
Palette<br />
Sonar display color templates with varying degrees of color<br />
and brightness. On the Palette menu, you can select a sonar<br />
display template suited for your fishing conditions from 14<br />
palette options.<br />
A bottom brown<br />
palette clearly<br />
separates fish<br />
and structure from<br />
the bottom<br />
Palette menu<br />
To select a Palette:<br />
1. From the Sonar Options menu, highlight Palette and press ENTER.<br />
2. Use the keypad to select the desired palette and press ENTER.<br />
31
Sonar<br />
Temperature Graph<br />
Uses a red line graph with digital display at<br />
the top of the screen to illustrate changes in<br />
Temperature. The Temperature graph makes it<br />
easier to recognize temperature trends.<br />
To turn the Temperature Graph on/off, highlight<br />
Temperature Graph on the Sonar Options menu<br />
and press ENTER.<br />
Depth Line<br />
Displays a dark line over the bottom surface,<br />
making it easier to distinguish the bottom from<br />
fish, trees and other objects.<br />
To turn on/off the Depth Line, select Depth Line<br />
and press ENTER.<br />
Temperature graph<br />
Depth Line<br />
Amplitude Scope<br />
Allows you to see the amplitude of real-time echoes as they appear<br />
on the display. The Amplitude Scope displays live returns even when<br />
you are viewing your sonar history. To turn off the Scope, highlight<br />
Amplitude scope on the Sonar Options menu and press ENTER.<br />
Amplitude Scope<br />
Zoom Bars<br />
When your unit is in Split Zoom mode, zoom bars show which echoes will be<br />
displayed on the screen when the display is zoomed in to a particular zoom range.<br />
Only echoes shown between the top and bottom of a zoom bar will be displayed at<br />
that selected zoom range.<br />
To turn on/off Zoom Bars, highlight Zoom Bars on the Sonar Options menu and<br />
press ENTER.<br />
NOTE: When the screen is zoomed, you can use the Zoom<br />
Pan feature to scroll up and down the water column. That<br />
allows you to see portions of the water column not visible at<br />
the selected zoom range. When turned on, Zoom Bars will<br />
appear when the Zoom in key is pressed.<br />
32
Sonar<br />
Fish ID<br />
Displays fish echoes as fish symbols instead of<br />
fish arches with or without depth. This makes<br />
it easier to recognize fish on the sonar display.<br />
Symbols — places a fish symbol where a<br />
fish is detected.<br />
Depths — places depths above each fish<br />
detected; helps gauge the distance from each<br />
fish symbol to the boat.<br />
Both — turns on both Symbols and Depths.<br />
Fish Symbols and Depths<br />
To select a Fish ID option:<br />
1. Highlight Fish ID and press Enter.<br />
2. Select Symbols, Depths or Both and press ENTER.<br />
Fish ID Beeps — sounds a tone when the system detects a fish.<br />
Measure Distance<br />
Used to measure the distance from one location to another on the sonar display.<br />
To Measure distance:<br />
1. Move the cursor to the starting location.<br />
2. Select Measure distance on the Sonar menu and press Enter.<br />
3. Move the cursor to the second location. The Measure distance line<br />
will appear with the distance between the two locations shown in the<br />
cursor dialog box.<br />
4. To measure another position, press Enter and move the cursor to<br />
the desired location.<br />
Log Sonar Data<br />
Used to save sonar chart data to your unit’s internal<br />
memory or to an MMC/SD card.<br />
To access the Sounder Logging menu, select<br />
Log Sonar Data from the Sonar menu and press<br />
ENTER.<br />
33
Sonar<br />
Filename<br />
Save to<br />
Bytes<br />
Log All Channels<br />
Time Remaining<br />
Log Sonar Menu<br />
Input the desired name for the sonar log file<br />
Selects location where sonar log will be saved/stored<br />
Controls number of bytes per sounding. More bytes yields<br />
better resolution/shorter logging time; conversely, fewer<br />
bytes produces longer sonar logs/lower resolution<br />
Saves returns from all active sonar frequencies and from<br />
both StructureScan modes – Downscan & Sidescan – in a<br />
single sonar log (StructureScan sold separately)<br />
Recording time left until memory storage runs out<br />
To input filename:<br />
1. Highlight the Filename text box and<br />
press enter. A keyboard will appear<br />
on the screen.<br />
2. Use the keypad to input the desired<br />
filename.<br />
3. Select OK and press enter.<br />
Filename keyboard<br />
Internal selected on device menu<br />
Bytes per sounding<br />
menu<br />
To select Save to or Bytes per Sounding:<br />
1. Highlight Save to or Bytes per Sounding from the Sounder Logging<br />
menu and press enter.<br />
2. Use the keypad to select the desired option and press enter.<br />
34
Sonar<br />
Start Logging<br />
A sonar log is a recording of sonar activity displayed on<br />
the sonar page.<br />
To record a sonar log, highlight the Start Logging button<br />
and press enter.<br />
When a sonar log is being recorded, a blinking red circle<br />
will be displayed in the upper left-hand corner of the<br />
screen and a logging message will appear periodically<br />
at the bottom of the screen.<br />
To stop logging:<br />
1. Select Stop from the Sounder Logging<br />
menu and press enter. The Stop<br />
Logging menu will appear.<br />
2. Highlight the Stop Logging button<br />
and press Enter.<br />
Indicator blinks when<br />
sonar is being recorded<br />
Stop Logging menu<br />
Source<br />
Allows you to select the sonar source for your unit. You can select your unit as the<br />
source, or choose another unit on your ethernet network, allowing you to share sonar<br />
returns from one unit with other units on the network.<br />
To share/receive sonar data:<br />
1. Press Menu twice, select Sonar and press Enter. Make sure the<br />
units sharing sonar have network sonar turned on.<br />
2. Press Exit twice.<br />
3. Access the Sonar page, on the unit that will be sharing its sonar<br />
(master).<br />
4. Press Menu, select Source and press Enter.<br />
5. Select This unit and press Enter.<br />
6. Press Exit.<br />
NOTE: To stop receiving shared sonar, turn off network sonar<br />
on the desired units.<br />
35
Chart<br />
Chart <strong>Operation</strong><br />
Point of Interest (POI)<br />
Waypoint<br />
Chart orientation indicator<br />
Cursor coordinates<br />
Current position icon Cursor<br />
Chart page in 2D Chart mode<br />
Map scale<br />
To access the Chart page:<br />
1. Press the Pages key.<br />
2. Use the keypad to select the Chart icon and press Enter.<br />
The previous image shows items you will see on the chart page:<br />
• Point of Interest (POI): A position represented by a symbol or<br />
character.<br />
• Cursor: Used to view specific areas on the Chart page, select POIs,<br />
create waypoints and measure distances. When the cursor is onscreen,<br />
pressing the Exit key will toggle between the cursor's location<br />
on the Chart page and your actual position.<br />
• Chart orientation indicator: Indicates the current direction the Chart<br />
page is facing.<br />
• Cursor coordinates: Displays the coordinates of the cursor.<br />
• Waypoint: An electronic address based on the latitude and longitude<br />
of a selected location.<br />
• Map Scale: Represents the relationship between the distance on<br />
the Chart page and the real distance on the earth's surface.<br />
• Current position icon: Represents your current position.<br />
36
Chart<br />
Find Current Position<br />
Power on the unit and display the Chart page. The current position icon represents<br />
your current position on screen. The icon always points to your heading.<br />
If the current position icon displays a question mark then the unit has not<br />
achieved a satellite lock and is not tracking your current position. When<br />
sufficient satellites are received to determine a position, the icon's movement will<br />
correspond with your movement.<br />
Chart menu<br />
Use the Chart menu to adjust settings and enter commands.<br />
From this menu you have access to routes, waypoints, info,<br />
chart options and screen settings.<br />
To open the Chart menu, go to the Chart page and press the<br />
MENU key. The following features are listed in the order they<br />
appear on the Chart menu, top to bottom:<br />
• New Waypoint: Creates a new waypoint.<br />
• New Route: Creates a new route.<br />
• Go to Cursor: Navigates to the cursor position on the Chart page.<br />
• Find: Opens the Find menu. From the Find menu you can search for<br />
items by select categories.<br />
• Info: Shows a list of items close to the cursor.<br />
Chart menu<br />
• Measure: Used to measure the distance between current position<br />
and another point on the Chart page or between two different points.<br />
• Overlay: Toggles weather and radar overlay on or off (Radar and<br />
Weather module sold separately)<br />
• Chart options: Opens the Chart options submenu which contains<br />
the Map Orientation, Look Ahead, Chart categories and Imagery features.<br />
Chart Options menu<br />
Controls chart features and options including Map<br />
Orientation, Chart Detail, Look Ahead, Chart<br />
categories and Imagery.<br />
37
Chart<br />
Orientation<br />
Chart detail<br />
Look ahead<br />
Categories<br />
Imagery<br />
Chart Options<br />
Controls the way the Chart page moves in relation to your<br />
movement. (North Up, Heading Up and Course Up)<br />
Controls level of map detail (Full, Medium, Low)<br />
Shows more of the map area in front of you<br />
Opens chart categories display settings list<br />
Toggles 2D and Shaded Relief map display settings (only<br />
available on select US models)<br />
Go To Cursor<br />
The Go To Cursor command is a quick and easy way to navigate to anything you<br />
see on the Chart page.<br />
To go to cursor:<br />
1. Move the cursor over the desired location.<br />
2. Press Menu, select Goto and press Enter.<br />
Selecting POIs on Chart page with Cursor<br />
To select a Chart page POI:<br />
1. From the Chart page use the<br />
Arrow keypad to center the<br />
cursor over a POI. A pop-up<br />
box will appear describing the<br />
POI. The POI's coordinates are<br />
displayed in the lower left hand<br />
corner of the Chart page.<br />
Waypoints<br />
A waypoint is the latitude and longitude of a specific position on the earth's surface.<br />
You can quickly create a waypoint at your current position or you can create a waypoint<br />
at the cursor's position on the Chart page. You also can create a waypoint at<br />
any location by manually entering the position's latitude and longitude.<br />
38
Chart<br />
Waypoints are important because they can be saved in the unit and later used to find<br />
your way back to a specific location, such as a favorite fishing spot or an important<br />
geographical feature. To quickly save a waypoint at the vessel's current position<br />
press the WPT/Find key.<br />
Create Waypoint from Chart page<br />
To create a Waypoint at the cursor's position:<br />
1. Place the cursor on the Chart<br />
page where you want to set the<br />
waypoint and press Enter<br />
twice. The New Waypoint menu<br />
will appear.<br />
2. Select Save from the New<br />
Waypoint menu.<br />
New Waypoint at Cursor menu<br />
To create a Waypoint at the Vessel's position:<br />
1. Press the MENU key. From the Chart menu select New Waypoint.<br />
2. When the New Waypoint at Vessel menu appears, select Save.<br />
NOTE: You can also create a waypoint at the vessel's positon<br />
by pressing the WPT key.<br />
To Navigate to a Waypoint from the Waypoints screen:<br />
1. From the Pages screen select Waypoints, routes, trails, press ENTER.<br />
When the Waypoints screen appears select the waypoint you want to<br />
navigate to from the waypoints list and press MENU. The Waypoints<br />
screen menu will appear. From the Waypoints screen menu select<br />
Go to.<br />
39
Chart<br />
Waypoint name<br />
Waypoint icon<br />
Distance and<br />
Bearing<br />
Waypoint latitude<br />
and longitude<br />
Time and date the<br />
waypoint was<br />
created<br />
Waypoints screen<br />
To view stored waypoints go to the Waypoints screen in the Utilities page. From the<br />
Waypoints screen you can view and edit stored waypoints.<br />
Waypoints screen menu<br />
To open the Waypoints screen menu, press the<br />
MENU key from the Waypoints screen.<br />
Edit<br />
New<br />
Show<br />
Go to<br />
Delete<br />
Sort<br />
Delete All<br />
Find<br />
Waypoints Screen menu<br />
Opens the Edit Waypoint menu<br />
Opens the New Waypoint menu<br />
Shows selected waypoint on the chart<br />
Navigates to selected waypoint<br />
Deletes the selected waypoint<br />
Controls how waypoints are sorted on the waypoints screen<br />
Deletes all waypoints<br />
Use to search for waypoints from the waypoints screen<br />
40
Chart<br />
Waypoints screen, Search for Waypoint by name<br />
If the waypoint list contains too many waypoints to search through manually, you<br />
can search for a specific waypoint by name.<br />
To Search for Waypoint by Name:<br />
1. From the Waypoints screen press the<br />
MENU key. The Waypoints screen<br />
menu will appear.<br />
2. From the Waypoints screen menu<br />
select Find. A keypad will appear.<br />
Use the keypad to enter the name of<br />
the waypoint you are searching for<br />
and press OK.<br />
Waypoints screen, Sort Waypoints<br />
You can choose how waypoints are sorted in<br />
the Waypoints list by selecting Sort from the<br />
Waypoints screen list menu.<br />
Waypoints can be sorted by Name, Nearest or<br />
Icon. By default the unit stores waypoints by<br />
name.<br />
Waypoint Information screen<br />
When a waypoint is saved to the Chart page, you<br />
can view detailed information about that saved<br />
waypoint.<br />
To view waypoint information:<br />
1. Place the cursor over the waypoint<br />
and press the MENU key.<br />
2. Select Info and press enter.<br />
41
Chart<br />
Editing a Waypoint on the Chart page<br />
To Edit a Waypoint from the Chart page:<br />
1. Place the cursor over the waypoint and press the ENTER key. The<br />
Edit Waypoint menu will appear.<br />
Edit Waypoint menu<br />
The Edit Waypoint menu is used to edit waypoint settings and coordinates. Use this<br />
menu to change the name, icon, color and description of a waypoint.<br />
Select More from the Edit Waypoint menu and the following edit options will<br />
appear:<br />
Name<br />
Position<br />
Icon<br />
Color<br />
Description<br />
Display<br />
Depth<br />
Alarm Radius<br />
Delete<br />
Save<br />
Cancel<br />
Edit waypoint — More options<br />
Edit the name of a waypoint<br />
Enter a latitude or longitude for a waypoint<br />
Select a different waypoint icon<br />
Change waypoint icon color<br />
Input additional waypoint information<br />
Controls how a waypoint will be shown on the chart<br />
Select waypoint depth<br />
Distance from a waypoint where arrival alarm will sound<br />
This will delete a waypoint<br />
Saves your waypoint changes<br />
Cancels any waypoint changes<br />
42
Chart<br />
Edit Waypoint name, description, position or depth<br />
To Edit Waypoint name or description:<br />
1. From the Edit Waypoint menu, select the Name or Description text<br />
box and press ENTER. The Waypoint keypad will appear.<br />
2. Use the keypad to enter the desired waypoint name and select OK.<br />
To Edit Waypoint position:<br />
1. From the Edit Waypoint menu select the<br />
latitude/longitude and press enter.<br />
2. Use the Arrow keypad to input the desired<br />
latitude or longitude and select OK.<br />
To Edit Waypoint depth or alarm radius:<br />
1. From the Edit Waypoint (More) menu select the Depth or Alarm<br />
radius text box and press enter. A numerical keypad will appear.<br />
2. Input the desired depth or alarm radius and press ENTER.<br />
Edit Waypoint icon and color<br />
You can change the default waypoint icon and color from the Edit Waypoint menu.<br />
Edit Icon menu<br />
Use the Edit Icon menu and Edit<br />
Icon Color menu to change the<br />
appearance of icons on the Chart<br />
page.<br />
Icon color palette<br />
43
Chart<br />
Routes<br />
Routes make it easier to plan trips to desired destinations and backtrack to a previous<br />
location. A route is a series of waypoints linked together to mark a course of travel. A<br />
route must have at least two waypoints. The route segment between two waypoints<br />
is called a leg. A route gives you the ability to navigate to several waypoints in<br />
an ordered sequence without having to manually select the next waypoint in the<br />
series.<br />
Create Route from Chart page<br />
To create a new route open the Chart menu and select New Route. You can use the<br />
cursor on the Chart page to create a route.<br />
To Create a New Route from the Chart page:<br />
1. Press the Menu key and select New Route from the Chart menu,<br />
press enter.<br />
2. Move the cursor to the start of the route and press ENTER to set<br />
the first waypoint. Move the cursor to the next location and press<br />
ENTER to set a second waypoint.<br />
3. Repeat Step 2 until you have set all the desired waypoints along<br />
the route.<br />
4. Press the MENU key to open the Edit route menu. Select Save and<br />
press ENTER. The route will be saved to the Routes screen.<br />
44
Chart<br />
5. From the Routes screen highlight the route and select Start. The<br />
Start Route message box will appear, select Forward.<br />
Routes screen<br />
To view stored routes go to the Routes screen in the Utilities page. From the Routes<br />
screen you can view and edit stored routes.<br />
Route name<br />
Start of route<br />
End of route<br />
Number of legs<br />
in route<br />
Route<br />
distance<br />
45
Chart<br />
Routes screen menu<br />
From the Routes screen menu you can create a new<br />
route, edit a route or start a route.<br />
To open the Routes screen menu, from the Routes<br />
screen, press the MENU key.<br />
Edit<br />
New<br />
Show<br />
Start<br />
Delete<br />
Delete All<br />
Find<br />
Routes Screen menu<br />
Opens the Edit Route screen<br />
Opens the New Route screen<br />
Shows the Route on the Chart page<br />
Select to start navigating a route<br />
Deletes a selected route<br />
Deletes all routes<br />
Use to search for routes in the Routes screen<br />
To Edit Route:<br />
1. From the Routes screen select<br />
the route to be edited and press<br />
ENTER. The Edit Route screen<br />
will appear.<br />
2. From the Edit Route screen you<br />
can edit the route name, display<br />
and waypoints in the route.<br />
3. Use the Arrow keypad to select<br />
which route feature you want to<br />
edit and press ENTER.<br />
Edit Route screen<br />
To Display / Hide Route:<br />
1. From the Routes screen select the route from the routes list, press<br />
ENTER. The Edit Route screen will appear.<br />
2. Highlight the Display check box and press ENTER to either Display<br />
or hide the route from the Chart page.<br />
46
Chart<br />
To Insert, Edit or Remove Waypoints from a Route:<br />
1. From the Routes screen select a route from the route list, press<br />
ENTER.<br />
2. The Edit Route screen will appear.<br />
Select a waypoint from the Waypoint<br />
list, press MENU. A small submenu<br />
will appear with the options: Insert,<br />
Edit and Remove.<br />
3. Select Insert and press ENTER to<br />
insert a waypoint into the route. To<br />
remove a waypoint select Remove.<br />
Selecting Edit will bring up the Edit<br />
Waypoint dialog.<br />
To Navigate Route from Routes screen:<br />
1. Select the route you want to navigate and press MENU. The Routes<br />
screen menu will appear.<br />
2. Select Start from the Routes screen menu The Start Route dialog<br />
will appear. Select Forward to navigate the route forward or Reverse<br />
to navigate the route in reverse.<br />
To Search for Route by Name:<br />
1. From the Routes screen press MENU. The Routes screen menu<br />
will appear.<br />
2. From the Routes screen menu select Find. A keypad will appear.<br />
Use the keypad to enter the name of the route you are searching for<br />
and press OK.<br />
47
Chart<br />
Trails<br />
A trail is a record of the path you have traveled. Trails not only show you where you<br />
have been, they can be used to retrace your path back to your starting point. On the<br />
Chart page a trail is presented by a solid line extending from the back of the current<br />
position icon.<br />
From the factory, the unit is automatically set to create and record a trail when the<br />
unit is turned on and you are navigating. The unit will continue to record a trail until<br />
the trail length reaches the maximum trail point setting.<br />
When the unit reaches the maximum trail point number it will automatically begin<br />
recording the trail over itself. By default, the unit places a dot (trail point) on the<br />
Chart page every time you change course.<br />
Shows if trail is<br />
being recorded<br />
Indicates if Trail is<br />
displayed on Chart<br />
Trail name<br />
Trail color<br />
Number of<br />
Trail points<br />
Trails screen<br />
To view stored trails go to the Trails screen in the Utilities page. From the Trails<br />
screen you can view and edit stored trails.<br />
Trails screen menu<br />
From the Trails screen menu you can create<br />
a new trail, edit a trail or delete a trail.<br />
To open the Trails screen menu, press the<br />
MENU key from the Trails screen.<br />
48
Chart<br />
Edit<br />
New<br />
Show<br />
Display<br />
Record<br />
Delete<br />
Delete All<br />
Find<br />
Trails screen menu<br />
Opens the Edit Trail menu<br />
Opens the New Trail menu<br />
Displays the trail on the chart<br />
Turns on/off trail display on Chart<br />
Select or deselect to actively record a trail<br />
Deletes a selected trail<br />
Select to delete all trails<br />
Use to search for trails in the Trails screen<br />
New Trail menu<br />
You can edit a trail from the New Trail menu or from the Edit Trail menu once a<br />
trail is created.<br />
To Create a New Trail:<br />
1. From the Pages screen, select Utilities and press ENTER. The<br />
Waypoints and Routes screen will appear.<br />
2. From the Waypoints and Routes<br />
screen select Trails. The Trails screen<br />
will appear.<br />
3. Press MENU. The Trails screen menu<br />
will appear.<br />
4. Select New, press MENU. The New<br />
Trail menu will appear, select Save.<br />
Edit Trail menu<br />
The Edit Trail menu is used to edit trail settings and coordinates. Use this menu to<br />
change the trail name, trail color and description of a trail.<br />
To edit a Trail name:<br />
1. From the Trails screen select the<br />
desired trail and press ENTER. The<br />
Edit Trail menu will appear.<br />
2. Select the trail name box and press<br />
ENTER.<br />
3. Enter the trail name and select OK.<br />
49
Chart<br />
Trail line Color options<br />
You can change the default trail line color from the Edit Trail More menu by selecting<br />
the Trail line color palette option.<br />
Trail line color<br />
palette menu<br />
NOTE: If you record several overlapping trails, changing<br />
the color of the different trail lines is a good way to keep them<br />
separate when viewing them on the Chart page.<br />
Measuring Distances on Chart page<br />
Use the Measure feature to measure distances between your location and another<br />
position on the Chart page, or between two different positions.<br />
To select/deselect Measure feature:<br />
1. Move the cursor to the starting location.<br />
2. Select Measure on the Chart menu and press Enter.<br />
3. Move the cursor to the<br />
second location. The<br />
Measure Distance line will<br />
appear with the distance<br />
between the two locations<br />
shown in the cursor dialog<br />
box.<br />
4. To measure the distance<br />
to another position, press<br />
Enter and move the cursor to the desired location. Press Exit to<br />
return to normal operation.<br />
50
Chart<br />
Search by Coordinates<br />
To search for Chart page POI using coordinates:<br />
1. From the Chart page press the MENU<br />
key. The Chart menu will appear, select<br />
Find. The Find menu will appear.<br />
2. From the Find menu select Coordinate.<br />
The Find Coordinate keypad will appear.<br />
Use the keypad to enter the desired<br />
coordinates and select OK.<br />
Find Chart item<br />
To search for specific Chart page item:<br />
1. From the Chart page press the MENU key. The Chart menu will<br />
appear, select Find. The Find menu will appear.<br />
2. From the Find menu select Chart Items. The Find - Chart Items<br />
screen will appear. Select Name, a keypad will appear. Use the<br />
keypad to enter the name of the chart item and select OK.<br />
To view a list of specific Chart POI search options select Category from the<br />
Find - Chart Items screen. A drop down list will appear. Select the specific<br />
category from the drop down list.<br />
51
Chart<br />
Map Orientation<br />
To change Chart page orientation:<br />
1. From the Chart page press the<br />
MENU key. The Chart menu<br />
will appear, select Chart options.<br />
The Chart options submenu will<br />
appear.<br />
2. From the Chart options submenu<br />
select Map Orientation. The three<br />
Map Orientation options are: North<br />
Up, Heads Up and Course Up.<br />
North Up<br />
Heading Up<br />
Course Up<br />
Map Orientation<br />
Displays the Chart page with North always at the top<br />
of the screen<br />
Displays the Chart page in the direction the boat is<br />
facing<br />
Displays the Chart page at the same orientation as<br />
your initial bearing to a destination<br />
Look Ahead<br />
Keeps your current position at the bottom of the Chart page to display more map<br />
area in front of you.<br />
To select / deselect the Look Ahead feature:<br />
1. From the Chart page press the MENU key. The Chart menu will<br />
appear, select Chart options. The Chart options submenu will<br />
appear.<br />
2. From the Chart options submenu select or deselect Look Ahead to<br />
turn this feature on or off.<br />
52
Chart<br />
Chart categories<br />
Use the Chart Categories screen to control what you want to see on the Chart page.<br />
To select / deselect Chart Categories:<br />
1. From the Chart page press MENU.<br />
The Chart menu will appear; select<br />
Chart options. The Chart options<br />
submenu will appear.<br />
2. From the Chart options submenu<br />
select Chart categories. The Chart<br />
Categories screen will appear.<br />
Select or deselect the chart options<br />
you want to display on screen.<br />
2D and Shaded Relief<br />
(Shaded Relief only available on U.S. Insight models)<br />
To select between 2D and Shaded Relief:<br />
1. From the Chart page press the MENU key. The Chart menu will<br />
appear. From the Chart menu select Chart options. The Chart options<br />
submenu will appear.<br />
2. From the Chart options submenu select Imagery. The Imagery drop<br />
down menu will appear with two map options: 2D and Shaded Relief.<br />
Make your selection and press ENTER.<br />
2D mapping<br />
Shaded Relief, only available<br />
on U.S. Insight models.<br />
53
Chart<br />
Chart page Icons, Tides and Currents<br />
Use the cursor on the Chart page to view detailed information about selected icons,<br />
including Tides and Currents.<br />
The image, at left, shows a Current icon selected on the Chart page. To view<br />
detailed information about an icon, press the MENU key then select Info from<br />
the Chart menu. From the Chart Info screen, press Details.<br />
Detailed information also can be viewed for Tide icons.<br />
Radar Overlay<br />
Places radar returns on top of the map. That gives you greater awareness of your<br />
surroundings by allowing you to see radar returns aligned with actual radar targets.<br />
To turn on radar overlay:<br />
1. Highlight Overlay on the Chart menu and press enter.<br />
2. Select Radar and press enter.<br />
NOTE: You must have a NMEA 2000 or NMEA 0183 heading<br />
sensor to enable Radar overlay.<br />
54
Chart<br />
Radar Options<br />
The Radar Options menu appears when Radar Overlay is turned<br />
on. It allows you to customize the radar overlay settings from<br />
the Chart Page.<br />
To access the Radar Options menu, select Radar Options from<br />
the Chart menu and press Enter.<br />
Radar Options<br />
Radar State<br />
Adjust<br />
Auto Gain<br />
Sea Clutter<br />
Transparency<br />
Radar Options menu<br />
Selects radar transmission mode<br />
Adjusts Gain, Sea Clutter, Rain Clutter, Interference<br />
Rejection and Target Boost<br />
Automatic Gain setting that is suitable for a variety of<br />
conditions<br />
Selects Sea Clutter setting from auto (harbor, offshore)<br />
and manual settings.<br />
Controls the transparency of radar overlay on the map To<br />
make adjustments, highlight Transparency and press the<br />
arrow keys left/right<br />
NOTE: Radar State, Adjust, Auto Gain and Sea Clutter are<br />
covered in more detail in the Radar <strong>Operation</strong> section.<br />
Navionics<br />
Your unit offers an unprecedented level of 2D and 3D mapping detail and numerous<br />
mapping options, including support for Navionics Platinum, Gold, HotMaps and<br />
high definition Fish'n chip electronic charts.<br />
To view Navionics data:<br />
1. Insert your Navionics card in the unit's MMC/SD card slot.<br />
2. Press Menu twice, select Chart and press enter.<br />
3. Highlight Chart data and press Enter.<br />
4. Select Navionics and press enter.<br />
55
Chart<br />
Navionics Settings menu<br />
Use to customize the way Navionics data will be displayed on the Chart page, allowing<br />
you to adjust the features best suited for your fishing conditions.<br />
To change Navionics Settings:<br />
1. Select Chart options from the Chart menu<br />
and press Enter.<br />
2. Highlight Settings and press Enter.<br />
3. Select a setting and press enter.<br />
4. Highlight the desired option and press<br />
enter.<br />
Navionics Settings and Options<br />
<br />
• Safety Depth — Allows you to display the depth areas corresponding to the<br />
safety contour desired. Available options are:<br />
Off: No depth area displayed.<br />
Other numeric depth values: The areas with depths up to value selected<br />
are displayed in shades going from darker blue (for lower depths) to lighter<br />
blue (for higher depths). The areas whose depths are over the selected<br />
value, and therefore navigable under safety conditions, will be displayed in<br />
white. The dryline areas are displayed in green.<br />
• Contours Depth — Used to select the display of depth contours.<br />
Available options:<br />
-5m: display depth contours up to 5 meters (16 feet)<br />
-10m: display depth contours up to 10 meters (33 feet)<br />
-20m: display depth contours up to 20 meters (66 feet)<br />
-All: all depth contours are displayed<br />
Navionics Settings<br />
NOTE: When Night mode is selected, depth areas are<br />
displayed from lighter blue (for lower depths) to darker<br />
blue (for higher depths). Depth areas over the value set are<br />
displayed in black.<br />
56
Chart<br />
• Texture Type — Enables (on) or disables (off) the 3D shading feature.<br />
Photo overlay allows you to enable (full) or disable (off) the aerial photography<br />
overlay chart feature.<br />
NOTE: These features are only applicable with Navionics<br />
Platinum or Platinum Plus charts.<br />
• Annotation — Allows you to display "Main" names (i.e. city names) only<br />
or the "Full" set of names on the Chart page.<br />
• Presentation Types — Is used for the selection of the symbols and colors<br />
of the navigation chart "look and feel"; either U.S. or International "paper<br />
chart" presentation types can be selected.<br />
• Chart Details — This menu is used to select which object types and information<br />
layers are displayed on-screen.<br />
Available options:<br />
Standard: Equivalent to standard display settings as defined in ECS<br />
(Electronic Charting System) regulations.<br />
All: Enables the display of all the object types and information layers on<br />
the Chart page.<br />
User: Allows selection of individual object types and information layers<br />
on-screen.<br />
57
Radar<br />
Radar <strong>Operation</strong> (optional)<br />
Range<br />
Range Ring Size<br />
North Indicator<br />
Heading Line<br />
Radar orientation indicator<br />
Range Rings<br />
To access the Radar Page:<br />
1. Press the Pages key.<br />
2. Use the keypad to select the Radar Icon and press ENTER.<br />
NOTE: You will only be able to see the Radar page if your unit<br />
is connected to a radar.<br />
58
Radar<br />
Radar menu<br />
Use the Radar menu to make adjustments to radar display settings<br />
and features that not only change the appearance of the display,<br />
but also make navigation easier.<br />
To access the Radar menu, press the Menu key when the Radar<br />
page is on the display.<br />
Radar State<br />
Controls radar transmission modes: Off, Transmit and Standby. Off turns off the<br />
radar. Transmit broadcasts a radar signal and standby leaves the radar on, but does<br />
not broadcast a signal.<br />
To select Radar State:<br />
1. Press Menu, highlight Radar State and press<br />
Enter.<br />
2. Select the desired state and press enter.<br />
NOTE: It can take 90 seconds or more to transition from Off<br />
to Standby.<br />
Adjust menu<br />
From the Adjust menu you can make adjustments to Gain, Sea clutter, Rain clutter,<br />
Interference rejection and Target boost.<br />
To access the Adjust menu:<br />
1. From the Radar menu select Adjust and press<br />
ENTER. The Adjust menu will appear.<br />
2. Highlight the desired setting and press the Arrow<br />
keypad left/right to make adjustments.<br />
59
Radar<br />
Adjust menu options<br />
Gain<br />
Sea Clutter<br />
Rain Clutter<br />
Interference Rejection<br />
Target Boost<br />
Controls the sensitivity of the radar receiver.<br />
Increasing gain will show more detail on<br />
the screen; decreasing gain will show<br />
less detail. Too much detail will clutter the<br />
screen. Conversely, desired returns may not<br />
be shown if gain is too low.<br />
Reduces or eliminates onscreen clutter<br />
caused by wave action near your vessel.<br />
Precipitation reflects radar signals, cluttering<br />
the screen. Rain Clutter reduces or eliminates<br />
returns caused by rain, hail, sleet or snow.<br />
Reduces interference from other active radars<br />
near your vessel. If another ship is operating<br />
radar near you, interference from its<br />
radar signals can appear on your display.<br />
Increase interference rejection until radar<br />
interference is eliminated from your display.<br />
Interference Rejection has four settings: Off,<br />
Low, Medium and High.<br />
This feature increases the size of radar<br />
targets, making them easier to see on the<br />
display. Target Boost has four options: Off,<br />
Low, Medium and High.<br />
Auto Gain<br />
Selecting Auto gain from the Radar menu will automatically set the sensitivity of<br />
the receiver to a level that works well under most conditions, reducing the need for<br />
adjustments. If you make adjustments to the Gain level when Auto gain is on, Gain<br />
will switch to manual mode.<br />
To select Auto Gain:<br />
1. Press the MENU key. The Radar menu will appear<br />
2. Select Auto gain and press ENTER.<br />
60
Sea Clutter<br />
Radar<br />
Allows you to select the Sea Clutter adjustment mode — Auto or <strong>Manual</strong>. If you<br />
make changes to Sea Clutter when it is in auto mode (Harbor or Offshore), Sea Clutter<br />
will switch to <strong>Manual</strong> mode.<br />
<strong>Manual</strong><br />
Harbor<br />
Offshore<br />
Sea Clutter Options<br />
Switches Sea Clutter from Auto to <strong>Manual</strong> mode<br />
Auto setting optimized for harbor-like environment<br />
Auto setting designed for offshore conditions<br />
Acquire Targets<br />
Used to select MARPA (Mini Automatic Radar Plotting Aid) targets. Refer to the<br />
Radar Settings segment in the Settings section for information on using MARPA.<br />
Position<br />
You can move the PPI (Plan Position Indicator) to different locations on the radar<br />
display. There are three Position options: Center, Look Ahead and Offset.<br />
Center: PPI centered on the<br />
display<br />
To change the PPI position:<br />
1. Select Position from the Radar menu and press enter.<br />
2. Select the desired position and press enter.<br />
Look Ahead: PPI moves down,<br />
allowing you to see more of what<br />
is in front of you<br />
61
Radar<br />
Center<br />
Look Ahead<br />
Offset<br />
Position<br />
Default setting, will position the PPI in the center of<br />
the screen<br />
Shifts the PPI to the bottom of the screen, allowing<br />
you to see more of the area in front of your vessel<br />
Allows you to move the PPI to a any location on the<br />
display. If you shift the PPI to the right, you will see<br />
more of what is to the left of your boat; if you move<br />
the PPI forward you will be able to see more of the<br />
area behind you<br />
Symbology<br />
Used to turn on/off symbols displayed on the PPI screen, including range rings, range<br />
markers and compass overlay. Rather than turn off each display feature individually,<br />
the Symbology feature allows you to remove them all at once.<br />
To toggle Symbology on/off highlight Symbology on the radar menu and press<br />
enter.<br />
Symbology on<br />
Symbology off<br />
EBL/VRM<br />
An Electronic Bearing Line (EBL) is a radial line used to show the bearing of a<br />
radar target to your vessel. A Variable Range Marker (VRM) is a range ring used to<br />
measure the precise distance to a radar target. Selecting EBL/VRM from the Radar<br />
Menu allows you to place up to two EBL/VRMs on the PPI display.<br />
62
Radar<br />
EBL/VRM 1 EBL/VRM 2 EBL/VRM 1 & EBL/<br />
VRM 2 Data Boxes<br />
EBL/VRM menu<br />
Places selected Electronic Bearing Line and Variable Range Marker on the display.<br />
To select an EBL/VRM:<br />
1. Press the Menu key.<br />
2. Use the keypad to select the EBL/VRM and<br />
press ENTER.<br />
3. Use the keypad to move the EBL and<br />
increase/decrease the size of the VRM.<br />
Press Exit.<br />
EBL/VRM menu<br />
Adjust<br />
Adjusts size and location of active EBL/VRM.<br />
To adjust an EBL/VRM:<br />
1. From the Radar menu highlight EBL/VRM and press enter.<br />
2. Select Adjust and press enter.<br />
3. Use the keypad to make adjustments to the EBL/VRM. Press<br />
Exit.<br />
63
Radar<br />
Data Box<br />
Turns on/off on screen EBL/VRM information<br />
box.<br />
To turn on/off the EBL/VRM information box,<br />
highlight Data box on the EBL/VRM menu and<br />
press enter.<br />
Data box<br />
Guard Zones<br />
A zone or zones near or around your vessel<br />
that alert you if a radar target enters or leaves<br />
a zone. That makes it easier to be aware of<br />
the movement of radar targets around you,<br />
which improves collision avoidance.<br />
There are two guard zones: Guard Zone 1<br />
and Guard Zone 2.<br />
You can control the shape, range, depth,<br />
bearing, width and sensitivity of guard<br />
zones.<br />
Guard Zone 2 (sector)<br />
Guard Zone 1 (circle)<br />
Turns on/off<br />
Guard Zone1<br />
Turns on/off<br />
Guard Zone 2<br />
Guard Zone menu<br />
NOTE: We recommend a 70-75% Guard Zone sensitivity<br />
setting for the BR24 to see smaller targets. Adjust as needed<br />
for your situation.<br />
64
Radar<br />
To turn on a Guard Zone:<br />
1. Press Menu, select Guard Zones and press Enter.<br />
2. Highlight Guard Zone 1 or Guard Zone 2 and press Enter.<br />
To change the shape of Guard Zones<br />
1. Select Shape and press Enter.<br />
2. Select the desired shape and press Enter.<br />
Using the Adjust menu:<br />
1. Select Adjust and press Enter.<br />
2. Press the keypad up/down to select the desired<br />
setting.<br />
3. When the desired setting is selected, press the<br />
keypad left/right to make adjustments.<br />
4. After adjustments are completed, press Enter.<br />
To choose alarm trigger (vessels entering or exiting zones):<br />
1. Select Alarm when and press Enter.<br />
2. Select the desired option and press Enter.<br />
Radar Overlay<br />
Radar Overlay places radar returns on top of the map on the Chart Page.<br />
That gives you greater awareness of your<br />
surroundings by allowing you to see radar<br />
returns aligned with actual radar targets.<br />
More information on Radar Overlay is<br />
available in the Chart <strong>Operation</strong> section of<br />
this manual.<br />
NOTE: You must have an NMEA 2000 or NMEA 0183 heading<br />
sensor to enable Radar overlay.<br />
65
Settings<br />
Settings Menu<br />
The Settings Menu provides access to installation and advanced configuration<br />
settings for your unit. To access the Settings menu, press Menu twice.<br />
Settings Menu Options<br />
System Sonar (if applicable) Units<br />
Page Radar (if applicable) Network<br />
Navigation (if applicable) Fuel Vessels<br />
Chart (if applicable) Alarms Simulator<br />
System<br />
Used to change system settings like units, language and<br />
key beeps.<br />
To access the System menu:<br />
1. Press Menu twice.<br />
2. Highlight System and press enter.<br />
Language<br />
Selects the language used on menus and dialog boxes. US units will be geofenced<br />
to English only if operated beyond 30 degrees West or beyond the international date<br />
line to the East.<br />
To select a language:<br />
1. Select Language from the System menu and press enter.<br />
2. Highlight the desired language and press Enter. A window will<br />
appear indicating the unit must restart to switch languages.<br />
3. Select Yes and press enter. The unit will restart.<br />
System Menu<br />
Text Size<br />
This unit will display text in two sizes: Small and<br />
Normal. The Text Size menu allows you to select<br />
the size of menu text.<br />
66
Settings<br />
To change Text Size:<br />
1. Highlight Text Size from the System menu and press Enter.<br />
2. Use the keypad to select the desired text size and press enter.<br />
Key Beeps<br />
By default, a tone (key beep) will sound when<br />
any key is pushed on the unit. You can change<br />
key beep volume or turn them on or off from the<br />
Key Beep menu.<br />
Key beeps turned on<br />
To change Key Beep settings:<br />
1. Highlight Key Beeps on the System menu and press enter.<br />
2. Select the desired setting and press enter.<br />
Time (optional)<br />
Used to change local time to offset differences in time zone and to select the way<br />
time and date will be displayed.<br />
To set Time or Date format:<br />
1. Highlight Time on the System menu and press<br />
enter. The Time menu will appear.<br />
2. Select the Time format or Date format<br />
dropdown menu and press enter.<br />
3. Use the keypad to select the desired format<br />
and press enter.<br />
4. Highlight OK and press enter.<br />
To set Local Time:<br />
1. Select Local Time on the Time menu and press the keypad left/right<br />
to select the desired offset.<br />
2. Highlight OK and press enter.<br />
67
Settings<br />
Datum<br />
A model of the earth’s surface based on a network of surveyed ground features<br />
(points). This unit’s default datum is WGRS-84.<br />
To select a Datum:<br />
1. Select Datum from the Chart settings menu and press enter.<br />
2. Use the keypad to select the desired datum. Press Enter.<br />
Coord System<br />
Controls the coordinate system used when position coordinates are entered and<br />
displayed.<br />
To change Coordinate System:<br />
1. Select Coord System from the Chart settings<br />
menu and press enter.<br />
2. Highlight the desired option and press<br />
enter.<br />
Magnetic Variation<br />
Converts magnetic north data to true north, increasing the accuracy of navigation<br />
information. The Magnetic Variance Auto setting, automatically converts magnetic<br />
north to true north. When using manual mode, you will have to input the magnetic<br />
variance.<br />
To change magnetic variation settings:<br />
1. Highlight Magnetic Variation on the System menu. Press ENTER.<br />
2. Select Auto or <strong>Manual</strong> and press enter.<br />
68
Settings<br />
Satellite Status<br />
Satellites<br />
Monitors the location of satellites in view and the quality of the unit’s satellite lockon.<br />
The Satellite page has two display options.<br />
The Satellite screen displays a circular graphic that shows where satellites are<br />
located and a bar graph that monitors the strength of satellites within range of your<br />
unit. Your unit is locked on to satellites shown with blue bars.<br />
To access the Satellite screen select Satellites from the System menu and press<br />
enter.<br />
69
Settings<br />
Screen Capture<br />
Saves images of your unit’s screen to your unit. That allows you to capture images<br />
of everything from underwater structure and fish to routes, map areas and radar<br />
targets.<br />
To take a screen capture:<br />
1. Select Screen Capture from the System menu and press enter.<br />
2. Press the LIGHT/Power key to capture the current screen. Repeat<br />
this step take additional screen captures.<br />
To save screen captures to MMC/SD card:<br />
1. Select Files from the Utilities list on the Pages menu. Press Enter.<br />
2. Highlight My Files and press the keypad to the right. Select screenshots<br />
and press the keypad to the right.<br />
3. Highlight the desired screenshot(s). Press<br />
menu. The screenshot menu will appear.<br />
4. Select Copy or Copy All and press enter.<br />
5. Your MMC/SD card will be listed on the screen.<br />
Select your MMC/SD card and press enter.<br />
Files selected on<br />
Utilities list<br />
Screenshot selected Screenshot menu MMC/SD card selected<br />
70
Settings<br />
Restore Defaults<br />
The Restore Defaults command switches the unit back to the settings it had when<br />
you purchased it (default). Instructions on Restoring defaults are covered in the<br />
Getting Started section.<br />
Advanced<br />
A fine tuning adjustment for advanced users that allows you to turn on/off features<br />
and control settings like duplicate waypoint names and slider hold off.<br />
Advanced Settings menu<br />
To access Advanced Settings:<br />
1. Select Advanced on the Settings menu and press<br />
enter.<br />
2. Highlight a desired setting and use the right/left<br />
arrow keys to open (—) or close (+) the setting.<br />
To adjust Waypoint, Hardware and Radar settings:<br />
1. Open the desired setting (—).<br />
2. Highlight the setting information and<br />
press Enter to turn it on/off. The center<br />
circle will be filled when the setting is<br />
on; empty when it is turned off.<br />
71
Settings<br />
To adjust cursor settings:<br />
1. Highlight the desired cursor setting and press enter. A dialog box<br />
will appear.<br />
2. Use the arrow keys to select the desired value and press enter.<br />
About<br />
Used to view your unit’s current software version. To check the unit’s software<br />
version, highlight About on the System menu and press enter.<br />
Pages<br />
Used to make adjustments to overlay data, combo page<br />
panels and to turn on/off SIRIUS radio (if applicable).<br />
Overlay data setting adjustments are covered in the<br />
Pages section.<br />
Navigation<br />
Allows you to make adjustments to arrival radius, crosstrack<br />
error, trail and loran settings.<br />
Arrival Radius<br />
Arrival radius settings is the distance at which you will<br />
be alerted when approaching your destination.<br />
XTE limit<br />
The cross-track error setting, is the distance at which you will be alerted when you<br />
are drifting off course.<br />
To adjust Arrival radius and XTE limit:<br />
1. Select the desired option from the Navigation menu and press<br />
Enter.<br />
2. Follow the onscreen instructions.<br />
72
Settings<br />
Trails<br />
Controls the way trails are logged (updated). Trails mark your movement as you<br />
travel, placing points along your path using one<br />
of three logging types: Time, Distance or Auto.<br />
You can save up to 10 trails with up to 9,999<br />
points per trail. If a trail exceeds 9,999 points,<br />
each new point will overwrite a point at the<br />
beginning of the trail.<br />
Trails Menu<br />
Logging Type<br />
Controls the method used for updating a trail. Trails can be updated using Time,<br />
Distance or the default automatic setting.<br />
Time<br />
Distance<br />
Auto<br />
Logging Types<br />
A point is placed along the trail after a selected amount of time<br />
A point is placed along the trail after you travel a selected<br />
distance<br />
A point is placed along the trail every time you change direction<br />
To select a Logging Type:<br />
1. Highlight Logging Type on the Trails menu and press enter.<br />
2. Use the keypad to select Auto, Distance or Time and press enter.<br />
Distance Period<br />
Controls how far you will travel before a point is placed along the trail.<br />
To set Distance period:<br />
1. Highlight Distance Period and press<br />
enter. The distance period<br />
keypad will appear.<br />
2. Input the desired distance and select<br />
OK. Press enter.<br />
Distance Period set to 1nm<br />
73
Settings<br />
Time Period<br />
Controls how much time will pass before a point is placed along the trail.<br />
To set Time Period:<br />
1. Highlight Time Period and press<br />
enter. The distance period keypad<br />
will appear.<br />
2. Input the desired distance and select<br />
OK. Press enter.<br />
Time Period set to 5 seconds<br />
Phantom Loran<br />
Uses GPS and Loran coordinates to calculate Loran position.<br />
To set up phantom loran:<br />
1. Select Phantom loran on the Navigation menu and press Enter.<br />
2. Highlight Loran Settings and press<br />
Enter. The Loran settings<br />
menu will appear.<br />
3. Select the desired GRI (Group<br />
repetition interval) and press<br />
Enter.<br />
4. Select the Preferred Station and press Enter.<br />
5. Highlight Save and press Enter.<br />
Loran Settings Menu<br />
74
Settings<br />
Chart Settings Menu<br />
Contains Chart settings ranging from display options<br />
like Range Rings and Grid Lines to map settings like<br />
Chart Data and Datum.<br />
To access the Chart Settings Menu:<br />
1. Press Menu twice.<br />
2. Highlight Chart and press Enter.<br />
Chart Data<br />
This unit can use mapping data from <strong>Lowrance</strong><br />
and Navionics. The Chart Data menu allows you<br />
to select the desired map data (Shaded relief<br />
mapping data available in US only).<br />
To select chart data:<br />
1. Highlight Chart Data on the Chart<br />
Settings menu and press enter.<br />
2. Select the desired map data and<br />
press enter.<br />
Range Rings<br />
A navigation aid used to estimate distances.<br />
Centered around your location, Range<br />
Rings are placed a preset distance from<br />
your location, allowing you to quickly<br />
estimate distances while navigating.<br />
To turn Range Rings On/Off, highlight<br />
Range Rings on the Chart Settings menu<br />
and press ENTER.<br />
Chart Settings Menu<br />
The Chart Settings menu<br />
changes when Navionics is<br />
the selected chart data type.<br />
Range Rings<br />
Heading Extension<br />
A line extending from the front of the current position icon that is used to estimate<br />
distance and time of arrival. The distance and estimated time of arrival is based on<br />
the time interval selected from the Heading Extension menu. Heading Extension<br />
works with both <strong>Lowrance</strong> and Navionics chart data.<br />
75
Settings<br />
Heading Extension line<br />
To use Heading Extension:<br />
1. Highlight Heading Extension from the chart settings menu<br />
and press enter.<br />
2. Select the desired time interval and press enter.<br />
NOTE: Range Rings and Heading Extension may not be<br />
available in all chart data.<br />
Popup Information<br />
Turns on information windows that appear when<br />
the cursor is centered on a point of information.<br />
That allows you to identify POIs without having<br />
to zoom in to see it on the screen.<br />
To turn on/off Popup Information, highlight<br />
Popup Information on the Chart Settings menu<br />
and press ENTER.<br />
Grid Lines<br />
Displays base values for latitude and<br />
longitude, making it easier to get a general<br />
idea of your location on the latitude/<br />
longitude scale.<br />
To turn Grid Lines On/Off, select Grid<br />
Lines from the Chart Settings menu and<br />
Press ENTER.<br />
Gridlines<br />
Waypoints<br />
Turns on/off waypoint display properties. When a large number of waypoints are on<br />
the display, turning off waypoints will provide a better view of the map. To turn on/<br />
off waypoint display properties, select Waypoints from the Chart menu and press<br />
ENTER.<br />
76
Settings<br />
Routes<br />
Turns on/off route display properties. When several routes are on the display,<br />
turning off routes will give you a better view<br />
of the map.<br />
To turn on/off route display properties,<br />
select Routes from the Chart menu and press<br />
ENTER.<br />
Trails<br />
Turns on/off Trail display properties. When several trails are on the display, turning<br />
off routes will give you a better view of the map.<br />
To turn on/off trail display properties, select Trails from the Chart menu and press<br />
ENTER.<br />
Hide Chart<br />
Removes mapping data from the display, making it easier<br />
to view routes, waypoints and the cursor.<br />
To turn on/off the map data, highlight Hide Chart on the<br />
Chart Settings menu and press ENTER.<br />
Hide Chart mode<br />
77
Settings<br />
Sonar Settings (HDS-5 &7)<br />
The Sonar Settings Menu is used to modify Sonar<br />
options and display settings like Sonar Source,<br />
Noise Rejection and Fishing Mode.<br />
To access the Sonar Settings:<br />
1. Press MENU twice.<br />
2. Select Sonar and press ENTER.<br />
Sonar Settings Menu<br />
Network Sonar<br />
Allows your unit to send/receive sonar data from another sonar unit on an ethernet<br />
network. To turn on/off network sonar, highlight Network sonar on the Sonar<br />
Settings menu and press enter. Sonar sharing is covered in the Sonar section.<br />
Noise Rejection<br />
Interference from bilge pumps, engine vibration,<br />
air bubbles, etc, can clutter your unit’s display.<br />
Noise Rejection uses ASP (Advanced Signal<br />
Processing) to automatically clear interference<br />
from the display.<br />
To adjust Noise Rejection:<br />
1. Highlight Noise Rejection on the Sonar Settings menu and press<br />
ENTER.<br />
2. Use the keypad to select the desired option and press enter.<br />
Surface Clarity<br />
Wave action, boat wakes and temperature<br />
inversion are some of the sources that can<br />
cause onscreen clutter near the surface.<br />
Surface Clarity reduces surface clutter by<br />
decreasing the sensitivity of the receiver<br />
near the surface.<br />
Surface Clutter<br />
78
Settings<br />
To adjust Surface Clarity:<br />
1. Select Surface Clarity from the Sonar Settings menu and press<br />
ENTER.<br />
2. Use the keypad to choose the desired option.<br />
Scroll Speed<br />
Controls how fast the sonar chart scrolls across the screen. A slower scroll speed<br />
is best suited for ice fishing or fishing while<br />
at anchor. It is also useful when you want<br />
to record a higher quality sonar log in deep<br />
water. By default, Scroll Speed is set to<br />
normal.<br />
To make adjustments, select Scroll Speed from the Sonar Settings menu and use the<br />
keypad to make adjustments.<br />
<strong>Manual</strong> Mode<br />
Advanced user mode that bypasses digital depth to give you greater control of ping<br />
settings. Digital depth causes the unit to search for the bottom regardless of the<br />
portion of the water column you are targeting. While you still will get good results<br />
using digital depth, it prevents you from getting optimum performance in certain<br />
situations, like fishing for suspended targets.<br />
In <strong>Manual</strong> Mode the unit sends sonar signals (pings) only to the depth range you<br />
select. Adjustments made to the range setting will be reflected in your unit’s ping<br />
speed. That makes it easy to get the best scrolling speed and the best screen resolution<br />
for a selected range.<br />
Select <strong>Manual</strong> Mode from the Sonar Settings menu and press ENTER to turn on/<br />
off <strong>Manual</strong> Mode.<br />
79
Settings<br />
Fishing Modes<br />
Enhances the performance of your unit by providing preset packages of sonar<br />
settings geared to specific fishing conditions.<br />
Settings optimized for fishing modes include: Color Palette, Sensitivity,<br />
Interference Rejection, Surface Clarity and Ping Speed, among others. Fishing<br />
modes allow you to spend more time fishing and less time adjusting settings.<br />
Fishing<br />
Mode<br />
Depth Settings Palette<br />
General Use ≤1,000 ft 50% Ping speed Bottom brown/ blue background<br />
Shallow Water ≤ 60 ft 75% Ping speed bottom brown/white background<br />
Fresh Water ≤ 400 ft 50% Ping speed bottom brown/white background<br />
Deep Water ≥ 1,000 ft 50% Ping speed Deep Blue<br />
Slow Trolling ≤ 400 ft 50% Ping speed Bottom brown/white background<br />
Fast Trolling ≤ 400 ft Lower chart speed Bottom brown/white background<br />
Clear Water ≤ 400 ft 50% Ping speed Bottom brown/white background<br />
Ice Fishing ≤ 400 ft<br />
Settings optimized to reduce interference from<br />
other sonar units<br />
NOTE: Use Shallow Water Fishing mode when fishing in less<br />
than 60 feet of water.<br />
Shallow Water Fishing Mode<br />
Brackish Water Fishing Mode<br />
80
Settings<br />
To select a Fishing Mode:<br />
1. Select Fishing Mode from the Sonar Settings menu and press<br />
Enter.<br />
2. Use the keypad to select the desired mode and press enter.<br />
Reset Fishing Mode<br />
Resets selected fishing mode to default settings. That is useful when you want to<br />
clear settings adjustments made while using a fishing mode. To restore fishing mode<br />
defaults, select Reset Fishing Mode and press ENTER<br />
Installation Menu<br />
Controls unit settings like Keel Offset, Water<br />
Speed Calibration and Transducer Type only<br />
for components connected to this display unit<br />
through the blue sonar connector. You can not<br />
adjust settings of network components through<br />
the Installation menu.<br />
To access the Installation menu, highlight<br />
Installation on the Sonar Settings menu and<br />
press ENTER.<br />
Sonar Installation menu<br />
Keel Offset<br />
All transducers measure water depth from the transducer to the bottom. As a result,<br />
water depth readings do not account for the distance from the transducer to the keel<br />
or from the transducer to the water surface. You can use Keel Offset to factor those<br />
distances into the unit’s depth calculations.<br />
Transducer<br />
Keel<br />
Keel Offset (-3.5 feet)<br />
Accounting for the distance from the transducer to the keel will prevent you from<br />
striking underwater objects or running aground, which could damage the keel.<br />
Offsetting the distance from the transducer to the water surface will give you a more<br />
precise depth reading.<br />
81
Settings<br />
Before setting keel offset, measure the distance from the transducer to the lowest<br />
part of the keel. If, for example, the keel is 3.5 feet below the transducer, it will be<br />
input as –3.5 feet.<br />
NOTE: To input a keel offset that accounts for the distance<br />
from the transducer to the water surface, you will enter a positive<br />
number. If the transducer is 1.5 feet below the waterline,<br />
it will be input as +1.5 feet. That will give you a more precise<br />
depth reading.<br />
To set Keel Offset:<br />
1. Highlight the Keel Offset text box on the Installation menu and press<br />
enter.<br />
2. Use the keypad to enter the desired keel offset. Select OK and press<br />
enter.<br />
Water Speed Calibration<br />
When there are differences in speed data, Water Speed<br />
Calibration calibrates data from a paddlewheel with GPS<br />
data. That ensures the accuracy of speed data from your<br />
paddlewheel.<br />
To calibrate Water Speed:<br />
Water speed<br />
calibration dialog box<br />
1. Select the Water Speed Calibration text box from the Installation<br />
menu and press enter. The Water Speed Calibration keypad will<br />
appear.<br />
2. Use the arrow keys to enter the percentage difference in speed<br />
data. Select OK and press enter.<br />
NOTE: If the paddlewheel is reading a slower speed than the<br />
GPS unit, you will input a positive (+) percentage. Conversely,<br />
a negative (–) percentage will be entered if the paddlewheel is<br />
reading a faster speed than the GPS unit.<br />
82
Settings<br />
Water Speed Averaging<br />
Averages water speed by measuring your speed at a selected interval. Water speed<br />
intervals range from one to 30 seconds. If you select five seconds, your water speed<br />
will be recorded every five seconds, then averaged.<br />
To select a Water Averaging interval :<br />
1. Highlight the Water Speed Averaging box on the Installation menu.<br />
2. Press the keypad left/right to select the desired interval.<br />
3. Highlight OK and press enter.<br />
Temperature Calibration<br />
When there are differences in temperature data,<br />
Temperature Calibration calibrates data from one<br />
temperature sensor with date from another temperature<br />
source. That ensures the accuracy of temperature data<br />
from the selected temperature sensor.<br />
To calibrate Temperature:<br />
Water Temp<br />
calibration dialog box<br />
1. Select the Temperature Calibration text box from the Installation<br />
menu and press enter. The Water Temperature Calibration dialog<br />
box will appear.<br />
2. Use the arrow keys to enter the percentage difference between<br />
temperature sources. Select OK and press enter.<br />
NOTE: If the temperature sensor is reading a lower<br />
temperature than the other temperature source, you will input a<br />
positive (+) percentage. Conversely, a negative (–) percentage<br />
will be entered if the temperature sensor is reading a higher<br />
temperature than the other temperature source.<br />
Temperature Averaging<br />
Averages temperature by measuring temperature<br />
data at a selected interval. Temperature intervals<br />
range from one to 30 seconds.<br />
If you select five seconds, your temperature will be averaged using measurements<br />
taken every five seconds.<br />
83
Settings<br />
To select a Temperature Averaging interval:<br />
1. Highlight the Temperature Averaging box on the Installation menu.<br />
2. Press the keypad left/right to select the desired interval and press<br />
enter.<br />
Transducer Type<br />
Selects the transducer model connected to your display unit. In some transducers<br />
with built-in temperature sensors, the temperature may not be accurate if the correct<br />
transducer is not selected from the Transducer Type menu.<br />
To select a Transducer Type:<br />
1. Highlight Transducer Type box on the<br />
Installation menu and press enter.<br />
The Select Transducer menu will<br />
appear.<br />
2. Use the keypad to your transducer<br />
type and press enter.<br />
3. Highlight OK and press enter.<br />
Transducer type menu<br />
84
Settings<br />
Radar Settings Menu (optional)<br />
Controls Radar options and display settings like Target<br />
Expansion, Orientation and Bearings.<br />
To access the Radar settings menu:<br />
1. Press menu twice.<br />
2. Select Radar and press enter.<br />
Radar Settings<br />
Target Expansion<br />
Increases the size of radar targets, making them easier to see on the radar display. To<br />
turn on/off Target Expansion, highlight Target Expansion and press ENTER.<br />
Target Trails<br />
Creates an onscreen history of the movement<br />
of radar targets, making it easier to monitor<br />
the direction and position of targets in relation<br />
to your vessel.<br />
To set Target Trails:<br />
1. Highlight Target Trails on the<br />
Radar Settings menu and press<br />
enter.<br />
2. Use the arrows to select an<br />
interval and press enter.<br />
Target Trails<br />
Palette<br />
Radar echoes can be displayed in black, white, green or yellow. The Palette feature<br />
allows you to select the color that suits your viewing preferences.<br />
To change the Palette:<br />
1. Highlight Palette on the Radar Settings menu and press enter.<br />
2. Use the keypad to select the desired color palette and press<br />
enter.<br />
85
Settings<br />
Black Color Palette<br />
White Color Palette<br />
Orientation<br />
Controls the way the map moves in relation to the movement of your vessel. That<br />
allows you to select a desired method for viewing your surroundings on the radar<br />
display.<br />
• Course Up — map stays at same orientation as the initial bearing to the<br />
selected waypoint.<br />
• Heading Up — unit keeps your heading at the top of the screen, regardless<br />
of the direction you are traveling.<br />
• North Up — North is always shown at the top of the screen.<br />
To change Map Orientation:<br />
1. Highlight Map Orientation on the Radar<br />
Settings menu and press enter.<br />
2. Use the keypad to select the desired<br />
option and press enter.<br />
Threshold<br />
Controls the level of radar returns. That allows you to unclutter the display by<br />
removing unwanted signals. To make adjustments, select Threshold and press the<br />
keypad left/right.<br />
North Indicator<br />
The North indicator is shown on the outer circle of the radar display. To turn on/<br />
off North Indicator, select North Indicator from the Radar Settings menu and press<br />
ENTER.<br />
86
Settings<br />
Range Rings<br />
Allows you to quickly estimate the distance<br />
from your vessel to a another radar target.<br />
To turn on/off Range Rings, highlight Range<br />
Rings on the Radar Settings menu and press<br />
ENTER.<br />
Range Markers<br />
Range rings<br />
Located below each Range Ring, Range<br />
Markers display the distance from your position<br />
to each range ring.<br />
To turn on/off Range Markers, select Range<br />
Markers from the Radar Settings menu and<br />
press ENTER.<br />
Range markers<br />
Compass<br />
A Compass overlay can be displayed on the background of the radar page. To turn<br />
on/off the Compass overlay, select Compass and press ENTER.<br />
Compass Overlay turned off<br />
Compass Overlay turned on<br />
Bearings<br />
Bearings allows you to choose if you want the direction you are headed to show<br />
as True Magnetic (TM) or Relative (R). T/M or True/Magnetic will show your<br />
direction based on magnetic north. R or Relative will show your direction based on<br />
your relative heading.<br />
87
Settings<br />
To set T/M or R:<br />
1. Press menu twice.<br />
2. Select Radar and press enter.<br />
3. Highlight Bearings and press enter.<br />
4. Use the arrows to select a bearing and press Enter.<br />
MARPA<br />
MARPA automatically tracks selected radar targets, making it easier to avoid<br />
collisions. You can track up to 10 targets simultaneously. MARPA uses default or<br />
selected CPA (closest point of approach) and TCPA settings (Time to closest point<br />
of approach) to determine if a selected target is safe, dangerous or lost.<br />
NOTE: To use Radar overlay or MARPA, an RC42 heading sensor<br />
and a valid GPS fix is required. Your display, radar system and RC42<br />
heading sensor need to be connected to the NMEA2000 network.<br />
Please refer to the HDS installation manual.<br />
• Safe — not on an approaching path to your vessel<br />
• Dangerous — on an approaching path to your vessel; when a target<br />
breaches the selected CPA or TCPA thresholds the<br />
target will be classified as dangerous<br />
• Lost — selected target moves out of MARPA range<br />
You can change CPA and TCPA values on the Dangerous vessels dialog.<br />
Dangerous vessels dialog<br />
88
Settings<br />
To adjust CPA and TCPA settings:<br />
1. Press menu twice<br />
2. Select Vessels and press Enter.<br />
3. Select Dangerous Vessels and press Enter.<br />
4. Select the CPA or TCPA text box and press Enter.<br />
5. Follow the onscreen instructions and press enter.<br />
6. Select Save and press Enter.<br />
Acquiring<br />
new target<br />
Acquired<br />
targets<br />
Selecting MARPA targets:<br />
1. From the Radar page, press Menu.<br />
2. Select Acquire Targets and press Enter.<br />
3. Move the cursor over a desired target and press<br />
Enter.<br />
4. Repeat Step 3 to select more targets.<br />
5. Press Exit to remove the cursor from the<br />
display.<br />
Canceling MARPA targets<br />
You can cancel MARPA targets individually or all at once.<br />
89
Settings<br />
To cancel individual targets:<br />
1. Press the keypad to activate the cursor.<br />
2. Move the cursor over a target you are tracking and press Menu.<br />
3. Select Cancel Target and press Enter.<br />
Cancel individual targets<br />
Cancel all targets<br />
To cancel all targets:<br />
1. From the radar page, press Menu.<br />
2. Select Cancel All MARPA Targets and press Enter.<br />
MARPA Settings<br />
There are two settings on the MARPA menu:<br />
History Length and Safe Ring.<br />
Similar to the target trails features, history length<br />
controls the length of trails on selected targets<br />
making it easier to follow target movement.<br />
The Safe Ring provides a graphical representation<br />
of CPA settings.<br />
To select history length:<br />
1. Select MARPA and press Enter.<br />
2. Select History Length and press Enter.<br />
3. Select the desired settings and press Enter.<br />
90
Settings<br />
Target Alarms<br />
You can be alerted when a MARPA target breaches CPA or TCPA thresholds by<br />
setting an alarm.<br />
To set MARPA target alarm:<br />
1. Press menu twice.<br />
2. Select Alarms and press<br />
Enter.<br />
3. Select Settings and press<br />
Enter.<br />
4. Select Vessels and press<br />
Enter.<br />
5. Select the desired alarm and<br />
press Enter.<br />
Viewing MARPA targets on Vessels list<br />
You can view a list of MARPA targets by selecting Vessels from Utilities on the<br />
Pages menu.<br />
Installation<br />
Provides access to the Radar Installation menu. Your installation menu will vary<br />
depending on the type of radar your have connected to your HDS unit.<br />
Radar Installation menu<br />
BR24 Installation menu<br />
To access Radar Installation menu:<br />
1. Press the MENU key twice.<br />
2. Highlight Radar and press ENTER.<br />
3. Select Installation and press ENTER.<br />
91
Settings<br />
Installation Adjustment Menu<br />
The installation adjustment menu is used to make adjustments to bearing alignment,<br />
range offset, antenna height and open array park angle.<br />
When the installation adjustment menu is accessed, press the<br />
keypad up/down to select a feature. Press the keypad left/right<br />
to make adjustments to a selected feature.<br />
Press Exit to return to the Radar Installation menu. To remove<br />
the Radar Installation menu from the screen, select Close and Adjustment Menu<br />
press enter.<br />
Bearing alignment<br />
Used to align the bow of your vessel with the heading line (zero point). Bearing<br />
alignment is also referred to as zero bearing.<br />
To make adjustments to bearing alignment, switch the radar state to Transmit and set<br />
radar orientation to Heading Up.<br />
To select Heading up orientation:<br />
1. From the Radar Page, press MENU.<br />
2. Select Orientation and press ENTER.<br />
3. Use the keypad to select Heading Up and press ENTER.<br />
4. Press EXIT.<br />
Before Bearing Alignment<br />
After Bearing Alignment<br />
Bow of ship is lined up with<br />
the tip of a peninsula; the<br />
bearing line is not.<br />
Bearing line aligned with<br />
peninsula, matching the<br />
alignment of the bow.<br />
92
Settings<br />
To Adjust Bearing Alignment:<br />
1. Line up the bow of your vessel with a stationary target (lighthouse,<br />
pier, etc) at least 1 nm away<br />
2. Select Adjust Bearing Alignment from the Radar Installation menu<br />
and press ENTER. The Installation Adjustment menu will appear.<br />
3. Press the keypad left/right to rotate the radar image so the reference<br />
target is at 0° or 12 o’clock from the radar center.<br />
<br />
Range offset<br />
Eliminates the time lag between real radar returns and the time it takes data to be<br />
processed by the radar software. Range Offset is also referred to as zero range and<br />
trigger delay.<br />
Range Offset Sequence. The circle shrinks as range is increased.<br />
To Adjust Range Offset:<br />
1. Use the ZOOM IN/ ZOOM OUT keys to set range to 1/8 nm.<br />
2. Highlight Adjust range offset from the Radar Installation menu and<br />
press ENTER. The installation adjustment menu will appear.<br />
3. Press the keypad to the left set range offset to 0.<br />
Press enter.<br />
4. If there is a blank, black circle around the center<br />
or a solid circle of color at the center, increase the<br />
range offset until the circle disappears or almost<br />
disappears.<br />
5. If you increase the range offset too far, decrease it until the circle<br />
appears again.<br />
93
Settings<br />
Antenna Height<br />
Antenna height is the distance from the waterline to the Antenna (scanner). It is<br />
important to correctly input antenna height to prevent problems with the Sea Clutter<br />
feature.<br />
To Adjust Antenna Height:<br />
1. Select Adjust Antenna Height from the Installation menu and press<br />
enter.<br />
2. Press the keypad left/right to input the distance from the antenna to<br />
the water surface. Press exit.<br />
Tune<br />
You should not have to adjust Tune for the life of this unit. This feature is intended<br />
for use by only trained technicians.<br />
Fast scan mode (BR24 Radar only)<br />
Increases the speed of the radar scanner when the range is set to 1.5nm or less. That<br />
aids in collision avoidance by giving you more updates on the movement of targets<br />
in your vicinity.<br />
To use Fast Scan mode:<br />
1. Press menu twice.<br />
2. Select Radar and press Enter.<br />
3. Select Installation and press Enter.<br />
4. Highlight Fast scan mode and press Enter.<br />
5. Press Exit twice to return to the display.<br />
6. Zoom in the radar display to 1.5nm or less and BR24 scanning<br />
speed will increase.<br />
94
Settings<br />
Sidelobe suppression (BR24 only)<br />
Sidelobes are false returns caused by the reflection of your radar<br />
signal. Sidelobe suppression helps reduce the impact of sidelobes<br />
on your radar display. The default Auto mode will work<br />
well under most conditions.<br />
To make manual adjustments Sidelobe suppression:<br />
1. Press menu twice.<br />
2. Select Radar and press Enter.<br />
3. Select Installation and press Enter.<br />
4. Highlight Sidelobe suppression and press Enter.<br />
5. Highlight Sidelobe suppression and press the keypad<br />
left/right to make manual adjustments.<br />
6. Press Exit.<br />
Reset Radar to Factory Defaults<br />
Resets radar to factory default settings.<br />
95
Settings<br />
Fuel<br />
Used to input fuel data like engine/tank configuration,<br />
fuel tank capacity and engine calibration. Your unit uses<br />
that data to calculate the overall fuel performance of your<br />
vessel. To access the Fuel menu, select Fuel from the<br />
Settings menu and press enter.<br />
Fuel menu<br />
Refuel<br />
Controls engine calibration and is used to input the amount of fuel added to the<br />
tank(s). Engines must be calibrated with your fuel tanks to get correct readings on<br />
fuel economy, fuel used, etc.<br />
Set to Full<br />
checkbox: check<br />
this box when you<br />
fill up your tank<br />
Refuel menu<br />
Amount Added<br />
text box: Input<br />
amount of fuel<br />
added here<br />
It is important to enter the amount of fuel added to your tank(s) each time fuel<br />
is added. That ensures the correct fuel data is used in the unit’s fuel performance<br />
calculations.<br />
To input fuel added:<br />
1. Select Refuel from the Fuel menu and press enter.<br />
2. Use keypad to select the Amount Added window and press enter.<br />
The Amount Added text box will appear.<br />
3. Use the keypad to input the amount of fuel added and press<br />
enter.<br />
96
Settings<br />
To set tank to full:<br />
1. Highlight the Set to full checkbox<br />
on the Refuel screen and press<br />
enter.<br />
2. Highlight OK and press enter.<br />
The calibration options screen will<br />
appear. You are<br />
ready to calibrate. Tank set to full<br />
To calibrate engine(s):<br />
1. With the calibration options screen displayed, select the checkbox<br />
next to the engine you would like to calibrate .<br />
2. Highlight OK and press enter. The Calibration screen will<br />
appear.<br />
Calibration options screen<br />
Calibration screen<br />
3. Use the keypad to highlight the Actual amount used window and<br />
press enter.<br />
4. Input the amount of fuel used in the Actual amount used dialog box<br />
and press enter.<br />
5. Highlight the Next button and press enter. The Confirm calibration<br />
screen will appear.<br />
6. After confirming calibration data, highlight OK and press enter.<br />
97
Settings<br />
Fuel Used<br />
Data information screen that displays fuel<br />
consumption data including fuel used<br />
since last fill up, fuel used on the current<br />
trip and fuel used during a season.<br />
To access fuel used information, select<br />
Fuel Used from the Fuel menu and press<br />
enter.<br />
Highlight the Reset button and press<br />
enter to set corresponding fuel data<br />
values (trip and seasonal) to zero.<br />
Fuel used screen<br />
Vessel Setup<br />
Controls vessel configuration, which includes selecting the number of engines/<br />
fuel tanks and inputting the capacity of each fuel tank. Vessel Setup data must be<br />
configured before you can calibrate your engine(s).<br />
To access the Vessel Setup menu, highlight Vessel Setup on the Fuel menu and press<br />
enter.<br />
Vessel<br />
configuration<br />
menu: select<br />
number of<br />
engines and fuel<br />
tanks here<br />
Tank size text<br />
box: input<br />
tank size here<br />
Calibration<br />
info button: get<br />
calibration info<br />
here<br />
Vessel Setup<br />
98
Settings<br />
Engine/Tank Configuration<br />
Used to input the number of engines and fuel tanks on your vessel. Your unit must<br />
have that information to be able to calibrate you engine(s).<br />
To select engine-tank configuration:<br />
1. Highlight the vessel configuration drop-down<br />
menu and press enter.<br />
2. Select a engine/tank configuration and press<br />
enter.<br />
3. Highlight the Save button and press enter.<br />
To input tank size:<br />
1. Highlight the Tank size text box and press enter.<br />
2. Use the keypad to input the size of the selected tank and press<br />
enter.<br />
3. Repeat Step 2 for each tank on your vessel.<br />
4. Select the Save button and press enter.<br />
Calibrate<br />
Launches engine calibration information window<br />
referring you to your fuel sensor’s installation<br />
manual.<br />
99
Settings<br />
Alarms<br />
This unit has alarms covering everything from depth and water temp rate to fuel and<br />
waypoint radius. The alarms list has three tabs: Active, History and Settings.<br />
• Active — used to view alarms that have been enabled<br />
• History — shows log of alarm activity, which includes data like when<br />
alarms were triggered and when they were cleared<br />
• Settings — provides access to Alarms list, allowing you to enable<br />
alarms and set alarm limits<br />
NOTE: Some alarms will not work unless a corresponding<br />
sensor is connected to the unit or the network.<br />
To enable/disable an Alarm:<br />
1. Select Alarms from the Settings menu and press enter.<br />
2. Highlight Settings and press enter.<br />
3. Select the desired alarm from the alarms list and press enter.<br />
Displays list of<br />
enabled alarms<br />
Shows history of<br />
alarm activity<br />
Enable alarms and set<br />
limits (thresholds)<br />
Enabled<br />
Alarm<br />
Alarms List<br />
Alarm Limits (Thresholds)<br />
100
Settings<br />
To silence an alarm:<br />
When an Alarm is triggered, a tone will sound and a alarm window will appear on<br />
the screen. Press Enter to silence the alarm and close the alarm window.<br />
After alarm is silenced its corresponding alarm bell will continue to flash<br />
in the bottom left corner of the screen. To remove the bell from the screen,<br />
disable the alarm and then enable it again. The bell will not reappear unless<br />
the alarm is triggered.<br />
Set Limit<br />
Sets thresholds (limits) that will trigger the alarm when met or exceeded. If a<br />
threshold can be set for a particular alarm, the Set Limit button will appear at the<br />
bottom of the screen when that alarm is highlighted on the alarm list.<br />
To set alarm limit:<br />
1. Highlight the desired alarm on the alarm<br />
screen and press Menu.<br />
2. Select Set Limit and press enter. The<br />
Alarm Limit keypad will appear.<br />
3. Input the desired alarm threshold and<br />
press enter.<br />
Siren Enabled<br />
When the Siren is enabled, a tone will sound when an alarm is triggered. To enable<br />
sirens, highlight Siren Enabled on the Alarms menu and press ENTER.<br />
Units<br />
Controls the unit of measure used for unit data. Only Imperial and Nautical units<br />
will be shown if the unit is operated outside of a zone defined by 30 degrees west<br />
longitude and the International Date Line.<br />
To access the Units menu, select Units from the Settings menu<br />
and press enter.<br />
To change a unit of measure:<br />
1. Select a unit from the Units menu. Press<br />
enter.<br />
2. Select the a unit of measure and press enter.<br />
101
Settings<br />
Network<br />
Controls network configuration, data sources, serial port<br />
settings, waypoint sharing and allows you to monitor<br />
network performance (NMEA 2000 and ethernet) and<br />
network devices.<br />
To access the Network menu, select Network from the<br />
Settings menu and press enter.<br />
Network menu<br />
Auto Configure<br />
Resets all Data Sources to default settings<br />
and removes all instances on networked HDS<br />
units.<br />
To auto configure a network:<br />
1. Select Auto Configure from the Network menu and press enter.<br />
2. Highlight Yes and press enter.<br />
Data Sources<br />
An advanced feature that allows you to use data from a network data source or data<br />
from a sensor connected to your unit.<br />
If, for example, you do not want to use your<br />
unit’s internal GPS antenna, you could use an<br />
external GPS antenna connected to an ethernet<br />
or NMEA 2000 network.<br />
To access the Data Source Selection Screen,<br />
highlight Data Sources on the Network menu<br />
and press enter.<br />
Data Source Selection Screen<br />
To select a data source:<br />
1. Select a data category and press the keypad to the right. A<br />
subcategory list will appear.<br />
2. Select a subcategory and press the keypad to the right. A list of<br />
sources will be displayed.<br />
3. Highlight a desired data source and press enter.<br />
102
Settings<br />
Data Source menu<br />
Allows you to change the name and scope of a source and add/<br />
remove sources from a NMEA 2000 or ethernet network. To access<br />
a Data Source menu, highlight a desired source and press Menu.<br />
Rename<br />
Used to rename a Data Source. That makes it easier to recognize one data source<br />
from another when they are the same type of source.<br />
To Rename a data source:<br />
1. Select Rename from the desired data source menu and press<br />
enter. A keyboard will appear.<br />
2. Input the desired name and select OK and press enter.<br />
New<br />
Allows you to create a new instance of a data source.<br />
To create new data source instance:<br />
1. Select New from the desired source menu and press enter. A<br />
keyboard will appear.<br />
2. Input the name of the new instance, select OK and press enter.<br />
Remove<br />
Removes an instance from the Data Source Selection list.<br />
To remove an instance, select Remove from the desired data source menu and press<br />
enter. The data source is removed from the Data Source Select list.<br />
Scope<br />
Controls the way data source settings are shared/not shared on an ethernet network.<br />
Scope lets you select a mode that allows data source settings to be shared by HDS<br />
units on an ethernet network (Global).<br />
You can also select a mode that allows each HDS unit to have individual data source<br />
settings (Local).<br />
Scope Settings<br />
Global<br />
Local<br />
Data source settings will apply to all Data source setting will apply only<br />
HDS units on an ethernet network. to the unit with the local setting.<br />
103
Settings<br />
To select a scope:<br />
1. Highlight Scope on the selected device’s data source menu and<br />
press enter.<br />
2. Use the keypad to select Global or Local and press enter.<br />
Reset Global and Reset Local<br />
Selecting Reset Global will reset all the source selections to default settings and<br />
removes all instances on all networked HDS units.<br />
Reset Local is used to change all source selections on your HDS unit from Local to<br />
Global.<br />
To reset global or local sources:<br />
1. Highlight Reset Global or Reset Local and press enter. A confirmation<br />
message will appear.<br />
2. Select Yes and press enter.<br />
Device List<br />
Displays a list of devices connected to a NMEA<br />
2000 network.<br />
To access the device list, Select Device List from<br />
the Network menu and press enter.<br />
From the Device List you can:<br />
• View device data<br />
Device List<br />
• Change the device instance<br />
• Configure device alarms<br />
• Configure devices<br />
• Calibrate devices<br />
• Enable/disable WAAS/EGNOS/MSAS for GPS antenna by<br />
configuring HDS iGPS<br />
Device Menu<br />
Controls the way data is displayed on the Device list. To<br />
access the Device menu, highlight the desired device and press<br />
menu.<br />
104
Settings<br />
Details<br />
Refresh<br />
Sort<br />
Device Menu Options<br />
Accesses the Device Information screen<br />
Refreshes the device list<br />
Allows you to sort device list by Model ID or Serial No.<br />
Configuring Devices<br />
Devices have different configuration options. Name, tank size and location can<br />
be configured on some devices; only the name can be configured on others. Some<br />
devices like a fuel flow, can be calibrated from the device list.<br />
Device List<br />
Device Information<br />
Screen<br />
To configure a device name or device tank size:<br />
Device Configuration<br />
Screen<br />
1. Select a device from the device list and press enter. The Device<br />
Information screen will appear.<br />
2. Highlight the Configure button and press enter. The Device<br />
Configuration screen will appear.<br />
3. Highlight the Name or Tank Size text box and press enter. A keypad<br />
will appear.<br />
4. Use keypad to input the desired information. Select OK and press<br />
enter.<br />
NOTE: For more information on device configuration refer to the<br />
documentation that came with your device.<br />
105
Settings<br />
To configure device location:<br />
1. Select a device from the device list and press enter. The Device<br />
Information screen will appear.<br />
2. Highlight the Configure button and press enter. The Device<br />
Configuration screen will appear.<br />
3. Highlight the Location dropdown menu and press enter.<br />
4. Select the desired location and press enter.<br />
Instance<br />
You can change a device instance from the Device Configuration screen. This,<br />
however, should only be attempted by a qualified technician.<br />
Calibrating devices<br />
Several devices can be calibrated from the devices list including Fluid Levels, Fuel<br />
Flows and Trim Tabs. Every device that can be calibrated from the devices list, will<br />
have a calibrate button on the Device Information screen. The calibrate button opens<br />
the Device Calibration screen, which has onscreen calibration instructions for the<br />
device.<br />
Calibrate button<br />
Calibration instructions for a<br />
fluid level<br />
To access calibration instructions:<br />
1. Select the desired device from the device list and press enter.<br />
2. Highlight the Calibrate button on the Device Information screen and<br />
press enter. Follow the onscreen calibration instructions.<br />
NOTE: For more information on device calibration, refer to<br />
the documentation that came with your device.<br />
106
Settings<br />
Diagnostics screen: NMEA 2000<br />
Diagnostics screen: UDB<br />
Diagnostics<br />
Displays diagnostic information on NMEA 2000 networks displays the status of<br />
information shared between units (UDB). From the UDB tab, you also can select a<br />
unit to be used as the master (primary) unit when sharing information. To access the<br />
Diagnostics screen, select Diagnostics from the Network menu and press enter.<br />
NMEA 2000 receive/send waypoint<br />
Turns on/off the unit’s ability to send and receive waypoints across a NMEA 2000<br />
network. NMEA 0183 receive waypoint controls the unit’s ability to receive waypoints<br />
over a NMEA 0183 network.<br />
To turn on/off NMEA send/receive waypoint<br />
commands, highlight the desired NMEA send/<br />
receive option and press enter.<br />
NMEA 2000 receive waypoint<br />
turned on<br />
Serial Ports<br />
Configures communication ports to send or receive data with another electronic<br />
device, like an autopilot.<br />
To configure serial ports:<br />
1. Highlight Serial Ports on the Network menu<br />
and press enter.<br />
2. Select the desired setting and press<br />
Enter.<br />
3. Use the keypad to select the desired<br />
option and press enter.<br />
4. Highlight OK and press enter.<br />
Serial settings menu<br />
107
Settings<br />
NMEA 0183 Output<br />
Controls NMEA 0183 sentences used, allowing you to select the type of messages<br />
your unit will transmit when communicating with other NMEA 0183 devices.<br />
To access NMEA 0183 Output screen:<br />
1. Select NMEA 0183 Output from the<br />
Network menu and press enter.<br />
2. Select NMEA 2000 output sentences<br />
and press Enter.<br />
3. Select the desired category and<br />
press Enter to reveal the NMEA<br />
0183 sentences.<br />
4. Highlight the desired sentence to<br />
turn it on/off.<br />
5. Press Exit.<br />
NMEA 0183 Output sentences<br />
screen<br />
Vessels (only available if connected to AIS receiver)<br />
Controls settings used to monitor vessels transmitting<br />
AIS information in your area. That makes it easier to<br />
navigate safely through high traffic areas.<br />
To access the Vessels menu, select Vessels from the<br />
Settings menu and press enter.<br />
Vessels Menu<br />
MMSI (Maritime Mobile Service Identity)<br />
You need to have your own MMSI number entered into the HDS system to be able<br />
to receive addressed messages from AIS vessels.<br />
NOTE: To display MMSI messages, you must turn on the<br />
“Vessels message” option in the Alarm Settings menu.<br />
To input MMSI number:<br />
1. Highlight MMSI on the Vessels menu<br />
and press enter.<br />
2. Use the keypad to input the MMSI<br />
number and press enter.<br />
108
Settings<br />
Icon Filters<br />
Allow you to select what vessels will be shown on<br />
the display.<br />
To select a Display option:<br />
1. Select Icon Filters on the Vessels menu<br />
and press enter.<br />
2. Use the keypad to select the desired<br />
display setting and press enter.<br />
3. To select a value for Hide further than or Hide slower than, highlight<br />
the dropdown menu and press Enter.<br />
4. Use the keypad to select the desired value and press Enter.<br />
5. Select Save and press Enter.<br />
Course Extension<br />
A line extending from each vessel on the chart screen<br />
used to estimate where a vessel will be in a selected<br />
amount of time, if it maintains its current course.<br />
Course Extension<br />
To use Course Extension:<br />
1. Select Course Extension from the Vessels<br />
menu and press enter.<br />
2. Select the desired duration and press enter.<br />
Dangerous Vessels<br />
Allows you to set the dangerous vessel threshold via CPA (Closest point of approach)<br />
and TCPA (Time to closest point of approach) settings.<br />
To adjust CPA or TCPA settings:<br />
1. Select Dangerous Vessels from the Vessels menu and press<br />
Enter.<br />
2. Select the CPA or TCPA text box<br />
and press Enter.<br />
3. Follow the onscreen instructions<br />
and press enter.<br />
4. Select Save and press Enter.<br />
109
Settings<br />
Simulator<br />
Accesses all simulation types including default<br />
demo and simulator modes as well as advanced<br />
custom simulations.<br />
To access the Simulator menu, highlight Simulator<br />
on the Settings menu and press enter.<br />
Simulator menu<br />
Simulate<br />
Turns on/off your unit’s simulator. Simulate must be turned on to view a simulation,<br />
whether you are using the default mode or a custom simulation.<br />
To turn on the simulator, select Simulate from the Simulator menu and press<br />
enter.<br />
Demo Mode<br />
Rotates simulations from each of the unit’s operation modes with screens detailing<br />
some of the unit’s most popular features.<br />
To choose a Demo Mode:<br />
1. Highlight Demo Mode from the Simulator menu and press enter.<br />
2. Use the keypad to select the desired mode and press enter.<br />
Advanced<br />
Allows you to set up a customized simulation using<br />
sonar, GPS, radar and weather data files (where<br />
applicable).<br />
To access the Advanced menu, select Advanced from<br />
the Simulator menu and press enter.<br />
Advanced Simulator menu<br />
110
Settings<br />
Source Files<br />
Controls source files used in radar, sonar, AIS (Chart) and Weather simulations.<br />
Source files allow you to use your own data while running a simulation.<br />
To select a source file:<br />
1. Highlight the desired source file category on<br />
the Advanced menu and press enter. A window<br />
will appear with a list of available files.<br />
2. Use the keypad to select a source file and<br />
press enter.<br />
3. Select Save and press Enter.<br />
<br />
Sonar Source Files<br />
GPS Source<br />
Selects the data source that will be used in a GPS simulation. That allows you to use<br />
navigation data from sonar, radar, simulated course or simulated routes as GPS data<br />
during a simulation.<br />
To select a GPS Source:<br />
1. Select GPS Source from the Advanced<br />
menu and press enter.<br />
2. Use the keypad to select the desired<br />
source and press enter.<br />
GPS Source menu<br />
Speed and Course<br />
Allows you to select the speed and course to be used during a simulation.<br />
To input Speed and Course<br />
1. Select Speed or Course from the Advanced menu<br />
and press enter.<br />
<br />
2. Use the keypad to input the desired value and<br />
press enter.<br />
111
Settings<br />
Route<br />
Allows you to select a route to be used during a simulation.<br />
To select a route:<br />
1. Select Route from the Advanced menu and press enter. A Route<br />
List will appear.<br />
2. Use the keypad to select the desired route and press enter.<br />
Set Start Position<br />
Sets the starting point of a GPS Simulation to the cursor position.<br />
To set start position:<br />
1. Move the cursor into the desired position and access Simulator<br />
advanced menu.<br />
2. Highlight Set Start Position and press enter.<br />
3. Select the Set button and press enter.<br />
4. Highlight Save and press enter.<br />
Restore Defaults<br />
Switches Advanced simulator options back to defaults settings. To restore defaults,<br />
select Restore Defaults from the Advanced menu and press enter.<br />
112
Specifications<br />
Specifications: HDS-5/5m & HDS-7/7m<br />
General<br />
Case Size:<br />
• HDS-5: 5.8” H x 7.3” W x 4” D (14.6 x 18.4 x<br />
10.2 cm), 2.30 lbs<br />
• HDS-7: 6.4” H x 8.8” W x 3.5” D (16.3 x 22.4<br />
x 8.8 cm), 3.10 lbs<br />
Display:<br />
• HDS-5: 5.0” (12.7 cm) diagonal high contrast<br />
16-bit color TFT, 480 x 480 pixel resolution<br />
• HDS-7: 6.4” (16.3 cm) diagonal high contrast<br />
16-bit color TFT, 640 x 480 pixel resolution<br />
Backlighting:<br />
• HDS-5: Florescent (CCFL) backlit screen,<br />
LED keypad backlight<br />
• HDS-7: LED backlit screen and keypad<br />
Supply voltage: 10 to 18 volts DC<br />
Supply current:<br />
• HDS-5: 0.7A at 13VDC with backlight on,<br />
0.4A with backlight off<br />
• HDS-7: 0.8A at 13VDC with backlight on,<br />
0.4A with backlight off<br />
Operating temperature: -15°C to 55°C (5°F<br />
to 130°F)<br />
MMC slots: One with waterproof door.<br />
Reads SD and MMC<br />
Audible alarms: Local and networked<br />
alarms available for included and optional<br />
components, including sonar, GPS/<br />
navigation, battery voltage, weather, engine/<br />
transmission, tank level, AIS and DSC.<br />
Communications: NMEA 0183 input and<br />
output up to 38,400 baud, NMEA 2000,<br />
Navico Ethernet<br />
Standards compliance:<br />
• Waterproofing: IPX7 with card door closed<br />
• EMC: IC RSS-310; FCC Part 15 Class B;<br />
IEC60945<br />
Compliance:<br />
The <strong>Lowrance</strong> HDS complies with the following<br />
regulations:<br />
• CE compliant under R&TTE directive.<br />
• C - Tick compliant under Radiocommunications<br />
act 1992.<br />
• CCS Type approval.<br />
HDS also meets the technical standards in<br />
accordance with Part 15.103 of the FCC<br />
rules. For more information please refer to our<br />
website: www.lowrance.com.<br />
Sonar<br />
Frequency: 50/200 kHz or 83/200 kHz<br />
Power output: 250W Peak to Peak (31W<br />
RMS) actual, 30,000W Peak to Peak analog<br />
equivalent<br />
Depth capability: 5,000 ft dependent on<br />
transducer configuration and installation, bottom<br />
composition and water conditions<br />
Built-in sonar recording capacity: 10min to<br />
2hrs internal memory depending on depth<br />
range and ping speed<br />
Surface water temperature: Available built<br />
into transducer or via external network<br />
Paddlewheel speed log: Available with optional<br />
speed sensor<br />
Audible alarms: Shallow, Deep, Temperature<br />
change<br />
GPS<br />
Receiver/antenna:<br />
• Built in 16 parallel channel internal antenna<br />
• External antennas supported via NMEA<br />
0183 and NMEA 2000<br />
Satellite DGPS: WAAS, EGNOS, MSAS<br />
supported<br />
Compass Safe Distance: 20cm (8 inches)<br />
Charting: Contains built-in <strong>Lowrance</strong> or<br />
Navionics basemap; Navionics Gold,<br />
Platinum, and Platinum Plus supported via<br />
SD/MMC card<br />
Position updates: 1 second with internal<br />
antenna<br />
Chart scale: 50ft (20m) to 2,500 nautical<br />
miles (3,000 miles)<br />
Built-in GPS recording capacity: 32MB<br />
internal memory capacity for up to 5,000<br />
user-definable waypoints, 10 tracks, and 200<br />
routes<br />
Audible alarms: Arrival, off-course, anchor<br />
113
Unit Care<br />
Unit Care<br />
Cleaning the screen<br />
Clean the screen with a mixture of distilled water (50%) and white distilled<br />
vinegar (50%) or Windex® Vinegar Multi Surface. Do not use any type of abrasive<br />
cleaners. They will remove the Anti-Reflection coating from the glass.<br />
Inspect the buttons<br />
Make sure that no buttons are stuck in the down position. If one is stuck, wiggle<br />
the button to free it back to the normal position.<br />
Debris in the keyboard contacts<br />
In case there is dirt or other debris covering the contacts inside the keypad, press<br />
down on the button in question and wiggle it to try to restore its function<br />
Clean the connections<br />
Corrosion or oxidation could occur on the power cable connector pins and fuseholder.<br />
This can prevent sufficient power from flowing to the unit. Clean the<br />
connections to be sure. Sometimes the substance is clear and not easily seen.<br />
Contact & Service Information<br />
For spare parts or service information, please contact one of our local sales offices<br />
or visit our website:<br />
www.lowrance.com<br />
114
Troubleshooting<br />
Troubleshooting<br />
If your unit is not working, or if you need technical help, use the following<br />
troubleshooting section before contacting the customer service department.<br />
Unit won’t turn on<br />
1. Check the power cable’s connection at the unit.<br />
2. Make sure the power cable is wired properly. The red wire<br />
connects to the positive battery terminal, black to negative<br />
or ground.<br />
3. Check the fuse.<br />
4. Measure the battery voltage at the unit’s power connector.<br />
You will measure the two biggest pins. It should be at least<br />
10 volts. If it isn’t, the wiring to the unit is defective, the battery<br />
terminals or wiring on the terminals are corroded, or the<br />
battery needs charging.<br />
Unit freezes, locks up, or operates erratically<br />
1. Electrical noise from the boat’s motor, trolling motor, or an<br />
accessory may be interfering with the sonar unit. Rerouting<br />
the power and transducer cables away from other electrical<br />
wiring on the boat may help. Route the sonar unit’s power<br />
cable directly to the battery instead of through a fuse block<br />
or ignition switch.<br />
2. Inspect the transducer cable for breaks, cuts, or pinched<br />
wires.<br />
3. Check the transducer and power connector. Make sure it’s<br />
securely plugged into the unit.<br />
Weak bottom echo, erratic readings or no fish returns<br />
1. Make sure face of the transducer is parallel to the ground.<br />
(Refer to the installation manual for more information.)<br />
2. If the transducer is mounted inside the hull, be sure it is<br />
shooting through only one layer of fiberglass, that it is<br />
securely bonded to the hull and DOES NOT have air<br />
115
Troubleshooting<br />
bubbles. (See the Installation Section for how to install the<br />
transducer.)<br />
3. When attaching a transducer to the inside of a hull, ONLY<br />
use epoxy available from LEI (see inside back cover for order<br />
information).<br />
4. Do NOT use RTV silicone rubber adhesive or any other type<br />
of epoxy. The LEI epoxy is specially formulated so that it will<br />
cure properly for shoot-through applications.<br />
5. Clean the face of the transducer. Oil, dirt and fuel can cause<br />
a film to form on the transducer, reducing its effectiveness.<br />
6. Electrical noise from the boat’s motor or trolling motor can<br />
interfere with the sonar. This causes the sonar to automatically<br />
increase its discrimination or noise rejection feature.<br />
This can cause the unit to eliminate weaker signals such as<br />
fish and can display lines across the screen.<br />
7. The water may be deeper than the sonar’s ability to find the<br />
bottom. If the sonar can’t find the bottom signal while it’s in<br />
the automatic mode, the digital sonar display will flash continuously.<br />
It may change the range to limits far greater than<br />
the water you are in. If this happens, place the unit in the<br />
manual mode, then change the range to a realistic one, (for<br />
example, 0-100 feet) and increase the sensitivity. As you<br />
move into shallower water, a bottom signal should appear.<br />
8. Check the battery voltage. If the voltage drops, the unit’s<br />
transmitter power also drops, reducing its ability to find the<br />
bottom or targets.<br />
Bottom echo disappears at high speeds, erratic reading<br />
or weak bottom echo while boat is moving<br />
1. This is likely due to cavitation (turbulence) in the water surrounding<br />
the transducer. You may need to move the transducer<br />
lower in the water or to another location. The transducer<br />
cannot send or receive signals through air bubbles.<br />
2. Electrical noise from the boat’s motor or trolling motor<br />
can interfere with the sonar. This causes the sonar to<br />
automatically increase its discrimination or noise rejection<br />
feature. This can cause the unit to eliminate weaker signals<br />
such as fish or even structures from the display. Try using<br />
resistor spark plugs or routing the sonar unit’s power and<br />
116
Troubleshooting<br />
transducer cables away from other electrical wiring on the<br />
boat.<br />
3. When trolling over weed beds in 20ft of water or less, you<br />
may experience vertical bars, loss of the chart picture, or<br />
the digital depth. First, do a soft reset of the unit. Then go<br />
to the Full Sonar Chart screen. Press Menu and select Sonar<br />
Features. Now turn the Chart <strong>Manual</strong> Mode to On. This<br />
will leave everything in Automatic Mode except depth. Now<br />
go back to the main menu and set the depth range for the<br />
depth you are in such as 0-20 feet.<br />
4. It can sometimes be difficult for a high-powered unit to capture<br />
the lightning-fast return in shallow water. Turn off the<br />
automatic sensitivity setting and manually reduce the sensitivity<br />
until the unit locks onto the bottom.<br />
5. If two or more sonar units using the same frequency are operating<br />
at the same time, one or more of them may lose the<br />
depth reading due to the interference. It is like two radio stations<br />
trying to both broadcast on 97.3FM. In shallow water,<br />
if the transducers are far enough apart, you may be able to<br />
operate them together. However, the deeper the water, the<br />
wider the beams spread out. When they cross each other,<br />
the interference occurs.<br />
No fish arches when Fish I.D. is turned off<br />
1. If you are using a transom-mounted transducer, the angle<br />
of the transducer may prevent a fish arch from displaying<br />
properly. If the arch slopes up but not down, then the front of<br />
the transducer is too high and needs to be lowered. If only<br />
the back half of the arch is shown, the nose of the transducer<br />
is angled too low and needs to be raised. This is the<br />
most common problem if a partial arch is displayed.<br />
2. The sensitivity may not be high enough. For the unit to display<br />
a fish arch, it has to be able to receive the fish’s echo<br />
from the time it enters the cone until it leaves. If the sensitivity<br />
is not high enough, the unit shows the fish only when it is<br />
in the center of the cone.<br />
3. Use the Zoom feature. It is much easier to display fish arches<br />
when zoomed in on a small range of water than a large<br />
one. If your boat is in water deeper than 20ft, try setting the<br />
upper and lower limits to a 20ft depth section, such as 40ft<br />
117
Troubleshooting<br />
to 60ft or whatever depth you expect the fish to appear at.<br />
This will maximize the screen resolution to show small objects<br />
larger on the screen. It is unlikely you will see averagesized<br />
fish display as arches in a 100ft deep water column.<br />
4. The boat must be moving at a slow trolling speed to see<br />
fish arches. If the boat is motionless, fish stay in the cone<br />
and show as horizontal lines on screen. This is especially<br />
applicable to ice fishing.<br />
Noise<br />
1. A major cause of sonar problems is electrical noise. This<br />
usually appears on the sonar’s display as random patterns<br />
of dots or lines. In severe cases, it can completely cover the<br />
screen with black dots, or cause the unit to operate erratically,<br />
or not at all.<br />
2. To eliminate or minimize the effects of electrical noise,<br />
try to determine the cause. With the boat at rest in<br />
the water, turn all electrical equipment on the boat<br />
off including the engine. Turn on your sonar unit.<br />
Sensitivity should be set at 70-75 percent. There should be<br />
a steady bottom signal on the display. Now turn on each<br />
piece of electrical equipment on the boat and view the effect<br />
on the sonar’s display.<br />
3. If you find noise interference is from an electrical instrument,<br />
trolling motor, pump, or radio, you can usually reroute<br />
the sonar unit’s power cable and transducer cable away<br />
from the wiring causing the interference. VHF radio antenna<br />
cables radiate noise when transmitting, so be sure to keep<br />
the sonar’s wires away from it. You may need to route the<br />
sonar unit’s power cable directly to the battery to isolate it<br />
from other wiring on the boat.<br />
4. If no noise displays on the sonar unit from electrical equipment,<br />
then make sure everything except the sonar unit is<br />
turned off, then start the engine. Increase the RPM with<br />
the gearshift in neutral. If noise appears on the display, the<br />
problem could be one of three things; spark plugs, alternator,<br />
or tachometer wiring. Try using resistor spark plugs, alternator<br />
filters, or routing the sonar unit’s power cable away<br />
from engine wiring to help eliminate noise problems. Make<br />
sure to use the in-line fuse supplied with the unit when wiring<br />
the power cable to the battery.<br />
118
Troubleshooting<br />
5. When no noise appears on the sonar unit after all of the<br />
above tests, then the noise source is probably cavitation.<br />
Many people make sonar installations which function perfectly<br />
in shallow water, or when the boat is at rest. In most<br />
cases, the cause of the malfunction is the location and/or<br />
angle of the transducer. The face of the transducer must be<br />
placed in a location that has a smooth flow of water at all<br />
boat speeds. Read your transducer owner’s manual or the<br />
Installation instructions in this manual for the best mounting<br />
position.<br />
GPS Not Accurate<br />
1. <strong>Lowrance</strong> Electronics obtains its mapping data from government<br />
agencies. Mapping is not an exact science. A unit’s<br />
GPS position (Latitude/Longitude) can be extremely accurate,<br />
but the location of a cartographic item such as a street,<br />
highway, or point-of-interest may be slightly inaccurate. In<br />
most cases, we have found the mapping detail in our products<br />
to be very accurate. We encourage the reporting of<br />
inaccuracies or omissions so that we can consider them<br />
for future revisions. Please consider that our products are<br />
designed to be aids to navigation and not the sole means of<br />
navigation. A prudent navigator will also have several items<br />
necessary for safe navigation.<br />
2. The accuracy of your position could look different at various<br />
zoom ranges. For example, at a 5 mile range, the cursor<br />
representing your position may appear to be in the center<br />
of a highway your are driving on. However, if you zoom into<br />
a much closer .1 mile range, the position may appear offcenter<br />
due to the variables mentioned above.<br />
3. Try this simple method to verify that the GPS receiver in<br />
your unit is accurate. Have your unit lock onto GPS position<br />
in a known location like your driveway, boat slip, or campsite.<br />
Save that location in the unit as a waypoint. Now travel<br />
away from the known location. Stop and recall the saved<br />
waypoint in the unit. Select GO TO to start the unit navigating<br />
back to that location. Observe the Distance To Go data<br />
as you travel back to that location. When you arrive at your<br />
waypoint, the Distance To Go should be close to 0.<br />
119
Troubleshooting<br />
Cards not Read by Unit<br />
1. Before purchasing a pre-loaded mapping card for a unit,<br />
go to our Mapping Index at http://www.lowrance.com/Products/Mapping/default.asp<br />
Click on the type of card you are<br />
interested in and look at the list of units that are compatible<br />
with that card.<br />
2. When zooming in to see more detail, be sure the cursor is<br />
located within the area covered by the mapping card.<br />
3. In the Chart menu, select Chart Options and then Chart<br />
Categories. Make sure all the categories you want to see<br />
have a check mark beside them.<br />
4. If the card is not recognized by the unit, make sure the card<br />
contacts and corresponding unit pins are clean and free of<br />
obstructions. Verify that the card is securely seated in the<br />
card port.<br />
5. If it is a card for a MapCreate map or saved GPS data, it<br />
may need to be formatted. Do not format pre-loaded cards<br />
such as Nautic-Path, Fishing Hot Spots Pro, Lake Master<br />
Pro, Freedom Maps, or Navionics. The information will be<br />
deleted from the card. Please be aware that <strong>Lowrance</strong> GPS<br />
products will only read cards that are FAT formatted. MMC<br />
cards formatted using FAT 32 or NTFS will not work with<br />
our products.<br />
Current Position not on the Screen<br />
1. First, make sure the unit is locked onto the satellites and<br />
shows a fix on the satellite status screen. Then check for<br />
cross-hairs on the screen (or for an automotive unit, a red<br />
box with an X). If this is on the screen, it means that you had<br />
pressed one of the arrow buttons. If that is the case, the unit<br />
thinks that you want to scroll to a location on the screen or<br />
zoom in or out to see more detail. Press the EXIT button to<br />
clear the crosshairs and your current position will show in<br />
the middle of the display.<br />
2. To determine your current position, the GPS receiver must<br />
“lock” onto at least 3 GPS satellites. For the best signal reception,<br />
an external GPS antenna/receiver should be located<br />
where it can receive as many signals as possible. There<br />
120
Troubleshooting<br />
should be nothing around or above the antenna. However,<br />
GPS antennas can receive signals well through many types<br />
of glass and fabric. It is recommended to try various locations<br />
before making a permanent installation.<br />
3. If you are using a NMEA 2000 network, both branches of the<br />
power cable with red and black wires need to be connected<br />
to a 12volt power source. Be sure all cable connections are<br />
clean and solid. Check to be sure power is reaching the<br />
GPS receiver. Also, check the power to the blue connector<br />
network and the red connector network.<br />
Update the Software<br />
Make sure your unit has the latest software version. Go to the Software<br />
Update page on <strong>Lowrance</strong>.com. You can download updates for free.<br />
Reset the Unit<br />
Sometimes resetting your unit can solve unusual issues. Go to <strong>Lowrance</strong>.<br />
com to access a list of reset procedures for <strong>Lowrance</strong> products. Locate the<br />
one that applies to the model you own. Try a Soft Reset first, this will return<br />
your settings to factory defaults. If you decide to try a Hard Reset, save<br />
any important stored data to an MMC or SD card or write the information<br />
down. The data will be deleted during this process.<br />
Radar won’t Start Up<br />
If the radar, does not start up, try the following steps:<br />
1. Verify head unit has the latest code that supports radar.<br />
2. Verify that the communication port is set to RADAR<br />
3. Turn the unit, radar and network off, then turn everything<br />
back on. On power up the Radar should start initializing.<br />
Change over to the Radar Page and see if the unit is initializing<br />
or giving the count down indication.<br />
a. If you are getting a countdown: allow it to complete and<br />
then try to power on the Radar. If the Radar does not<br />
start rotating then the Radar will need to be sent in for<br />
service.<br />
b. If you are NOT getting a countdown, press MENU, select<br />
RADAR INFORMATION and press ENT.<br />
121
Troubleshooting<br />
Highlight FORCE STATUS UPDATE and press ENT.<br />
Pay attention to the RX/TX buttons.<br />
c. If the TX is not lighting up then either you do not have<br />
the com port set to RADAR or the GPS unit is defective.<br />
Verify that the Com Port is set properly, if it is then the<br />
<strong>Lowrance</strong> unit will need to be sent in for repair.<br />
d. If the TX is blinking but the RX is not then you are not<br />
getting any information from the RIM, the processor or<br />
the Radar. There is a fuse inside the processor that<br />
has more than likely blown. Remove the front left black<br />
screw, then remove the grounding post on the right side<br />
of the front of the unit. Gently slide the front cover off,<br />
the fuse is located on the left side of the board. This<br />
fuse is very tight and difficult to remove, you may need<br />
to use a pair of pliers to get a good grip on it and gently<br />
try to pull it out. Replace the fuse, the faceplate, and<br />
the screws, making sure that the front face is securely<br />
seated so not to lessen the water seal.<br />
4. If the communication is hooked up properly and all information<br />
fields are properly displayed on the “radar information”<br />
page, but the unit starts to warm up but you never see a<br />
count down to standby on the screen and then radar communication<br />
is lost after one minute. The voltage supply to<br />
the Radar Antenna or the gauge wire supplying the voltage<br />
may be to small.<br />
122
Index<br />
Index<br />
Symbols<br />
2D and Shaded Relief 53<br />
A<br />
Acquire targets 61<br />
Active cursor 9<br />
Active panel 23<br />
Add dashboard 20<br />
Adjusting colorline 29<br />
Adjusting sensitivity 29<br />
Adjusting text size 66<br />
Adjust panel sizes 24<br />
Advanced settings 71<br />
Alarm Limits 101<br />
Alarms 100<br />
Enable/Disable 100<br />
Amplitude scope 32<br />
Antenna height 94<br />
Arrival Radius 72<br />
Auto gain 60<br />
Auto Sensitivity 27<br />
B<br />
Backlight 6<br />
Bearing alignment 92<br />
Bearings 87<br />
C<br />
Calibrate engine 97, 99<br />
Calibrating devices 106<br />
Cancel individual MARPA targets 90<br />
Canceling MARPA targets 89<br />
Chart categories 53<br />
Chart data 75<br />
Chart icons 54<br />
Chart icons, tides and currents 54<br />
Chart look ahead 52<br />
Chart options 37<br />
Chart page 15<br />
Chart popup information 76<br />
Chart settings 75<br />
Grid lines 76<br />
Heading extension 75<br />
Range rings 75<br />
Closing menus 7<br />
Colorline 28<br />
Compass 113<br />
Compass overlay 87<br />
Configure device location 106<br />
Configure device name 105<br />
Configuring devices 105<br />
Configuring device tank size 105<br />
Configuring network devices 105<br />
Coord System 68<br />
Copy files to MMC/SD 22<br />
Course extension 109<br />
Cross-track error 72<br />
Current position 37<br />
Currents 54<br />
Cursor 6<br />
Custom range 30<br />
D<br />
Dangerous vessels 109<br />
Dashboards 17<br />
Add/Removing source 19<br />
Change layout 20<br />
Configure limits 19<br />
Editing 17<br />
Data files 22<br />
Data overlay<br />
Add/Remove source 14<br />
Editing 11<br />
Move/Place 12<br />
Select data 12<br />
Data overlay configuration 12, 13, 14<br />
Data overlay edit mode 11<br />
Data source scope 103<br />
Datum 68<br />
123
Index<br />
Delete data files 22<br />
Delete sonar logs 22<br />
Demo mode 110<br />
Depth line 32<br />
Device list 104<br />
Displaying combo pages 23<br />
Displaying multiple panels 24<br />
E<br />
EBL/VRM 62<br />
EBL/VRM adjust menu 63<br />
EBL/VRM menu 63<br />
Engine/Tank configuration 99<br />
Ethernet 113<br />
ENET 113<br />
F<br />
Fast scan mode 94<br />
Find current position 37<br />
Finding chart items 51<br />
Fish ID 33<br />
Fish ID beeps 33<br />
Fishing mode 8<br />
Fishing modes 80<br />
Flasher 29<br />
Frequency 28, 113<br />
Fuel 96<br />
Fuel used 98<br />
G<br />
Gain 60<br />
Global source 103<br />
Go to cursor 38<br />
GPS source 111<br />
Guard zone configuration 65<br />
Guard zones 64<br />
H<br />
Hide chart 77<br />
I<br />
Icon filters 109<br />
Info page 16<br />
K<br />
Keel offset 81<br />
Key beeps 67<br />
Keypad 6<br />
Keypad functions 5<br />
L<br />
Language 66<br />
Local source 103<br />
Log sonar data 33<br />
M<br />
Magnetic Variation 68<br />
<strong>Manual</strong> Conventions 4<br />
Map orientation 52<br />
MARPA 88<br />
MARPA acquire targets 61<br />
MARPA settings 89, 90<br />
MARPA targets 89<br />
Measuring distances on chart 50<br />
MMSI 108<br />
Multiple panels 24<br />
N<br />
Navigation settings 72<br />
Navionics 55<br />
Navionics settings 56<br />
Network 102<br />
Network auto configuration 102<br />
Network data source 102<br />
Network data source settings 103<br />
Network device list 104<br />
Network diagnostics 107<br />
Network sonar 78<br />
New data source 103<br />
NMEA<br />
124
Index<br />
NMEA 0183 113<br />
NMEA 2000 113<br />
NMEA 0183 output 108<br />
NMEA 2000 receive/send waypoint<br />
107<br />
P<br />
Page settings 72<br />
Pages screen 10<br />
Phantom Loran 74<br />
Ping Speed 30<br />
Point of interest (POI) 36<br />
Position 113<br />
R<br />
Radar adjust menu 59<br />
Radar compass overlay 87<br />
Radar installation adust menu 91<br />
Radar installation menu 91<br />
Radar interference rejection 60<br />
Radar menu 59<br />
Radar North indicator 86<br />
Radar options 55<br />
Radar orientation 86<br />
Radar overlay 54, 65<br />
Radar page 16<br />
Radar palettes 85<br />
Radar position 61<br />
Radar range markers 87<br />
Radar range offset 93<br />
Radar range rings 87<br />
Radar settings 85<br />
Radar state 59<br />
Radar target trails 85<br />
Radar threshold 86<br />
Rain clutter 60<br />
Range 28<br />
Refuel 96<br />
Remove data source 103<br />
Rename data source 103<br />
125<br />
Reset Fishing Mode 81<br />
Reset global source 104<br />
Reset local source 104<br />
Reset radar 95<br />
Restore defaults 71<br />
Restore simulator defaults 112<br />
Routes 44<br />
Create 44<br />
Editing 46<br />
Navigate 47<br />
Search 47<br />
Turn on/off 77<br />
S<br />
Satellites screen 69<br />
Saving screen captures 70<br />
Scope 103<br />
Screen capture 70<br />
Sea clutter 60, 61<br />
Search by coordinates 51<br />
Selecting active panel 23<br />
Selecting POIs 38<br />
Sensitivity 27<br />
Serial ports 107<br />
Set local time 67<br />
Set start position 112<br />
Sidelobe suppression 95<br />
Silencing alarms 101<br />
Simulate route 112<br />
Simulator 110<br />
Simulator advanced settings 110<br />
Simulator demo mode 110<br />
Simulator GPS source 111<br />
Simulator source files 111<br />
Simulator speed and course 111<br />
SIRIUS radio 72<br />
Sonar adjust menu 29<br />
Sonar depth line 32<br />
Sonar flasher 29<br />
Sonar frequency 28<br />
Sonar installation menu 81<br />
Sonar logging 33<br />
Sonar logs 22<br />
Sonar log settings 34
Index<br />
Sonar manual mode 79<br />
Sonar menu 27<br />
Sonar network source 35<br />
Sonar noise rejection 78<br />
Sonar options 30<br />
Sonar page 15<br />
Sonar palettes 31<br />
Sonar range 28<br />
Sonar scroll speed 79<br />
Sonar settings 78<br />
Sonar source 35<br />
Sonar splitscreen 28<br />
Sonar temperature graph 32<br />
Sorting waypoints 41<br />
Split 28<br />
Surface clarity 78<br />
Symbology 62<br />
System settings 66<br />
T<br />
Tank size 99<br />
Target alarms 91<br />
Target boost 60<br />
Target expansion 85<br />
Target trails 85<br />
Temperature averaging 83<br />
Temperature calibration 83<br />
Temperature Graph 32<br />
Text size 66<br />
Tides 54<br />
Time 67<br />
Trail distance period 73<br />
Trail logging type 73<br />
Trails 48<br />
Create 49<br />
Editing 49, 50<br />
Turn on/off 77<br />
Trail settings 73<br />
Trail time period 74<br />
Transducer type 84<br />
U<br />
Unit Care 114<br />
Units 101<br />
Upper and Lower Limits 30<br />
Utilities 21<br />
V<br />
Vessel course extension 109<br />
Vessel icon filters 109<br />
Vessels 108<br />
Vessel setup 98<br />
Viewing Sonar History 26<br />
W<br />
Water speed averaging 83<br />
Water speed calibration 82<br />
Waypoint options 40<br />
Waypoints 38<br />
Create at current position 39<br />
Create at vessel position 39<br />
Editing 42, 43<br />
Search 41<br />
Turn on/off 76<br />
X<br />
XTE limit 72<br />
Z<br />
Zoom bars 32<br />
126
Navico Databases License Agreement<br />
THIS IS A LEGAL AGREEMENT BETWEEN THE END-USER WHO<br />
FIRST PURCHASES THIS PRODUCT AS A CONSUMER ITEM FOR<br />
PERSONAL, FAMILY, OR HOUSEHOLD USE ("YOU") AND NAVICO, THE<br />
MANUFACTURER OF THIS PRODUCT ("WE", "OUR", OR "US").<br />
USING THE PRODUCT ACCOMPANIED BY THIS LICENSE AGREEMENT<br />
CONSTITUTES ACCEPTANCE OF THESE TERMS AND CONDITIONS.<br />
IF YOU DO NOT ACCEPT ALL TERMS AND CONDITIONS, PROMPTLY<br />
RETURN THE PRODUCT WITHIN 30 DAYS OF PURCHASE. PLEASE<br />
RETURN USING THE ENCLOSED UPS SHIPPING LABEL AND INCLUDE:<br />
PROOF OF PURCHASE, NAME, ADDRESS, AND PHONE NUMBER. YOUR<br />
PURCHASE PRICE AND ANY APPLICABLE TAXES WILL BE REFUNDED.<br />
PLEASE ALLOW 4-6 WEEKS TO PROCESS YOUR REFUND.<br />
1. This License Agreement applies to the one or more databases that your<br />
product may contain. We refer to these singly as a "Database" and together<br />
as the "Databases." Your product may thus include the "WBS Database"<br />
which contains worldwide background surface mapping data, the "Smart-<br />
Map Database" which contains inland mapping data, or other Databases.<br />
2. The Databases that your product may contain are licensed, not sold. We<br />
grant to you the nonexclusive, nonassignable right to use these Databases<br />
for supplemental navigation reference purposes, but only as long as you<br />
comply with the terms and conditions of this License Agreement. We reserve<br />
the right to terminate this license if you violate any aspect of this License<br />
Agreement. You are responsible for using official government charts<br />
and prudent navigation for safe travel.<br />
3. The Databases housed in your product are protected by the copyright notices<br />
appearing on the product or its screen(s). You may NOT modify, adapt,<br />
translate, reverse engineer, decompile, disassemble, rent, lease, or resell<br />
any Database, and you may NOT create derivative works based upon any<br />
Database or its contents. Any unauthorized reproduction, use, or transfer of<br />
a Database may be a crime and may subject you to damages and attorney<br />
fees.<br />
4. This License Agreement will terminate immediately without prior notice<br />
from us if you fail to comply with or violate any of the provisions of this<br />
Agreement. Upon termination, you will promptly return all products containing<br />
one or more Databases to us.<br />
5. Prices and programs are subject to change without notice.<br />
6. This License Agreement shall be governed by the laws of the State of Oklahoma<br />
and comprises the complete and exclusive understanding between<br />
you and us concerning the above subject matter.
Databases Limited Warranty<br />
"We", "our", or "us" refers to Navico, the manufacturer of this product. "You" or<br />
"your" refers to the first person who purchases the product as a consumer item for<br />
personal, family, or household use. The Databases Limited Warranty applies to the<br />
one or more databases that your product may contain. We refer to each of these as<br />
a "Database" or together as the "Databases." Your product may thus include the<br />
"WBS Database" which contains worldwide background surface mapping data, the<br />
"SmartMap Database" which contains inland mapping data, or other Databases.<br />
We warrant to you that we have accurately compiled, processed, and reproduced<br />
the portions of the source material on which the Databases are based. However, we<br />
are under no obligation to provide updates to the Databases, and the data contained<br />
in the Databases may be incomplete when compared to the source material. WE<br />
MAKE NO EXPRESS OR IMPLIED WARRANTY OF ANY KIND ABOUT<br />
THE ACCURACY OF THE SOURCE MATERIAL ITSELF, INCLUDING BUT<br />
NOT LIMITED TO IMPLIED WARRANTIES OF MERCHANTABILITY OR<br />
FITNESS FOR A PARTICULAR PURPOSE.<br />
If there is a defect in any Database, your exclusive remedy shall be, at our option,<br />
either a refund of the price you paid for the product containing the defective Database<br />
or a replacement of such product. WE WILL NOT UNDER ANY CIRCUM-<br />
STANCES BE LIABLE TO ANYONE FOR ANY SPECIAL, CONSEQUEN-<br />
TIAL, INCIDENTAL, OR OTHER INDIRECT DAMAGE OF ANY KIND.<br />
Some states do not allow the exclusion or limitation of incidental or consequential<br />
damages, so the above limitations or exclusions may not apply to you.<br />
This warranty does NOT apply in the following circumstances: (1) when the product<br />
has been serviced or repaired by anyone other than us; (2) when the product<br />
has been connected, installed, combined, altered, adjusted, or handled in a manner<br />
other than according to the instructions furnished with the product; (3) when<br />
any serial number has been effaced, altered, or removed; or (4) when any defect,<br />
problem, loss, or damage has resulted from any accident, misuse, negligence, or<br />
carelessness, or from any failure to provide reasonable and necessary maintenance<br />
in accordance with the instructions of the owner’s manual for the product.<br />
We reserve the right to make changes or improvements in our products from time<br />
to time without incurring the obligation to install such improvements or changes<br />
on equipment or items previously manufactured.<br />
This warranty gives you specific legal rights and you may also have other rights<br />
which may vary from state to state.<br />
Your remedies under this warranty will be available so long as you can show in a<br />
reasonable manner that the defect occurred within one (1) year from the date of<br />
your original purchase, and we must receive your warranty claim no later than 30<br />
days after such 1-year period expires. Your claim must be substantiated by a dated<br />
sales receipt or sales slip.
Visit our website:<br />
www.lowrance.com<br />
*988-10041-001*<br />
© Copyright 2011<br />
All Rights Reserved<br />
Navico Holding AS