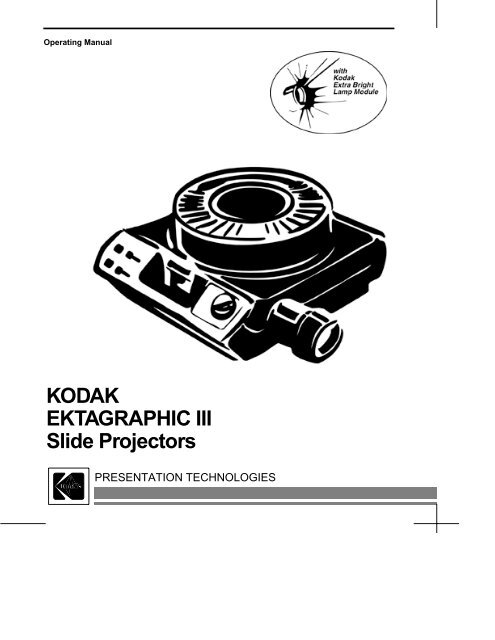
KODAK EKTAGRAPHIC III Slide Projectors - Support Home Page ...
KODAK EKTAGRAPHIC III Slide Projectors - Support Home Page ...
KODAK EKTAGRAPHIC III Slide Projectors - Support Home Page ...

You also want an ePaper? Increase the reach of your titles
YUMPU automatically turns print PDFs into web optimized ePapers that Google loves.
Operating Manual<br />
<strong>KODAK</strong><br />
<strong>EKTAGRAPHIC</strong> <strong>III</strong><br />
<strong>Slide</strong> <strong>Projectors</strong><br />
PRESENTATION TECHNOLOGIES
Important Safety Instructions<br />
When using your projector, always follow basic safety precautions:<br />
1. Read and understand all instructions before using this equipment.<br />
2. Operate this projector with 110- to 125-volt 60 Hz current only. Incorrect voltage can cause projector<br />
malfunction. See “Startup” on page 3 for Models <strong>III</strong> BR and <strong>III</strong> ABR, which feature a multi-voltage<br />
selector.)<br />
3. Close supervision is necessary when any appliance is used by or near children, or others who may not<br />
understand the need for these precautions. Do not leave the projector unattended during use.<br />
4. Be careful not to touch hot parts. For lamp replacement, allow the module to cool before touching the<br />
lamp and the surrounding area. Do not place the lamp module on heat-sensitive surfaces.<br />
5. Do not operate your projector if the cord is damaged or if the projector has been dropped or damaged<br />
(see “How to Obtain Service” on page 30).<br />
6. Position the cord so that it is not tripped over, pulled, or placed in contact with hot surfaces.<br />
7. If an extension cord is necessary, use a cord with a current rating at least equal to that of the projector.<br />
Cords rated for less amperage than the projector may overheat.<br />
8. Always unplug the projector from the electrical outlet before cleaning and servicing and when it is not<br />
in use.<br />
9. Allow the projector to cool before storing.<br />
10. Do not immerse this equipment in water or other liquids.<br />
11. Do not disassemble this projector. Use a qualified service technician when service or repair is required.<br />
Incorrect reassembly can cause electric shock the next time the projector is used.<br />
12. Use only safety electrical low-voltage (SELV) devices.<br />
13. The use of an accessory attachment not recommended by the manufacturer may increase risk of<br />
damage.<br />
14. Keep the air-flow vents unobstructed.<br />
Save These Instructions
Operating Manual<br />
<strong>KODAK</strong><br />
<strong>EKTAGRAPHIC</strong> <strong>III</strong><br />
<strong>Slide</strong> <strong>Projectors</strong>
Congratulations!<br />
You have just purchased a <strong>KODAK</strong> <strong>EKTAGRAPHIC</strong> <strong>III</strong> <strong>Slide</strong> Projector with<br />
a <strong>KODAK</strong> Extra Bright Lamp Module.<br />
This new lamp module procides 30% greater light intensity so your images<br />
look brighter, richer and more saturated. This module features a “Lamp On”<br />
indicator on the lamp module door.
Contents<br />
Important Safety Instructions . . . . . . . . . . . . . . . . . . . . . . . . . . . . . . . . . . . . 2<br />
Overview . . . . . . . . . . . . . . . . . . . . . . . . . . . . . . . . . . . . . . . . . . . . . . . . . . . . 2<br />
Introduction . . . . . . . . . . . . . . . . . . . . . . . . . . . . . . . . . . . . . . . . . . . . . . . . . . 3<br />
Operation . . . . . . . . . . . . . . . . . . . . . . . . . . . . . . . . . . . . . . . . . . . . . . . . . . . . 3<br />
Startup . . . . . . . . . . . . . . . . . . . . . . . . . . . . . . . . . . . . . . . . . . . . . . . . . . 3<br />
Loading the <strong>Slide</strong> Tray . . . . . . . . . . . . . . . . . . . . . . . . . . . . . . . . . . . . . . 6<br />
Projecting Your <strong>Slide</strong>s . . . . . . . . . . . . . . . . . . . . . . . . . . . . . . . . . . . . . 10<br />
Editing Your Presentation . . . . . . . . . . . . . . . . . . . . . . . . . . . . . . . . . . 17<br />
Clearing a Gate Jam . . . . . . . . . . . . . . . . . . . . . . . . . . . . . . . . . . . . . . . 18<br />
Using the Built-In Viewer . . . . . . . . . . . . . . . . . . . . . . . . . . . . . . . . . . . 19<br />
Using a Dissolve Control . . . . . . . . . . . . . . . . . . . . . . . . . . . . . . . . . . . 20<br />
Shutdown . . . . . . . . . . . . . . . . . . . . . . . . . . . . . . . . . . . . . . . . . . . . . . . 20<br />
Maintenance . . . . . . . . . . . . . . . . . . . . . . . . . . . . . . . . . . . . . . . . . . . . . . . . 21<br />
Changing the Projection Lamp . . . . . . . . . . . . . . . . . . . . . . . . . . . . . . . 22<br />
Cleaning the Condenser, Heat-Absorbing Glass, and Mirror . . . . . . . 23<br />
Troubleshooting . . . . . . . . . . . . . . . . . . . . . . . . . . . . . . . . . . . . . . . . . . . . . 27<br />
Warranty . . . . . . . . . . . . . . . . . . . . . . . . . . . . . . . . . . . . . . . . . . . . . . . . . . . 29<br />
How to Obtain Service . . . . . . . . . . . . . . . . . . . . . . . . . . . . . . . . . . . . . . . . 30<br />
Appendix A . . . . . . . . . . . . . . . . . . . . . . . . . . . . . . . . . . . . . . . . . . . . . . . . . 31<br />
Serial Number<br />
The serial number of your projector is printed on the label affixed to the power<br />
cord retainer on the base of the projector. Record this number, as well as the<br />
model identification, date, and place of purchase, for future reference.<br />
<strong>KODAK</strong> <strong>EKTAGRAPHIC</strong> <strong>III</strong> <strong>Slide</strong> Projector 1
Overview<br />
FRONT RIGHT<br />
1 – Tray<br />
2 – Lock Ring<br />
3 – Storage Compartment/Remote<br />
4 – Elevating Foot<br />
5 – Elevating Adjustment Wheel<br />
6 – Elevating Foot Release Button<br />
7 – Lens<br />
8 – Viewer (Model ATS)<br />
9 – Focus Knob<br />
10 – Autofocus (Models A, AMT, & ATS)<br />
11 – Select Bar<br />
12 – Timer (Models AMT & ATS)<br />
13 – Reverse<br />
14 – Forward<br />
15 – Power/Fan/Half Lamp/Full Lamp<br />
BACK RIGHT<br />
16 – Tray Release Latch<br />
17 – Lamp Module<br />
18 – Raised Index Mark<br />
19 – Reading Light Cover<br />
20 – Standby Light (Model E Plus)<br />
21 – Special-Application Receptacle<br />
22 – Remote Receptacle<br />
BASE<br />
23 – Power Cord<br />
24 – Power Cord Retainer<br />
25 – Leveling Foot<br />
2 <strong>KODAK</strong> <strong>EKTAGRAPHIC</strong> <strong>III</strong> <strong>Slide</strong> Projector
Introduction<br />
Take the time to read the instructions in this operating manual to become<br />
familiar with your <strong>KODAK</strong> <strong>EKTAGRAPHIC</strong> <strong>III</strong> <strong>Slide</strong> Projector and how to<br />
operate it properly.<br />
Operation<br />
Startup<br />
Models <strong>III</strong> BR<br />
and ABR Only<br />
Important<br />
Before you turn on your new <strong>KODAK</strong> <strong>EKTAGRAPHIC</strong> <strong>III</strong> BR or ABR <strong>Slide</strong><br />
Projector, it is critical to set the voltage selector to the proper setting. Use<br />
the proper fuse for the voltage selection. See the fuse label on the back of the<br />
projector.<br />
The voltage selector on the <strong>KODAK</strong> <strong>EKTAGRAPHIC</strong> <strong>III</strong> BR or ABR <strong>Slide</strong><br />
Projector is located on the base of the projector. Using a small object, such as<br />
a coin, you can set the voltage selector for the proper voltage (100, 115, 130,<br />
220, 230, and 240 V).<br />
<strong>KODAK</strong> <strong>EKTAGRAPHIC</strong> <strong>III</strong> <strong>Slide</strong> Projector 3
Operation<br />
<strong>EKTAGRAPHIC</strong> <strong>III</strong> BR and ABR <strong>Slide</strong> <strong>Projectors</strong> have a sensing capability<br />
to automatically set the proper power cycle (50 or 60 Hz). This eliminates the<br />
need to manually change the two-position switch included on models<br />
manufactured before November 1996. These projectors are shipped with a<br />
detachable power cord that is packaged separately (not wound on the Power<br />
Cord Retainer).<br />
A spare fuse is provided. The fuse is located in the small, pull-out storage door<br />
below the Power Inlet. Simply pull the door with your finger. Remove the<br />
spent fuse with a small object (e.g., pencil tip) by pushing the fuse up and<br />
removing it from the receptacle. Press the spare fuse into the receptacle and<br />
close the storage door.<br />
Important<br />
The <strong>EKTAGRAPHIC</strong> <strong>III</strong> BR and ABR <strong>Slide</strong> <strong>Projectors</strong> are supplied with a<br />
3-wire grounding power cord to comply with UL122 (USA) and CSA222<br />
(Canada) safety and electrical standards. We urge you to provide a permanent,<br />
properly installed 3-wire receptacle as the source of power for this projector.<br />
For advice and assistance, call a licensed electrician or your local power<br />
company.<br />
When used outside the United States of America, please use a proper adapter<br />
that ensures grounding and polarization.<br />
Although the Models <strong>III</strong> BR and ABR are approved to the standards of UL<br />
and CSA, they are not intended to meet approval in all countries worldwide.<br />
4 <strong>KODAK</strong> <strong>EKTAGRAPHIC</strong> <strong>III</strong> <strong>Slide</strong> Projector
Operation<br />
Models A,<br />
AMT and ATS<br />
Open the storage compartment and remove the remote control.<br />
Plug the 5-pin cable remote connector into the remote-control receptacle,<br />
aligning the raised dot with the metallic rivet head.<br />
This receptacle also accepts plugs for accessories, such as Kodak dissolve<br />
controls.<br />
Plug the power cord into a grounded outlet with 110- to 125-volt 60 Hz<br />
current only.<br />
<strong>KODAK</strong> <strong>EKTAGRAPHIC</strong> <strong>III</strong> <strong>Slide</strong> Projector 5
Operation<br />
Loading the <strong>Slide</strong> Tray<br />
A <strong>KODAK</strong> <strong>EKTAGRAPHIC</strong> Universal <strong>Slide</strong> Tray is designed to hold up to<br />
80 slides. Be sure that your slide mounts are in good condition; frayed or bent<br />
mounts may fail to drop into the projector. A variety of slide trays are<br />
available with capacity up to 140 slides. See your dealer in Kodak products<br />
for a complete list of Kodak trays and accessories.<br />
Note: Do not attempt to project slides mounted with sticky or loose tape.<br />
Place the tray over the center post of the projector. Align the "0" slot with the<br />
gate index; the tray will drop into position.<br />
If your 80-slide tray does not drop easily, rotate the metal plate on the bottom<br />
of the tray until it locks into position. For a 140-slide tray, secure the lock<br />
ring, invert the tray, and align the index hole with the index notch. <strong>Slide</strong> and<br />
hold the tray release latch in the direction of the arrow, and turn the bottom<br />
plate until the index hole and notch align. Then release the latch.<br />
80-<strong>Slide</strong> Tray<br />
140-<strong>Slide</strong> Tray<br />
6 <strong>KODAK</strong> <strong>EKTAGRAPHIC</strong> <strong>III</strong> <strong>Slide</strong> Projector
Operation<br />
Front-Screen<br />
Projection<br />
Remove the lock ring by turning it counterclockwise and lifting it off.<br />
Check each slide’s orientation (horizontal or vertical), and arrange them in the<br />
order you wish to show them. Then turn the slides upside down.<br />
Number each mount in the upper right-hand corner of the film’s shiny side.<br />
Insert your first slide into the first slot in the tray so that the number is visible<br />
on the outer circumference of the tray. Insert your second slide in the second<br />
slot with the emulsion (dull side) facing your first slide, and so on.<br />
<strong>KODAK</strong> <strong>EKTAGRAPHIC</strong> <strong>III</strong> <strong>Slide</strong> Projector 7
Operation<br />
Replace the lock ring by turning it clockwise until it is secure<br />
Rear-Screen<br />
Projection<br />
You can easily adapt a show from front- to rear-screen projection. Remove<br />
each slide from the tray and turn it around (keeping the slide upside down).<br />
This will give the projected slide a mirror image on the screen.<br />
Insert your first slide back into the first slot in the tray. The number is now<br />
visible in the inner circumference of the tray.<br />
Replace the lock ring by turning it clockwise until it is secure.<br />
With a Dissolve<br />
Control<br />
When you use a dissolve control, put your slides into two trays (one for oddand<br />
one for even-numbered slides).<br />
8 <strong>KODAK</strong> <strong>EKTAGRAPHIC</strong> <strong>III</strong> <strong>Slide</strong> Projector
Operation<br />
Tray<br />
Removing the Tray<br />
Place the loaded slide tray on the projector. Align the tray index bar with the<br />
gate index. The tray will drop into position.<br />
To remove the slide tray:<br />
• press the select bar all the way down<br />
• align the tray index bar with the gate<br />
index.<br />
You can then lift off the tray.<br />
Raised Index Mark<br />
This feature allows you to<br />
coordinate tray starting positions<br />
for multiple-projector<br />
presentations. For an 80-slide tray<br />
in the zero position, the raised<br />
index mark is at slot 20. If you<br />
start with slide 6, it will align at<br />
slot 26. For a 140-slide tray in the<br />
zero position, the index mark is at<br />
slot 35. So, if you start with<br />
slide 12, it will align at slot 47.<br />
<strong>KODAK</strong> <strong>EKTAGRAPHIC</strong> <strong>III</strong> <strong>Slide</strong> Projector 9
Operation<br />
Projecting Your <strong>Slide</strong>s<br />
Lens<br />
To insert a lens, push the focus knob up and position the lens gear teeth on<br />
the lens barrel with the notch on the projector.<br />
Lamp<br />
<strong>Slide</strong> the power switch to half lamp (for longer lamp life) or lamp (for<br />
maximum brightness).<br />
You may want to keep a spare <strong>KODAK</strong> EC Lamp Module (CAT 831 3587)<br />
handy in case the lamp burns out during a presentation. Replacing the entire<br />
module makes the change quick and easy. (See “Maintenance” on page 21 for<br />
instructions on changing the lamp module.) See your dealer in Kodak<br />
products to order this module.<br />
10 <strong>KODAK</strong> <strong>EKTAGRAPHIC</strong> <strong>III</strong> <strong>Slide</strong> Projector
Operation<br />
Forward and<br />
Reverse<br />
Press the forward button on the projector or the remote control to project the<br />
first slide. To change slides, briefly press the forward or reverse buttons.<br />
Focus<br />
Focus your first slide using the focus knob on the projector or the focus button<br />
on the remote control.<br />
Autofocus<br />
(Models A, AMT,<br />
and ATS only)<br />
Random Projection<br />
With autofocus on, the projector automatically focuses each slide, after you<br />
focus your first slide manually. Turn autofocus off if glass slides make the<br />
autofocus motor run continuously.<br />
For random projection of any slide in the<br />
tray:<br />
• press and hold down the<br />
select bar,<br />
• rotate the tray to the desired slide,<br />
and<br />
• release the select bar.<br />
<strong>KODAK</strong> <strong>EKTAGRAPHIC</strong> <strong>III</strong> <strong>Slide</strong> Projector 11
Operation<br />
Screen Image<br />
Use the elevating foot to horizontally center the projected image on the<br />
screen. To release the foot, press the release button, while lifting the front of<br />
the projector to the desired height. Use the elevating wheel to make fine<br />
adjustments.<br />
If the image is not level, make an adjustment by turning the leveling foot at<br />
the rear of the projector.<br />
Timer<br />
(Models AMT & ATS<br />
only)<br />
To time your slides, use the timer switch for slide changes from 3 to<br />
22 seconds.<br />
To interrupt the timer, press either<br />
the forward or reverse button. For<br />
manual operation, slide the timer<br />
switch to Off.<br />
12 <strong>KODAK</strong> <strong>EKTAGRAPHIC</strong> <strong>III</strong> <strong>Slide</strong> Projector
Operation<br />
Reading Light<br />
To illuminate a small area for reading, lift the reading light cover while the<br />
projector lamp is on.<br />
Standby Light<br />
(Model E Plus only)<br />
A glowing standby light indicates a<br />
“ready” condition.<br />
In a dissolve program, it indicates<br />
that<br />
• both projectors are receiving<br />
power<br />
• both power switches are set at<br />
fan<br />
• both projection lamps are<br />
properly installed, not burned<br />
out, and ready<br />
• both standby lights are operational<br />
• all thermal fuses are functional<br />
Special-Application<br />
Receptacle<br />
The special-application receptacle allows additional external control and<br />
programming capability. It provides 22.5 V low-voltage power isolated from<br />
the main power line.<br />
Use this receptacle for:<br />
• automatic “return-to-zero” devices (models A and E Plus)<br />
• a low-voltage power supply<br />
• a dark shutter switch<br />
The receptacle accepts 8-pin plugs and DIN-type plugs with 3 or 5 pins at<br />
180˚. (See “Appendix A” for contact identification descriptions.)<br />
<strong>KODAK</strong> <strong>EKTAGRAPHIC</strong> <strong>III</strong> <strong>Slide</strong> Projector 13
Operation<br />
Important<br />
All equipment, cables, and connectors used with the special-application<br />
receptacle must be assembled by qualified electronic personnel All circuits<br />
connected electrically to the projector through this receptacle must have a<br />
rating of not more than 30 V (rms) and must comply with Underwriters<br />
Laboratories, Inc., low-voltage, limited energy circuit requirements. 1<br />
Single <strong>Slide</strong>s<br />
To project single slides, slide the power switch to a half- or full-lamp position.<br />
Remove the tray and insert a slide upside down into the projector gate. Push<br />
the slide all the way down.<br />
After viewing the slide, press forward, reverse, or the select bar to eject the<br />
slide.<br />
Selecting <strong>Slide</strong><br />
Projection Lenses<br />
When buying a lens, consider features such as focal length (measured in<br />
millimetres), aperture (designed as an f/stop), and the lens design (curved or<br />
flat).<br />
When selecting a lens, remember that the shorter the focal length (i.e., the<br />
smaller the f/number), the brighter the projected image. Also, a curved-field<br />
lens, in combination with cardboard open face mounts from an automated<br />
mounting process, provide superior projection quality. A flat-field lens is the<br />
best choice for glass-mounted slides.<br />
1.UL-122, Photographic Equipment, Underwriters Laboratories, Inc., 33 Pfingsten Road,<br />
Northbrook, IL 60062-2096; CSA Specification C222, Number 118-1959 (R1965), Picture<br />
Machines Appliances, CSA, 178 Rexdale Boulevard, Rexdale, Ontario M9W 1R3 Canada.<br />
14 <strong>KODAK</strong> <strong>EKTAGRAPHIC</strong> <strong>III</strong> <strong>Slide</strong> Projector
Operation<br />
Choosing a Curvedor<br />
Flat-Field Lens<br />
The lens you select depends on how you use your projector and what type of<br />
slide mount you use. So that you may choose the lens that best meets your<br />
needs, we do not include a lens with the projector.<br />
To obtain the best results of a projected image, insert slides with the emulsion<br />
side toward the projection lens, slide curve toward the light source.<br />
A flat-field lens works best for:<br />
• general home projection<br />
• glass mounts<br />
• plastic mounts<br />
• mixed mounts<br />
• non-embossed cardboard mounts<br />
• rear-projection applications<br />
• duplicated slides<br />
A curved-field lens works best for:<br />
• embossed cardboard mounts (Embossed mounts have beveled edges<br />
around the aperture. Kodak Premium Processing and Kodak Processing<br />
labs provide embossed mounts.)<br />
Lens Focal Length/<br />
Projector Distance<br />
Use the illustration on the following page to help determine the lens focal<br />
length and projector distance.<br />
<strong>KODAK</strong> <strong>EKTAGRAPHIC</strong> <strong>III</strong> <strong>Slide</strong> Projector 15
Operation<br />
L<br />
D<br />
75 mm 13.3’<br />
100 mm 17.7’<br />
125 mm 22.2’<br />
150 mm 26.6’<br />
175 mm 31.0’<br />
200 mm 35.4’<br />
16 <strong>KODAK</strong> <strong>EKTAGRAPHIC</strong> <strong>III</strong> <strong>Slide</strong> Projector
Operation<br />
Editing Your Presentation<br />
Removing the<br />
Lock Ring<br />
To add or remove slides in the tray, you must first remove the lock ring.<br />
Turn the ring counterclockwise and lift off.<br />
Removing a <strong>Slide</strong><br />
Rotate the tray to the slide you wish to remove. Firmly press and hold down<br />
the select bar to eject the slide.<br />
Adding a <strong>Slide</strong><br />
When the lock ring is off, you can add a slide to any empty slot.<br />
(See “Front-Screen Projection” on page 7.)<br />
Replace and secure the lock ring.<br />
<strong>KODAK</strong> <strong>EKTAGRAPHIC</strong> <strong>III</strong> <strong>Slide</strong> Projector 17
Operation<br />
Clearing a Gate Jam<br />
To remove a defective slide or foreign object stuck in the projector gate, you<br />
need to remove the tray.<br />
• <strong>Slide</strong> the tray release latch in the direction of the arrow, and<br />
• with your other hand, lift off the back of the tray.<br />
Rotate the metal plate on the bottom of the tray until it locks into position.<br />
(For a 140-slide tray, see “Loading the <strong>Slide</strong> Tray” on page 6.) Put the tray<br />
aside.<br />
Remove the slide or object from the projector gate by pressing the forward<br />
button or removing the slide manually.<br />
Remount damaged slides to protect your projector and slides from subsequent<br />
damage.<br />
18 <strong>KODAK</strong> <strong>EKTAGRAPHIC</strong> <strong>III</strong> <strong>Slide</strong> Projector
Operation<br />
Using the Built-In Viewer<br />
(Model ATS Only)<br />
Important<br />
Before opening the viewer, you must remove the projection lens from the<br />
projector.<br />
Removing the<br />
Lens<br />
Turn the focus knob to the horizontal position. Push the knob toward the top<br />
of the projector as you withdraw the lens.<br />
Opening the<br />
Viewer<br />
Grasp the viewer handle and pull it out from the base of the projector. It will<br />
pop into place.<br />
<strong>Slide</strong> the power switch to lamp to project your slides.<br />
Closing the Viewer<br />
To close the viewer, fold it and push it back into the body of the projector.<br />
<strong>KODAK</strong> <strong>EKTAGRAPHIC</strong> <strong>III</strong> <strong>Slide</strong> Projector 19
Operation<br />
Reinserting the<br />
Lens<br />
To reinsert the lens, push the focus knob up and position the lens gear teeth<br />
on the lens barrel with the notch on the projector.<br />
Using a Dissolve Control<br />
Shutdown<br />
One of the more common uses for a dissolve control is a simple two-projector<br />
fade. This feature fades down the light beam in one projector, while changing<br />
the image and fading up the light beam in the other projector. This eliminates<br />
a dark-screen interval.<br />
When using a dissolve control, you need to divide your slides into two trays<br />
(odd- and even-numbered slides).<br />
The dissolve control has two connectors that plug into the remote-control<br />
receptacles in the rear of two projectors. Refer to your dissolve-control<br />
operating manual for additional instructions and features.<br />
See your dealer in Kodak products for more information on Kodak dissolve<br />
controls.<br />
To shut down,<br />
• remove and store the tray<br />
• slide the power switch to off<br />
Your projector will remain warm for several minutes.<br />
20 <strong>KODAK</strong> <strong>EKTAGRAPHIC</strong> <strong>III</strong> <strong>Slide</strong> Projector
Maintenance<br />
To ensure a long life and trouble-free operation for your projector:<br />
• Allow the air to flow freely around the projector.<br />
• Do not recirculate warm air.<br />
• Keep the projector dust free.<br />
• If your projector is chilled, bring it to room temperature before operating.<br />
Projection Lamps<br />
Quartz-halogen 82 V projection lamps—<br />
Included: EXR, 300 W (35-hour lamp life at full lamp/medium-brightness)<br />
Sampling of other lamps:<br />
EXY (200 hours/less brightness)<br />
EXW (15 hours/maximum brightness)<br />
FHS (70 hours/medium brightness)<br />
Use combinations of lamp brightness, plus half- and full-lamp settings to<br />
approximate image brightness in multi-projector presentations.<br />
Desired<br />
Brightness<br />
Maximum<br />
High<br />
Medium<br />
Low<br />
EKTAGRPAHIC <strong>III</strong><br />
Projector Lamp<br />
EXW<br />
EXR<br />
FHS<br />
EXY<br />
Lamp Tips<br />
• Projector operation on line voltages above 125 volts greatly<br />
reduces the lamp life.<br />
• Unplug the projector before changing the lamp.<br />
• Allow for unrestricted flow of air to the exhaust vent to prolong<br />
lamp life.<br />
• Gently wipe off any fingerprints with a soft cloth moistened with<br />
rubbing alcohol.<br />
<strong>KODAK</strong> <strong>EKTAGRAPHIC</strong> <strong>III</strong> <strong>Slide</strong> Projector 21
Maintenance<br />
Changing the Projection Lamp<br />
<strong>Slide</strong> the power switch to Off and unplug the projector.<br />
Allow the projector and lamp<br />
to cool for about 10 minutes.<br />
Push the lamp-module<br />
release button and remove<br />
the lamp module. You can<br />
replace it with a new lamp<br />
module or replace only the<br />
lamp.<br />
Note: There is an additional<br />
safety latch, which reduces<br />
the chance of an accident<br />
with a loosely inserted lamp<br />
module, that may cause some<br />
resistance. To release the<br />
latch, you may need to apply<br />
extra effort when you pull out<br />
the module.<br />
To replace only the lamp, lift up the lamp release clip. Carefully remove the<br />
worn lamp from the socket and place it on a heat-resistant surface.<br />
Insert a new lamp into the<br />
socket. Push down to tightly<br />
seat the replacement lamp.<br />
Relatch the clip in the forward<br />
position and push the lamp<br />
module all the way back into<br />
the projector until it latches.<br />
22 <strong>KODAK</strong> <strong>EKTAGRAPHIC</strong> <strong>III</strong> <strong>Slide</strong> Projector
Maintenance<br />
Cleaning the Condenser, Heat-Absorbing Glass, and<br />
Mirror<br />
To clean the condenser, heat-absorbing glass, or mirror, you must disassemble<br />
the lamp module.<br />
<strong>Slide</strong> the power switch to Off and<br />
unplug the projector. Allow the<br />
projector to cool about 10 minutes.<br />
Push the lamp-module release<br />
button and remove the lamp<br />
module.<br />
Use a torx-head screwdriver to<br />
remove the screw.<br />
Using a flat-blade screwdriver, apply ample<br />
pressure to release each of the metal tabs.<br />
Lift off the top of the lamp module.<br />
<strong>KODAK</strong> <strong>EKTAGRAPHIC</strong> <strong>III</strong> <strong>Slide</strong> Projector 23
Maintenance<br />
Condenser Lens<br />
You can clean the condenser lens in place, or by pulling it out. Wear gloves<br />
to prevent fingerprints.<br />
Heat-Absorbing<br />
Glass<br />
(Models without<br />
<strong>KODAK</strong> Extra Bright<br />
Lamp Module)<br />
Caution<br />
The heat-absorbing glass is fragile. Handle it only when cool.<br />
The heat-absorbing glass easily removes for cleaning.<br />
Clean both sides of the condenser lens and the heat-absorbing glass with a<br />
soft, lint-free cloth.<br />
Do not leave fingerprints. Replace the lens and heat-absorbing glass to their<br />
original locations.<br />
24 <strong>KODAK</strong> <strong>EKTAGRAPHIC</strong> <strong>III</strong> <strong>Slide</strong> Projector
Maintenance<br />
Reassembling the<br />
Lamp Module<br />
To reassemble the lamp module, you will need to align and insert each tab<br />
into its appropriate slot.<br />
Start with the tabs in the rear of the lamp module.<br />
Insert the remainder of the tabs into slots until all 7 tabs on the top and 2 on<br />
the bottom are secured. Insert the screw and tighten. Then insert and seat the<br />
lamp.<br />
<strong>KODAK</strong> <strong>EKTAGRAPHIC</strong> <strong>III</strong> <strong>Slide</strong> Projector 25
Maintenance<br />
Mirror<br />
To clean the mirror, invert the lamp module to reach the mirror. Gently clean<br />
the mirror with a soft, lint-free cloth moistened with lens cleaner.<br />
When your maintenance is complete, push the lamp module back into the<br />
projector.<br />
Thermal Fuses<br />
Your projector has two thermal fuses that prevent overheating. If your<br />
projector will not operate, call the Kodak Information Center or Kodak in your<br />
country to obtain the name of a service center nearest you (see “How to Obtain<br />
Service” on page 30).<br />
26 <strong>KODAK</strong> <strong>EKTAGRAPHIC</strong> <strong>III</strong> <strong>Slide</strong> Projector
Troubleshooting<br />
Consult this guide before calling for service.<br />
PROBLEM CAUSE CORRECTION<br />
Projector does not operate No power to projector Plug power cord into suitable<br />
electrical outlet. Set power<br />
switch to Lamp.<br />
No illumination on screen with slide in<br />
projector gate<br />
<strong>Slide</strong> not in proper focus on screen<br />
focus.<br />
Power switch on Off or Fan<br />
Lamp burned out<br />
Lamp not seated in socket<br />
<strong>Slide</strong> itself not sharp<br />
First slide in tray not properly<br />
<strong>Slide</strong> in different type of mount from<br />
others<br />
Projection lens installed improperly<br />
Set switch to Lamp.<br />
Install new lamp or lamp module<br />
Check lamp.<br />
Examine slide for proper focus.<br />
Focus center of first slide.<br />
Focus manually.<br />
Uneven edge-to-edge focus <strong>Slide</strong> itself is not sharp Examine slide.<br />
Curved field lens used with glass,<br />
plastic, or non-embosssed mounts<br />
Curved field lens used for rear<br />
projection<br />
Read and follow the instructions<br />
for installing the lens.<br />
Try a flat field lens.<br />
(See “Choosing a Curved- or<br />
Flat-Field Lens” on page 15.)<br />
Use a flat field lens.<br />
Autofocus motor runs continuously Glass slides in tray Turn off autofocus or use slides<br />
with mounts other than glass.<br />
Autofocus fails to operate Lamp performance Install new lamp and try<br />
autofocus again.<br />
<strong>KODAK</strong> <strong>EKTAGRAPHIC</strong> <strong>III</strong> <strong>Slide</strong> Projector 27
Troubleshooting<br />
PROBLEM CAUSE CORRECTION<br />
<strong>Slide</strong> fails to drop into projection<br />
position<br />
Tray base plate not properly indexed<br />
Tray not properly positioned on<br />
projector<br />
<strong>Slide</strong> mount warped or frayed at<br />
corners slide.<br />
Projector not level or tilted too high<br />
Uneven illumination on screen Projection lamp not fully seated Check lamp.<br />
Condenser lens not installed or not<br />
positioned properly in mount<br />
<strong>Slide</strong> mount not seated properly in<br />
projector gate<br />
Rotate the tray base plate until<br />
it locks into position.<br />
Reposition tray on projector.<br />
Straighten mount or remount<br />
slide.<br />
Set projector on a stand equal<br />
with center of screen.<br />
Check condenser lens.<br />
Check slide position and slidemount<br />
condition.<br />
Projector won't cycle to next slide Tray not properly positioned Reposition tray.<br />
Program does not start with the with<br />
the correct slide<br />
<strong>Slide</strong> or foreign object stuck in gate<br />
Tray number is not aligned with the<br />
with the raised index mark.<br />
See "Clearing a Gate Jam" on<br />
page 18.<br />
Reposition tray (see “Tray” on<br />
page 9).<br />
28 <strong>KODAK</strong> <strong>EKTAGRAPHIC</strong> <strong>III</strong> <strong>Slide</strong> Projector
Warranty<br />
Kodak warrants this <strong>KODAK</strong> <strong>EKTAGRAPHIC</strong> <strong>Slide</strong> Projector to function<br />
properly for four years from the date of purchase.<br />
If this <strong>KODAK</strong> <strong>EKTAGRAPHIC</strong> <strong>Slide</strong> Projector does not function properly<br />
within the warranty period, upon submission of dated proof of purchase,<br />
Kodak will repair it without charge, except for worn-out projector lamps. If<br />
Kodak is unable to repair the projector, the option of replacement or refund of<br />
the purchase price will be available.<br />
See an audiovisual products dealer in your country for the <strong>KODAK</strong><br />
<strong>EKTAGRAPHIC</strong> <strong>III</strong> ABR <strong>Slide</strong> Projector's warranty coverage.<br />
Limitations<br />
This warranty does not cover circumstances beyond Kodak’s control,<br />
projector lamps, or problems caused by failure to follow the care and<br />
operating instructions in the manual.<br />
Any modification to the original design of this projector nullifies this<br />
warranty.<br />
Warranty service will not be provided without dated proof of purchase.<br />
Kodak makes no other express warranty for this product.<br />
Repair or replacement is Kodak’s only obligation. Kodak will not be<br />
responsible for any consequential or incidental damages resulting from<br />
the sale or use of this projector, regardless of the cause of such damages.<br />
Your Rights Under<br />
State Law<br />
Some states do not allow the exclusion or limitation of incidental or<br />
consequential damages, so the above limitation or exclusion may not apply to<br />
you. This warranty gives you specific legal rights, and you may also have<br />
other rights that vary from state to state.<br />
<strong>KODAK</strong> <strong>EKTAGRAPHIC</strong> <strong>III</strong> <strong>Slide</strong> Projector 29
How to Obtain Service<br />
Assistance U.S.: 1-800-242-2424<br />
Canada: 1-800-465-6325<br />
www.kodak.com/go/projectors<br />
To obtain service or for assistance in using your <strong>KODAK</strong> <strong>EKTAGRAPHIC</strong><br />
<strong>Slide</strong> Projector, contact the Kodak Information Center at 1-800-242-2424,<br />
Monday through Friday, 8 a.m. to 8 p.m. (Eastern time). In Canada, call<br />
1-800-465-6325, Monday through Friday, 8:30 a.m. to 5 p.m. (Eastern time).<br />
Or call Kodak in your country.<br />
Shipping<br />
Instructions<br />
To help us get your <strong>KODAK</strong> <strong>EKTAGRAPHIC</strong> <strong>Slide</strong> Projector back to you<br />
promptly, please enclose a note giving details of the problem, dated proof of<br />
purchase, and your complete name and shipping address. Pack the unit in a<br />
sturdy carton with ample packing material to protect the unit during shipping<br />
and handling.<br />
30 <strong>KODAK</strong> <strong>EKTAGRAPHIC</strong> <strong>III</strong> <strong>Slide</strong> Projector
Appendix A<br />
Special-Application Receptacle Identification Chart<br />
Contacts Function Description<br />
1 & 3 Zero-Position Switch<br />
(Models A and E Plus)<br />
Connects to an internal single-pole single-throw normally<br />
open switch. Contacts are closed when the slide tray is at any<br />
position other than zero. These leads connect only to the<br />
switch terminals. Do not exceed a switching load of 1 A at<br />
30 V ac.<br />
4 & 5 Shutter Switch Connects to an internal single-pole single-throw normally<br />
closed switch. Contacts are open when a slide is in the<br />
projector gate and the shutter is open. These leads connect<br />
only to the switch terminals. Do not exceed a switching load<br />
of 1 A at 30 V ac.<br />
7 & 8 Low-Voltage Supply For operating external equipment. The current is supplied by<br />
a secondary winding on the main motor, isolated from the<br />
line-voltage power, and is available whenever the main<br />
projector motor is running. Supply is 25.5 V, 500 mA (1/2 A)<br />
maximum. Contact number 8 is common (return) for the<br />
remote-control circuit. Contact number 7 is the “hot” lead and<br />
is fused with a slow-blowing fuse. (Replacement requires<br />
disassembly of the projector by a qualified technician.)<br />
6 & 8 Forward Tray Connects to the forward tray-advance circuitry in the<br />
projector. These contacts are connected internally to the<br />
remote-control receptacle and an electrical connection made<br />
at either receptacle will result in a forward cycle.<br />
2 & 8 Reverse Tray Cycle Connects to the reverse tray-advance circuitry in the<br />
projector. These contacts are connected internally to the<br />
remote-control receptacle and an electrical connection made<br />
at either receptacle will result in a reverse cycle.<br />
Shell Plug Ground If a plug with a conducting shell is used, it is connected to the<br />
projector frame (chassis) through the special-application<br />
receptacle and to earth ground through the projector's power<br />
cable.<br />
<strong>KODAK</strong> <strong>EKTAGRAPHIC</strong> <strong>III</strong> <strong>Slide</strong> Projector 31
Presentation Technologies<br />
EASTMAN KODKCOMPANY<br />
Rochester, New York 14650<br />
www.kodak.com/go/projectors<br />
Kodak, Ektagraphic, and kodalux are trademarks.<br />
PRESENTATION TECHNOLOGIES<br />
Part No. 5B905 12/98 Revision ©EastmanKodak Company Printed In U.S.A.