You also want an ePaper? Increase the reach of your titles
YUMPU automatically turns print PDFs into web optimized ePapers that Google loves.
1). Read & Retain these Instructions carefully before installing or operating this product.<br />
2). Comply with Warnings: All warnings and instructions for these products should be adhered to.<br />
3). Unpacking: On unpacking your product please check carefully for any signs of damage that may have occurred whilst in transit from the <strong>Laney</strong> factory to<br />
your dealer. In the unlikely event that there has been damage, please repack your unit in its original carton and consult your dealer. We strongly advise you to<br />
keep your original transit carton, since in the unlikely event that your unit should develop a fault, you will be able to return it to you dealer for rectification<br />
securely packed.<br />
4). Amplifier Connection: In order to avoid damage , it is advisable to establish and follow a pattern for turning on and off your system. With all system parts<br />
connected, turn on source equipment, CD/MP3 players, mixers/recorders, etc, BEFORE turning on your guitar amplifier. Many products have large transient<br />
surges at turn on and off which can cause damage to your speakers. By turning on your guitar amplifier LAST and making sure its level control is set to a minimum,<br />
any transients from other equipment should not reach your loud speakers. Wait till all system parts have stabilised, usually a couple of seconds. Similarly when<br />
turning off your system always turn down the level controls on your guitar amplifier and then turn off its power before turning off other equipment<br />
5). Servicing: Refer all servicing to qualified service personnel. Servicing is required when the apparatus has been damaged in any way, such as when the DC<br />
Power Supply is damaged, liquid has been spilled or objects have fallen into the apparatus, the apparatus has been exposed to rain or moisture, does not operate<br />
normally, or has been dropped.<br />
6).Placement: This electrical apparatus should not be exposed to dripping or splashing and care should be taken not to place objects containing liquids,<br />
such as vases, upon the apparatus.<br />
Do not install near any heat sources such as radiators, heat registers, stoves or other apparatus (including amplifiers) that produce heat. Do not block any<br />
of the ventilation openings.<br />
Use only with a cart, stand, tripod, bracket, or table specified by the manufacturer, or sold with the apparatus. When a cart is used, use caution when<br />
moving the cart/apparatus combination to avoid injury from tip-over.<br />
7). When using the DC power Supply: Only use the approved DC power supply provided by the manufacturer. Rating 12Vdc 500mA. Protected<br />
by a 125°C thermal fuse.<br />
Make sure that the line voltage at the installation matches the input voltage on the DC power Supply.<br />
Protect the power cord on the DC power Supply from being walked on or pinched, particularly at plugs, convenience receptacles, and the point they exit<br />
from the apparatus.(See notes on using the DC Power Supply page 10).<br />
8). Batteries: Use only alkaline batteries (LR6) in the product. (See notes on fitting and replacing batteries page 10-11).<br />
9).Sound Levels: Exposure to extremely high noise levels may cause a permanent hearing loss. Individuals vary<br />
considerably in susceptibility to noise-induced hearing loss, but nearly everyone will lose some hearing if exposed to<br />
sufficiently intense noise for a sufficient time.<br />
The U.S. Government’s Occupational Safety and Health Administration (OSHA) has specified the following<br />
permissible noise level exposures: According to OSHA, any exposure in excess of the above permissible limits could<br />
result in some hearing loss. Earplugs or protectors to the ear canals or over the ears must be worn when operating<br />
this amplification system in order to prevent a permanent hearing loss, if exposure is in excess of the limits as set<br />
forth above. To ensure against potentially dangerous exposure to high sound pressure levels, it is recommended that<br />
all persons exposed to equipment capable of producing high sound pressure levels such as this amplification system<br />
be protected by hearing protectors while this unit is in operation.<br />
10). Maintenance: Clean only with a dry cloth.<br />
Care of your <strong>Laney</strong> amplifier will prolong it's life.....and yours!<br />
Duration Per<br />
Day in Hours<br />
8<br />
6<br />
4<br />
3<br />
2<br />
1 ½<br />
1<br />
½<br />
¼ or less<br />
Sound Level dBA,<br />
slow response<br />
90<br />
92<br />
95<br />
97<br />
100<br />
102<br />
105<br />
110<br />
115
1). Lisez le & Maintenez ces instructions: soigneusement avant d'installer ou actionner ce produit.<br />
2). Conformez-vous aux avertissements: Tous les avertissements et instructions pour ces produits devraient.<br />
3). Déballage: Au déballage de votre produit vérifiez svp soigneusement tous les signes des dommages qui ont pu s'être produits tandis qu'en transit de l'usine de<br />
<strong>Laney</strong> à votre revendeur. Dans l'événement peu probable qu'il y a eu des dommages, réemballent svp votre unité dans son carton original et consultent votre revendeur.<br />
Nous vous conseillons fortement que pour garder votre carton original de passage, puisque dans l'événement peu probable que votre unité devrait développer un<br />
défaut, vous pourrez le renvoyer te revendeur pour la rectification solidement emballée.<br />
4). Raccordement d'amplificateur: Afin d'éviter des dommages, il est recommandé d'établir et suivre un modèle pour tourner en marche et en arrêt votre système.<br />
Avec tout le système les pièces ont relié, allument l'équipement de source, CD/MP3 les joueurs, mélangeurs/enregistreurs, etc., AVANT DE mettre en marche votre<br />
amplificateur de guitare. Beaucoup de produits font tourner de grandes montées subites passagères à en marche et en arrêt qui peuvent endommager vos haut-parleurs.<br />
En mettant en marche votre BOUT d'amplificateur de guitare et en veillant sa commande de niveau est placé à un minimum, toutes les coupures de l'autre équipement<br />
ne devrait pas atteindre vos haut-parleurs forts. Attendez jusqu'à ce que toutes les pièces de système ont stabilisé, habituellement deux ou trois secondes. De même en<br />
arrêtant votre système déclinez toujours les commandes de niveau sur votre amplificateur de guitare et coupez alors son courant avant d'arrêter l'autre équipement<br />
5). Entretien: Référez-vous tous qui entretiennent au personnel de service qualifié. L'entretien est exigé quand l'appareil a été endommagé de quelque façon, comme<br />
quand l'approvisionnement d'alimentation CC Est endommagé, liquide a été renversé ou les objets sont tombés dans l'appareil, l'appareil a été exposé à la pluie ou à<br />
l'humidité, ne fonctionne pas normalement, ou a été lâché.<br />
6).Placement: Cet appareil électrique ne devrait pas être exposé à l'égoutture ou l'éclaboussement et le soin devraient être pris pour ne pas placer des objets<br />
contenant des liquides, tels que des vases, sur l'appareil. N'installez près d'aucune source de chaleur telle que des radiateurs, des registres de la chaleur, des fourneaux ou<br />
d'autres appareils (amplificateurs y compris) cette chaleur de produit. Ne bloquez pas les ouvertures l'unes des de ventilation. Employez seulement avec un chariot, un<br />
stand, un trépied, une parenthèse, ou une table spécifique par le fabricant, ou vendue avec l'appareil. Quand un chariot est utilisé, faites attention en déplaçant la<br />
combinaison de chariot/appareil pour éviter des dommages de incliner-au-dessus de.<br />
7). En employant l'approvisionnement d'alimentation CC: Employez seulement l'approvisionnement d'alimentation CC Fourni par le fabricant. Classement<br />
12Vcc 500mA. Protégé par un 125 ° C fusible thermique. Assurez-vous que tension secteur à l'installation assortit la tension d'entrée sur l'approvisionnement<br />
d'alimentation CC. Protégez le cordon de secteur sur l'approvisionnement d'alimentation CC Contre être marchée dessus ou pincement, en particulier derrière les<br />
fiches, derrière les douilles de convenance, et derrière le point qu'ils sortent de l'appareil. (Voir les notes sur employer la page d'approvisionnement d'alimentation CC<br />
10).<br />
8). Batteries: Utilisez seulement les accumulateurs alcalins (LR6) dans le produit. (Voir les notes sur l'ajustage de précision et remplacer la page de batteries 10-11).<br />
Niveaux<br />
9).Sound: L'exposition aux niveaux extrêmement élevés de bruit peut causer une perte d'audition permanente. Les individus<br />
varient considérablement dans la susceptibilité à la perte d'audition due au bruit, mais presque chacun perdra une certaine<br />
audition si exposé au bruit suffisamment intense pendant un temps suffisant. L'administration du gouvernement des États-<br />
Unis (OSHA) a spécifié les expositions permises suivantes de niveau de bruit : Selon l'OSHA, n'importe quelle exposition audessus<br />
des limites permises ci-dessus a pu avoir comme conséquence une certaine perte d'audition. Des boules quies ou les<br />
protecteurs aux canaux d'oreille ou au-dessus des oreilles doivent être portés en actionnant ce système d'amplification afin<br />
d'empêcher une perte d'audition permanente, si l'exposition est au-dessus des limites comme déterminé ci-dessus. Pour<br />
s'assurer contre l'exposition potentiellement dangereuse aux niveaux élevés de pression acoustique, on lui recommande que<br />
toutes les personnes aient exposé à l'équipement capable de produire les niveaux élevés de pression acoustique tels que ce<br />
système d'amplification soient protégées par les protecteurs auriculaires tandis que cette unité est en fonction.<br />
10). Entretien: Nettoyez seulement avec un tissu sec.<br />
Le soin de votre amplificateur de <strong>Laney</strong> prolongera it' ; la vie de s ..... et vôtre !<br />
Durée par<br />
Jour (heures)<br />
8<br />
6<br />
4<br />
3<br />
2<br />
1 ½<br />
1<br />
½<br />
¼ ou inférieur<br />
Niveau sonore<br />
moyen (dBA)<br />
90<br />
92<br />
95<br />
97<br />
100<br />
102<br />
105<br />
110<br />
115
LR5<br />
4<br />
1). Lesen Sie & Vor der Installierung oder dem Betrieb dieses Produktes behalten Sie diese Anweisungen sorgfältig.<br />
2). Willigen Sie mit Warnungen ein: Alle Warnungen und Anweisungen für diese Produkte sollten an gehaftet werden.<br />
3). Auspacken: Auf Auspacken Ihres Produktes überprüfen Sie bitte sorgfältig auf allen möglichen Zeichen des Schadens, die während bei dem Transport von<br />
der <strong>Laney</strong> Fabrik zu Ihrem Händler aufgetreten sein können. Im unwahrscheinlichen Ereignis, dass packen es Schaden gegeben hat, bitte Ihre Maßeinheit in<br />
seinem ursprünglichen Karton ein und konsultieren Ihren Händler. Wir beraten Sie stark, dass Ihren ursprünglichen Durchfahrtkarton halten, da im<br />
unwahrscheinlichen Ereignis, dass Ihre Maßeinheit eine Störung entwickeln sollte, Sie in der Lage sind, sie zu Ihnen zurückzubringen Händler für die sicher<br />
verpackte Korrektur.<br />
4). Verstärker-Anschluss: Um Schaden zu vermeiden, ist es ratsam ein Muster für einschalten und weg von Ihrem System herzustellen und zu folgen. Mit<br />
allem System schlossen die Teile an, schalten Quellausrüstung, CD/MP3 Spieler, Mischer/Recorder, usw. ein, BEVOR sie Ihren Gitarrenverstärker<br />
einschielten. Viele Produkte lassen große vorübergehende Schwankungen an an und abstellen, die Schaden Ihrer Lautsprecher verursachen können. Indem<br />
man Ihr Gitarrenverstärker LETZTES einschält und seine waagerecht ausgerichtete Steuerung sicherstellt, wird auf ein Minimum, alle mögliche<br />
Ausgleichströme von anderer Ausrüstung sollte Ihre lauten Lautsprecher nicht erreichen eingestellt. Warten Sie bis alle Systemsteile haben stabilisiert,<br />
normalerweise ein paar Sekunden. Ähnlich wenn Sie Ihr System abstellen, drehen Sie immer unten die waagerecht ausgerichteten Kontrollen auf Ihrem<br />
Gitarrenverstärker und stellen Sie dann seinen Strom ab, bevor Sie andere Ausrüstung abstellen<br />
5). Instandhaltung: Verweisen Sie alle, die auf qualifiziertes Service-Personal instandhalten. Die Instandhaltung wird, wenn der Apparat in jeder Hinsicht<br />
beschädigt worden ist, wie, wenn die Gleichstrom-Versorgung geschädigt wird, Flüssigkeit ist verschüttet worden angefordert, oder Gegenstände sind in den<br />
Apparat gefallen, ist der Apparat Regen oder Feuchtigkeit ausgesetzt worden, funktioniert nicht normalerweise oder ist gefallen worden.<br />
6). Placement: Dieser elektrische Apparat sollte nicht Bratenfett ausgesetzt werden, oder das Spritzen und die Sorgfalt sollten angewendet werden, um die<br />
Gegenstände nicht zu setzen, die Flüssigkeiten, wie Vasen, nach dem Apparat enthalten. Bringen Sie nicht nahe irgendwelchen Wärmequellen wie<br />
Heizkörpern, Hitzeregistern, Öfen oder anderen Apparaten (einschließlich Verstärker) diese Erzeugnishitze an. Blockieren Sie nicht irgendwelche der<br />
Ventilationsöffnungen. Verwenden Sie nur mit einer Karre, einem Standplatz, einem Stativ, einem Haltewinkel oder einer Tabelle, die vom Hersteller spezifiziert<br />
wird oder mit dem Apparat verkauft ist. Wenn eine Karre benutzt wird, Vorsicht, wenn Sie die Karren-/Apparatekombination verschieben, um Verletzung von<br />
spitzen-über zu vermeiden.<br />
7). Wenn die Gleichstrom-Versorgung verwendet wird: Benutzen Sie nur die Gleichstrom-Versorgung, die vom Hersteller bereitgestellt wird. Bewertung<br />
12Vdc 500mA. Geschützt durch ein 125 ° C Thermosicherung. Überprüfen Sie, ob die Linie Spannung an der Installation die Eingangsspannung auf der<br />
Gleichstrom-Versorgung zusammenbringt. Schützen Sie das Netzanschlusskabel auf der Gleichstrom-Versorgung vor an gegangen werden oder, besonders<br />
an den Steckern, an den Hilfsaufnahmewannen und am Punkt geklemmt werden, die sie vom Apparat herausnehmen. (Sehen Sie Anmerkungen über die<br />
Anwendung der Versorgungseite10).<br />
8). Batterien: Benutzen Sie nur alkalische Batterien (LR6) im Produkt. (Sehen Sie Anmerkungen über Befestigung und das Ersetzen der Batterieseite10-11).<br />
Niveaus<br />
9). Sound: Aussetzung zu den extrem hohen Geräuschpegeln kann einen dauerhaften Verlust der Hörfähigkeit<br />
verursachen. Einzelpersonen schwanken beträchtlich in Anfälligkeit zum noise-induced Verlust der Hörfähigkeit, aber<br />
fast jeder verliert irgendeine Hörfähigkeit, wenn es genug intensiven Geräuschen während einer genügenden Zeit<br />
herausgestellt wird. Die der US-berufliche Sicherheits-und Gesundheits-Verwaltung Regierung (OSHA) hat die<br />
folgenden zulässigen Geräuschpegelbelichtungen spezifiziert: Entsprechend OSHA konnte jede mögliche Belichtung<br />
mehr als notwendig die oben genannten zulässigen Begrenzungen etwas Verlust der Hörfähigkeit ergeben.<br />
Ohrenpfropfen oder Schutze zu den Gehörgängen oder über den Ohren müssen getragen werden, wenn man dieses<br />
Verstärkungssystem laufen lässt, um einen dauerhaften Verlust der Hörfähigkeit zu verhindern, wenn Belichtung mehr<br />
als notwendig die Begrenzungen ist, wie oben festgelegt. Um gegen möglicherweise gefährliche Aussetzung zu den<br />
hohen Schalldruckpegeln sicherzustellen, wird es empfohlen dass alle Personen der Ausrüstung herausstellten, die<br />
zum Produzieren der hohen Schalldruckpegel wie dieses Verstärkungssystem fähig ist werden geschützt durch<br />
Hörschutze während diese Maßeinheit in Kraft ist.<br />
10). Wartung: Säubern Sie nur mit einem trockenen Tuch.<br />
Dauer pro<br />
Tag in Stunden<br />
8<br />
6<br />
4<br />
3<br />
2<br />
1 ½<br />
1<br />
½<br />
¼ oder weniger<br />
GeräuschpegelldBA<br />
langsame Reaktion<br />
90<br />
92<br />
95<br />
97<br />
100<br />
102<br />
105<br />
110<br />
115
1). Lea el & Conserve estas instrucciones cuidadosamente antes de instalar o de funcionar este producto.<br />
2). Confórmese con advertencias: Todas las advertencias e instrucciones para estos productos se deben adherir.<br />
3). Desempaque: Al desempaquetar su producto compruebe por favor cuidadosamente para saber si hay cualquier muestra del daño que pudo haber<br />
ocurrido mientras que en tránsito de la fábrica de <strong>Laney</strong> a su distribuidor autorizado. En el acontecimiento inverosímil que ha habido daño, reembala por<br />
favor su unidad en su cartón original y consulta a su distribuidor autorizado. Le aconsejamos fuertemente que guardar su cartón original del tránsito, puesto<br />
que en el acontecimiento inverosímil que su unidad debe desarrollar una avería, usted podrá volverlela distribuidor autorizado para la rectificación llena con<br />
seguridad.<br />
4). Conexión del amplificador: Para evitar daño, es recomendable establecer y seguir un patrón para dar vuelta por intervalos a su sistema. Con todo el<br />
sistema las piezas conectaron, giran el equipo de la fuente, CD/MP3 a los jugadores, mezcladores/registradores, etc, ANTES de girar su amplificador de la<br />
guitarra. Muchos productos hacen que las oleadas transitorias grandes en den vuelta por intervalos que pueden causar daño a sus altavoces. Girando su<br />
ÚLTIMO del amplificador de la guitarra y cerciorándose de su control llano se fija a un mínimo, cualquier transeúnte del otro equipo no debe alcanzar sus<br />
altavoces ruidosos. Espere hasta que todas las piezas del sistema se han estabilizado, generalmente uces par de segundos. Semejantemente al apagar su<br />
sistema rechace siempre los controles llanos en su amplificador de la guitarra y después corte su corriente antes de apagar el otro equipo<br />
5). Mantenimiento: Refiera todos que mantienen a los personales de servicio calificados. Se ha derramado el servicio se requiere cuando el aparato se ha<br />
dañado de cualquier manera, por ejemplo cuando se daña la fuente de corriente continua, Líquido o los objetos han caído en el aparato, el aparato se ha<br />
expuesto a la lluvia o a la humedad, no funciona normalmente, ni se ha caído.<br />
6).Placement: Este aparato eléctrico no se debe exponer al goteo o el salpicar y el cuidado se deben tomar para no poner los objetos que contienen<br />
líquidos, tales como floreros, sobre el aparato. No instale cerca de ninguna fuentes de calor tales como radiadores, registros del calor, estufas u otros<br />
aparatos (amplificadores incluyendo) ese calor del producto. No bloquee las aberturas unas de los de la ventilación. Utilice solamente con un carro, un<br />
soporte, un trípode, un soporte, o una tabla especificada por el fabricante, o vendida con el aparato. Cuando se utiliza un carro, tenga cuidado al mover la<br />
combinación del carro/del aparato para evitar lesión de inclinar-sobre.<br />
7). Al usar la fuente de corriente continua: Utilice solamente la fuente de corriente continua Proporcionada por el fabricante. Clasificación 12Vdc<br />
500mA. Protegido por un fusible de 125 ° C térmica. Cerciórese de que la línea voltaje en la instalación empareje el voltaje de entrada en la fuente de<br />
corriente continua. Proteja el cable eléctrico en la fuente de corriente continua Contra ser caminado encendido o sejeción, particularmente en de los<br />
enchufes, de los receptáculos de la conveniencia, y del punto que salen del aparato. (Véase las notas sobre usar la página de la fuente de corriente<br />
continua10).<br />
8). Baterías: Utilice solamente los acumuladores alcalinos (LR6) en el producto. (Véase las notas sobre la guarnición y el reemplazo de la página de las<br />
baterías10-11). Niveles<br />
9).Sound: La exposición a los niveles de ruidos extremadamente altos puede causar una pérdida de oído<br />
permanente. Los individuos varían considerablemente en susceptibilidad a la pérdida de oído inducida por el<br />
ruido, pero casi cada uno perderá una cierta audiencia si está expuesta al ruido suficientemente intenso por un<br />
suficiente tiempo. La Occupational Safety and Health Administration del gobierno de los E.E.U.U. (OSHA) ha<br />
especificado las exposiciones permitidas siguientes del nivel de ruidos: Según el OSHA, cualquier exposición<br />
superior a los límites permitidos antedichos podía dar lugar a una cierta pérdida de oído. Los auriculares o los<br />
protectores a los canales de oído o sobre los oídos deben ser usados al gestionar este sistema de la amplificación<br />
para prevenir una pérdida de oído permanente, si la exposición está superior a los límites según lo dispuesto<br />
arriba. Para asegurar contra la exposición potencialmente peligrosa a los altos niveles de presión sana, se<br />
recomienda que todas las personas expusieron al equipo capaz de producir altos niveles de presión sana tales<br />
como este sistema de la amplificación sean protegidas por los protectores de oído mientras que esta unidad es en<br />
funcionamiento.<br />
10). Mantenimiento: Limpie solamente con un paño seco.<br />
El cuidado de su amplificador de <strong>Laney</strong> prolongará it' ¡vida de s ..... y la suya!<br />
Duración por<br />
Día en Horas<br />
8<br />
6<br />
4<br />
3<br />
2<br />
1 ½<br />
1<br />
½<br />
¼ o menos<br />
Nivel de Sonido<br />
dBA, Respuesta Lenta<br />
90<br />
92<br />
95<br />
97<br />
100<br />
102<br />
105<br />
110<br />
115
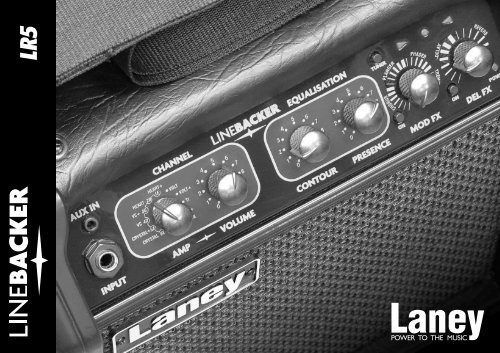
The Linebacker series is a state of the art, processor-based design, enabling a wide range of different<br />
sounds to be created from your guitar.<br />
The 5W LR5 model, great for bedroom, practice or busking.<br />
Features a 6" custom driver, one instrument channel, one<br />
microphone channel, eleven built in amp models and range of<br />
"must have" effects like; chorus, phase, flange, tremolo, reverb<br />
and delay. Providing everything you need from clean tones to<br />
full-out overdrive. Also provided is a handy built in guitar tuner<br />
so you always have the best possible sound.<br />
On the rear panel can be found the controls & sockets for the<br />
Microphone & Headphones, along with the DC Power In socket<br />
and Power switch.<br />
The cabinet features an open back design enabling easy stowage<br />
of Power Supply, cables, etc. With its included Guitar Style strap,<br />
the amp is easily transported to wherever your sounds are<br />
needed the most.<br />
To enable you to get the most from your new <strong>Laney</strong> amp please read and retain this manual.<br />
Best wishes from all at <strong>Laney</strong>
HEART+<br />
1E<br />
HEART 2B<br />
VC+ 3G<br />
VOLT<br />
VOLT+<br />
3<br />
5<br />
4 6<br />
7<br />
3<br />
5<br />
4 6<br />
7<br />
3<br />
5<br />
4 6<br />
7<br />
FLANGE<br />
PHASER<br />
VC 4D<br />
CRYSTAL+<br />
5A<br />
CRYSTAL 6E<br />
TI<br />
TI+<br />
WRECK<br />
2<br />
8<br />
1 9<br />
0 10<br />
2<br />
8<br />
1 9<br />
0 10<br />
2<br />
8<br />
1 9<br />
0 10<br />
CHORUS<br />
TREMOLO<br />
ON<br />
ON<br />
POWER<br />
AUX IN Jack<br />
AMP/TUNER Selector Control<br />
VOLUME Control<br />
CONTOUR Control<br />
PRESENCE Control<br />
TUNER & Button<br />
MOD FX LED<br />
TUNER LED<br />
DEL FX LED<br />
GUITAR INPUT Jack Socket<br />
MOD FX on/off Button<br />
MOD FX Control-Chorus,<br />
Flanger, Phaser, Tremolo<br />
DEL FX on/off Button<br />
DEL FX Control-Delay,<br />
Reverb
DC Power Supply: Your LR5 comes supplied with a 12V DC Power Supply, this is easily<br />
fitted between the mains outlet and the amp. When using the amp with the power supply a<br />
few precautions should be followed:<br />
1). Only use the DC Power supply that is supplied by the manufacturer. The use of other<br />
DC Power Supplies may cause damage or other problems.<br />
2). Turn the power switch to OFF and disconnect any other attached devices, before<br />
plugging in and turning ON the DC Power Supply.<br />
3). When the DC Plug is connected to the socket, the battery compartment is isolated<br />
from the unit. Both the DC Power Supply and the battery tray are independent of each<br />
other.<br />
4). Although no harm will come to the batteries if left in place whilst the DC Power supply is being used, it is recommended<br />
that they be removed. Use either one power source or the other.<br />
Batteries: The use of a DC Power Supply is recommended as the units main power source, however, should you prefer to use<br />
batteries, use only Alkaline type (LR6).<br />
Used continuously the batteries will last for approximately 13 hours. (This will vary greatly with the actual conditions of use).<br />
As the batteries run down, the power indicator on the fascia panel will become dim when the battery power is too low.<br />
Replace the batteries or revert to the DC Power Supply.<br />
Fitting Batteries: When installing or replacing batteries, always turn the power switch to the OFF position and disconnect<br />
any other devices you have may have connected. This prevents damage to your speaker and/or other devices. Follow the photo<br />
sequence to fit a set of batteries.<br />
1). Turn the amplifier upside down to access the battery tray that is located under the chassis, place the amp on a piece of felt<br />
or cloth to avoid damage.<br />
2). Push the catch to release, then lift out the lid of the battery tray and insert 6 AA batteries, ensure that the orientation is<br />
correct to the legend on the tray.<br />
3). When closing the lid of the battery tray, insert the tabs opposite the catch first, then push the lid down until a click is heard.
If used incorrectly batteries may leak or explode and cause damage or injury, please take the following precautions.<br />
1). Carefully follow the installation instructions for fitting new batteries, especially the polarity.<br />
2). Avoid mixing new batteries with old or part used batteries.<br />
3). Avoid mixing battery types.<br />
4). Do not try to recharge or take apart alkaline batteries.<br />
5). Remove the batteries from the unit if it is not going to be used for a long time.<br />
6). If batteries have leaked in the battery tray, remove the batteries and all traces of the discharge from the tray. Use caution so<br />
that none of the discharge gets near the skin or the eyes. Any affected areas should be immediately rinsed with cold running<br />
water, seek medical advice,<br />
7). Do not dispose of used batteries in fire or water systems. Batteries must not be exposed to excessive heat such as sunlight,<br />
fire or the like.<br />
8). Used batteries should always be disposed of in compliance with the current regulations applicable to the country/region<br />
where you live.<br />
+ -<br />
Attaching the Strap: Attach the supplied strap to the<br />
buttons on each side of the cabinet securely, so that it does<br />
not become detached causing damage or injury.
Now the power supply is connected or the batteries are fitted read on.<br />
POWER: This is the power ON/OFF switch.<br />
INPUT JACK: Connect your guitar here. Use only good quality cables to<br />
avoid poor sound quality.<br />
TUNER/AMP MODEL SELECTION: Choose from the various pre<br />
programmed amp models<br />
VOLUME CONTROL: Adjust the volume level of the instrument<br />
connected to the Input Jack.<br />
EQUALISATION CONTOUR/PRESENCE: This set of tone<br />
controls can have a great effect on your sound.<br />
MOD FX: Choose from Chorus, Flanger, Phaser or Tremolo.<br />
DEL FX: Choose from Delay or Reverb.
MIC SOCKET & VOLUME CONTROL: Connect your microphone and adjust its volume. Use<br />
only dynamic microphones, electret & condenser mic’s will not work.<br />
HEADPHONE/RECORD OUT: A rear panel 6.35” stereo jack is provided for headphone use.
IN DEPTH<br />
12V DC POWER SOCKET: Connect to your DC Power Supply. Make sure the voltage marked<br />
on the DC Power Supply matches the outlet voltage for your country!<br />
POWER: This is the main power ON/OFF switch. After switch on, all of the LED’s on the fascia light<br />
up momentarily, after a couple of seconds the LED’s indicate the previous<br />
settings used: i.e. If the amp was last used with Chorus & Reverb, the MOD<br />
FX & DEL FX LED’s will be lit. The Power LED will also be lit with the<br />
switch in the ON position..<br />
INPUT JACK: Connect your guitar here. Use only good quality cables to<br />
avoid poor sound quality.<br />
TIP<br />
AUX IN JACK: Use this input for CD/MP3 players to allow you to play<br />
along to the music or use as backing. For use with standard stereo 3.5mm<br />
jack leads. The overall volume of your player is controlled by the its own volume control.<br />
(NOTE: This input is not muted when in the guitar tuner is in use).<br />
AMP: This control allows the user to select from the various factory pre<br />
programmed amp models.These are not just guitar amp settings, used as a<br />
starting point, each can be configured as a compilation of amp and/or<br />
EQ/effect set-ups to give some of music’s most inspirational sounds. There<br />
is a vast choice to suit your own style & taste.<br />
TIP<br />
(Descriptive table to follow Page 18)
VOLUME CONTROL: Controls the volume of the instrument connected to the Input Jack. This<br />
control does not have any effect on any microphone connected to<br />
the amp.<br />
EQUALISATION CONTOUR/PRESENCE: As the name<br />
suggests this set of controls can have a great effect on your sound.<br />
Basically the Contour control is a mix of conventional Bass & Mid<br />
controls, and the Presence acts more as a Bright/Tone Control.<br />
MOD FX: Activate by pressing the ON Button. This control applies<br />
various effects to make your own unique sound. Choose from<br />
Chorus, Flanger, Phaser or Tremolo depending on the style required<br />
or the Amp Model chosen, the LED will flash according to the<br />
modulation of effect used.<br />
TIP<br />
DEL FX: Activate by pressing the ON button. The first section of<br />
the rotary control adjusts the length of Delay applied to the signal,<br />
the LED will flash according to the delay time. The second half of the<br />
control adjusts the length of Reverb applied to the signal from Room<br />
to Cathedral.<br />
The really important thing is to experiment with the EQ and FX controls, because they effect each amp<br />
model in a different way.<br />
The cool sounds you discover can be noted in the user settings section. (Page 21/22)
MIC VOLUME: Controls the volume of the Mic connected to<br />
the Mic Input Socket. This control is independent from the<br />
instrument volume control on the fascia.<br />
TIP<br />
MIC SOCKET: Connect a microphone here. Please note the<br />
following when a mic is connected to the amp:<br />
The location of the microphone relative to the amp could cause<br />
feedback as could the volume level being too high. Both are<br />
easily remedied.<br />
Use a Dynamic Mic only, you can not use a condenser mic or a plug-in powered mic that requires a power<br />
supply.<br />
HEADPHONE/RECORD OUT: A rear panel 6.35” stereo jack is provided<br />
for headphone use. This output may also be used to connect to a mixing desk<br />
for recording if required.<br />
TIP<br />
TIP<br />
(The internal speaker is automatically disconnected when using phones.<br />
If your Phones have a 3.5mm jack an adaptor will be required)<br />
SECURITY SLOT: You can connect commercially available anti-theft cables and other security<br />
devices to the amp.<br />
See http://www.kensington.com/<br />
SERIAL NO: Displays the model and serial number of the unit.
TUNER OPERATION: By pressing the Tuner Button the amplifier will Mute and the tuner<br />
function will be activated.<br />
The round LED will flash to indicate Tuner operation.<br />
The AMP selector should then be used to select each string in<br />
turn to be tuned.<br />
These are E,B,G,D,A,E and numbered 1-6 with 1 being the High<br />
“E” and 6 being Low “E”<br />
Adjust the string tension to make just the centre LED light.<br />
(As the tune is approached, the centre LED and the LED from the<br />
direction of tune will speed up flashing to show you are getting<br />
close to the in tune position.<br />
When in tune the LEDs will stop flashing and only the Centre<br />
LED will be continuously lit.<br />
Repeat this for each string and then go back through them again<br />
to make final adjustments if required.<br />
To exit the tuner function press the tuner button.<br />
Alternatively remove the input jack and replace.<br />
(You will be returned to the channel and sound settings prior to tuning.)
Amp Model Definitions<br />
Linebacker<br />
Sounds<br />
Tone Description Amp modelled<br />
Crystal Pure & Clean Clean channel of an LC amp - bright and full<br />
Crystal + Clean with Compression Clean channel of an LC amp - bright and full + a clean boost pedal to<br />
give more low end<br />
VC Clean & Warm A VC combo set clean<br />
VC+ 1 x 12" Combo Semi Distorted A VC combo with the drive channel switched to give a semi broken up<br />
tone<br />
Heart 1 x 12" Classic vintage tone Lionheart Combo on the clean channel pushed hard giving you a classic<br />
semi distorted vintage tone<br />
Heart + 1 x 12" Classic vintage distorted tone Lionheart combo with more gain dialled in<br />
Volt Classic rock distortion Tube head and cab combination - set to give you a crunch tone<br />
Volt + Classic rock solo tone Tube head driven hard - more gain dialled in<br />
TI Crushing rhythm tone TI signature head pushed<br />
TI + Hard rock solo tone TI signature head pushed hard<br />
Wreck Insane full on gain Drive channel of a modern valve head - full on!<br />
Factory Reset:<br />
You can at any time return the amplifier to all its original factory settings.<br />
With the amplifier in the OFF state, hold down the DEL FX Button, turn ON the power switch, continue holding<br />
down the DEL FX Button for a few seconds while all the LED’s flash, then as the LED’s become steady, release the<br />
DEL FX Button & the factory settings are restored.
Power Supply<br />
Output Power Rating<br />
Loudspeaker<br />
Features<br />
12V DC Power Supply or 6 “AA” size Batteries<br />
5W<br />
Custom Designed 6” 8 Ohm Driver<br />
1 Instrument Channel, 1 Microphone Channel - (Balanced or Unbalanced)<br />
11 built in amp models<br />
Contour & Presence EQ controls<br />
Chorus,Flanger, Phaser, Tremolo, Delay & Reverb FX<br />
Tuner Function<br />
Security Slot<br />
Size (H*W*D) 301*285*176 Unit Weight 4.5Kg<br />
Included Items<br />
DC Power Supply, Guitar Style Carry Strap<br />
NOTE: This equipment has been tested and found to comply with the limits for a Class B digital device, pursuant to part 15 of the FCC Rules.<br />
These limits are designed to provide reasonable protection against harmful interference in a residential installation. This equipment generates,<br />
uses and can radiate radio frequency energy and, if not installed and used in accordance with the instructions, may cause harmful interference<br />
to radio communications. However, there is no guarantee that interference will not occur in a particular installation. If this equipment does<br />
cause harmful interference to radio or television reception, which can be determined by turning the equipment off and on, the user is encourage<br />
to try to correct the interference by one or more of the following measures:<br />
Reorient or relocate the receiving antena<br />
Increase the separation between the equipment and receiver<br />
Connect the equipment into an outlet on a circuit different from that to which the receiver is connected<br />
Consult the dealer or an experienced radio/TV technician for help<br />
Unauthorized changes or modification to this system can void the user’s authority to operate this equipment<br />
This product conforms to the requirements of the following European Regulations, Directives & Rules:-<br />
CE Mark (93/68/EEC), Low Voltage (72/23/EEC), EMC (2004/108/EEC),<br />
RoHS (EU2002/95/EC), WEEE (EU2002/96/EC)<br />
In order to reduce environmental damage, at the end of its useful life, this product must not be disposed of along with normal Household<br />
waste to landfill sites. It must be taken to an approved recycling centre according to the recommendations of the<br />
WEEE (Waste Electrical and Electronic Equipment) directive applicable in your country.<br />
In the interest of continued development, <strong>Laney</strong> reserves the right to amend product specification without prior notification.
7<br />
L Z B 1 2 3 4<br />
Headphones<br />
OR<br />
5<br />
4 6<br />
N15039<br />
Mixer Desk<br />
3<br />
2<br />
1 9<br />
0 10<br />
8<br />
Power To The Music<br />
WWW.LANEY.CO.UK<br />
SERIAL NO:<br />
MP3<br />
Dynamic Mic<br />
Guitar
NOTES
ISSUE: 2.0


