Wireless Rain Gauge with Indoor / Outdoor ... - Oregon Scientific
Wireless Rain Gauge with Indoor / Outdoor ... - Oregon Scientific
Wireless Rain Gauge with Indoor / Outdoor ... - Oregon Scientific

You also want an ePaper? Increase the reach of your titles
YUMPU automatically turns print PDFs into web optimized ePapers that Google loves.
EN<br />
<strong>Wireless</strong> <strong>Rain</strong> <strong>Gauge</strong><br />
<strong>with</strong> <strong>Indoor</strong> / <strong>Outdoor</strong> Thermometer<br />
Model: RGR126<br />
User Manual<br />
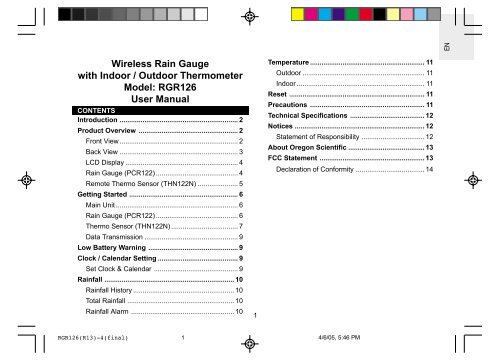
CONTENTS<br />
Introduction .............................................................. 2<br />
Product Overview .................................................... 2<br />
Front View .............................................................. 2<br />
Back View .............................................................. 3<br />
LCD Display ........................................................... 4<br />
<strong>Rain</strong> <strong>Gauge</strong> (PCR122) ........................................... 4<br />
Remote Thermo Sensor (THN122N) ..................... 5<br />
Getting Started ......................................................... 6<br />
Main Unit ................................................................ 6<br />
<strong>Rain</strong> <strong>Gauge</strong> (PCR122) ........................................... 6<br />
Thermo Sensor (THN122N) ................................... 7<br />
Data Transmission ................................................. 9<br />
Low Battery Warning ............................................... 9<br />
Clock / Calendar Setting .......................................... 9<br />
Set Clock & Calendar ............................................ 9<br />
<strong>Rain</strong>fall .................................................................... 10<br />
<strong>Rain</strong>fall History ..................................................... 10<br />
Total <strong>Rain</strong>fall ........................................................ 10<br />
<strong>Rain</strong>fall Alarm ...................................................... 10<br />
1<br />
Temperature ............................................................ 11<br />
<strong>Outdoor</strong> ................................................................ 11<br />
<strong>Indoor</strong> ................................................................... 11<br />
Reset ....................................................................... 11<br />
Precautions ............................................................ 11<br />
Technical Specifications ....................................... 12<br />
Notices .................................................................... 12<br />
Statement of Responsibility ................................. 12<br />
About <strong>Oregon</strong> <strong>Scientific</strong> ........................................ 13<br />
FCC Statement ....................................................... 13<br />
Declaration of Conformity .................................... 14<br />
RGR126(R13)-4(final)<br />
1<br />
4/6/05, 5:46 PM
EN<br />
INTRODUCTION<br />
Congratulations on purchasing the <strong>Oregon</strong> <strong>Scientific</strong> TM<br />
<strong>Wireless</strong> <strong>Rain</strong> <strong>Gauge</strong> <strong>with</strong> <strong>Indoor</strong> / <strong>Outdoor</strong><br />
Thermometer (RGR126). The rain gauge is equipped<br />
<strong>with</strong> the following functions:<br />
• Daily and total rainfall display<br />
• 9-day rainfall history<br />
• <strong>Rain</strong>fall alarm<br />
• <strong>Indoor</strong> / outdoor temperature display<br />
• Real-time clock and calendar setting<br />
• 328-foot (100-meter) transmission range<br />
PRODUCT OVERVIEW<br />
FRONT VIEW<br />
1<br />
The RGR126 operates at 433MHz. No wire installation<br />
is required.<br />
2<br />
3<br />
4<br />
5<br />
6<br />
7<br />
2<br />
1. FOUR-LINE LCD DISPLAY: For displaying the total<br />
rainfall, current rainfall or rainfall history, indoor / outdoor<br />
temperature and clock / calendar<br />
2. SEARCH: Press and hold to enforce a search for the<br />
rain gauge and remote thermo sensor<br />
3. in - mm: Selects between inch and millimeter rainfall<br />
measurement<br />
8<br />
RGR126(R13)-4(final)<br />
2<br />
4/6/05, 5:46 PM
EN<br />
4. ((.)): Displays the rain alarm setting; press and hold to<br />
enter the rain alarm setting mode<br />
5. SINCE: Toggles between displaying the start day or<br />
start year for total rainfall; press and hold to clear the<br />
previous rainfall start time and reset the rainfall counter<br />
to start again<br />
6. HISTORY: Toggles between rainfall history and daily<br />
rainfall<br />
7. : Enables or disables the rainfall alarm<br />
8. REMOVABLE TABLE STAND: For securing the main<br />
unit on a flat surface<br />
BACK VIEW<br />
1. ANTENNA: Receives radio signal from rain gauge<br />
and remote thermo sensor<br />
2. : Increases setting values; press and hold for<br />
rapid increase<br />
3. : Decreases setting values; press and hold for<br />
rapid decrease<br />
4. WALL MOUNT HOLE<br />
5. TIME / SET: Toggles among the time, day, year<br />
and rainfall display; press and hold to enter the time<br />
setting mode<br />
6. RESET: Returns all settings to their default values<br />
7. °C / °F BUTTON: Selects between °C and °F<br />
8. BATTERY COMPARTMENT: Accommodates 2 x<br />
UM-3 or AA-sized batteries<br />
4<br />
1<br />
2<br />
3<br />
5<br />
6<br />
7<br />
8<br />
3<br />
RGR126(R13)-4(final)<br />
3<br />
4/6/05, 5:46 PM
EN<br />
LCD DISPLAY<br />
RAIN GAUGE (PCR122)<br />
1<br />
2<br />
3<br />
1. ANTENNA:<br />
Transmits radio<br />
signal to main<br />
unit<br />
2. BATTERY<br />
COMPARTMENT:<br />
Accommodates 2<br />
x UM-3 or AAsized<br />
batteries<br />
4<br />
1<br />
1. Today's <strong>Rain</strong>fall, <strong>Rain</strong>fall History, <strong>Rain</strong>fall Alarm,<br />
Start Date of Total <strong>Rain</strong>fall Record, Time / Date<br />
2. <strong>Rain</strong> <strong>Gauge</strong> RF Reception Status, Total <strong>Rain</strong>fall<br />
3. Thermo-sensor RF Reception Status, <strong>Outdoor</strong><br />
Temp<br />
4. <strong>Indoor</strong> Temp<br />
2<br />
4<br />
RGR126(R13)-4(final)<br />
4<br />
4/6/05, 5:46 PM
EN<br />
REMOTE THERMO SENSOR (THN122N)<br />
1<br />
1. LED Indicator 1<br />
1. WALL MOUNT<br />
HOLE<br />
2. RESET hole<br />
3. CHANNEL<br />
number (1-3)<br />
4. BATTERY<br />
COMPARTMENT<br />
2<br />
3<br />
4<br />
5<br />
RGR126(R13)-4(final)<br />
5<br />
4/6/05, 5:46 PM
EN<br />
GETTING STARTED<br />
Position the main unit, rain gauge, and thermo sensor<br />
<strong>with</strong>in effective range:<br />
• <strong>Rain</strong> gauge - 328 feet / 100 meters<br />
• Thermo sensor - 98 feet / 30 meters<br />
IMPORTANT It is recommended that you follow the<br />
sequence below when setting up the units:<br />
1. Set up the main unit.<br />
2. Set up the rain gauge, then press and hold<br />
SEARCH on the main unit and wait until you receive<br />
a signal.<br />
3. Set up the thermo sensor, then press and hold SEARCH<br />
on the main unit and wait until you receive a signal.<br />
4. In the event that you do not obtain a signal from a<br />
remote unit please repeat the process above.<br />
2. Press RESET, or press and hold SEARCH on the<br />
main unit to initiate operation. The reception icon<br />
on the main unit will blink while it is searching for<br />
the sensor or rainfall gauge.<br />
NOTE Every time the battery in the main unit is<br />
changed, repeat installation before use.<br />
RAIN GAUGE (PCR122)<br />
1. Insert the batteries, matching the polarity (+ and -)<br />
as shown in the battery compartment.<br />
"AA" UM3 1.5V<br />
"AA" UM3 1.5V<br />
"AA" UM3 1.5V<br />
"AA" UM3 1.5V<br />
MAIN UNIT<br />
1. Insert the batteries, matching the polarity (+ and -)<br />
as shown in the battery compartment.<br />
2. Mount the rain gauge on a level surface.<br />
6<br />
RGR126(R13)-4(final)<br />
6<br />
4/6/05, 5:46 PM
EN<br />
3. Put drops of water on the cross at the base to check<br />
the leveling.<br />
5. Remove the fiber tape from around the bucket<br />
assemblies.<br />
3<br />
3<br />
1<br />
4<br />
2<br />
THERMO SENSOR (THN122N)<br />
1. Insert the batteries, matching the polarity (+ and -)<br />
as shown in the battery compartment.<br />
4. Use the metal ring to adjust the level of the rain<br />
gauge.<br />
2. Set the channel switch to any channel. The switch<br />
is located in the battery compartment.<br />
3. Press RESET on the sensor.<br />
4. Close the remote sensor battery compartment.<br />
7<br />
RGR126(R13)-4(final)<br />
7<br />
4/6/05, 5:46 PM
EN<br />
5. Secure the sensor in the desired location using the<br />
wall mount or table stand.<br />
For best results:<br />
• Insert the batteries before you mount the sensor.<br />
• Place the sensor out of direct sunlight and<br />
moisture.<br />
• Do not place the sensor more than 98 feet (30<br />
meters) from the main (indoor) unit.<br />
• Position the sensor so that it faces the main<br />
(indoor) unit, minimizing obstructions such as<br />
doors, walls, and furniture.<br />
8<br />
• Place the sensor in a location <strong>with</strong> a clear view to<br />
the sky, away from metallic or electronic objects.<br />
• Position the sensor close to the main unit during<br />
cold winter months as below-freezing temperatures<br />
may affect battery performance and signal<br />
transmission.<br />
You may need to experiment <strong>with</strong> various locations to<br />
get the best results.<br />
Standard Alkaline batteries contain significant amounts<br />
of water. Because of this they will freeze in low<br />
temperatures of approximately 10°F (-12°C). Disposable<br />
Lithium batteries have a much lower threshold for<br />
temperature <strong>with</strong> an estimated freezing range of below<br />
-40°F (-40°C).<br />
<strong>Wireless</strong> ranges can be impacted by a variety of factors<br />
such as extremely cold temperatures. Extreme cold may<br />
temporarily reduce the effective range between the<br />
sensor and the base station. If the unit's performance<br />
fails due to low temperature, the unit will resume proper<br />
functioning as the temperature rises to <strong>with</strong>in the normal<br />
temperature range (i.e. no permanent damage will occur<br />
to the unit due to low temperatures).<br />
RGR126(R13)-4(final)<br />
8<br />
4/6/05, 5:46 PM
EN<br />
DATA TRANSMISSION<br />
Data is sent from the remote thermo sensor approx.<br />
every 78 seconds and every 94 seconds from the rain<br />
gauge. The reception icon shows the status - see table.<br />
THERMO SENSOR RAIN GAUGE DESCRIPTION<br />
Searching<br />
Connected<br />
Disconnected<br />
If <strong>with</strong>out obvious reason the main unit display shows<br />
that the thermo sensor or rainfall connector is<br />
disconnected, press and hold SEARCH to enforce an<br />
immediate search.N<br />
If that fails, check:<br />
• The remote rain gauge and thermo sensor are still<br />
in place.<br />
• The batteries of the main unit, rain gauge, and<br />
thermo sensor are still good. Replace them if<br />
necessary.<br />
• The transmission is <strong>with</strong>in range and path is clear<br />
of obstacles and interference. Shorten the distance<br />
if necessary. Then press and hold SEARCH again.<br />
LOW BATTERY WARNING<br />
There are 3 low-battery indicators - see table.<br />
UNIT LOCATION ON MAIN UNIT DISPLAY<br />
Main<br />
Remote Thermo Sensor<br />
<strong>Rain</strong> <strong>Gauge</strong><br />
<strong>Indoor</strong> Temperature Area<br />
<strong>Outdoor</strong> Temperature Area<br />
Total <strong>Rain</strong>fall Area<br />
Replace the batteries immediately when the respective<br />
indicator lights up.<br />
CLOCK / CALENDAR SETTING<br />
Press TIME / SET to toggle among today's rainfall, time,<br />
date, and year.<br />
SET CLOCK & CALENDAR<br />
1. Press TIME / SET to display the clock or calendar.<br />
2. Press and hold TIME / SET for two seconds.<br />
3. Use or to set the desired value.<br />
4. Press TIME / SET to confirm.<br />
5. Repeat steps 3 and 4 to complete all settings.<br />
6. The order of the settings is hour, minute, year,<br />
month and day.<br />
9<br />
RGR126(R13)-4(final)<br />
9<br />
4/6/05, 5:46 PM
EN<br />
RAINFALL<br />
Today's rainfall appears on the 1st line of the display<br />
and total rainfall is shown on the 2nd line. Press in /<br />
mm to toggle between inches and millimeters as the<br />
unit of measurement.<br />
RAINFALL HISTORY<br />
The rainfall history is displayed on the 1st line of the<br />
LCD display. The main unit can record up to 9 days of<br />
rainfall.<br />
Use HISTORY to display the record for a particular day.<br />
The day of the record will be displayed <strong>with</strong> a minus (-)<br />
sign.<br />
Caution: Other sensors using the 433 MHz transmission<br />
frequency may influence the rainfall reading. Please<br />
avoid placing those sensors too close to the unit.<br />
TOTAL RAINFALL<br />
The total rainfall is displayed on the 2nd line of the LCD<br />
display.<br />
To display the commencing date of the total rainfall<br />
record, press SINCE. The date will appear on the 1st<br />
line of the display. Press again to show the commencing<br />
year.<br />
To clear the existing commencing date and reset it to<br />
start again, press and hold SINCE. The total rainfall will<br />
now be equal to the today rainfall and the unit will start<br />
again to collect the rainfall data.<br />
RAINFALL ALARM<br />
The rain alarm value can be displayed at any time by<br />
pressing (( • )).<br />
To set the rainfall alarm,<br />
1. Press and hold (( • )) for two seconds.<br />
2. Use or to set the desired value.<br />
3. Press (( • )) to confirm. The alarm will be activated.<br />
The rain alarm indicator will light up.<br />
The alarm will go off for one minute when the rainfall<br />
reaches the preset value and the rain alarm indicator<br />
will flash. A reminder beep will be emitted every minute.<br />
Once the rain alarm is on the indicator will not stop<br />
flashing unless is pressed or the rain alarm value is<br />
changed. To stop the alarm and reminder beep, press<br />
any button or change the rainfall alarm value.<br />
To deactivate the alarm, press .<br />
10<br />
RGR126(R13)-4(final)<br />
10<br />
4/6/05, 5:46 PM
EN<br />
TEMPERATURE<br />
OUTDOOR<br />
The outdoor temperature is displayed on the 3rd line of<br />
the LCD display. Use the °C / °F button to select between<br />
Centigrade and Fahrenheit display units.<br />
INDOOR<br />
The indoor temperature is displayed on the 4th line of<br />
the LCD display. Use the °C / °F button to select between<br />
Centigrade and Fahrenheit display units.<br />
RESET<br />
This button should only be used when the unit is<br />
operating in an unfavorable way. Use a blunt stylus to<br />
hold down the button. All settings will return to their<br />
default values.<br />
PRECAUTIONS<br />
This product is engineered to give you years of<br />
satisfactory service if you handle it carefully. Here are a<br />
few precautions:<br />
• Do not immerse the unit in water.<br />
• Do not clean the unit <strong>with</strong> abrasive or corrosive<br />
materials. They may scratch the plastic parts and<br />
corrode the electronic circuit.<br />
• Do not subject the unit to excessive force, shock,<br />
dust, temperature or humidity, which may result in<br />
malfunction, shorter electronic life span, damaged<br />
battery and distorted parts.<br />
• Do not tamper <strong>with</strong> the unit's internal components.<br />
Doing so will invalidate the warranty on the unit<br />
and may cause unnecessary damage. The unit<br />
contains no user-serviceable parts.<br />
• Only use fresh batteries as specified in the user's<br />
manual. Do not mix new and old batteries as the<br />
old ones may leak.<br />
• Always read the user's manual thoroughly before<br />
operating the unit.<br />
11<br />
RGR126(R13)-4(final)<br />
11<br />
4/6/05, 5:46 PM
EN<br />
TECHNICAL SPECIFICATIONS<br />
TYPE<br />
Main Unit Dimensions<br />
L x W x H<br />
DESCRIPTION<br />
3.54 x 0.98 x 5.59 inches<br />
(90 x 25 x 142 mm)<br />
Weight (<strong>with</strong>out battery) 0.38 lbs (173 g)<br />
Main unit<br />
Display rainfall range (total) 0 - 999.99 inch (0 - 25,400 mm)<br />
Display rainfall range 0 - 99.99 inch (0 - 2,540 mm)<br />
(history / daily)<br />
<strong>Rain</strong>fall resolution<br />
0.04 inch (1 mm)<br />
Operating range 23°F to 122°F<br />
(-5°C to +50°C)<br />
Temperature resolution 0.2°F to (0.1°C)<br />
Remote <strong>Rain</strong> <strong>Gauge</strong> (PCR122)<br />
Operating range<br />
33.8° F to 140.0°F<br />
(1.0° C to 60.0°C)<br />
Weight 0.57 lbs (260 g)<br />
Remote Thermo Sensor (THN122N)<br />
Proposed operating range -22° F to 140°F<br />
(-30° C to 60°C)<br />
Power<br />
Main unit<br />
2 x UM-3 / AA 1.5V batteries<br />
<strong>Rain</strong> gauge<br />
2 x UM-3 / AA 1.5V batteries<br />
Remote thermo sensor 2 x UM-4 / AAA 1.5V batteries<br />
General<br />
RF Transmission Frequency 433 MHz<br />
RF Transmission Range <strong>Rain</strong> gauge - 328 feet<br />
(100 meters)<br />
Remote thermo sensor - 98 feet<br />
(30 meters)<br />
Temperature sensing cycle Around 78 seconds<br />
<strong>Rain</strong>fall sensing cycle Around 94 seconds<br />
NOTE It is recommended that you use alkaline<br />
batteries <strong>with</strong> this product for longer performance or<br />
lithium batteries in temperatures below freezing.<br />
NOTE Design and specifications are subject to change<br />
<strong>with</strong>out notice.<br />
NOTICES<br />
STATEMENT OF RESPONSIBILITY<br />
<strong>Oregon</strong> <strong>Scientific</strong> will not be held liable for any bodily<br />
injury, death, property damages, or any other claims<br />
of whatever nature resulting from the misuse or<br />
negligence of the product, whether intentional or<br />
unintentional.<br />
<strong>Oregon</strong> <strong>Scientific</strong> will not be responsible for any<br />
deviations in the usage of the device from those<br />
specified in the user instructions or any approved<br />
alternations or repairs of the product.<br />
12<br />
RGR126(R13)-4(final)<br />
12<br />
4/6/05, 5:46 PM
EN<br />
ABOUT OREGON SCIENTIFIC<br />
Visit our website (www.oregonscientific.com) to learn<br />
more about <strong>Oregon</strong> <strong>Scientific</strong> products such as digital<br />
cameras; MP3 players; children's electronic learning<br />
products and games; projection clocks; health and fitness<br />
gear; weather stations; and digital and conference phones.<br />
The website also includes contact information for our<br />
Customer Care department in case you need to reach<br />
us, as well as frequently asked questions and customer<br />
downloads.<br />
We hope you will find all the information you need on our<br />
website, however if you're in the US and would like to<br />
contact the <strong>Oregon</strong> <strong>Scientific</strong> Customer Care department<br />
directly, please visit:<br />
www2.oregonscientific.com/service/support<br />
OR<br />
Call 1-800-853-8883.<br />
For international inquiries, please visit:<br />
www2.oregonscientific.com/about/international/default.asp<br />
FCC STATEMENT<br />
This device complies <strong>with</strong> Part 15 of the FCC Rules.<br />
Operation is subject to the following two conditions: (1)<br />
This device may not cause harmful interference, and<br />
(2) This device must accept any interference received,<br />
including interference that may cause undesired<br />
operation.<br />
WARNING Changes or modifications not expressly<br />
approved by the party responsible for compliance could<br />
void the user's authority to operate the equipment.<br />
NOTE This equipment has been tested and found to<br />
comply <strong>with</strong> the limits for a Class B digital device,<br />
pursuant to Part 15 of the FCC Rules. These limits are<br />
designed to provide reasonable protection against<br />
harmful interference in a residential installation.<br />
This equipment generates, uses and can radiate radio<br />
frequency energy and, if not installed and used in<br />
accordance <strong>with</strong> the instructions, may cause harmful<br />
interference to radio communications. However, there<br />
is no guarantee that interference will not occur in a<br />
particular installation. If this equipment does cause<br />
harmful interference to radio or television reception,<br />
which can be determined by turning the equipment off<br />
and on, the user is encouraged to try to correct the<br />
interference by one or more of the following measures:<br />
13<br />
RGR126(R13)-4(final)<br />
13<br />
4/6/05, 5:46 PM
EN<br />
• Reorient or relocate the receiving antenna.<br />
• Increase the separation between the equipment<br />
and receiver.<br />
• Connect the equipment into an outlet on a circuit<br />
different from that to which the receiver is<br />
connected.<br />
• Consult the dealer or an experienced radio / TV<br />
technician for help.<br />
DECLARATION OF CONFORMITY<br />
The following information is not to be used as contact for<br />
support or sales. Please call our customer service number<br />
(listed on our website at www.oregonscientific.com), or<br />
on the warranty card for this product) for all inquiries<br />
instead.<br />
We<br />
Name:<br />
<strong>Oregon</strong> <strong>Scientific</strong>, Inc.<br />
Address:<br />
19861 SW 95th Ave., Tualatin,<br />
<strong>Oregon</strong> 97062 USA<br />
Telephone No.: 1-800-853-8883<br />
Fax No.: 1-503-684-3332<br />
Address:<br />
Block C, 9/F, Kaiser Estate,<br />
Phase 1,41 Man Yue St.,<br />
Hung Hom, Kowloon,<br />
Hong Kong<br />
is in conformity <strong>with</strong> Part 15 of the FCC Rules. Operation<br />
is subject to the following two conditions: 1) This device<br />
may not cause harmful interference. 2) This device must<br />
accept any interference received, including interference<br />
that may cause undesired operation.<br />
declare that the product<br />
Product No.: RGR126<br />
Product Name: <strong>Wireless</strong> <strong>Rain</strong> Monitor<br />
Manufacturer: IDT Technology Limited<br />
14<br />
RGR126(R13)-4(final)<br />
14<br />
4/6/05, 5:46 PM