Create successful ePaper yourself
Turn your PDF publications into a flip-book with our unique Google optimized e-Paper software.
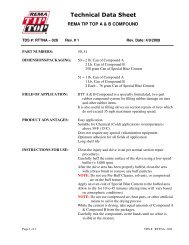
120 SERIES<br />
FEATURES &<br />
BENEFITS<br />
20 SERIES<br />
"ACCUWAY'' Spread Pattern Equalizer<br />
ENSURES spreading dead center of the<br />
spreader. (Indicated with "22" in model number)<br />
Gears are unconditionally guaranteed<br />
ENSURES trouble free operation.<br />
spread with confidence<br />
Spreading Chart<br />
Operation Guide<br />
MODEL 179<br />
Dial-A-Matic spread rate control<br />
ENSURES spreading at exact spread<br />
rates.<br />
For Models:<br />
76-22 96-22<br />
78-22 98-22<br />
Service <strong>Manual</strong><br />
Parts List<br />
Optional BORDER PATROL spread pattern<br />
cut-off prevents spreading on drive-ways,<br />
flower beds, etc.<br />
MODEL 88<br />
Extension hoppers available for all round<br />
hopper spreaders. Adds 20 lbs. to<br />
capacity.<br />
Shipped Set-Up. Saves time and labor<br />
ENSURES proper assembly. (except #64)<br />
Model:<br />
98-22<br />
pictured<br />
MODEL 298<br />
Mulch Spreader<br />
Stainless steel frames ensure longer<br />
spreader life, easier maintenance and<br />
present a quality image.<br />
MODEL 299<br />
Mulch Spreader<br />
High grade plastic non-corroding wheels<br />
with nylon bearings, no lubrication<br />
required, ENSURES trouble free<br />
maintenance.<br />
It’s the spread that counts<br />
P.O. Box 7 • Urbana, IN 46990 USA<br />
1-800-972-6130 • Fax 260-774-3416<br />
P.O. Box 7<br />
140 Mill Street<br />
Urbana, IN<br />
46990 USA<br />
1-800-972-6130<br />
Fax: 260-774-3416<br />
© 2004 Spyker Spreaders – Urbana, IN U.S.A. 05-99-0078
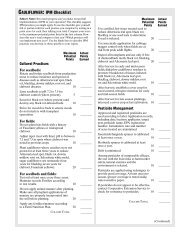
Tools you will need:<br />
Assembly Instructions<br />
For Quick and Easy Assembly - First Read Entire Procedure<br />
Then Follow Carefully The Step by Step Instructions<br />
Medium Sized Screwdriver<br />
7/16” & 3/8” wrenches<br />
Hammer<br />
Pliers<br />
1. Sit<br />
Tow Behind Frame Assembly<br />
spreader<br />
assembly on<br />
hopper as shown.<br />
Parts you will use:<br />
Parts for Models:<br />
76-22 96-22<br />
78-22 98-22<br />
• (3) 1/4 - 20 x 1 1/2" 55 bolt<br />
• (8) 1/4 - 20 55 hex nut<br />
• (3) 1/4 - 20 x 1 3/4" 55 bolt<br />
• (1) 1/4 - 20 x 2 3/4" 55 bolt<br />
• (1) 1/4 - 20 x 1" bolt<br />
• (2) 10 - 24 x 1 1/2" 55 bolt<br />
• (2) 10 - 24 55 lock nut<br />
• (2) handle grips<br />
• (1) agitator wire<br />
• (4) handle/tow bar braces<br />
• (1) cable clamp<br />
• (1) felt washer<br />
• (1) manual<br />
• (1) 1/4 - 20 x 1" 55 bolt<br />
2.For stainless<br />
steel models<br />
remove nuts and<br />
bolts that attach<br />
front of hopper to<br />
frame as indicated,<br />
and then<br />
insert Bump Bar<br />
(3) into frame<br />
assembly. Next,<br />
re-insert bolts and<br />
tighten nuts.<br />
Note: For black frames remove nuts and bolts<br />
that attach front hopper to frame. Push<br />
bump bar into frame (Black bump bars do<br />
not have holes drilled in them). Re-insert<br />
bolts and nuts and tighten against the<br />
bump bar.<br />
1<br />
2
Tow Bar Assembly<br />
Tow Bar Assembly<br />
3.Attach braces (8)<br />
to frame with bolts<br />
(37) and nuts<br />
(34). Attach<br />
braces to towbar,<br />
and towbar to<br />
frame using 2<br />
bolts (35) and<br />
nuts (34).<br />
5. Insert<br />
Clevis Pin<br />
(43) into Hitch<br />
Plates and fasten<br />
with Cotter Pin (42).<br />
4. Attach<br />
Hitch<br />
plates (44) to Tow<br />
Bar assembly<br />
6. Attach<br />
On/Off Lever<br />
Control (46) to Tow<br />
Bar assembly using<br />
2 bolts (32) and<br />
nuts (33).<br />
using 2 bolts (35)<br />
and nuts (34).<br />
Proceed to page 9 for instructions on connecting cable to<br />
Rate Gate Linkage.<br />
3<br />
4
Walk Behind Frame Assembly<br />
Walk Behind Frame Assembly<br />
1. Remove<br />
nuts and<br />
bolts that attach<br />
front of hopper to<br />
frame as indicated<br />
and then insert<br />
Bump Bar (3) into<br />
frame assembly.<br />
Next, re-insert bolts<br />
and tighten nuts.<br />
3.Attach T-Handle<br />
assembly to frame<br />
with 1 bolt (31) and<br />
nut (34).<br />
2.Insert T-Handle (6)<br />
into Ground Prop<br />
(5) and fasten with<br />
2 bolts (37) and<br />
nuts (34).<br />
4. Attach<br />
Braces (8)<br />
to frame and T-<br />
Handle assembly.<br />
Use 3 bolts (35)<br />
and nuts (34) to<br />
attach braces to<br />
the frame and to<br />
the round tube of<br />
ground prop. Use<br />
bolt (57) and nut<br />
(34) to attach<br />
braces to the flat<br />
support section of<br />
ground prop.<br />
5<br />
6
Walk Behind Frame Assembly<br />
Rate Dial Adjustment<br />
5. Attach<br />
On/Off<br />
Control Lever (13)<br />
to T-Handle<br />
assembly using 2<br />
bolts (32) and<br />
nuts (33).<br />
New Linkage Adjustment Procedure<br />
1. Set regulator dial to 1.<br />
2. Set lever completely to off<br />
position.<br />
3. Attach cable clamp (59) to<br />
ground prop with 1 1 /4” bolt<br />
and nut and finger tighten.<br />
4. Route cable through clamp,<br />
then through swivel and then<br />
tighten the cable clamp bolt<br />
just enough to allow the cable<br />
to slide back and forth easily.<br />
5. Adjust sheath on cable so there is a 1/8” inch of control wire that<br />
is visible between the sheath and the edge of the rate gate linkage.<br />
6. Tighten the cable clamp bolt to secure the sheath.<br />
7. Tighten the screw on the cable fastener to anchor the wire, making<br />
sure that the rate gate linkage is pushed up against the dial.<br />
8. Trim excess wire behind cable fastener connector when finished<br />
(if necessary).<br />
Dial Setting Information<br />
The RATE DIAL has 9 numbers with 10 stops<br />
between each number, for accurate control of<br />
the spreading rate.<br />
The dial is set with only a turn. It will automatically<br />
lock into the set position. LINE UP THE<br />
DIAL NUMBER WITH THE DIAL INDICATOR.<br />
7<br />
8
Exploded<br />
View<br />
Walk Behind Hopper<br />
& Frame Assembly<br />
55<br />
35<br />
55<br />
35<br />
35<br />
55<br />
38<br />
35<br />
55<br />
1<br />
38<br />
10<br />
8 4<br />
3<br />
48<br />
34<br />
10<br />
8 4<br />
34<br />
35 34<br />
34<br />
34<br />
37 35<br />
13<br />
56<br />
34<br />
32<br />
37<br />
7<br />
5<br />
8<br />
57<br />
31 4<br />
34<br />
34<br />
30<br />
41<br />
35<br />
34<br />
4<br />
48<br />
33<br />
34<br />
35 34<br />
6 34<br />
34<br />
37 35<br />
13<br />
56<br />
34<br />
32<br />
37<br />
7<br />
5<br />
8<br />
34<br />
57<br />
31 4<br />
34<br />
34<br />
30<br />
41<br />
35 48 9<br />
34<br />
9<br />
10
Exploded<br />
View<br />
Pull Behind Hopper<br />
& Frame Assembly<br />
35<br />
55<br />
35<br />
Note:<br />
Nylon washers [55] go on<br />
plastic hoppers only<br />
35<br />
55<br />
35<br />
55<br />
55<br />
1<br />
9<br />
48<br />
30<br />
34<br />
9<br />
3<br />
33<br />
47<br />
35<br />
37 34 36 35<br />
34<br />
34<br />
46<br />
34<br />
56<br />
8<br />
34<br />
32<br />
8<br />
34<br />
45<br />
35<br />
4<br />
34<br />
34<br />
38<br />
41<br />
37<br />
48<br />
33<br />
47<br />
35<br />
42 43<br />
44<br />
30<br />
48<br />
34<br />
37 34 36 35<br />
34<br />
34<br />
34<br />
46<br />
56<br />
8<br />
34<br />
32<br />
8<br />
34<br />
45<br />
35<br />
4<br />
34<br />
34<br />
38<br />
41<br />
37<br />
48<br />
10<br />
34<br />
3<br />
11<br />
12
Exploded View<br />
Parts List<br />
17<br />
19<br />
16<br />
18<br />
63<br />
21<br />
24<br />
12<br />
24<br />
20<br />
54<br />
12<br />
14<br />
11<br />
f<br />
12<br />
12<br />
14<br />
52<br />
15<br />
12<br />
51<br />
50<br />
Stainless Hopper<br />
Gear Box<br />
40<br />
41<br />
39<br />
39<br />
41<br />
53<br />
2<br />
Item # Part # Quantity Description Price<br />
1 05-94-0054-0 1 Hopper/Black<br />
2 05-91-1100 1 Hopper/Stainless<br />
3 05-81-1030 1 Hand Hold/Bump Bar/Painted<br />
3 05-97-3030 1 Hand Hold/Bump Bar/Stainless<br />
4 05-81-1020 1 Frame/Painted<br />
4 05-97-3020 1 Frame/Stainless<br />
5 05-94-1120 1 Ground Prop./Painted<br />
5 05-98-3020 1 Ground Prop./Stainless<br />
6 05-94-1010 1 T-Handle/Painted<br />
6 05-98-3010 1 T-Handle/Stainless<br />
7 05-94-0022 2 Handle Grip<br />
8 05-81-1040 4 Brace for Ground Prop./Tow Bar/Painted<br />
8 05-97-3040 4 Brace for Ground Prop./Tow Bar/Stainless<br />
9 05-95-0017 1 Idle Wheel<br />
10 05-95-0016 1 Drive Wheel<br />
11 05-71-2205 1 Hopper Bottom Plate/Plastic Hopper<br />
12 99-10-0205 5 1/4 - 20 x 1/2" Bolt/Hopper Bottom Plate<br />
13 05-98-0018-1 1 On/Off Control Lever/Walk Behind<br />
14 05-94-0042 2 Guide for Rate Gate/Diffuser<br />
15 05-94-0068 1 Rate Gate<br />
16 05-94-0069 1 Dial Mount<br />
17 SS-94-0006 1 Dial<br />
18 05-24-1101 1 Rate Gate Linkage<br />
19 SS-94-0012-1 1 Spinner<br />
20 SS-94-0007 1 Hopper Bottom Bearing<br />
21 SS-96-0003 1 Agitator Wire<br />
22 05-97-0021 1 Spinner Shaft 70 Series<br />
22 05-97-0016 1 Spinner Shaft 90 Series<br />
23 05-94-0035 1 Gear Support<br />
24 SS-92-0002 2 Felt Washer<br />
25 05-94-0034 1 Pinion Gear<br />
26 05-94-0033 1 Bevel Gear<br />
27 05-90-0014 1 Cotter Pin/Bevel Gear 3/16" x 3/4"<br />
28 05-90-0012-R 1 Collar 5/8" Bore, 1 1/8" OD, 1/2" wide SS 5/16" - 18 Set Screw<br />
29 SS-90-0002 1 Roll Pin/Spinner 1/8" x 7/8"<br />
30 99-50-1081 2 Cotter Pin/Pinion/Gear 1/8" x 1"/Idle Wheel<br />
31 05-90-0017 1 1/4 - 20 x 2 3/4" Bolt/Ground Prop. To Frame<br />
32 05-90-0015 2 10 - 24 x 1 3/8" Bolt/Levers<br />
33 05-91-0008 2 10 - 24 Lock Nut/Levers<br />
34 SS-91-0004 11 1/4 -20 Lock Nut<br />
35 05-90-0016 8 1/4 - 20 x 1 3/4" Bolt/Hopper/Braces<br />
36 05-93-1065 1 Axle<br />
37 SS-90-0012 3 1/4 - 20 x 1 1/2" Bolt/T-Handle to Ground Prop.<br />
38 05-90-0029 1 Cotter Pin/Drive Wheel 3/16" x 1 1/2"<br />
39 05-94-0036 2 Gear Box Cover<br />
40 05--98-0094 1 Gearbox Retainer Clip SS - Small<br />
41 05--98-0095 2 Gearbox Retainer Clip SS - Large<br />
42 99-50-1042 1 Hairpin Cotter #8<br />
43 SS-90-0006 1 Clevis Pin/ 1/2" x 1 27/64"<br />
44 05-81-1013 2 Hitch Plates/Painted<br />
44 05-97-3013 2 Hitch Plates/Stainless<br />
45 05-81-1110 1 Tow Bar/Painted<br />
45 05-97-3210 1 Tow Bar/Stainless<br />
46 05-98-0017-1 1 On/Off Control Lever/Tow Behind<br />
47 05-94-0021 1 End Cap/Tow Bar<br />
48 05-94-0028 2 Axle Bushings<br />
64<br />
30<br />
23<br />
28<br />
22<br />
27<br />
29<br />
25<br />
26<br />
30<br />
38<br />
48<br />
50 05-94-0045 1 Accuway Adjustment Screw<br />
51 05-94-0046 1 Accuway Adjustment Nut Bracket<br />
52 05-94-0043 1 Diffuser<br />
53 SS-96-0002 1 Screen<br />
54 05-94-0049 1 Spinner Cam Extension<br />
55 05-94-0064 4 Nylon Washer/Plastic Hopper Only<br />
56 05-24-1105 1 Cable Clamp Tow Behind<br />
56 05-81-1105 1 Cable Clamp Walk Behind<br />
57 05-90-0047 1 1/4 - 20 x 1" Bolt<br />
58 05-74-2350 1 Parts Bag for Push Spreader/Painted<br />
59 05-73-2350 1 Parts Bag for Pull Spreader/Painted<br />
60 05-78-2350 1 Parts Bag for Push Spreader/Stainless<br />
61 05-79-2350 1 Parts Bag for Pull Spreader/Stainless<br />
62 05-99-0078 1 <strong>Manual</strong><br />
63 05-90-0044 1 Cable Fastener<br />
64 05-92-0004 1 5/8” Finishing Washer/Stainless<br />
13<br />
14
Read Before Using<br />
Read Before Using<br />
SPEED - ACCURACY - FREEDOM FROM STRIPES AND STREAKS<br />
are yours - when you use this Spreader.<br />
The spread width ranges from 4 ft. to 12 ft. wide, depending on the<br />
volume/density, particle size of the material and the rate of travel.<br />
The spread thins or feathers at the outer edges, eliminating sharp,<br />
“Edge of spread” lines which cause stripes and streaks. Extra coverage<br />
can be given under trees and other heavy feeding areas without showing<br />
“edge of spread” lines.<br />
Gaps and double overlaps are less likely. Small errors in travel are<br />
forgiven and do not show.<br />
WARNING: When spreading products containing herbicides, exercise extreme<br />
caution with respect to careless spreading and to wind-drift.<br />
CONTACT OF SOME PRODUCTS ON SOME PLANTS CAN BE FATAL.<br />
If a dial setting is not found, use the size and weight comparison table<br />
found on the back page.<br />
Determine a dial setting on the low side. If the setting proves to be<br />
too low, cover the area more than one time. A higher setting can be<br />
used when a proven dial setting is established.<br />
REMEMBER - Published dial settings can be approximate only. The<br />
operation of the spreader, the condition of the material (damp or dry<br />
or over-pulverized) and weather conditions, are all contributing factors.<br />
For these reasons, it’s often a good idea to spread the area 2 times -<br />
at one-half rate - in cross directions (SEE INFORMATION ON ONE-HALF<br />
RATE DIAL SETTINGS ON REFERENCE CHART ON THE BACK PAGE.<br />
SPREADING AT ONE-HALF RATE DIAL SETTINGS IS HIGHLY RECOM-<br />
MENDED UNDER DAMP & HUMID CONDITIONS.<br />
BECOME FAMILIAR WITH THE OPERATION OF THE SPREADER<br />
BEFORE YOU PUT MATERIAL IN THE HOPPER.<br />
Practice walking with the spreader, opening and closing the rate gate<br />
at the appropriate times.<br />
Travel at a constant speed and operate the spreader lever position.<br />
Remember: Open the rate gate after the spreader is in motion at<br />
operating speed (about 3 mph., or at a brisk walking pace).<br />
Close the rate gate while spreader is still at operational speed.<br />
15<br />
Rotary Agitator<br />
Use the rotary agitator only if needed. Free-flowing, lump-free materials<br />
will not require the agitator. The rotary agitator is easily installed or<br />
removed. Note the clockwise rotation & sweep. Place felt washer<br />
around spinner shaft before inserting agitator. - See page 14.<br />
OIL BEARINGS AND ALL MOVING PARTS<br />
Make certain the spreader is running freely!<br />
Now You are Ready to Put Material in the Hopper<br />
• Make certain the rate gate is in closed position.<br />
• As insurance against spill damage and spill loss, put material in the<br />
hopper with the spreader on a walk, driveway, paper, plastic, etc.<br />
• The spreader will be easier to use if you only half-fill the hopper. Later<br />
on you can fill the hopper if you so choose.<br />
• Or for added capacity, the inverted bag in the hopper can serve as a<br />
capacity extension. Also, an extension hopper, complete with filtering<br />
and pulverizing screen, is available from the manufacturer.<br />
Now You are Ready to Spread<br />
• Spread header strips at the ends of the area<br />
OPPOSITE the direction of spreading. This will<br />
provide a “turn-around” area, an area to realign<br />
the spreader for the return spread.<br />
• Example is for 6 ft. wide spread: Make the<br />
first spreading pass at one-half the spread<br />
width from the edge of the spreading area or<br />
in this case approximately 3 feet or one big<br />
step.<br />
• Additional spreading passes will be at the full<br />
spread width or approximately 6 feet apart.<br />
• TAKE A SIGHTING AT THE FAR END. Keep<br />
your eye on the sighting as you spread. You<br />
will not need to wonder where you are or<br />
where you have been. Continue until spreading<br />
is completed.<br />
• Left over fertilizer can be spread under trees and other high feeding<br />
areas without showing “edge of spread” lines.<br />
16<br />
Header<br />
3’ 6’ 6’<br />
Header
Read Before Using<br />
NOTE: With the rotary agitator installed, the rate gate closed (not spreading) and with<br />
material in the hopper, the spreader will push harder than normal. (This is because the<br />
agitator is stirring the material and it has no place to go.)<br />
RECOMMENDATION: When not spreading and the spreader is being<br />
pushed some distance, tip the spreader so only the idle wheel is on<br />
the ground.<br />
Cleaning the Spreader is Part of the Spreading Job.<br />
IMMEDIATELY AFTER USE - CLEAN AND OIL THE SPREADER<br />
• Method #1 - Wipe spreader thoroughly with an oily cloth. Oil all<br />
bearings and bearing areas.<br />
• Method #2 - Wash, rinse, and dry the spreader. Note: Drying<br />
takes time. (Moisture trapped in bearing areas is slow to go.)<br />
Immediately after drying - oil all bearings and moving parts. Make<br />
certain all operations are thorough.<br />
Note: Good “Dry Cleaning” is preferable to poor “Wet Cleaning”.<br />
• It is virtually impossible to have rust and corrosion on a clean, dry,<br />
oiled surface.<br />
• Again - just before using - oil all bearings and moving parts.<br />
• In storage, ideally the spreader should be hung by the handle. In<br />
any case, do not pile weight on the spreader, as excess weight over<br />
a period of time can distort the tires.<br />
“Accuway” Use Instructions.<br />
BALANCING THE SPREAD - A COMPLICATED PROBLEM WITH A SIMPLE SOLUTION<br />
HERE’S THE PROBLEM - IT’S THE VARIABLES<br />
It’s the VARIABLES. Each variable has it’s own spread pattern<br />
characteristics.<br />
It’s the VARIABLES. They’re transposed and mirrored in the Spread<br />
pattern.<br />
TRAVEL SPEED, HUMIDITY AND CONDITION OF PRODUCT ARE<br />
MAJOR FACTORS IN BALANCING THE SPREAD<br />
“To Every Action There Is Always An Opposed and Equal Reaction”<br />
(Newton’s law of motion - Sir Isaac Newton, 1642-1727.)<br />
Accuway - What It Does<br />
Read Before Using<br />
Accuway Spread Pattern Equalizer Balances the spread<br />
pattern - Bulls Eye - Dead to the Center of the Spreader. All<br />
products. All spreading conditions. Skewing is eliminated.<br />
Does not change the spread width.<br />
CAUTION: Never, never, never use the Accuway to split the product<br />
flow from the hopper to the spreading spinner.<br />
VARIABLES in product, weather, spreading equipment, spreader<br />
operator, etc., and combinations of variable elements produce<br />
VARIABLES in the spread pattern.<br />
• VARIABLES include product size, weight, shape, surface finish,<br />
hygroscopic or non hygroscopic composition, condition of product<br />
(exposure to humidity, temperature, etc.)<br />
• VARIABLES include spreading rate (light, medium, heavy).<br />
• VARIABLES include size, shape, design of spreading spinner.<br />
• VARIABLES include product dispensing on spreading spinner.<br />
• VARIABLES include condition of the spreader end the spreading<br />
spinner (product build up on the casting vanes, etc.)<br />
• VARIABLES include operator habits, fast or slow walking, tilting<br />
spreader forward or backward or operating spreader in a level<br />
attitude.<br />
Accuway - How It Works<br />
A turn of the spread pattern shifter dial factors the variables.<br />
Shifts the product placement on the spreading spinner.<br />
This in turn balances the spread pattern heavier to right or heavier to<br />
left as required.<br />
Adjustment is very sensitive. (Note the very fine threads on the<br />
Equalizer adjustment stem.)<br />
Viewed from the operators position<br />
To spread heavier left - move the ramp out.<br />
To spread heavier right - move the ramp in.<br />
17<br />
18
Read Before Using<br />
Grass Seed Spreading Chart<br />
The Accuway has two ramps. A front side and a back side ramp.<br />
The front side ramp 2 is used to shift the spread pattern to the right.<br />
The back side ramp 1 is used to shift the spread pattern to the left.<br />
NEVER, NEVER, NEVER USE ACCUWAY FRONT AND REAR RAMPS TO<br />
SPLIT THE PRODUCT FLOW. Use only the front side or the back side.<br />
With proper adjustment you should be able to achieve a balanced<br />
spread pattern.<br />
First - set the spread rate dial 3 .<br />
Now you are ready to balance the spread pattern.<br />
2<br />
Dial settings are approximate only. Spreading at one half rate in cross directions<br />
is usually recommended.<br />
Manufacturer<br />
and Product<br />
Manufacturer’s<br />
Bag Rate<br />
Lbs. per Sq. Ft.<br />
1000 Sq. Ft. Coverage<br />
Micro-Dial Settings<br />
Full Rate<br />
Once over<br />
Half rate<br />
Twice over<br />
Spread<br />
Width<br />
(In feet<br />
based on<br />
brisk walking)<br />
Bent Grass or Red Top 0.5# 1,000 1.25 4<br />
1# 1,000 2.0 4<br />
2# 1,000 2.5 4<br />
Park, Merion, Delta, or Kentucky Bluegrass 0.5# 1,000 2.5 4<br />
1# 1,000 3.0 4<br />
2# 1,000 3.5 4<br />
Hulled Bermuda 2# 1,000 2.75 2.25 6<br />
3# 1,000 3.0 2.5 6<br />
4# 1,000 3.25 2.75 6<br />
Mixtures including coarse seeds 2# 1,000 6.0 6<br />
4# 1,000 7.0 6<br />
6# 1,000 7.0 6<br />
A<br />
Note the relationship of the rate gate opening<br />
to the front side of the ramp.<br />
1<br />
Rye Grasses or Tall Fescue 2# 1,000 6.0 6<br />
4# 1,000 7.0 6<br />
6# 1,000 7.75 6<br />
Dichondra 4 oz. 1,000 1.9 8<br />
8 oz. 1,000 2.1 8<br />
12 oz. 1,000 2.5 8<br />
Pensacola Bahia 4# 1,000 4.5 3.75 7<br />
5# 1,000 4.75 4.0 7<br />
6# 1,000 5.0 4.25 7<br />
Granule Size - Dial Setting Guide<br />
Dial settings are approximate only.<br />
Product Lbs. per 1000 Sq. Ft. Full Rate Half Rate<br />
B<br />
Note the relationship of the rate gate opening<br />
to the back side of the ramp.<br />
3<br />
Fine Pellets<br />
Mixed Fine Pellets<br />
Small Pellets<br />
Nitrogen Pellets Med.<br />
Med. Pellets & Granules<br />
Med. Pellets<br />
Large Heavy Pellets<br />
1 3.6 3.1<br />
2 4.0 3.5<br />
3 4.2 3.7<br />
2 3.7 3.2<br />
4 4.7 4.1<br />
6 5.2 4.5<br />
2 3 2.2<br />
4 4.2 3.7<br />
6 4.5 4<br />
1 3.5 3<br />
2 4.2 3.7<br />
3 4.7 4<br />
2 3.5 3<br />
4 4.2 3.8<br />
6 5.2 4.5<br />
2 3.5 3<br />
4 4.2 3.8<br />
6 5.2 4.5<br />
2 3.8 3.3<br />
4 4.9 4.1<br />
6 5.9 4.9<br />
19<br />
20
Broadcast Spreading<br />
1 YEAR<br />
LIMITED WARRANTY<br />
Broadcast<br />
spreading is as<br />
old as early man.<br />
In the early days<br />
of agriculture,<br />
field seeding was<br />
accomplished<br />
with hand cast<br />
broadcasting. The<br />
hand cast method<br />
of seeding was a<br />
limited factor in<br />
growing field<br />
crops that were<br />
hand seeded.<br />
Mechanized casting<br />
came into<br />
being in 1868<br />
when Samuel<br />
Speicher invented<br />
the Hand Crank<br />
"Cyclone" Seeder.<br />
The seed sower<br />
was a breakthrough<br />
in field<br />
seeding. It was<br />
hailed as a major<br />
advancement in<br />
agricultural implements.<br />
Paul Speicher put<br />
the hand crank<br />
seeder on wheels<br />
in 1955.<br />
This development<br />
ushered in a new<br />
era in spreading<br />
and spreading<br />
products. New<br />
products and<br />
product forms<br />
adapted to broadcast<br />
spreading<br />
were developed.<br />
Did You Know?<br />
In 1988 a new<br />
dimension was<br />
added to broadcast<br />
spreading -<br />
SPREAD PATTERN<br />
CONTROL - a dead<br />
center spread pattern<br />
equalizer.<br />
Spyker's Accuway ®<br />
spread pattern<br />
equalizer solves a<br />
complicated problem<br />
with a fundamental<br />
patented<br />
solution.<br />
THERE'S MORE TO A SPREADER THAN MEETS THE EYE –––<br />
LOTS MORE<br />
Spreadability - Dial-a-matic regulator ensures exact spread rate.<br />
Accuway ® Spread Pattern Equalizer assures exact placement of the<br />
spread pattern - Bull's Eye - dead to the center of the spreader. All<br />
products - All spreading conditions. Skewing is eliminated.<br />
Durability - 70 & 90 Series spreaders will survive use and abuse.<br />
Welded steel construction is double braced, finished in baked on epoxy<br />
enamel. Generous use of highest quality stainless steel. Guaranteed<br />
metal gears.<br />
Reliability - You can count on.<br />
Accuway ® spread control system is so innovative, it's patented. Is so<br />
successful it's used on all Spyker 70 & 90 Series spreaders. Is so<br />
simple. A complicated problem is solved with a fundamental solution.<br />
(Newton's law of motion: To every action there is always an opposed<br />
and equal reaction.)<br />
This is warranted to the original purchaser only. Spyker will<br />
replace parts with defects in materials or workmanship, for a<br />
period of one year from the date of purchase.<br />
*For Spyker Spreaders LLC, products employing metal gear<br />
systems, pinion and bevel, these metal gears, only, not inclusive<br />
of any other parts or materials, are warranted for the life of<br />
the spreader, not to be used for replacement or repair past<br />
original purchase.<br />
Spyker Spreaders LLC will not be liable for any loss, damage<br />
or expense including, but not limited to, consequential or<br />
incidental damages, arising from the operation, condition or use<br />
of the item. The sole and exclusive remedy against Spyker<br />
Spreaders LLC being the replacement of the defective parts.This<br />
warranty gives you specific legal rights, and you may also have<br />
other rights which vary from state to state.<br />
THIS EXPRESS WARRANTY, WHICH IS APPLICABLE ONLY TO<br />
THE ORIGINAL PURCHASE, IS IN LIEU OF AND EXCLUDES ALL<br />
OTHER WARRANTIES, WHETHER EXPRESSED OR IMPLIED BY<br />
OPERATION OF LAW OR OTHERWISE, INCLUDING ANY<br />
WARRANTY OF MERCHANTABILITY OR FITNESS FOR<br />
PARTICULAR PURPOSE.<br />
SPYKER SPREADERS LLC<br />
P.O. Box 7 • Urbana, IN 46990 USA<br />
Serviceability - 24 hour replacement parts service available direct<br />
from the factory. 70 & 90 Series spreaders shipped set up except<br />
hand hold/bump bar and push handle or tractor pull bar.<br />
21