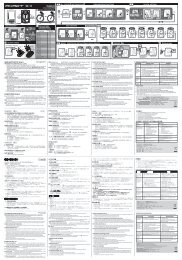
RideSync Training Software - Giant Bicycles
RideSync Training Software - Giant Bicycles
RideSync Training Software - Giant Bicycles

Create successful ePaper yourself
Turn your PDF publications into a flip-book with our unique Google optimized e-Paper software.
<strong>Training</strong> <strong>Software</strong><br />
Installation and Setup User Manual
CONTENTS<br />
Introduction 3<br />
Installation 4<br />
First Setup Assistance 6<br />
- Adjust personal settings<br />
- Adjust heart rate zone<br />
- Adjust measuring units<br />
- Chart view mode<br />
Home Screen 10<br />
Device Screen 11<br />
- Device based & File based<br />
- Import device<br />
- Setup device<br />
- Import rawdata file<br />
- Import <strong>RideSync</strong> exercise file<br />
Calendar Screen 14<br />
- Calendar View<br />
- Month View<br />
- Day View<br />
- <strong>Training</strong> Diary<br />
<strong>Training</strong> Screen 16<br />
Activities<br />
- Daily Info<br />
- Open Diary (today)<br />
- Open Diary (current exercise)<br />
- Last Week<br />
Analyzing (current)<br />
- Exercise View<br />
- Histogram<br />
- Lap Summary<br />
- Open Compare Selection Dialog<br />
Export<br />
- Exercise to Excel<br />
- Exercise to Text File<br />
- File file Export Plugin<br />
Report Screen 19<br />
Tools Screen 20<br />
- Heart rate Calculator<br />
- Pace Converter<br />
- Database Explorer<br />
- Backup Restore Center<br />
Settings Screen 21<br />
Preferences<br />
- Measuring Units<br />
- Views<br />
- Language<br />
- Operation<br />
- Device<br />
- File Location<br />
User Configuration<br />
Open/ Save file 23<br />
<strong>Software</strong> Version 23<br />
<strong>Giant</strong> <strong>RideSync</strong> <strong>Training</strong> <strong>Software</strong> User Manual<br />
Basic Instruction Version 3.0.3.2284(1.0)
INTRODUCTION 3<br />
Welcome to <strong>Giant</strong> <strong>RideSync</strong> personal training software. Using the Device setup window, you can quickly setup your Neos PRO via the PC-link dock, and<br />
download your recorded data. <strong>RideSync</strong> can analyze your ride data into graphs and charts and manage your personal training schedule. <strong>RideSync</strong> was<br />
designed to assist your training with visual analysis to your performance data.<br />
Note: <strong>RideSync</strong> only supports Microsoft Windows XP, Windows Vista and Windows 7 operating systems.
INSTALLATION 4<br />
Download the <strong>Giant</strong> <strong>RideSync</strong> install software from<br />
www.<strong>Giant</strong>bicycle.com and follow the instructions with the install wizard.<br />
Select your default language, then click OK:<br />
Read the License Agreement and choose I accept the agreement, then<br />
click Next.<br />
Click Next on the Welcome screen:<br />
You can use the default installation location (recommended) or to install<br />
to a different location. Click Browse, then select the location on your<br />
computer. Click next.
INSTALLATION 5<br />
Select Full installation and make sure both options (Additional Plugins<br />
and Neos pro USB Interface Driver Files) are checked, and go Next.<br />
During the installation, you can select whether you want to install the<br />
additional Desktop or Quick Launch icons.<br />
Select Start Menu Folder or choose Browse to select folder you want<br />
<strong>RideSync</strong> to place the shortcuts, and go Next.<br />
A window reviewing all of the previous selections will pop up, to begin<br />
the installation, click Install.
INSTALLATION / FIRST SETUP ASSISTANCE 6<br />
Once the installation process is complete, you will need to install the<br />
required drivers. Confirm that the box next to ‘Do you want to install the<br />
Neos Pro interface driver now?’ is checked, then click Finish.<br />
When you first launch <strong>RideSync</strong>, the First Time Welcome Message<br />
should appear. Select ‘Yes (Open First Step Wizard)’ to begin setting up<br />
your profile.<br />
To the process of installing the required Bridge Driver, click “install”<br />
If the First Time Welcome Message does not appear, click the <strong>Giant</strong><br />
button at the top left and move to > Help > click on First Setup<br />
Assistance.<br />
Congratulations <strong>RideSync</strong> <strong>Training</strong> <strong>Software</strong> is now installed on your<br />
computer. To launch the program, and begin setting up your profile,<br />
double-click the <strong>RideSync</strong> icon in the start menu or on your desktop (if<br />
you selected this option during the installation process).
FIRST SETUP ASSISTANCE / ADJUST PERSONAL SETTINGS 7<br />
Follow the First Steps Wizard to setup the initial user information.<br />
Create a new user name, then click OK. Begin entering your user<br />
information and profile.<br />
Open User administration.<br />
In User Configuration, setup your birth date, gender, height, Goal<br />
weight, Resting HR, Maximum HR, and <strong>Training</strong> hours per day and<br />
HR-zones. You can also add a profile image by clicking Assign user<br />
image (top right corner).<br />
NOTE: You must setup a user profile before you can begin downloading<br />
data from your Neos Pro computer, to <strong>RideSync</strong>.
ADJUST HEART RATE ZONE 8<br />
In HR-zone setting, you can set up your HR zone range or use HR<br />
Calculator to automatically adjust your values for you. This area helps<br />
you manage your training zones.<br />
Next, click Apply HR Zones, then select the diagram tab either Age<br />
formula or Karvonen formula based zones.<br />
The Karvonen method of calculating your exercise heart rate is considered the gold standard,<br />
benefiting athletes, or people who are looking for weight loss and fitness improvement.<br />
As you become more fit, your heart becomes more efficient at pumping blood to the rest of the<br />
body. When resting, the number of beats per minute slows down. The Karvonen calculation,<br />
devised by a Scandinavian physiologist, takes this into consideration by introducing a number<br />
called the heart rate reserve into the equation—the difference between your maximal heart rate<br />
and your resting heart rate.<br />
Clicking on the Diagram tab also displays the Warning Zone, Anaerobic<br />
Zone, Aerobic Zone, Fatburning Zone and Healthy Zone.<br />
If you selected HR Calculator, insert the values of MHF (Max Heart<br />
Rate), RHF (Resting Heart Rate) and Age on the Calculation tab.
ADJUST MEASURING UNITS / CHART VIEW MODE 9<br />
In Measuring Units, click open Units configuration page...<br />
In the Chart View Mode section, select your preferred mode to display<br />
charts; Split mode or Altitude mode, then click Next.<br />
Choose Metric or Imperial units for Speed and Length<br />
(Distance/Speed/Altitude/Body Height), then choose Celsius (℃) or<br />
Fahrenheit (℉) for Temperature and finally choose kg or lb for Weight.<br />
Click OK.<br />
Congratulations! You have finished the First Setup Assistance wizard.<br />
Click Finish to begin using <strong>RideSync</strong>.
HOME SCREEN 10<br />
Your Home screen is your dashboard for <strong>RideSync</strong> and provides quick access to all of your training information. Customize it by selecting the Widgets<br />
drop down menu in the top right corner and selecting which information you would like to be displayed.
DEVICE SCREEN 11<br />
The Device screen is where you connect and interface with your <strong>Giant</strong> Neos Pro computer. There are two sections on the Device screen:<br />
Device based: Import device and Setup device (import the recorded data from computer to PC and setup the computer<br />
device from quick setup window)<br />
File based: Export raw data file and Export exercise file. Here is where you can export information from your PC/desktop<br />
directly to your <strong>Giant</strong> Neos Pro computer.
DEVICE SCREEN: IMPORT DEVICE / SETUP DEVICE 12<br />
This function is for importing the recorded data from <strong>Giant</strong> Neos<br />
Computer unit via the PC-link USB dock, to your PC.<br />
Setup Device<br />
This section allows users to quickly and easily setup their computer<br />
preferences and settings from one area–transferring the settings to your<br />
<strong>Giant</strong> Neos Pro when you are complete.<br />
Once you have setup your preferences and other settings, connect your<br />
Neos Pro computer using the PC Link USB cable.<br />
Wait until the LCD screen shows PC LINK, then select Transfer<br />
Settings. You can also delete the recorded data by clicking Clear<br />
Memory.<br />
Make sure the computer unit is firmly connected on PC-link USB dock<br />
and click Import Device. When a connection is made with your PC, PC<br />
LINK will display. If your <strong>Giant</strong> Neos Pro computer is not transferring<br />
data, make sure it is not in sleep mode. To wake it up, click any button<br />
on your <strong>Giant</strong> Neos Pro, data should begin immediately.<br />
Click the box Erase data after transfer if you want to erase the recorded<br />
data on <strong>Giant</strong> Neos Pro computer, after transfer.
DEVICE SCREEN: IMPORT RAWDATA FILE OR RIDESYNC EXERCISE FILE<br />
13<br />
If you have files on your on your computer that you would like to import into your <strong>RideSync</strong> program, you can use these functions to import files directly<br />
into <strong>RideSync</strong>. Select Import raw data file, locate the file on your computer and select Open.
CALENDAR SCREEN 14<br />
The Calendar screen allows users to have a full picture of their calendar year training schedule. As you import more ride data into <strong>RideSync</strong>, your<br />
Calendar will serve as a great area to get a quick glance of weekly training hours, overall mileage and better help manage your training regime.<br />
Calendar View shows an exploded calendar year view of your<br />
training.<br />
Day View shows a complete hourly breakdown of your day. This<br />
feature is great for those double day training days and for reviewing<br />
the optimal workout times. By viewing time-stamped workouts in the<br />
Daily View, you can review your information to understand when you<br />
are the most efficient.<br />
Month View shows your training by month giving you a quick<br />
overview of your efforts and snapshot of rest days as well as other<br />
critical training information. Use the arrows in left/right side of the<br />
calendar to flip between months.
CALENDAR: TRAINING DIARY 15<br />
Want to get a look into your training data downloaded from your Neos<br />
Pro? In Month View, find the date that you are looking to analyze.<br />
Next, select the top right icon for the exercise file. This will bring up the<br />
<strong>Training</strong> Diary window showing a complete breakdown of your workout,<br />
including all necessary information for analysis, including:<br />
1. Rider profile (weight, HR, mood setting, etc.)<br />
2. Weather conditions<br />
3. Complete overview of Activity Data<br />
4. Heart rate Zone analysis<br />
In the <strong>Training</strong> Diary screen, you can also view a complete histogram<br />
chart view of your workout by selecting the bottom left corner graph<br />
icon. This icon will open up to a chart view of all your exercise data<br />
captured points, for analysis.
TRAINING SCREEN: ACTIVITIES 16<br />
The <strong>Training</strong> Screen consists of 3 sections: Activities, Analyzing<br />
(current), and Export.<br />
In Activities, the Daily Info section gives users the ability to see their<br />
daily training information.<br />
The Open Diary (today) & Open Diary (current exercise) sections<br />
provide the ability to edit and analyze your training information within the<br />
Diary View.
TRAINING SCREEN: ANALYZING<br />
17<br />
In Analyzing View, you can track and analyze all the relevant information<br />
to your specific training goals. View complete workouts or sections of a<br />
workout (by highlighting an area of that workout).<br />
In Analyzing (current), you can view your Exercise and Histogram in<br />
Heart rate, Speed, Power, Cadence, Climbing rate, and Slope. You can<br />
choose Split View and Altitude View. You also can view Lap Summary,<br />
and Open compare selection Dialog to compare selected excises.<br />
Lap Summary allows you to view each lap separately, in detail. Choose<br />
Comparison Chart you can view the Lap Speed Comparison, Lap<br />
Distance Comparison, Lap Time Comparison, Lap Altitude Comparison,<br />
and Lap Vertical Speed Comparison by selecting the icons at left<br />
bottom. Click OK return the <strong>Training</strong> Page.<br />
Note: you must have recorded multiple laps on your <strong>Giant</strong> Neos Pro<br />
computer. If you do not have laps recorded, the software will baseline<br />
your data as one complete lap.<br />
In Analyzing (current), you can view your data by Histograms or<br />
Distributions diagrams. Click OK at right bottom to return the <strong>Training</strong><br />
Page.
TRAINING SCREEN: EXPORT 18<br />
In the Export section, you can export the data into an Excel file, or save data as a TXT file or FIT Plugin file format.
REPORT SCREEN 19<br />
In the Report screen, you can view the summary of exercise individually in Summary View, or review different diagrams in Report View by selecting one<br />
of the following categories: Person & Health, Weather, <strong>Training</strong> Time, Distance, Speed, Performance, Calories, Ascend, Descend.
TOOLS SCREEN 20<br />
In the Tools screen, you can use the Heart Rate Calculator to identify<br />
your optimum heart rate zones.<br />
You can also use the Database Explore section where you can view all<br />
of your exercises and delete selected exercises.<br />
Or you can use the Pace Converter to convert the data of bike speed<br />
and walk minutes.<br />
Using the Backup Restore Center, you can backup your User Database<br />
and System Environment.
SETTINGS SCREEN: PREFERENCES 21<br />
In Preferences > Measuring Units. Select your preferred<br />
Distance/speed/altitude unit, Temperature unit and weight unit.<br />
In Preferences > Language, select your desired language (please make<br />
sure the language is the same as your operating system). Close and<br />
restart <strong>RideSync</strong> after any changes are made to the language settings.<br />
In Preferences > Views, you can customize the indicators shown in the<br />
Calendar view and Start mode.<br />
In Preferences > Operation, setup the Operation mode; Novice,<br />
Advanced, or Expert.
SETTINGS SCREEN: PREFERENCES 22<br />
In Preferences > Device, you can customize the device options after<br />
data transfer.<br />
You can always edit the user information in User Configuration and<br />
create or delete users using the icons at the top left corner. Add your<br />
personal photo or images using the icons on the right.<br />
Note: You must have at least one user profile to run <strong>RideSync</strong> software.<br />
In Preference> File Location, you can setup the file location in Database<br />
Folder and User Folder.
OPEN / SAVE FILES 23<br />
On the top left corner <strong>Giant</strong> logo button, you can open, save, save as<br />
files, or export your data files. You can even send the data via e-mail to<br />
yourself or a coach.<br />
Open the top left corner <strong>Giant</strong> logo button, select Help > Version<br />
checkup to view the of software version.<br />
For any question regarding <strong>RideSync</strong>, please contact your local dealer<br />
or visit the <strong>Giant</strong> <strong>Bicycles</strong> website: www.giant-bicycle.com
© 2012 <strong>Giant</strong> Bicycle Inc—ALL RIGHTS RESERVED