SPOT REPAIRS WITH AUTOBASE PLUS ? THREE STEP PROCESS
SPOT REPAIRS WITH AUTOBASE PLUS ? THREE STEP PROCESS
SPOT REPAIRS WITH AUTOBASE PLUS ? THREE STEP PROCESS

You also want an ePaper? Increase the reach of your titles
YUMPU automatically turns print PDFs into web optimized ePapers that Google loves.
TECHNICAL DATA SHEET<br />
Page 1 of 8<br />
April 2004<br />
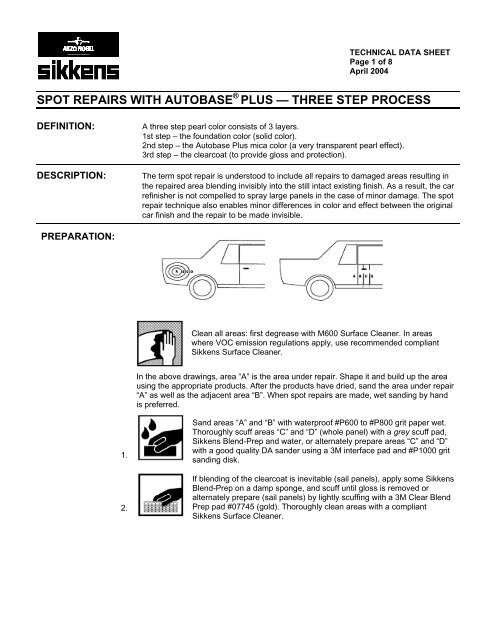
<strong>SPOT</strong> <strong>REPAIRS</strong> <strong>WITH</strong> <strong>AUTOBASE</strong> ® <strong>PLUS</strong> — <strong>THREE</strong> <strong>STEP</strong> <strong>PROCESS</strong><br />
DEFINITION:<br />
DESCRIPTION:<br />
A three step pearl color consists of 3 layers.<br />
1st step – the foundation color (solid color).<br />
2nd step – the Autobase Plus mica color (a very transparent pearl effect).<br />
3rd step – the clearcoat (to provide gloss and protection).<br />
The term spot repair is understood to include all repairs to damaged areas resulting in<br />
the repaired area blending invisibly into the still intact existing finish. As a result, the car<br />
refinisher is not compelled to spray large panels in the case of minor damage. The spot<br />
repair technique also enables minor differences in color and effect between the original<br />
car finish and the repair to be made invisible.<br />
PREPARATION:<br />
Clean all areas: first degrease with M600 Surface Cleaner. In areas<br />
where VOC emission regulations apply, use recommended compliant<br />
Sikkens Surface Cleaner.<br />
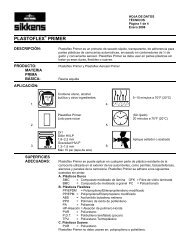
In the above drawings, area “A” is the area under repair. Shape it and build up the area<br />
using the appropriate products. After the products have dried, sand the area under repair<br />
“A” as well as the adjacent area “B”. When spot repairs are made, wet sanding by hand<br />
is preferred.<br />
1.<br />
2.<br />
Sand areas “A” and “B” with waterproof #P600 to #P800 grit paper wet.<br />
Thoroughly scuff areas “C” and “D” (whole panel) with a grey scuff pad,<br />
Sikkens Blend-Prep and water, or alternately prepare areas “C” and “D”<br />
with a good quality DA sander using a 3M interface pad and #P1000 grit<br />
sanding disk.<br />
If blending of the clearcoat is inevitable (sail panels), apply some Sikkens<br />
Blend-Prep on a damp sponge, and scuff until gloss is removed or<br />
alternately prepare (sail panels) by lightly scuffing with a 3M Clear Blend<br />
Prep pad #07745 (gold). Thoroughly clean areas with a compliant<br />
Sikkens Surface Cleaner.
TECHNICAL DATA SHEET<br />
Page 2 of 8<br />
April 2004<br />
<strong>SPOT</strong> <strong>REPAIRS</strong> <strong>WITH</strong> <strong>AUTOBASE</strong> ® <strong>PLUS</strong> — <strong>THREE</strong> <strong>STEP</strong> <strong>PROCESS</strong><br />
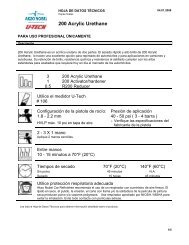
APPLICATION OF <strong>AUTOBASE</strong> <strong>PLUS</strong><br />
(THE FOUNDATION COLOR):<br />
1.<br />
Contains acrylic resins and<br />
other ingredients. When<br />
mixed, also contains<br />
isocyanates<br />
TO COMPLY<br />
<strong>WITH</strong><br />
NATIONAL<br />
RULE VOC<br />
LEVELS.<br />
2.<br />
100:10<br />
Autobase Plus (foundation)<br />
Sikkens Standard Hardener<br />
or Sikkens XP Hardener<br />
To comply with National Rule VOC<br />
levels. Add 10 % hardener.<br />
100 parts by volume Autobase Plus<br />
10 parts by volume Sikkens<br />
Standard or XP Hardener.<br />
3.<br />
Use the Measuring Stick<br />
# 14 (Blue)<br />
After adding hardener,<br />
Stir the mixture and continue to<br />
mix as follows<br />
4.<br />
100:50<br />
Autobase Plus (foundation)<br />
Autobase Plus Reducer<br />
Mixing Ratio:<br />
100 parts by volume Autobase Plus<br />
50 parts by volume Autobase Plus<br />
Reducer Fast or Medium<br />
Use the Measuring Stick<br />
#1 (Black)<br />
5.<br />
6.<br />
2x1<br />
HVLP Siphon<br />
0.071"–0.087" (1.8–2.2 mm)<br />
HVLP Gravity<br />
0.051"–0.059" (1.3–1.5 mm)<br />
Max 10 psi (max 0.8 bar)<br />
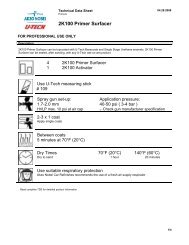
Application Method:<br />
Spray single coats of Autobase Plus<br />
in area "A", extending slightly<br />
beyond previous coats until opacity<br />
is achieved.<br />
7.<br />
3–5 minutes at 70°F (20°C) Flash 3–5 minutes and tack between<br />
each coat.
TECHNICAL DATA SHEET<br />
Page 3 of 8<br />
April 2004<br />
<strong>SPOT</strong> <strong>REPAIRS</strong> <strong>WITH</strong> <strong>AUTOBASE</strong> ® <strong>PLUS</strong> — <strong>THREE</strong> <strong>STEP</strong> <strong>PROCESS</strong><br />
BLENDING<br />
THE<br />
FOUNDATION<br />
COLOR:<br />
8.<br />
Prior to applying the fade out coats, add to the ready to spray color 100 parts by volume<br />
reduced Autobase Plus Pearl Color using the 1 to 1 mixture of Autobase Plus Solid Color<br />
with Autobase Plus Pearl Color. This will make the foundation color transparent,<br />
facilitating a more uniform blend with the foundation color.<br />
100:100<br />
Autobase Plus foundation<br />
color, ready to spray.<br />
Autobase Plus pearl color<br />
ready to spray<br />
Add the reduced Autobase Plus<br />
Pearl Color to the ready to spray<br />
Autobase Plus foundation color, ratio<br />
100:100.<br />
9.<br />
1–2x1<br />
HVLP Siphon<br />
0.071"–0.087" (1.8–2.2 mm)<br />
HVLP Gravity<br />
0.051"–0.059" (1.3–1.5 mm)<br />
Max 10 psi (max 0.8 bar)<br />
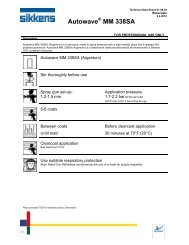
With this transparent foundation<br />
color, spray 1 to 2 thin coats.<br />
Extending beyond the repair area,<br />
gradually fading out into area “C”.<br />
Allow for flash-off between coats.<br />
A.<br />
OPTIONAL FADEOUT<br />
100:50<br />
Autobase Plus Mix<br />
Autobase Plus Blending<br />
Additive<br />
For final blending, add to this mix,<br />
50 parts by volume Autobase Plus<br />
Blending Additive.<br />
B.<br />
1x1<br />
Spray a final fade out coat only in<br />
area “C”.<br />
APPLICATION CONTINUED:<br />
10.<br />
11.<br />
15–20 minutes at 70°F (20°C)<br />
Apply Autobase Plus Pearl<br />
Color.<br />
Allow the foundation color to dry for<br />
15–20 minutes before applying the<br />
pearl coat color.<br />
Note: It is very important that this<br />
foundation color is as invisible as<br />
possible before proceeding with the<br />
Autobase Plus pearl coat color.
TECHNICAL DATA SHEET<br />
Page 4 of 8<br />
April 2004<br />
<strong>SPOT</strong> <strong>REPAIRS</strong> <strong>WITH</strong> <strong>AUTOBASE</strong> ® <strong>PLUS</strong> — <strong>THREE</strong> <strong>STEP</strong> <strong>PROCESS</strong><br />
APPLICATION OF <strong>AUTOBASE</strong> <strong>PLUS</strong><br />
(PEARL COLOR):<br />
100:50<br />
Autobase Plus Pearl Color<br />
Autobase Plus Reducer<br />
Medium<br />
1.<br />
Mixing Ratio:<br />
100 parts by volume Autobase Plus<br />
pearl color<br />
50 parts by volume Autobase Plus<br />
Reducer, Medium<br />
2.<br />
Use the Sikkens<br />
Measuring Stick #1 (Black).<br />
3.<br />
4.<br />
3–4x1<br />
HVLP Siphon<br />
0.071"–0.087" (1.8–2.2 mm)<br />
HVLP Gravity<br />
0.051"–0.059" (1.3–1.5 mm)<br />
Max 10 psi (max 0.8 bar)<br />
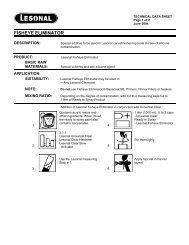
Application Method:<br />
Spray 3–4 even, thin coats of pearl.<br />
Alternate the spraying area with<br />
each coat.<br />
Start application well within<br />
foundation color, then wider, then<br />
within foundation color, wider, etc.<br />
The last coats should extend well<br />
from the foundation color, fading into<br />
area "D".<br />
2–3 minutes at 70°F (20°C) NOTE: Do not spray a drop coat.<br />
5.<br />
15–20 minutes at 70°F (20°C)<br />
6.<br />
Apply clear coat<br />
7.<br />
NOTE:<br />
Do not add extra reducer to the Autobase Plus Pearl Color. Fade out as described<br />
above. After each application, remove dry overspray with a tack rag.
TECHNICAL DATA SHEET<br />
Page 5 of 8<br />
April 2004<br />
<strong>SPOT</strong> <strong>REPAIRS</strong> <strong>WITH</strong> <strong>AUTOBASE</strong> ® <strong>PLUS</strong> — <strong>THREE</strong> <strong>STEP</strong> <strong>PROCESS</strong><br />
APPLICATION<br />
OF <strong>AUTOBASE</strong> <strong>PLUS</strong><br />
<strong>THREE</strong>-<strong>STEP</strong><br />
METALLIC COLORS: As the application of 3-step metallic colors is very similar to that of a 3-step pearl color spot<br />
repair, we will not repeat every aspect of the process but will highlight the major differences<br />
of the process.<br />
After adding hardener, mix the metallic foundation color 100 parts by volume to 50 parts by<br />
volume of Autobase Plus Reducer.<br />
BLENDING THE<br />
FOUNDATION<br />
COLOR:<br />
Apply single coats in area A until opacity is achieved. Extend each coat slightly beyond<br />
the previous one. (Do not make any attempt at fade-out yet.)<br />
1.<br />
2.<br />
100:100<br />
Autobase Plus foundation<br />
color, Ready to Spray<br />
Autobase Plus mid-coat<br />
color, Ready to Spray<br />
2x1<br />
Mixing Ratio:<br />
Reduce the mid-coat color 100 parts color<br />
to 50 parts Autobase Plus Reducer. Add<br />
this ready-to-spray mid-coat color to the<br />
ready-to-spray foundation color at a ratio<br />
of one to one.<br />
Application Method:<br />
With this “tinted” transparent foundation<br />
color, spray 2 medium coats. Extend<br />
beyond the first coats of foundation color,<br />
gradually fading out into area C.<br />
3.<br />
15–20 minutes<br />
at 70°F (20°C)<br />
Allow this tinted foundation color to dry to<br />
15-20 minutes before applying the (red)<br />
mid-coat color.<br />
APPLICATION OF<br />
<strong>AUTOBASE</strong> <strong>PLUS</strong><br />
(MID COAT):<br />
1.<br />
3–4x1<br />
Mix the mid-coat color 100:50 and apply<br />
3–4 medium wet coats, allowing a flashoff<br />
time of 5–10 minutes between coats.<br />
Do not overlap in the same areas.<br />
2.<br />
Apply Autocoat III or<br />
Autoclear III<br />
Allow the Autobase Plus mid-coat color to<br />
flash/dry for 15-20 minutes before<br />
applying clearcoat.
TECHNICAL DATA SHEET<br />
Page 6 of 8<br />
April 2004<br />
<strong>SPOT</strong> <strong>REPAIRS</strong> <strong>WITH</strong> <strong>AUTOBASE</strong> ® <strong>PLUS</strong> — <strong>THREE</strong> <strong>STEP</strong> <strong>PROCESS</strong><br />
ALTERNATE <strong>PROCESS</strong> USING<br />
<strong>AUTOBASE</strong> <strong>PLUS</strong> BLENDING<br />
ADDITIVE AS A CLEAR<br />
FOUNDATION: It is also possible, prior to repairing Autobase Plus (three-stage process), to spray 1<br />
single coat of Autobase Plus Blending Additive. Flash off for 3–5 minutes, and then follow<br />
directions on “Spot Repairs with Autobase Plus–Three Stage Process”.<br />
Using Autobase Plus Blending Additive, as a clear foundation coat for fade-out<br />
areas will result in an easier blend as far as color, flip tone and effect are concerned.<br />
APPLICATION OF<br />
CLEARCOAT:<br />
Autobase Plus is sufficiently dry to clearcoat after 15-20 minutes at 70ºF (20ºC).<br />
Tack the entire repair area and clearcoat with Autoclear III Autoclear HS + or Autoclear<br />
Vision HS.<br />
Note: Refer to Autoclear III, Autoclear HS + or Autoclear Vision HS technical data<br />
sheets.<br />
Example, Autoclear III:<br />
1.<br />
2.<br />
Contains acrylic resins.<br />
When mixed, Autoclear III<br />
also contains isocyanates.<br />
100:50:30<br />
Autoclear III<br />
Sikkens Standard Hardener<br />
Sikkens Production Activator<br />
Mixing Ratio:<br />
100 parts by volume Autoclear III<br />
50 parts by volume Sikkens Standard Hardener<br />
30 parts by volume Sikkens Production Activator<br />
3.<br />
4.<br />
Use the Measuring<br />
Stick #1 (Black).<br />
2–3x1<br />
HVLP Siphon<br />
0.071"–0.087" (1.8–2.2 mm)<br />
HVLP Gravity<br />
0.051"–0.059" (1.3–1.5 mm)<br />
Max 10 psi (max 0.8 bar)<br />
Application Method:<br />
Spray 2 to 3 single coats of Autoclear III, the last<br />
coat over entire panel. Allow 5 minutes flash time<br />
after each coat. Limit the application of coats right<br />
next to an adjacent panel.<br />
5.<br />
5 minutes at 70°F (20°C)<br />
6.<br />
7 hours at 70°F (20°C)<br />
20 minutes at 140°F (60°C)
TECHNICAL DATA SHEET<br />
Page 7 of 8<br />
April 2004<br />
<strong>SPOT</strong> <strong>REPAIRS</strong> <strong>WITH</strong> <strong>AUTOBASE</strong> ® <strong>PLUS</strong> — <strong>THREE</strong> <strong>STEP</strong> <strong>PROCESS</strong><br />
BLENDING OF<br />
CLEARCOAT:<br />
Akzo Nobel Coatings/Sikkens strongly recommends the application of clear coat over the<br />
whole panel that is thoroughly prepared. Clear coating of entire panel is required for lifetime<br />
warranty.<br />
There are, however, instances where this is not practical. Such as repairs on older vehicles<br />
where economics would dictate that a warranty is not required. In these instances, it may be<br />
acceptable to blend the clearcoat into a small area such as a rocker panel or sail panel,<br />
vertical areas only. This procedure is not warranteed or OE approved.<br />
For Autoclear III: Procedures listed below should also be used for Autoclear HS +. Refer to<br />
your local VOC regulations for “Specialty Coating” compliance.<br />
1.<br />
100:50<br />
Autoclear III, ready to spray<br />
Reducer SRA 7.0<br />
Application Method:<br />
When blending of the clear is inevitable.<br />
After the last coat of clear is sprayed, add<br />
50 parts by volume of Reducer SRA 7.0.<br />
2.<br />
3.<br />
Use the Sikkens Measuring<br />
Stick # 1 (black).<br />
1x1<br />
HVLP Siphon<br />
0.071"–0.087" (1.8–2.2 mm)<br />
HVLP Gravity<br />
0.051"–0.059" (1.3–1.5 mm)<br />
Max 10 psi (max 0.8 bar)<br />
Hard line the last coat of clear into the<br />
prepared area (sail panel), keeping a<br />
sharp blend line.<br />
4.<br />
5.<br />
Reducer SRA 7.0<br />
Ready to spray<br />
2x1<br />
HVLP 10 psi (max 0.8 bar)<br />
Conventional. 20–30 psi<br />
(1.3–2.0 bar)<br />
Use pure Reducer SRA 7.0 to dissolve<br />
overspray edge.<br />
Spray 1 thin coat.<br />
Flash for 15 seconds.<br />
Apply a final thin coat.
TECHNICAL DATA SHEET<br />
Page 8 of 8<br />
April 2004<br />
<strong>SPOT</strong> <strong>REPAIRS</strong> <strong>WITH</strong> <strong>AUTOBASE</strong> ® <strong>PLUS</strong> — <strong>THREE</strong> <strong>STEP</strong> <strong>PROCESS</strong><br />
AFTER<br />
TREATMENT:<br />
NOTE:<br />
After the repair area is completely dry, the fade out area (if any) may be polished<br />
with an ultra-fine polishing compound and waxed. (Please see dry to polish time of<br />
the products used.)<br />
Please refer to the following Technical Data Sheets for more information.<br />
—Autobase Plus Solid, Metallic and Pearl Colors<br />
—Autobase Plus Blending Additive<br />
—Sikkens Reducer SRA 7.0<br />
—Autoclear III<br />
—Autoclear HS +<br />
—Autoclear Vision HS<br />
SAFETY ASPECTS:<br />
READY TO<br />
SPRAY VOC: -Autobase Plus 100:50 6.5 lb/gal. 780 g/liter<br />
-Autobase Plus with 10% hardener,<br />
then 100 :50 with Autobase Plus Reducers : 6.3 – 6.4 lb/gal. 756 - 768 g/liter<br />
NOTICE:<br />
Do not handle until the Material Safety Data Sheets have been read and<br />
understood. Regulations require that all employees be trained on Material Safety<br />
Data Sheets for all chemicals with which they come in contact. The manufacturer<br />
recommends the use of an air-supplied respirator when exposed to vapors or spray<br />
mist.