Tempo Man - Giant Bicycles
Tempo Man - Giant Bicycles
Tempo Man - Giant Bicycles

Create successful ePaper yourself
Turn your PDF publications into a flip-book with our unique Google optimized e-Paper software.
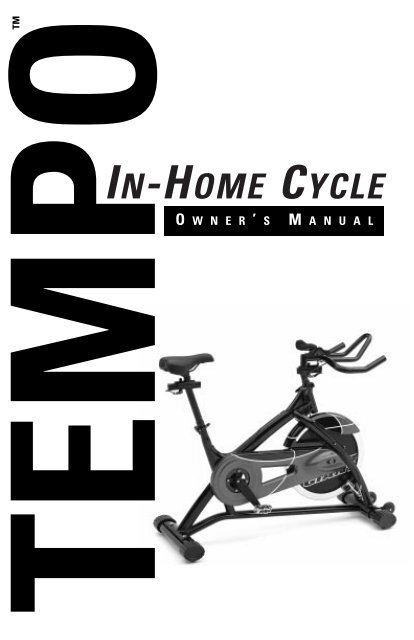
TEMPO<br />
<br />
IN-HOME CYCLE<br />
O W N E R ’ S<br />
M A N U A L
T A B L E O F C O N T E N T S<br />
Introduction......................................................................................................................Page 1<br />
Safety Tips .......................................................................................................................Page 2<br />
Special Features ..............................................................................................................Page 3<br />
1) Installation and Adjustment ........................................................................................Page 4<br />
A. Positioning <strong>Tempo</strong><br />
B. Setting Up Your <strong>Tempo</strong><br />
C. Adjusting <strong>Tempo</strong><br />
D. Moving your <strong>Tempo</strong><br />
2) Using Your <strong>Tempo</strong>.....................................................................................................Page 5<br />
3) Maintenance of Your <strong>Tempo</strong> ....................................................................................Page 6<br />
4) <strong>Giant</strong> Indoor Cycling Equipment Limited Warranty.....................................................Page 6
I N T R O D U C T I O N<br />
<strong>Giant</strong> <strong>Tempo</strong> Indoor Exercise Bicycle<br />
Congratulations. You have purchased one of the finest indoor exercise bicycles made; the <strong>Giant</strong> <strong>Tempo</strong><br />
indoor exercise bicycle. Whether you want to maintain your cycling form or improve your physical<br />
fitness, <strong>Giant</strong>’s <strong>Tempo</strong> indoor exercise bicycle can help you reach your goals.<br />
<strong>Tempo</strong> is designed to allow you to duplicate the fit and feel of your bicycle, or to simply select a<br />
comfortable riding position for a custom fit that makes the bicycle feel like an extension of your body.<br />
From its sturdy and attractive tubular steel frame to the fully adjustable rider compartment, <strong>Tempo</strong> will<br />
become an important part of your total fitness program.<br />
<strong>Giant</strong>, the world’s leading distributor of quality bicycles, has developed a truly remarkable indoor cycle<br />
with a list of features not found on other indoor exercise bicycles. For example, a ratcheted microadjustable<br />
tension control knob allows you to precisely set the exact amount of pedaling resistance. A<br />
standard direct-pull alloy brake mechanism, equipped with oversized felt pads, applies resistance to<br />
both sides of the 40-pound flywheel insuring a smooth pedaling action. <strong>Tempo</strong>’s dual-sided pedals<br />
feature SPD compatible clipless fittings on one side, while toe clips can be installed on the other side<br />
of the pedal.<br />
Whether you want to go easy or hard, for a long time or just a short while, <strong>Tempo</strong> will make indoor<br />
exercise more enjoyable and beneficial.<br />
Before using your <strong>Tempo</strong> Indoor Exercise Bicycle, it is essential to read this entire manual carefully.<br />
No one should use this equipment without first reading, and following, the instructions and safety<br />
warnings contained in this manual. The <strong>Tempo</strong> indoor exercise bicycle is not a toy, and it is not<br />
intended for use by children.<br />
This manual contains a number of safe practices in the “Safety Tips” section. Additional warnings are<br />
placed throughout the manual. Warnings related to your personal safety are indicated by:<br />
WARNING<br />
Remember, however, this manual or the warnings do not replace the need to be alert and to use your<br />
common sense when using the <strong>Tempo</strong> indoor exercise bicycle.<br />
1
S A F E T Y<br />
T I P S<br />
WARNING<br />
TO AVOID SERIOUS PERSONAL INJURY:<br />
• Before beginning any conditioning or fitness program, consult with your<br />
physician or health professional. Only this person can establish the proper<br />
conditioning or fitness program that is appropriate for your age and physical<br />
condition.<br />
• If you feel faint, dizzy, short of breath, or if you have chest or other pains, STOP<br />
IMMEDIATELY! Consult your physician before you continue.<br />
• NEVER attempt to use the stationary cycle when ill or in a weakened condition.<br />
• NEVER use <strong>Tempo</strong> if your body weight exceeds 300 lb.<br />
• NEVER ride <strong>Tempo</strong> in a standing position at high revolutions per minute (RPM)<br />
until you have practiced at low RPM.<br />
• ALWAYS read operating instructions before beginning.<br />
• ONLY install the indoor cycle on a solid, level surface in a well-lighted and wellventilated<br />
area.<br />
• ALWAYS properly warm up before beginning use of the indoor cycle.<br />
• ALWAYS wear proper attire and footwear that fully covers your feet.<br />
• ALWAYS keep children and pets clear of the indoor cycle and moving parts while<br />
in use.<br />
• ALWAYS wait until the pedals are completely stopped before removing your feet<br />
from the pedals or dismounting.<br />
2
S P E C I A L<br />
F E A T U R E S<br />
Fully Adjustable Rider Compartment<br />
Saddle tilt, reach, and height as well as<br />
handlebar height and reach are fully and<br />
easily adjusted.<br />
Dual Sided Pedals<br />
Allows you to use either SPD compatible<br />
clipless pedals or toe clips.<br />
Micro Adjustable Tension Control<br />
Fine-tune the exact resistance you<br />
want with the micro adjustable tension<br />
control. The ratcheted control knob<br />
allows you to duplicate resistance<br />
settings from one workout to the next.<br />
Large Felt Resistance Pads<br />
Two large 3 ” x 1” felt resistance pads<br />
apply tension to the side of the weighted<br />
flywheel, guaranteeing a smooth pedal<br />
action regardless of pedal rpm.<br />
Multi Position Handlebar<br />
<strong>Tempo</strong>’s handlebar provides at least<br />
five different positions for maximum<br />
comfort.<br />
3
1.W H A T I T’ S C A L L E D<br />
1. Saddle<br />
2. Saddle tilt adjustment<br />
3. Saddle reach quick release adjustment<br />
4. Saddle height quick release adjustment<br />
5. Levelers<br />
6. Dual sided pedal<br />
7. Felt resistance pads<br />
8. Transport Wheels<br />
9. Fly wheel<br />
10. Chain tension adjustment bolt<br />
11. Resistance adjustment knob<br />
12. Handlebar height quick release adjustment<br />
13. Handlebar reach quick release adjustment<br />
14. Handlebar<br />
15. Emergency brake<br />
16. Elbow pads<br />
17. Water bottle cage fittings<br />
1<br />
16<br />
15<br />
14<br />
2<br />
12<br />
17<br />
13<br />
11<br />
3<br />
4<br />
10<br />
9<br />
8<br />
5 6<br />
7<br />
5<br />
4
2.I N S T A L L A T I O N A N D A D J U S T M E N T<br />
A. Positioning <strong>Tempo</strong><br />
1. Pick a Cheerful Place<br />
It is a good idea to place your <strong>Tempo</strong> in a large room with plenty of sunshine,<br />
light and mirrors. <strong>Tempo</strong> should also be placed on a solid surface or short<br />
nap carpet so it does not “walk” or build up static electricity when being used.<br />
2. Keep <strong>Tempo</strong> Level<br />
To help prevent your <strong>Tempo</strong> from rocking on an uneven floor, there are<br />
leveling disks at each corner (Fig. 1). To raise the height of one corner, rotate<br />
the rubber footpad counter clockwise. When the desired height is reached,<br />
hold the footpad in place with one hand while rotating the locking wing nut<br />
clockwise with the other hand.<br />
F IGURE 1<br />
B. Setting Up <strong>Tempo</strong><br />
1. Quick Release Adjustment for Saddle and Handlebar Position<br />
Lever<br />
Cap<br />
Cap<br />
Lever<br />
Open<br />
Lever<br />
Lever<br />
Close<br />
F IGURE 2<br />
Open quick<br />
release by rotating<br />
lever out, and<br />
away from frame.<br />
F IGURE 3<br />
Hold the cap<br />
securely and turn<br />
lever clockwise<br />
until snug.<br />
F IGURE 4<br />
Continue holding the<br />
cap and turn lever<br />
back (counterclockwise)<br />
one<br />
full turn.<br />
F IGURE 5<br />
Close quick<br />
release by rotating<br />
lever in, and<br />
toward frame.<br />
2. Duplicating Your Bike’s Position<br />
If you own a road or mountain bike and want to duplicate its rider compartment layout, we recommend the<br />
following steps for adjusting your <strong>Tempo</strong>:<br />
• Measure the distance from the top of your saddle to the center of the bottom bracket spindle (crack arm<br />
axle) on your bike. Adjust your <strong>Tempo</strong>’s seat post height to the same measurement. Also adjust the<br />
tilt of your <strong>Tempo</strong>’s saddle so that is level to the ground. A carpenter’s level will make this job easier.<br />
• Place a straight edge ruler or 2 X 4 on top of your bike’s saddle and extend it out over your handlebar,<br />
making sure the straight edge is level or parallel to the ground. Measure the distance from the bottom<br />
edge of the straight edge to the top of your handle bar near the handlebar stem. Raise or lower the<br />
handlebar stem height on your <strong>Tempo</strong> until you duplicate this position.<br />
• Finally, measure the distance from the nose of your road bike saddle to the front of the handlebar.<br />
Duplicate this position on your <strong>Tempo</strong> by sliding the handlebar forward or<br />
back.<br />
Keep in mind these steps will get your <strong>Tempo</strong>’s riding position close to the<br />
riding position on your bike. You may have to make further adjustments to<br />
compensate for different pedals, riding shoes, saddle, handlebar and crank arm<br />
length. Also, it is a good idea to make a note of the saddle height, saddle<br />
fore/aft position, handlebar height and handlebar for/aft position you’ve<br />
calculated in the event you have to re-set them again. Reference numbers are<br />
provided on the seat post (Fig.4), saddle base, handlebar stem and handlebar F IGURE 4<br />
base for this purpose.<br />
5
C. Adjusting Your <strong>Tempo</strong><br />
There are five different adjustment features available on your <strong>Tempo</strong> to<br />
ensure your workouts are comfortable and provide maximum benefit. Taking<br />
the time to carefully adjust your <strong>Tempo</strong> to your dimensions is strongly<br />
recommended.<br />
Keep in mind that the steps which follow will establish a basic neutral<br />
riding position which will work for most people, but perhaps not for you.<br />
<strong>Giant</strong> recommends following these steps and riding your <strong>Tempo</strong> for a<br />
week or two before making further adjustments. When further adjustments<br />
are necessary, make them in small increments of approximately two<br />
millimeters at a time.<br />
• Adjust the saddle tilt by loosening the saddle clamp nut (Fig. 5) under the<br />
saddle with a 14 millimeter wrench or adjustable “crescent” wrench.<br />
Position the saddle so it is level with the ground. A carpenter’s level may<br />
make this adjustment easier. When the saddle is level, re-tighten the nut<br />
while holding the saddle in place.<br />
• Adjust the saddle height so that when the ball of your foot is on the pedal<br />
and the pedal is in the lowest position, your knee is slightly bent.. If your<br />
saddle is at the correct height, your knee will be slightly below your hip<br />
at the top of the pedal stroke (your knee should not come above your hip<br />
at the top of the pedal stroke). If your hips rock downward when the<br />
pedals are at the lowest position, lower the saddle slightly until the<br />
rocking is eliminated.<br />
• Adjust the saddle fore/aft position so the saddle is centered over the seat<br />
post (Ref # 4 on saddle base).<br />
• Adjust the handlebar height until the handlebar is level with or about one<br />
inch below the top of the saddle. Laying a straight edge or 2 x 4 on top<br />
of the saddle and extending it out over the handlebar may make this<br />
adjustment easier (Fig. 6).<br />
• Adjust the fore/aft position of the handlebar so that you are leaning at<br />
about a 45 degree angle when your hands are positioned at the back of<br />
the handlebar (Fig 7). This position may be somewhat uncomfortable at<br />
first unless you’ve been regularly riding a road bicycle. However, as you<br />
become accustomed to the position, it will be more comfortable because<br />
your body weight is distributed between the saddle and the handlebar.<br />
• Adjust the pedal resistance by turning the tension adjusting knob. To<br />
increase resistance turn the knob counterclockwise. To decrease<br />
resistance turn the knob clockwise. (Fig. 8))<br />
D. Moving Your <strong>Tempo</strong><br />
To move your <strong>Tempo</strong> to a new location, stand at the rear of the unit and<br />
lift the angled support tube behind the seat post tube with both hands and<br />
lift the unit until the entire weight is on the two transport wheels on the<br />
forward support bar.(Fig. 9) Roll the unit to the new, properly selected<br />
location (see “Positioning <strong>Tempo</strong>”).<br />
F IGURE 5<br />
F IGURE 6<br />
F IGURE 7<br />
F IGURE 8<br />
F IGURE 9<br />
6
3.U S I N G Y O U R T E M P O<br />
WARNING<br />
TO AVOID SERIOUS PERSONAL INJURY:<br />
Before beginning any conditioning or fitness program, consult with your physician or health<br />
professional. Only this person can establish the proper conditioning or fitness program that is<br />
appropriate for your age and physical condition.<br />
• If you feel faint, dizzy, short of breath, or if you have chest or other pains, STOP IMMEDIATELY!<br />
Consult your physician before you continue.<br />
• NEVER attempt to use the stationary cycle when ill or in a weakened condition.<br />
• ALWAYS read operating instructions before beginning.<br />
• ALWAYS properly warm up before beginning use of the stationary cycle.<br />
• ALWAYS wear proper attire and athletic or cycling shoes when using <strong>Tempo</strong>.<br />
• ALWAYS keep children and pets clear of the stationary cycle and moving parts while in use.<br />
1. Warm-Up<br />
According to Lisa Brinton, Certified Personal Trainer and Indoor Cycling Instructor, “A gradual warm up<br />
will lead to efficient calorie burning by increasing the body’s core temperature, increase metabolic rate<br />
so oxygen is delivered to the working muscles more quickly and reduce the possibility of injuries by<br />
improving the elasticity of the muscles. Start your ride with very little resistance on the flywheel and<br />
pedal at a moderate RPM of about 50 to 70 pedal revolutions per minute. Gradually increase flywheel<br />
resistance and pedaling speed for at least 8 to 10 minutes. You are warmed up when your breathing rate<br />
has increased and you begin to notice a light sweat.”<br />
2. Workout<br />
If you have not been exercising regularly, Certified Personal Trainers, like Lisa Brinton, recommend<br />
limiting your workout to a moderate level and about 30 minutes for a couple weeks. Try to workout at<br />
least 3 to 4 times a week. After a couple weeks gradually increase the duration & intensity of your<br />
workouts until reaching 45 minutes.<br />
Lisa recommends the “talk” test to determine the intensity of your workouts. If you can talk in complete<br />
sentences while exercising you are working at a moderate level. On the other hand, if you must gasp for<br />
air when trying to talk you are working out at an intense level.<br />
3. Cool Down<br />
Lisa points out that a cool down is just the opposite of warm-up. “After a workout, a cool down period<br />
will flush your muscles of lactic acid build-up and allow your cardiovascular system to slowly return to<br />
normal activity level”. During cool down, reduce the resistance level and pedal RPM until breathing<br />
returns to near normal, approximately three to five minutes. Lisa also asks her indoor cycling students to<br />
stretch during and just after cool down. While pedaling during cool down arm and shoulder muscles can<br />
be stretched. After cool down stretch the leg muscles for a few minutes primarily the quadriceps,<br />
hamstrings, calves and gluteus.<br />
7
4.M A I N T E N A N C E<br />
Your <strong>Tempo</strong> indoor exercise bicycle should require very little maintenance.<br />
To keep it looking new, wipe the surface with a clean damp cloth. Use a little<br />
dish washing liquid on stubborn dirt, but never use abrasives.<br />
Be certain to wipe all perspiration from the <strong>Tempo</strong> when you are finished.<br />
Perspiration contains salt and other substances that can damage surfaces or<br />
leave a white residue.<br />
If you should need service, contact your local Authorized <strong>Giant</strong> Dealer for<br />
qualified repair and advice.<br />
For identification and record keeping purposes, the serial number for your<br />
<strong>Tempo</strong> is located on the front support tube (Fig. 11). It is a good idea to<br />
record this serial number on your purchase receipt or in the owner's manual.<br />
F IGURE 10<br />
G IANT INDOOR CYCLING EQUIPMENT LIMITED WARRANTY<br />
<strong>Giant</strong> brand indoor cycling equipment is fully assembled at no additional charge by your Authorized <strong>Giant</strong><br />
Dealer and is warranted (excluding electrical components) to be free from defect in material and<br />
workmanship for as long as the original purchaser owns the equipment.<br />
Electrical components are warranted to be free from defect in material and workmanship for a period of two<br />
years from the date of purchase. ALL IMPLIED WARRANTIES APPLICABLE TO SUCH COMPONENTS,<br />
INCLUDING THE WARRANTIES OF MERCHANTABILITY AND FITNESS FOR PARTICULAR PURPOSE, ARE<br />
LIMITED IN DURATION TO THIS TWO-YEAR PERIOD.<br />
Some states do not allow limitation on how long an implied warranty lasts, so the above limitation may not<br />
apply to you.<br />
Free 60-Day Repair Labor<br />
If your <strong>Giant</strong> brand indoor cycle is found to be defective in materials, workmanship, or assembly within 60<br />
days of purchase, it will be repaired for you without charge for labor or materials. To receive this service,<br />
simply bring your <strong>Giant</strong> brand indoor cycle to the Authorized <strong>Giant</strong> Dealer from whom the unit was purchased.<br />
L IMITED REMEDY<br />
Unless otherwise provided, the sole remedy under the above warranty or any implied warranty is limited to<br />
the replacement of defective parts with those of equal or greater value at the sole discretion of <strong>Giant</strong>.<br />
Unless covered by the free 60-day repair labor period you will be responsible for labor costs associated with<br />
warranty replacements.<br />
IN NO EVENT SHALL GIANT BE RESPONSIBLE FOR INCIDENTAL OR CONSEQUENTIAL DAMAGES, WHETHER<br />
BASED ON CONTRACT, WARRANTY, NEGLIGENCE, PRODUCT LIABILITY, OR ANY OTHER THEORY, INCLUDING,<br />
WITHOUT LIMITATION, PERSONAL INJURY DAMAGES, PROPERTY DAMAGE, OR ECONOMIC LOSSES.<br />
E XCLUSIONS<br />
THE ABOVE WARRANTY, OR ANY IMPLIED WARRANTY, DOES NOT COVER NORMAL WEAR AND TEAR,<br />
AND ALL WARRANTIES ARE VOID IF THE FITNESS EQUIPMENT IS USED FOR OTHER THAN NORMAL<br />
ACTIVITIES, INCLUDING, BUT NOT LIMITED TO, THE FAILURE TO FOLLOW THE OWNERS MANUAL.<br />
Some states do not allow the exclusion or limitation of consequential damages, so the above limitation or<br />
exclusion may not apply to you. This warranty gives you specific legal rights, and you may also have other<br />
rights, which vary from state to state.<br />
W HAT YOU SHOULD DO<br />
Bring your <strong>Giant</strong> brand indoor cycling equipment along with a purchase receipt or other proof of the date of<br />
purchase to an Authorized <strong>Giant</strong> Dealer or write to the Customer Service Department at: <strong>Giant</strong> Bicycle, Inc.,<br />
3587 Old Conejo Road, Newbury Park, CA 91320.<br />
8
3587 Old Conejo Road, Newbury Park, CA 91320.