Xcite manual - german:A.
Xcite manual - german:A.
Xcite manual - german:A.

You also want an ePaper? Increase the reach of your titles
YUMPU automatically turns print PDFs into web optimized ePapers that Google loves.
®<br />
state of the art bike technology<br />
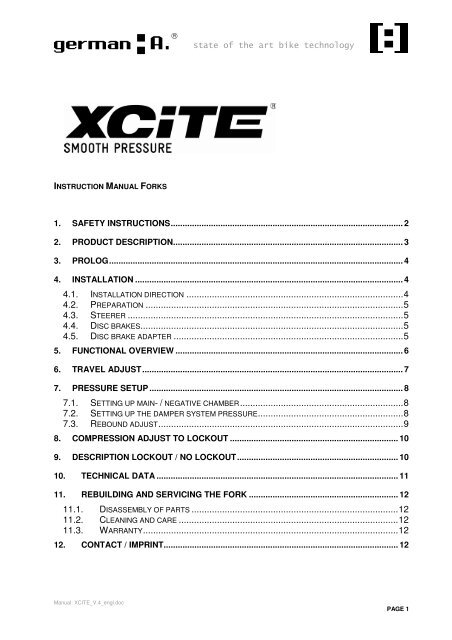
INSTRUCTION MANUAL FORKS<br />
1. SAFETY INSTRUCTIONS.................................................................................................. 2<br />
2. PRODUCT DESCRIPTION................................................................................................. 3<br />
3. PROLOG............................................................................................................................ 4<br />
4. INSTALLATION ................................................................................................................. 4<br />
4.1. INSTALLATION DIRECTION .....................................................................................4<br />
4.2. PREPARATION .....................................................................................................5<br />
4.3. STEERER ............................................................................................................5<br />
4.4. DISC BRAKES.......................................................................................................5<br />
4.5. DISC BRAKE ADAPTER ..........................................................................................5<br />
5. FUNCTIONAL OVERVIEW ................................................................................................ 6<br />
6. TRAVEL ADJUST.............................................................................................................. 7<br />
7. PRESSURE SETUP........................................................................................................... 8<br />
7.1. SETTING UP MAIN- / NEGATIVE CHAMBER................................................................8<br />
7.2. SETTING UP THE DAMPER SYSTEM PRESSURE.........................................................8<br />
7.3. REBOUND ADJUST................................................................................................9<br />
8. COMPRESSION ADJUST TO LOCKOUT ....................................................................... 10<br />
9. DESCRIPTION LOCKOUT / NO LOCKOUT.................................................................... 10<br />
10. TECHNICAL DATA ...................................................................................................... 11<br />
11. REBUILDING AND SERVICING THE FORK ............................................................... 12<br />
11.1. DISASSEMBLY OF PARTS .................................................................................12<br />
11.2. CLEANING AND CARE ......................................................................................12<br />
11.3. WARRANTY....................................................................................................12<br />
12. CONTACT / IMPRINT................................................................................................... 12<br />
Manual: XCITE_V.4_engl.doc<br />
PAGE 1
®<br />
state of the art bike technology<br />
1. Safety instructions<br />
The forks of the "<strong>Xcite</strong>" series are designed for<br />
Cross-country (XC), Marathon and All Mountain use only.<br />
1) Please regularly control all screws of the fork especially the screws of the disc adapter!<br />
2) During use / ride do not reach into the area of the fork. This may lead to serious injuries!<br />
3) Please make sure that the fork is operating freely and have no contact throughout the<br />
whole travel!<br />
4) Please make sure that the tire to be used can rotate freely throughout the whole travel.<br />
5) Please follow the instructions given by manufacturers of any attached parts like brakes<br />
and so on, carefully!<br />
6) The shock of the fork contains an oil hydraulic shock. When dismantling a pressurized<br />
unit, an explosion-like pressure release may result. Always wear safety goggles when<br />
dismantling the fork / shock!<br />
7) You need special confirmation of the producer for dismantling fork / shock beyond<br />
normal maintenance. The warranty is void if unauthorized maintenance work is done on<br />
your fork.<br />
8) Gearshift and brake cables must not wear away any aluminium of the fork at any time.<br />
9) Don’t use the active lockout for driving off-road, non-stop or jumps.<br />
Always ascertain that the fork is adjusted properly to bear the riders weight for the<br />
purpose intended, to avoid bottoming out. This may seriously damage the fork. If the fork<br />
has bottomed out, it should be sent in for a check.<br />
Used symbols and formatting:<br />
PLEASE NOTE! - Points out extremely important and safety-relevant information.<br />
Major points and important terms are printed in bold letters.<br />
Manual: XCITE_V.4_engl.doc<br />
PAGE 2
®<br />
state of the art bike technology<br />
2. Product description<br />
Without compression<br />
adjust (lockout)<br />
With compression<br />
adjust (lockout)<br />
Steerer Carbon / Alu<br />
1 1/8“ ahead<br />
Air valve<br />
main-/ negative chamber<br />
Crown<br />
System pressure shock / compression<br />
adjust up to lockout<br />
Stanchion 36 mm<br />
aluminium hard coated<br />
Wiper<br />
Bridge<br />
Outer tube<br />
Carbon / Alu<br />
Travel adjust<br />
(wheel is not applicable for <strong>manual</strong>)<br />
Rebound adjust<br />
Dropout<br />
Fig. 1.0 Description<br />
Depending on version the product can differ from the illustration.<br />
Manual: XCITE_V.4_engl.doc<br />
PAGE 3
®<br />
state of the art bike technology<br />
3. Prolog<br />
The XCITE combines low weight, stiffness and innovative design. Two of the XCITES<br />
outstanding characteristics are the „MUSCLE-Design“ of the crown and the „FLAP-Design“ of the<br />
bridge. This design of the crown and the bridge are special features which are contributing<br />
factors to the unparalleled stiffness to weight ratio, as well as its unique, highly recognisable<br />
design. The XCITE is the lightest fork in its category and has some quite features like stepless<br />
travel adjust (by remote or <strong>manual</strong>ly), rebound adjust, adjustable spring rate and a compression<br />
adjust (0-100%) up to lockout in 180° including a blow off safety valve. The XCITES air chamber<br />
is split into the main- / and negative chamber as a consequence the spring rate is adjustable to<br />
every rider. The special manufactured fibre tubes have the benefit of less weight without loss of<br />
stiffness or stability. Every part of this fork is engineered without compromise in order to achieve<br />
minimal weight in combination with equal or superior riding performance. The slide bushings are<br />
custom made product and also used in aircraft. Combined with the hard coated stanchions, the<br />
slide bushings guarantee low-friction sliding for a silky smooth ride.<br />
4. Installation<br />
4.1. Installation direction<br />
Moving direction<br />
Fig. 2.0 Moving direction<br />
Manual: XCITE_V.4_engl.doc<br />
PAGE 4
®<br />
state of the art bike technology<br />
In moving direction, the brake adapter is mounted at the left back side (see fig. 2.0 and 2.1).<br />
Without compression adjust (lockout)<br />
With compression adjust (lockout)<br />
Moving direction<br />
4.2. Preparation<br />
Fig. 2.1 Moving direction from top side<br />
PLEASE NOTE! On delivery, the fork is at the minimal travel setting. Before fitting the<br />
fork to your bike, please push the button for travel adjustment to get the maximum length<br />
of the fork. If the down tubes don’t move, pull them out <strong>manual</strong>ly.<br />
Please check the following points before installing the fork into the bike:<br />
• Equipment compatibility (meaning brakes, headset bearing etc.)<br />
• Correct steerer tube length / size<br />
• Correct position of headset race and bearing<br />
4.3. Steerer<br />
The steerer tube has to be specified for 1 1/8 inch headset (1+1/8 inch = 28.6 mm). If you<br />
intend to cut the tube, please use a pipe cutter (only for aluminium steerer tube) or a metal saw.<br />
ATTENTION! Don’t use a claw fastener for carbon steerer! For carbon steerer tubes please<br />
use only a fine saw! The length of the steerer depends on your frame, headset and the<br />
quantities of spacers.<br />
4.4. Disc brakes<br />
The XCITE is designed for disc brakes with a six inch post mount calliper, for rotors with 160<br />
mm diameter. For a larger rotor diameter please use the adapter specified by the break<br />
manufacturer.<br />
Please read the <strong>manual</strong> of your brake system for mounting the brakes on the fork with post<br />
mount system (PM). PLEASE NOTE! The maximum diameter for any disc brake rotors to be<br />
used in combination with a XCITE fork is 185 mm (~7.3 inch)!<br />
4.5. Disc brake adapter<br />
PLEASE NOTE! Please make sure, that all screws of the disc adapter are tightened with the<br />
correct torque. Minimum torque for M6 screws is 12 Nm (106 lbfin) and 9 Nm (80 lbfin) for the<br />
M5 screws.<br />
Manual: XCITE_V.4_engl.doc<br />
PAGE 5
®<br />
state of the art bike technology<br />
5. Functional overview<br />
Without compression<br />
adjust (lockout)<br />
With compression<br />
adjust (lockout)<br />
Filling valve<br />
main- / negative chamber<br />
Compression adjust from<br />
0 - 100% with blow off vent<br />
Travel adjust stepless<br />
(wheel is not applicable<br />
for <strong>manual</strong>)<br />
Rebound adjust stepless<br />
Fig. 3.0 Features<br />
Manual: XCITE_V.4_engl.doc<br />
PAGE 6
®<br />
state of the art bike technology<br />
6. Travel adjust<br />
You can reduce the stack height of your fork activating the remote control or by turning the<br />
adjust lever on the down tube of the fork, while putting your weight on the fork. In the desired<br />
position you just have to release the remote or the adjust lever and the fork will remain in this<br />
position. If you want to move back to the maximum travel position, you just have to shift your<br />
weight off the front wheel and activate the remote or turn the adjust lever again. The fork will<br />
move back to the max. travel position.<br />
Travel adjust with remote control<br />
To adjust the travel from your handlebar, activate the remote<br />
control lever at your handlebar. Push the handlebar downwards<br />
and release the lever at the travel position you desire. To release<br />
back to maximum travel, just push the remote control lever again,<br />
shift your weight of the front wheel and the fork will move back to<br />
the maximum travel.<br />
Manual adjust of the travel<br />
In order to adjust the travel, push the adjust button on the down<br />
tube and push the fork down until you have reached the travel you<br />
want. In the desired position release the adjust button and the<br />
travel will stay reduced to the point you have selected. In order<br />
release back to the maximum travel position activate the adjust<br />
button again, shift your weight off the front wheel and the fork will<br />
move back to the maximum travel position.<br />
Button<br />
(side view)<br />
Travel adjust with<br />
remote control<br />
Side view:<br />
Travel adjust without remote<br />
control (<strong>manual</strong>ly)<br />
PLEASE NOTE! Do not jump with strongly reduced fork travel! The fork may bottom out and<br />
might suffer damage!<br />
Manual: XCITE_V.4_engl.doc<br />
PAGE 7
®<br />
state of the art bike technology<br />
7. Pressure Setup<br />
For correct pressure setup in the air chambers, please use a pump adapter or an appropriate<br />
suspension pump to prevent air loss when removing the pump.<br />
The modification of the air spring characteristics to riders weight and intended use is done by<br />
adjusting the amount of air pressure in the main and negative air chambers. Before filling in<br />
pressure please remove the protective valve caps. The pump or the pump adapter must have a<br />
VG 8 thread like DIN 7756 and DIN 7757.<br />
Please make sure if your suspension pump has the right adapter for a VG 8 thread. This<br />
adapter allows the filling of the chambers without pressure loss when removing the pump after<br />
filling.<br />
On delivery all chambers are filled with a basic setup. Feel free to test the existing setup prior to<br />
any adjustments according to the pressure recommended in chart 1. If neither is to your liking,<br />
you can still choose your individual setup.<br />
7.1. Setting up main- / negative chamber<br />
The first step is removing the red air chamber cap. In a second step you screw on the<br />
suspension pump or the adapter. Please make sure, the valve is free of any dirt or particles<br />
which might prevent an airtight seal. Now you can start adjusting in the pressure.<br />
PLEASE NOTE! While adjusting the pressure of the main air chamber, activate the travel adjust<br />
mechanism several times in order to inflate the negative air chamber with the connecting valve.<br />
Benchmarks for the right pressure are given in the chart below. The minimum pressure for the<br />
main- and the negative chamber is 1 bar (14 psi). Maximum pressure for the main- and the<br />
negative chambers is 20 bars (290 psi).<br />
7.2. Setting up the damper system pressure<br />
This pressure has no effects on the spring characteristics. This chamber has to be filled once<br />
with 6-10 bars (87 – 145 psi). As a rule, higher pressure means more compression damping,<br />
less pressure means less compression damping: High pressure means less comfort (race<br />
setup), low pressure means more comfort.<br />
Manual: XCITE_V.4_engl.doc<br />
PAGE 8
®<br />
state of the art bike technology<br />
Chart 1: Pressure for chambers (standard values)<br />
Rider weight (KG)<br />
Pressure of main- and<br />
negative chamber<br />
(bar)<br />
Pressure in damper<br />
(bar)<br />
60 3 6 to 10<br />
70 3,5 6 to 10<br />
80 4 6 to 10<br />
90 5 6 to 10<br />
100 5,5 - 6 6 to 10<br />
If the suggested settings do not meet your personal requirements, you may change the<br />
pressures to your liking, but keep in mind not to exceed the maximum and minimum pressures<br />
allowed for the chambers! PLEASE NOTE! Please make sure you never cause your fork to<br />
bottom out due a soft setup or due a jumping while in the reduced travel setting.<br />
7.3. Rebound adjust<br />
High damping (slow rebound)<br />
Less damping (fast rebound)<br />
Fig. 6.0 Rebound adjust<br />
General rule:<br />
• Fast rebound: For more sensitive and faster-responding fork. It’s better<br />
for quick successive impacts (comfortable setup).<br />
• Slow rebound: Typical setup for the street, Uphill or Downhill for long<br />
impacts (race setup).<br />
Tip: Turn the rebound control to the left until it is open as far as possible while still preventing<br />
the front wheel from jumping off the ground when the handlebar is pushed down all the way and<br />
then release abruptly. Retry until you have reached a satisfying setup. In our opinion this is the<br />
perfect setup for first test ride. The final rebound setup can be done according to your personal<br />
taste afterwards.<br />
Manual: XCITE_V.4_engl.doc<br />
PAGE 9
®<br />
state of the art bike technology<br />
8. Compression adjust to lockout<br />
The compression adjust will be done with the golden knurl at the left top side of the fork. The<br />
knurl can be turned from 0 to 180° steplessly. 0° means no compression damping, 180° means<br />
lockout. A blow off safety valve protects the fork in lockout mode from damage. That valve is<br />
named blow off vent and will be opened by an impact in lockout mode. Fig. 7.0 shows the knurl<br />
as an example. (PLEASE NOTE: The end position of the knurl relative to the crown can differ.)<br />
PLEASE NOTE: Don’t use the active lockout for driving off-road, non-stop or jumps.<br />
Open<br />
Fig. 7.0 Compression adjust<br />
Lock Out<br />
9. Description lockout / no lockout<br />
Without compression<br />
adjust (lockout)<br />
With compression<br />
adjust (lockout)<br />
Manual: XCITE_V.4_engl.doc<br />
PAGE 10
®<br />
state of the art bike technology<br />
10. Technical data<br />
X-RAY CRITERION+ CRITERION BOOST<br />
System Teleskopic fork Teleskopic fork Teleskopic fork Teleskopic fork<br />
Model 26“ carbon 26“ carbon 26“ carbon / aluminium 26“ aluminium<br />
Steerer 1 1/8” ahead<br />
carbon 250 mm<br />
1 1/8” ahead<br />
carbon 250 mm<br />
1 1/8” ahead<br />
aluminium 250 / 300 mm<br />
1 1/8” ahead<br />
aluminium 250 / 300 mm<br />
Use CC-Race<br />
Marathon<br />
All Mountain<br />
CC-Race<br />
Marathon<br />
All Mountain<br />
CC-Race<br />
Marathon<br />
All Mountain<br />
CC-Race<br />
Marathon<br />
All Mountain<br />
Brakes Postmount disc only Postmount disc only Postmount disc only Postmount disc only<br />
Weight /<br />
Travel<br />
Plus weights<br />
of options<br />
Suspension<br />
Materials<br />
Axle to<br />
crown<br />
length<br />
Options<br />
max. 185 mm<br />
max. 185 mm<br />
1.298 g / 100 mm 1.350 g / 120 mm<br />
1.416 g / 150 mm<br />
Lockout approx. 60 g<br />
Remote approx. 82 g<br />
Lockout approx. 60 g<br />
Remote approx. 82 g<br />
Air spring with oil Air spring with oil<br />
damping, adjustable damping, adjustable<br />
rebound,<br />
rebound,<br />
compression adjust compression adjust<br />
lockout including lockout including<br />
blow off vent<br />
blow off vent<br />
Carbon fibre technology, Carbon fibre technology,<br />
CNC manufactured CNC manufactured<br />
/ forged aluminium / forged aluminium<br />
485 mm / 100 mm 505 mm / 120 mm<br />
535 mm / 150 mm<br />
- Lockout<br />
- Remote f. travel adjust<br />
- Thru-axle bolt (20 mm<br />
quick release skewers)<br />
EN AW 7075-T6 hard<br />
coated 36 mm<br />
CFK Carbon fibre<br />
technology 42.5 mm<br />
- Lockout<br />
- Remote f. travel adjust<br />
- Thru-axle bolt (20 mm<br />
quick release skewers)<br />
EN AW 7075-T6 hard<br />
coated 36 mm<br />
CFK Carbon fibre<br />
technology 42.5 mm<br />
All listed specifications are subject to change, errors excepted.<br />
max. 185 mm<br />
1.384 g / 100 mm<br />
1.422 g / 120 mm<br />
1.487 g / 150 mm<br />
Lockout approx. 60 g<br />
Remote approx. 82 g<br />
Air spring with oil<br />
damping, adjustable<br />
rebound,<br />
compression adjust<br />
lockout including<br />
blow off vent<br />
Carbon fibre technology,<br />
CNC manufactured<br />
/ forged aluminium<br />
485 mm / 100 mm<br />
505 mm / 120 mm<br />
535 mm / 150 mm<br />
- Lockout<br />
- Remote f. travel adjust<br />
- Thru-axle bolt (20 mm<br />
quick release skewers)<br />
EN AW 7075-T6 hard<br />
max. 185 mm<br />
1.445 g / 100 mm<br />
1.521 g / 120 mm<br />
1.553 g / 150 mm<br />
Lockout approx. 60 g<br />
Remote approx. 82 g<br />
Air spring with oil<br />
damping, adjustable<br />
rebound,<br />
compression adjust<br />
lockout including<br />
blow off vent<br />
CNC manufactured<br />
/ forged aluminium<br />
485 mm / 100 mm<br />
505 mm / 120 mm<br />
535 mm / 150 mm<br />
- Lockout<br />
- Remote f. travel adjust<br />
- Thru-axle bolt (20 mm<br />
quick release skewers)<br />
EN AW 7075-T6 hard<br />
Stanchions<br />
coated 36 mm<br />
coated 36 mm<br />
Outer tubes<br />
CFK Carbon fibre EN AW 7075-T6<br />
technology 42.5 mm 42.5 mm<br />
Dropouts Standard 9 mm skewers Standard 9 mm skewers Standard 9 mm skewers Standard 9 mm skewers<br />
Manual: XCITE_V.4_engl.doc<br />
PAGE 11
®<br />
state of the art bike technology<br />
11. Rebuilding and servicing the fork<br />
Please Note! Please follow the safety instructions described in chapter 1!<br />
Spring elements are general subject to wear and tear and must be serviced (depending on<br />
usage and type of use) at least approx. once a year. Service means dismantling, change of<br />
(silicon-) oil, exchange of seals and parts if they are worn out. Due to the modular build-up<br />
of the fork almost any worn parts can be exchanged if necessary (you will be given an<br />
estimate) and the unit will be as good as new afterwards.<br />
For a proper service please send in the fork including the original papers to your dealer or<br />
directly to the address you’ll find at our homepage. Please check first the address and the<br />
service costs at our homepage or webshop: www.<strong>german</strong>-a.de.<br />
11.1. Disassembly of parts<br />
Any further dismantling of parts requires the agreement of the manufacturer.<br />
All warranties become void when dismantling parts of the fork or shock privately, without<br />
written consent of the manufacturer.<br />
11.2. Cleaning and care<br />
Fork and shock may be cleaned with cleaners generally used for bicycles. Please make<br />
sure that the valve caps are properly seated. Solvents and aggressive cleaners may attack<br />
labels and surfaces. Use only water, a clean cloth or a soft brush. Apply a drop of oil to<br />
each bearing, wipe off excessive oil.<br />
11.3. Warranty<br />
German:A. ® may allow individual support beyond governmental regulations. In such a case<br />
parts may be obtained at cost price. No warranty is available in the following cases:<br />
• Sheared off valves<br />
• Destroyed valve threads<br />
• Damper noises while damping properly<br />
• Worn out glide bushings<br />
• Wear and tear due to use (seals, guide-bushings, surfaces)<br />
• Mechanical damage / bent adjusters<br />
• Mechanical damage to surfaces<br />
• Improper maintenance and service<br />
• Missing serial number<br />
• Damage due to falls, jumps and competitions<br />
• All unauthorized work on fork or shocks<br />
• Abrasion of aluminium by shifting/brake cables or tire<br />
• Use of disc brakes with a rotor diameter lager than 185 mm<br />
12. Contact / Imprint<br />
GERMAN ANSWER bike technology GmbH & Co. KG, Hefragstr. 6, 61200 Wölfersheim,<br />
Germany, Email: info@<strong>german</strong>-a.de, Tel.: +49 (0) 6036-983600, Fax: +49 (0) 6036-983610,<br />
Web: www.<strong>german</strong>-a.de<br />
Register court: District court Friedberg HRA 1723, General manager: Dipl.-Wirtsch.-Ing. Thomas Kamm<br />
Personally liability corporation: creative sport products GmbH, Domicile D- 61200 Wölfersheim / Germany, Register court: District court Friedberg HRB 2845<br />
Manual: XCITE_V.4_engl.doc<br />
PAGE 12