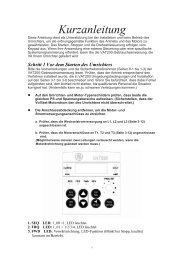
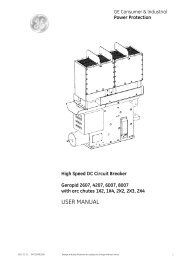
High Speed DC Circuit Breaker - G E Power Controls
High Speed DC Circuit Breaker - G E Power Controls
High Speed DC Circuit Breaker - G E Power Controls

You also want an ePaper? Increase the reach of your titles
YUMPU automatically turns print PDFs into web optimized ePapers that Google loves.
2.2 Installation<br />
2.2.1 Operational environment<br />
• The breaker, as delivered, is IP00 protected. It is intended<br />
to work in indoor applications, without pollutions, with<br />
non-conductive dust, protected against high humidity<br />
and condensation. Low conductivity dust deposit due to<br />
frequent condensation of humidity is acceptable. General<br />
environmental conditions refer to EN 50123-1 - annex<br />
B, and IEC60947, class PD3.<br />
• The breaker can operate within ambient temperature<br />
range of –5°C…+40°C (23...104°F). With decreased nominal<br />
current, breaker can operate up to +60°C (140°F).<br />
• The breaker can operate at altitude up to 2000m<br />
(~6500ft).<br />
• The breaker shall not be subjected to strong vibrations.<br />
Vibrations of 0.5g per 30sec in vertical and horizontal directions<br />
are allowed.<br />
• Air shall be clean and its relative humidity shall be not<br />
more than 50 % r.h. at the maximum temperature of<br />
+40°C (104°F). Relative humidity may be higher if the<br />
temperatures are lower, for example, 90 %r.h. at +20°C<br />
(68°F). Slight condensation might occur during variations<br />
of temperature<br />
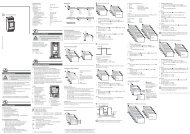
2.2.2 Installation and interfaces<br />
• The lower and upper connections (code nr: 4) must be<br />
connected directly to the main cables or bus bars. The<br />
breaker must only be used in an upright operation position<br />
with the arc chute in place and fully secured.<br />
• After installation, both the arc chute and special<br />
threaded joints must be checked for tightness.<br />
• The safety distances as shown in the dimensional drawings<br />
must be maintained to grounded or insulated parts.<br />
Suitable measures must be taken to protect personnel<br />
from arcs.<br />
• Strong, external magnetic fields, caused by improperly<br />
located supply conductors or tray fields from other devices,<br />
can lead to a shift of the trip setting thresholds.<br />
This may result in premature tripping, or no tripping at<br />
al, during low-level short circuit current events. This has<br />
to be accounted for when installing and operating the<br />
device with shielding added if appropriate.<br />
• The control wires must be connected to the control terminals<br />
(code nr: 19), as shown in the schematic circuit<br />
diagram (Page 14). The protective grounding wire must<br />
be connected at the marked contact.<br />
2.3 Usage<br />
2.3.1 Supply and load<br />
• In accordance with its type, the breaker has been designed<br />
for the current and voltage listed in Table 1, section<br />
3.3.<br />
• During continuous operation, breaker must be loaded<br />
with its rated current at maximum. Load currents in excess<br />
of breaker nameplate rating are allowable for brief<br />
periods. Refer to the short time currents listed in Tables<br />
1a/1b.<br />
• Do not exceed the rated operating voltage shown on the<br />
breaker’s nameplate.<br />
• The drive and the auxiliary tripping devices (code nr: 8).<br />
shall be supply within the specified control voltage<br />
range. The auxiliary-tripping devices must be loaded<br />
with the values listed in Table 2a at maximum.<br />
• Plugging or removing the auxiliary current connectors<br />
are only allowed at zero potential, no voltage (-X2<br />
:1/:2) (-X3 :4/:5) !<br />
2.3.2 Adjusting the OCT<br />
• OCT is an over-current tripping device (code nr: 7), which<br />
trips a breaker in case of overload or short circuit. This is<br />
fully adjustable, instantaneous and direct tripping device.<br />
• OCT adjustment [Fig.3], within a specific range, is realized<br />
by turning the screw 1.<br />
• Adjusting procedure requires an SW6 hexagon wrench<br />
2.<br />
• The adjustment must only be carried out after the<br />
breaker has been disconnected from the main circuit<br />
and has been grounded.<br />
• Turning the adjustment screw clockwise increased the<br />
trip threshold, turning the screw counter-clockwise decreased<br />
the tripping threshold.<br />
• Aligning the arrow and the marking into one line 3 performs<br />
adjustment.<br />
S47183-e 01/2008 Design and specifications are subject to change without notice 5