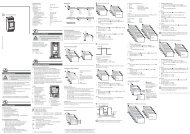
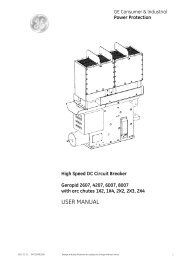
High Speed DC Circuit Breaker - G E Power Controls
High Speed DC Circuit Breaker - G E Power Controls
High Speed DC Circuit Breaker - G E Power Controls

Create successful ePaper yourself
Turn your PDF publications into a flip-book with our unique Google optimized e-Paper software.
6.1.1 General visual inspection<br />
• Check out for damages or cracks of the frame, the<br />
adapter or the arc chute.<br />
• Check out the black marks on the countersunk screws.<br />
These shall be joined together. If any screw is loosening,<br />
shall be replaced with new one, using glue, Loctite222.<br />
Afterwards, mark the screw with black line to<br />
sign its position in nest.<br />
• Check out for missing screws or caps.<br />
• Check out for deglutinated labels. Clean and fix it.<br />
• Check out for corrosion. In case of finding significant<br />
corrosion, please contact GE representative for consulting.<br />
• Check out for distinct manifestations of flame or<br />
smoke at the frame. Especially in lower area of the<br />
breaker. Please document it and contact GE representative<br />
for consulting.<br />
• Clean the breaker from dirt and dust. Remove all dirt<br />
with a dry clothes. No particularly high signs of abrasion<br />
(rough chips) should be seen anywhere.<br />
• Clean and degrease the cooper terminals.<br />
6.1.2 General functional inspection<br />
Pay attention to the warnings, Section 1!<br />
• In order to check the latch mechanism, the breaker<br />
can be opened and closed with a hand lever.<br />
• Switch remotely the breaker ON and OFF several<br />
times using ST or UVR, and using closing drive. The<br />
contacts must close after the CLOSE command and<br />
must open following the OPEN command<br />
• The breaker mechanism must not appear sluggish nor<br />
must ON/OFF be unduly delayed.<br />
6.1.3 Inspection of the arc chute<br />
Pay attention to the warnings, Section 1!<br />
A) Remove the arc chute<br />
• [Fig. 41]. Loosen the clamping screws (3) and (4), using<br />
SW 5 hexagon wrench and take off the arch chute (1)<br />
from the adapter (2).<br />
B) Check the arc chute<br />
• [Fig. 42]. Check the arc chute’s interior, as far as possible,<br />
for deposits (1). There shall not be copper pearls<br />
on the metal-plates, which could partially link the<br />
plates.<br />
• [Fig. 42]. Check the general condition of the insulation<br />
plates (4). These shall no be bended or burned. Also<br />
other insulation shall not be heavily damaged.<br />
• [Fig. 42]. Check the arc horns (2). Its cross section shall<br />
not be reduced more than ~30%.<br />
• [Fig. 42] Check the splitting plates (3). These shall not<br />
be burned more than ~20mm [~0,8in].<br />
C) Install the arc chute<br />
• [Fig. 41]. Put in arc chute (1) into adapter (2).<br />
• [Fig. 41]. Tighten front- and backside connections of<br />
the arc runners (3), including lock washer. Use a<br />
torque of 10 Nm [88 lbf*in].<br />
• [Fig. 41]. Tighten front- and backside of the arc chute<br />
connections (4), including flat washers. Use a torque of<br />
5 Nm [44 lbf*in].<br />
1<br />
2<br />
4<br />
3<br />
5<br />
Fig. 40 Using of the hand lever<br />
Fig. 41 Arc chute and arc runners fixing<br />
S47183-e 01/2008 Design and specifications are subject to change without notice 37