Setting up the stereo power amplifier - Meridian
Setting up the stereo power amplifier - Meridian
Setting up the stereo power amplifier - Meridian

You also want an ePaper? Increase the reach of your titles
YUMPU automatically turns print PDFs into web optimized ePapers that Google loves.
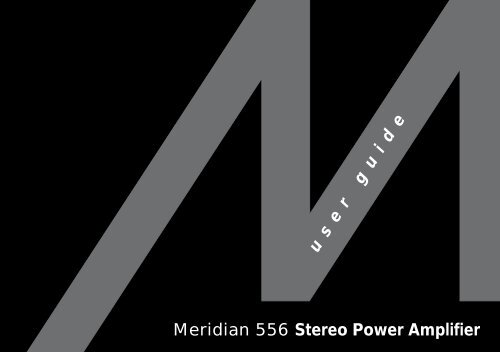
user guide<br />
<strong>Meridian</strong> 556 Stereo Power Amplifier
Preface<br />
ii<br />
Sales and service in <strong>the</strong> UK<br />
<strong>Meridian</strong> Audio Ltd<br />
Stonehill<br />
Stukeley Meadows<br />
Cambs<br />
PE18 6ED<br />
England<br />
Tel (01480) 52144<br />
Fax (01480) 459934<br />
Sales and service in <strong>the</strong> USA<br />
<strong>Meridian</strong> America Inc<br />
3800 Camp Creek Parkway<br />
Building 2400<br />
Suite 112<br />
Atlanta<br />
GA 30331<br />
Tel (404) 344 7111<br />
Fax (404) 346 7111<br />
Designed and<br />
manufactured in <strong>the</strong> UK by<br />
Digital Gramophone and Wireless Ltd<br />
Stonehill<br />
Stukeley Meadows<br />
Cambs<br />
PE18 6ED<br />
England<br />
Copyright © 1993–1997 Digital<br />
Gramophone and Wireless Ltd<br />
Part no: 556/1<br />
This guide was produced by<br />
Human-Computer Interface Ltd,<br />
Cambridge, England.
Contents<br />
Introduction 1<br />
Introduces <strong>the</strong> 556 Stereo Power<br />
Amplifier, and provides an overview of <strong>the</strong><br />
o<strong>the</strong>r products available in <strong>the</strong> <strong>Meridian</strong><br />
500 Series.<br />
The <strong>Meridian</strong> 500 Series ........................ 2<br />
Sample configurations ........................... 3<br />
Specification and accessories ............... 6<br />
<strong>Setting</strong> <strong>up</strong> <strong>the</strong> <strong>stereo</strong><br />
<strong>power</strong> <strong>amplifier</strong> 7<br />
Describes how to unpack, install, and use<br />
<strong>the</strong> <strong>stereo</strong> <strong>power</strong> <strong>amplifier</strong>, and explains<br />
what you should do if your <strong>amplifier</strong><br />
requires servicing.<br />
Unpacking .............................................. 8<br />
Connecting <strong>the</strong> <strong>stereo</strong> <strong>power</strong><br />
<strong>amplifier</strong> ................................................. 9<br />
Troubleshooting ..................................... 12<br />
Maintenance .......................................... 13<br />
Service and guarantee ........................... 14<br />
Index ...................................................... 15<br />
Preface<br />
iii
Preface<br />
iv
Introduction<br />
In choosing <strong>the</strong> 556 Stereo Power Amplifier you have acquired a<br />
component that combines major advances in audio and engineering<br />
design.<br />
The 556 Stereo Power Amplifier uses a unique feedback topology and<br />
precision local error correction system. It is designed and constructed in<br />
dual mono format, including a massive twin wound toroidal transformer,<br />
and <strong>the</strong> unit has full <strong>the</strong>rmal, load, and DC protection.<br />
This guide is designed to enable you to obtain <strong>the</strong> best possible results<br />
from <strong>the</strong> unit in conjunction with <strong>the</strong> o<strong>the</strong>r units in your system.
Introduction<br />
2<br />
The <strong>Meridian</strong> 500 Series<br />
The <strong>Meridian</strong> 500 Series is a unique system of digital, analogue,<br />
and video components designed to meet <strong>the</strong> demand for<br />
absolute quality, ease of use, and lasting value.<br />
The flexibility of <strong>the</strong> <strong>Meridian</strong> 500 Series is such that you can<br />
assemble a system as simple or as complex as you need,<br />
perfectly suited to your musical and environmental requirements,<br />
and with <strong>the</strong> ability to add to it or change it at a later date should<br />
your requirements change. The 500 Series is also compatible<br />
with <strong>the</strong> existing <strong>Meridian</strong> 200 Series and 600 Series<br />
components, and <strong>the</strong> new 800 Series.<br />
Each <strong>Meridian</strong> 500 Series component is housed in a matching<br />
slim line case. Front panel controls provide access to <strong>the</strong> most<br />
important functions, and <strong>the</strong> full range of functions is available<br />
from <strong>the</strong> <strong>Meridian</strong> System Handset using a simple and intuitive<br />
control interface.<br />
500 Series communications<br />
The <strong>Meridian</strong> 500 Series includes a sophisticated<br />
communications link, to ensure that any configuration of units<br />
will work toge<strong>the</strong>r as a fully integrated system.<br />
The 500 Series communications system allows you to control<br />
any combination of units using a single handset, and ensures<br />
that your commands from <strong>the</strong> handset are interpreted<br />
unambiguously. It also allows all <strong>the</strong> units to be switched off<br />
from <strong>the</strong> front panel of any unit in <strong>the</strong> system.<br />
Professional features<br />
The 500 Series also provides features for professional users,<br />
including RS232 computer control, and balanced connections.<br />
The following pages give examples of four suggested<br />
configurations to illustrate <strong>the</strong> flexibility of <strong>the</strong> <strong>Meridian</strong> 500<br />
Series.
Sample configurations<br />
506 20-Bit CD Player<br />
506 501<br />
504<br />
556<br />
A500<br />
The 506 20-Bit CD Player is an integrated CD transport and<br />
converter, providing both digital and analogue outputs.<br />
A500<br />
The 506 20-Bit CD Player is ideally suited for use with <strong>the</strong><br />
<strong>Meridian</strong> 556 Stereo Power Amplifier and A500 Loudspeakers,<br />
with control over <strong>the</strong> volume and source selection provided by<br />
<strong>the</strong> 501 Control Unit. The 504 Stereo FM Tuner is an ideal<br />
addition to <strong>the</strong> system if radio reception is required.<br />
500 Compact Disc Transport<br />
500<br />
504<br />
562<br />
DSP5000<br />
DSP5000<br />
The 500 Compact Disc Transport provides a precision digital<br />
output, and can drive <strong>Meridian</strong> DSP5000 Digital Loudspeakers<br />
directly.<br />
A 562 Digital Controller can be added to cater for conventional<br />
analogue sources, such as <strong>the</strong> 504 Stereo FM Tuner, and<br />
provide source selection between <strong>up</strong> to 12 different analogue or<br />
digital sources.<br />
Introduction 3
Introduction<br />
4<br />
566 20-Bit Digital to Analogue<br />
Converter<br />
500<br />
566<br />
The digital output provided by <strong>the</strong> 500 Compact Disc Transport<br />
can be decoded by <strong>the</strong> 566 20-Bit Digital to Analogue Converter<br />
to provide a high-quality audio output for use with a<br />
conventional audio pre<strong>amplifier</strong>. The 566 20-Bit Digital to<br />
Analogue Converter can also decode digital signals from o<strong>the</strong>r<br />
sources, including LaserDisc players and Digital Audio Tape.<br />
502<br />
502 Analogue Controller<br />
557<br />
A500<br />
A500<br />
The 502 Analogue Controller is a full function pre<strong>amplifier</strong> for use<br />
with any analogue source, and includes balanced inputs to allow<br />
you to take advantage of balanced sources, including <strong>the</strong> 566<br />
20-Bit Digital to Analogue Converter. It provides balanced<br />
outputs which are ideal for use with <strong>the</strong> 557 Stereo Power<br />
Amplifier.
562V Multimedia Controller<br />
504<br />
Satellite<br />
Video recorder<br />
LaserDisc<br />
500 562V<br />
The 562V Multimedia Controller is <strong>the</strong> ideal control unit for use<br />
with <strong>the</strong> <strong>Meridian</strong> DSP6000 Digital Loudspeakers.<br />
It provides direct digital inputs for digital sources, such as <strong>the</strong><br />
500 Compact Disc Transport and LaserDisc sound, toge<strong>the</strong>r<br />
with precision Delta Sigma Analogue to Digital Conversion, for<br />
Television<br />
DSP6000 DSP6000<br />
conventional analogue sources such as <strong>the</strong> 504 Stereo FM<br />
Tuner and video sound.<br />
It also includes video switching for CVBS and S-VHS signals,<br />
such as from a satellite receiver, LaserDisc player, or video<br />
recorder.<br />
Introduction 5
Introduction<br />
6<br />
Specification and accessories<br />
Specification<br />
Input 1.6V RMS.<br />
Output (<strong>stereo</strong>) Greater than 100W per channel into 8Ω.<br />
Greater than 170W per channel into 4Ω.<br />
Distortion Less than 0.1%.<br />
Noise Less than -100dB.<br />
Finish Black textured enamel and glass.<br />
Heatsinks black painted aluminium.<br />
Dimensions 88mm x 400mm x 320mm<br />
(3.45" x 15.7" x 12.6").<br />
Weight 12kg (26 lbs).<br />
Consumption 30VA quiescent, 650VA max.<br />
<strong>Meridian</strong> Audio reserves <strong>the</strong> right to amend product<br />
specifications at any time.<br />
Available accessories<br />
The following accessories are available from your dealer:<br />
❍ Power cord Europe.<br />
❍ Power cord Canada and USA.
<strong>Setting</strong> <strong>up</strong> <strong>the</strong> <strong>stereo</strong><br />
<strong>power</strong> <strong>amplifier</strong><br />
This chapter explains how to install <strong>the</strong> <strong>stereo</strong> <strong>power</strong> <strong>amplifier</strong>. It<br />
describes what you should find when you unpack <strong>the</strong> <strong>stereo</strong> <strong>power</strong><br />
<strong>amplifier</strong>, how you should connect it to your o<strong>the</strong>r audio equipment, and<br />
<strong>the</strong> siting constraints.<br />
You should not make any connections to <strong>the</strong> <strong>stereo</strong> <strong>power</strong> <strong>amplifier</strong> or to<br />
any o<strong>the</strong>r component in your system whilst <strong>the</strong> AC <strong>power</strong> s<strong>up</strong>ply is<br />
connected and switched on.
<strong>Setting</strong> <strong>up</strong> <strong>the</strong> <strong>stereo</strong> <strong>power</strong> <strong>amplifier</strong><br />
8<br />
Unpacking<br />
The 556 Stereo Power Amplifier comes in a box containing <strong>the</strong><br />
following components:<br />
❍ 556 Stereo Power Amplifier.<br />
❍ 1 <strong>power</strong> cord.<br />
❍ This manual.<br />
You are advised to retain <strong>the</strong> packing in case you need to<br />
transport <strong>the</strong> unit.<br />
Before connecting <strong>power</strong><br />
Before you begin installation you should ensure that your <strong>stereo</strong><br />
Power Amplifier is set to <strong>the</strong> correct voltage for your local AC<br />
s<strong>up</strong>ply. If it is not, do not try to install <strong>the</strong> unit, and contact your<br />
dealer.<br />
Do not make connections, or insert or remove plugs, while<br />
<strong>the</strong> unit is connected to <strong>the</strong> s<strong>up</strong>ply and switched on, as <strong>the</strong><br />
transients generated could damage <strong>the</strong> loudspeakers.<br />
Once set <strong>up</strong>, <strong>the</strong> <strong>stereo</strong> <strong>power</strong> <strong>amplifier</strong> can be left switched on<br />
as it consumes negligible <strong>power</strong> when not in use.<br />
If you are not going to use <strong>the</strong> <strong>stereo</strong> <strong>power</strong> <strong>amplifier</strong> for a<br />
period of several days you should switch <strong>the</strong> unit completely off,<br />
at <strong>the</strong> back panel, and disconnect it from <strong>the</strong> AC <strong>power</strong> s<strong>up</strong>ply.<br />
To position <strong>the</strong> <strong>stereo</strong> <strong>power</strong> <strong>amplifier</strong><br />
During normal operation <strong>the</strong> heatsinks, ie <strong>the</strong> fins at each end of<br />
<strong>the</strong> case, may become quite hot. The <strong>stereo</strong> <strong>power</strong> <strong>amplifier</strong><br />
should <strong>the</strong>refore be positioned to allow a free flow of air around<br />
<strong>the</strong> fins.<br />
Do not place <strong>the</strong> <strong>stereo</strong> <strong>power</strong> <strong>amplifier</strong>:<br />
❍ In direct sunlight.<br />
❍ Near heat sources, eg a radiator.<br />
❍ Stacked with any o<strong>the</strong>r audio products, as <strong>the</strong> heat it<br />
generates may damage <strong>the</strong> o<strong>the</strong>r products.
Connecting <strong>the</strong> <strong>stereo</strong> <strong>power</strong> <strong>amplifier</strong><br />
Back panel<br />
Outputs<br />
Input (R)<br />
INPUT +<br />
– OFF<br />
–<br />
+<br />
INPUT<br />
The output terminals should be connected to loudspeakers of<br />
4Ω to 15Ω, using ei<strong>the</strong>r banana plug or bare wire connections.<br />
Each channel of <strong>the</strong> 556 Stereo Power Amplifier provides twin<br />
outputs for bi-wiring. On speakers that provide separate<br />
connections to <strong>the</strong> bass/mid and tweeter units this allows <strong>the</strong><br />
units to be connected independently to <strong>the</strong> <strong>stereo</strong> <strong>power</strong><br />
<strong>amplifier</strong>, for optimum sound quality.<br />
+<br />
–<br />
ON<br />
Outputs (+) Outputs (-) Outputs (-)<br />
Outputs (+)<br />
–<br />
+<br />
Input (L)<br />
Alternatively, for loudspeakers providing a single pair of inputs,<br />
ei<strong>the</strong>r of <strong>the</strong> output terminals can be used.<br />
<strong>Setting</strong> <strong>up</strong> <strong>the</strong> <strong>stereo</strong> <strong>power</strong> <strong>amplifier</strong> 9
<strong>Setting</strong> <strong>up</strong> <strong>the</strong> <strong>stereo</strong> <strong>power</strong> <strong>amplifier</strong><br />
10<br />
To connect to a conventional<br />
pre<strong>amplifier</strong><br />
● Connect <strong>the</strong> sockets marked INPUT on <strong>the</strong> back panel of <strong>the</strong><br />
<strong>stereo</strong> <strong>power</strong> <strong>amplifier</strong> to <strong>the</strong> outputs from your pre<strong>amplifier</strong>.<br />
You should ei<strong>the</strong>r use a twin-screened audio cable, or a pair of<br />
single-screened audio cables. These cables can have a<br />
considerable effect on <strong>the</strong> quality of <strong>the</strong> sound, and you are<br />
advised to seek your dealer’s advice on <strong>the</strong> best type of cables<br />
for your system.<br />
To connect to a 501 Control Unit<br />
OUTPUT<br />
501 Control Unit 556 Stereo Power Amplifier<br />
Audio lead<br />
INPUT INPUT<br />
● Connect <strong>the</strong> sockets marked OUTPUT L and R on <strong>the</strong> back<br />
panel of <strong>the</strong> 501 Control Unit to <strong>the</strong> INPUT sockets on <strong>the</strong><br />
back panel of <strong>the</strong> 556 Stereo Power Amplifier.<br />
To connect to A500 Loudspeakers<br />
A500 Loudspeaker<br />
556 Stereo Power Amplifier<br />
A500 Loudspeaker<br />
● Use <strong>the</strong> links provided to bridge <strong>the</strong> HF and LF terminals on<br />
<strong>the</strong> back of each loudspeaker.<br />
● Connect one of each pair of <strong>the</strong> red and black terminals on<br />
<strong>the</strong> back panel of <strong>the</strong> 556 Stereo Power Amplifier to <strong>the</strong> red<br />
and black terminals on <strong>the</strong> A500 Loudspeakers.
To bi-wire to A500 Loudspeakers<br />
A500 Loudspeaker<br />
556 Stereo Power Amplifier<br />
● If necessary, remove <strong>the</strong> links bridging <strong>the</strong> LF and HF<br />
terminals on <strong>the</strong> back of each loudspeaker.<br />
A500 Loudspeaker<br />
● Connect <strong>the</strong> LF red and black terminals from each<br />
loudspeaker to <strong>the</strong> red and black terminals on <strong>the</strong> appropriate<br />
channel of <strong>the</strong> <strong>stereo</strong> <strong>power</strong> <strong>amplifier</strong>, using twin loudspeaker<br />
cable.<br />
● Connect <strong>the</strong> HF red and black terminals from each<br />
loudspeaker to <strong>the</strong> o<strong>the</strong>r pair of red and black terminals on <strong>the</strong><br />
appropriate channel of <strong>the</strong> <strong>stereo</strong> <strong>power</strong> <strong>amplifier</strong>.<br />
<strong>Setting</strong> <strong>up</strong> <strong>the</strong> <strong>stereo</strong> <strong>power</strong> <strong>amplifier</strong><br />
11
<strong>Setting</strong> <strong>up</strong> <strong>the</strong> <strong>stereo</strong> <strong>power</strong> <strong>amplifier</strong><br />
12<br />
Troubleshooting<br />
This section describes problems you may encounter when using<br />
<strong>the</strong> <strong>stereo</strong> <strong>power</strong> <strong>amplifier</strong>, and includes suggested solutions.<br />
If <strong>the</strong>se suggestions fail to cure <strong>the</strong> problem, please contact<br />
your <strong>Meridian</strong> dealer for fur<strong>the</strong>r assistance.<br />
No front panel indicator is shown<br />
❍ Check that your AC <strong>power</strong> s<strong>up</strong>ply is connected correctly.<br />
❍ Check that <strong>the</strong> ON OFF switch on <strong>the</strong> back panel is in <strong>the</strong> ON<br />
position.<br />
❍ Check that <strong>the</strong> fuse on <strong>the</strong> <strong>stereo</strong> <strong>power</strong> <strong>amplifier</strong> back panel<br />
and <strong>the</strong> fuse in <strong>the</strong> unit’s <strong>power</strong> plug have not blown; see To<br />
change <strong>the</strong> mains fuse, page 13.<br />
The sound has cut out<br />
The 556 Stereo Power Amplifier includes a <strong>the</strong>rmal shutdown,<br />
which mutes <strong>the</strong> output if <strong>the</strong> <strong>amplifier</strong> becomes too hot.<br />
❍ Leave <strong>the</strong> <strong>amplifier</strong> for a few minutes to cool down, and <strong>the</strong><br />
sound will come back on.<br />
The 556 Stereo Power Amplifier also includes a <strong>power</strong> circuit<br />
breaker to protect <strong>the</strong> loudspeakers.<br />
❍ Check <strong>the</strong> system for <strong>the</strong> cause of <strong>the</strong> cut out.<br />
❍ Switch off, wait 5 seconds, <strong>the</strong>n switch on to reset <strong>the</strong> <strong>power</strong>.
Maintenance<br />
Cleaning<br />
When cleaning <strong>the</strong> <strong>stereo</strong> <strong>power</strong> <strong>amplifier</strong> bear in mind that <strong>the</strong><br />
front of <strong>the</strong> unit is metal, and <strong>the</strong> lid is glass.<br />
Disconnect <strong>the</strong> <strong>power</strong> cord before cleaning <strong>the</strong> unit.<br />
Note: Do not use abrasive cleaners on any part of <strong>the</strong> <strong>stereo</strong><br />
<strong>power</strong> <strong>amplifier</strong>.<br />
To clean <strong>the</strong> case<br />
● Use a slightly damp cloth.<br />
Ensure that no water is allowed to get inside <strong>the</strong> case, and do<br />
not reconnect <strong>the</strong> <strong>power</strong> until you are certain that <strong>the</strong> <strong>stereo</strong><br />
<strong>power</strong> <strong>amplifier</strong> is completely dry.<br />
To clean <strong>the</strong> audio connections<br />
The audio sockets on <strong>the</strong> back of <strong>the</strong> <strong>stereo</strong> <strong>power</strong> <strong>amplifier</strong> are<br />
gold-plated and need no cleaning if gold-plated phono plugs are<br />
used. O<strong>the</strong>rwise, it is recommended that you unplug and<br />
reconnect <strong>the</strong> plugs at least once a year. A proprietary contact<br />
cleaner can be used to some advantage.<br />
To change <strong>the</strong> mains fuse<br />
Fuse<br />
Spare<br />
● Remove <strong>the</strong> mains connector, and pull out <strong>the</strong> drawer next to<br />
<strong>the</strong> <strong>power</strong> input to access <strong>the</strong> fuses.<br />
Before replacing a blown fuse, if possible ascertain <strong>the</strong> cause of<br />
<strong>the</strong> failure.<br />
The fuse drawer includes a spare fuse. This should be replaced<br />
by one of <strong>the</strong> same rating.<br />
<strong>Setting</strong> <strong>up</strong> <strong>the</strong> <strong>stereo</strong> <strong>power</strong> <strong>amplifier</strong><br />
13
<strong>Setting</strong> <strong>up</strong> <strong>the</strong> <strong>stereo</strong> <strong>power</strong> <strong>amplifier</strong><br />
14<br />
Service and guarantee<br />
Service<br />
The <strong>Meridian</strong> 500 Series of hi-fi components have been carefully<br />
designed to give years of untroubled service. There are no userserviceable<br />
parts inside <strong>the</strong> case, nor do <strong>the</strong> units require any<br />
form of maintenance.<br />
In <strong>the</strong> unlikely event that your <strong>stereo</strong> <strong>power</strong> <strong>amplifier</strong> fails to<br />
function correctly, it should be returned, in its original<br />
packaging, to your <strong>Meridian</strong> dealer.<br />
In case of difficulty within <strong>the</strong> UK or USA please contact <strong>the</strong><br />
appropriate sales and service address shown on page ii.<br />
In case of difficulty outside <strong>the</strong> UK or USA, contact <strong>the</strong> importing<br />
agent for <strong>the</strong> territory. A list of <strong>Meridian</strong> agents abroad is<br />
available from <strong>Meridian</strong> Audio.<br />
No responsibility can be accepted for <strong>the</strong> <strong>stereo</strong> <strong>power</strong> <strong>amplifier</strong><br />
whilst in transit to <strong>the</strong> factory or an agent, and customers are<br />
<strong>the</strong>refore advised to insure <strong>the</strong> unit.<br />
When seeking service under guarantee, proof of <strong>the</strong> date of<br />
purchase will be required.<br />
Guarantee<br />
The 556 Stereo Power Amplifier is guaranteed against defects in<br />
material and workmanship for two years from <strong>the</strong> date of<br />
purchase.<br />
The guarantee is void if <strong>the</strong> 556 Stereo Power Amplifier has been<br />
subject to misuse, accident, or negligence, or has been<br />
tampered with or modified in any way without <strong>the</strong> written<br />
authorisation of <strong>Meridian</strong> Audio Limited. Attempted servicing by<br />
unauthorised people may also invalidate this guarantee. Labour<br />
and carriage charges are not covered unless by local agreement.<br />
Outside <strong>the</strong> UK, local warranty liability is restricted to equipment<br />
purchased within <strong>the</strong> territory. Our agents abroad are only under<br />
contractual obligation to service under guarantee equipment<br />
sold through <strong>the</strong>m. They are entitled to make a non-refundable<br />
charge for any service carried out on o<strong>the</strong>r equipment.<br />
This guarantee does not limit your statutory rights within <strong>the</strong><br />
United Kingdom.
Index<br />
A Accessories 6<br />
B Bi-wire connection 11<br />
C Cleaning<br />
<strong>the</strong> audio connections 13<br />
<strong>the</strong> case 13<br />
Components<br />
Connecting<br />
8<br />
to a 501 Control Unit 10<br />
to a conventional pre<strong>amplifier</strong> 10<br />
to A500 Loudspeakers 10, 11<br />
F Fuse, replacing 13<br />
G Guarantee 14<br />
H Heat generated during<br />
operation 8<br />
I Installing 8<br />
Introduction 1<br />
M Maintenance 13<br />
<strong>Meridian</strong> 500 Series<br />
500 Compact Disc<br />
2<br />
Transport 3, 4, 5<br />
501 Control Unit 3<br />
502 Analogue Controller 4<br />
504 Stereo FM Tuner 3, 5<br />
506 20-Bit CD Player 3<br />
556 Stereo Power Amplifier 3<br />
557 Stereo Power Amplifier 4<br />
562 Digital Controller 3<br />
562V Multimedia Controller 5<br />
566 20-Bit Digital to Analogue<br />
Converter 4<br />
communications 2<br />
<strong>Meridian</strong> A500 Loudspeakers<br />
<strong>Meridian</strong> DSP6000 Digital<br />
3, 4<br />
Loudspeakers 5<br />
<strong>Meridian</strong> DSP5000 Digital<br />
Loudspeakers 3<br />
<strong>Meridian</strong> System Handset 2<br />
O Outputs 9<br />
Overheating 8, 12<br />
P Positioning 8<br />
S Service 14<br />
Sound has cut out 12<br />
Specification 6<br />
Switching on 8<br />
T Thermal protection 12<br />
Troubleshooting 12<br />
U Unpacking 8<br />
Index<br />
15
Index<br />
16