
You also want an ePaper? Increase the reach of your titles
YUMPU automatically turns print PDFs into web optimized ePapers that Google loves.
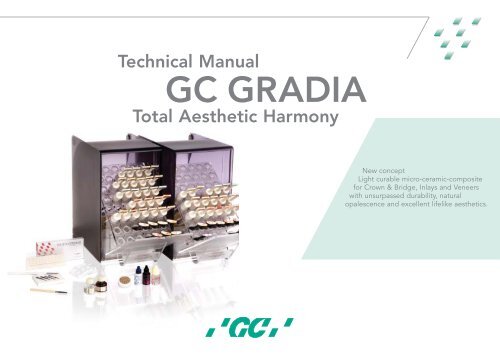
Technical Manual<br />
<strong>GC</strong> <strong>GRADIA</strong><br />
Total Aesthetic Harmony<br />
New concept<br />
Light curable micro-ceramic-composite<br />
for Crown & Bridge, Inlays and Veneers<br />
with unsurpassed durability, natural<br />
opalescence and excellent lifelike aesthetics.
INDEX<br />
Introduction. . . . . . . . . . . . . . . . . . . . . . . . . . . . . . . . . . . . . . . . . . . . . . . . . . . . . . . . . . . . . . . . . . 1<br />
1. <strong>GC</strong> <strong>GRADIA</strong> Components . . . . . . . . . . . . . . . . . . . . . . . . . . . . . . . . . . . . . . . . . . . . . . . . . . . . 2<br />
2. Shade Combination Chart . . . . . . . . . . . . . . . . . . . . . . . . . . . . . . . . . . . . . . . . . . . . . . . . . . . . 4<br />
3. <strong>GC</strong> <strong>GRADIA</strong> Features . . . . . . . . . . . . . . . . . . . . . . . . . . . . . . . . . . . . . . . . . . . . . . . . . . . . . . . 5<br />
4. Clinical Procedures . . . . . . . . . . . . . . . . . . . . . . . . . . . . . . . . . . . . . . . . . . . . . . . . . . . . . . . . . . 9<br />
5. Composite Build-up Procedure . . . . . . . . . . . . . . . . . . . . . . . . . . . . . . . . . . . . . . . . . . . . . . . . 12<br />
1) Anterior veneer crown (incisal free metal backing). . . . . . . . . . . . . . . . . . . . . . . . . . . . . 12<br />
2) Anterior jacket crown . . . . . . . . . . . . . . . . . . . . . . . . . . . . . . . . . . . . . . . . . . . . . . . . . . .17<br />
3) Posterior inlay . . . . . . . . . . . . . . . . . . . . . . . . . . . . . . . . . . . . . . . . . . . . . . . . . . . . . . . . . 20<br />
4) Posterior jacket crown / total-coverage composite crown . . . . . . . . . . . . . . . . . . . . . . 22<br />
5) Anterior veneer crown (incisal metal backing) . . . . . . . . . . . . . . . . . . . . . . . . . . . . . . . . 24<br />
6. Physicals / Cure Times / Cure depth . . . . . . . . . . . . . . . . . . . . . . . . . . . . . . . . . . . . . . . . . . . . . 28<br />
7. Packaging . . . . . . . . . . . . . . . . . . . . . . . . . . . . . . . . . . . . . . . . . . . . . . . . . . . . . . . . . . . . . . . . . 29<br />
8. Contents of Kits and Refill Packages. . . . . . . . . . . . . . . . . . . . . . . . . . . . . . . . . . . . . . . . . . . . 30<br />
9. Questions and Answers . . . . . . . . . . . . . . . . . . . . . . . . . . . . . . . . . . . . . . . . . . . . . . . . . . . . . . 31<br />
10. Precautions . . . . . . . . . . . . . . . . . . . . . . . . . . . . . . . . . . . . . . . . . . . . . . . . . . . . . . . . . . . . . . . 33
INTRODUCTION<br />
Light-cured composites for dental restorations have become popular thanks to their excellent<br />
physical properties and ease of use. With growing demands for higher aesthetics in dental<br />
treatments, also superior quality has become a crucial requirement. This implies a higher<br />
availability of composites of superior aesthetics and quality, next to ceramics.<br />
Dentists and Dental Technicians likewise were seeking a durable dental composite that rivaled the<br />
aesthetics of porcelain: however so far, composite fillers affected the translucency and opalescence<br />
of C&B composite systems. With this as background, <strong>GC</strong> <strong>GRADIA</strong> has been developed with all<br />
these requirements in mind.<br />
New <strong>GC</strong> <strong>GRADIA</strong> resulted in a high-strength micro-hybrid composite system with the brightness,<br />
translucency and warmth in the oral environment likewise porcelain, useful for inlays, veneers<br />
and crowns.<br />
The aesthetic potential of this composite has been thoroughly reviewed. Instead of the pale<br />
colour that is typical for traditional C&B composites, <strong>GC</strong> <strong>GRADIA</strong> features a bright and warm<br />
colour that makes it similar to the best ceramic now available. Once in the mouth, <strong>GC</strong> <strong>GRADIA</strong><br />
has an appearance that closely resembles the natural tooth, which was not feasible with traditional<br />
composites.<br />
<strong>GC</strong> <strong>GRADIA</strong> features a high mechanical strength, thanks to its hybrid MFR formulation of polymer<br />
that has reinforced bonding between the organic-inorganic filler and the lightly filled matrix resin.<br />
<strong>GC</strong> <strong>GRADIA</strong> shows excellent physical properties such as surface smoothness (typical of MFR<br />
composites) and wear-resistance. It is bio-compatible and kind to opposing dentition. In addition<br />
to the lifelike tooth shades <strong>GC</strong> <strong>GRADIA</strong> offers easy to apply opaque materials with excellent flow<br />
and cure properties. The tin, even layers of FOUNDATION OPAQUE and OPAQUE shades mask<br />
color effectively and are easily and quickly light cured. All shades of <strong>GC</strong> <strong>GRADIA</strong> polymerize<br />
completely with short irradiation times using the <strong>GC</strong> STEPLIGHT SL-I during layering and<br />
characterization followed by the <strong>GC</strong> LABOLIGHT LV-III for final curing. Polymerization results in no<br />
change to <strong>GC</strong> <strong>GRADIA</strong>’s colour allowing technicians to see subtle colours of the final restoration<br />
throughout all phases of fabrication.<br />
<strong>GC</strong> <strong>GRADIA</strong> introduces a new standard for dental composites with better aesthetics and a wider<br />
range of clinical applications. We believe <strong>GC</strong> <strong>GRADIA</strong> will meet the needs of dentists and laboratory<br />
technicians as a restorative material for both anterior and posterior applications in the mouths of<br />
the most aesthetically demanding patients.<br />
<strong>GRADIA</strong><br />
1
1. <strong>GC</strong> <strong>GRADIA</strong> COMPONENTS<br />
■ FOUNDATION OPAQUE (FO): 1 shade<br />
A paste-type opaque with exceptional light-curing characteristics. Flows readily into small areas.<br />
Polymerizes even in undercut areas of framework and has a bright light yellow color, as an ideal<br />
base for additional opaque applications.<br />
■ OPAQUE (O): 16 shades<br />
A paste-type opaque that applies readily, flows easily yet will not drip or run. Exceptional<br />
masking properties. The 16 shades express all of the basic tooth shades.<br />
■ MARGIN OPAQUE (MO): 1 shade<br />
Usually applied after the FOUNDATION OPAQUE in widths of 1 mm around the cervical margin.<br />
Effective in masking unwanted alloy show through around the margin. Can also be used on molar<br />
occlusal and lingual surfaces of jacket crowns. Easy to apply and fluid without running. It can be<br />
used in combination with OPAQUE to modify the standard colour.<br />
■ OPAQUS DENTIN (OD): 22 shades: 16 based on Vita ® shades and<br />
6 shades of OPAQUS DENTIN INTENSIVE<br />
When thick layers of composite can not be applied, OPAQUS DENTIN (opaque dentin) can be<br />
used instead of the regular DENTIN to reduce the white shade of OPAQUE and express a deeper<br />
colour. OPAQUS DENTIN can also be used as a cervical colour (choosing one shade darker than<br />
the crown’s, for instance ODA3.5 for an A3) in order to achieve deeper shades in the cervical and<br />
root areas.<br />
■ SHOULDER DENTIN (SD): 6 shades<br />
Used, among other things, to make custom shades. SHOULDER DENTIN creates deeper, richer<br />
cervical and root colours and reproduces the reflective brightness of natural teeth. In addition,<br />
can be used to mask the underlying alloy.<br />
EI1<br />
E3<br />
DA3<br />
CT2<br />
ODA3.5<br />
MO<br />
OA3<br />
Metal<br />
FO<br />
Veneer<br />
(incisal-free metal casting)<br />
■ DENTIN (D): 16 shades<br />
Has exceptional elongation properties and strength. These features permit forming it into<br />
delicate, long, finger-like strands or other like shapes. Masking ability is superb and exhibits a<br />
brighter colour which can reflect through a larger amount of Enamel. Superior to conventional<br />
dentin materials.<br />
■ INTENSIVE COLOR (IC): 15 shades<br />
This group consists of 14 colours, frequently used in porcelain, and one Clear (IC0), which can also<br />
be used to subdue the colour intensity of the 14 shades. The stains can be used after applying<br />
OPAQUE, DENTIN and ENAMEL. Where incisal is backed by alloy and lacking clarity, applying<br />
(IC7) Lavender creates an appearance of translucency.<br />
■ ENAMEL (E): 4 basic shades<br />
Enamel shades eliminate a too strong opalescence and the pale, whitish look of conventional<br />
materials. These exhibit warmth and true translucency.<br />
T0, CT o EI1<br />
EI1 and EI3<br />
DA2<br />
OA2<br />
ODI4<br />
CT4<br />
SD4<br />
MS<br />
HE1<br />
MO<br />
ODI3<br />
SD4<br />
Jacket crown<br />
2
■ HALO ENAMEL (HE): 1 shade<br />
Frames and contours the tooth when applied at the incisal edge, the proximal surfaces or the<br />
occlusal of posterior teeth. Comes in easy-to-apply, delicate yellow colored paste.<br />
■ PEARL ENAMEL (PE): 2 shades<br />
White pastes used at cusp tips to create decalcification spots and other white blemishes found<br />
in natural teeth.<br />
E2<br />
DA2<br />
OA2<br />
CT2<br />
ODA3<br />
CT2<br />
DA2<br />
MO<br />
■ ENAMEL INTENSIVE (EI): 3 shades<br />
Highly translucent. In a multi layering application, deep colour and depth can be obtained by<br />
using in the same manner as a conventional Enamel. In particular, it can be used for the occlusal<br />
surfaces of posterior teeth.<br />
■ TRANSLUCENT (T): 5 shades<br />
Five different degrees of translucent matching subtleties found in natural teeth.<br />
Jacket crown /<br />
Full coverage resin crown<br />
■ CERVICAL TRANSLUCENT (CT): 3 shades<br />
Highly translucent with a light amber colour. Can be applied cervically or in the incisal area to<br />
obtain deeper translucency. It is also used as dentin for inlays and posterior crowns, providing<br />
the resin with an aesthetic finish while maintaining the tooth colour.<br />
■ MAMELON STAIN (MS): 3 shades<br />
Used to create mamelon striations and other effects found in natural teeth.<br />
■ <strong>GC</strong> <strong>GRADIA</strong> DIE HARDNER<br />
Die Hardner, when coated on dies, hardens and preserves the surface during fabrication of<br />
inlays, jacket crowns, etc.<br />
■ <strong>GC</strong> <strong>GRADIA</strong> SEPARATOR<br />
A composite resin separator that is applied to working stone models when making inlays and<br />
onlays. It functions optimal on a Die Hardner treated stone surface.<br />
■ <strong>GC</strong> <strong>GRADIA</strong> DIAPOLISHER<br />
Developed specifically for the <strong>GC</strong> <strong>GRADIA</strong> System, this fine diamond-containing material is used<br />
on a felt wheel to apply a lustrous finish to restorations.<br />
EI 1•3 (or E)<br />
CT2•3•4<br />
■ <strong>GC</strong> <strong>GRADIA</strong> AIR BARRIER<br />
This agent creates an air barrier to guarantee a complete polymerization of the composite surface<br />
and avoid the inhibition layer.<br />
Inlay<br />
■ <strong>GC</strong> COMPOSITE PRIMER<br />
It is a light-curing bonding agent used for the additional application of composite layers and for<br />
repair works. <strong>GC</strong> COMPOSITE PRIMER can also be used as a modeling liquid to lubricate the<br />
spatula when applying the resin pastes.<br />
■ <strong>GC</strong> METALPRIMER II<br />
A tenacious bonding agent between the first composite layer e.g. FOUNDATION OPAQUE and<br />
the metal framework.<br />
3
2. SHADE COMBINATION CHART<br />
Translucency<br />
Opacity<br />
4<br />
Masking capacity of each paste
3. <strong>GC</strong> <strong>GRADIA</strong> CHARACTERISTICS<br />
1. NATURAL AESTHETICS<br />
1) <strong>GC</strong> <strong>GRADIA</strong> colour tones and translucency similar to those of natural teeth<br />
Its level of brightness and light transmission is similar or closer to porcelain than conventional<br />
composites. Where required, the underlying tooth preparation can be masked while maintaining<br />
a natural, life-like appearing anterior jacket crown. Thus the <strong>GC</strong> <strong>GRADIA</strong>’s build-up technique<br />
mirrows those used for ceramics.<br />
2) Reduction of pale opalescence typical for composites<br />
The opalescence and fluorescence features typical for composites could not be avoided so<br />
far, especially with translucent colours. When a crown was seated under the light conditions<br />
found in the mouth, the excessively opalescent colour would make it impossible to reproduce<br />
the natural colour. These features have been changed in <strong>GC</strong> <strong>GRADIA</strong> by optimizing the filler<br />
particle size, thereby controlling and adjusting the diffusion of light through the material. This<br />
allows to maintain the desired colour, created at dentin level, also when the restoration is seated<br />
in the mouth.<br />
Comparison of translucency<br />
0.5mm<br />
1.0mm<br />
1.5mm<br />
Product A<br />
Dentin<br />
<strong>GC</strong> <strong>GRADIA</strong><br />
Dentin A<br />
<strong>GC</strong> <strong>GRADIA</strong><br />
Opaque Dentin A<br />
11: Jacket crown made with conventional composite<br />
21: <strong>GC</strong> <strong>GRADIA</strong> Jacket crown<br />
3) <strong>GC</strong> <strong>GRADIA</strong>’s complete spectrum of colours<br />
<strong>GC</strong> <strong>GRADIA</strong> has a complete spectrum of colours comparable to natural dentition offering wider<br />
range than other composite systems.<br />
Comparison of opalescence<br />
Comparison of fluorescence<br />
1. OPAQUS DENTIN (OD) is used to express the deep cervical colours. SHOULDER DENTIN (SD)<br />
follows the same concept as shoulder ceramic bodies.<br />
2. MAMELON STAIN (MS) allows to easily reproduce the dentin structure in the mamelon area.<br />
INTENSIVE COLOR (IC) is available in 15 shades and is effective in characterizing crowns with<br />
cracks, decalcification areas, etc.<br />
3. ENAMEL INTENSIVE (EI) shades create the appearance of depth. CERVICAL TRANSLUCENT<br />
(CT) has a translucent amber color that is particularly suitable for the cervical area.<br />
4. HALO ENAMEL (HE) is used to clearly express the contour of the tooth. PEARL ENAMEL (PE)<br />
is applied to express white lines/zones and cusp tips.<br />
<strong>GC</strong> <strong>GRADIA</strong> Product A Product B Product C <strong>GC</strong> <strong>GRADIA</strong> Product A Product B Product C<br />
A comparison of <strong>GC</strong> <strong>GRADIA</strong>’s translucent colour tones with its competitors demonstrates that colours and translucency are<br />
similar. However, a comparison of fluorescence on a black background – as in the mouth – shows that <strong>GC</strong> <strong>GRADIA</strong> features a<br />
more natural fluorescence compared with other products.<br />
<strong>GC</strong> <strong>GRADIA</strong>’s wide range of colours enables restorations to appear more like porcelain than<br />
other composites.<br />
5
2. HIGH MECHANICAL STRENGTH FOR USE IN A WIDE RANGE OF CASES<br />
<strong>GC</strong> <strong>GRADIA</strong> provides superior physical properties and beautiful, natural aesthetics. The unique<br />
chemistry of <strong>GC</strong> <strong>GRADIA</strong> couples its micro-fine ceramic/pre-polymer filler with urethane<br />
dimethacrylate matrix to produce a unique ceramic composite with exceptionally high strength<br />
and wear resistance.<br />
As a consequence, <strong>GC</strong> <strong>GRADIA</strong> can be safely used also in those cases in posterior areas where<br />
often chipping and cracking problems occur.<br />
■ Stress-strain curve (fracture resistance) ■ Flexural strength ■ Occlusal wear – Horizontal slide with a load of<br />
1.7 MPa on bovine enamel (200,000 times)<br />
Wear depth (vs. bovine tooth enamel): 200,000 times<br />
Stress<br />
<strong>GC</strong> <strong>GRADIA</strong><br />
ProductA<br />
ProductB<br />
ProductC<br />
<strong>GC</strong> <strong>GRADIA</strong><br />
Product A<br />
Product B<br />
<strong>GC</strong> <strong>GRADIA</strong><br />
Product A<br />
Product B<br />
Product C<br />
Product C<br />
Strain<br />
Product A = MFR conventional composite<br />
Product B = Last-generation composite for restorations<br />
Product C = Hybrid ceramic<br />
■ Flexural energy<br />
■ Wear depth of bovine tooth enamel (surface roughness)<br />
<strong>GC</strong> <strong>GRADIA</strong><br />
Product A<br />
Product B<br />
Product C<br />
<strong>GC</strong> <strong>GRADIA</strong><br />
Product B<br />
Product C<br />
6
3. EXCELLENT HANDLING CHARACTERISTICS<br />
1) Ease of application<br />
FOUNDATION OPAQUE flows readily into undercut areas made from 100 μm RETENTION BEADS<br />
II SSS. The thixotropic properties of OPAQUE allow a uniform application without pooling. The<br />
texture of DENTIN ENAMEL pastes permits easily controlled spreading on all surfaces, also on<br />
complex surfaces such as occlusals of inlays and posterior crowns.<br />
3) Easy polishing<br />
<strong>GC</strong> <strong>GRADIA</strong>’s durable micro-ceramic composite surface is easily brought to a lustrous gloss with<br />
the <strong>GC</strong> <strong>GRADIA</strong> DIAPOLISHER.<br />
2) Simple Light pre-curing<br />
By using the new <strong>GC</strong> STEPLIGHT SL-I pre-curing light unit, the precuring time of <strong>GC</strong> <strong>GRADIA</strong><br />
pastes (excluding opaque materials) is reduced to 10 sec.<br />
4) Easy Intra-Oral Repairs<br />
Using <strong>GC</strong> COMPOSITE PRIMER and a conventional operatory curing light makes intra-oral<br />
repairs quick and easy.<br />
7
4. NEW ENVIRONMENTALLY FRIENDLY SYRINGE<br />
The screw section of the syringe can be re-used by simply replacing the barrel that contains<br />
paste, thus eliminating waste.<br />
1) Remove the used syringe barrel.<br />
2) Rotate hub to unlock.<br />
3) Remove plunger.<br />
4) Attach new syringe barrel to hub,<br />
insert plunger and lock hub.<br />
8
4. CLINICAL PROCEDURE<br />
Determine whether <strong>GC</strong> <strong>GRADIA</strong> is suitable for the patient.<br />
ORAL EXAMINATION<br />
Indications: 1. Anterior and posterior jacket crowns. Full coverage crowns.<br />
2. Anterior veneer metal-backed crowns, with or without incisal support.<br />
3. Inlays, onlays, laminate veneers.<br />
4. Implant superstructures.<br />
Contra indications: Malocclusions, bruxism or clenching.<br />
ABUTMENT TOOTH AND<br />
CAVITY PREPARATIONS<br />
Tooth preparation and design of restorations vary according to circumstances.<br />
The instructions for a correct preparation are illustrated below.<br />
■ Anterior veneer crown<br />
(With Incisal Support)<br />
The preparation is similar to a PFM crown. The<br />
margins should have a deep chamfer or shoulder<br />
with minimum depth of 0.8mm. Thickness of<br />
metal framework on the labial side should be<br />
0.3mm.<br />
0.3mm<br />
0.8mm<br />
2mm<br />
0.5mm<br />
■ Inlay<br />
Contour the cavity with rounded internal line<br />
angles. Avoid contact of opposing occlusion<br />
with the margins of restoration. The pit & fissure<br />
minimum depth should be 1.0mm, the width of<br />
occlusal surface at least 2.0mm with only shoulder<br />
margins occlusally. Interproximally, it should<br />
be box shaped.<br />
1.3 mm<br />
2.0 mm<br />
1mm<br />
■ Anterior jacket crown<br />
Prepare abutment tooth similar to a PFM crown<br />
(minimum of 1.3mm labial). Margin-design can<br />
be a deeper chamfer or shoulder (0.8mm).<br />
1.3mm<br />
0.8 1.2mm<br />
(0.5mm)<br />
1.5 2mm<br />
1.3mm)<br />
0.8 1.0mm<br />
(0.8mm)<br />
0.8 1.0mm<br />
(0.5mm)<br />
■ Onlay<br />
Contour the cavity with rounded internal line<br />
angles. Avoid contact of opposing occlusion with<br />
the margins of the restoration. Pit & fissure depth<br />
minimum should be 1.0mm and cusp at least<br />
1.3mm.<br />
1.3 1.8mm<br />
1mm<br />
■ Posterior jacket crown<br />
The occlusal reduction should be at least<br />
1.3mm. Margins should have 1.3mm depth with<br />
a deep chamfer or shoulder.<br />
1.3 1.8 mm 1.3 1.8 mm<br />
1mm<br />
■ Margin preparations<br />
Prepare deep chamfers (1)<br />
or shoulders (2).<br />
1.3 mm<br />
0.8 1mm<br />
0.8mm<br />
min.<br />
0.8mm<br />
min.<br />
YES YES NO NO<br />
9
IMPRESSION TAKING<br />
Retract gingiva in normal manner. Use a vinyl silicone impression<br />
material such as <strong>GC</strong> EXAMIX NDS, <strong>GC</strong> EXAFAST NDS,<br />
<strong>GC</strong> EXAJET or <strong>GC</strong> EXAFLEX.<br />
BITE REGISTRATION AND<br />
COLOUR RECORDING<br />
Use <strong>GC</strong> EXABITE II to make occlusal or bite registration.<br />
Select a shade from the Vitapan ® classical shade guide.<br />
EXABITE II NDS<br />
TEMPORARY RESTORATION<br />
Fabricate temporary restoration with <strong>GC</strong> UNIFAST TRAD /<br />
<strong>GC</strong> UNIFAST LC or <strong>GC</strong> REVOTEK LC and cement with a<br />
eugenol-free temporary cement such as <strong>GC</strong> FREEGENOL.<br />
<strong>GC</strong> EXAMIX NDS, <strong>GC</strong> EXAFAST NDS,<br />
<strong>GC</strong> EXAJET and <strong>GC</strong> EXAFLEX<br />
<strong>GC</strong> UNIFAST III<br />
POUR & PREPARE MASTER<br />
MODEL<br />
Pour and prepare working model with a Type IV die stone such<br />
as <strong>GC</strong> FUJIROCK EP.<br />
<strong>GC</strong> FUJIROCK EP<br />
<strong>GC</strong> FREEGENOL<br />
PRODUCTION OF THE RESTORATION Refer to COMPOSITE BUILD-UP PROCEDURE, pages 12 - 27<br />
10
REMOVAL OF THE TEMPORARY<br />
RESTORATION AND CLEANING<br />
Remove temporary restoration, sealing material or cement. Clean cavity. Rinse and<br />
dry cavity thoroughly.<br />
<strong>GC</strong> METALPRIMER II<br />
CLEANING AND TREATMENT<br />
OF THE RESTORATION<br />
FOR BONDING<br />
■ Internal Metal bonding surface<br />
Sandblast the metal surface with aluminum oxide (+/- 50 microns) and apply a<br />
thin layer of <strong>GC</strong> METALPRIMER II. After applying the primer, carefully avoid<br />
contaminating the metal surface before cementing the restoration.<br />
Precaution: Apply one or two thin coats of <strong>GC</strong> METALPRIMER II. A too thick coat<br />
can reduce adhesive strength.<br />
■ <strong>GC</strong> <strong>GRADIA</strong> internal bonding surface (metal free restorations)<br />
Apply thin layer of <strong>GC</strong> COMPOSITE PRIMER to internal bonding surface then light<br />
cure with conventional operatory curing light for 20 sec.<br />
When using LABOLIGHT LV-II/LV-III, light-cure for one minute.<br />
<strong>GC</strong> COMPOSITE<br />
PRIMER<br />
<strong>GC</strong> LABOLIGHT LV-II / LV-III<br />
CEMENTATION<br />
Cement with <strong>GC</strong> FUJI PLUS or comparable dental cement per<br />
manufacturer’s instructions.<br />
<strong>GC</strong> FUJI PLUS<br />
ADJUSTING & POLISHING<br />
OCCLUSAL SURFACE<br />
Adjust occlusal surface with diamond or carborundum point then use silicone<br />
points. Finally, add <strong>GC</strong> <strong>GRADIA</strong> DIAPOLISHER to felt or chamois wheel and buff<br />
to a lustrous finish.<br />
<strong>GC</strong> <strong>GRADIA</strong> DIAPOLISHER<br />
11
5. COMPOSITE BUILD-UP PROCEDURE<br />
1. ANTERIOR VENEER CROWN (INCISAL FREE METAL BACKING)<br />
1. PREPARING MASTER MODEL 2. WAX-UP<br />
EI1<br />
E3<br />
OA3<br />
DA3<br />
CT2<br />
ODA3.5<br />
MO<br />
Metal<br />
FO<br />
Prepare the master model in the<br />
usual manner using <strong>GC</strong> Fujirock EP.<br />
Margins pencilled in red.<br />
Apply <strong>GC</strong> Multisep to the master die.<br />
Use different coloured wax in order<br />
to easily identify the thickness of wax<br />
during veneer cut-out.<br />
Fully contour the wax-up.<br />
Underlying wax colour acts as a depth<br />
guide.<br />
Scribe 1 mm from incisal and proximal<br />
areas, establishing where metal<br />
casting limits will be. Using a wax<br />
bur or instrument, remove 1 mm<br />
depth of wax incisal/lingual.<br />
3. PREPARE SILICONE INDEX<br />
45°<br />
Wax-up<br />
1mm<br />
Silicone<br />
index<br />
Make lingual silicone impression<br />
index.<br />
Use <strong>GC</strong> Exaflex Putty for making a<br />
silicon impression index.<br />
Remove excess of silicon incisally to<br />
an angle of 45°. This silicon index<br />
is later used in building up Dentin<br />
and Enamel.<br />
4.MAKING CASTINGS<br />
Wax up die with <strong>GC</strong> Inlay Wax.<br />
Retention Beads II SSS (particle<br />
size: 100μ) enhance mechanical<br />
bond strength between casting and<br />
<strong>GC</strong> <strong>GRADIA</strong> composite veneer.<br />
Used in combination with<br />
<strong>GC</strong> Metalprimer II bonding agent.<br />
Apply a thin layer of Adhesive II for<br />
<strong>GC</strong> Retention Beads II SSS.<br />
Let surface dry and become tacky.<br />
Sprinkle a layer of <strong>GC</strong> Retention Sprue and invest using a <strong>GC</strong><br />
Beads II SSS evenly over wax phosphate bonded investment and<br />
surface.<br />
cast in a normal way.<br />
12
Chart 1 – Curing time for Opaque pastes<br />
<strong>GC</strong> LABOLIGHT LV-II, III 1 minute<br />
<strong>GC</strong> LABOLIGHT LV-I<br />
3 minutes<br />
5. PREPARE CASTING<br />
MO<br />
OA3<br />
Metal<br />
FO<br />
Remove beads within 0,5 mm from<br />
margin area with a carbide bur.<br />
Finish and polish metal casting in a<br />
usual manner.<br />
Sandblast metal surface that requires<br />
application of <strong>GC</strong> METALPRIMER II<br />
with clean 50μ aluminium oxide.<br />
Blow surface with clean, dry<br />
air and immediately apply<br />
<strong>GC</strong> METALPRIMER II.<br />
Note: There will be no change in<br />
surface look after coating.<br />
<strong>GC</strong> METALPRIMER II is a metal adhesive<br />
primer with monomer containing<br />
thiophosphoric metacrylate (MEPS).<br />
Note: <strong>GC</strong> METALPRIMER II is very<br />
volatile. Replace bottle cap<br />
immediately after use.<br />
6. FOUNDATION OPAQUE (FO)<br />
Note: Remove any Opaque remaining<br />
on nozzle syringe tip with tissue<br />
paper.<br />
Apply <strong>GC</strong> METALPRIMER II, one or twice FOUNDATION OPAQUE shade serves<br />
by using a clean brush. Allow drying for as foundation of all shades.<br />
a few seconds.<br />
Dispense FOUNDATION OPAQUE<br />
Immediately start to apply FOUNDATION<br />
OPAQUE to avoid contamination of the into disposable pallet and shield with<br />
bonding surface.<br />
light protective cover.<br />
Apply layer of FOUNDATION - For best results, light cure Opaques<br />
OPAQUE about 100μ thickness with with <strong>GC</strong> LABOLIGHT LV-III: see chart<br />
flat brush.<br />
1 above<br />
Note: If Opaque gets too thick, stir - Refer to curing depth of<br />
with brush to restore fluidity. Opaque chart on page 28.<br />
7. MARGIN OPAQUE (MO) 8. OPAQUE (O)<br />
For deeper, richer cervical colours,<br />
apply MARGIN OPAQUE in 1 mm<br />
width cervically using a round<br />
brush.<br />
MARGIN OPAQUE, if applied after<br />
Opaque layer of the tooth shade,<br />
may create a whitish line showing<br />
through final composite layer.<br />
To entire surface, apply two thin coats First layer<br />
of OPAQUE (O) using a flat brush.<br />
Avoid to use a too thick layer, the<br />
curing process might turn out to be<br />
insufficient.<br />
Second layer<br />
Light cure: chart 1<br />
Light cure: chart 1<br />
Light cure: chart 1<br />
13
Chart 2 – Curing time for Dentin/Enamel<br />
bodies and intensive colours<br />
<strong>GC</strong> STEPLIGHT SL-I<br />
10 seconds<br />
<strong>GC</strong> LABOLIGHT LV-II, III 30 seconds<br />
<strong>GC</strong> LABOLIGHT LV-I<br />
60 seconds<br />
9. OPAQUE DENTIN (OD)<br />
E3<br />
DA3<br />
Metal<br />
ODA3.5<br />
For deeper, richer cervical, increase<br />
chroma by selecting next most<br />
saturated shade i.e., ODA3,5 for an<br />
A3. Apply OPAQUS DENTIN (OD)<br />
in 2-3 mm widths widths in cervical<br />
area.<br />
Light cure: see chart 2<br />
Note: To reproduce an individual<br />
colour for the cervical area following<br />
the individual patient case, SHOULDER<br />
DENTIN (SD) can also be used.<br />
SHOULDER DENTIN is available in<br />
6 shades.<br />
10. DENTIN (D)<br />
Attach silicone index lingually. Note: To prevent voids, smooth Create mamelons 1,5 mm<br />
Apply Dentin paste leaving room DENTIN surface with flat brush. from incisal edge.<br />
for ENAMEL.<br />
Note: Apply MAMELON STAIN to<br />
accentuate striations.<br />
Note: To increase appearance of<br />
translucency, apply INTENSIVE<br />
COLOR (IC7 Lavender).<br />
Light cure: see chart 2 Light cure: see chart 2 Light cure: see chart 2<br />
11. ENAMEL (E)<br />
Side view of facial contour.<br />
Apply appropriate ENAMEL shade<br />
starting at 1 mm from incisal edge<br />
towards center of crown, with silicone<br />
index still in place.<br />
ENAMEL characterization completed.<br />
Light cure: see chart 2<br />
14
Chart 2 – Curing time for Dentin/Enamel<br />
bodies and intensive colours<br />
<strong>GC</strong> STEPLIGHT SL-I<br />
10 seconds<br />
<strong>GC</strong> LABOLIGHT LV-II, III 30 seconds<br />
<strong>GC</strong> LABOLIGHT LV-I<br />
60 seconds<br />
Chart 3 – Final curing time<br />
<strong>GC</strong> LABOLIGHT LV-II, III<br />
<strong>GC</strong> LABOLIGHT LV-I<br />
3 minutes<br />
5 minutes<br />
12. CERVICAL TRANSLUCENT (CT) 13. ENAMEL INTENSIVE (EI)<br />
14. HALO ENAMEL (HE)<br />
EI1<br />
EI1<br />
HE1<br />
HE1<br />
CT2<br />
CT2<br />
For deeper, richer colour, apply Apply ENAMEL INTENSIVE at incisal Add HALO ENAMEL to proximal<br />
(CT) at cervical area towards tooth edge towards cervical area for natural areas to accentuate tooth contour.<br />
center.<br />
appearance.<br />
Light cure: see chart 2<br />
Light cure: see chart 2 Light cure: see chart 2<br />
15. FINAL BUILD-UP 16. AIR BARRIER 17. FINAL LIGHT CURING<br />
Application is complete on labial<br />
surface.<br />
Remove silicone index. Apply<br />
ENAMEL INTENSIVE (EI) on the<br />
lingual surface as needed.<br />
Immediately coat surface with After applying <strong>GC</strong> <strong>GRADIA</strong> AIR<br />
<strong>GC</strong> <strong>GRADIA</strong> AIR BARRIER to BARRIER, light cure. Remove<br />
eliminate air inhibition layer and to <strong>GC</strong> <strong>GRADIA</strong> AIR BARRIER with<br />
ensure complete polymerization. water, after final polymerization.<br />
Light cure: see chart 2<br />
Light cure: see chart 3<br />
18. ADJUST CONTOUR<br />
Adjust contour with diamond and/or<br />
carbide burs. Refer to page 16 for<br />
additional composite applications.<br />
Note: To add resin, first roughen<br />
resin surface with bur, coat with<br />
<strong>GC</strong> COMPOSITE PRIMER and<br />
light cure 1 min. in <strong>GC</strong> LABOLIGHT<br />
LV-III.<br />
Apply added material, DENTIN,<br />
ENAMEL or ENAMEL INTENSIVE<br />
and light cure 3 min. Then<br />
characterize surface with diamond<br />
and carborundum points.<br />
Adjust surface<br />
Refine surface texture with diamond<br />
or carborundum points. Smooth with<br />
silicone points.<br />
Finish<br />
Finish surface with Robinson Brush<br />
together with <strong>GC</strong> <strong>GRADIA</strong><br />
DIAPOLISHER.<br />
Polish & Buff<br />
Use <strong>GC</strong> <strong>GRADIA</strong> DIAPOLISHER on<br />
felt or chamois wheel for a lustrous<br />
finish.<br />
15
Chart 2 – Curing time for Dentin/Enamel<br />
bodies and intensive colours<br />
<strong>GC</strong> STEPLIGHT SL-I<br />
10 seconds<br />
<strong>GC</strong> LABOLIGHT LV-II, III 30 seconds<br />
<strong>GC</strong> LABOLIGHT LV-I<br />
60 seconds<br />
Chart 3 – Final curing time<br />
<strong>GC</strong> LABOLIGHT LV-II, II<br />
<strong>GC</strong> LABOLIGHT LV-I<br />
3 minutes<br />
5 minutes<br />
19. COMPLETED VENEER CROWN<br />
Labial view Lingual view SHADE A3 AND <strong>GC</strong> <strong>GRADIA</strong><br />
CROWN<br />
<strong>GC</strong> <strong>GRADIA</strong>’s brighter, deeper and<br />
richer colours provide superior<br />
aesthetics and vitality versus<br />
conventional composites.<br />
ADDITIONAL BUILD-UP & REPAIRS<br />
Roughen composite surface with<br />
bur.<br />
Coat surface with a tin layer of<br />
<strong>GC</strong> COMPOSITE PRIMER.<br />
Light cure 1 min. with <strong>GC</strong> LABOLIGHT Apply desired additional shades.<br />
LV-III or 20 sec. with conventional<br />
operatory curing light.<br />
Note: For extensive additions, cure Refer to page 15 for finishing<br />
with <strong>GC</strong> LABOLIGHT LV-III. steps.<br />
If using conventional operatory curing<br />
light, cure for 1 min.<br />
Light cure: see chart 2<br />
Light cure: see chart 3<br />
16
2. COMPOSITE BUILD-UP PROCEDURE<br />
Chart 1 – Curing time for Opaque pastes<br />
<strong>GC</strong> LABOLIGHT LV-II, II 1 minute<br />
<strong>GC</strong> LABOLIGHT LV-I<br />
3 minutes<br />
Chart 2 - Curing time for Dentin/Enamel<br />
bodies and intensive colours<br />
<strong>GC</strong> STEPLIGHT SL-I<br />
10 seconds<br />
<strong>GC</strong> LABOLIGHT LV-II, III 30 seconds<br />
<strong>GC</strong> LABOLIGHT LV-I<br />
60 seconds<br />
T0, CT o EI1<br />
EI1 and EI3<br />
MS<br />
1. MODEL PREPARATION<br />
2. PREPARE SILICONE INDEX 3. <strong>GC</strong> <strong>GRADIA</strong> DIE HARDNER<br />
1 mm<br />
DA2<br />
HE1<br />
OA2<br />
MO<br />
ODI4<br />
CT4<br />
SD4<br />
ODI3<br />
SD4<br />
Prepare <strong>GC</strong> Fujirock EP dies in normal<br />
manner. Pencil margins in red.<br />
Wax-up. Form silicone index<br />
lingually.<br />
Cut-off 1 mm from incisal. (Refer to<br />
page 12 – Prepare Silicone Index).<br />
Coat dies with thin layer of<br />
<strong>GC</strong> <strong>GRADIA</strong> DIE HARDNER.<br />
Note: If needed, add wax as<br />
spacer.<br />
4. <strong>GC</strong> <strong>GRADIA</strong> SEPARATOR 5: JACKET CROWN ON NATURAL DIE 6. JACKET CROWN ON ALLOY CORE<br />
Note: Followed step by step<br />
procedure illustrates the composite<br />
buildup process for a Jacket crown<br />
on alloy core.<br />
Apply thin coat of <strong>GC</strong> <strong>GRADIA</strong><br />
SEPARATOR.<br />
Special pre-curing treatment for<br />
Jacket crown on a natural die, without<br />
discolouration.<br />
Apply thin coat of INTENSIVE COLOR<br />
(IC0 Clear).<br />
Light cure each surface for 10 sec.<br />
with <strong>GC</strong> STEPLIGHT SL-I.<br />
Proceed to # 7, SHOULDER<br />
DENTIN.<br />
Special pre-curing treatment for<br />
Jacket crown on alloy core.<br />
Apply OPAQUE (O) to entire die<br />
surface. Than MARGIN OPAQUE<br />
(MO) to cervical and lingual surface.<br />
Light cure: see chart 2 Light cure: see chart 1<br />
7. SHOULDER DENTIN (SD)<br />
SD2.3.4.5<br />
SD7.8<br />
Apply SHOULDER DENTIN (SD2, 3,<br />
4 or 5) cervically. If SD is not available,<br />
use DENTIN (increase chroma by<br />
selecting next most saturated shade,<br />
i.e.DA3,5 for an A3.<br />
Light cure: see chart 2<br />
Note: Use SD7 or SD8 to mask<br />
underlying alloy then apply SD2,<br />
3, 4 or 5.<br />
For non-metal crown, use SD2, 3, 4<br />
or 5 in cervical area.<br />
17
Chart 2 – Curing time for Dentin/Enamel<br />
bodies and intensive colours<br />
<strong>GC</strong> STEPLIGHT SL-I<br />
10 seconds<br />
<strong>GC</strong> LABOLIGHT LV-II, III 30 seconds<br />
<strong>GC</strong> LABOLIGHT LV-I<br />
60 seconds<br />
T0, CT and EI1<br />
MS 8. COLOUR MODIFICATION (INCISAL) 9. COLOUR MODIFICATION (DENTIN) 10. DENTIN BUILD-UP<br />
EI1 and EI3<br />
DA 2<br />
ODI4<br />
CT4<br />
Place silicone index and apply dentin<br />
as a base.<br />
Apply INTENSIVE COLOR (IC7<br />
Lavender) to the incisal area to increase<br />
translucency.<br />
To create natural variations of<br />
brightness in the dentin, apply<br />
OPAQUS DENTIN to cervical 1/3.<br />
Take care not to apply the OPAQUS<br />
DENTIN up to the final crown shape<br />
surface.<br />
Using silicone index, add DENTIN,<br />
leaving room for ENAMEL and<br />
characterizations and taken in<br />
consideration final shape of<br />
composite crown.<br />
Light cure: see chart 2 Light cure: see chart 2<br />
Light cure: see chart 2<br />
11. MAMELON STAIN 12. ENAMEL / TRANSLUCENT<br />
Apply thin layer of MAMELON STAIN<br />
to create striation effects.<br />
Caution: Re-applying stains may Apply ENAMEL or TRANSLUCENT Characterize incisal with MAMELON<br />
create shadow under TRANSLUCENT shade, considering the final shape STAIN or by mixing INTENSIVE<br />
layer.<br />
of the crown.<br />
COLORS (IC3 & 4).<br />
Light cure: see chart 2<br />
13. TRANSLUCENT, HAIRLINE CRACKS<br />
Light cure: see chart 2<br />
Light cure: see chart 2<br />
14. COMPLETING LABIAL<br />
EI3<br />
EI1<br />
EI1<br />
Crack liner<br />
(IC13/IC5)<br />
EI1<br />
HE1<br />
HE1<br />
Apply appropriate CERVICAL (IC5 Brown) to create effect on<br />
TRANSLUCENT (CT) covering hairline crack.<br />
cervical 1/3 of crown. Add ENAMEL<br />
INTENSIVE (EI) and INTENSIVE<br />
COLOR (IC13 Crack liner) in vertical<br />
layering, then INTENSIVE COLOR.<br />
Light cure: see chart 2<br />
Cross section depicting creation of<br />
hairline crack effect.<br />
Apply HALO ENAMEL (HE) to<br />
proximal areas to complete the labial<br />
build-up procedure.<br />
Light cure: see chart 2<br />
CT2<br />
18
Chart 2 - Curing time for Dentin/Enamel<br />
bodies and intensive colours<br />
<strong>GC</strong> STEPLIGHT SL-I<br />
10 seconds<br />
<strong>GC</strong> LABOLIGHT LV-II, III 30 seconds<br />
<strong>GC</strong> LABOLIGHT LV-I<br />
60 seconds<br />
Chart 3 – Final curing time<br />
<strong>GC</strong> LABOLIGHT LV-II, II<br />
<strong>GC</strong> LABOLIGHT LV-I<br />
3 minutes<br />
35 minutes<br />
15. COMPLETING LINGUAL<br />
FINISH PROXIMALS<br />
HE1<br />
MS<br />
ODI3<br />
Apply appropriate MAMELON STAIN<br />
to prevent natural tooth from showing<br />
through resin surface.<br />
Apply OPAQUS DENTIN INTENSIVE<br />
to cervical 1/3.<br />
Progressively add HALO ENAMEL<br />
from incisal toward cervical.<br />
Add HALO ENAMEL to proximal<br />
areas. Slightly over contour proximals<br />
to allow grinding and polishing.<br />
Light cure: see chart 2<br />
Light cure: see chart 2 Light cure: see chart 2<br />
17. AIR BARRIER 18. FINAL LIGHT CURE 19. REMOVE CROWN 20. ADJUST & POLISH<br />
21. COMPLETED CROWNS<br />
Immediately coat surface with After applying <strong>GC</strong> <strong>GRADIA</strong> AIR<br />
<strong>GC</strong> <strong>GRADIA</strong> AIR BARRIER to BARRIER, light cure. Remove<br />
eliminate air inhibition layer <strong>GC</strong> <strong>GRADIA</strong> AIR BARRIER with<br />
and to guarantee complete water.<br />
polymerization.<br />
Light cure: see chart 3<br />
Adjust shape and contour surface.<br />
Polish by buffing. (see page 15)<br />
Excellent fit and marginal integrity<br />
Labial view<br />
Lingual view<br />
19
Chart 2 – Curing time for Dentin/Enamel<br />
bodies and intensive colours<br />
Chart 3 – Final curing time<br />
<strong>GC</strong> STEPLIGHT SL-I<br />
10 seconds<br />
<strong>GC</strong> LABOLIGHT LV-II, II<br />
3 minutes<br />
<strong>GC</strong> LABOLIGHT LV-II, III<br />
30 seconds<br />
<strong>GC</strong> LABOLIGHT LV-I<br />
3-5 minutes<br />
3. COMPOSITE BUILD-UP PROCEDURE<br />
<strong>GC</strong> LABOLIGHT LV-I<br />
60 seconds<br />
1. MODEL PREPARATION 2. UNDERCUTS 3. <strong>GRADIA</strong> SEPARATOR<br />
EI 1•3 (or E)<br />
CT2•3•4<br />
Pour model using <strong>GC</strong> FUJIROCK<br />
EP.<br />
Apply thin coat of <strong>GC</strong> <strong>GRADIA</strong> DIE<br />
HARDNER on die surface.<br />
Block-out undercuts with wax.<br />
Coat cavity with <strong>GC</strong> <strong>GRADIA</strong><br />
SEPARATOR.<br />
4. CERVICAL TRANSLUCENT (CT)<br />
EI 1•3•(or E)<br />
CT 2•3•4<br />
O,<br />
OD,<br />
MO<br />
Apply thin layer of INTENSIVE<br />
COLOR (IC0 Clear).<br />
Add CERVICAL TRANSLUCENT as<br />
dentin colour. Natural tooth colour<br />
will show through.<br />
If tooth is discolored, first apply<br />
OPAQUE (O), MARGIN OPAQUE<br />
(MO) or OPAQUS DENTIN (OD) to<br />
cavity floor.<br />
Light cure: see chart 2<br />
Light cure: see chart 2<br />
5. ENAMEL INTENSIVE 6. COMPLETED BUILD-UP 7. AIR BARRIER 8. CONTOUR & POLISH<br />
Apply appropriate ENAMEL<br />
INTENSIVE or ENAMEL and<br />
contour.<br />
Light cure: see chart 2<br />
Immediately coat surface with<br />
<strong>GC</strong> <strong>GRADIA</strong> AIR BARRIER to<br />
eliminate air inhibition layer (see<br />
page 15).<br />
Final light cure 3 minutes. Wash off<br />
<strong>GC</strong> <strong>GRADIA</strong> AIR BARRIER with water<br />
(see page 15).<br />
Light cure: see chart 3<br />
Refine surface texture with diamond<br />
or carborundum points.<br />
Smooth with silicone points.<br />
Finish surface with Robinson<br />
Brush.<br />
Apply <strong>GC</strong> <strong>GRADIA</strong> DIAPOLISHER<br />
with felt or chamois wheel.<br />
20
9. COMPLETED INLAY<br />
Example of clinical cases<br />
21
4. POSTERIOR JACKET CROWN / FULL COVERAGE COMPOSITE CROWN<br />
Chart 1 – Curing time for Opaque pastes<br />
<strong>GC</strong> LABOLIGHT LV-II, II 1 minute<br />
<strong>GC</strong> LABOLIGHT LV-I<br />
3 minutes<br />
Chart 2 - Curing time for Dentin/Enamel<br />
bodies and intensive colours<br />
<strong>GC</strong> STEPLIGHT SL-I<br />
10 seconds<br />
<strong>GC</strong> LABOLIGHT LV-II, III 30 seconds<br />
<strong>GC</strong> LABOLIGHT LV-I<br />
60 seconds<br />
E2<br />
CT2<br />
1. PREPARE MODEL 2. FOUNDATION OPAQUE (FO), OPAQUE (O), ETC.<br />
3. DENTIN (D)<br />
Note: For jacket crowns, see<br />
steps 1-5 in 5-2 "ANTERIOR<br />
JACKET CROWNS", on page 17.<br />
If natural tooth is stained, start with<br />
OPAQUE.<br />
DA2<br />
OA2<br />
CT2<br />
ODA3<br />
DA2<br />
MO<br />
Pour model in <strong>GC</strong> FUJIROCK EP.<br />
Make cast coping in usual manner.<br />
Note: This step procedure is also<br />
suitable to a metal supported full<br />
coverage composite crown.<br />
Apply FOUNDATION OPAQUE then<br />
OPAQUE to facial. Add MARGIN<br />
OPAQUE to occlusal & lingual then<br />
OPAQUS DENTIN to cervical. After<br />
each application light cure.<br />
Light cure OPAQUE: see chart 1<br />
Light cure OPAQUS DENTIN: see<br />
chart 2<br />
Apply DENTIN in usual manner.<br />
Light cure: see chart 2<br />
4. CHECK DENTIN HEIGHT 5. CERVICAL TRANSLUCENT (CT)<br />
CT2<br />
1mm<br />
1mm<br />
DENTIN build-up should have 1 mm<br />
freeway space.<br />
Note: Maintain 1 mm infra-occlusion,<br />
referring to adjacent and antagonist<br />
teeth.<br />
Add CERVICAL TRANSLUCENT to<br />
occlusal surface.<br />
Light cure: see chart 2<br />
6. CONFIRM FREEWAY SPACE 7. ENAMEL<br />
Before light curing (CT), check to Check shape and position of Apply ENAMEL while checking<br />
ensure there is adequate space for interproximal contacts.<br />
occlusal relationship.<br />
ENAMEL.<br />
Light cure: see chart 2<br />
22
Chart 3 – Final curing time<br />
<strong>GC</strong> LABOLIGHT LV-II, II<br />
<strong>GC</strong> LABOLIGHT LV-I<br />
3 minutes<br />
3-5 minutes<br />
8. AIR BARRIER 9. COMPLETED CROWN<br />
Coat surface with <strong>GC</strong> <strong>GRADIA</strong> AIR<br />
BARRIER and light cure. Wash off<br />
<strong>GC</strong> <strong>GRADIA</strong> AIR BARRIER with<br />
water.<br />
Light cure: see chart 3<br />
Completed crown after adjusting,<br />
contouring and polishing.<br />
Clinical example of a <strong>GC</strong> <strong>GRADIA</strong><br />
metal supported 3 unit bridge.<br />
23
5. COMPOSITE BUILD-UP PROCEDURE<br />
Simplified build-up procedure<br />
1. MODEL PREPARATION<br />
2. FRAMEWORK<br />
E2<br />
IC7<br />
OA2<br />
DA2<br />
Metal<br />
ODA3<br />
MO<br />
FO<br />
Pour model using <strong>GC</strong> FUJIROCK<br />
EP. Prepare in normal manner.<br />
Coat die with <strong>GC</strong> MULTISEP, wax Note: Suggest making coping in<br />
separator, wax-up crown and create different colour wax from build-up.<br />
veneer (window).<br />
Colour contrast will determine depth<br />
of veneer.<br />
Note: To get thinner coat cut tip of<br />
brush (See sketch of bead pattern<br />
to the right)<br />
Cut out veneer or window, preserving<br />
proximal contact in metal.<br />
Apply thin layer of <strong>GC</strong> ADHESIVE II for<br />
<strong>GC</strong> Retention Beads II SSS. Allow to dry.<br />
Surface will get tacky.<br />
Sprinkle uniform layer of <strong>GC</strong><br />
Retention Beads II SSS on surface.<br />
Note: Resin will bond to alloy with<br />
application of <strong>GC</strong> METALPRIMER II.<br />
Bead coating design allows<br />
maximum room for shade<br />
reproduction and obtains a suitable<br />
mechanical retention strength.<br />
CASTING<br />
TRIM CASTING<br />
Sprue then invest with Remove any metal retention beads<br />
<strong>GC</strong>’s phosphate bonded within 0,5 mm of outer margins of<br />
investments.<br />
casting.<br />
Cast and finish in normal manner.<br />
24
Chart 1 – Curing time for Opaque pastes<br />
<strong>GC</strong> LABOLIGHT LV-II, II 1 minute<br />
<strong>GC</strong> LABOLIGHT LV-I<br />
3 minutes<br />
Chart 2 - Curing time for Dentin/Enamel<br />
bodies and intensive colours<br />
<strong>GC</strong> STEPLIGHT SL-I<br />
10 seconds<br />
<strong>GC</strong> LABOLIGHT LV-II, III 30 seconds<br />
<strong>GC</strong> LABOLIGHT LV-I<br />
60 seconds<br />
IC7<br />
OA2<br />
Metal<br />
FO<br />
3. PREPARING METAL CASTING<br />
<strong>GC</strong> METALPRIMER II is very volatile.<br />
Replace bottle cap immediately after<br />
use.<br />
As soon as surface is dry, immediately<br />
apply FOUNDATION OPAQUE to<br />
prevent surface contamination.<br />
ODA3<br />
MO<br />
Sandblast with clean 50μ aluminium<br />
oxide.<br />
Blow surface clean with clean-dry air<br />
and immediately prepare to apply<br />
<strong>GC</strong> METALPRIMER II.<br />
Apply one or two thin coats of<br />
<strong>GC</strong> METALPRIMER II.<br />
Allow to dry.<br />
Surface will appear unchanged.<br />
4. FOUNDATION OPAQUE (FO) 5. MARGIN OPAQUE (MO)<br />
Apply FOUNDATION OPAQUE, a Note: If OPAQUE gets a little thick, Opaques can ONLY be light cured<br />
100μm layer (thickness of RETENTION simply stir it with the brush to restore with <strong>GC</strong> LABOLIGHT LV-II/LV-III.<br />
BEADS II SSS).<br />
fluidity.<br />
<strong>GC</strong> STEPLIGHT SL-I can not be used<br />
for opaque pastes.<br />
For deeper, richer cervical colour,<br />
apply MARGIN OPAQUE with round<br />
brush.<br />
Light cure: see chart 1 Light cure: see chart 1<br />
Note: MARGIN OPAQUE (MO)<br />
is applied onto FOUNDATION<br />
OPAQUE (FO).<br />
To avoid white line, do not apply<br />
(MO) over opaque.<br />
6. OPAQUE (O) 7. INTENSIVE COLOR (IC7) 8. OPAQUS DENTIN (OD)<br />
Apply two thin layers of OPAQUE<br />
using flat brush.<br />
A too thick layer may not polymerize<br />
as well.<br />
Light cure first coat.<br />
Light cure second coat.<br />
To create translucency, add For deeper, richer cervical color, add<br />
INTENSIVE COLOR (IC7) to incisal OPAQUS DENTIN in 2-3 mm widths<br />
area.<br />
around the cervical area.<br />
Use round brush.<br />
Make (OD) one shade higher than<br />
the crown.<br />
Light cure: see chart 1<br />
Light cure: see chart 1<br />
Light cure: see chart 2<br />
Light cure: see chart 2<br />
25
Chart 2 - Curing time for Dentin/Enamel<br />
bodies and intensive colours<br />
<strong>GC</strong> STEPLIGHT SL-I<br />
10 seconds<br />
<strong>GC</strong> LABOLIGHT LV-II, III 30 seconds<br />
<strong>GC</strong> LABOLIGHT LV-I<br />
60 seconds<br />
Chart 3 – Final curing time<br />
<strong>GC</strong> LABOLIGHT LV-II, II<br />
<strong>GC</strong> LABOLIGHT LV-I<br />
3 minutes<br />
3-5 minutes<br />
E2<br />
9. DENTIN<br />
DA2<br />
Build-up DENTIN to form and shape Brush surface to prevent bubbles ENAMEL will be added later to cover Proximal view of DENTIN<br />
crown.<br />
Leave room for ENAMEL.<br />
forming with ENAMEL application. incisal 2/3.<br />
application.<br />
Create mamelons from incisal to<br />
about center of crown.<br />
Light cure: see chart 2<br />
10. ENAMEL (E) 11. AIR BARRIER<br />
Coat surface with <strong>GC</strong> <strong>GRADIA</strong> AIR<br />
BARRIER in usual manner.<br />
Apply ENAMEL, starting from incisal<br />
and feathering down to about the<br />
center of crown.<br />
Note: For deeper cervical colour,<br />
add CERVICAL DENTIN.<br />
After applying CERVICAL<br />
TRANSLUCENT.<br />
After applying ENAMEL.<br />
Light cure: see chart 2 Light cure: see chart 2<br />
12. FINAL LIGHT CURING 13. FINAL SHAPING<br />
Use <strong>GC</strong> LABOLIGHT LV-II/LV-III for final<br />
cure then wash off <strong>GC</strong> <strong>GRADIA</strong> AIR<br />
BARRIER with water.<br />
Light cure: see chart 3<br />
Shape, form and refine crown<br />
anatomy, with diamond and<br />
carborundum points.<br />
Accentuate surface features with<br />
diamond and carborundum points<br />
then smooth with silicone points.<br />
Polish & Buff<br />
Use <strong>GC</strong> <strong>GRADIA</strong> DIAPOLISHER<br />
Use Robinson Wheel or similar on felt and/or chamois wheel for a<br />
together with <strong>GC</strong> <strong>GRADIA</strong> lustrous finish.<br />
DIAPOLISHER, taken care not to<br />
damage the surface texture.<br />
26
14. COMPLETED CROWN<br />
Completed <strong>GC</strong> <strong>GRADIA</strong> crown –<br />
labial view<br />
Comparison of <strong>GC</strong> <strong>GRADIA</strong> crown to shade guide – Shade A2<br />
<strong>GC</strong> <strong>GRADIA</strong>’s brighter, deeper and richer colours provide superior<br />
aesthetics and vitality versus conventional composites.<br />
27
6. PHYSICALS / CURING TIMES / CURING DEPTHS<br />
• PHYSICAL PROPERTIES • CURING DEPTH (WITH <strong>GC</strong> LABOLIGHT LV-III)<br />
PRODUCT<br />
<strong>GC</strong> <strong>GRADIA</strong> Product A Product B Product C<br />
IRRADIATION TIME: 30 SEC.<br />
CURING DEPTH IN MM<br />
Flexural strength (MPa)<br />
Flexural modulus (MPa)<br />
Flexural energy (MPa)<br />
Occlusal wear (microns*)<br />
124<br />
6,92<br />
1,92<br />
* After 200,000 horizontal slide with a load of 1.70 MPa<br />
* Values were measured by the research labs of <strong>GC</strong> Corporation, Tokyo<br />
8,7<br />
61<br />
3,94<br />
0,65<br />
IRRADIATION TIME FOR THE PRE-CURING AND FINAL CURING PROCESSES<br />
7,7<br />
123<br />
9,13<br />
1,13<br />
12,3<br />
158<br />
15,34<br />
0,82<br />
5,7<br />
Dentin<br />
OPAQUS DENTIN<br />
OPAQUS DENTIN<br />
INTENSIVE<br />
SHOULDER<br />
DENTIN<br />
ENAMEL<br />
HALO ENAMEL<br />
ENAMEL INTENSIVE<br />
PEARL ENAMEL<br />
TRANSLUCENT<br />
CERVICAL TRANSLUCENT<br />
DA1,DA2,DB1,<br />
DB2.DC1,DD2<br />
DA3,DA3.5,DB3,<br />
DC2,DC3,DD3<br />
DA4,DB4,DC4, DD4<br />
ODA1,ODA2,ODB1,ODB2<br />
ODC1, ODD2<br />
ODA3,ODA3.5,ODB3,<br />
ODC2,ODC3,ODD3,ODD4<br />
ODA4,ODB4,ODC4<br />
ODI1,ODI2,ODI3,ODI4,ODI5,ODI6<br />
SD2,SD3,SD4,SD5<br />
SD7,SD8<br />
E1,E2,E3,E4<br />
HE1<br />
EI1,EI3,EI5<br />
PE1,PE3<br />
T0,T1,T2,T4,T5<br />
CT2,CT3,CT4<br />
1.1<br />
1.0<br />
0.9<br />
1.1<br />
1.3<br />
1.8<br />
1.5<br />
1.6<br />
1.7<br />
1.8<br />
2.5<br />
2.6<br />
2.3 2.9<br />
Light curing unit<br />
Foundation Opaque,<br />
Opaque, Margin Opaque<br />
Dentin<br />
Opaqus Dentin<br />
Opaqus Dentin intensive<br />
Shoulder Dentin<br />
Enamel<br />
Pearl Enamel<br />
Halo Enamel<br />
Enamel Intensive<br />
Translucent<br />
Cervical<br />
Translucent<br />
Intensive Color<br />
Mamelon stain<br />
* For each surface of a single crown<br />
<strong>GC</strong> LABOLIGHT LV-II, III <strong>GC</strong> LABOLIGHT LV-I <strong>GC</strong> STEP LIGHT SL-I<br />
Pre-cure<br />
1min.<br />
Final cure<br />
Pre-cure Final cure Pre-cure Final cure<br />
3min.<br />
30 sec. 3 min. 1 min. 5 min. 10 sec.<br />
*<br />
30 sec. 1 min. 10 sec.<br />
*<br />
IRRADIATION TIME: 1 MINUTE<br />
FOUNDATION<br />
OPAQUE<br />
FO<br />
MARGIN OPAQUE MO<br />
OA1,OA2,OA3,OA3.5,<br />
OB1,OB2,OC1,<br />
OPAQUE<br />
OD2,OD3<br />
OA4,OB3,OB4,<br />
OC2,OC3,OC4,OD4<br />
MAMELON STAIN MS2,MS3,MS5<br />
IC0(Clear),IC9(White)<br />
IC1(Melon),IC7(Lavander),<br />
IC10(Corn),IC12(Black),<br />
IC13(Crack liner)<br />
INTENSIVE COLOR<br />
IC2(Pink),IC3(Yellow),<br />
IC8(Blue),IC11(Red),<br />
IC4(Red brown)<br />
IC5(Brown),IC6(Olive green)<br />
IC14(Dark red brown)<br />
CURING DEPTH IN MM.<br />
0.25<br />
0.25<br />
0.20<br />
0.15<br />
0.4<br />
0.4<br />
0.2<br />
0.1<br />
1.5<br />
28
7. PACKAGING<br />
■ <strong>GC</strong> <strong>GRADIA</strong> MASTER SET (10 shades)<br />
A1, A2, A3, A3,5, B2, B3, B4, C2, C3, D3<br />
■ <strong>GC</strong> <strong>GRADIA</strong> STANDARD SET (6 shades)<br />
A2, A3, A3,5, B2, B3, C2<br />
<strong>GC</strong> <strong>GRADIA</strong><br />
SEPARATOR<br />
<strong>GC</strong> <strong>GRADIA</strong><br />
DIE HARDNER<br />
<strong>GC</strong> COMPOSITE<br />
PRIMER<br />
<strong>GC</strong> METALPRIMER II<br />
<strong>GC</strong> <strong>GRADIA</strong><br />
DIAPOLISHER<br />
<strong>GC</strong> <strong>GRADIA</strong><br />
AIR BARRIER<br />
<strong>GC</strong> <strong>GRADIA</strong> PASTE<br />
(2,9ml)<br />
<strong>GC</strong> <strong>GRADIA</strong><br />
SYRINGE PLUNGER<br />
<strong>GC</strong> <strong>GRADIA</strong><br />
SHADE GUIDE KIT<br />
■ <strong>GC</strong> <strong>GRADIA</strong> INTENSIVE COLOR SET<br />
(11 shades)<br />
(11 shades)<br />
29
8. KIT CONTENTS AND INDIVIDUAL ITEMS<br />
<strong>GC</strong> <strong>GRADIA</strong> Foundation Opaque<br />
<strong>GC</strong> <strong>GRADIA</strong> Margin Opaque<br />
<strong>GC</strong> <strong>GRADIA</strong> Opaque<br />
<strong>GC</strong> <strong>GRADIA</strong> Opaqus Dentin<br />
<strong>GC</strong> <strong>GRADIA</strong> Opaqus Dentin Intensive<br />
<strong>GC</strong> <strong>GRADIA</strong> Shoulder Dentin<br />
<strong>GC</strong> <strong>GRADIA</strong> Dentin<br />
MASTER SET (10 shades) STANDARD SET (6 shades) INTENSIVE COLOR SET (11 shades) REFILL PACKAGES<br />
Syringe 2,4 ml<br />
Syringe 2,4 ml<br />
Syringe 2,4 ml<br />
Syringe 2,9 ml<br />
Syringe 2,9 ml<br />
Syringe 2,9 ml<br />
Syringe 2,9 ml<br />
<strong>GC</strong> <strong>GRADIA</strong> Enamel<br />
<strong>GC</strong> <strong>GRADIA</strong> Halo Enamel<br />
<strong>GC</strong> <strong>GRADIA</strong> Enamel Intensive<br />
<strong>GC</strong> <strong>GRADIA</strong> Pearl Enamel<br />
<strong>GC</strong> <strong>GRADIA</strong> Translucent<br />
<strong>GC</strong> <strong>GRADIA</strong> Cervical Translucent<br />
<strong>GC</strong> <strong>GRADIA</strong> Mamelon Stain<br />
<strong>GC</strong> <strong>GRADIA</strong> Intensive Color<br />
<strong>GC</strong> Metalprimer II<br />
<strong>GC</strong> Composite Primer<br />
<strong>GC</strong> <strong>GRADIA</strong> Air Barrier<br />
<strong>GC</strong> <strong>GRADIA</strong> Separator<br />
<strong>GC</strong> <strong>GRADIA</strong> Die Hardner<br />
<strong>GC</strong> <strong>GRADIA</strong> Diapolisher<br />
Accessories<br />
IC7 (Lavender) IC7 (Lavender) IC0 (Clear ), IC1 (Melon),<br />
IC2 (Pink), IC3 (Yellow),<br />
IC4 (Red brown),<br />
IC5 (Brown), IC6 (Olive green),<br />
IC7 (Lavender), IC8 (Blue),<br />
IC9 (White), IC10 (Corn)<br />
IC0 (Clear), IC1 (Melon), IC2 (Pink),<br />
IC3 (Yellow), IC4 (Red brown),<br />
IC5 (Brown), IC6 (Olive green),<br />
IC7 (Lavender), IC8 (Blue), IC9 (White),<br />
IC10 (Corn), IC11 (Red), IC12 (Black),<br />
IC13 (Crack Liner), IC14 (Dark red brown)<br />
5ml<br />
3ml<br />
10ml<br />
5ml<br />
5ml<br />
8 g<br />
#1 <strong>GC</strong> <strong>GRADIA</strong> No. 1 Round brush: 10 pieces<br />
#2 <strong>GC</strong> <strong>GRADIA</strong> No. 1 Flat brush: 10 pieces<br />
#3 <strong>GC</strong> <strong>GRADIA</strong> No. 7 Brush: 3 pieces<br />
#4 <strong>GC</strong> <strong>GRADIA</strong> Brush handle (ivory or white): 1 piece<br />
#5 <strong>GC</strong> <strong>GRADIA</strong> Disposable mixing pad: 5 pieces<br />
#6 <strong>GC</strong> <strong>GRADIA</strong> Mixing pad cover: 1 piece<br />
#7 <strong>GC</strong> <strong>GRADIA</strong> No. 22 Mixing blocks: 1 set<br />
#8 <strong>GC</strong> <strong>GRADIA</strong> Shade chart - 1 piece<br />
#9 <strong>GC</strong> <strong>GRADIA</strong> Shade guide kit - 1 piece<br />
Syringe 2,9 ml<br />
Syringe 2,9 ml<br />
Syringe 2,9 ml<br />
Syringe 2,9 ml<br />
Syringe 2,9 ml<br />
Syringe 2,9 ml<br />
Syringe 2,4 ml<br />
Syringe 2,4 ml<br />
Note:<br />
1) The shade combination chart is not available separately.<br />
2) The 2.9 ml syringe refill package does not include the re-usable plunger.<br />
■ <strong>GC</strong> LIGHT CURING UNITS AND SPECIFICATIONS<br />
30<br />
<strong>GC</strong> STEPLIGHT SL-I<br />
Power:<br />
AC 220 V 50/60 Hz<br />
Electric power consumption: 170VA<br />
Lamp rating:<br />
150 W<br />
Dimensions:<br />
115mm (width)<br />
220mm (depth)<br />
275mm (height)<br />
Weight:<br />
2 kg<br />
Package:<br />
1 main body<br />
<strong>GC</strong> LABOLIGHT LV-III<br />
Power:<br />
AC 220 V 50/60 Hz<br />
Electric power consumption:<br />
90VA<br />
Lamp rating:<br />
27 W (3 pieces)<br />
Turntable operating area: 90 mm (diameter) 9 x 70mm (height)<br />
Dimensions:<br />
185mm (width)<br />
245mm (depth)<br />
275mm (height)<br />
Weight:<br />
10kg<br />
Package: 1 main body (with 2 turntables, 2 supporting mounts,<br />
supporting posts – 8 pieces each long/short)
9. QUESTIONS & ANSWERS<br />
Q1. After sandblasting, if alloy surface is touched with fingers will bond strength of<br />
<strong>GC</strong> METALPRIMER II be affected?<br />
A1. Yes. Sandblast alloy surface again and reapply <strong>GC</strong> METALPRIMER II.<br />
Q2. Should sandblasted metal be ultrasonic or steam cleaned?<br />
A2. No! The water may contain oil. Simply use filtered air pressure to remove aluminium<br />
oxide residue.<br />
Q3. Opaque is a little thick when dispensing from syringe. Is this a problem?<br />
A3. Not a problem! <strong>GC</strong> <strong>GRADIA</strong> pastes are thixotropic (certain gels exhibit this property<br />
but they become more fluid when stirred or put into motion, e.g. a syringe plunger).<br />
The thixotropic property helps control flow and prevents OPAQUE from pooling in<br />
undesired areas.<br />
Q4. Can OPAQUE be diluted to improve flow?<br />
A4. No, other than stirring it with a brush or spatula. <strong>GC</strong> COMPOSITE PRIMER and/or<br />
<strong>GC</strong> <strong>GRADIA</strong> INTENSIVE COLORS should not be used to dilute opaque pastes.<br />
Q5. Can OPAQUE tooth shade be used instead of FOUNDATION OPAQUE?<br />
A5. Yes, but it may require four very thin layers (each layer being light cured) in order to<br />
polymerize fully in undercut areas.<br />
Q8. Is there a way of preventing cracks in composite bridges?<br />
A8. Yes,<br />
a) Avoid applying large amounts of resin at one time between light cures.<br />
b) Create breaks where materials overlap.<br />
c) Build veneer by applying several thin layers, light curing them at each stage.<br />
Q9. How can entrapping air bubbles be prevented?<br />
A9. There are two ways:<br />
1.Before applying resin, lightly tap top of the paste surface with a spatula (spatula<br />
edge should not be nicked or rough. That will cause bubbles).<br />
2.Apply thin coat of <strong>GC</strong> COMPOSITE PRIMER to roughened resin surface. Light cure<br />
1 min. before applying next paste layer.<br />
Q10. Which paste should be used on hollow part of a pontic?<br />
A10. Build-up with TRANSLUCENT. Contour to conform to adjacent area, light cure, then<br />
apply OPAQUE and light cure again.<br />
Q11. Which light curing unit should be used?<br />
A11. Those compatible with <strong>GC</strong> <strong>GRADIA</strong> – <strong>GC</strong> LABOLIGHT LV-III, <strong>GC</strong> STEPLIGHT SL-I.<br />
Units radiating ultraviolet light can not be used. They may cure surface monomer<br />
excessively, creating a non-bonding barrier between it and the next composite layer.<br />
Q6. Is it possible to cover to the top of RETENTION BEADS II SSS with a single layer<br />
of FOUNDATION OPAQUE?<br />
A6. Yes! The SSS BEADS are 100μ, the curing depth of FOUNDATION OPAQUE is 300μ. A<br />
single layer of FOUNDATION OPAQUE will be polymerized correctly in the underent<br />
areas of the RETENTION BEADS II SSS.<br />
Q12. Can the brushes be cleaned?<br />
A12. Yes! Clean thoroughly with pure alcohol (ethanol) after applying <strong>GC</strong> METALPRIMER II,<br />
<strong>GC</strong> <strong>GRADIA</strong> DIE HARDNER, <strong>GC</strong> <strong>GRADIA</strong> SEPARATOR, OPAQUES. Make sure that the<br />
ethanol dries off before re-using the tools. After using <strong>GC</strong> <strong>GRADIA</strong> AIR BARRIER, wash<br />
brush thoroughly with water.<br />
Q7. OPAQUE did not cure.<br />
A7. The OPAQUE layer might be too thick. Remove it and apply two very thin layers<br />
instead of one thick layer.<br />
Q13. Is it hard to remove composite inlays from working model?<br />
A13. No! Apply <strong>GC</strong> <strong>GRADIA</strong> DIE HARDNER, block-out undercuts with wax then apply the<br />
<strong>GC</strong> <strong>GRADIA</strong> SEPARATOR.<br />
31
Q14. How can the <strong>GC</strong> <strong>GRADIA</strong> SEPARATOR be removed from the composite surface?<br />
A14. Either sandblast it off or clean it thoroughly with ethanol. Any residual separator on the<br />
composite surface has a negative effect on the adhesive cementation.<br />
Q15. Can not get a good gloss on the composite?<br />
A15. Apply <strong>GC</strong> <strong>GRADIA</strong> DIAPOLISHER to clean felt and/or chamois wheel and buff.<br />
Avoid using other polishing materials. A suitable silicone points finishing before final<br />
polishing allow to achieve better brightness.<br />
Q16. Paste starts curing while working with it.<br />
A16. Avoid working in bright sunlight (near a window) or within 30 cm from lab light.<br />
<strong>GC</strong> <strong>GRADIA</strong> is designed to promptly react to light for better physical properties.<br />
Q17. Are there any contra indications?<br />
A17. See page 33 of manual (Precautions). <strong>GC</strong> <strong>GRADIA</strong> can not be used with patients<br />
affected by mal occlusion, bruxism or clenching. There should be no occlusal contacts<br />
at metal composite margins.<br />
Q18. How should <strong>GC</strong> <strong>GRADIA</strong> be stored?<br />
A18. Store at room temperature and away from direct sunlight. For long term storage,<br />
keep in a dark, cool place. If refrigerated, remove at least 30 min before using for easy<br />
handling.<br />
32
10. PRECAUTIONS<br />
1. For use by dental professionals only.<br />
2. <strong>GC</strong> <strong>GRADIA</strong> should not be used with patients having known sensitivity to methacrylates.<br />
3. Persons similar effected should immediately stop using it and consult a physician.<br />
4. Avoid contact with oral tissue, skin or eyes. If contact made, wash with water. If the eye is involved,<br />
immediately flush with water and seek medical attention.<br />
5. Do not ingest or inhale any components of <strong>GC</strong> <strong>GRADIA</strong>.<br />
6. Do not use these liquids near open flames, other sources of heat or sunlight. Flammable liquids<br />
are <strong>GC</strong> COMPOSITE PRIMER, <strong>GC</strong> METALPRIMER II, <strong>GC</strong> <strong>GRADIA</strong> SEPARATOR and <strong>GC</strong> <strong>GRADIA</strong><br />
DIE HARDNER.<br />
Note:<br />
1. Use <strong>GC</strong> <strong>GRADIA</strong> within 2 years from<br />
manufacturing date.<br />
2. Keep light curing units clean and replace<br />
lamps when required.<br />
3. Remove excess liquid paste from around<br />
syringe nozzle.<br />
4. <strong>GC</strong> METALPRIMER II brush should be used<br />
exclusively for that purpose.<br />
7. Do not mix components of this product with other products.<br />
8. Do not use ultraviolet lights or visible light curing units that can radiate ultraviolet light.<br />
9. Do not look directly into curing lights.<br />
Note: Vita® is a registered trademark of Vita Zahnfabrik,<br />
Bad Säckingen, Germany<br />
10. Product can be refrigerated but must be brought to room temperature for easy handling (approximately<br />
30 minutes).<br />
11. The material should be used immediately after extrusion from syringe. Keep tightly sealed.<br />
12. Avoid inhaling dust while grinding or polishing. Use a dust mask.<br />
13. Brushes in the kit should be used exclusively with this product.<br />
14. Do not use this product in any way other than as indicated in the instructions.<br />
33
For technical and commercial information, please contact<br />
<strong>GC</strong> EUROPE N.V.<br />
Head Office<br />
Interleuvenlaan 33<br />
B - 3001 Leuven<br />
Tel. +32.16.74.10.00<br />
Fax. +32.16.40.48.32<br />
info@gceurope.com<br />
www.gceurope.com<br />
<strong>GC</strong> GERMANY GmbH<br />
Paul-Gerhardt-Allee 50<br />
D - 81245 München<br />
Tel. +49.89.89.66.74.0<br />
Fax. +49.89.89.66.74.29<br />
info@germany.gceurope.com<br />
www.germany.gceurope.com<br />
<strong>GC</strong> FRANCE s.a.s.<br />
9 bis, Av. du Bouton d’Or – BP 166<br />
F - 94384 Bonneuil sur Marne Cedex<br />
Tel. +33.1.49.80.37.91<br />
Fax. +33.1.49.80.37.90<br />
info@france.gceurope.com<br />
www.france.gceurope.com<br />
<strong>GC</strong> UNITED KINGDOM Ltd.<br />
12-15, Coopers Court<br />
Newport Pagnell<br />
UK - Bucks. MK16 8JS<br />
Tel. +44.1908.218.999<br />
Fax. +44.1908.218.900<br />
info@uk.gceurope.com<br />
www.uk.gceurope.com<br />
<strong>GC</strong> ITALIA S.r.l.<br />
Via Calabria 1<br />
I - 20098 San Giuliano Milanese<br />
Tel. +39.02.98.28.20.68<br />
Fax. +39.02.98.28.21.00<br />
info@italy.gceurope.com<br />
www.italy.gceurope.com<br />
<strong>GC</strong> EUROPE N.V.<br />
Sucursal Ibérica<br />
Edificio Codesa 2<br />
ES - 28230 Las Rozas, Madrid<br />
Tel. +34.916.364.340<br />
Fax. +34.916.364.341<br />
info@spain.gceurope.com<br />
www.spain.gceurope.com<br />
<strong>GC</strong> AUSTRIA GmbH<br />
Tallak 124<br />
A - 8103 Rein bei Graz<br />
Tel. +43.3124.54020<br />
Fax. +43.3124.54020.40<br />
info@austria.gceurope.com<br />
www.austria.gceurope.com<br />
<strong>GC</strong> BENELUX B.V.<br />
Edisonbaan 12<br />
NL - 3439 MN Nieuwegein<br />
Tel. +31.30.63.08.500<br />
Fax. +31.30.60.55.986<br />
info@benelux.gceurope.com<br />
www.benelux.gceurope.com<br />
<strong>GC</strong> EUROPE N.V.<br />
East <strong>Europe</strong>an Office<br />
Siget 19B<br />
HR - 10020 Zagreb<br />
Tel. +385.1.46.78.474<br />
Fax. +385.1.46.78.473<br />
info@eeo.gceurope.com<br />
www.eeo.gceurope.com<br />
<strong>GC</strong> NORDIC AB<br />
Finnish Branch<br />
Vanha Hommaksentie 11B<br />
FIN - 02430 Masala<br />
Tel. & Fax. +358.9.221.82.59<br />
info@finland.gceurope.com<br />
www.finland.gceurope.com<br />
<strong>GC</strong> NORDIC AB<br />
Kungsporten 4 A<br />
S - 427 50 Billdal<br />
Tel. +46 31 939553<br />
Fax. +46 31 914246<br />
info@nordic.gceurope.com<br />
www.nordic.gceurope.com<br />
<strong>GC</strong> AUSTRIA GmbH<br />
Swiss Office<br />
Wilerstrasse 3<br />
CH - 9545 Wängi<br />
Tel. +41.52.366.46.46<br />
Fax. +41.52.366.46.26<br />
info@switzerland.gceurope.com<br />
www.switzerland.gceurope.com<br />
z L MA EN 8 40 06/09 - Revised June 2008