

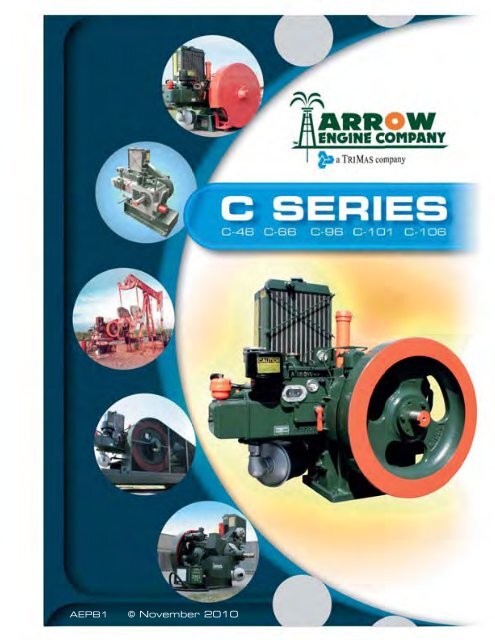
C-Series Book - Industrial Engine Service
C-Series Book - Industrial Engine Service
C-Series Book - Industrial Engine Service

Create successful ePaper yourself
Turn your PDF publications into a flip-book with our unique Google optimized e-Paper software.
AEPB1 © November 2010
C-SERIES<br />
SERVICE, OPERATION<br />
& PARTS MANUAL<br />
CONTENTS<br />
INTRODUCTION 1<br />
General Description 1<br />
Know Your <strong>Engine</strong> 2<br />
2 FUEL SYSTEM 9<br />
Fuel System and Carburetor 9<br />
Arrow <strong>Engine</strong> Natural Gas Specification 9<br />
Fuel Connection 10<br />
1 OPERATION 3<br />
Before Starting 3<br />
Fuel Consumption of Arrow <strong>Engine</strong>s 10<br />
<strong>Engine</strong> Fuels 12<br />
Positive Fuel Shut-Off 12<br />
Starting The <strong>Engine</strong> 3<br />
Stopping The <strong>Engine</strong> 4<br />
Speed Adjustment 4<br />
Circulation Oil 5<br />
Oil Sump 5<br />
Oil Pump 6<br />
Oil Pressure Relief Valve 6<br />
Oil Filter 7<br />
3 COOLING SYSTEM 13<br />
Vapor Phase System 13<br />
Pressurized-Condensing System 13<br />
Pressure Relief Valve 14<br />
Thermal-Siphon 14<br />
Governor Lubrication 7<br />
Clutch Lubrication 7<br />
1-800-331-3662 ARROW ENGINE COMPANY<br />
i
4 IGNITION SYSTEM 17<br />
Magneto-Low Tension 17<br />
8 TROUBLESHOOTING 35<br />
<strong>Engine</strong> Won’t Start 35<br />
CONTENTS<br />
Spark Plug 17<br />
Power Take-Off Clutch 18<br />
5 AIR CLEANER SYSTEMS 19<br />
Air Cleaner 19<br />
Crankcase Breather 19<br />
Parts Information 20<br />
Clutch Won’t Pull or Heats 36<br />
<strong>Engine</strong> Heats 36<br />
<strong>Engine</strong> Loses Water Without Visible<br />
Leaks 37<br />
<strong>Engine</strong> Blows Oil Out Crankcase or<br />
Valve Cover Breather into Air Filter 37<br />
<strong>Engine</strong> Fails to Operate Properly Under<br />
Load 38<br />
<strong>Engine</strong> Fails to Start 38<br />
6 CLUTCH ACTUATOR ASSEMBLY<br />
& INSTRUCTIONS<br />
21<br />
7 ENGINE OVERHAUL 29<br />
Disassembly of Cylinder Head 29<br />
Refacing the Valves 29<br />
Reassembly of Cylinder Head 30<br />
Valve Adjustment 30<br />
Cylinder Sleeve 30<br />
Piston 31<br />
Piston Pin 31<br />
Piston Rings 31<br />
Fitting Piston Rings 32<br />
Connecting Rod 32<br />
Timing Camshaft 32<br />
Crankshaft 33<br />
Camshaft 33<br />
Flywheels 33<br />
9 Emissions 39<br />
Compliance versus Certifi ed 39<br />
Arrow Certifi ed <strong>Engine</strong>s 39<br />
Emission Set Points 39<br />
10 SPECIFICATIONS 41<br />
Clearances and Tolerances 42<br />
Crankcase 42<br />
Crankshaft 42<br />
Cylinder Head 43<br />
Camshaft 44<br />
Rocker Arm 45<br />
Connecting Rod 46<br />
Dimension C-46, C-66, C-96 48<br />
Specifi cation Chart 49<br />
ii C-SERIES SERVICE, OPERATION & PARTS MANUAL – AEPB1 1-800-331-3662
11 PARTS 50<br />
Crankcase Assembly 50<br />
Crankshaft 52<br />
Camshaft 53<br />
Cylinder Head 54<br />
Flywheel Housing 55<br />
Flywheels 55<br />
Governor 56<br />
Governor Repair Kits 58<br />
Connecting Rod & Piston 59<br />
Rocker Arm 60<br />
Pressure Condensing (Radiator) 62<br />
Fan Repair Kits 64<br />
Power Take Off 65<br />
Starting Crank 65<br />
Clutch, 7" & 8" 66<br />
Clutch, 10" 68<br />
Clutch, 11" 70<br />
Ring Gear, Starter, Instrument Panel 72<br />
Portable Electric Starter - 990 74<br />
Magneto - American Bosch 76<br />
Magneto - Altronic 77<br />
Magneto Accessories 78<br />
Ignition 80<br />
Alternator 82<br />
Breather Systems 84<br />
Carburetors for New Style <strong>Engine</strong>s 86<br />
Carburetors for Old Style <strong>Engine</strong>s 88<br />
Carburetors for Very Old Style <strong>Engine</strong>s 90<br />
Oil Lines, Oil Pump & Strainer 92<br />
Flexible Oil Lines for Old Style <strong>Engine</strong>s 94<br />
12 OIL LINE KITS 96<br />
Oil Line Installation Instructions 96<br />
Oil Lines for C-46 97<br />
Oil Lines for C-66 98<br />
Oil Lines for C-96/101/106 99<br />
13 GASKET SETS 100<br />
14 SERVICE & MAINTENANCE<br />
SCHEDULE 104<br />
WARRANTY 105<br />
CONTENTS<br />
1-800-331-3662 ARROW ENGINE COMPANY<br />
iii
iv C-SERIES SERVICE, OPERATION & PARTS MANUAL – AEPB1 1-800-331-3662
GENERAL DESCRIPTION<br />
The Model C-46, C-66, C-96,<br />
C-101 and C-106 engines are<br />
especially designed for oil well<br />
pumping service, which normally<br />
requires continuous operation with a<br />
minimum of maintenance. The design<br />
of the engine allows oil to be added<br />
to the crankcase while the engine<br />
is running, which further cuts loss of<br />
operating time. Other manufactures of<br />
engines require the engine to be stopped<br />
while adding oil.<br />
To meet continuous duty requirements,<br />
the engines operate at low speeds, s,<br />
lessening the wear of engine parts as well<br />
as wear of driven pumping equipment. The<br />
C-46, C-101 and C-106 have a maximum m<br />
operating RPM of 800. The maximum m<br />
operating RPM of the C-96 is 600 RPM.<br />
The C-66 has maximum RPM of 700.<br />
The single cylinder Models C-46, C-66,<br />
C-96, C-101 and C-106 are valve-in-head ad<br />
engines with exhaust and suction valve<br />
seat inserts. With this type design the valve<br />
mechanism is readily accessible and easily<br />
serviced. The C-101 and C-106 engines<br />
also have domed combustion chambers for<br />
increased power.<br />
The natural gas carburetors furnished<br />
as standard equipment on these engines<br />
are designed to operate on natural gas.<br />
When the Arrow engines are operated on<br />
gaseous fuels, it is very important to have<br />
a volume tank connected to the engine by<br />
the fuel line. This will provide suffi cient low<br />
pressure volume of fuel to the engine. The<br />
Arrow gas volume tank Model #HBD-2459<br />
is suggested to be used for this purpose on<br />
all Arrow single cylinder engines.<br />
All bearings and moving parts are pressure<br />
lubricated by oil, fed through the engines<br />
from a positive displacement trochoidal<br />
gear oil pump. The oil is fi ltered through a<br />
full fl ow oil fi lter cartridge. An oil level sight<br />
gauge indicates, at a glance, the oil level in<br />
the crankcase.<br />
Arrow engines are furnished with an Arrow<br />
AF-603-RL ignition system. The standard<br />
cooling system on the C-46, C-66, C-96,<br />
C-101 and C-106 engines is the pressure<br />
condensing system.<br />
The pressurized-condensing type of<br />
cooling system has an advantage of<br />
maintaining a more uniform high operating<br />
temperature in the engine. The higher<br />
operating temperature of the engine helps<br />
prevent contamination and sludging of the<br />
engine. A combination water level sight<br />
gauge and low water shut-down switch<br />
shows, at a glance, the coolant level in<br />
1-800-331-3662 ARROW ENGINE COMPANY<br />
1
the cooling system. The proper water level<br />
in pressure condensing system is 1" – 2"<br />
below top of water hopper.<br />
Additional standard features of the Arrow<br />
engines are: an air cleaner to assure<br />
uncontaminated air to the engine, a heavy<br />
duty power take-off clutch, low oil pressure<br />
and low water level safety switches, subbase,<br />
and instruction/parts manual.<br />
KNOW YOUR ENGINE<br />
Please familiarize yourself with the details<br />
of construction and operation of the engine<br />
before placing it in service. Never neglect<br />
routine service and lubrication.<br />
Keep your engine clean inside and out.<br />
Frequent cleaning and regular oil changes<br />
will enable you to discover the beginning<br />
of troubles and enable you to prevent<br />
serious failures. Sturdiness, compactness,<br />
simplicity, and accessibility are stressed<br />
in the design of this engine. Intelligent<br />
care, and the operator’s understanding of<br />
the engine, will aid in realizing the utmost<br />
performance.<br />
2 C-SERIES SERVICE, OPERATION & PARTS MANUAL – AEPB1 1-800-331-3662
1<br />
BEFORE STARTING<br />
1. Fill the crankcase with the<br />
correct grade and type of<br />
oil to the proper level on<br />
the sight gauge. On new<br />
engines or newly rebuilt<br />
engines, use only a nondetergent,<br />
single viscosity<br />
motor oil for the fi rst three (3)<br />
weeks of operation. That is,<br />
an SAE 20 or SAE 30 nondetergent<br />
oil. Multi-viscosity oils<br />
will not allow rings to seat properly<br />
during initial break-in period. After the fi rst<br />
three (3) weeks of operation, a high grade<br />
10 W 40 motor oil is recommended.<br />
C-101 and C-106 Catalyst Equipped<br />
<strong>Engine</strong>s<br />
Catalyst equipped engines are susceptible<br />
to elements in the oil contaminating or<br />
plugging the catalyst. Below are the<br />
maximum limits that are allowed in the<br />
lube oil for catalyst equipped engines:<br />
CATALYST EQUIPPED ENGINES<br />
Phosphorous<br />
Zinc<br />
Ash<br />
Oil Consumption<br />
Max. 0.09% by weight<br />
Max. 0.04% by weight<br />
Max. 0.50% by weight<br />
Less than 0.0015 lb/bhp-hr<br />
2. Fill the cooling system with clean, soft<br />
water to proper level on sight gauge or<br />
one-two inches below the top of the water<br />
hopper. If the engine is to be operated<br />
in freezing temperatures, add a proper<br />
amount of anti-freeze. Prior to pouring into<br />
the engine, it is imperative to thoroughly<br />
mix anti-freeze and water. The engine<br />
cannot internally mix the water as it has<br />
no water pump. Also, it is imperative that<br />
at least 40% water is used. Usually a 50-<br />
50 mixture is very ample unless operating<br />
in Arctic temperatures. NEVER ATTEMPT<br />
TO OPERATE ARROW ENGINES WITH<br />
PURE ANTI-FREEZE IN THE<br />
COOLING SYSTEM AS THE<br />
ENGINE WILL OVERHEAT.<br />
3. Be sure that there is an<br />
ample supply of gas and that<br />
the fuel lines are at least 1" in<br />
size and in good condition, with<br />
no leaks.<br />
4. Push up the compression<br />
release lever to the start position,<br />
so that the intake valve is held open<br />
to relieve the compression for easier<br />
cranking.<br />
5. Disengage the clutch before attempting to<br />
start the engine.<br />
STARTING THE ENGINE<br />
The engine may be started with a hand<br />
crank, the optional portable 12 Volt DC<br />
Arrow engine starter, or with a factoryinstalled<br />
ring gear starter.<br />
HAND CRANK STARTER<br />
When using hand crank, proceed as<br />
follows:<br />
1. Insert crank in position so that it engages<br />
the cranking jaw securely and can be<br />
turned freely. Be sure the end of the<br />
crankshaft, where the crank fi ts, is clean<br />
without rust or an accumulation of grime,<br />
so the crank will rotate freely on the shaft,<br />
and easily release itself when the engine<br />
fi res.<br />
2. Adjust governor speed setting so the<br />
throttle is at least half open. Reset low oil<br />
pressure shutdown switch.<br />
1-800-331-3662 ARROW ENGINE COMPANY<br />
3
1<br />
3. Raise compression release lever all the<br />
way to relieve compression for easier<br />
cranking. Crank engine until approximate<br />
starting speed is reached.<br />
4. Pull down compression release lever to<br />
running position, open the fuel supply<br />
and continue cranking for several<br />
revolutions or until the engine fires.<br />
ARROW PORTABLE ELECTRIC<br />
STARTER<br />
When the optional Arrow starter<br />
is used, proceed as follows:<br />
1. Slip the starter housing on<br />
the pin provided by the<br />
rim of the large fl ywheel<br />
near the base below the<br />
carburetor.<br />
2. Connect the #4 welding cables<br />
(optional with the Arrow Starter) from the<br />
Arrow Starter to battery in the pumpers<br />
vehicle. Polarity does not matter. Adjust<br />
governor to half open.<br />
3. After raising the compression release lever<br />
to the relieved position, pull on the Arrow<br />
Starter handle to engage the roller against<br />
the flywheel. Push the starter button<br />
on the handle and spin the flywheel to<br />
approximate cranking speed.<br />
4. Pull down the compression release lever<br />
to running position. Open the fuel supply<br />
and continue spinning engine for several<br />
revolutions or until engine the fires.<br />
5. After the engine starts, remove and<br />
disconnect the Arrow Starter.<br />
CAUTION: Other starter brands may not<br />
contain an overspeed clutch to protect<br />
against harming the starter when engaged<br />
against a running engine.<br />
6. Proceed with same steps as when hand<br />
cranking.<br />
RING GEAR STARTER<br />
If the engine is equipped with Ring-gear<br />
starting, proceed as follows:<br />
1. Connect the starter cables to the plugs<br />
in the bracket located adjacent to the oil<br />
pressure gauge and to the battery in the<br />
pumper’s vehicle. Adjust governor to half<br />
open.<br />
2. After raising the compression release<br />
lever to the relieved position, turn switch to<br />
the “start” position, and start spinning the<br />
flywheel to approximate cranking speed.<br />
3. Pull down the compression release lever<br />
to running position, open the fuel supply<br />
and continue spinning engine for several<br />
revolutions or until the engine fi res. Do not<br />
hold starter engaged for longer than 15<br />
seconds at one time.<br />
4. After engine starts, proceed with same<br />
steps as when hand cranking.<br />
STOPPING THE ENGINE<br />
1. Disengage clutch and allow engine to idle<br />
for a few minutes.<br />
2. Stop the engine by turning off the gas<br />
supply.<br />
SPEED ADJUSTMENT<br />
Speed adjustments for this engine can<br />
be made by adjusting knob on the governor<br />
terminal lever. Accurate settings can be<br />
made with tachometer readings taken from<br />
the hour meter/tachometer. The governor<br />
is properly set at the factory for the speed<br />
range.<br />
Should it become necessary to reset the<br />
governor, a defi nite procedure should be<br />
followed:<br />
1. Disconnect the control rod to the<br />
carburetor.<br />
4 C-SERIES SERVICE, OPERATION & PARTS MANUAL – AEPB1 1-800-331-3662
2. Unhook the spring from the pin in the base<br />
of the governor, and with the governor<br />
lever all the way forward toward the<br />
carburetor, measure the distance from the<br />
center of the hole in the governor lever to<br />
the center of the spring pin. This distance<br />
should be exactly 1¾" on the C-46, C-66,<br />
C-81 and C-96 engines. On the C-101 and<br />
C-106 engines, the distance should be<br />
211⁄16". If the distance is not as specified<br />
above, loosen the allen head clamp bolt<br />
on the governor lever and set the lever for<br />
the correct distance specified. Tighten the<br />
clamp bolt securely.<br />
3. Adjust the length of control rod so<br />
that the butterfl y valve is all the way<br />
open but not against the stop, and the<br />
governor rod back to the position where<br />
the butterfl y valve is just closed, but not<br />
jammed tight against the sides of the<br />
venturi. Then, adjust the Allen screw on<br />
top of the governor so the butterfl y valve<br />
cannot close any further. Lock the allen<br />
screw with the jam nut.<br />
If these adjustments are properly made,<br />
the maximum no-load speed will be<br />
4%-5% above the speed shown in the<br />
specifi cations. It is advisable to frequently<br />
check the operating speed of the engine<br />
with the tachometer.<br />
CIRCULATION OIL<br />
Oil is drawn from the oil sump through a<br />
fi ne screen by the oil pump; then pumped<br />
through an externally mounted full fl ow<br />
fi lter, into the camshaft base block to the<br />
camshaft bearing and to the valve lifter. An<br />
oil pressure regulating valve is located in<br />
the camshaft base block and is accessible<br />
without removing the camshaft Assy. Oil<br />
bypassed by the regulating valve is sprayed<br />
on the camshaft gear.<br />
An additional oil bypass valve is located<br />
in the new trochoidal oil pump to protect the<br />
oil fi lter in extreme cold temperatures. Note<br />
that all oil is fi ltered before going to any part<br />
of the engine. The oil fi lter also features a<br />
built-in bypass valve which opens in the<br />
event of a clogged fi lter allowing continued<br />
lubrication of the engine.<br />
In the Arrow single cylinder engines,<br />
the oil travels via tubing from the drilled<br />
passage in the top of the base block to the<br />
governor. From a tee in the camshaft base<br />
block, oil travels to the oil collector fl ange<br />
on the crankshaft. Oil from the collector<br />
fl ange passes through a drilled passage in<br />
the crankshaft to lubricate the connecting<br />
rod bearing. Tubing, originating also at<br />
the camshaft base block, carries oil to the<br />
cylinder head and valve mechanisms.<br />
OIL SUMP<br />
The crankcase serves as a reservoir for<br />
the engine oil supply. This large reservoir<br />
permits longer intervals between oil<br />
changes.<br />
It is recommended that the oil reservoir<br />
be drained and refi lled with new, clean oil<br />
at regular monthly intervals, or as required<br />
depending on site conditions. Because<br />
oil gradually accumulates small particles<br />
of dust, grit and corrosive material which<br />
cause unnecessary engine wear, it should<br />
be drained when the engine is hot, as this<br />
aids in the removal of sediments.<br />
The formation of sludge in the oil is due<br />
in part to contamination caused by the<br />
gases, leaking by the piston rings, coming<br />
in contact with the oil and condensing. If,<br />
when draining, the oil appears to be thick<br />
and congealed, the oil sump should be<br />
cleaned thoroughly. Also, remove the oil<br />
pump strainer and clean.<br />
The oil supply should be checked regularly,<br />
and replenished if necessary, to maintain the<br />
level at the sight gauge. Oil may be added<br />
to the engine while it is running through<br />
the ASP-1 Oil Filler. Overfi lling should be<br />
avoided.<br />
1<br />
1-800-331-3662 ARROW ENGINE COMPANY<br />
5
1<br />
OIL PUMP<br />
A trochoidal or gerotor type oil pump<br />
supplies oil under pressure to the oil<br />
circulatory system. The oil pump is attached<br />
to, and driven by, the camshaft Assy. On<br />
current production engines an oil pressure<br />
relief valve bypass, set at 60-65 pounds<br />
pressure, is built into the oil pump Assy.<br />
This serves to protect the oil fi lter element<br />
during extremely cold temperatures.<br />
The relief valve bypass is of the ball and<br />
spring design. Adjustment may be made by<br />
adding or removing spacer washers from<br />
beneath the oil relief valve adjusting screw.<br />
Add washers to increase the pressure and<br />
remove to lower pressure.<br />
Adjusting<br />
Screw<br />
Spacer<br />
Washers<br />
GEROTOR OIL PUMP<br />
Spring<br />
Ball<br />
Oil Pressure Relief Valve<br />
to Camshaft<br />
Gerotor<br />
On older engines using the trochoidal type<br />
pump, a separate bypass valve is located in<br />
the oil line between the oil pump and the<br />
oil fi lter. This bypass is nonadjustable and<br />
factory set at 75-80 pounds.<br />
On engines manufactured prior to 1983,<br />
an external gear type pump was used with<br />
no bypass between the pump and oil fi lter.<br />
The trochoidal oil pump with the bypass<br />
valve will serve as an exact replacement on<br />
previous, older manufactured engines.<br />
It should not be necessary to service oil<br />
pump except during overhaul when it should<br />
be disassembled, cleaned, inspected, and<br />
checked for wear. Severe sludging will<br />
require occasional disAssy to clean pump<br />
passages and the relief valve. Low oil<br />
pressure is a possible indication of clogged<br />
oil pump passages.<br />
OIL PRESSURE RELIEF VALVE<br />
The oil pressure relief valve, which<br />
is located in the camshaft base block,<br />
provides proper oil pressure to all parts<br />
of the engine. If it is necessary to adjust<br />
oil pressure, adjustment can be made by<br />
inserting or removing washers in the spring<br />
retainer plug located behind the relief valve<br />
spring. This plug should always be screwed<br />
down tight. Oil pressure SHOULD NOT be<br />
regulated by loosening this plug.<br />
To increase oil pressure, washers are<br />
added, and to decrease oil pressure, washers<br />
are removed. Normally, 4 or 5 washers will<br />
give 30-45 pounds oil pressure.<br />
The oil pressure relief valve depends<br />
upon free movement of the ball to operate<br />
correctly. If erratic oil pressure is traced<br />
to the pressure relief valve, remove plug,<br />
pull out spring and ball, clean thoroughly,<br />
and inspect spring for correct length. The<br />
oil pressure is factory set at 55-65 pounds<br />
pressure on all engines with factory-installed<br />
oil fi lters.<br />
On Climax engines manufactured prior<br />
to 1977 and not manufactured by Arrow<br />
<strong>Engine</strong> Company, normal oil pressure was<br />
17-20 PSI. The bypass spring on older<br />
engines was lighter in tension than the<br />
current spring. By installing the current<br />
spring, Part #94-A, and installing the OFK-<br />
1-NS Oil Filter Kit, older model engines can<br />
be updated to current specifi cations.<br />
6 C-SERIES SERVICE, OPERATION & PARTS MANUAL – AEPB1 1-800-331-3662
OIL FILTER<br />
The standard oil fi lter is accessible on<br />
the outside of the engine base and is the<br />
full fl ow type. It has a built-in bypass valve<br />
that will allow the oil to continue to fl ow to<br />
the engine bearings, even though the fi lter<br />
element is clogged up. Also, the fi lter has<br />
an antisyphon valve built-in. ALL OIL IS<br />
FILTERED BEFORE LUBRICATING THE<br />
WORKING PARTS.<br />
GOVERNOR LUBRICATION<br />
The governor is lubricated automatically<br />
from the engine oil supply, and requires<br />
no additional lubrication. However, an<br />
occasional drop of light oil on the throttle<br />
lever linkage to prevent binding and wear is<br />
a good idea. Periodically loosen the oil line<br />
fi tting on top of the governor to be sure the<br />
line isn’t clogged and that the governor is<br />
being lubricated.<br />
CLUTCH LUBRICATION<br />
Throw Out Collar – Before starting, apply<br />
a small amount of lubricant through the<br />
fi tting on the tapered part of the housing.<br />
Anti-Friction Bearings – For clutches<br />
not supplied with permanently lubricated<br />
bearings, apply weekly a small amount of<br />
lubricant to pilot bearings through the hole<br />
in the clutch shaft; and to shaft bearings<br />
through the grease fi tting located at the<br />
housing hub.<br />
Lubricant – Any high grade, soda base<br />
short fi ber grease may be used (which is<br />
recommended for anti-friction bearings),<br />
having operation temperatures of 200°F<br />
(93°C). A multi-purpose lithium base<br />
grease for high operating temperature<br />
is highly recommended. The C-96,<br />
C-101 and C-106 engines are furnished<br />
with a sealed, shielded pilot bearing<br />
in the twin disc clutch and requires no<br />
lubrication through the clutch shaft. The<br />
C-96 clutch shaft is normally a solid shaft<br />
with no grease fi tting.<br />
1<br />
GOVERNOR ASSEMBLY<br />
Oil Supply<br />
Flyweights<br />
Thrust<br />
Bearing<br />
Oil Supply<br />
Flyweights<br />
Oil Pressure<br />
Indicator<br />
Oil Return<br />
Oil Pressure<br />
Indicator<br />
Oil Return<br />
C-46, C-66, C-96 C-101 and C-106<br />
1-800-331-3662 ARROW ENGINE COMPANY<br />
7
1<br />
Notes<br />
8 C-SERIES SERVICE, OPERATION & PARTS MANUAL – AEPB1 1-800-331-3662
2<br />
FUEL SYSTEM AND<br />
CARBURETOR<br />
The engine normally operates on gaseous<br />
fuels. Proper fuel adjustments are important<br />
to assure effi cient operation, full rated power,<br />
longer life and emission requirements.<br />
The carburetors, furnished as standard<br />
equipment on Arrow engines, are suitable<br />
for effi cient operation on pipeline natural<br />
gas. For best results, the Arrow Gas Volume<br />
tank Model HBD-2459 should always be<br />
installed in the fuel system at a convenient<br />
location next to the engine, but not more<br />
than ten (10) feet away. The volume tank<br />
should have a minimum capacity of 100<br />
cubic inches (1.6 M3) per horsepower (.75<br />
KW).<br />
ARROW ENGINE NATURAL<br />
GAS SPECIFICATION<br />
Arrow certifi ed engines are certifi ed on<br />
Commercial Quality Natural Gas (CQNG),<br />
sometimes referred to as Pipeline Quality<br />
Natural Gas, and also thought of as the<br />
quality of gas supplied by a utility to a<br />
customer. CQNG is not consistent and<br />
varies from countries, states and locally over<br />
time. Emissions certifi cation is based on the<br />
fuel specifi ed by the EPA test requirements,<br />
having a minimum of 70% methane by<br />
volume or have a gross calorifi c value<br />
between 950 and 1,100 British thermal units<br />
per standard cubic foot.<br />
Other limits (Trace Gas, Temperature,<br />
Water, etc…):<br />
1. Maximum liquid hydrocarbons at the<br />
coldest expected engine mounted<br />
regulator fuel outlet is 2% or less by<br />
gaseous volume.<br />
2. Maximum total organic halide content,<br />
as expressed as chloride concentration<br />
(TOHC1), is 60 micrograms/liter.<br />
3. Maximum permissible sulfur bearing<br />
compounds (H2S, etc…) is 30 ppm total<br />
by volume.<br />
4. Maximum Free hydrocarbon content is<br />
12% by volume.<br />
5. Maximum solid particle size is 5 microns.<br />
6. No water/glycol is permitted into the<br />
engine via the fuel system at anytime.<br />
7. Maximum total siloxanes allowed is 5 ug/l.<br />
8. Due to emissions requirements/<br />
restrictions, no compressor oil carry over<br />
is allowed.<br />
9. The fuel gas temperature at the inlet to<br />
the engine must be between -20°F (-29°C)<br />
and 130F (60°C).<br />
STANDARD COMMERCIAL<br />
QUALITY NATURAL GAS<br />
Methane<br />
Content<br />
Noncombustible inerts (N2,<br />
CO2, He, etc)<br />
Non-methane hydrocarbon<br />
mass fraction<br />
Liquid<br />
Hydrocarbon<br />
Oxygen<br />
Water Vapor<br />
Saturated low<br />
heating value<br />
Stoichiometric air/fuel ratio<br />
Hydrogen/carbon ratio.<br />
93% by Volume Maximum<br />
3% by Volume Maximum<br />
0.15 Maximum<br />
2% by Volume Maximum<br />
0.2% by Volume Maximum<br />
100% Relative Humidity<br />
900 BTU /cu ft<br />
(approx.)<br />
16.08:1 by Mass (approx.)<br />
3.85:1 (approx.)<br />
1-800-331-3662 ARROW ENGINE COMPANY<br />
9
2<br />
FUEL CONNECTION<br />
An extended line causes considerable loss<br />
of pressure when only ounces of pressure are<br />
available. Use at least a 1" I.D. minimum fl exible<br />
hose from the volume tank to the carburetor<br />
with no restricted fi ttings such as street elbows<br />
or restricted globe or needle shut-off valves. If<br />
the volume tank must be placed some distance<br />
from the carburetor, use 1" (24.5 MM) to 1 ¼"<br />
(33.75 MM) pipe from the scrubber to within two<br />
or three feet of the carburetor with the remainder<br />
1" fl exible hose to absorb vibration.<br />
FUEL CONNECTION<br />
278-H-SP Safety Valve Option<br />
set at 15 PSI<br />
Fisher Regulator<br />
No S-102-4<br />
Low pressure chamber<br />
High pressure chamber<br />
fitting. This will clear air and any foreign matter<br />
from the gas line and provide fuel for starting<br />
immediately.<br />
FUEL CONSUMPTION<br />
OF ARROW ENGINES<br />
To arrive at the rate of fuel usage on Arrow<br />
engines, you must keep in mind all internal<br />
combustion engines are heat engines. This<br />
means that the fuel consumed furnishes the heat<br />
which in turn provides the increase in pressure<br />
in the cylinder to create the power impulses.<br />
By using the BTU Rate Chart, you can<br />
determine the BTU rate for MAXIMUM<br />
HORSEPOWER at the RPM shown for each<br />
Arrow engine. The following is a typical example:<br />
What is the fuel consumption of a C-96 running<br />
around the clock at 570 RPM using refi nery<br />
natural gas for fuel?<br />
BTU Rate Chart<br />
Maximum Output per HP Hour<br />
1” outlet to<br />
engine. Use<br />
hose and clamp<br />
suited to engine.<br />
400<br />
360<br />
C-106<br />
320<br />
Quick drain<br />
1” pipe plug<br />
VOLUME TANK<br />
(ARROW PART NO. 259-FR)<br />
1” 90° street elbow<br />
BTU (IN THOUSANDTHS)<br />
280<br />
240<br />
200<br />
160<br />
120<br />
C-96<br />
C-66<br />
C-46<br />
(3) 1/2” bolts on<br />
14 1/2” circle<br />
80<br />
A gas inlet tee at the carburetor, fitted with a 1/8"<br />
(3.175 MM) pipe plug for checking inlet pressure,<br />
is required. When starting the engine for the first<br />
time, turn the gas on in the line momentarily before<br />
fastening the flexible fuel hose to carburetor inlet<br />
40<br />
350<br />
450 550 650 750 850<br />
RPMs<br />
10 C-SERIES SERVICE, OPERATION & PARTS MANUAL – AEPB1 1-800-331-3662
By looking at the BTU Rate Chart, you will<br />
see that the BTU requirement for the C-96<br />
at 570 RPM is 200,000 BTU per hour.<br />
The BTU Fuel Values Table shows that<br />
the BTU value of refi nery natural gas is<br />
1100 BTU/cu ft.<br />
BTU Fuel Values Table<br />
FUEL<br />
Refi nery Natural Gas<br />
Artifi cial Gas<br />
Wellhead or Separator Gas<br />
Butane<br />
Propane<br />
Gasoline<br />
1100/cu ft<br />
600/cu ft<br />
1000/cu ft*<br />
BTU<br />
21,000/lb.<br />
(98,700/Gal.)<br />
21,500/lb<br />
(101,050/Gal.)<br />
19,500/lb<br />
(120,000/Gal.)<br />
* An average BTU rating for well head gas<br />
is 1000/cu ft. The gas should be analyzed<br />
to get an accurate rating.<br />
200000<br />
1100<br />
Example:<br />
= 181.81 cu ft per hour<br />
or<br />
181.81 × 24 = 4363.44 cu ft<br />
per 24 hour day<br />
However, an engine producing less than<br />
maximum horsepower for a given RPM will<br />
use slightly less fuel.<br />
The Horsepower Requirements Chart<br />
shows horsepower ratings on Arrow single<br />
cylinder engines at various RPMs.<br />
Example:<br />
14.25<br />
19.00 = 75%<br />
Horsepower Requirements Chart<br />
KW<br />
29.8<br />
26<br />
22.4<br />
18.6<br />
16.4<br />
14.9<br />
13.4<br />
11.9<br />
10.4<br />
8.9<br />
7.5<br />
6<br />
4.5<br />
3<br />
HP Horsepower Ratings<br />
40<br />
35<br />
C-106<br />
30<br />
25<br />
22<br />
20<br />
C-96<br />
18<br />
16<br />
14<br />
C-66<br />
12<br />
10<br />
C-46<br />
8<br />
6<br />
4<br />
200 300 400 500 600 700 800<br />
RPMs<br />
C-96 at 570 RPM requires 200,000 BTU<br />
per hour or 200000 BTU – 2.02 gal butane<br />
per hour 98700 BTU per gal. Or 48.48 gal<br />
per 24 hour (2.02 x 24 = 48.48).<br />
By using the Fuel Consumption Table, you<br />
can fi nd the C-96 at 75% load uses 10.5 cu<br />
ft of 1100 BTU gas per horsepower hour or<br />
149.6 cu ft per hour (10.5 x 14.25 = 149.6<br />
cu ft per hour or 3591 cu ft per 24 hour).<br />
Fuel Consumption Table<br />
FUEL USED<br />
PER HP HR<br />
Natural Gas<br />
1100 BTU/cu ft<br />
Butane 98,700<br />
BTU/Gal<br />
4.7 lbs/gal<br />
Gasoline<br />
120,000 BTU/Gal<br />
6.15 lbs/gal<br />
100%<br />
LOAD<br />
9.5<br />
cu ft<br />
.50<br />
lbs<br />
.09<br />
gal<br />
75%<br />
LOAD<br />
10.5<br />
cu ft<br />
.56<br />
lbs<br />
.095<br />
gal<br />
50%<br />
LOAD<br />
11.4<br />
cu ft<br />
.64<br />
lbs<br />
.11<br />
gal<br />
2<br />
1-800-331-3662 ARROW ENGINE COMPANY<br />
11
2<br />
If we use the same example, burning<br />
Butane instead of natural gas for fuel, we<br />
arrive at the following:<br />
C-96 at 570 RPM requires 200,000 BTU<br />
per hour or 200,000 BTU - 2.02 gal butane<br />
per hour 98700 BTU per gal. or 48.48 gal.<br />
per 24 hour (2.02 x 24 = 48.48).<br />
However, if we are only producing 14.25<br />
HP or 75% of maximum load, we look at the<br />
Fuel Consumption Table and fi nd we are<br />
using .56 lbs. of fuel per HP HR or 1.7 gal<br />
butane per hour (.56 lbs. x 14.25 HP = 7.98<br />
lbs. 4.7 lbs per gal = 1.7 gal) or 40.8 gal per<br />
24 hour (1.7 x 24 = 40.8 gal).<br />
It should be pointed out that the above<br />
calculations and tables are based on<br />
engines in new or like-new condition. The<br />
general condition of an engine will have a<br />
large bearing on fuel consumption, that is<br />
the more wear an engine has, the poorer<br />
the fuel economy.<br />
If your horsepower requirement is 14.25<br />
HP, the C-96 is producing 75% of maximum<br />
power.<br />
ENGINE FUELS<br />
<strong>Engine</strong> fuels are highly combustible and<br />
may ignite or explode. Fuels must be<br />
conducted to the engine with proper piping,<br />
free from leaks, and designed to resist<br />
breakage from vibration. If a gas engine<br />
has been cranked excessively without<br />
starting, or if the engine shutdown with fuel<br />
supply open, shut off the gas fuel supply and<br />
ignition. Then crank the engine to purge the<br />
cylinders, exhaust system, and crankcase<br />
of accumulated, unburned gas. If you fail<br />
to do this, a spark plug could ignite the gas<br />
and cause an explosion.<br />
POSITIVE FUEL SHUT-OFF<br />
Some means of positive fuel shut-off<br />
should be provided for emergency use.<br />
Pressurized fuels (natural gas, liquefi ed<br />
petroleum gas, etc.) should have another<br />
shut-off valve, preferably automatic,<br />
other than those in the carburetor or gas<br />
pressure regulation equipment. It is the<br />
fi nal responsibility of the engine owner to<br />
ensure that the installation is free from fuel<br />
or exhaust leakage, and such installation<br />
meets all applicable codes.<br />
12 C-SERIES SERVICE, OPERATION & PARTS MANUAL – AEPB1 1-800-331-3662
3<br />
VAPOR PHASE SYSTEM<br />
(Used on old Climax and early Arrow engines.)<br />
The vapor phase system can be described<br />
as a cooling system where it is normal for<br />
water to boil in the radiator tank or hopper.<br />
The steam rises in to the radiator or<br />
condenser and is condensed by the cooling<br />
action of the fan.<br />
In order for steam to rise into the radiator,<br />
air must escape. Provision for this escaping<br />
air is made in the front center tube of the<br />
radiator core. This tube only is closed at its<br />
bottom and open at its top end. The small<br />
holes can be seen near the bottom of the<br />
center tube at front of radiator. Be sure these<br />
holes are kept open for passage of air.<br />
The coolant level should be maintained<br />
1" – 2" below the bottom header plate of the<br />
condenser core. Do not allow coolant to be at<br />
a level high enough to rise in the condenser<br />
core, as this blocks the passage of steam, and<br />
will only force the water out the small bleed<br />
hole in the front center tube, lowering the<br />
coolant volume and cause overheating until<br />
the coolant gets down to the proper level.<br />
When the engine is stopped, water may<br />
be added by removing the fi ller cap on the<br />
water hopper. The fi ller cap must be kept<br />
tight with a good gasket; otherwise, steam<br />
will escape, causing the engine to run dry of<br />
cooling water.<br />
Under most conditions, (except severe<br />
sub-zero weather) the height to which<br />
steam rises in the radiator can be felt by<br />
placing your hand on the outside of the<br />
radiator core. If the radiator remains cold,<br />
and water continues to boil out of the water<br />
gauge, after two or three hours of operation,<br />
check to see if the air hole, near bottom of<br />
center tube, is open (mentioned above in<br />
this Radiator section).<br />
When operating in climates where freezing<br />
occurs, an anti-freeze solution should<br />
be used. Since this type cooling system<br />
cools by the water boiling, it is imperative<br />
that at least 40% water is mixed with the<br />
antifreeze. In other than arctic<br />
climates a 50-50 mixture is suffi cient.<br />
Always thoroughly mix the water and<br />
anti-freeze before pouring into the system.<br />
Do not use pure anti-freeze as severe<br />
damage will result. Since pure anti-freeze<br />
will not boil and turn to steam, consequently<br />
It will not rise into the condenser and be<br />
cooled.<br />
Manufacturers of anti-freeze change their<br />
formula from year to year. Some brands<br />
are not for vapor cooled engines. Please<br />
consult your dealer.<br />
PRESSURIZED-CONDENSING<br />
SYSTEM<br />
The pressure-condensing cooling system<br />
is standard, is a closed type, operating at 4<br />
pounds above atmospheric pressure. This<br />
system is advantageous when operated<br />
at higher altitudes. If operating at 3500 ft.<br />
above sea level or higher, it is advisable<br />
to use the pressure condensing system to<br />
keep up the boiling point temperature for<br />
better engine performance.<br />
The pressure-condensing system cools<br />
in the same manner as the vapor system.<br />
Water boils in the water hopper with steam<br />
rising into the condenser core, where the<br />
cool air from the fan removes the heat, thus<br />
condensing the vapor; it falls back into the<br />
water hopper as a cool liquid. This system<br />
will control the engine temperature through<br />
a wide ambient temperature range.<br />
1-800-331-3662 ARROW ENGINE COMPANY<br />
13
3<br />
When the pressure-condensing cooling<br />
system is used in climates with freezing<br />
temperatures, a mixture of anti-freeze and<br />
water must be used. A good grade of antifreeze<br />
should be mixed with water before<br />
pouring into the engine. Usually 50-50 mix<br />
is very suffi cient. Never use less than 40%<br />
water in a pressure-condensing cooling<br />
system.<br />
WARNING:<br />
DO NOT ATTEMPT TO FILL THE<br />
COOLING SYSTEM WHILE THE<br />
ENGINE IS RUNNING.<br />
Since this system operates at 4 pounds<br />
pressure, steam and water escape when<br />
the cap is removed. Do not remove the cap<br />
while the engine is running. Before stopping<br />
the engine, let it run a few minutes with the<br />
clutch disengaged to reduce pressure so<br />
the cap may be removed with safety.<br />
The coolant level should be checked on a<br />
regular basis to be assured no leaks have<br />
occurred. The coolant level is 1" below<br />
the bottom header plate in the condenser<br />
core. Never fi ll the system so full that<br />
expansion causes the coolant to rise up<br />
in the condenser tubes. This will block the<br />
steam from rising in the tubes to be cooled.<br />
In turn, heating will occur until coolant is<br />
forced out the overfl ow on the pressure cap<br />
and coolant reaches the proper level.<br />
ALWAYS CHECK AND ADD COOLANT<br />
THROUGH THE FILLER CAP ON THE<br />
WATER HOPPER RATHER THAN THE<br />
PRESSURE CAP ON TOP OF THE<br />
CONDENSER.<br />
PRESSURE RELIEF VALVE<br />
A pressure cap on the condenser prevents<br />
damaging pressure from developing. Do not<br />
use a pressure cap of greater than 4 pounds<br />
pressure as this only exerts excessive<br />
pressure on the cooling system.<br />
During the warm-up period, air and slight<br />
amounts of vapor will be released from the<br />
pressure relief valve. If vapor is released<br />
under normal operation, after the engine is<br />
warmed up, check whether the condenser<br />
fi ns are clogged with dirt, which will restrict<br />
the air fl ow causing the engine to overheat.<br />
Inspect the condenser for this condition<br />
every week or so.<br />
THERMAL-SIPHON<br />
(Optional and older Climax and Arrow<br />
engines.)<br />
The thermal-siphon cooling system differs<br />
from the ebullient cooling system in that<br />
the radiator is fi lled with coolant 3/4 full.<br />
In the thermal-siphon system the core is<br />
actually a radiator rather than a condenser.<br />
A hose connects the radiator top tank to the<br />
water hopper. A sight glass is in the hose<br />
approximately 1/3 of the distance down<br />
from the top tank. The coolant level should<br />
be visible in this gauge glass at normal<br />
14 C-SERIES SERVICE, OPERATION & PARTS MANUAL – AEPB1 1-800-331-3662
level for the system to operate as a thermosyphon<br />
system. If the coolant level should<br />
fall below the bottom of the radiator, the<br />
system will function as an ebullient system<br />
and the low water level safety switch will<br />
protect the engine from overheating.<br />
In some cases it is desirable to operate<br />
the system as an ebullient cooling system<br />
with the coolant level 1"-2" below the<br />
bottom header plate of the radiator during<br />
extreme cold temperatures. This in turn<br />
will allow the engine to run at a higher<br />
temperature helping to minimize sludging<br />
and condensation in the crankcase. When<br />
ambient temperatures rise to summer times<br />
levels, fi ll the system to a level visible in the<br />
gauge glass in the hose and operate as a<br />
thermal-siphon cooling system. This system<br />
operates at 4 pounds pressure just like the<br />
pressure condensing cooling system.<br />
3<br />
1-800-331-3662 ARROW ENGINE COMPANY<br />
15
3<br />
Notes<br />
16 C-SERIES SERVICE, OPERATION & PARTS MANUAL – AEPB1 1-800-331-3662
4<br />
MAGNETO-LOW TENSION<br />
Ignition System<br />
2. Air gap – the air gap between the EMG<br />
and magnet bar should be a nominal .030<br />
inches, but no more than .080 inches.<br />
CHARGING<br />
BAR<br />
3. Coil – Check the coil on a reliable tester, or<br />
substitute a new identical coil in its place.<br />
If trigger coil is moved, timing should be<br />
checked.<br />
+<br />
-<br />
SPARK<br />
PLUG<br />
Start the engine. If desired, the timing<br />
may be checked with a timing light.<br />
TRIGGER COIL<br />
ASSEMBLY<br />
TRIGGER<br />
MAGNET BAR<br />
IGNITION<br />
COIL<br />
CHARGING<br />
GENERATOR<br />
CAUTION:<br />
Be sure proper air gap is maintained<br />
between trigger coil and trigger magnet.<br />
The Arrow AF-603RL low tension magneto<br />
is of the rotating magnet design. A high<br />
energy magnet is attached to the fl ywheel<br />
and passes by a permanently mounted<br />
generator coil facing the fl ywheel. Each<br />
time the magnet passes by the face of the<br />
generator coil, a capacitor is charged to<br />
peak voltage.<br />
A trigger magnet is also mounted on<br />
the fl ywheel and faces off to a trigger coil<br />
located on the engine. The trigger coil is<br />
positioned so that the magnet will pass the<br />
trigger coil and cause the SCR to discharge<br />
the storage capacitor into the ignition<br />
transformer located near the spark plug.<br />
The Arrow AF-603RL should provide long,<br />
maintenance free service because there<br />
are no moving parts. All electronic parts are<br />
encapsulated to protect against moisture<br />
and physical damage.<br />
When spark test indicates unsatisfactory<br />
magneto performance, check the following:<br />
1. Electrical connections – they could have<br />
become loose.<br />
Generator<br />
Trigger<br />
SPARK PLUG<br />
The spark plug supplied with the engine<br />
has been selected according to heat range,<br />
to give the longest service and most<br />
satisfactory performance, but peculiarities<br />
of actual operation may indicate a change<br />
from the factory selection. All Arrow engines<br />
are equipped at the factory with spark plugs<br />
with stainless steel electrodes. Only a small<br />
level of H2S in the fuel will cause a standard<br />
steel electrode plug to be short-lived.<br />
1-800-331-3662 ARROW ENGINE COMPANY<br />
17
4<br />
For protection against enforced shutdown<br />
and difficult starting due to faulty spark<br />
plugs, it is advisable to inspect, clean, file the<br />
electrodes and regap the spark plug every<br />
few weeks of operation.<br />
The low limit gap is recommended because<br />
when plug is used, the electrodes burn away<br />
to widen the gap. With the new solid state<br />
ignition, plugs setting is .030" – .035".<br />
POWER TAKE-OFF CLUTCH<br />
The clutch is a single plate dry disc type<br />
with cushion engagement and has suffi cient<br />
capacity for transmitting the engine’s power.<br />
The clutch is engaged by a hand lever,<br />
which may be mounted on either side of the<br />
clutch operating shaft. The clutch housing<br />
may also be rotated to any desired position<br />
to facilitate the lever operation and service.<br />
This clutch requires very little attention<br />
except for periodic checks and lubrication.<br />
If the clutch does not pull, heats or the<br />
operating lever jumps out of the engaged<br />
position, an adjustment is required. To adjust<br />
the clutch, remove the hand hole plate on<br />
the clutch housing and turn the clutch until<br />
the adjusting lock pin can be reached. Pull<br />
out adjusting lock pin and turn adjusting<br />
yoke to the right, or clockwise, until the<br />
operating lever requires a distinct pressure<br />
to engage. If the adjusting yoke cannot be<br />
screwed up any tighter, this indicates the<br />
clutch driving plate is worn out and must be<br />
replaced.<br />
NOTE: A new Power Take-Off generally<br />
requires several adjustments until the<br />
friction surfaces are worn in. When a new<br />
Power Take-Off has been installed on an<br />
engine, rap the shaft on the end to center<br />
the pilot bearing to relieve any excessive<br />
thrust due to resistance of the pilot bearing<br />
when being passed into the fl ywheel.<br />
18 C-SERIES SERVICE, OPERATION & PARTS MANUAL – AEPB1 1-800-331-3662
5<br />
AIR CLEANER<br />
VALVE COVER<br />
BREATHER Assy<br />
10<br />
9<br />
8<br />
The air cleaner with clean oil/element will<br />
protect the engine parts from abrasive dust<br />
and dirt in the air. Every month, depending<br />
upon the operating conditions, clean the<br />
air cleaner in solvent and refi ll with clean<br />
oil of the type used in the engine or paper<br />
element, whichever is applicable.<br />
7<br />
6<br />
5<br />
4<br />
3<br />
1<br />
CRANKCASE BREATHER<br />
NOTE: This section does not address the<br />
EPA emissions compliant breather systems<br />
- please call Customer <strong>Service</strong> at 1-800-331-<br />
3662 if you have questions about this system.<br />
The crankcase breather plays an important<br />
role in assuring Arrow engines perform with<br />
maximum efficiency. A simple poppet valve,<br />
in the body of the valve cover breather, allows<br />
crankcase pressure to be evacuated, and a<br />
secondary fitting is located in the crankcase top<br />
cover.<br />
Each time the piston goes back from the<br />
cylinder head, the piston compresses the<br />
air in the crankcase chamber. This pressure<br />
opens the poppet valve in the breather and, in<br />
turn, this pressure dissipates. When the piston<br />
travels back toward the head, the poppet valve<br />
closes and a light vacuum is created in the<br />
crankcase. Simultaneously, the smaller fitting<br />
located on the top cover allows a small flow of<br />
fresh air to enter the crankcase.<br />
If excessive oil blows out either breather,<br />
usually the disc valve is worn or has stuck<br />
and should be replaced. A simple test of the<br />
crankcase breathing system is to unscrew the<br />
small fitting out of the crankcase top cover,<br />
plug the hose off the air filter and place your<br />
finger over the hole in the cover. If the breather<br />
is working properly, you feel a definite vacuum<br />
build up. If you don’t feel a vacuum but a<br />
pressure build up, check the poppet valve in<br />
the breather on the valve cover.<br />
1-800-331-3662 ARROW ENGINE COMPANY<br />
19
5<br />
The constant fl ow of fresh air in the<br />
crankcase will eliminate condensation of<br />
moisture and sludging in the crankcase.<br />
Also, the vacuum will eliminate oil seepage<br />
and leaks.<br />
Do not plug the hole in the top crankcase<br />
cover instead of using the fi tting. This will<br />
prevent any fresh air from entering the<br />
crankcase which can cause excessive<br />
moisture (condensation) to occur, along with<br />
rapid contamination of the lubricating oil.<br />
In most cases when excessive oil is blown<br />
out of the crankcase breather, the cause can<br />
be traced to a faulty breather rather than<br />
excessive blow-by or more serious reasons.<br />
When the crankcase breather is ordered<br />
as a spare part, it comes complete with a<br />
connecting hose and clamps. This allows<br />
the replacement breather to be used on<br />
older engines which do not have the tapped<br />
hole in the valve cover.<br />
PARTS INFORMATION<br />
It is important to note that currently<br />
produced parts for new Arrow engines<br />
will fi t exactly on all of the older model<br />
engines. Even though materials have been<br />
improved and, in some cases, slight design<br />
improvements have been made, ALL<br />
ARROW PARTS ARE RETROFITABLE TO<br />
THE VERY EARLIEST CLIMAX ENGINE<br />
MANUFACTURED AND STILL RUNNING.<br />
20 C-SERIES SERVICE, OPERATION & PARTS MANUAL – AEPB1 1-800-331-3662
6<br />
NEW CLUTCH ACTUATOR<br />
ASSY & ADJUSTMENT<br />
INSTRUCTIONS<br />
Note: Images shown represent a C-66<br />
<strong>Engine</strong>. All C-series engines have a similar<br />
confi guration and actuator components will<br />
assemble in the same manner as shown.<br />
The clutch must be rotated so the operating<br />
shaft is oriented horizontally and toward the<br />
bottom of the engine as shown. This can be<br />
done by removing all of the bolts surrounding<br />
the clutch face, rotating the clutch in place,<br />
then replacing and retightening the bolts<br />
in the new location. Note: the clutch does<br />
not need to be removed from the fl ywheel<br />
housing in order to rotate it, only loosened.<br />
Assy of Kit onto <strong>Engine</strong><br />
2. Main Component Attachment<br />
The top bracket should be positioned<br />
as shown, using 2 (3/8 ID) fl at washers<br />
between the bracket and the clutch housing<br />
for spacing, 2 (3/8 ID) split-lock washers<br />
and 2 (3/8-16x1.25) hex bolts as shown.<br />
1. Clutch Orientation<br />
1-800-331-3662 ARROW ENGINE COMPANY<br />
21
6<br />
Slide the splined lever onto the operating<br />
shaft and secure in place with a 1/2-13x1.75<br />
hex bolt. Position the lever so that it is as<br />
near vertical alignment as possible with the<br />
clutch operating shaft in the disengaged<br />
position. (Note: The splined lever may later<br />
have to be rotated either direction by one<br />
spline during adjustment.)<br />
The base bracket should be positioned as<br />
shown. The existing bolt that secures the<br />
engine case to the base should be removed.<br />
The base bracket should be attached using<br />
1 fl at washer, 1 split-lock washer, and 1<br />
hex bolt. (C46 and C66 engines will use a<br />
3/4-10x3.5 bolt with 3/4 ID washers. C96<br />
and C106 engines will use a 7/8-9x3.5 bolt<br />
with 7/8 ID washers.) Do not fully tighten<br />
the bracket to the engine base; further<br />
adjustment will be necessary.<br />
22 C-SERIES SERVICE, OPERATION & PARTS MANUAL – AEPB1 1-800-331-3662
6<br />
The assembled actuator unit (consisting<br />
of the linear actuator, clevis, 6mm rollpin,<br />
1/2x1.75 long shoulder bolt, 1/2 ID fl at<br />
washer, 3/8-16 locknut, base linkage<br />
bar, and slotted linkage bar) will attach to<br />
the three locations as shown. The linear<br />
actuator will attach to the top bracket using<br />
one 5/16x1.75 long shoulder bolt, two 5/16<br />
ID fl at washers, two 5/16 ID brass spacers,<br />
and one 1/4-20 locknut. The base linkage<br />
bar will attach to the base bracket using one<br />
1/2x1.25 long shoulder bolt and one 3/8-16<br />
locknut. The slotted linkage bar will attach<br />
to the splined lever using one 1/2x1.25 long<br />
shoulder bolt, two 1/2 ID fl at washers, and<br />
one 3/8-16 locknut.<br />
1-800-331-3662 ARROW ENGINE COMPANY<br />
23
6<br />
3. Adjustment<br />
Proper adjustment of the clutch actuator is<br />
critical to operation and to ensure longevity<br />
of the clutch and actuator. The intent of<br />
the design and the goal of the adjustment<br />
process is for the clutch to engage when<br />
the actuator is on its outward stroke and the<br />
two linkage bars become in line with each<br />
other. (Excessive binding in the linkage<br />
can cause damage to the clutch and/or<br />
the actuator.) After the clutch engages, the<br />
actuator should continue to travel outward,<br />
allowing the slotted linkage to relieve the<br />
engagement pressure on the clutch.<br />
While the actuator is in the fully retracted,<br />
disengaged position, the shoulder bolt in the<br />
splined lever joint should be approximately<br />
centered in the slot of the linkage bar. Once<br />
the actuator is fully extended and the clutch<br />
is in the engaged position, the shoulder bolt<br />
in the splined lever joint should, again, be<br />
approximately centered in the slot of the<br />
linkage bar (such that any force is removed<br />
from the clutch shaft).<br />
The splined lever should be positioned<br />
initially, as near vertical (pointed downward)<br />
as possible, with the clutch disengaged.<br />
The base bracket should begin with the<br />
bolt securing it to the base positioned<br />
approximately in the center of the slot and<br />
fully tightened so that the base bracket<br />
does not move during clutch engagement/<br />
disengagement (recommended 180-200 ftlbs<br />
for ¾ grade 5 fasteners; 250-270 ft-lbs<br />
for 7/8 grade 5 fasteners).<br />
24 C-SERIES SERVICE, OPERATION & PARTS MANUAL – AEPB1 1-800-331-3662
6<br />
Extend the actuator (confi rming that clutch<br />
engagement occurs) and check fi nal position<br />
of the shoulder bolt in the slot (confi rming<br />
that it is approximately centered and not<br />
applying any pressure to the clutch).<br />
Retract the actuator (by reversing<br />
polarity to its leads), confi rming that clutch<br />
disengagement occurs and the linkage<br />
returns to its starting position.<br />
1-800-331-3662 ARROW ENGINE COMPANY<br />
25
6<br />
If proper adjustment cannot be reached<br />
by altering the position of the base bracket<br />
alone, the splined lever should be removed<br />
from the operating shaft and be repositioned,<br />
rotating it on the operating shaft by one (1)<br />
spline one direction or the other. (Do not<br />
rotate the splined lever more than one (1)<br />
spline rotation from vertical either direction<br />
when in the disengaged clutch position.)<br />
If during extension or retraction, the clutch<br />
is not fully engaged (or disengaged) or the<br />
shoulder bolt does not come to rest centered<br />
in the linkage bar slot, adjustments must<br />
be made as necessary. The two locations<br />
for adjustment are the base bracket and<br />
the splined lever. The fi rst adjustment<br />
that should be made is to move the base<br />
bracket one direction or the other within the<br />
slot (depending on the direction needed for<br />
proper clutch engagement/disengagement,<br />
while maintaining a fi nished position with<br />
the bolt centered in the slot).<br />
A combination of fi ne adjustments in these<br />
two locations will ultimately, fi rst, allow the<br />
clutch actuator system to fully engage the<br />
clutch, then release the applied pressure by<br />
centering the bolt in the linkage slot; then,<br />
second, allow the linkage to disengage the<br />
26 C-SERIES SERVICE, OPERATION & PARTS MANUAL – AEPB1 1-800-331-3662
clutch, returning the bolt to the center of the<br />
slot in the linkage.<br />
After the clutch has been properly adjusted<br />
for operation, all bolts should be checked<br />
and tightened as necessary.<br />
If further adjustment assistance is<br />
necessary, please contact David Johnson<br />
at Arrow <strong>Engine</strong> Company. 1-800-331-<br />
3662.<br />
6<br />
4. Cover Attachment<br />
After the clutch actuator linkage has<br />
been adjusted and correct operation has<br />
been verifi ed, the protective cover can be<br />
attached.<br />
The outer cover should be attached to the<br />
top bracket using two ¼ fl at washers and<br />
two ¼-20 x .625 bolts as shown. The outer<br />
cover should also be attached to the base<br />
bracket through the slot in the cover using<br />
one 5/16 fl at washer and one 5/16-18 x .625<br />
bolt as shown.<br />
The two-piece shield cover-plates install<br />
as shown, using ¼-20 x .625 bolts and ¼ ID<br />
fl at washers. The actuator wires should be<br />
positioned to exit the cover from the notch<br />
in the upper corner.<br />
1-800-331-3662 ARROW ENGINE COMPANY<br />
27
6<br />
Notes<br />
28 C-SERIES SERVICE, OPERATION & PARTS MANUAL – AEPB1 1-800-331-3662
7 ENGINE OVERHAUL<br />
7<br />
CYLINDER HEAD<br />
The cylinder head is an iron alloy casting<br />
with chrome nickel replaceable intake and<br />
exhaust valve inserts.<br />
Maintenance service and adjustments can<br />
be readily performed, as the head can be<br />
easily removed without disturbing any other<br />
major engine parts. In the event the engine<br />
develops low compression, loss of power, is<br />
diffi cult to start, or has a combustion knock<br />
due to carbon deposits, the head should be<br />
removed for inspection.<br />
CYLINDER HEAD<br />
INLET<br />
PORT<br />
VALVE<br />
GUIDES<br />
EXHAUST<br />
PORT<br />
INTAKE<br />
VALVE<br />
VALVE<br />
SEAT<br />
INSERTS<br />
EXHAUST<br />
VALVE<br />
DISASSEMBLY OF CYLINDER HEAD<br />
1. Remove cylinder head cover. Disconnect<br />
fuel line from carburetor. Disconnect<br />
throttle rod at carburetor.<br />
2. Remove cylinder head stud nuts and lift<br />
off the cylinder head. Place combustion<br />
chamber over a suitable block to hold<br />
valves in closed position.<br />
3. With a suitable lever (a 3/8" U-shaped rod is<br />
satisfactory) under the rocker arm, depress<br />
the valve spring to release the valve spring<br />
lock retainers. The valve spring washers<br />
and valve springs can be removed.<br />
4. Clean all parts in solvent or fuel oil<br />
to remove carbon, gum, and varnish<br />
deposits. If the valves or valve seats<br />
are severely burned, they should not be<br />
reground, since the metal behind the burn<br />
has probably lost its original properties.<br />
Valves that are warped or have reduced<br />
diameter at the valve stem should be<br />
discarded and replaced with new valves.<br />
5. When refacing the valves, the maximum<br />
face runout in reference to the valve<br />
stems should not exceed .002" (total<br />
indicator readings) and only enough metal<br />
should be removed to produce a bright<br />
face and a continuous margin.<br />
REFACING THE VALVES<br />
Valves should be ground to a 45° seat angle.<br />
Grind the seat with a 45° grinding wheel. Because<br />
the valve guide is used to pilot the grinder, this<br />
procedure must be attempted only when the<br />
valve guides are clean and in good condition.<br />
VALVE REFACING<br />
RIGHT<br />
WRONG<br />
Hold valve face and seat runout to .002<br />
inch and maintain sufficient margin as<br />
illustrated above. Excessive runout or<br />
insufficient margin may lead to early<br />
valve failure.<br />
WRONG<br />
1°<br />
RIGHT<br />
Maintain a valve seat width of 7/64" to 1/8"<br />
by grinding the outer edge of the seat on a 75<br />
degree angle. Do not grind the seat bore to<br />
narrow the seat, as this moves the center of the<br />
seat too near the valve edge. Discard valves<br />
that have been refaced to point where the edge<br />
of the valves become less than 3/64".<br />
1°<br />
1-800-331-3662 ARROW ENGINE COMPANY<br />
29
7<br />
REASSEMBLY OF<br />
CYLINDER HEAD<br />
1. To reassemble the cylinder head parts,<br />
lubricate and insert valves in valve guides,<br />
and install valve springs and spring<br />
washers. Valve spring dampening coils<br />
(close wound) must be placed toward the<br />
cylinder head.<br />
2. Depress the valve spring washers and<br />
replace the valve spring lock retainers.<br />
3. Be sure that the surfaces of the cylinder<br />
head and block are absolutely clean.<br />
Always install a new head gasket. Do<br />
NOT use the old head gasket over again.<br />
It will more than likely not seal completely.<br />
Install the cylinder head Assy.<br />
4. Snug the cylinder head studs evenly,<br />
and then tighten alternately with a torque<br />
wrench to specifi ed torque for the engine<br />
model. Stud nuts must be re-torqued after<br />
engine is hot.<br />
5. Hand crank the engine until the piston<br />
is top dead center on the compression<br />
stroke.<br />
6. Loosen the rocker arm lock nut and insert<br />
a .020" feeler between the rocker arm and<br />
valve stem. Turn the rocker arm screw<br />
until proper clearance is obtained. Without<br />
further movement of the rocker arm screw,<br />
tighten the lock nut securely. Recheck the<br />
clearance with a feeler gauge.<br />
VALVE ADJUSTMENT<br />
With the engine warm, reset both intake<br />
and exhaust tappet clearance to .020"<br />
(.508mm).<br />
NOTE: Always reset valve tappet clearance<br />
after re-torquing cylinder head stud nuts.<br />
CYLINDER SLEEVE<br />
This engine has a replaceable wet type<br />
cylinder sleeve of refi ned alloy chrome<br />
nickel iron, fi nely machined and honed for<br />
close piston clearances. The lower end<br />
of the sleeve has a large fl at seal (C-66,<br />
C-96), or three sealing rings (C-46, C-101,<br />
C-106), installed to seal off the water jacket.<br />
The cylinder sleeve can be readily removed<br />
by using a suitable block of wood between<br />
the crankshaft throw and the sleeve, and<br />
bumping the block by turning the fl ywheel.<br />
Because the sleeve is replaceable, oversize<br />
pistons and rings or seals are not supplied.<br />
When the sleeve and piston become worn<br />
excessively, standard size parts are to be<br />
installed.<br />
When installing the cylinder sleeve, spread<br />
a slight amount of o-ring lube over the sealing<br />
rings. Never use oil, grease, or white lead.<br />
The upper and lower contact surfaces of the<br />
cylinder block should be thoroughly cleaned<br />
before the cylinder sleeve is inserted. Care<br />
should be taken to push the sleeve straight in<br />
the block to avoid damage to the seal rings.<br />
To force the sleeve home to fully seated<br />
position, the cylinder head may be slipped<br />
over the cylinder head studs and used to tap<br />
sleeve into place.<br />
On C-66 and C-96 engines the fl at garter<br />
seal is installed in back end of the cylinder<br />
block, being sure it is in straight and not<br />
distorted. The sleeve is then inserted in the<br />
garter ring and tapped into place with the<br />
cylinder head.<br />
On C-46, C-101 and C-106 engines, the<br />
o-ring type seals are installed in the grooves<br />
in the sleeve. Again, be positive the o-rings<br />
are not twisted or distorted. Then slide the<br />
sleeve with the rings on it into the cylinder<br />
block and drive home using the cylinder<br />
head as a battering ram.<br />
30 C-SERIES SERVICE, OPERATION & PARTS MANUAL – AEPB1 1-800-331-3662
When the sleeve is seated, the top of the<br />
sleeve should project approximately .005"<br />
above the top surface of the cylinder block<br />
to ensure a tight seal with the cylinder head<br />
gasket.<br />
PISTON<br />
A cast iron piston with two compression<br />
rings, one scraper ring and one oil ring are<br />
used in the C-46 and the C-66 & C-96 have<br />
three compression rings, one scraper ring<br />
and one oil ring. The C-101 and C-106<br />
has an aluminum alloy piston with two<br />
compression rings, one scraper ring, and<br />
one oil ring.<br />
On the C-66, C-96, C-101 and C-106, the<br />
removal of the piston may be accomplished<br />
by taking off the cylinder head, the hand<br />
hole cover and the connecting rod bearing<br />
cap. Scrape the upper part of the cylinder<br />
sleeve to remove the carbon ridge. The<br />
connecting rod and piston may then be<br />
pushed towards the cylinder head end of<br />
the crankcase for removal.<br />
The C-46 connecting rod and piston<br />
must be removed through the hand hole in<br />
the back of the engine. After the cylinder<br />
head and the hand hole cover have been<br />
removed, roll the large fl ywheel over until the<br />
connecting rod throw has reached its lowest<br />
point. Remove the connecting rod bearing<br />
cap and push the piston and connecting rod<br />
just far enough away from the crankshaft<br />
to be able to lift the connecting rod over it.<br />
The piston and connecting rod may then be<br />
pulled from the engine. Be sure to remove<br />
the carbon ridge from the cylinder sleeve.<br />
While the piston is out of the engine,<br />
thoroughly soak it in solvent to remove the<br />
gum and varnish that adheres to the piston<br />
rings and grooves. Piston clearance in sleeve<br />
is checked by inverting piston and inserting<br />
it into sleeve, with a feeler gauge in place<br />
between piston skirt and cylinder wall, at 90°<br />
degrees from the piston pin holes.<br />
PISTON PIN<br />
The piston pin should be a light palmpush<br />
fi t in the piston, and it is clamped in the<br />
connecting rod. Considerable care should<br />
be used to ensure proper fi t of piston pin.<br />
An over-tight piston pin will result in binding<br />
and scoring, while a loose fi t will cause<br />
knocking. C-46, C-66 and C-96 pistons<br />
have replaceable piston pin bushings. The<br />
C-101 and C-106 do not have bushings.<br />
PISTON RINGS<br />
Two compression rings (the C-66 and<br />
C-96 have three compression rings), one<br />
scraper ring and one oil ring are assembled<br />
to the piston for a satisfactory seal of piston<br />
to cylinder sleeve and for controlling oil<br />
lubrication.<br />
All piston rings should be selectively<br />
fi tted to each individual ring groove and the<br />
cylinder sleeve. The rings should not be too<br />
loose in the groove, but should be suffi ciently<br />
free to move under their own weight when<br />
the piston is rotated. Be careful not to distort<br />
piston rings when removing or installing.<br />
Compression<br />
Rings<br />
Oil Scraper<br />
Ring<br />
Oil Ring<br />
PISTON RINGS<br />
7<br />
1-800-331-3662 ARROW ENGINE COMPANY<br />
31
7<br />
FITTING PISTON RINGS<br />
1. Place the piston ring in the cylinder<br />
sleeve and square it up with the cylinder<br />
wall by inserting the piston and moving<br />
the ring slightly.<br />
2. Measure the gap with a feeler gauge. If<br />
the gap is less than specifi ed, remove<br />
the ring and dress the ends with a fi ne<br />
fi le until the proper clearance is obtained.<br />
With insuffi cient clearance, expansion<br />
from heat will cause the ring ends to but,<br />
resulting in warped rings and scored<br />
cylinder.<br />
Assemble the piston ring in the proper<br />
grooves of the piston. Oil the rings generously<br />
when installing. It is desirable to lightly hone<br />
the cylinder walls to cut any glaze. This will<br />
cause the piston rings to seat better. The<br />
C-46 piston with connecting rod is installed<br />
easier if the piston rings are not assembled<br />
on the piston before installation. The piston<br />
rings are assembled on the piston after the<br />
piston has been inserted into the engine. To<br />
accomplish this, the piston and connecting<br />
rod must be pushed into the cylinder sleeve<br />
from the back of the engine and far enough<br />
that the top of the piston sticks out of the<br />
sleeve. The piston rings are then assembled<br />
on the piston.<br />
CONNECTING ROD<br />
The connecting rod is machined<br />
for precision fi t with the cap bored to<br />
accommodate aluminum precision shell<br />
bearings with shims. When installing shell<br />
bearings, the bearing back and bore surface<br />
must be absolutely clean and free of oil.<br />
The bearing face should be oiled to assure<br />
lubrication when the engine is fi rst started.<br />
NOTE: Never scrape precision shell<br />
bearings, and DO NOT FILE the connecting<br />
rod parting surface to adjust the bearing.<br />
Install a new bearing.<br />
TIMING CAMSHAFT<br />
To obtain correct ignition and valve timing,<br />
it will be necessary to time the camshaft and<br />
crankshaft by meshing the gears correctly.<br />
1. Insert camshaft Assy into crankcase,<br />
making sure the oil pressure plunger is<br />
in place.<br />
2. Lift the camshaft Assy into position and<br />
insert the upper left hand screw through<br />
the cover plate. Catch the thread three or<br />
four turns.<br />
3. Turn the engine to BOTTOM dead center<br />
(eye setting is close enough).<br />
4. Rock the camshaft gear out of mess<br />
by manipulating the lower end of the<br />
camshaft Assy.<br />
5. Turn the camshaft gear until the hole in<br />
the upper drive gear is central in the hole<br />
in the top of the crankcase (under the<br />
governor), with the camshaft block forced<br />
against the cover plate, in the position it<br />
shall have when all screws are down tight.<br />
To check, tighten the screw temporarily<br />
used to hold the camshaft block in place.<br />
Should this force the holes out of alignment,<br />
try changing the mesh of the gear by one<br />
tooth in the direction to bring the holes<br />
central. When the holes are central with the<br />
crank at outer dead center, the camshaft<br />
will be timed exactly right.<br />
Next, loosen the single screw used to hold<br />
the camshaft Assy in place and insert and<br />
tighten the two small piloted screws. Then,<br />
secure the two larger screws and fi nally<br />
insert the central screw. Do not tighten the<br />
central screw too tightly, as it may distort the<br />
cover plate. It should only be tight enough<br />
to prevent oil leakage. Make the necessary<br />
oil connection on the inside of the crankcase<br />
and reassemble the parts removed.<br />
32 C-SERIES SERVICE, OPERATION & PARTS MANUAL – AEPB1 1-800-331-3662
CRANKSHAFT<br />
CRANKSHAFT Assy (61)<br />
Main<br />
Bearings<br />
Timing<br />
Ring Gear<br />
Oil<br />
Collector<br />
8. Remove the fi ve central screws from the<br />
rectangular cover plate behind the fl ywheel.<br />
These hold the camshaft Assy in place.<br />
Do NOT remove this cover plate. The<br />
camshaft Assy may now be lifted out of the<br />
crankcase. Attached to the camshaft Assy<br />
is the oil pump, which may be removed by<br />
removing two cap screws.<br />
CAMSHAFT/ VALVE LIFTER Assy (90)<br />
7<br />
INLET<br />
PORT<br />
To remove crankshaft:<br />
1. Disconnect connecting rod.<br />
2. Remove large fl ywheel.<br />
3. Remove clutch and small fl ywheel.<br />
4. Remove small fl ywheel housing.<br />
5. Remove the crankshaft through small<br />
fl ywheel housing opening.<br />
VALVE<br />
GUIDES<br />
EXHAUST<br />
PORT<br />
INTAKE<br />
VALVE<br />
VALVE<br />
SEAT<br />
INSERTS<br />
EXHAUST<br />
VALVE<br />
CAMSHAFT<br />
The camshaft Assy is virtually the heart<br />
of the engine. It is so well made and so<br />
thoroughly lubricated that there is little<br />
occasion for its removal. If this should<br />
become necessary, proceed as follows:<br />
1. Drain crankcase.<br />
2. Remove strainer.<br />
3. Remove top crankcase cover.<br />
FLYWHEELS<br />
A large heavy fl ywheel provides smooth,<br />
even speed operation. This fl ywheel also<br />
carries the timing marks. A smaller light<br />
fl ywheel is mounted at the power take-off<br />
end and drives the clutch power take-off. It<br />
also acts as a counter balance to help reduce<br />
vibration.<br />
4. Remove magneto.<br />
5. Remove governor.<br />
6. Disconnect oil lines at camshaft block and<br />
oil pump.<br />
7. Remove valve push rods.<br />
1-800-331-3662 ARROW ENGINE COMPANY<br />
33
7<br />
Notes<br />
34 C-SERIES SERVICE, OPERATION & PARTS MANUAL – AEPB1 1-800-331-3662
8 TROUBLESHOOTING<br />
8<br />
ENGINE WON’T START<br />
No Ignition Spark<br />
1. Low oil pressure switch tripped –<br />
reset switch.<br />
2. Low oil level – refi ll crankcase with<br />
proper motor oil to full level.<br />
3. Low water level switch in shutoff<br />
position – refi ll cooling system with<br />
coolant to proper level.<br />
4. Damaged ignition wire or terminals –<br />
replace.<br />
5. Faulty Ignition<br />
6. Faulty spark plug – remove and<br />
replace.<br />
No Fuel<br />
1. Be sure the fuel gas is turned on<br />
at the main valve and that there is<br />
gasoline in the fl oat bowl, if furnished.<br />
2. Be sure the fuel hose is not kinked or<br />
stopped up, and is of suffi cient size as<br />
to not restrict the flow of fuel gas.<br />
No Compression<br />
1. Be sure compression release is in<br />
down position.<br />
2. Stuck valve-remove valve cover and<br />
check valves to see that both are<br />
opening and closing while turning<br />
engine over. Often a stuck valve may<br />
be freed up by spraying with light oil<br />
and tapping with a small hammer. If<br />
this doesn’t work, the head will have<br />
to be removed.<br />
3. Valve adjustment backed off - readjust<br />
valves to .020 clearance.<br />
4. Valve burned - remove head and<br />
recondition.<br />
<strong>Engine</strong> Flooded<br />
1. Remove spark plug – turn engine<br />
over several times with compression<br />
release in down position to blow<br />
surplus fuel out cylinder – clean plug<br />
and reinstall.<br />
2. Try cranking engine with fuel shut off<br />
to clear cylinder of remaining fuel.<br />
3. Start engine in usual manner.<br />
1-800-331-3662 ARROW ENGINE COMPANY<br />
35
8<br />
CLUTCH WON’T PULL OR HEATS<br />
Clutch<br />
1. Check the adjustment to the point<br />
where clutch lever snaps in with a<br />
fi rm snap. Refer to clutch section<br />
of this Instruction Manual for clutch<br />
adjustment instructions.<br />
2. If the clutch is properly adjusted, but<br />
still does not pull, remove the cover<br />
and check the clutch plates to assure<br />
that the teeth are not sheared off.<br />
3. If the teeth are sheared off, install new<br />
clutch plates, refer to clutch section of<br />
this instruction manual.<br />
4. Check the drive belt tension and<br />
alignment.<br />
5. Be sure pilot bearing or clutch housing<br />
bearings are not worn. If necessary to<br />
replace, refer to clutch section of this<br />
instruction manual.<br />
ENGINE HEATS<br />
Coolant Level<br />
1. Check the coolant level, if low, fi ll to<br />
proper level 1" – 2" below inside top of<br />
the water hopper.<br />
2. Check the condenser and the water<br />
hopper for signs of leaks, and correct<br />
if leaks are present.<br />
3. On vapor phase condenser, be sure<br />
the bleed hole in the center tube of<br />
the condenser is open. On pressure<br />
condensing cooling system, check the<br />
cap on top of condenser to be sure<br />
the gasket seal is OK and the cap fi ts<br />
properly.<br />
4. Make sure the antifreeze mixture is<br />
not too rich because of the addition of<br />
pure antifreeze. Premix the antifreeze<br />
and water to avoid hot spots. Do not<br />
use less than 40% water.<br />
5. Check the engine overload.<br />
Fan Belt<br />
1. Check the fan belt tension – tighten if<br />
loose.<br />
36 C-SERIES SERVICE, OPERATION & PARTS MANUAL – AEPB1 1-800-331-3662
ENGINE LOSES WATER<br />
WITHOUT VISIBLE LEAKS<br />
Leak Or Pinhole In Top Of<br />
Condenser<br />
1. With engine full of coolant and at<br />
operating temperature, slowly move<br />
your hand up the face of the condenser<br />
starting at the water hopper. As your<br />
hand moves up the condenser the<br />
temperature should get cooler. This<br />
indicates a normal condition.<br />
2. If the condenser is virtually the<br />
same temperature, top to bottom,<br />
this indicates a small pinhole at the<br />
top, allowing fl uid to escape in the<br />
form of invisible vapor. Remove the<br />
condenser for repair.<br />
Cylinder Head Is Cracked<br />
1. Coolant may be escaping into the<br />
exhaust valve port, and blowing out<br />
the exhaust.<br />
2. To check this possible condition,<br />
remove the head and place it on a solid<br />
surface with the valve guides down.<br />
3. Carefully fi ll the water jacket of head<br />
with kerosene or solvent and check<br />
for leaks. If leak is present, replace<br />
the head.<br />
Head Gasket Leaking<br />
1. Shut down and cool the engine. The<br />
coolant will leak and be visible.<br />
2. Replace head gasket.<br />
ENGINE BLOWS OIL OUT<br />
CRANKCASE OR VALVE COVER<br />
BREATHER INTO AIR FILTER<br />
Faulty Poppet Valve in Valve Cover<br />
Breather<br />
1. Remove the breather and check to<br />
see the Poppet Valve is in place and<br />
not worn out. If it is, the breather<br />
should be replaced.<br />
2. Check the fi tting in top crankcase<br />
cover. There should not be more than<br />
16" WC pressure upon running the<br />
engine.<br />
3. Check the cap on the top of the oil<br />
fi lter Assy to be sure air is not leaking<br />
in. This leakage will allow too much<br />
air in the crankcase causing loss of<br />
vacuum.<br />
8<br />
1-800-331-3662 ARROW ENGINE COMPANY<br />
37
8<br />
ENGINE FAILS TO OPERATE<br />
PROPERLY UNDER LOAD<br />
Improper Fuel Adjustment<br />
1. Confi rm fuel pressure is at the<br />
specifi ed fuel pressure see “Emissions<br />
Set Points”.<br />
Fuel Supply Restricted Or Valve<br />
Closed<br />
1. Disconnect the lines and blow clear.<br />
2. Check all fuel supply valves for<br />
operating condition.<br />
Fuel Lines Too Hot<br />
1. Protect the fuel line from heat of the<br />
engine.<br />
2. Move the fuel lines away from engine<br />
exhaust.<br />
Varying Fuel Supply Due To Faulty<br />
Regulator<br />
1. Check the fuel pressure and reset the<br />
regulator.<br />
2. Replace the regulator if adequate fuel<br />
pressure is not maintained when the<br />
engine is in operation.<br />
Optional Choke Partially Closed<br />
1. The fuel setting should always be<br />
done with the choke wide open. The<br />
Impco carburetor does not need a<br />
choke.<br />
Volume Tank Full Of Liquid Or Trash<br />
1. Clean and drain both high and low<br />
pressure chamber of volume tank.<br />
Fuel BTU Level Too Low<br />
1. Adjust fuel level.<br />
ENGINE FAILS TO START<br />
1. The carburetor diaphragm is oil<br />
soaked and stiff because of extremely<br />
cold weather. Replace with silicone<br />
diaphragm.<br />
2. Incorrect fuel inlet pressure.<br />
3. Damaged air and gas valve Assy and<br />
must be replaced.<br />
38 C-SERIES SERVICE, OPERATION & PARTS MANUAL – AEPB1 1-800-331-3662
9 Emissions<br />
9<br />
COMPLIANT VERSUS<br />
CERTIFIED ENGINES<br />
As of July 1, 2008 Arrow <strong>Engine</strong>s rated<br />
under 25 HP will be sold as “certifi ed” which<br />
means they meet the emissions standards<br />
(40 CFR 90 and 40 CFR 60) set forth by the<br />
EPA effective July 1, 2008.<br />
Arrow engines that are “compliant” engines<br />
means they are NOT certified coming out<br />
from the factory. Being “compliant” means<br />
that with the proper air fuel ratio controller<br />
and catalyst the engines are able to meet the<br />
EPA emission standards required as of July<br />
1, 2008.<br />
ARROW CERTIFIED ENGINES<br />
Owner and operators must retain<br />
the “Certifi cate of Conformity”, have a<br />
maintenance plan, and keep maintenance<br />
records in order to keep the engine in a<br />
“certifi ed” manner.<br />
Maintenance recommendations are listed<br />
on page 108 of this manual. Owners and<br />
operators should maintain their engine(s)<br />
per their own maintenance program. This<br />
maintenance program should be based on<br />
their specifi c site operating conditions.<br />
Please consult Arrow <strong>Engine</strong> Company<br />
engineering department if adding any<br />
exhaust back pressure restriction to the<br />
system. Emission certifi cations is based on<br />
using the (standard) silencer P/N:MUF-1.<br />
Contact Arrow <strong>Engine</strong> Company<br />
engineering department if the engine is to<br />
be operated continuously below 25% load.<br />
All certifi ed and certifi able engines require a<br />
closed loop breather system - please consult<br />
the factory if you have any questions.<br />
EMISSION SET POINTS<br />
C-46 Emission Set Points<br />
RPM RANGE 400 to 800 RPM<br />
MAX. HP<br />
RATING<br />
GAS SUPPLY<br />
SETTINGS<br />
(Pressure<br />
measured at fuel<br />
inlet to carburetor)<br />
800 RPM @ 9 HP(6.71kW)<br />
700 RPM @ 9 HP(6.71kW)<br />
600 RPM @ 8 HP(5.97kW)<br />
500 RPM @ 7 HP(5.22kW)<br />
400 RPM @ 5 HP(3.73kW)<br />
800 RPM @ 8" WC (20.3cm)<br />
700 RPM @ 8" WC (20.3cm)<br />
600 RPM @ 8" WC (20.3cm)<br />
500 RPM @ 9" WC (22.9cm)<br />
400 RPM @12" WC (30.5cm)<br />
C-66 Emission Set Points<br />
RPM RANGE 350 to 700 RPM<br />
MAX. HP<br />
RATING<br />
GAS SUPPLY<br />
SETTINGS<br />
(Pressure<br />
measured at fuel<br />
inlet to carburetor)<br />
700 RPM @ 13 HP(9.7kW)<br />
600 RPM @ 13 HP(9.7kW)<br />
500 RPM @ 11 HP(8.2kW)<br />
350 RPM @ 8 HP(5.97kW)<br />
700 RPM @ 5" WC (12.7cm)<br />
600 RPM @ 8" WC (20.3cm)<br />
500 RPM @ 11" WC (27.9cm)<br />
350 RPM @12" WC (30.5cm)<br />
C-96 Emission Set Points<br />
RPM RANGE<br />
MAX. HP<br />
RATING<br />
GAS SUPPLY<br />
SETTINGS<br />
(Pressure<br />
measured at fuel<br />
inlet to carburetor)<br />
300 - 600 RPM<br />
600 RPM @ 19 HP(14.17kW)<br />
500 RPM @ 18 HP(14.43kW)<br />
400 RPM @ 14 HP(10.44kW)<br />
300 RPM @ 11 HP(8.2kW)<br />
600 RPM @ 3" WC (7.6cm)<br />
500 RPM @ 3" WC (7.6cm)<br />
400 RPM @ 4" WC (10.2cm)<br />
300 RPM @ 4.5" WC<br />
(11.4cm)<br />
1-800-331-3662 ARROW ENGINE COMPANY<br />
39
9<br />
C-101 Emission Set Points<br />
RPM RANGE<br />
MAX. HP<br />
RATING<br />
CARBURETOR<br />
SETTINGS<br />
GAS SUPPLY<br />
SETTINGS<br />
(Pressure<br />
measured at fuel<br />
inlet to carburetor)<br />
400 - 800 RPM<br />
800 RPM @ 25 HP(18.65kW)<br />
700 RPM @ 24 HP(17.9kW)<br />
600 RPM @ 23 HP(17.16kW)<br />
500 RPM @ 22 HP(16.41kW)<br />
400 RPM @ 19 HP(14.17kW)<br />
Idle Screw - Plugged<br />
Mixture Valve - Full Rich<br />
Notch Locked<br />
800 RPM @ 5" WC (12.7cm)<br />
700 RPM @ 6" WC (15.2cm)<br />
600 RPM @ 7" WC (17.8cm)<br />
500 RPM @ 8" WC (20.3cm)<br />
400 RPM @ 9" WC (22.9cm)<br />
All emission settings in the above tables<br />
are based on 1000 BTU Pipeline Natural<br />
Gas.<br />
This manual is intended to give the<br />
installer of this certifi ed engine all of the<br />
information that is necessary to properly<br />
install the engine and related components.<br />
Failure to follow these instructions when<br />
installing a certifi ed engine violates federal<br />
law (40CFR 1068.105(b)), subject to fi nes<br />
or other penalties as described in the Clean<br />
Air Act.<br />
Use of the correct engine fuel supply<br />
pressure is essential. It is the responsibility<br />
of the installer to install a fuel pressure<br />
regulator upstream of the engine and to<br />
verify the correct fuel pressure specifi ed by<br />
the manufacturer is supplied to the engine.<br />
After the fuel pressure has been set and<br />
verifi ed it is the responsibility of the installer<br />
to protect the fuel pressure setting from any<br />
further adjustment or tampering.<br />
Arrow cannot be held liable for any<br />
emissions noncompliance resulting from<br />
incorrect installation of this engine or failure<br />
to use the required settings.<br />
ALTITUDE ADJUSTMENTS<br />
Below are the adjustments required to the inlet fuel pressure for the certifi ed engines<br />
at various elevations to maintain the certifi ed emissions, eg: C-101 running 800 RPM at<br />
10,000' elevation the fuel pressure should be set at 3.5" WC, fi gured thusly - Standard fuel<br />
setting 5" WC + -1.5" WC = 3.5" WC<br />
<strong>Engine</strong> Elevation 300<br />
RPM<br />
350<br />
RPM<br />
400<br />
RPM<br />
500<br />
RPM<br />
600<br />
RPM<br />
700<br />
RPM<br />
800<br />
RPM<br />
K-6 2,000'<br />
-0.6 -0.6 -0.6 -0.5 -0.4<br />
N/A N/A<br />
610M -1.53 -1.53 -1.53 -1.27 -1.02<br />
4,000'<br />
-1.17 -1.17 -1 -0.9 -0.8<br />
N/A N/A<br />
1,220M -2.97 -2.97 -2.54 -2.29 -2.03<br />
6,000'<br />
-1.7 -1.7 -1.5 -1.3 -1.1<br />
N/A N/A<br />
1,829M -4.32 -4.32 -3.8 -3.3 -2.79<br />
8,000'<br />
-2.16 -2.16 -1.9 -1.7 -1.4<br />
N/A N/A<br />
2,438M -5.49 -5.49 -4.83 -4.32 -3.55<br />
10,000'<br />
-2.7 -2.7 -2.4 -2.1 -1.8<br />
N/A N/A<br />
3,048M -6.86 -6.86 -6.1 -5.33 -4.57<br />
40 C-SERIES SERVICE, OPERATION & PARTS MANUAL – AEPB1 1-800-331-3662
<strong>Engine</strong> Elevation 300<br />
RPM<br />
350<br />
RPM<br />
400<br />
RPM<br />
500<br />
RPM<br />
600<br />
RPM<br />
700<br />
RPM<br />
800<br />
RPM<br />
C-46 2,000'<br />
-0.84 -0.6 -0.6 -0.6 -0.6<br />
N/A N/A<br />
610M -2.13 -1.53 -1.53 -1.53 -1.53<br />
4,000'<br />
-1.56 -1.17 -1 -1 -1<br />
N/A N/A<br />
1,220M -3.96 -2.97 -2.54 -2.54 -2.54<br />
6,000'<br />
-2.28 -1.7 -1.5 -1.5 -1.5<br />
N/A N/A<br />
1,829M -5.79 -4.32 -3.8 -3.8 -3.8<br />
8,000'<br />
-2.88 -2.16 -1.9 -1.9 -1.9<br />
N/A N/A<br />
2,438M -7.32 -5.49 -4.83 -4.83 -4.83<br />
10,000'<br />
-3.66 -2.7 -2.4 -2.4 -2.4<br />
N/A N/A<br />
3,048M -9.3 -6.86 -6.1 -6.1 -6.1<br />
C-66 2,000'<br />
-0.84 -0.82 -0.77 -0.6 -0.35<br />
N/A<br />
610M -2.13 -2.08 -1.96 -1.53 -0.89<br />
4,000'<br />
-1.56 -1.53 -1.43 -1 -0.65<br />
N/A<br />
1,220M -3.96 -3.89 -3.63 -2.54 -1.65<br />
6,000'<br />
-2.28 -2.23 -2.1 -1.5 -0.95<br />
N/A<br />
1,829M -5.79 -5.66 -5.33 -3.8 -2.41<br />
8,000'<br />
-2.88 -2.82 -2.6 -1.9 -1.2<br />
N/A<br />
2,438M -7.32 -7.16 -6.6 -4.83 -3.05<br />
10,000'<br />
-3.66 -3.52 -3.3 -2.4 -1.5<br />
N/A<br />
3,048M -9.3 -8.94 -8.38 -6.1 -3.8<br />
C-96 2,000' -0.32 -0.3 -0.28 -0.2 -0.2<br />
610M -0.81 -0.76 -0.71 -0.5 -0.5<br />
4,000' -0.59 -0.55 -0.52 -0.3 -0.3<br />
1,220M -1.5 -1.4 -1.32 -0.76 -0.76<br />
6,000' -0.86 -0.81 -0.76 -0.5 -0.5<br />
1,829M -2.18 -2.06 -1.93 -1.27 -1.27<br />
8,000' -1.1 -0.98 -0.96 -0.72 -0.72<br />
2,438M -2.79 -2.49 -2.44 -1.83 -1.83<br />
10,000' -1.35 -1.27 -1.2 -0.9 -0.9<br />
3,048M -3.43 -3.23 -3.05 -2.29 -2.29<br />
C-101 2,000'<br />
-0.6 -0.6 -0.5 -0.4 -0.35<br />
N/A N/A<br />
610M -1.53 -1.53 -1.27 -1.02 -0.89<br />
4,000'<br />
-1.17 -1 -0.9 -0.8 -0.65<br />
N/A N/A<br />
1,220M -2.97 -2.54 -2.29 -2.03 -1.65<br />
6,000'<br />
-1.7 -1.5 -1.3 -1.1 -0.95<br />
N/A N/A<br />
1,829M -4.32 -3.8 -3.3 -2.79 -2.41<br />
8,000'<br />
-2.16 -1.9 -1.7 -1.4 -1.2<br />
N/A N/A<br />
2,438M -5.49 -4.83 -4.32 -3.55 -3.05<br />
10,000'<br />
-2.7 -2.4 -2.1 -1.8 -1.5<br />
N/A N/A<br />
3,048M -6.86 -6.1 -5.33 -4.57 -3.8<br />
N/A<br />
N/A<br />
N/A<br />
N/A<br />
N/A<br />
N/A<br />
N/A<br />
N/A<br />
N/A<br />
N/A<br />
N/A<br />
N/A<br />
N/A<br />
N/A<br />
N/A<br />
9<br />
Water Column, inches<br />
Water Column, centimeters<br />
1-800-331-3662 ARROW ENGINE COMPANY<br />
41
9<br />
42 C-SERIES SERVICE, OPERATION & PARTS MANUAL – AEPB1 1-800-331-3662
10 SPECIFICATIONS<br />
MECHANICAL SPECIFICATIONS C-46 C-66 C-96 C-101 C-106<br />
<strong>Engine</strong> Data<br />
Valve Arrangement In Head In Head In Head In Head In Head<br />
Max Permissible Speed – RPM 800 700 600 800 800<br />
Max Rating for Pumping – HP 9 13 19 24.5 32<br />
Max Rating for Pumping – Kilowatt 6.7 9.7 14.2 18.3 23.9<br />
Valve Timing<br />
Intake Opens: ATCD - DEG 7 7 8 8 8<br />
Intake Closes: ABDC - DEG 26 26 28 40 40<br />
Exhaust Opens: BBDC - DEG 23 23 40 40 40<br />
Exhaust Closes: ATDC - DEG 15 15 8 8 8<br />
Wrench Torques<br />
Cylinder Head Stud. – Foot-pounds 175 175 243 243 243<br />
Cylinder Head Stud. – Newton-meters 273 273 330 330 330<br />
Connecting Rod Bolts – Foot-pounds 92 92 175 175 175<br />
Connecting Rod Bolts – Newton-meters 125 125 237 237 237<br />
Exhaust System<br />
Flange NPT – Inches 1-1/2 2 2-1/2 2-1/2 2-1/2<br />
Flange NPT – Millimeters 38.1 50.8 63.5 63.5 63.5<br />
Clutch<br />
Shaft Diameter – Inches 1.437-<br />
1.436<br />
2.250-<br />
2.249<br />
2.250-<br />
2.249<br />
2.250-<br />
2.249<br />
2.250-<br />
2.249<br />
Shaft Diameter – Millimeters 36.5 57.1 57.1 57.1 57.1<br />
Shipping Weight<br />
Pounds 1433 1811 2790 2975 2975<br />
Kilograms 650 821 1266 1349 1349<br />
Capacities*<br />
Water – Quarts 12 16 20 20 20<br />
Water – Liters 11.4 15.1 18.9 18.9 18.9<br />
Oil – Quarts 7+ 7+ 11+ 11+ 11+<br />
Oil – Liters 6.6 6.6 10.4 10.4 10.4<br />
Oil Viscosity – Expected Air Temperature<br />
SAE 30W or 10W40<br />
Above 30°F (-1°C)<br />
SAE 20W or 10W30<br />
10°F to 30°F (-23°C to -1°C)<br />
SAE 5W20<br />
Below -10°F (23°C)<br />
10<br />
* All engine models: When furnished with an outside oil fi lter, add one quart of oil to the amount shown above for the total capacity.<br />
Oil capacity prior to Serial No. 201387 is 9 quarts (8.51L). When ARROW Crankcase 1-96 is used for replacement on engines prior<br />
to serial No. 201387, change the oil capacity on the instructions plate from 9 quarts (8.51L) to 11 quarts (10.4L).<br />
1-800-331-3662 ARROW ENGINE COMPANY<br />
43
10<br />
CLEARANCES AND TOLERANCES – CRANKCASE<br />
Remove<br />
carbon ridge<br />
Compression release lever<br />
Description Unit C-46 C-66 C-96 C-101/106<br />
Cylinder Sleeve Bore inch 4.999-5.001 5.749-5.7510 6.99-7.001 7.4995-7.5010<br />
mm 126.975-127.0 146.02-146.07 177.77-177.82 190.48-190.52<br />
CLEARANCES AND TOLERANCES – CRANKSHAFT<br />
Crank Gear<br />
Backlash<br />
.004-.007<br />
Oil Collector<br />
Flange Clearance<br />
.001-.003<br />
Crank Pin Diameter<br />
(see chart)<br />
Description Unit C-46 C-66 C-96 C-101/106<br />
Main Bearing Journal Diameter inch 3.001-3.0015 3.001-3.0015 3.626-3.627 3.626-3.627<br />
mm 76.225-76.581 76.225-76.581 92.100-92.125 92.100-92.125<br />
Crank Pin Diameter inch 2.999-3.000 2.999-3.000 3.624-3.625 3.624-3.625<br />
mm 76.174-76.2 76.174-76.2 92.049-92.075 92.049-92.075<br />
44 C-SERIES SERVICE, OPERATION & PARTS MANUAL – AEPB1 1-800-331-3662
CLEARANCES AND TOLERANCES – CYLINDER HEAD<br />
10<br />
Intake Valve<br />
Valve Seat<br />
45° Angle<br />
Roll Pin<br />
Exhaust Valve<br />
Valve Guide<br />
Valve Spring<br />
Valve Spring Retainer<br />
Valve Keepers<br />
Exhaust Flange<br />
Description Unit C-46 C-66 C-96 C-101/106<br />
Valve Stem Diameter (Intake) inch .3730-.3735 .5605-.5610 .5605-.5610 .5620-.5625<br />
mm 9.474-9.486 14.236-14.249 14.236-14.249 14.274-14.287<br />
Valve Stem Diameter (Exhaust) inch 3720-.3725 .5595-.5600 .5595-.5600 .5615-.5620<br />
mm 9.448-9.461 14.211-14.224 14.211-14.224 14.262-14.274<br />
Valve Guide Diameter<br />
inch 3745-.3750 .5620-.5625 .5620-.5625 .5640-.5645<br />
Assembled in Head<br />
mm 9.512-9.525 14.274-14.287 14.274-14.287 14.274-14.287<br />
Valve Guide Outside Diameter inch 7515-.7525 .8755-.8765 .8755-.8765 .9380-.9385<br />
mm 19.088-19.113 22.237-22.263 22.239-22.263 23.825-23.837<br />
Intake Valve to Guide Clearance inch 001-.002 .001-.002 .001-.002 .0015-.0025<br />
mm .0254-.0508 .0254-.0508 .0254-.0508 .0381-.0635<br />
Exhaust Valve to Guide<br />
inch .002-.002 .002-.003 .002-.003 .002-.003<br />
Clearance<br />
mm 0508-.0508 .0508-.0762 .0508-.0762 .0508-.0762<br />
Valve Spring Free Length inch 4 4 4-11/16 4-11/16<br />
mm 101.6 101.6 119.06 119.06<br />
Valve Spring Assembled Length inch 3 3 3 3<br />
mm 76.2 76.2 76.2 76.2<br />
Valve Spring Compressed Length inch 2-1/2 2-1/2 2-1/2 2-1/2<br />
mm 63.5 63.5 63.5 63.5<br />
Cylinder head Stud Nut Torque inch 175 175 245 245<br />
mm 273 273 332 330<br />
Exhaust Flange NPT inch 1-1/2 2 2-1/2 2-1/2<br />
mm 38.1 50.8 63.5 63.5<br />
1-800-331-3662 ARROW ENGINE COMPANY<br />
45
10<br />
CLEARANCES AND TOLERANCES – CAMSHAFT<br />
Gov. Drive Gear<br />
Backlash .003-.005<br />
Cam Bearing Diameter<br />
1.7495-1.7505<br />
Oil Pressure<br />
Indicator Pin<br />
Cam Journal<br />
Clearance .0015-.0035<br />
Oil Pressure<br />
Adjusting Screw<br />
Valve Spring<br />
Free Length 1-1/2"<br />
Assembled Length 1"<br />
Lifter Clearance<br />
Description Unit C-46 C-66 C-96 C-101/106<br />
Camshaft Bearing Journal inch 1.747-1.748 1.747-1.748 1.747-1.748 1.747-1.748<br />
mm 44.373-44.399 44.373-44.399 44.373-44.399 44.373-44.399<br />
Camshaft Bearing Diameter inch 1.7495-1.7505 1.7495-1.7505 1.7495-1.7505 1.7495-1.7505<br />
mm 44.437-44.463 44.437-44.463 44.437-44.463 44.437-44.463<br />
Camshaft to Bearing Clearance inch .0015-.0035 .0015-.0035 .0015-.0035 .0015-.0035<br />
mm .0381-.0889 .0381-.0889 .0381-.0889 .0381-.0889<br />
Gov. Drive Gear Backlash inch .003-.005 .003-.005 .003-.005 .003-.005<br />
mm .0762-.127 .0762-.127 .0762-.127 .0762-.127<br />
Valve Lifter Guide Diameter inch .9835-.9845 .9835-.9845 1.2495-1.2505 1.2495-1.2505<br />
mm 24.98-25.0 24.98-25.0 31.737-31.762 31.737-31.762<br />
Valve Lifter Diameter inch .9818-.9828 .9818-.9828 1.2470-1.2480 1.2470-1.2480<br />
mm 24.937-24.963 24.937-24.963 31.673-31.699 31.673-31.699<br />
Lifter to Guide Clearance inch .0007-.0027 .0007-.0027 .0015-.0035 .0015-.0035<br />
mm .01778-.0685 .01778-.0685 .0381-.0889 .0381-.0889<br />
Oil Pressure Spring<br />
inch 1-1/2 1-1/2 1-1/2 1-1/2<br />
Free Length<br />
mm 38.1 38.1 38.1 38.1<br />
Oil Pressure Spring<br />
inch 1 1 1 1<br />
Assembled Length<br />
mm 25.4 25.4 25.4 25.4<br />
46 C-SERIES SERVICE, OPERATION & PARTS MANUAL – AEPB1 1-800-331-3662
CLEARANCES AND TOLERANCES – ROCKER ARM<br />
10<br />
Rocker Arm Bushing<br />
Ream to fit<br />
Push Rod Intake<br />
Rocker Arm Shaft<br />
Clearance (see chart)<br />
Push Rod Exhaust<br />
Valve Tappet<br />
Adjusting Screw<br />
Valve Tappet<br />
Clearance .020<br />
Description Unit C-46 C-66 C-96 C-101/106<br />
Rocker Arm Shaft Diameter inch 1.247-1.248 1.247-1.248 1.5605-1.5610 1.5605-1.5610<br />
mm 31.673-31.699 31.673-31.699 38.265-39.649 38.265-39.649<br />
Rocker Arm Bushing Diameter inch 1.249-1.250 1.249-1.250 1.562-1.563 1.562-1.563<br />
Assembled<br />
mm 31.724-31.75 31.724-31.75 39.674-39.000 39.674-39.700<br />
Rocker Arm Shaft to Bushing inch .001-.003 .001-.003 .001-.0025 .001-.0025<br />
Circumference<br />
mm .0254-.0762 .0254-.0762 .0254-.0635 .0254-.0635<br />
Valve Tappet Clearance, Hot inch .020 .020 .020 .020<br />
mm .508 .508 .508 .508<br />
1-800-331-3662 ARROW ENGINE COMPANY<br />
47
10<br />
CLEARANCES AND TOLERANCES – CONNECTING ROD & PISTON<br />
Torque (see chart)<br />
Torque (see chart)<br />
Stagger Ring Gaps<br />
Piston Pin<br />
Hole Diameter 1.9995-2.0<br />
Oil Ring<br />
Oil Scraper Ring<br />
Compression Rings<br />
Pin to Bushing<br />
Clearance (see chart)<br />
Description Unit C-46 C-66 C-96 C-101/106<br />
Oil Pump Gr. to Body Clearance inch .001-.003 .001-.003 .001-.003 .001-.003<br />
mm .0254-.0762 .0254-.0762 .0254-.0762 .0254-.0762<br />
Oil Pump Gear Backlash inch .003-.005 .003-.005 .003-.005 .003-.005<br />
mm .0762-.127 .0762-.127 .0762-.127 .0762-.127<br />
Piston Dia. (at bottom of skirt) inch 4.994-4.996 5.744-5.746 6.992-6.993 7.4905-7.4952<br />
mm 126.847-126.898 145.897-145.948 177.596-177.622 190.259-190.310<br />
Piston to Cylinder Clearance inch .003-.007 .003-.007 .006-.009 .007-.0105<br />
mm 0.0762-.1778 0.0762-1778 .1524-.2286 .1778-.2667<br />
Piston Ring Groove Width inch .251-.252 .251-.252 .251-.252 .2515-.2525<br />
mm 6.375-6.400 6.375-6.400 6.375-6.400 6.388-6.413<br />
Piston Ring Clearance in Groove inch .002-.004 .002-.004 .002-.0035 .0025-.0045<br />
• Compression mm .0508-.1016 .0508-.1016 .0508-.0889 .0635-.1143<br />
• Scraper<br />
inch .0015-.0035 .0015-.004 .0015-.004 .0025-.0045<br />
mm .0381-.0889 .0381-.1016 .0381-.1016 .0635-.1143<br />
• Oil Control<br />
inch .002-.004 .002-.004 .002-.004 .002-.004<br />
mm .0508-.1016 .0508-.1016 .0508-.1016 .0508-.1016<br />
Piston Ring Gap<br />
inch .010-.020 .010-.020 .027-.037 .023-.033<br />
• Compression mm .254-.508 .254-.508 .685-.939 .584-.838<br />
• Scraper<br />
inch .010-.025 .010-.025 .015-.030 .023-.033<br />
mm .254-.635 .254-.635 .381-.762 .584-.838<br />
• Oil Control<br />
inch .010-.020 .015-.025 .015-.025 .023-.033<br />
mm .254-.508 .381-.635 .381-.635 .584-.838<br />
Piston Pin Diameter inch 1.4835-1.4840 1.4835-1.4840 1.9985-1.9990 1.9985-1.9990<br />
mm 37.680-37.693 37.680-37.693 50.761-50.774 50.761-50.774<br />
Piston Pin Bushing Assembled inch 1.4845-1.4850 1.4845-1.4850 2.000-2.001 1.995-2.0005<br />
Inside Diameter<br />
mm 37.706-37.719 37.706-37.719 50.8-50.825 50.7-50.8<br />
48 C-SERIES SERVICE, OPERATION & PARTS MANUAL – AEPB1 1-800-331-3662
10<br />
Description Unit C-46 C-66 C-96 C-101/106<br />
Pin to Bushing Clearance inch .0005-.0015 .0005-.0015 .0010-.0025 .0005-.0010<br />
mm .0127-.0381 .0254-.0635 .0254-.0635 .0127-.0254<br />
Connecting Rod. Bearing Inside inch 3.003-3.004 3.003-3.004 3.628-3.629 3.628-3.629<br />
Diameter<br />
mm 76.216-76.301 76.216-76.301 92.151-92.176 92.151-92.176<br />
Bearing to Crank Pin Clearance inch .002-.005 .002-.005 .003-.005 .003-.005<br />
mm .0508-.127 .0508-.127 .0762-.127 .0762-.127<br />
Connecting Rod Side Clearance inch .014-.020 .016-.022 .012-.018 .012-.018<br />
mm .355-.508 .406-.5588 .3048-.457 .3048-.457<br />
Connecting Rod Nut Torque inch 92 92 175 175<br />
mm 125 125 273 273<br />
Connecting Rod Piston Pin End inch 35 35 45 45<br />
Nut<br />
mm 47 47 61 61<br />
1-800-331-3662 ARROW ENGINE COMPANY<br />
49
10 DIMENSIONS<br />
(To remove head and piston)<br />
A<br />
B<br />
D<br />
C<br />
G<br />
Q<br />
R<br />
F<br />
AR<br />
ROW<br />
BB(Keyway)<br />
CC<br />
ARROW<br />
S<br />
E<br />
DD<br />
O (Exhaust)<br />
H<br />
P(Dia 4<br />
Holes)<br />
(base height)<br />
I<br />
K<br />
L<br />
N<br />
J<br />
M<br />
AA<br />
X<br />
U<br />
V<br />
Y<br />
Z<br />
T<br />
W<br />
C-46 C-66 C-96 C-101/106<br />
Descr inch mm inch mm inch mm inch mm<br />
A 69 1753 76 1930 98 2489 95 1/2 2426<br />
B 45 1143 50 1270 60 1524 57 1448<br />
C 24 610 26 660 38 965 33 3/8 848<br />
D 32 7/8 835 36 7/8 937 42 1/4 1073 43 1092<br />
E 12 305 12 305 17 432 17 432<br />
F 39 991 44 1/8 1121 50 1270 51 7/16 1307<br />
G 10 2 54 10 254 18 457 18 457<br />
H 15 381 18 457 22 559 22 559<br />
I 24 7/8 632 29 1/8 740 33 3/4 857 36 3/4 933<br />
J 6 3/8 162 10 254 15 3/8 391 15 3/8 391<br />
K 18 1/2 470 24 3/4 629 36 3/4 933 36 3/4 933<br />
L 21 533 26 3/4 679 39 3/4 1010 41 1041<br />
M 1 1/4 32 1 25 1 1/2 38 2 1/8 54<br />
N 47 5/8 1210 53 3/8 1356 63 1600 60 1/2 1537<br />
O 1 7/16 36 2 1/4 57 2 1/4 57 2 1/2 64<br />
P 25/32 20 13/16 21 1 1/16 27 1 1/8 29<br />
Q 13 3/8 340 14 3/8 365 15 3/8 391 15 3/8 391<br />
R 4 102 4 1/2 114 5 127 5 127<br />
S 28 711 32 813 40 1016 40 1016<br />
T 6 5/8 168 7 3/4 197 8 5/8 219 8 5/8 219<br />
U 5 7/8 149 7 3/4 197 7 7/8 200 7 7/8 200<br />
V 15 381 17 1/2 444 19 1/2 495 18 1/2 470<br />
W 15 5/8 397 15 11/16 398 17 3/8 441 15 3/8 391<br />
X 17 5/8 * 448 21 7/8 556 21 1/4 540 22 11/16 576<br />
Y 22 1/8 562 29 7/16 748 29 1/8 740 31 9/16 802<br />
Z 39 1/8 * 994 45 1/8 1146 46 1/2 1181 47 1194<br />
AA 1 1/4 32 1/2 13 1/2 13 1 1/2 38<br />
BB 3/8 x 3/16 10 x 5 5/8 x 5/16 16 x 8 5/8 x 5/16 16 x 8 5/8 x 5/16 16 x 8<br />
CC 17/16 36 2 1/4 57 2 1/4 57 2 1/4 57<br />
DD 3 1/2 89 5 1/2 140 5 1/2 140 6 1/2 165<br />
* Before S/N 115463: X=16 1/4", Z=37 3/4".<br />
50 C-SERIES SERVICE, OPERATION & PARTS MANUAL – AEPB1 1-800-331-3662
ENGINE SPECIFICATIONS<br />
10<br />
Description Unit C-46 C-66 C-96 C-101/106<br />
Rated Continuous HP @ KW 6.7 9.7 14.2 18.3/23.9<br />
HP 9 13 19 24.5/32<br />
Max Continuous RPM RPM 800 700 600 800<br />
Bore & Stroke inch 5" x 6¼" 5¼" x 7½" 7" x 8½" 7½" x 8½"<br />
mm 127 x 159 146 x 190.5 178 x 216 190.5 x 216<br />
Displacement CI 122.7 195 327 376<br />
liter 2 3.3 5.5 6.4<br />
Compression Ratio 4.8:1 5.2:1 4.8:1 6.2:1<br />
RPM RANGE RPM 400-800 350-700 300-600 300-800<br />
WR² (Spoke Flywheel) Lb-Ft² 290 600 1600 1760<br />
Moment of Inertia Kg-M² 12.18 25.20 67.20 73.92<br />
WR² (QD Flywheel) Lb-Ft² 1850 1850<br />
Moment of Inertia Kg-M² 77.88 77.88<br />
P.T.O. Shaft Size inch 1 7/16" 2 1/4" 2 1/4" 2 1/4"<br />
mm 36.5MM 57.2MM 57.2MM 57.2MM<br />
Oil Capacity * quart 7 7 11 11<br />
liter 6.6 6.6 10.4 10.4<br />
Water Capacity quart 12 16 20 20<br />
liter 11.4 15.1 18.9 18.9<br />
Spark Plug Size mm 18 18 18 18<br />
Exhaust Connection up to 20' 1½" 2" 2½" 2½"<br />
up to 6M 38mm 50.8mm 63.5mm 63.5mm<br />
20'-30' 2" 2½" 3" 3"<br />
6-9M 50.8mm 63.5mm 76.2mm 76.2mm<br />
Fuel Gas Pipe Size NPT 3/8" 3/8" ½" 1/2"<br />
Size Mounting Bolts (4 ea) inch ¾" ¾" 1" 1"<br />
Shipping Weight lbs 1360 1640 2580 2690<br />
Truck Load Qty<br />
Safety Controls Standard<br />
Ignition<br />
Fuel<br />
Fuel System<br />
Lubrication<br />
Filtration-Oil<br />
kg 617 744 1170 1220<br />
per 45 ft<br />
truck bed<br />
24 22 16 16<br />
Water Level, Oil Pressure & Overspeed<br />
Capacity Discharge Ignition<br />
Natural Gas<br />
Impco Type Carburetor<br />
Full Pressure<br />
Replaceable Full Flow Filter<br />
Clutch-P.T.O. C-107-SP-5 C-110-HP-4 C-110-HP-3 SP-111-HP-3<br />
Starting Equipment<br />
Ring Gear Standard<br />
* For oil fi lter changes, add 1 Quart or .95 Liter.<br />
FOR ADDITIONAL INFORMATION SEE INDIVIDUAL ENGINE PRODUCT SHEETS AND ENGINE ACCESSORY SHEETS.<br />
1-800-331-3662 ARROW ENGINE COMPANY<br />
51
10<br />
HORSEPOWER DERATES<br />
Condition Continuous Duty Intermittent Duty<br />
Altitude<br />
Naturally Aspirated<br />
Deduct 3% for each 1,000' above 1,500' Deduct 3% for each 1,000' above 500'<br />
Deduct 3% for each 305m above 457m<br />
Deduct 3% for each 305m above 152m<br />
Altitude<br />
Turbo Charged<br />
Deduct 3% for each 1,000' above 3,000'<br />
Deduct 3% for each 305m above 914m<br />
Deduct 3% for each 1,000' above 1,500'<br />
Deduct 3% for each 305m above 457m<br />
Temperature Deduct 1% for every 10°F above 100°F Deduct 1% for every 10°F above 85°F<br />
Deduct 1% for every 5.5°C above 38°C Deduct 1% for every 5.5°C above 29°C<br />
Duty Ratings & Standards<br />
The load and speed that can be applied<br />
without interruption except for normal<br />
maintenance.<br />
The highest load and speed that can<br />
be applied under specifi c conditions of<br />
varying load and/or speed.<br />
All ratings are corrected to 500' (152m) altitude, 29.38Hg (746mm), and a temperature of 85°F<br />
(29°C).<br />
Natural Gas ratings are based on the use of 900 BTU (33.5 J/cm3) LHV gas. Propane ratings are<br />
based on the use of 2335 BTU HD-5 propane.<br />
52 C-SERIES SERVICE, OPERATION & PARTS MANUAL – AEPB1 1-800-331-3662
10<br />
1-800-331-3662 ARROW ENGINE COMPANY<br />
53
11 11 PARTS<br />
CRANKCASE ASSEMBLY<br />
29<br />
38<br />
17<br />
45<br />
43<br />
15<br />
25<br />
7<br />
8<br />
6<br />
54<br />
4<br />
16<br />
28<br />
31<br />
27<br />
18<br />
30<br />
37<br />
32<br />
34<br />
33<br />
10<br />
44<br />
1<br />
22<br />
5<br />
36<br />
13<br />
3<br />
35<br />
53<br />
21<br />
26<br />
10<br />
14<br />
1<br />
9<br />
56<br />
19<br />
24<br />
20<br />
41<br />
55<br />
23<br />
42<br />
51<br />
39<br />
40<br />
12<br />
47<br />
2<br />
52<br />
50<br />
11<br />
46<br />
48<br />
49<br />
No. Description<br />
C-46 C-66 C-96 C-101/106<br />
Part No. Qty Part No. Qty Part No. Qty Part No. Qty<br />
1 Plated Lock Washer 1A-3/8 18 1A-3/8 18 1A-3/8 18 1A-3/8 18<br />
2 Plated Lock Washer 1A-1/2 8 1A-1/2 8 1A-1/2 8 1A-1/2 8<br />
3 Plated Lock Washer 1A-3/4 4 1A-7/8 4 1A-7/8 4<br />
4 Crankcase Assy 1-46 1 1-66 1 1-96 1 1-106 1<br />
5 Dowel Pin 2-46 2 2-46 2 2-46 2 2-46 2<br />
6 Cylinder Head Stud-Long 3-46 1 3-66 1 3-96 1 3-106 1<br />
7 Cylinder Head Stud-Short 4-46 5 4-66 5 4-96 5 4-96 5<br />
8 Hopper Stud 6-46 6 6-46 6 5-96 6 5-96 6<br />
9 Camshaft Plate 7-46 1 7-46 1 7-46 1 7-46 1<br />
10 Capscrew Hex Head 7A-3/816x1 14 7A-3/816x1 14 7A-3/816x3/4 14 7A-3/816x3/4 14<br />
11 Capscrew Hex Head 7A-1/213x11/4 1 7A-1/213x11/4 1 7A-1/213x11/4 1 7A-1/213x11/4 1<br />
12 Capscrew Hex Head 7A-1/213x11/2 7 7A-1/213x11/2 7 7A-1/213x11/2 7 7A-1/213x11/2 7<br />
13 Capscrew Hex Head 7A-3/410x3 4 7A-7/89x3 4 7A-7/89x3 4<br />
14 Cover Gasket 8-46 1 8-46 1 8-46 1 8-46 1<br />
15 Cyl Sleeve Gasket 12-46 2 12-66 1 12-96 1 12-106 3<br />
16 Arrow Oil Filler ASP-1 1 ASP-1 1 ASP-1 1 ASP-1 1<br />
17 Cylinder Sleeve 13-46 1 13-66 1 13-96 1 13-106 1<br />
18 Adapter Oil Line 14-46 1 14-46 1 14-46 1 14-46 1<br />
19 Cover & Clamp Assembly 16-46 1 16-46 1 16-96 1 16-96 1<br />
20 ● Hand Hole Cover 17-46 1 17-46 1 17-96 1 17-96 1<br />
21 ● Cover Clamp 18-46 1 18-46 1 18-96 1 18-96 1<br />
54 C-SERIES SERVICE, OPERATION & PARTS MANUAL – AEPB1 1-800-331-3662
No. Description<br />
C-46 C-66 C-96 C-101/106<br />
Part No. Qty Part No. Qty Part No. Qty Part No. Qty<br />
22 ● Hand Hole Cover Bolt 19-46 1 19-46 1 19-46 1 19-46 1<br />
23 ● Hand Hole Cover Nut 20-46 1 20-46 1 20-46 1 20-46 1<br />
24 ● Washer 21-46 1 21-46 1 21-46 1 21-46 1<br />
25<br />
Safety Switch 20-P-7 1 20-P-7 1 20-P-7 1 20-P-7 1<br />
Safety Switch w/ /Bracket 20-PM-27 1 20-PM-27 1 20-PM-27 1 20-PM-27 1<br />
26 Cover Gasket 22-46 1 22-46 1 22-96 1 22-96 1<br />
27 Top Cover 23-A-46 1 23-66 1 23-96 1 23-96 1<br />
28 Eye Bolt<br />
23-1A-46 1 23-1-46 1 23-1A-46 1 23-1A-46 1<br />
23-1A-96 1 223-1A-96 1<br />
29 Breather Filter * 23-B-46 1 23-B-46 1 23-B-46 1 23-B-46 1<br />
30 Top Cover Gasket 24-46 1 24-66 1 24-96 1 24-96 1<br />
31 Nut Heavy Hex 25A-3/410 1 25A-3/410 1 25A-3/410 2 25A-3/410 2<br />
32 Cover Assembly 25-46 1 25-66 1 25-96 1 25-96 1<br />
33 ● Cover 26-46-NA 1 26-46 1 26-96 1 26-96 1<br />
34 ● Intake Valve Lifter 28-46 1 28-46 1 28-46 1 28-46 1<br />
35 ● Intake Valve Lever 29-46 1 29-46 1 29-46 1 29-46 1<br />
● Washer 27-46 1 27-46 1 27-46 1 27-46 1<br />
● Washer Ex. Roller Rocker 59-118 2 59-118 2 59-118 1 59-118 1<br />
● Ring Gear Guard Painted 612-46 1<br />
36 ● Roll Pin 41A-3/16x11/4 1 41A-3/16x11/4 1 41A-3/16x11/4 1 41A-3/16x11/4 1<br />
37 Gasket 32-46 1 32-46 1 32-96 1 32-96 1<br />
38 Instruction Plate ANP-9 1 ANP-9 1 ANP-9 1 ANP-9 1<br />
39 Bearing Housing 43-46 1 43-66 1 43-96 1 43-96 1<br />
40 Oil Retainer 44-46 1 44-46 1 44-96 1 44-96 1<br />
41<br />
Shim (.015) 48-46 5 48-46 4 48-96 4 48-96 4<br />
Shim (.015) Brass * 48-B-46 1 48-B-46 1 48-B-96 1 48-B-96 1<br />
42<br />
Shim (.005) 50-46 3 50-46 4 50-96 4 50-96 4<br />
Shim (.005) Brass * 50-B-46 1 50-B-46 1 50-B-96 1 50-B-96 1<br />
43 Base 58-66 1 58-96 1 58-96 1<br />
44<br />
Fuel Pump Gasket * 314-46 1 314-46 1 314-46 1 314-46 1<br />
Pump Cover Plate w/ Gasket * 314-P-46 1 314-P-46 1 314-P-46 1 314-P-46 1<br />
45 Instrument Panel Zinc Plated 866-46 1 866-46 1 866-46 1 866-46 1<br />
46 Oil Level Gauge Assembly ACE-400 1 ACE-400 1 ACE-400 1 ACE-400 1<br />
47 ● Oil Level Gauge Base ACE-401-A-46 1 ACE-401-A-46 1 ACE-401-A-46 1 ACE-401-A-46 1<br />
48<br />
● Sediment Bowl ACE-402-46 1 ACE-402-46 1 ACE-402-46 1 ACE-402-46 1<br />
● Float Bowl w/ Hinge * ACE-304-46 1 ACE-304-46 1 ACE-304-46 1 ACE-304-46 1<br />
49<br />
● Bail Assy ACE-403-118 1 ACE-303-118 1 ACE-303-118 1 ACE-303-118 1<br />
● Bail Assy * ACE-403-46 1 ACE-403-46 1 ACE-403-46 1 ACE-403-46 1<br />
50 ● Gasket ACE-409-46-NS 2 ACE-409-46 2 ACE-409-46 2 ACE-409-46 2<br />
● Dial, Oil Level Gauge 298-118 1 298-118 1 298-118 1 298-118 1<br />
51 ● Gasket 36-46 1 36-46 1 36-46 1 36-46 1<br />
52 ● Machine Screw Flat, Soc 12D-3/816x1 2 12D-3/816x1 2 12D-3/816x1 2 12D-3/816x1 2<br />
53 Oil Filter Element OFK-1-E 1 OFK-1-E 1 OFK-1-E 1 OFK-1-E 1<br />
Pipe Fitting PF5-3/8x1/2 1 PF5-3/8x1/2 1 PF5-3/8x1/2 1 PF5-3/8x1/2 1<br />
54 Dial Cock 76400 1 76400 1 76400 1 76400 1<br />
Plug * PF4-1/4 1 PF4-1/4 1 PF4-1/4 1 PF4-1/4 1<br />
Plug PF4-1/2 1 PF4-1/2 1 PF4-1/2 1 PF4-1/2 1<br />
55 Oil Line Connecting Screw * 115-46 1 115-46 1 115-46 1 115-46 1<br />
56 Brass Washer 245-46 1 245-46 1 245-46 1 245-46 1<br />
* Not used in current production.<br />
● 1-800-331-3662 Assembly Component<br />
ARROW ENGINE COMPANY<br />
11<br />
55
11<br />
CRANKSHAFT ASSEMBLY<br />
1<br />
10<br />
2<br />
8<br />
7<br />
5<br />
4<br />
11<br />
6<br />
7<br />
8 9<br />
3<br />
No. Description<br />
C-46 C-66 C-96 C-101/106<br />
Part No. Qty Part No. Qty Part No. Qty Part No. Qty<br />
1 Capscrew Hex Head 7A-3/816x2 1 7A-3/816x2 1 7A-3/816x23/4 1 7A-3/816x23/4 1<br />
2 90 Deg Ell 49x4 1 49x4 1 49x4 1 49x4 1<br />
3 Crankshaft Assy 61-46 1 61-66 1 61-96 1 61-96 1<br />
4 ● Bare Crankshaft 62-46 1 62-66 1 62-96 1 62-96 1<br />
5 ● Crankshaft Timing Gear 63-46 1 63-46 1 63-96 1 63-96 1<br />
6 ● Oil Collector Flange 65-46 1 65-46 1 65-96 1 65-96 1<br />
7 ● Bearing Cone 68-46 2 68-66 2 68-96 2 68-96 2<br />
8 ● Bearing Cup 68-A-46 2 68-A-66 2 68-A-96 2 68-A-96 2<br />
9 ● SAE Nut 72-46 1 72-46 1 72-96 1 72-96 1<br />
10 ● Woodruff Key 104A-#25 1 104A-#25 1 104A-#25 1 104A-#25 1<br />
11 Woodruff Key 104A-#V 1 104A-#V 1 104A-#36 1 104A-#36 1<br />
● Assembly Component.<br />
56 C-SERIES SERVICE, OPERATION & PARTS MANUAL – AEPB1 1-800-331-3662
CAMSHAFT ASSEMBLY<br />
11<br />
27<br />
28<br />
26<br />
30<br />
29<br />
7<br />
5<br />
6<br />
4<br />
24<br />
20 19<br />
1<br />
2<br />
25<br />
18<br />
12<br />
17<br />
3<br />
12<br />
21<br />
22<br />
14<br />
15<br />
16<br />
8<br />
11<br />
13<br />
10<br />
9<br />
23<br />
No. Description<br />
C-46 C-66 C-96 C-101/106<br />
Part No. Qty Part No. Qty Part No. Qty Part No. Qty<br />
Camshaft Assy 90-46 1 90-46 1 90-96 1 90-106 1<br />
1 ● Internal Lock Washer 2C-1/2 4 2C-1/2 4 2C-1/2 4 2C-1/2 4<br />
2 ● Capscrew Hex Head 7A-1/213x3 4 7A-1/213x3 4 7A-1/213x3 4 7A-1/213x3 4<br />
3 ● Valve Lifter Guide 91-46 1 91-46 1 91-96 1 91-96 1<br />
4 ● 1/2" Hard Steel Ball 93-46 1 93-46 1 93-46 1 93-46 1<br />
5 ● #8 Flat Washer 93-A-46 2 93-A-46 2 93-A-46 2 93-A-46 2<br />
6 ● Oil Rel.Spring-New Style 94-A-46 1 94-A-46 1 94-A-46 1 94-A-46 1<br />
7 ● Oil Relief Valve Screw 95-46 1 95-46 1 95-46 1 95-46 1<br />
8 ● Camshaft Bearing Assy-Pr 97-46 1 97-46 1 97-46 1 97-46 1<br />
9 ● Camshaft Assembly 98-46 1 98-46 1 98-96 1 98-106 1<br />
10 ●● Camshaft Timing Gear 101-46 1 101-46 1 101-46 1 101-46 1<br />
11 ●● Woodruff Key 104A-#13 1 104A-#13 1 104A-#13 1 104A-#13 1<br />
12 ● Pilot Bushing 102-46 4 102-46 4 102-46 4 102-46 4<br />
13 ● Woodruff Key 104A-#6 1 104A-#6 1 104A-#6 1 104A-#6 1<br />
14 ● Governor Drive Gear 105-46 1 105-46 1 105-46 1 105-46 1<br />
15 ● Washer 107-46 1 107-46 1 107-46 1 107-46 1<br />
16 ● Gov Drive Gear Screw 108-46 1 108-46 1 108-46 1 108-46 1<br />
17 ● Valve Lifter 109-46 2 109-46 2 109-96 2 109-96 2<br />
18 ● Socket Head Pipe Plug PF18-1/4 1 PF18-1/4 1 PF18-1/4 1 PF18-1/4 1<br />
19 ● Rivet, Button Head AES-46 1 AES-46 1 AES-46 1 AES-46 1<br />
20 ● Screw, U-Drive 646-C-46 1 646-C-46 1 646-C-46 1 646-C-46 1<br />
21 Plated Lock Washer 1A-1/2 2 1A-1/2 2 1A-1/2 2 1A-1/2 2<br />
22 Capscrew Hex Head 7A-1/213x11/4 2 7A-1/213x11/4 2 7A-1/213x11/4 2 7A-1/213x11/4 2<br />
23 Pilot Screw 112-46 2 112-46 2 112-46 2 112-46 2<br />
24 Cotter Pin * 2A-3/32x5/8 1 2A-3/32x5/8 1 2A-3/32x5/8 1 2A-3/32x5/8 1<br />
25 Oil Pressure Plunger * 110-46 1 110-46 1 110-96 1 110-96 1<br />
26 Male Branch Tee 1/8 119-RG-46 1 119-RG-46 1 119-RG-46 1 119-RG-46 1<br />
27 Cam Assy Crankcase Oil Line OL-K-46 1 OL-K-46 1 OL-K-96 1 OL-K-96 1<br />
28 ● Elbow 90° 49x4 1 49x4 1 49x4 1 49x4 1<br />
29 Rocker Cam Assy Line OL-B-46 1 OL-B-66 1 OL-B-96 1 OL-B-96 1<br />
30 ● Elbow 45° 54x4 1 54x4 1 54x4 1 54x4 1<br />
* Not used in current production<br />
● Assembly Component.<br />
1-800-331-3662 ARROW ENGINE COMPANY<br />
●● Sub-Assembly Component.<br />
57
11<br />
CYLINDER HEAD ASSEMBLY<br />
11<br />
4<br />
13<br />
1<br />
6<br />
2<br />
17<br />
11<br />
1<br />
7<br />
14<br />
10<br />
9<br />
8<br />
12<br />
5<br />
3<br />
15<br />
20<br />
19<br />
21<br />
22<br />
16<br />
18<br />
No. Description<br />
C-46 C-66 C-96 C-101/106<br />
Part No. Qty Part No. Qty Part No. Qty Part No. Qty<br />
Cylinder Head Assy, Complete 222-46 1 222-66 1 222-96 1 222-106 1<br />
● Dowel Pin 2-46 1 2-46 2 2-46 1<br />
1 ● Cotter Pin 2A-3/32x3/4 2 2A-3/32x3/4 2 2A-3/32x3/4 2<br />
2 ● Cylinder Head 223-46 1 223-66 1 223-96 1 223-106 1<br />
3 ● Exhaust Flange Stud 225-46 2 225-66 2 225-66 2 225-66 2<br />
4 ● Intake Elbow Stud 226-46 2 226-46 2 226-46 2<br />
5 ● Rocker Arm Bracket Stud 227-46 1 227-66 1 227-66 1 227-106 1<br />
6 ● Inlet Valve 229-46 1 229-66 1 229-66 1 229-106 1<br />
7 ● Exhaust Valve 230-46 1 230-66 1 230-96 1 230-106 1<br />
8 ● Valve Spring 232-46 2 232-46 2 232-96 2 232-96 2<br />
9 ● Valve Spring Retainer 233-46 2 233-66 2 233-66 2 233-66 2<br />
10 ● Valve Retainer Lock, Pair 234-46 2 234-66 2 234-66 2 234-66 4<br />
11 ● Setscrew, Socket Head 19A-3/816x3/4 2 19A-3/816x3/4 2 19A-3/816x3/4 2<br />
12 Valve Stem Guide 224-46 2 224-66 2 224-66 2 224-106 2<br />
13 Exhaust Valve Seat Insert 228-A-46 2 228-A-66 2 228-A-96 2 228-A-106 2<br />
14 Cylinder Head Gasket 238-46 1 238-66 1 238-96 1 238-106 1<br />
Grafoil Cyl Head Gasket 238-G-46 1 238-G-66 1 238-G-96 1 238-G-106 1<br />
15 Finished Hex Nut 29A-1/213 2 29A-1/213 2 29A-1/213 2 29A-1/213 2<br />
16 Finished Hex Nut 29A-5/818 1 29A-5/818 1 29A-5/818 1 29A-5/818 1<br />
17 High Grd Nut #8 34A-5/818 6 34A-5/818 6 34A-3/416 6 34A-3/416 6<br />
18 Muffl er & Components MUF-2-46 1 MUF-2-66 1 MUF-2-96 1 MUF-2-96 1<br />
19 ● Exhaust Flange 235-46 1 235-66 1 235-96 1 235-96 1<br />
20 ● Muffl er MUF-1 1 MUF-1 1 MUF-1 1 MUF-1 1<br />
21 ● Close Nipple PF2-11/2 1 PF2-2 1<br />
22 ● 90 Deg Street Elbow PF10-21/2x11/2 1 PF10-21/2x2 1 PF5-21/2 1 PF5-21/2 1<br />
58 C-SERIES SERVICE, OPERATION & PARTS MANUAL – AEPB1 1-800-331-3662
FLYWHEEL HOUSING ASSEMBLY<br />
11<br />
4<br />
5<br />
3<br />
1<br />
3<br />
No. Description<br />
1<br />
Plated Lock Washer<br />
(inner ring only)<br />
C-46 C-66 C-96 C-101/106<br />
Part No. Qty Part No. Qty Part No. Qty Part No. Qty<br />
1A-1/2 8 1A-1/2 8 1A-1/2 8 1A-1/2 8<br />
2 Capscrew Hex Head 7A-3/816x2 1 7A-3/816x2 1 7A-3/816x23/4 1 7A-3/816x23/4 1<br />
7A-1/213x11/2 8 7A-1/213x11/2 12 7A-1/213x11/2 8 7A-1/213x11/2 8<br />
3<br />
Capscrew Hex Head<br />
7A-1/213x13/4 5 7A-1/213x13/4 5<br />
44-46 1 44-46 1 44-46 1 44-46 1<br />
4 Oil Retainer<br />
55-96 1 55-96 1<br />
5 Flywheel Housing 51-46 1 51-66 1 51-96 1 51-106 1<br />
FLYWHEELS<br />
6<br />
3<br />
4<br />
5<br />
2<br />
1<br />
7<br />
C-46 C-66 C-96 C-101/106<br />
No. Description<br />
Part No. Qty Part No. Qty Part No. Qty Part No. Qty<br />
1 Capscrew, Hex Head 368-9/1612x31/2 3 368-9/1612x31/2 3 368-5/811x31/2 3 368-5/811x31/2 3<br />
2 Washer 1B-5/8 3 1B-5/8 3 1B-5/8 3 1B-5/8 3<br />
3 Small Flywheel 367-46 1 367-66 1 367-96 1 367-106 1<br />
4 Large Flywheel 368-46 1 368-66 1 368-96 1 368-106 1<br />
5 Bushing 368-B-46 (F) 1 368-B-46 (F) 1 368-B-106 (J) 1 368-B-106 (J) 1<br />
6 SAE Locking Washer 71-46 1 71-46 1 71-96 1 71-96 1<br />
7 Flywheel Key 72-A-46 1 72-A-46 1 72-A-96 1 72-A-96 1<br />
Flywheel Guard, Aluminum 368-A-46 1 368-A-66 1 368-A-96 1 368-A-96 1<br />
Flywheel Guard, Plastic 368-ASE-46 1 368-ASE-66 1 368-ASE-96 1 368-ASE-106<br />
Woodruff Key 104A-#V 1 104A-#V 1 104A-#36 1 104A-#36 1<br />
* Not used in current production<br />
● Assembly Component.<br />
●● Sub-Assembly Component.<br />
1-800-331-3662 ARROW ENGINE COMPANY<br />
59
11<br />
GOVERNOR ASSEMBLY<br />
176-46/66/96 Governor Assembly<br />
45<br />
41<br />
40<br />
39<br />
57<br />
11<br />
12<br />
40<br />
17<br />
43<br />
20<br />
16<br />
38<br />
33<br />
29<br />
3 32 34<br />
9<br />
44<br />
42<br />
1<br />
5<br />
6<br />
2<br />
8<br />
23<br />
21<br />
52 53<br />
7<br />
15<br />
46<br />
48 47<br />
49<br />
30<br />
19<br />
26<br />
22<br />
28<br />
13<br />
56<br />
51<br />
54<br />
55<br />
176-101/106 Governor Assembly<br />
57<br />
17<br />
37<br />
11<br />
12<br />
39<br />
5<br />
1<br />
25<br />
33<br />
27<br />
29<br />
23<br />
21<br />
45<br />
32<br />
41<br />
20<br />
40<br />
20<br />
40<br />
49<br />
31<br />
26<br />
36<br />
30<br />
35<br />
6<br />
2<br />
52<br />
56<br />
53<br />
46<br />
48<br />
7<br />
42<br />
15<br />
47<br />
32<br />
10<br />
24<br />
18<br />
19<br />
22<br />
28<br />
4<br />
13<br />
51<br />
54<br />
55<br />
No. Description<br />
C-46 C-66 C-96 C-101/106<br />
Part No. Qty Part No. Qty Part No. Qty Part No. Qty<br />
Governor Assy Complete 176-46 1 176-46 1 176-46 1 176-106<br />
1 Plated Lock Washer 1A-1/4 4 1A-1/4 4 1A-1/4 4 1A-5/16 4<br />
2 Plated Lock Washer 1A-3/8 3 1A-3/8 3 1A-3/8 3 1A-3/8 3<br />
3 Cotter Pin 2B-1/16x3/8 4 2B-1/16x3/8 4 2B-1/16x3/8 4<br />
4 Internal Lock Washer 2C-1/2 1<br />
5 Capscrew Hex Head 7A-1/420x5/8 4 7A-1/420x5/8 4 7A-1/420x5/8 4 7A-5/1618x2 2<br />
6 Capscrew Hex Head 7A-3/816x1 3 7A-3/816x1 3 7A-3/816x1 3 7A-3/816x1 3<br />
7 Capscrew Socket Head 9A-1/428x3/4 1 9A-1/428x3/4 1 9A-1/428x3/4 1 9A-1/420x1 1<br />
8 Int Snap Ring 11A-N5000-118 2 11A-N5000-118 2 11A-N5000-118 2<br />
60 C-SERIES SERVICE, OPERATION & PARTS MANUAL – AEPB1 1-800-331-3662
No. Description<br />
C-46 C-66 C-96 C-101/106<br />
Part No. Qty Part No. Qty Part No. Qty Part No. Qty<br />
9 Mach Screw Flat Slot 12C-1024x3/4 1 12C-1024x3/4 1 12C-1024x3/4 1<br />
10 Roll Pin 41A-3/16x7/8 1<br />
11 Set Screw Socket Head 19A-1/420x11/4 1 19A-1/420x11/4 1 19A-1/420x11/4 1 19A-3/816x11/4 1<br />
12 Jam Nut Heavy Hex 27A-1/420 1 27A-1/420 1 27A-1/420 1 27A-3/816<br />
13 Jam Nut Finished Hex 29D-3/824 1 29D-3/824 1 29D-3/824 1 29D-1/220 1<br />
Special Washer 27-46 1<br />
15 Roll Pin 41A-3/32x3/4 1 41A-3/32x3/4 1 41A-3/32x3/4 1 41A-3/32x3/4 1<br />
16 Steel Dowel Pin 41C-5/16x13/4 1 41C-5/16x13/4 1 41C-5/16x13/4 1<br />
17 Restricted Tee 45x4R 1 45x4R 1 45x4R 1 45x4R 1<br />
18 Woodruff Key 104A-#2 1<br />
19 Woodruff Key 104A-#1 1 104A-#1 1 104A-#1 1 104A-#6 1<br />
20 Expansion Plug (Washer/C-106) 176-B-46 1 176-B-46 1 176-B-46 1 192-A-106 2<br />
21 Lower Gov Housing Assy 177-46 1 177-46 1 177-46 1 177-106 1<br />
22 Governor Spring Pin 178-46 1 178-46 1 178-46 1 178-106 1<br />
23 Ball Bearing 179-46 179-46 179-46 179-106 1<br />
24 Bushing 179-A-106 1<br />
25 Thrust Bearing 179-B-106 1<br />
26 Governor Shaft Assy 181-46 1 181-46 1 181-46 1 181-106 1<br />
27 Governor Head 181-A-106 1<br />
28 Governor Gear 182-46 1 182-46 1 182-46 1 182-106 1<br />
29 Governor Weight 185-46 1 185-46 1 185-46 1 185-106 1<br />
30 Governor Weight Pin 186-46 1 186-46 1 186-46 1 186-106 1<br />
31 Roll Pin 41A-3/16x11/8 1<br />
32 Washer 187-46 1 187-46 1 187-46 1 187-106 1<br />
33 Governor Dash Pot Plunger 188-46 1 188-46 1 188-46 1 188-106 1<br />
34 Governor Plunger Washer 189-46 1 189-46 1 189-46 1<br />
35 Sleeve 189-106 1<br />
36 Pin 189-A-106 1<br />
37 Thrust Plate 190-106 1<br />
38 Steel Ball 190-46 1 190-46 1 190-46 1<br />
39 Governor Housing w/Bushing 191-46 1 191-46 1 191-46 1 191-106 1<br />
40 Bushing 193-46 1 193-46 1 193-46 1 192-106 2<br />
41 Governor Operating Shaft 196-46 1 196-46 1 196-46 1 196-106 1<br />
42 Governor Operating Rod Lvr 197-46 1 197-46 1 197-46 1 197-106 1<br />
43 Governor Rod End 198-46 1 198-46 1 198-46 1<br />
44 Governor Rod End Pin 199-46 1 199-46 1 199-46 1<br />
45 Governor Rod Lever Assy 202-46 1 202-46 1 202-46 1 202-106 1<br />
46 Governor Adjusting Screw 204-46 1 204-46 1 204-46 1 204-106 1<br />
47 Governor Adjusting Knob 205-46 1 205-46 1 205-46 1 205-46 1<br />
48 Governor Spring 207-46 (red) 1 207-66 (wht) 1 207-96 (blu) 1 207-106 (blk) 1<br />
49 Governor Housing Gasket 208-46 1 208-46 1 208-46 1 208-106 1<br />
Plated Bolt 209-A-106 2<br />
51 Oil Press Gauge Tube * 211-46 1 211-46 1 211-46 1 211-46 1<br />
52 Oil Pressure Gauge * 212-46 1 212-46 1 212-46 1 212-46 1<br />
53 Pin, Dowel, .25" x .75" ** 2-46 1 2-46 1 2-46 1 2-46 1<br />
54 Oil Press Gauge Gasket * 213-46 2 213-46 2 213-46 2 213-46 2<br />
55 Oil Press Gauge Nut 214-46 2 214-46 2 214-46 2 214-46 2<br />
56 Governor Gasket 215-46 1 215-46 1 215-46 1 215-46 1<br />
57 Elbow ASA-578 1 ASA-578 1 ASA-578 1 ASA-578 1<br />
Governor Repair Kit 176-RK-46 1 176-RK-46 1 176-RK-46 1 176-RK-106 1<br />
* Not used in current production ** For use with newer cam.<br />
1-800-331-3662 ARROW ENGINE COMPANY<br />
11<br />
61
11<br />
176-RK-46<br />
Governor Repair Kit, C-46, C-66 & C-96<br />
Description Part # Qty<br />
Lockwasher, Plated 1A-1/4 4<br />
Pin, Cotter 2B-1/16X3/8 4<br />
Capscrew, Hex Head 7A-1/420X5/8 2<br />
Ring, Retaining, Internal 11A-N5000-118 2<br />
Screw, Flat Slot, Mach 12C-1024X3/4 1<br />
Governor, Lower Housing Assembly 177-46 1<br />
Bearing, Ball 179-46 1<br />
Shaft ,Governor 181-46 1<br />
Gear, Governor 182-46 1<br />
Weight, Governor 185-46 2<br />
Pin, Governor Weight 186-46 2<br />
Governor Washer 187-46 4<br />
Governor Dash Pot Plunger 188-46 1<br />
Washer, Governor, Thrust 189-46 1<br />
Ball, Steel 190-46 1<br />
Shaft, Governor Opr 196-46 1<br />
Lever, Governor Opr Rod 197-46 1<br />
End, Governor Rod 198-46 1<br />
Pin, Governor Rod End 199-46 1<br />
Setscrew, Socket Head 19A-1/420X11/4 1<br />
Governor Rod Lever Assembly 202-46 1<br />
Gasket Governor Housing 208-46 1<br />
Capscrew, Drilled Hex Head 209-A-46 2<br />
Seal Governor 209-B-46 1<br />
Nut Hex Jam Heavy 27A-1/420 1<br />
Nut Hex Jam Finished 29D-3/824 1<br />
Pin Dowel Steel Grind One End 41C-5/16X13/4 1<br />
Key Woodruff 104A-#1 1<br />
Governor Housing & Bushing Assy 191-46 1<br />
Plug Expansion 176-B-46 1<br />
176-RK-106<br />
Governor Repair Kit, C-101 & C-106<br />
Description Part # Qty<br />
Lockwasher Plated 1A-5/16 4<br />
Washer 27-46 2<br />
Lockwasher Internal 2C-1/2 1<br />
Capscrew Hex Head 7A-5/1618X2 2<br />
Governor Rod Lvr Assembly 202-106 1<br />
Governor Housing Lower 177-106 1<br />
Bearing Thrust 179-B-106 1<br />
Bearing Ball 179-106 1<br />
Governor Weight Flange 181-A-106 1<br />
Governor Shaft Assembly 181-106 1<br />
Gear Governor 182-106 1<br />
Governor Wt 185-106 2<br />
Pin Governor Weight 186-106 2<br />
Spacer 187-106 3<br />
Sleeve Governor 188-106 1<br />
Pin 189-A-106 2<br />
Sleeve 189-106 2<br />
Thrust Plate 190-106 1<br />
Governor Housing w/ Bushing 191-106 1<br />
Shaft Governor Opr 196-106 1<br />
Governor Rod Lvr Inner 197-106 1<br />
Setscrew Socket Head 19A-3/816X11/4 1<br />
Gasket Governor Housing 208-106 1<br />
Bolt Plated 5/16 209-A-106 2<br />
Seal, Governor 209-B-46 1<br />
Nut Hex Finished 29A-3/816 1<br />
Nut Hex Jam Finished 29D-1/220 1<br />
Pin Roll 41A-3/16X7/8 1<br />
Pin Roll 41A-3/16X11/8 1<br />
Key Woodruff 104A-#2 1<br />
Key Woodruff 104A-#6 1<br />
62 C-SERIES SERVICE, OPERATION & PARTS MANUAL – AEPB1 1-800-331-3662
CONNECTING ROD AND PISTON<br />
11<br />
1<br />
9<br />
3<br />
11 12 15 13 10 14 12<br />
6 7 8<br />
2<br />
5<br />
4<br />
No.<br />
Description<br />
C-46 C-66 C-96 C-101/106<br />
Part No. Qty Part No. Qty Part No. Qty Part No. Qty<br />
Piston and Rod Comp Assy 7682-46 1 7682-66 1 7682-96 1 7682-106 1<br />
1 ● Piston and Rings (items 2,4-5) 76-46 1 76-66 1 76-96 1 76-106 1<br />
2 ●● Piston with Bushing 77-46 1 77-66 1 77-96 1 77-106 1<br />
3 Piston Pin Bushing 78-46 2 78-66 2 78-96 2<br />
4 ●● Piston Pin 79-46 1 79-66 1 79-96 1 79-106 1<br />
5 ●● Ring Set (items 6-8) 905-46 1 905-66 1 905-96 1 905-106 1<br />
6 ●●● Compression Ring 80-46 2 80-66 3 80-96 3 80-106 2<br />
7 ●●● Oil Scraper Piston Ring 80-S-46 1 80-S-66 1 80-S-96 1 80-S-106 1<br />
8 ●●● Piston Ring Oil Ring 81-46 1 81-66 1 81-96 1 81-106 1<br />
9<br />
10<br />
● Connecting Rod Assy (items<br />
10-15 & Connecting Rod)<br />
82-46 1 82-66 1 82-96 1 82-96 1<br />
●● Con Rod Bushing-Pr (Brass) 83-46 1 83-66 1 83-96 1 83-96 1<br />
●● Con Rod Bushing-Pr (Alum) 83-A-46 1 83-A-66 1 83-A-96 1 83-A-96 1<br />
11 ●● Connecting Rod Clamp Bolt 86-46 1 86-46 1 86-96 1 86-96 1<br />
12<br />
●● Locknut, Hex Security, 87-46 5 87-46 5 87-96 5 87-96 5<br />
No Plating<br />
13 ●● Connecting Rod Shim 88-46 1 88-A-66 1 88-96 1 88-96 1<br />
13 Connecting Rod Shim 88-66 1<br />
14 ● Anchor Screw (as required) * 84-46 84-46<br />
15 ● Connecting Rod Bolt 85-46 4 85-46 4 85-96 4 85-96 4<br />
* Not used in current production.<br />
● Assembly Component.<br />
●● Sub-Assembly Component.<br />
●●● Sub-Sub-Assembly Component<br />
1-800-331-3662 ARROW ENGINE COMPANY<br />
63
11<br />
ROCKER ARM ASSEMBLY<br />
9<br />
14<br />
13<br />
15<br />
17<br />
20<br />
16<br />
8<br />
3<br />
18<br />
12<br />
11<br />
10<br />
2<br />
1<br />
5<br />
17<br />
4<br />
6<br />
7<br />
16<br />
3<br />
13<br />
14<br />
18<br />
19<br />
64 C-SERIES SERVICE, OPERATION & PARTS MANUAL – AEPB1 1-800-331-3662
11<br />
No. Description<br />
C-46 C-66 C-96 C-101/106<br />
Part No. Qty Part No. Qty Part No. Qty Part No. Qty<br />
1 Plated Lock Washer 1A-3/8 3<br />
2 Capscrew Hex Head 7A-3/816x11/4 3<br />
3 Nut Finished Hex 29D-3/824 2 29D-3/824 2 29D-3/824 2 29D-3/824 2<br />
4 Nut Finished Hex 29A-1/220 1 29A-1/220 1 29A-1/220 1 29A-1/220 1<br />
5 Valve Cover 241-46 1 241-66 1 241-96 1 241-106 1<br />
6 Copper Washer 245-46 1 245-46 1 245-46 1 245-46 1<br />
7 Valve Cover Gasket 246-46 1 246-66 1 246-96 1 246-106 * 1<br />
8 Inner Valve Cover Gasket 246-A-106 1<br />
9 Rocker Arm Assy 247-46 1 247-66 1 247-96 1 247-106 1<br />
10 ● Rocker Arm Bracket 248-46 2 248-66 2 248-96 1 248-106 1<br />
11 ● Rocker Arm Shaft 249-46 1 249-66 1 249-96 1 249-96 1<br />
12 ● Valve Cover Stud 250-46 1 250-46 1 250-96 1 250-106 1<br />
13 ● O-Ring, Rocker Shaft Plug 251-A-46 2<br />
14 ● Rocker Shaft Plug 251-A1-46 2 251-A1-46 2 251-A1-46 2<br />
15 ● Rocker Arm Pin Stud 252-A1-46 1 252-A1-66 1 252-A1-66 1 252-A1-66 1<br />
16 ● Valve Rocker Arm Assy 253-46 2 253-66 2 253-96 2 253-96 2<br />
17 ●● Rocker Arm Bushing 253-A-46 1 253-A-66 1 253-A-96 1 253-A-96 1<br />
18 ● Valve Adjusting Screw 254-46 2 254-46 2 254-96 2 254-96 2<br />
19 Exhaust Push Rod Assy 256-46 1 256-66 1 256-96 1 256-106 1<br />
20 Intake Push Rod Assy 257-46 1 257-66 1 257-96 1 257-106 1<br />
Conversion Kit, Rocker Arm * 247-CK-46 2 247-CK-66 2 247-CK-66 2 247-CK-66 2<br />
* Not used in current production.<br />
● Assembly Component.<br />
●● Sub-Assembly Component.<br />
247-CK-46<br />
Rocker Arm Repair Kit<br />
Description Part # Qty<br />
Stud Rocker Arm Pin 252-A1-46 1<br />
Plug, Rocker Shaft with O-Ring 251-A-46 2<br />
247-CK-66<br />
Rocker Arm Repair Kit<br />
Description Part # Qty<br />
Stud Rocker Arm Pin 252-A1-66 1<br />
Plug, Rocker Shaft with O-Ring 251-A-46 2<br />
1-800-331-3662 ARROW ENGINE COMPANY<br />
65
11<br />
PRESSURE CONDENSING GROUP<br />
11<br />
8 2<br />
5<br />
7<br />
1<br />
4<br />
35<br />
17<br />
30<br />
10<br />
3<br />
6<br />
28<br />
36<br />
29<br />
13<br />
15<br />
16<br />
Thermal Syphon Adapter<br />
OPTION<br />
25<br />
22<br />
19<br />
20<br />
23<br />
23<br />
23<br />
24<br />
18<br />
Low Water Level Switch<br />
OPTION<br />
43<br />
32<br />
33<br />
17<br />
8<br />
2<br />
23<br />
19<br />
8<br />
2<br />
5<br />
43<br />
42<br />
41<br />
14<br />
27<br />
21<br />
34<br />
44 12<br />
45<br />
26<br />
46<br />
2<br />
34<br />
8<br />
2<br />
37<br />
39<br />
38<br />
40<br />
9<br />
2<br />
5<br />
26<br />
C-46 / 66 / 96<br />
C-101/106<br />
31<br />
Be sure to mix antifreeze<br />
with equal parts water<br />
before filling radiator.<br />
C-46 C-66 C-96 C-101/106<br />
No. Description<br />
Part No. Qty Part No. Qty Part No. Qty Part No. Qty<br />
1 Plated Lock Washer 1A-1/4 1 1A-1/4 1 1A-1/4 1 1A-1/4 1<br />
2 Plated Lock Washer 1A-3/8 29 1A-3/8 32 1A-3/8 32 1A-3/8 34<br />
3 Plated Lock Washer 1A-1/2 1 1A-1/2 1 1A-1/2 1 1A-1/2 1<br />
4 Flat Washer Standard 1B-1/4 1 1B-1/4 1 1B-1/4 1<br />
5 Flat Washer 1B-3/8 6 1B-3/8 6 1B-3/8 6 1B-3/8 6<br />
6 Flat Washer Standard 1B-1/2 1 1B-1/2 1 1B-1/2 1 1B-1/2 1<br />
7 Capscrew Hex Head 7A-1/420x5/8 1 7A-1/420x5/8 1 7A-1/420x5/8 1 7A-1/420x5/8 1<br />
8 Capscrew Hex Head 7A-3/816x1 25 7A-3/816x1 25 7A-3/816x1 25 7A-3/816x1 27<br />
66 C-SERIES SERVICE, OPERATION & PARTS MANUAL – AEPB1 1-800-331-3662
No.<br />
Description<br />
C-46 C-66 C-96 C-101/106<br />
Part No. Qty Part No. Qty Part No. Qty Part No. Qty<br />
9 Capscrew Hex Head 7A-3/816x11/4 2 7A-3/816x11/4 2 7A-3/816x11/4 2 7A-3/816x11/4 2<br />
10 Capscrew Hex Head 7A-1/213x3/4 1 7A-1/213x3/4 1 7A-1/213x3/4 1 7A-1/213x3/4 1<br />
11 Screw Self Drill & Tap 12G-#10x3/4 6 12G-#10x3/4 7 12G-#10x3/4 7 12G-#10x3/4 8<br />
12 Nut 29A-3/816 2 29A-3/816 2 29A-3/816 2 29A-3/816 4<br />
13 Finished Hex Nut 29A-1/428 8 29A-1/428 8 29A-1/428 8 29A-1/428 8<br />
14 Finished Hex Nut 29A-5/818 1 29A-5/818 1 29A-5/818 1 29A-5/818 1<br />
15 Radiator Shell w/ Support Rod 332-A-46 1 332-A-66 1 332-A-66 1 332-A-106 1<br />
16 Radiator Shell Support Rod 332-A1-46 2 332-A1-66 2 332-A1-66 2 332-A1-66 2<br />
Radiator and Shell Assy. 332-FT-46 1 332-FT-66 1 332-FT-66 1 332-FT-106 1<br />
Press Condenser Core<br />
332-FTC-46 1 332-FTC-66 1 332-FTC-66 1 332-FTC-106 1<br />
w/Gasket & Cap<br />
17<br />
J-Tube Radiator w/Gasket & 332-FTCM-46 1 332-FTCM-66 1 332-FTCM-66 1 332-FTCM-106 1<br />
Cap, Optional<br />
Vapor Phases Radiator Core w/ 332-46 1 332-66 1 332-66 1<br />
Gasket *<br />
18 Thermo Syphon Conversion Kit 332-TSK-46-1 1 332-TSK-46-1 1 332-TSK-46-1 1 332-TSK-46-1 1<br />
2 ● Plated Lock Washer 1A-3/8 2 1A-3/8 2 1A-3/8 2 1A-3/8 2<br />
7 ● Capscrew Hex Head 7A-3/816x1 2 7A-3/816x1 2 7A-3/816x1 2 7A-3/816x1 2<br />
19 ● TS Hose 332-TBH-66 1 332-TBH-66 1 332-TBH-66 1 332-TBH-66 1<br />
20<br />
● Sight Glass 332-TSD-46 1 332-TSD-46 1 332-TSD-46 1 332-TSD-46 1<br />
● Sight Glass, One(1) Inch 332-TSD-46-1 1 332-TSD-46-1 1 332-TSD-46-1 1 332-TSD-46-1 1<br />
21 ● Thermo Siphon Adapter ASP-3-G 1 ASP-3-G 1 ASP-3-G 1 ASP-3-G 1<br />
22 ● Nipple KCN-1" KCN-1 1 KCN-1 1 KCN-1 1 KCN-1 1<br />
23 ● Hose Clamp HC-16 1 HC-16 1 HC-16 1 HC-16 1<br />
24 ● Nipple Pipe PF1-1x21/2 1 PF1-1x21/2 1 PF1-1x3 1 PF1-1x3 1<br />
25 ● Elbow DMI 90 Deg PF10-1 1 PF10-1 1 PF10-1 1 PF10-1 1<br />
26 Water Hopper 333-46 1 333-66 1 333-96 1 333-106 1<br />
27 Radiator Core Gasket 336-46 1 336-66 1 336-66 1 336-106 1<br />
28 Flange Strap 337-46 1 337-46 1 337-46 1 337-106 1<br />
29 Flange Strap Front 338-46 1 338-66 1 338-66 1 338-106 1<br />
30 Flange Strap Rear 339-46 1 339-66 1 339-66 1 339-106 1<br />
31 Gasket, Hopper 347-46 1 347-66 1 347-96 1 347-96 1<br />
32 Fan Assy 356-A-46 1 356-A-66 1 356-A-66 1 356-A-106 1<br />
33 Fan Belt 357-46 1 357-66 1 357-96 1 357-106 1<br />
34 Fan Bracket-New Style 358-A-46 1 358-A-46 1 358-A-46 1 358-A-106 1<br />
35 Fan & Belt Gd Assy 362-46 1 362-66 1 362-96 1 362-106 1<br />
36 J-Tube Radiator Cap 500-4-46 1 500-4-46 1 500-4-46 1 500-4-46 1<br />
37 Water Filler w/Cap ASP-300-CL 1 ASP-300-CL 1 ASP-300-CL 1 ASP-300-CL 1<br />
38 ● Water Filler Body ASP-3-J 1 ASP-3-J 1 ASP-3-J 1 ASP-3-J 1<br />
39 ● Fifteen (15) Lb Pressure Cap ASP-3-K 1 ASP-3-K 1 ASP-3-K 1 ASP-3-K 1<br />
40 ● Water Filler Gasket 346-46 1 346-46 1 346-46 1 346-46 1<br />
41 Low Water Level Switch L-150 1 L-150 1 L-150 1 L-150 1<br />
42 Water Line OL-44 1 OL-E-66 1 OL-E-96 1 OL-E-96 1<br />
43 ● 90 Deg Ell 49x5x4 1 49x5x4 1 49x5x4 1 49x5x4 1<br />
44 Hopper Stud Nut 29A-3/824 6 29A-3/824 6 29A-3/824 6 29A-3/824 6<br />
45 Hopper Stud 6-46 6 6-46 6 5-96 6 5-96 6<br />
46 Capscrew, Hex Head 7A-3/816x13/4 2 7A-3/816x13/4 2 7A-3/816x13/4 2 7A-3/816x13/4 4<br />
Pipe Plug Socket Head PF18-1/4 1 PF18-1/4 1 PF18-1/4 1 PF18-1/4 1<br />
* Not used in current production. ● Assembly Component.<br />
11<br />
1-800-331-3662 ARROW ENGINE COMPANY<br />
67
11<br />
356-A-RK-46<br />
Fan Repair Kit<br />
Description Part # Qty<br />
Lockwasher, Extrnl 1C-5/8 1<br />
Washer Flat SAE Plated 1N-5/8 1<br />
Pin, Cotter 2A-3/32X1 2<br />
Spindle, Fan New Style 356-2-46 1<br />
Seal, Fan New Style (Rear) 356-5-46 1<br />
Gasket, Fan Hub, Old Style 356-6-46 1<br />
Nut, Hex, Slotted 5/8-18 Unf-2b 356-8-46 1<br />
Thread Protector For Fan Assembly 356-G-46 1<br />
Bearing Cup 6783-D-1 2<br />
Bearing Cone 6783-D-2 2<br />
Retainer, Grease 356-6A-46 1<br />
356-A-RK-66<br />
Fan Repair Kit<br />
Description Part # Qty<br />
Lockwasher, Extrnl 1C-5/8 1<br />
Washer Flat SAE Plated 1N-5/8 1<br />
Pin, Cotter 2A-3/32X1 2<br />
Spindle, Fan 356-2-66 1<br />
Seal, Fan New Style (Rear) 356-5-46 1<br />
Retainer, Grease 356-6A-46 1<br />
Gasket, Fan Hub, Old Style 356-6-46 1<br />
Nut, Hex, Slotted 5/8-18 Unf-2b 356-8-46 1<br />
Thread Protector For Fan Assembly 356-G-46 1<br />
Bearing Cup 6783-D-1 2<br />
Bearing Cone 6783-D-2 2<br />
356-RK-46<br />
Old Style Fan Repair Kit<br />
Description Part # Qty<br />
Lockwasher, Plated 1A-5/8 1<br />
Pin, Cotter 2A-1/8X11/4 2<br />
Nut, Hex, Jam Finished 29D-5/818 1<br />
Nut, Hex, Short Slotted Os 356-9-46 1<br />
Gasket, Fan Hub 498-D 1<br />
Retaining Seal For Fan Repair Kits 356-4-46 1<br />
Washer 1202-D 2<br />
Bearing Cup 6783-D-1 2<br />
Spindle 8002-LD 1<br />
Bearing Cone 6783-D-2 2<br />
68 C-SERIES SERVICE, OPERATION & PARTS MANUAL – AEPB1 1-800-331-3662
POWER TAKE-OFF<br />
11<br />
6<br />
3<br />
1<br />
4<br />
2<br />
4<br />
2<br />
7 5<br />
No. Description<br />
C-46 C-66 C-96 C-101/106<br />
Part No. Qty Part No. Qty Part No. Qty Part No. Qty<br />
1 Plated Lock Washer 1A-5/16 8<br />
2 Plated Lock Washer 1A-3/8 10 1A-3/8 24 1A-3/8 18 1A-3/8 24<br />
3 Capcrew, Hex Head 7A-5/1618x11/4 8 7A-3/816x11/2 8 7A-3/816x11/2 8 7A-3/816x11/2 8<br />
4 Capcrew, Hex Head 7A-3/816x1 10 7A-3/816x1 18 7A-3/816x1 12 7A-3/816x1 18<br />
5 Pilot Bearing Housing 367-A-66 1 367-A-106 1<br />
6 Spacer 374-D-96 1 374-D-106 1<br />
7 Clutch Assy C-107-SP-5-DB 1 C-110-HP-4 1 C-110-HP-3 1 SP-111-HP-3 1<br />
STARTING CRANK ASSEMBLY<br />
1<br />
5<br />
4<br />
2<br />
3<br />
No. Description<br />
C-46 C-66 C-96 C-101/106<br />
Part No. Qty Part No. Qty Part No. Qty Part No. Qty<br />
1 Starting Crank Assy 437-46 1 437-46 1 437-96 1 437-96 1<br />
2 ● Flat Washer SAE 1N-3/8 1 1N-3/8 1 1N-3/8 1 1N-3/8 1<br />
3 ● Capscrew, Hex Head 7A-3/818x11/4 1 7A-3/818x11/4 1 7A-3/818x11/4 1 7A-3/818x11/4 1<br />
4 ● Starting Crank Pawl Assy 439-46 1 439-46 1 439-46 1 439-46 1<br />
5 ● Starting Crank Spring 440-46 1 440-46 1 440-46 1 440-46 1<br />
● Assembly Component.<br />
1-800-331-3662 ARROW ENGINE COMPANY<br />
69
11 CLUTCH ASSY<br />
1<br />
7" Double Bearing & 8"<br />
2<br />
3<br />
4<br />
6<br />
7<br />
8<br />
9<br />
5<br />
10<br />
11<br />
13<br />
14<br />
19<br />
18<br />
20<br />
21<br />
26<br />
27<br />
25<br />
15<br />
CLUTCH ASSY<br />
31<br />
34<br />
32 33<br />
35<br />
36<br />
38<br />
39<br />
12<br />
16<br />
17<br />
23<br />
22<br />
51<br />
24<br />
50<br />
49<br />
28<br />
29<br />
30<br />
37<br />
35<br />
41<br />
40<br />
42<br />
43<br />
44<br />
23<br />
45<br />
46<br />
47<br />
48<br />
40<br />
No. Description<br />
C-46 (7") C-66 (7") C-66 (8")<br />
Part No. Qty Part No. Qty Part No. Qty<br />
Complete Clutch Assembly C-107-SP-5-DB 1 C-107-SP-5 * 1 C-107-SP-5 * 1<br />
1 Drive Ring 6661 1 6661 1 5805 1<br />
2 Pilot Bearing M-141 1 M-141 1 M-141-A 1<br />
3 Hub Nut 2727 1 2727 1 2727 1<br />
4 Lock Washer A-1587 1 A-1587 1 A-1587 1<br />
5 Clutch Pack XA-5060 1 XA-5060 1 XA-5079 1<br />
6 ● Hub, Back Plate Assy H-18 1 H-18 1 ZA-3177-C 1<br />
7 ● Release Spring A-2286 6 A-2286 6 A-2286 6<br />
8 ● 3 Piece Drive Plate A-5436-D 1 A-5436-D 1 6479-E 1<br />
9 ● Floating Plate A-3087 1 A-2286 1 A-3169 1<br />
70 C-SERIES SERVICE, OPERATION & PARTS MANUAL – AEPB1 1-800-331-3662
No. Description<br />
C-46 (7") C-66 (7") C-66 (8")<br />
Part No. Qty Part No. Qty Part No. Qty<br />
10 ● Adj. Lock Spring 1382 1 1382 1 115 1<br />
11 ● Adj Lock Pin 2042 1 2042 1 2042 1<br />
12 ● Adjustable Yoke Assy A-16 1 A-16 1 1990 1<br />
13 ●● Finger Lever 2411 4 2411 4 2411 4<br />
14 ●● Tee Head Cotter Pin 2B-5/32x1/2 4 2B-5/32x1/2 4 2B-5/32x1/2 4<br />
15 ●● Finger Lever Pin B-1537-A 4 B-1537-A 4 B-1537-D 4<br />
16 ●● Adjustable Yoke 1990 1 1990 1 1990 1<br />
17 ● Sliding Sleeve Assy S-387 1 S-387 1 S-384 1<br />
18 ●● Lever Link Pin B-1537-C 4 B-1537-C 4 B-1537-D 4<br />
19 ●● Lever Link Pin B-1537-B 4 B-1537-B 4 B-1537-D 4<br />
20 ●● Lever Link 2968 1 2968 1 2968 1<br />
21 ●● Cotter Pin (Roll Pin) 2A-1/8x3/4 8 2A-1/8x3/4 8 2A-1/8x3/4 8<br />
22 ● Collar Assy X-117-C8 1 X-117-C8 1 X-117-C8 1<br />
23 ●● Capscrew Hex Head 7A-1/213 x13/4 3 7A-1/213 x13/4 3 7A-1/213 x13/4 3<br />
24 ●● Locknut 32A-3/824 2 32A-3/824 2 32A-3/824 2<br />
25 Hose Assy A-1663 1 A-1663 1 A-1663 1<br />
26 ● Fitting M-1284 1 M-1284 1 M-1284 1<br />
27 ● Flex Hose M-1292-A 1 M-1292-A 1 M-1292-A 1<br />
28 ● Fitting M-1283 1 M-1283 1 M-1283 1<br />
29 ● Internal Lock Washer 2C-5/8 1 2C-5/8 1 2C-5/8 1<br />
30 ● Jam Nut Finished Hex Head 29D-5/818 2 29D-5/818 2 29D-5/818 2<br />
31 ● Lube Fitting-Male M-268 1 M-268 1 M-268 1<br />
32 Capscrew Hex Head 7A-5/16x18x5/8 1 7A-5/16x18x5/8 1 7A-5/16x18x5/8 1<br />
33 Internal Lock Washer 2C-5/16 1 2C-5/16 1 2C-5/16 1<br />
34 Bearing Retainer Ring A-1181 1 A-1181 1 A-1181 1<br />
35<br />
Bearing M-177 1 M-177 1 M-177 1<br />
Bearing, Double Bearing Clutch M-1590 2<br />
36 Key; Sq. Ends 6A-1/4x1/4x17/8 1 6A-1/4x1/4x17/8 1 6A-1/4x1/4x17/8 1<br />
Hollow Shaft, 1 7/16" * XA-3026 1<br />
37 Hollow Shaft, 1 3/4" * XA-3026-AN 1 XA-3026-AN 1 XA-3026-AN 1<br />
Shaft, Double Bearing Clutch XA-3026-DB 1<br />
Solid Shaft * XA-3026-BE 1 XA-3026-BE 1<br />
38 Snap Ring A-1002 1 A-1002 1 A-1002 1<br />
39 Key; Sq. Ends 6A-3/8x3/8x21/2 1 6A-3/8x3/8x21/2 1 6A-7/16x33/8 1<br />
40 Shaft Fitting M-287 1 M-287 1 M-287 1<br />
41 Felt Packing 1561 1 1561 1 1561 1<br />
42 Capscrew Hex Head 7A-3/816x11/2 2 7A-3/816x11/2 2 7A-3/816x11/2 2<br />
43 Internal Lock Washer 2C-3/8 2 2C-3/8 2 2C-3/8 2<br />
44 Throwout Yoke X-1037 1 X-1037 1 X-1037 1<br />
45 Woodruff Key 104A-#15 2 104A-#15 2 104A-#15 2<br />
46 Operating Shaft 2757 1 2757 1 2757 1<br />
47 Clutch Housing 7958 1 7957 1 7957 1<br />
48 Grease Fitting Shaft M-503 1 M-503 1 M-503 1<br />
49 Hand Lever X-3799E 1 X-3799E 1 X-3799E 1<br />
50 Machine Screw Rd Head 12A-1/420x1/2 2 12A-1/420x1/2 2 12A-1/420x1/2 2<br />
51 Spec Plate ANP-21 1 ANP-21 1 ANP-21 1<br />
* Not used in current production.<br />
1-800-331-3662<br />
● Assembly Component. ●● Sub-Assembly Component.<br />
ARROW ENGINE COMPANY<br />
11<br />
71
11<br />
CLUTCH ASSEMBLY<br />
1<br />
10"<br />
2<br />
6<br />
3<br />
4<br />
5<br />
7<br />
8<br />
9<br />
10<br />
11<br />
12<br />
14<br />
15<br />
19<br />
20<br />
21<br />
27<br />
26<br />
25<br />
16<br />
32<br />
33<br />
34<br />
35<br />
36<br />
37<br />
13<br />
17<br />
18<br />
23<br />
22<br />
24<br />
31<br />
28<br />
29<br />
30<br />
38<br />
50<br />
49<br />
48<br />
39<br />
36<br />
40<br />
41<br />
42<br />
43<br />
23<br />
44<br />
46<br />
47<br />
45<br />
No. Description<br />
C-66 (10") C-96 (10")<br />
Part No. Qty Part No. Qty<br />
Complete Assembly C-110-HP-4 1 C-110-HP-3 1<br />
1 Drive Ring 6187-A 1 6187-A 1<br />
2 Pilot Bearing M-167 1 M-2262-A 1<br />
3 Hub Nut 1092-A 1 1092-A 1<br />
4 Spacer 367-S-96 1<br />
5 Lockwasher A-1588 1 A-1588 1<br />
6 Clutch Pack X-7876 1 X-7876 1<br />
7 ● Hub, Back Plate Assy 6030 1 6030 1<br />
8 ● Release Spring A-1069 6 A-1069 6<br />
72 C-SERIES SERVICE, OPERATION & PARTS MANUAL – AEPB1 1-800-331-3662
No. Description<br />
C-66 (10") C-96 (10")<br />
Part No. Qty Part No. Qty<br />
● 3 Piece Drive Plate 5878-G 1 5878-G 1<br />
9<br />
● 1 Piece Drive Plate 5878-F 1 5878-F 1<br />
● 1 Piece Drive Plate, Aluminum O-6314-A 1 O-6314-A 1<br />
● 1 Piece Drive Plate, SS O-6314-F 1 O-6314-F 1<br />
10 ● Floating Plate 5752 1 5752 1<br />
11 ● Adj. Lock Spring 115 1 115 1<br />
12 ● Adj Lock Pin 2245 1 2245 1<br />
13 ● Adjustable Yoke Assembly A-60 1 A-60 1<br />
14 ●● Finger Lever 103-F 1 103-F 1<br />
15 ●● Tee Head Cotter Pin 2B-5/32x1/2 4 2B-5/32x1/2 4<br />
16 ●● Finger Lever Pin B-1538-D 4 B-1538-D 4<br />
17 ●● Adjustable Yoke 1990 1 1990 1<br />
18 ● Sliding Sleeve Assy S-384 1 S-384 1<br />
19 ●● Lever Link Pin B-1537-D 4 B-1537-D 4<br />
20 ●● Lever Link 119-B-2 1 119-B-2 1<br />
21 ●● Cotter Pin (Roll Pin) 2A-1/8x3/4 8 2A-1/8x3/4 8<br />
22 ● Collar Assy X-117-CB 1 X-117-CB 1<br />
23 ●● Capscrew Hex Hd 7A-1/213x13/4 1 7A-1/213x13/4 1<br />
24 ●● Locknut 32A-3/824 2 32A-3/824 2<br />
25 Hose Assembly A-1663 1 A-1663 1<br />
26 ● Fitting M-1284 1 M-1284 1<br />
27 ● Flex Hose M-1292-A 1 M-1292-A 1<br />
28 ● Fitting M-1283 1 M-1283 1<br />
29 ● Internal Lockwasher 2C-5/8 1 2C-5/8 1<br />
30 ● Jam Nut Finixhed Hex Hd 29D-5/818 1 29D-5/818 1<br />
31 ● Lube Fitting-Male M-268 1 M-268 1<br />
32 Capscrew Hex Hd 7A-5/1618x5/8 1 7A-5/1618x5/8 1<br />
33 Internal Lockwasher 2C-5/16 1 2C-5/16 1<br />
34 Bearing Retainer Lock 1216-A 4 1216-A 4<br />
35 Bearing Spacer B-2147 1 B-2147 1<br />
36 Bearing M-207 2 M-207 2<br />
37 Key; Sq. Ends 6A-1/4x1/4x21/8 1 6A-1/4x1/4x21/8 1<br />
38 Key; Sq. Ends 6A-5/8x5/8x43/8 1 6A-5/8x5/8x43/8 1<br />
39 Shaft, 1 7/16" 4879-AU 1 4879-AU 1<br />
40 Shaft Fitting M-287 1 M-287 1<br />
41 Capscrew Hex Hd 7A-3/816x11/2 2 7A-3/816x11/2 2<br />
42 Internal Lockwasher 2C-3/8 2 2C-3/8 2<br />
43 Throwout Yoke X-1037 1 X-1037 1<br />
44 Woodruff Key 104A-#15 2 104A-#15 2<br />
45 Operating Shaft 1144-F 1 1144-F 1<br />
46 Clutch Housing 8879 1 8255 1<br />
47 Grease Fitting Shaft M-503 1 M-503 1<br />
48 Hand Lever X-3799E 1 X-3799E 1<br />
49 Machine Screw Rd Head 12A-1/420x1/2 2 12A-1/420x1/2 2<br />
50 Spec Plate ANP-22-A 1 ANP-22-A 1<br />
* Not used in current production.<br />
● Assembly Component. ●● Sub-Assembly Component.<br />
1-800-331-3662 ARROW ENGINE COMPANY<br />
11<br />
73
11<br />
CLUTCH ASSEMBLY<br />
11"<br />
1<br />
5<br />
2<br />
3<br />
4<br />
6<br />
7<br />
8<br />
9<br />
10<br />
13<br />
12<br />
14<br />
11<br />
15<br />
16<br />
19<br />
20<br />
21<br />
27<br />
26<br />
25<br />
17<br />
32<br />
35<br />
33<br />
34<br />
36<br />
37<br />
18<br />
23<br />
22<br />
24<br />
31<br />
28<br />
29<br />
30<br />
39<br />
50<br />
49<br />
48<br />
38<br />
36<br />
31<br />
40<br />
41<br />
42<br />
43<br />
23<br />
44<br />
46<br />
47<br />
45<br />
74 C-SERIES SERVICE, OPERATION & PARTS MANUAL – AEPB1 1-800-331-3662
11<br />
C-101/106 (11")<br />
No. Description<br />
Part No. Qty<br />
Complete Assembly SP-111-HP-3 1<br />
1 Drive Ring 6625-A 1<br />
2 Pilot Bearing M-167 1<br />
3 Hub Nut 1092 1<br />
4 Lockwasher A-1588 1<br />
5 Clutch Pack XA-6527 1<br />
6 ● Hub, Back Plate Assy ZA-6505-A 1<br />
7 ● Release Spring A-1069 6<br />
● 3 Piece Drive Plate A-5579-E 1<br />
8 ● 1 Piece Drive Plate, Aluminum O-6310-J 1<br />
● 1 Piece Drive Plate, SS O-6310-L 1<br />
9 ● Floating Plate XB-2343 1<br />
10 ● Tee Head Cotter Pin 2B-5/32x1/2 4<br />
11 ● Finger Lever B-1304 3<br />
12 ● Spring Washer M-2115-D 8<br />
13 ● Finger Lever B-1538-A 4<br />
14 ● Adj. Lock Spring 115 1<br />
15 ● Adj Lock Pin B-1272 1<br />
16 ● Adj. Ring A-4238 1<br />
17 ● Finger Lever Pin B-1538-A 3<br />
18 ● SI Sleeve Assy S-601 1<br />
19 ●● Lever Link Pin B-1537-D 8<br />
20 ●● Lever Link 2617 1<br />
21 ●● Cotter Pin (Roll Pin) 41A-3/32x5/8 8<br />
22 ● Collar Assy X-117 1<br />
23 ●● Capscrew Hex Head 7A-1/213x13/4 1<br />
24 ●● Locknut 32A-3/824 2<br />
25 Hose Assembly A-1663-A 1<br />
26 ● Fitting M-1284 1<br />
27 ● Flex Hose M-1292-B 1<br />
28 ● Fitting M-1283 1<br />
29 ● Internal Lockwasher 2C-5/8 1<br />
30 ● Jam Nut Finished Hex Head 29D-5/818 2<br />
31 ● Lube Fitting-Male M-268 2<br />
32 Capscrew Hex Head 7A-5/1618x5/8 1<br />
33 Internal Lockwasher 2C-5/16 1<br />
34 Bearing Retainer Shaft 1216-A 1<br />
35 Bearing Spacer B-2147 1<br />
36 Bearing M-207 2<br />
37 Key; Sq. Ends 6A-3/8x3/8x21/2 1<br />
38 Shaft, 1 7/16" A-5188 1<br />
39 Key; Sq. Ends 6A-5/8x5/8x53/8 1<br />
40 Shaft Fitting M-287 1<br />
C-101/106 (11")<br />
No. Description<br />
Part No. Qty<br />
41 Capscrew Hex Head 7A-3/816x11/2 2<br />
42 Internal Lockwasher 2C-3/8 2<br />
43 Throwout Yoke X-125-A 1<br />
44 Woodruff Key 104A-#15 2<br />
45 Operating Shaft 1144-F 1<br />
46 Clutch Housing 8255 1<br />
47 Grease Fitting Shaft M-503 1<br />
48 Hand Lever X-3799E 1<br />
49 Machine Screw Rd Head 12A-1/420x1/2 2<br />
50 Spec Plate ANP-22-A 1<br />
* Not used in current production.<br />
● Assembly Component. ●● Sub-Assembly Component.<br />
1-800-331-3662 ARROW ENGINE COMPANY<br />
75
11<br />
RING GEAR, STARTER & INSTRUMENT PANEL<br />
5<br />
6<br />
9<br />
10<br />
16<br />
15<br />
13<br />
2<br />
1<br />
11 12<br />
16<br />
8<br />
25<br />
22<br />
21<br />
20<br />
3<br />
17<br />
14<br />
19<br />
11<br />
4<br />
15<br />
16<br />
19<br />
23<br />
18<br />
24<br />
7<br />
76 C-SERIES SERVICE, OPERATION & PARTS MANUAL – AEPB1 1-800-331-3662
11<br />
No.<br />
Description<br />
Ring Gear Starter Assy less Mag<br />
Bracket<br />
C-46 C-66 C-96 C-101/106<br />
Part No. Qty Part No. Qty Part No. Qty Part No. Qty<br />
600-66-LB 1 600-96-LB 1 600-96-LB 1<br />
Ring Gear Starter Assy 600-46 1 600-66 1 600-96 1 600-96 1<br />
1 Plated Lock Washer 1A-1/2 6 1A-1/2 6 1A-1/2 6 1A-1/2 6<br />
2 Capscrew, Hex Head 7A-1/213x13/4 6 7A-1/213x13/4 6 7A-1/213x13/4 6 7A-1/213x13/4 6<br />
3 Starter Bracket 601-D1-46 1 601-D1-46 1 601-D1-46 1 601-D1-46 1<br />
4 Starter Bracket 601-D2-46 1 601-D2-46 1<br />
5 Ring Gear Adapter Assy 604-66 1 604-66 1 604-66 1 604-66 1<br />
6 ● Ring Gear 603-66 1 603-66 1 603-66 1 603-66 1<br />
7 Starter Motor 605-66 1 605-66 1 605-66 1 605-66 1<br />
Wiring Harness Bracket 607-66 1 608-66 1 608-66 1 608-66 1<br />
Starter Button AES-43 1 AES-43 1 AES-43 1 AES-43 1<br />
8 Washer, Star 1-1C-3/8 1 1-1C-3/8 1 1-1C-3/8 1 1-1C-3/8 1<br />
Mag Bracket 330-13A-46 1 330-13A-46 1 330-13A-46 1 330-13A-46 1<br />
9 Instrument Panel 609-46 1 609-46 1 609-46 1 609-46 1<br />
● Instrument Panel Assy 609-46-1 1 609-46-1 1 609-46-1 1 609-46-1 1<br />
Less Wiring<br />
●● Push On Female -Blue 16-14 PUSH ON 2 16-14 PUSH ON 2 16-14 PUSH ON 2 16-14 PUSH ON 2<br />
●● Terminal, Ring, #10 -14-16 Ga AES-66 1 AES-66 1 AES-66 1 AES-66 1<br />
●● Terminal Cole 3/8 608-C-66 2 608-C-66 2 608-C-66 2 608-C-66 2<br />
●● Wire Black 14 Gauge 14 AWG THHN-B 1' 14 AWG THHN-B 1' 14 AWG THHN-B 1' 14 AWG THHN-B 1'<br />
●● Cable #4 CABLE 1' #4 CABLE 1' #4 CABLE 1' #4 CABLE 1'<br />
10 ●● Switch, Rotary 868-A-255 1 868-A-255 1 868-A-255 1 868-A-255 1<br />
11 ●● Screw, Self Drill & Tap 12G-#10X3/4 6 12G-#10X3/4 6 12G-#10X3/4 6 12G-#10X3/4 6<br />
●● Elbow, Female, 90 Degree 50X4 1 50X4 1 50X4 1 50X4 1<br />
12 ●● Switch Safety Pm 20-P-7 1 20-P-7 1 20-P-7 1 20-P-7 1<br />
13 ●● Plate, Instrument 866-46 1 866-46 1 866-46 1 866-46 1<br />
●● Terminal AES-84 1 AES-84 1 AES-84 1 AES-84 1<br />
●● Screw Round Head Mach 12A-832X1/4 1 12A-832X1/4 1 12A-832X1/4 1 12A-832X1/4 1<br />
14 ●● Cannon Receptacle AES-72 1 AES-72 1 AES-72 1 AES-72 1<br />
● Wire Assembly For 609-46 609-46-2 1 609-46-2 1 609-46-2 1 609-46-2 1<br />
Hardware Kit 600-66-HW 1 600-66-HW 1 600-66-HW 1 600-66-HW 1<br />
● Lock Washer External 1C-3/8 1 1C-3/8 1 1C-3/8 1 1C-3/8 1<br />
● Nut Hex Finished Metric 29AM-5 1 29AM-5 1 29AM-5 1 29AM-5 1<br />
15 ● Capscrew Hex Head 7A-1/213X13/4 9 7A-1/213X13/4 9 7A-1/213X13/4 6 7A-1/213X13/4 6<br />
16 ● Lock Washer Plated 1A-1/2 9 1A-1/2 9 1A-1/2 6 1A-1/2 6<br />
17 ● Lock Washer Plated 1A-3/4 2 1A-3/4 2 1A-3/4 2 1A-3/4 2<br />
18 ● Lock Washer Plated 1A-3/8 3 1A-3/8 3 1A-3/8 3 1A-3/8 3<br />
19 ● Washer Flat Standard 1B-3/4 4 1B-3/4 4 1B-3/4 2 1B-3/4 2<br />
20 ● Washer Flat Standard 1B-3/8 3 1B-3/8 3 1B-3/8 3 1B-3/8 3<br />
21 ● Capscrew Hex Head 7A-3/410X3 2 7A-3/410X3 2 7A-3/410X3 1 7A-3/410X3 1<br />
22 ● Capscrew Hex Head 7A-3/816X21/4 3 7A-3/816X21/4 3 7A-3/816X21/4 3 7A-3/816X21/4 3<br />
23 ● Nut Hex Heavy 25A-3/410 2 25A-3/410 2<br />
24 ● Nut Hex Finished 29A-3/816 3 29A-3/816 3 29A-3/816 3 29A-3/816 3<br />
25 ● Capscrew Hex Head 7A-3/816x11/4 2 7A-3/816x11/4 2 7A-3/816x11/4 2 7A-3/816x11/4 2<br />
● Assembly Component. ●● Sub-Assembly Component.<br />
1-800-331-3662 ARROW ENGINE COMPANY<br />
77
11<br />
ARROW PORTABLE ELECTRIC STARTER (990 STARTER)<br />
31 28 32 33 45 30 31<br />
26<br />
18<br />
8<br />
27<br />
51<br />
55<br />
18 29<br />
23<br />
39<br />
54<br />
24<br />
22<br />
21<br />
38<br />
20<br />
19<br />
35<br />
34<br />
37<br />
36<br />
11<br />
59<br />
5<br />
12<br />
60<br />
4<br />
3<br />
5<br />
66<br />
64<br />
63 56 44 43<br />
1<br />
10<br />
7<br />
47<br />
13<br />
50<br />
25<br />
9<br />
40<br />
61<br />
57<br />
67<br />
14<br />
62<br />
53<br />
5<br />
48<br />
65<br />
15<br />
3<br />
4<br />
6<br />
42<br />
46<br />
2<br />
41<br />
54<br />
63<br />
36<br />
29<br />
68<br />
16<br />
58<br />
32<br />
69<br />
73<br />
ARROW PORTABLE ELECTRIC STARTER (990 STARTER)<br />
17<br />
22<br />
72<br />
70<br />
78 C-SERIES SERVICE, OPERATION & PARTS MANUAL – AEPB1 1-800-331-3662
11<br />
No.<br />
Description<br />
For all<br />
C-<strong>Series</strong><br />
<strong>Engine</strong>s<br />
Part No.<br />
1 Portable Electric Starter 990 1<br />
2 Screw, Nut & Washer Kit AES-58 2<br />
3 ● Plated Lock Washer 1A-1/4 5<br />
4 ● Washer Flat SAE 1N-1/4 4<br />
5 ● Capscrew Button Head 12B-1/420x5/8 5<br />
6 ● Finished Hex Nut 29A-1/420 2<br />
7 Washer Flat SAE 1N-5/8 1<br />
Qty<br />
8 Internal Lock Washer 2C-3/8 2<br />
9 Internal Lock Washer 2C-1/2 2<br />
10 Internal Lock Washer, Handle 2C-5/8 1<br />
11 Capscrew Hex Head 7A-5/1618x5/8 4<br />
12 External Retaining Ring 10A-5100-62 1<br />
13 Alligator. Clips & Plugs 12' Cable-ACP 1<br />
14 Cannon Plugs, Alligator. Clips 12' Cable-CPAC 1<br />
15 Cannon Plug Both Ends 12' Cable-CPCP 1<br />
16 Cannon Plug w/Plugs 12' Cable-CPP 1<br />
17 Plugs w/Female Receptacle. 12' Cable-PP 1<br />
18 Capscrew Button Head 12B-3/816x3/4 6<br />
19 Mach. Screw Flat Soc 12D-3/824x3/4 4<br />
20 Finished Hex Jam Nut 29D-1/220 5<br />
21 Woodruff Key 104A-#9 1<br />
22 Chain Drive Cover AES-3 1<br />
23<br />
Roller Chain, not sold AES-4-1 1<br />
separately<br />
24<br />
Drive Chain, not sold<br />
AES-5-1 1<br />
separately<br />
25 35-1 Chain Connecting Link AES-6 2<br />
26 Capscrew-Sm Head AES-7-A 1<br />
27 Capscrew-Lg Head AES-7-B 1<br />
28 Alum Brg Housing w/Brg AES-9 1<br />
29 Pivot Bracket AES-10 1<br />
30 Alum Brg Housing w/ Brg AES-11 1<br />
31 Bearing AES-12 2<br />
32 Roller with Key AES-13 1<br />
33 Sprocket Spacer AES-22 1<br />
34 Double Sprocket w/ Bushing AES-23-1 1<br />
35 Double Sprocket Bushing AES-24 1<br />
36 Electric Motor 12VDC AES-27 1<br />
37 Motor Brush Cover AES-27-5 1<br />
38 Bearing AES-28 1<br />
39 Sprocket-Motor AES-31 1<br />
40 Starter Button Wire AES-33 2<br />
41 Cable-Mtr-Solenoid AES-34 1<br />
42 Cable-Sol to Receptacle AES-35 1<br />
43 Insulated Washer AES-40 2<br />
For all<br />
C-<strong>Series</strong><br />
<strong>Engine</strong>s<br />
No. Description<br />
Part No. Qty<br />
44 1/2" Insulator AES-40-1 1<br />
45 Clutch Race AES-41 1<br />
46 Solenoid AES-42 1<br />
47 Starter Button AES-43 1<br />
48 Lock Pin AES-45 1<br />
49 Pin Handle Rivet AES-46 1<br />
50 Grip Cover AES-48 1<br />
51 Rlr Drive w/ Clutch AES-49-1 1<br />
52 Spacer AES-49-2 1<br />
53<br />
Blank Handle, not sold AES-50-1 1<br />
separately<br />
54 Frame AES-51-3 1<br />
55 Clutch AES-53 1<br />
56 Receptacle, Brass AES-55 2<br />
57 Pin Handle Grip Sleeve AES-56 1<br />
58 Solenoid Wire AES-57 1<br />
59 Grommet for Starter AES-59 1<br />
60 Retainer Pin AES-62 1<br />
61 Large Hole Eyelet AES-65 1<br />
62 Small Hole Eyelet AES-66 1<br />
Male Plug w/ Insulator Kit AES-37 1<br />
63 ● Starter Cable Grips AES-67 2<br />
64 ● Starter Cable Plugs AES-68 2<br />
65 Alligator Clips-Pair AES-71 1<br />
66 Cannon Receptacle AES-72 1<br />
Cannon Receptacle. Repair Kit AES-72-RK 1<br />
67 Cannon Plug Assy AES-73 1<br />
Cannon Plug Receptacle. Kit AES-73-RK 1<br />
68 Starter Bracket (C-46 Eng) AES-79-46 1<br />
69 Starter Bracket (C-66 Eng) AES-79-66 1<br />
70<br />
Starter Bracket (C-96, C-101, AES-79-96 1<br />
C-106)<br />
71 Adapter Plug AES-104 1<br />
72 Rotation Decal ANP-29 1<br />
73 Warning, Release Roller ANP-30 1<br />
1-800-331-3662 ARROW ENGINE COMPANY<br />
79
11<br />
MAGNETO – AMERICAN BOSCH ASSY (H-1415)<br />
6<br />
2<br />
1<br />
5<br />
4<br />
3<br />
No. Description<br />
C-46 C-66 C-96 C-101/106<br />
Part No. Qty Part No. Qty Part No. Qty Part No. Qty<br />
1 Points BK-52203 1 BK-52203 1 BK-52203 1 BK-52203 1<br />
2 Coil-H-1415 CL-521043 1 CL-521043 1 CL-521043 1 CL-521043 1<br />
3 Condenser-H-1415 CW-5279 1 CW-5279 1 CW-5279 1 CW-5279 1<br />
4 Distrib Plt-H-1415 DP-52524 1 DP-52524 1 DP-52524 1 DP-52524 1<br />
5 Distributor Gskt-H-1415 GA-5261 1 GA-5261 1 GA-5261 1 GA-5261 1<br />
6 Cam Lub-Wick-Felt WK-5263 1 WK-5263 1 WK-5263 1 WK-5263 1<br />
80 C-SERIES SERVICE, OPERATION & PARTS MANUAL – AEPB1 1-800-331-3662
MAGNETO – ALTRONIC (D1-B-1)<br />
11<br />
11 10<br />
2 4 14 5 7 6<br />
8<br />
12<br />
9<br />
15<br />
3<br />
1<br />
13<br />
No.<br />
Description<br />
C-46 C-66 C-96 C-101/106<br />
Part No. Qty Part No. Qty Part No. Qty Part No. Qty<br />
1<br />
1<br />
1<br />
1<br />
5 1<br />
6 1<br />
7 1<br />
8 1<br />
9 1<br />
10 1<br />
11 1<br />
12 1<br />
13 1<br />
14 1<br />
15 1<br />
1-800-331-3662 ARROW ENGINE COMPANY<br />
81
11<br />
MAGNETO ACCESSORIES<br />
11<br />
14<br />
15<br />
18<br />
17<br />
6<br />
13<br />
*Reference<br />
Only<br />
2<br />
4<br />
12<br />
5<br />
16<br />
2<br />
4<br />
1<br />
3<br />
10<br />
9<br />
7<br />
8<br />
82 C-SERIES SERVICE, OPERATION & PARTS MANUAL – AEPB1 1-800-331-3662
11<br />
No. Description<br />
C-46 C-66 C-96 C-101/106<br />
Part No. Qty Part No. Qty Part No. Qty Part No. Qty<br />
1 Plated Lock Washer 1A-1/4 1 1A-1/4 1 1A-1/4 1 1A-1/4 4<br />
2 Plated Lock Washer 1A-3/8 1 1A-3/8 1 1A-3/8 1 1A-3/8 3<br />
3 Flat Washer SAE 1B-1/4 1 1B-1/4 1 1B-1/4 1 1B-1/4 1<br />
4 Flat Washer Standard 1B-3/8 1 1B-3/8 1 1B-3/8 1 1B-3/8 1<br />
Flat Washer SAE 1N-3/8 1 1N-3/8 1 1N-3/8 1 1N-3/8 1<br />
5 Capscrew Hex Head 7A-3/816x1 2 7A-3/816x1 2 7A-3/816x1 2 7A-3/816x1 2<br />
6 Capscrew Hex Head 7A-3/816x11/2 2 7A-3/816x11/2 2 7A-3/816x11/2 2 7A-3/816x11/2 2<br />
7 Mach. Screw Flat Soc 12D-3/816x1 2 12D-3/816x1 2 12D-3/816x1 2 12D-3/816x1 2<br />
8 Nut Finished Hex 29A-1/420 1 29A-1/420 1 29A-1/420 1 29A-1/420 1<br />
9 T-Bolt 330-8-A-46 1 330-8-A-46 1 330-8-A-46 1 330-8-A-46 1<br />
10 Mag to Bracket Gasket 330-11-46 1 330-11-46 1 330-11-46 1 330-11-46 1<br />
11 Mag Bracket Assy-New 330-12A-46 1 330-12A-46 1 330-12A-46 1 330-12A-46 1<br />
12 Magneto Bracket w/HW 330-13A-46 1 330-13A-46 1 330-13A-46 1 330-13A-46 1<br />
13 Shaft 330-14-46 1 330-14-46 1 330-14-46 1 330-14-46 1<br />
14 Magneto Gear 330-15-46 1 330-15-46 1 330-15-46 1 330-15-46 1<br />
15 Magneto Bearing 330-16-46 1 330-16-46 1 330-16-46 1 330-16-46 1<br />
16 Gasket 330-17-46 1 330-17-46 1 330-17-46 1 330-17-46 1<br />
17 Spark Plug Cable - Old Style 330-20-46 1 330-20-46 1 330-20-96 1 330-20-96 1<br />
330-20-AB-46 1 330-20-AB-46 1 330-20-AB-96 1 330-20-AB-96 1<br />
18 Mag Cover-FM Eng ASP-4-FM 1 ASP-4-FM 1 ASP-4-FM 1 ASP-4-FM 1<br />
Mag Cover-H-1415 ASP-5-CL 1 ASP-5-CL 1 ASP-5-CL 1 ASP-5-CL 1<br />
1-800-331-3662 ARROW ENGINE COMPANY<br />
83
11<br />
IGNITION ASSEMBLY<br />
36<br />
20<br />
22<br />
13<br />
18<br />
16<br />
11<br />
1<br />
3<br />
6<br />
4<br />
30<br />
31<br />
27<br />
33<br />
19<br />
15<br />
33<br />
2<br />
19<br />
32<br />
34<br />
12<br />
14<br />
5<br />
16<br />
5<br />
5<br />
35<br />
17<br />
13<br />
22<br />
29<br />
11<br />
31<br />
24<br />
16<br />
28 16<br />
7<br />
20<br />
32<br />
19<br />
12<br />
14<br />
26<br />
29<br />
5<br />
5<br />
84 C-SERIES SERVICE, OPERATION & PARTS MANUAL – AEPB1 1-800-331-3662
No. Description<br />
C-46 C-66 C-96 C-101/106<br />
Part No. Qty Part No. Qty Part No. Qty Part No. Qty<br />
1 Ignition AF-603RL 1 AF-603RL 1 AF-603RL 1 AF-603RL 1<br />
11<br />
2 ● Trigger Magnet Bar Assy 400A-8811 1 400A-8811 1 400A-8811 1 400A-8811 1<br />
3<br />
● Charging Magnet Bar<br />
Assy<br />
400A-8813 1 400A-8813 1 400A-8813 1 400A-8813 1<br />
4 ● Electronic Ignition Module A400A-8814 1 A400A-8814 1 A400A-8814 1 A400A-8814 1<br />
5 ● Trigger Coil/Harness Assy 400A-8817 1 400A-8817 1 400A-8817 1 400A-8817 1<br />
6 ● Charging Generator A260D-8810 1 A260D-8810 1 A260D-8810 1 A260D-8810 1<br />
7 Spark Plug 330-18-46 1 330-18-46 1 330-18-46 1 330-18-46 1<br />
8 Ignition Kit w/ Brackets SFI-46 1 SFI-66 1 SFI-66 1 SFI-66 1<br />
9 ● Push On, Female -Blue 16-14 PUSH ON 3 16-14 PUSH ON 3 16-14 PUSH ON 3 16-14 PUSH ON 3<br />
10 ● Push On, Male -Red 16-14 MALE 3 16-14 MALE<br />
16-14 MALE<br />
16-14 MALE<br />
3<br />
3<br />
PUSH<br />
PUSH<br />
PUSH<br />
PUSH<br />
3<br />
11 ● Lock Washer, Plated 1A-1/4 8 1A-1/4 4 1A-1/4 4 1A-1/4 4<br />
12 ● Lock Washer, Plated 1A-3/8 3 1A-3/8 3 1A-3/8 3 1A-3/8 3<br />
13 ● Lock Washer, Plated 1A-5/16 3 1A-5/16 3 1A-5/16 3 1A-5/16 3<br />
14 ● Washer, Flat Standard 1B-3/8 1 1B-3/8 3 1B-3/8 3 1B-3/8 3<br />
15 ● Washer, Star 1C-3/8 2 1C-3/8 2 1C-3/8 2 1C-3/8 2<br />
16 ● Washer, Flat SAE Plated 1N-1/4 17 1N-1/4 14 1N-1/4 14 1N-1/4 14<br />
17 ● Washer, Flat SAE Plated 1N-5/16 1 1N-5/16 1 1N-5/16 1 1N-5/16 1<br />
18 ● Washer, Flat Standard 1B-5/16 2 1B-5/16 2 1B-5/16 2 1B-5/16 2<br />
19 ● Capscrew, Hx Head 7A-3/816X1 3 7A-3/816X11/4 2 7A-3/816X11/4 2 7A-3/816X11/4 2<br />
20 ● Capscrew, Hx Head 7A-1/420X11/4 4 7A-1/420X3/4 2 7A-1/420X3/4 2 7A-1/420X3/4 2<br />
21 ● Capscrew, Hx Head 7A-1/420X7/8 1 7A-3/816X7/8 1 7A-3/816X7/8 1 7A-3/816X7/8 1<br />
22 ● Capscrew, Hx Head 7A-5/1618X3/4 1 7A-5/1618X3/4 1 7A-5/1618X3/4 1 7A-5/1618X3/4 1<br />
23 ● Capscrew, Hx Head 7A-5/1618X1 2 7A-5/1618X1 2 7A-5/1618X1 2 7A-5/1618X1 2<br />
24 ● Coil, Ignition 330-2-AI-46 1 330-2-AI-46 1 330-2-AI-46 1 330-2-AI-46 1<br />
25 ● Gasket, Magneto Bracket 330-17-46 1 330-17-46 1 330-17-46 1 330-17-46 1<br />
26 ● Wire, Spark Plug 330-20-255 1 330-20-255 1 330-20-255 1 330-20-255 1<br />
27 ● Bracket, Chrg Gen, Adj 330-12B-CST-46 1 330-12B-CST-46 1 330-12B-CST-46 1 330-12B-CST-46 1<br />
28 ● Coil Brkt, Star Fire, Green 330-12C-CST-46 1 330-12C-CST-46 1 330-12C-CST-46 1 330-12C-CST-46 1<br />
29 ● Pick Up Coil Brkt, Green 330-12D-CST-46 1 330-12D-CST-46 1 330-12D-CST-96 1 330-12D-CST-96 1<br />
● Eyelet, Large Hole, AES-65 1 AES-65 1 AES-65 1 AES-65 1<br />
OPTIONAL<br />
● Eyelet, Small Hole, AES-66 4 AES-66 4 AES-66 4 AES-66 4<br />
OPTIONAL<br />
● Resistor, OPTIONAL 100 10 W 1 100 10 W 1 100 10 W 1 100 10 W 1<br />
30 ● Spacer 330-12A5-CST-46 2<br />
31 ● Nut, Hex, Finished, Zinc 29A-1/420 3 29A-1/420 4 29A-1/420 4 29A-1/420 4<br />
32 ● Bracket, Magnet Bar 330-12E-CST-46 1 330-12E-CST-46 1<br />
33 ● Bracket, Generator Stand 330-12A-CST-46 1 330-12A-CST-66 1 330-12A-CST-66 1 330-12A-CST-66 1<br />
34 ● Gasket 330-17-46 1 330-17-46 1 330-17-46 1 330-17-46 1<br />
35 ● Nut, Hex 25A-5/1618 1 25A-5/1618 1 25A-5/1618 1 25A-5/1618 1<br />
36 Wire Clip 47141825 1<br />
● Wire, 14 Gauge, Black, 14 AWG THHN-B 5<br />
OPTIONAL<br />
14 AWG THHN-B 1 14 AWG THHN-B 1 14 AWG THHN-B 1<br />
● Wire, 14 Gauge, White, 14 AWG THHN-W 3<br />
OPTIONAL<br />
14 AWG THHN-W 3 14 AWG THHN-W 3 14 AWG THHN-W 3<br />
● Wire, 14 Gauge, Yellow, 14 AWG THHN-Y 3<br />
OPTIONAL<br />
14 AWG THHN-Y 3 14 AWG THHN-Y 3 14 AWG THHN-Y 3<br />
● Assembly Component.<br />
1-800-331-3662 ARROW ENGINE COMPANY<br />
85
11<br />
ALTERNATOR SYSTEM<br />
5<br />
10<br />
6<br />
8<br />
7<br />
2<br />
4<br />
3<br />
1<br />
2<br />
9<br />
3<br />
1<br />
4<br />
11<br />
2<br />
3<br />
4<br />
11<br />
4<br />
11<br />
2<br />
2<br />
3<br />
4<br />
11<br />
86 C-SERIES SERVICE, OPERATION & PARTS MANUAL – AEPB1 1-800-331-3662
11<br />
No.<br />
Description<br />
C-46 C-66 C-96 C-101/106<br />
Part No. Qty Part No. Qty Part No. Qty Part No. Qty<br />
Alternator Assembly ALT-46-OP 1 ALT-66-OP 1 ALT-66-OP 1 ALT-106-OP 1<br />
1 ● Bracket AS5A-3 1 AS5A-3 1 AS5A-3 1 AS5D-3 1<br />
● Nipple Pipe Brass, OPTION 118-B-96 1 118-B-96 1 118-B-96 1 118-B-96 1<br />
● Tee Branch Female 1/8, 64227561 1 64227561 1 64227561 1 64227561 1<br />
OPTION<br />
2 ● Capscrew Hex Head 7A-3/816X23/4 1 7A-3/816X23/4 1 7A-3/816X23/4 1 7A-3/816X23/4 7<br />
3 ● Washer Flat Standard 1B-3/8 2 1B-3/8 2 1B-3/8 2 1B-3/8 5<br />
4 ● Lock Washer Plated 1A-3/8 1 1A-3/8 1 1A-3/8 1 1A-3/8 7<br />
5 ● Capscrew Hex Head 7A-5/1618X1 1 7A-5/1618X1 1 7A-5/1618X1 1 7A-5/1618X1 1<br />
● Push On Female -Blue<br />
16-14 PUSH 1 16-14 PUSH 1 16-14 PUSH 1 16-14 PUSH 1<br />
ON<br />
ON<br />
ON<br />
ON<br />
● Push On Male -Red<br />
16-14 MALE<br />
PUSH<br />
1 16-14 MALE<br />
PUSH<br />
1 16-14 MALE<br />
PUSH<br />
1 16-14 MALE<br />
PUSH<br />
● Eyelet Small Hole AES-66 2 AES-66 2 AES-66 2 AES-66 2<br />
● Terminal AES-84 1 AES-84 1 AES-84 1 AES-84 1<br />
6 ● Lock Washer Plated 1A-5/16 1 1A-5/16 1 1A-5/16 1 1A-5/16 1<br />
7 ● Alternator Pulley Machined AS3-2-M 1 AS3-2-M 1 AS3-2-M 1 AS3-2-M 1<br />
8 ● Alternator 12-Volt 69753A 1 69753A 1 69753A 1 69753A 1<br />
● Belt For Alternator, OPTION 357-46 1 357-66 1 357-96 1 357-106-NS 1<br />
● Switch, OPTION 60356 1 60356 1 60356 1 60356 1<br />
9 ● Packing Gland 3/8 In ASA-957 1 ASA-957 1 ASA-957 1<br />
● Decal, Maintenance Key Cost ANP-53 1 ANP-53 1 ANP-53 1<br />
Reduction<br />
● Nameplate Lubrication ANP-38 1 ANP-38 1 ANP-38 1<br />
10 ● Flat Washer, 5/16" 1N-5/16 1 1N-5/16 1 1N-5/16 1<br />
11 ● Nut 29A-3/816-96 6<br />
10 Gauge Wire AWG THHN-W 4' AWG THHN-W 4' AWG THHN-W 4' AWG THHN-W 4'<br />
Eyelet A4027 1 A4027 1 A4027 1 A4027 1<br />
Eyelet<br />
AWG12-10-<br />
TERM<br />
1 AWG12-10-<br />
TERM<br />
1 AWG12-10-<br />
TERM<br />
1 AWG12-10-<br />
TERM<br />
1<br />
1<br />
1-800-331-3662 ARROW ENGINE COMPANY<br />
87
11<br />
BREATHER SYSTEM<br />
1<br />
244-BHK-96<br />
1<br />
244-BHK-46<br />
8<br />
7<br />
2<br />
5<br />
7<br />
4<br />
2<br />
10<br />
9<br />
7<br />
8<br />
4<br />
8<br />
3<br />
3<br />
88 C-SERIES SERVICE, OPERATION & PARTS MANUAL – AEPB1 1-800-331-3662
11<br />
No.<br />
Description<br />
C-46 C-66 C-96 C-101/106<br />
Part No. Qty Part No. Qty Part No. Qty Part No. Qty<br />
1 Breather Hose Kit w/ Breather 244-BHK-46 244-BHK-46 244-BHK-46 244-BHK-46<br />
2 ● Breather Hose<br />
7/16 RUBBER<br />
HOSE<br />
1' 7/16 RUBBER<br />
HOSE<br />
1' 7/16 RUBBER<br />
HOSE<br />
1' 27/16 RUBBER<br />
HOSE<br />
3 ● Valve Cover Breather 244-BCP 1 244-BCP 1 244-BCP 1 244-BCP 1<br />
● Adaptor for 100/110 244-PV-A 1 244-PV-A 1<br />
4<br />
● Adaptor for 200/210 244-PV-A2 1 244-PV-A2 1<br />
● Adaptor, Vacuum Plate, EPA<br />
244-PV-A2-E 1 244-PV-A2-E 1<br />
Compliant <strong>Engine</strong>s<br />
5 ● Tee 8 1/2" 29T-63/8 1 29T-63/8 1<br />
6 ● Capscrew, Hex Head 7A-3/816x11/4 2 7A-3/816x11/4 2<br />
7 ● Lock Washer, External 1C-3/8 2 1C-3/8 2 1C-3/8 2 1C-3/8 2<br />
8 ● Gasket, Carb to Elbow 261-46 2 261-46 2 216-96 2 261-106 2<br />
9 ● Stud, Intake, Elbow 226-46 2 226-46 2<br />
10 ● Nut, Hex, Jam, Finished 29D-3/824 2 29D-3/824 2<br />
Breather Hose Kit w/ /Fittings 244-HK-46 1 244-HK-46 1 244-HK-96 1 244-HK-96 1<br />
1'<br />
1-800-331-3662 ARROW ENGINE COMPANY<br />
89
CARBURETORS FOR NEW STYLE ENGINES<br />
C-46 C-66 C-96 C-101<br />
C-106<br />
ASIC-5-ENG ASIC-5-ENG-66 ASIC-6-C-ENG ASIC-6-C-ENG-101 ASIC-6-C-ENG-106<br />
40<br />
40<br />
41<br />
17<br />
2<br />
3<br />
11<br />
15<br />
4<br />
2<br />
3<br />
6<br />
7<br />
8<br />
9<br />
9<br />
13<br />
5<br />
10<br />
11<br />
18<br />
13<br />
4<br />
12<br />
10<br />
14<br />
34<br />
24<br />
25<br />
33<br />
27<br />
29<br />
30<br />
16<br />
19<br />
6<br />
21<br />
35<br />
36 37 38<br />
22<br />
23<br />
28<br />
32<br />
31<br />
1<br />
20<br />
15<br />
22<br />
26<br />
27<br />
16<br />
21<br />
23<br />
24<br />
25<br />
28<br />
39<br />
29<br />
32<br />
30 31<br />
90
(For emissions compliant engines produced after July 1, 2008.<br />
No.<br />
Description<br />
1 Carburetor Assy ASIC-5-ENG 1<br />
C-46 C-66 C-96 C-101 C-106<br />
11<br />
Part No. Qty Part No. Qty Part No. Qty Part No. Qty Part No. Qty<br />
ASIC-5-<br />
ENG-66<br />
1<br />
ASIC-6-C-<br />
ENG<br />
1<br />
ASIC-6-C-<br />
ENG-101<br />
1<br />
ASIC-6-C-<br />
ENG-106<br />
2 ● Screw S1-3 4 S1-3 4 S1-3 4 S1-3 4 S1-3 4<br />
3<br />
● Inlet A2-39 1 A2-39 1<br />
● Cover C1-24 1 C1-24 1 C1-24 1<br />
4 ● 90 Elbow PF5-3/16 2 PF5-3/16 2<br />
5 ● Copper Tubing 3/16" 12" 3/16" 12"<br />
6 ● Spring S2-44 1 S2-44 1 S2-13 1 S2-13 1 S2-13 1<br />
7 ● Screw S1-12 6 S1-12 6 S1-12 6<br />
8 ● Backup Plate P2-15 1 P2-15 1 P2-15 1<br />
9 ● Air Valve Assy AV1-14925 1 AV1-14925 1 AV1-14-3-C 1 AV1-14-3-C 1 AV1-14-3-C 1<br />
10 ● Divider Plate AP2-14700 1 AP2-14700 1 P2-14 1 P2-14 1 P2-14 1<br />
11 ● Gasket G1-101 1 G1-101 1 G1-13 1 G1-13 1 G1-13 1<br />
12<br />
● Valve and Spacer<br />
Assy.<br />
AS3-22 1 AS3-22 1 AS3-22 1<br />
13 ● Air Valve Sealing Ring R1-14698 1 R1-14698 1 R1-19 1 R1-19 1 R1-19 1<br />
14 ● Valve BV1-14 1 BV1-14 1 BV1-14 1<br />
15 ● Body Assy AB1-38 1 Ab1-38 1 AB1-8-4 1 AB1-8-4 1 AB1-8-4 1<br />
16<br />
● Gasket,<br />
Throttle to Body<br />
G1-92 1 G1-92 1 G1-11 1 G1-11 1 G1-11 1<br />
17 ● Plug, 1/8" Pipe P3-13 1 P3-13 1<br />
18 ● Spring, Air Valve S2-45 1 S2-45 1<br />
19 ● Piston, idle Cutoff P4-1 1 P4-1 1<br />
20 Throttle Body Assy 1 1 AT2-4-1 1 AT2-4-1 1 AT2-4-1 1<br />
21 Throat T2-27 1 T2-27 1 1 1 1<br />
22 Screw S1-3 4 S1-3 4 S1-19 4 S1-19 4 S1-14 4<br />
23 Screw S1-22 2 S1-22 2 S1-12 2 S1-12 2 S1-12 2<br />
24 Butterfl y F2-2 1 F2-2 1 F2-4 1 F2-4 1 F2-4 1<br />
25 Throttle Shaft S5-6 1 S5-6 1 S5-2 1 S5-2 1 S5-2 1<br />
26 Restrictor Plate ASIC-31 1<br />
27 Gasket G1-18 1 G1-18 1 261-46 1 261-46 1 261-46 1<br />
28 Stop Screw S1-21 1 S1-21 1 S1-21 1 S1-21 1 S1-21 1<br />
29 Spring, Stop Idle Screw S2-15 1 S2-15 1 S2-15 1 S2-15 1 S2-15 1<br />
30 Throttle Stop Lever L1-8-1 1 L1-8-1 1 L1-8-2 1 L1-8-1-2 1 L1-8-2 1<br />
31 Throttle Lever AL1-7-1 1 AL1-7-1 1 AL1-7-1 1 AL1-7-1 1 AL1-7-1 1<br />
32 Throttle Stop Assy AL1-8-1 1 AL1-8-1 1 AL1-8-2 1 AL1-8-1-2 1 AL1-8-1-2 1<br />
33 Screw Pin, Throttle Stop S1-18 1 S1-18 1<br />
34 Pin, Throttle Stop P1-5 1 P1-5 1<br />
35 Screw S1-69 2 S1-69 2<br />
36 Bearing, Oilite B2-11 2 B2-11 2<br />
37 Seal S3-8 2 S3-8 2<br />
38 Ring, Seal Retainer R1-9 2 R1-9 2<br />
39 Adaptor Plate ASIC-16 1 ASIC-22 1<br />
40 Air Cleaner SA-K6 1 SA-K6 1 SA-90 SA-90 SA-90<br />
41 Air Filter Element<br />
SA-E-K6 1 SA-E-K8 1<br />
SA-K6-NS 1 SA-K6-NS 1<br />
1<br />
1-800-331-3662 ARROW ENGINE COMPANY<br />
91
11<br />
CARBURETORS FOR OLD STYLE ENGINES<br />
ASIC-6-A C-46 ASIC-6 C-66 ASIC-7 C-96 ASIC-8 C-106<br />
29 29 29 29<br />
10<br />
8<br />
25<br />
24<br />
20<br />
9<br />
19<br />
26<br />
16<br />
11<br />
18<br />
2<br />
13<br />
10<br />
18<br />
9<br />
26<br />
16<br />
19<br />
20<br />
11<br />
15<br />
14<br />
5<br />
10<br />
8<br />
25<br />
24<br />
20<br />
9<br />
19<br />
26<br />
16<br />
11<br />
18<br />
2<br />
13<br />
10<br />
18<br />
9<br />
26<br />
16<br />
19<br />
20<br />
11<br />
15<br />
14<br />
5<br />
7<br />
21<br />
1<br />
17 4<br />
28<br />
6<br />
13<br />
20<br />
12<br />
27<br />
3<br />
25<br />
24<br />
21<br />
1<br />
28<br />
17<br />
4<br />
13<br />
2<br />
7<br />
20<br />
12<br />
27<br />
3<br />
7<br />
21<br />
1<br />
17 4<br />
28<br />
6<br />
13<br />
20<br />
12<br />
27<br />
3<br />
25<br />
24<br />
21<br />
1<br />
17<br />
4<br />
13<br />
3<br />
2<br />
7<br />
20<br />
12<br />
27<br />
<strong>Engine</strong> Style Part # Includes<br />
Flange:<br />
Req.<br />
Air Filter<br />
ARROW C-46 100 ASIC-6-A 724 SA-60<br />
100 ASIC-6-B<br />
110 ASIC-6-A-110 724<br />
110 ASIC-6-110<br />
ARROW C-66 100 ASIC-6 818-L SA-78<br />
100 ASIC-6-B<br />
110 ASIC-6-110<br />
ARROW C-96 200 ASIC-7 727 SA-90<br />
200 ASIC-7-B<br />
210 ASIC-7-210<br />
ARROW C-106 200 ASIC-8-B SA-110<br />
210 ASIC-8-210<br />
92 C-SERIES SERVICE, OPERATION & PARTS MANUAL – AEPB1 1-800-331-3662
(For engines produced before July 1, 2008.)<br />
No.<br />
Description<br />
100-RK-46 Carburetor Repair Kit<br />
Description Part # Qty<br />
Bearing, Oilite B2-12 2<br />
Butterfl y, 1 1/2" Impco F2-4 1<br />
Gasket, Throttle to Body G1-11 1<br />
Gasket, 1 1/2" SAE Fl G1-19 1<br />
Retainer Seal R1-9 2<br />
Screw Sems Machine 10-24x5 S1-3 4<br />
Screw S1-12 2<br />
Spacer-100, 90 Deg. AS3-10 1<br />
Spring 110 Air Valve S2-13 1<br />
Shaft, Butterfl y, 5/16" S5-2 1<br />
Throttle Lever AL1-7-1 1<br />
Throttle Stop Assy, 5/16" AL1-8-2 1<br />
Valve, Diaphragm Assy. AV1-14-3 1<br />
ASIC-6-A ASIC-6 ASIC-7 ASIC-8<br />
Part No. Qty Part No. Qty Part No. Qty Part No. Qty<br />
1 Gasket, Carb to Elbow 261-46 1 261-46 1 261-96 1 261-106 1<br />
2 Body Assy AB1-8-4 1 AB1-8-4 1 AB1-11-2 1 AB1-11-2 1<br />
3 Throttle Lever AL1-7-1 1 AL1-7-1 1 AL1-9-1 1 AL1-9-1 1<br />
4 Throttle Stop Assy AL1-8-2 1 AL1-8-2 1 AL1-10 1 AL1-10 1<br />
5 Valve & Spacer Assy AS3-22 1 AS3-22 1 AS3-21 1 AS3-21 1<br />
6 Spacer AS3-10 2 AS3-10 2 AS3-45 2 AS3-45 2<br />
7 Throttle Body Assy AT2-4-1 1 AT2-4-1 1 AT2-5 1 AT2-6 1<br />
8 Valve, Diaphram Assy AV1-14-3 1 AV1-14-3 1 AV1-12-2 1 AV1-12-2 1<br />
9 Valve BV1-14 1 BV1-14 1 BV1-12 1 BV1-12 1<br />
10 Cover C1-17 1 C1-24 1 C1-18 1 C1-23 1<br />
11 Diaphragm D1-17-2 1 D1-13-2 1 D1-16-2 1 D1-12-2 1<br />
12 Butterfl y F2-4 1 F2-4 1 F2-5 1 F2-6 1<br />
13 Throttle to Body Gasket G1-11 2 G1-11 1 G1-21 2 G1-21 1<br />
14 Plt to Body Gasket G1-13 1 G1-20 1<br />
15 Plate, Divider P2-14 1 P2-12 1<br />
16 Plate, Backup P2-22 1 P2-15 1 P2-21 1 P2-13 1<br />
17 1/8 Sq Head Pipe Plug PF4-1/8 1 PF4-1/8 1 PF4-1/8 1 PF4-1/8 1<br />
18 Air Valve Ring R1-19 1 R1-19 1 R1-17 1 R1-17 1<br />
19 Mach Screw Sems S1-3 4 S1-3 4 S1-3 4 S1-3 4<br />
20 Screw S1-12 6 S1-12 6 S1-12 6 S1-12 6<br />
Screw S1-17 1 S1-17 1 S1-17 1 S1-17 1<br />
21 Screw S1-19 4 S1-19 4 S1-19 4 S1-19 4<br />
Screw S1-22 8 S1-22 8 S1-22 8 S1-22 8<br />
Screw S1-24 4 S1-24 4 S1-24 4 S1-24 4<br />
Screw S1-41 4 S1-41 4 S1-41 4 S1-41 4<br />
24 Idle Screw S1-74 1 S1-74 1 12E-3/816x11/4 1 12E-3/816x11/4 1<br />
25 Idle Screw Spring S2-88 1 S2-88 1 S2-16 1 S2-16 1<br />
26 Spring S2-85 1 S2-13 1 S2-17 1 S2-17 1<br />
27 Butterfl y Shaft S5-2 1 S5-2 1 S5-3 1 S5-3 1<br />
28 Cross Flange 724 1 818-L 1 727 1<br />
29 Air Filter SA-60 1 SA-78 1 SA-90 1 SA-110 1<br />
100-RK-96 Carburetor Repair Kit<br />
Description Part # Qty<br />
Bearing, Oilite B2-13 2<br />
Diaphragm Sil .-210 D1-12-2 1<br />
Butterfl y, 1 3/4" Impco F2-45 1<br />
Plate, Gasket to Body G1-20 1<br />
Gasket, Throttle to Body G1-21 1<br />
Gasket G1-23 1<br />
O Ring R1-8 2<br />
Screw Sem Machine 10-24x5 S1-3 2<br />
Screw S1-12 6<br />
Screw, 12-24x5/8 s1-19 4<br />
Screw S1-41 3<br />
Spring S2-17 1<br />
Shaft Seal S3-11 2<br />
Seal, Internal S3-20 1<br />
Shaft, Butterfly S5-3 1<br />
Throttle Lever 200 AL1-9-1 1<br />
1-800-331-3662 ARROW ENGINE Throttle COMPANY Stop Assy. 3/8 AL1-10 1<br />
Valve & Spacer Assy. AS3-21 1<br />
11<br />
93
11<br />
7<br />
3<br />
11<br />
13<br />
14<br />
5<br />
9<br />
12<br />
19<br />
18<br />
6<br />
10<br />
21<br />
20<br />
17<br />
15<br />
12<br />
4<br />
16<br />
8<br />
94 C-SERIES SERVICE, OPERATION & PARTS MANUAL – AEPB1 1-800-331-3662
OLD STYLE NATURAL GAS/GASOLINE CARBURETOR<br />
(Shown below are legacy components not used in current production.)<br />
11<br />
No.<br />
Description<br />
C-46 C-66 C-96 C-106<br />
Part No. Qty Part No. Qty Part No. Qty Part No. Qty<br />
1<br />
Inlet Manifold Repair Kit 262-RK-46 1 262-RK-66 1 262-RK-96 1 262-RK-106 1<br />
Inlet Manifold Repair Kit - LS 262-LS-RK-66 1 262-LS-RK-96 1<br />
2<br />
Mini Manifold Repair Kit 262-MRK-46 1 262-MRK-66 1 262-MRK-96 1 262-MRK-106 1<br />
Mini Manifold Repair Kit - LS 262-MLSRK-46 1 262-MLSRK-66 1 262-MLSRK-96 1<br />
3<br />
Plated Lock Washer 1A-#4 2 1A-#4 2 1A-#4 2 1A-#6 2<br />
Plated Lock Washer - LS 1A-#6 2 1A-#6 2 1A-#6 2<br />
4 Plated Lock Washer - Std & LS 1A-#8 1 1A-#8 1<br />
5 Plated Lock Washer - Std & LS 1A-1/4 1 1A-1/4 1 1A-1/4 1 1A-1/4 1<br />
Plated Flat Washer - Std & LS 1N-1/4 2 1N-1/4 2 1N-1/4 2 1N-1/4 2<br />
6 Capscrew Hex Head - Std & LS 7A-1/420x1 1 7A-1/420x1 1 7A-1/420x1 1 7A-1/420x1 1<br />
7<br />
Machine Screw Rod Head 12A-448x1/4 2 12A-448x1/4 2 12A-448x1/4 2 12A-632x5/16 2<br />
Machine Screw Rod Head - LS 12A-632x5/16 2 12A-632x5/16 2 12A-632x5/16 2<br />
8<br />
Machine Screw Rod Head<br />
- Std & LS<br />
12A-832x3/8 1 12A-832x3/8 1 12A-832x3/8 1 12A-832x3/8 1<br />
9 Heavy Hex Jam Nut - Std & LS 27A-1/420 1 27A-1/420 1 27A-1/420 1 27A-1/420 1<br />
10 Hex Fin Nut-Brass - Std & LS 29B-3/824 1 29B-3/824 1 29B-3/824 1 29B-3/824 1<br />
262-C-46<br />
Expansion Plug 262-C-46 1 262-C-46 1<br />
11<br />
176-B-46<br />
1 176-B-46 1<br />
Expansion Plug - LS 176-B-46 1 176-B-46 1 176-B-46 1<br />
12<br />
Manifold Bushing 262-B-46 2 262-B-46 2 262-B-46 2 262-B-106 2<br />
Manifold Bushing - LS 262-BLS-96 2 262-BLS-96 2 262-BLS-96 2<br />
13<br />
Throttle Control Shaft 263-46 1 263-46 1 263-96 1 263-106 1<br />
Throttle Control Shaft - LS 263-LS-46 1 263-LS-46 1 263-LS-96 1<br />
14<br />
Carb Throttle Valve 264-46 1 264-66 1 264-96 1 264-106 1<br />
Carb Throttle Valve - LS 264-LS-46 1 264-LS-66 1 264-LS-96 1<br />
15<br />
Throttle Lever Assy 267-46 1 267-46 1 267-46 1 267-106 1<br />
Throttle Lever Assy - LS 267-LS-96 1 267-LS-96 1 267-LS-96 1<br />
16 Throttle Shaft Retainer - Std & LS 269-46 1 269-46 1 269-46 1 269-46 1<br />
17 Carburetor Jet - Std & LS 272-46 1 272-66 1 272-96 1 272-96 1<br />
18 Carb Jet Needle - Std & LS 273-46 1 273-46 1 273-96 1 273-96 1<br />
19 Locking Knob - Std & LS 275-46 1 275-46 1 275-46 1 275-46 1<br />
20 Gasket - Std & LS 289-46 1 289-46 1 289-46 1 289-46 1<br />
21<br />
Ball Joint Rod End 312-106A 1<br />
Ball Joint Rod End - LS 312-106A 1 312-106A 1<br />
1-800-331-3662 ARROW ENGINE COMPANY<br />
95
11<br />
OIL LINES, OIL PUMP, AND STRAINER ASSY<br />
C-96<br />
C-106<br />
29<br />
28<br />
23<br />
40<br />
13<br />
14<br />
Optional Oil Sending Unit<br />
48 49<br />
C-46<br />
C-66<br />
3<br />
1<br />
19<br />
26<br />
1<br />
7<br />
25<br />
8<br />
38<br />
45<br />
12<br />
10<br />
46<br />
21<br />
20<br />
12<br />
50<br />
17<br />
15<br />
18<br />
24<br />
16<br />
43<br />
22<br />
14<br />
9<br />
27<br />
2<br />
41<br />
5<br />
6<br />
42<br />
39<br />
11<br />
37<br />
30<br />
36<br />
44<br />
35<br />
12<br />
3<br />
1<br />
33<br />
4<br />
34<br />
31<br />
32<br />
47<br />
No. Description<br />
C-46 C-66 C-96 C-101/106<br />
Part No. Qty Part No. Qty Part No. Qty Part No. Qty<br />
1 Plated Lock Washer 1A-3/8 6 1A-3/8 6 1A-3/8 6 1A-3/8 6<br />
2 Plated Lock Washer 1A-#10 3 1A-#10 3 1A-#10 3 1A-#10 3<br />
3 Capscrew Hex Head 7A-3/816x1 6 7A-3/816x1 6 7A-3/816x1 4 7A-3/816x1 4<br />
4 Capscrew 7A-3/816x21/4 1 7A-3/816x21/4 1 7A-3/816x21/4 1 7A-3/816x21/4 1<br />
5 Mach. Screw Fillister 12E-1024x3/4 2 12E-1024x3/4 2 12E-1024x3/4 2 12E-1024x3/4 2<br />
6 Mach. Screw Fillister 12E-1024x11/2 1 12E-1024x11/2 1 12E-1024x11/2 1 12E-1024x11/2 1<br />
7 Finished Hex Nut 29A-3/824 2 29A-3/824 2<br />
8 Restricted Tee 45x4R 1 45x4R 1 45x4R 45x4R<br />
9 Female Connection 46x4 1 46x4 1 46x4 1 46x4 1<br />
10 Straight Fitting 48x4 1 48x4 1 48x4 1 48x4 1<br />
11 Straight Connection 48x5x4 3 48x5x4 3 48x5x4 3 48x5x4 3<br />
96 C-SERIES SERVICE, OPERATION & PARTS MANUAL – AEPB1 1-800-331-3662
11<br />
No. Description<br />
C-46 C-66 C-96 C-101/106<br />
Part No. Qty Part No. Qty Part No. Qty Part No. Qty<br />
12 90 Deg Ell 49x4 2 49x4 2 49x4 2 49x4 2<br />
13 Female 90 Ell 50x4 1 50x4 1 50x4 1 50x4 1<br />
14 Elbow 54x4 3 54x4 3 54x4 3 54x4 3<br />
15 #8 Flat Washer 93-A-46 2 93-A-46 2 93-A-46 2 93-A-46 2<br />
16 3/8 Ball Oil Pump Pas 93-B-46 1 93-B-46 1 93-B-46 1 93-B-46 1<br />
17 Oil Relief Valve Adj Spring 94-A-46 1 94-A-46 1 94-A-46 1 94-A-46 1<br />
18 Oil Relief Valve Adj Screw 95-A-46 1 95-A-46 1 95-A-46 1 95-A-46 1<br />
19 Woodruff Key 104A-#3 1 104A-#3 1 104A-#3 1 104A-#3 1<br />
20 Brass Pipe Nipple 118-B-96 1 118-B-96 1 118-B-96 1 118-B-96 1<br />
21 Double Tapped Bushing 118-C-96 1 118-C-96 1 118-C-96 1 118-C-96 1<br />
22 Branch Tee 119-RG-46 1 119-RG-46 1 119-RG-46 1 119-RG-46 1<br />
23 Oil Pump Assy 124-A-46 1 124-A-46 1 124-A-96 1 124-A-96 1<br />
24 Oil Pump Body 125-A-46 1 125-A-46 1 125-A-46 1 125-A-46 1<br />
25 Oil Pump Shaft 128-A-46 1 128-A-46 1 128-A-96 1 128-A-96 1<br />
26 Gerator Set 129-ST-46 1 129-ST-46 1 129-ST-46 1 129-ST-46 1<br />
27 Oil Pump Plate (not shwn) 150-A-46 1 150-A-46 1 150-A-46 1 150-A-46 1<br />
28 Stud 162-96 1 162-96 1<br />
29 Oil Pump Spacer 163-A-96 1 163-A-96 1<br />
30 Oil Strainer Assy 166-46 1 166-46 1 166-96 1 166-96 1<br />
31 Oil Strainer Cover 167-46 1 167-46 1 167-46 1 167-46 1<br />
32 Compression Spring 169-46 1 169-46 1 169-96 1 169-96 1<br />
33 Oil Strainer Screen 171-46 1 171-46 1 171-46 1 171-46 1<br />
34 Screen Cover Gasket 173-46 1 173-46 1 173-46 1 173-46 1<br />
35 Sm. BlkHead Fitting 6400x5 1 6400x5 1 6400x5 1 6400x5 1<br />
36 Oil Filter Element * OFK-1-E 1 OFK-1-E 1 OFK-1-E 1 OFK-1-E 1<br />
37 Crankcase Tee-Oil Col OL-14 1 OL-A-66 1 OL-A-96 1 OL-A-96 1<br />
38 Crankcase-Gov Tee OL-24 1 OL-C-66 1 OL-C-96 1 OL-C-96 1<br />
39 Pump-Bulkhead OL-54 1 OL-F-66 1 OL-29 1 OL-29 1<br />
40 Governor Tee-Gauge OL-34 1 OL-D-66 1 OL-D-96 1 OL-D-96 1<br />
41 Rocker-Cam Assy Tee OL-B-46 1 OL-B-66 1 OL-B-96 1 OL-B-96 1<br />
42 Cam Assy-Bulkhead OL-I-46 1 OL-I-66 1 OL-N-96 1 OL-N-96 1<br />
43 Oil Line Fitting OL-I1-46 1 OL-I1-46 1 OL-I1-46 1 OL-I1-46 1<br />
44 Bulkhead Fitting * OL-I2-46 1 OL-I2-46 1 OL-I2-96 1 OL-I2-96 1<br />
45 Crankcase Tee-Cam Assy OL-K-46 1 OL-K-46 1 OL-K-96 1 OL-K-96 1<br />
46 Pipe Tee PF3-1/8 1 PF3-1/8 1 PF3-1/8 1 PF3-1/8 1<br />
47 Sq Head Pipe Plug PF4-3/4 1 PF4-3/4 1 PF4-3/4 1 PF4-3/4 1<br />
48 Oil Sending Unit, OPTION 60356 1 60356 1 60356 1 60356 1<br />
49 Tee, OPTION 64227561 1 64227561 1 64227561 1 64227561 1<br />
50 Nipple, OPTION 118-B-96 1 118-B-96 1 118-B-96 1 118-B-96 1<br />
* For C-46 from Serial #115025 and for C-66 from Serial #86939.<br />
1-800-331-3662 ARROW ENGINE COMPANY<br />
97
11<br />
FLEXIBLE OIL LINES FOR OLD STYLE ENGINES<br />
9 28<br />
14<br />
18<br />
34<br />
13<br />
35<br />
14<br />
29<br />
14<br />
33<br />
23<br />
36<br />
15<br />
10<br />
11<br />
31<br />
14<br />
27<br />
12<br />
32<br />
23<br />
26<br />
25<br />
11<br />
17<br />
Relief accessories<br />
for old style<br />
pump<br />
39<br />
37<br />
4 3 6<br />
24<br />
41<br />
39<br />
40<br />
30<br />
11<br />
42<br />
38<br />
22<br />
5<br />
2<br />
7<br />
8<br />
16<br />
20<br />
19<br />
21<br />
1<br />
98 C-SERIES SERVICE, OPERATION & PARTS MANUAL – AEPB1 1-800-331-3662
11<br />
No. Description<br />
C-46 C-66 C-96 C-106<br />
Part No. Qty Part No. Qty Part No. Qty Part No. Qty<br />
1 Plated Lock Washer 1A-#8 6 1A-#8 6 1A-#8 6 1A-#8 6<br />
2 Plated Lock Washer 1A-3/8 3 1A-3/8 3 1A-3/8 3 1A-3/8 3<br />
3 Plated Lock Washer 1A-5/16 3 1A-5/16 3 1A-5/16 3 1A-5/16 3<br />
4 Capscrew Hex Head 7A-5/1618x11/2 3 7A-5/1618x11/2 3 7A-5/1618x11/2 3 7A-5/1618x11/2 3<br />
5 Capscrew Hex Head 7A-3/816x1 2 7A-3/816x1 2 7A-3/816x1 2 7A-3/816x1 2<br />
6 Heavy Hex Nut 25A-5/1618 3 25A-5/1618 3 25A-5/1618 3 25A-5/1618 3<br />
7 Finished Hex Nut 29A-3/824 1 29A-3/824 2 29A-3/824 2 29A-3/824 2<br />
8 Roll Pin 41A-1/8x11/4 1 41A-1/8x11/4 1 41A-1/8x11/4 1 41A-1/8x11/4 1<br />
9 Restricted Tee 45x4R 1 45x4R 1 45x4R 1 45x4R 1<br />
10 Female Connection 46x4 1 46x4 1 46x4 1 46x4 1<br />
11 Straight Connection 48x5x4 2 48x5x4 2 48x5x4 2 48x5x4 2<br />
12 90 Deg Ell 49x5x4 1 49x5x4 1 49x5x4 1 49x5x4 1<br />
13 Female 90 Deg Ell 50x4 1 50x4 1 50x4 1 50x4 1<br />
14 Elbow 54x4 4 54x4 4 54x4 4 54x4 4<br />
15 45 Deg Ell 54x5x4 1 54x5x4 1 54x5x4 1 54x5x4 1<br />
16 Woodruff Key 104A-#3 1 104A-#3 1 104A-#3 1 104A-#3 1<br />
17 Brass Pipe Nipple 118-B-96 1 118-B-96 1 118-B-96 1 118-B-96 1<br />
18 Branch Tee 119-RG-46 1 119-RG-46 1 119-RG-46 1 119-RG-46 1<br />
19 Oil Pump Gear Drive 129-46 1 129-46 1 129-46 1 129-46 1<br />
20 Oil Pump Gear 130-46 1 130-46 1 130-46 1 130-46 1<br />
21 Oil Pump Cover 150-46 1 150-46 1 150-46 1 150-46 1<br />
22 Relief Valve 758-46 1 758-46 1 758-46 1 758-46 1<br />
23 Bulkhead Fitting 2700x5 1 2700x5 1 2700x5 1 2700x5 1<br />
24 Oil Filter Adapter Kit OFK-1-A 1 OFK-1-A 1 OFK-1-A 1 OFK-1-A 1<br />
25 Oil Filter Element OFK-1-E 1 OFK-1-E 1 OFK-1-E 1 OFK-1-E 1<br />
26 Oil Filter-Can Type OFK-1-E-1 1 OFK-1-E-1 1 OFK-1-E-1 1 OFK-1-E-1 1<br />
27 Oil Filter O-Ring OFK-1-U 1 OFK-1-U 1 OFK-1-U 1<br />
28 Governor Tee-Gauge OL-D-46 1 OL-16 1 OL-D-96 1 OL-D-96 1<br />
29 Oil-Col-Cam Assy Tee OL-A-46 1 OL-56 1 OL-19 1 OL-19 1<br />
30 Pump Tee-Bulkhead OL-H-46 1 OL-26 1 OL-F-96 1 OL-F-96 1<br />
31 Pump-Bulkhead OL-54 1 OL-F-66 1 OL-29 1 OL-29 1<br />
32 Canister-Bulkhead OL-G-46 1 OL-36 1 OL-G-96 1 OL-G-96 1<br />
33 Canister-Bulkhead OL-F-46 1 OL-46 1 OL-H-96 1 OL-H-96 1<br />
34 Governor Tee-Cam Plate OL-C-46 1 OL-66 1 OL-C-96 1 OL-C-96 1<br />
35 Rocker-Cam Assy Tee OL-B-46 1 OL-B-66 1 OL-B-96 1 OL-B-96 1<br />
36 Cam Assy-Bulkhead OL-I-46 1 OL-I-66 1 OL-N-96 1 OL-N-96 1<br />
37 Pipe Nipple-Sch 80 PF1-1/4x2-80 1 PF1-1/4x2-80 1 PF1-1/4x2-80 1<br />
38 Close Nipple PF2-1/4 1 PF2-1/4 1 PF2-1/4 1 PF2-1/4 1<br />
39 Pipe Tee PF3-1/4 1 PF3-1/4 1 PF3-1/4 1 PF3-1/4 1<br />
40 Sq Head Pipe Plug PF4-1/4 1 PF4-1/4 1 PF4-1/4 1 PF4-1/4 1<br />
41 90 Deg Street Elbow PF5-1/4 1 PF5-1/4 1 PF5-1/4 1 PF5-1/4 1<br />
42 Pipe Bushing PF9-3/8x1/4 1 PF9-3/8x1/4 1 PF9-3/8x1/4 1 PF9-3/8x1/4 1<br />
1-800-331-3662 ARROW ENGINE COMPANY<br />
99
12<br />
OIL LINE INSTALLATION<br />
INSTRUCTIONS<br />
1. When ordering universal oil line kits, all<br />
parts will arrive in one package. To identify<br />
each hose, the female fi tting on the hose<br />
will be marked with a letter and a number<br />
or two numbers. For example, the line for<br />
assembly OL-A-46 will be marked A4; the<br />
line for assembly OL-54 will be marked<br />
54, etc.<br />
2. Universal oil line kits include parts that<br />
allow conversion for both old and new<br />
style engines. Follow instructions as<br />
noted to convert hoses and fi tttings<br />
appropriately.<br />
3. CAUTION: Position hoses to be free of<br />
sharp bends so that lines will not kink and<br />
stop oil fl ow or crack tefl on lines.<br />
RIGHT<br />
WRONG<br />
4. CAUTION: Be sure hoses have ample<br />
clearance from all moving engine parts.<br />
100 C-SERIES SERVICE, OPERATION & PARTS MANUAL – AEPB1 1-800-331-3662
OLK-U-46<br />
12<br />
Complete Universal Oil Line Kit for C-46 <strong>Engine</strong>s<br />
OL-A-46<br />
Old Style<br />
OL-I-46<br />
54x4<br />
45° Elbow<br />
To Oil<br />
Collector<br />
15"<br />
To Cam<br />
Assy Tee<br />
54x4<br />
45° Elbow<br />
54x5x4<br />
45° Elbow<br />
To<br />
Cam Assy<br />
11"<br />
To<br />
Bulkhead<br />
(attaches to<br />
OLI-I2-46)<br />
OL-B-46<br />
OL-K-46<br />
46x4<br />
Straight<br />
Female<br />
Connection<br />
To Rocker<br />
Oil Adap<br />
12¼"<br />
To Cam<br />
Assy Tee<br />
54x4<br />
45° Elbow<br />
48x4<br />
Straight<br />
Connection<br />
To<br />
Crankcase<br />
Tee<br />
5¼"<br />
To<br />
Cam<br />
Assy Tee<br />
49x4<br />
90° Elbow<br />
OL-C-46<br />
45x4R<br />
Restricted<br />
Tee<br />
To<br />
Gov Tee<br />
15½"<br />
To<br />
Cam Plate<br />
Old Style<br />
49x4<br />
90° Elbow<br />
OL-14<br />
49x4<br />
90° Elbow<br />
To<br />
Crankcase<br />
Tee<br />
8¾"<br />
To Oil<br />
Collector<br />
49x4<br />
90° Elbow<br />
OL-D-46<br />
to 45x4R<br />
Restricted<br />
Tee<br />
To<br />
Governor<br />
Tee<br />
10¼"<br />
To<br />
Oil Gauge<br />
Old Style<br />
50x4<br />
Female<br />
90° Elbow<br />
OL-44<br />
49x5x4<br />
90° Elbow<br />
To<br />
Water Filler<br />
18¼"<br />
To Water<br />
Gauge<br />
49x5x4<br />
90° Elbow<br />
OL-F-46<br />
48x5x4<br />
Straight<br />
Connection<br />
To Oil<br />
Pump<br />
9¼"<br />
To<br />
Bulkhead<br />
Old Style<br />
2700x5<br />
Bulkhead<br />
Fitting<br />
OL-54<br />
48x5x4<br />
Straight<br />
Connection<br />
To Oil<br />
Pump<br />
12"<br />
To<br />
Bulkhead<br />
6400x5<br />
Sm Bulkhead<br />
Fitting<br />
OL-G-46<br />
49x5x4<br />
90° Elbow<br />
OL-H-46<br />
48x5x4<br />
Straight<br />
Connection<br />
To Oil<br />
Cannister<br />
To Oil<br />
Pump Tee<br />
16½"<br />
8½"<br />
To<br />
Bulkhead<br />
To<br />
Bulkhead<br />
Old Style<br />
2700x5<br />
Bulkhead<br />
Fitting<br />
Old Style<br />
Other Fittings<br />
14-46 Adapter Oil Line<br />
OL-I2-46 Bulkhead Fitting for OL-I-46 to Bulkhead<br />
118-B-96 Brass Pipe Nipple for Crankcase Tee<br />
118-C-96 Dbl Tapped Bushing for Crankcase Port<br />
119-RG-46 Male Branch Tee for Cam Assy Tee<br />
PF1-1/4x2-40 Pipe Nipple for Oil Pump to Tee<br />
PF2-1/4 Close Nipple for Relief Valve<br />
PF3-1/8 Pipe Tee for Crankcase Junction<br />
PF3-1/4 Bulkhead Pipe Tee for Relief on Pump Line<br />
48x4 Straight Fitting Convert OL-C-46 to<br />
OL-24<br />
49x5x4 90° Elbow Convert OL-44 to Old<br />
Style<br />
ASA-578 1/8" Street Elbow<br />
Note: To make OL-24 (Governor Tee to Crankcase), use OL-C-46 and change fi ttings.<br />
To make OL-34 (Governor Tee to gauge panel on Crankcase), use OL-A-46 and<br />
change fi ttings.<br />
1-800-331-3662 ARROW ENGINE COMPANY<br />
101
12<br />
OLK-U-66<br />
Complete Universal Oil Line Kit for C-66 <strong>Engine</strong>s<br />
OL-A-66<br />
OL-16<br />
Old Style<br />
49x4<br />
90° Elbow<br />
To Crankcase<br />
Tee<br />
10¼"<br />
To Oil<br />
Collector<br />
49x4<br />
90° Elbow<br />
to 45x4R<br />
Restricted<br />
Tee<br />
To<br />
Governor<br />
Tee<br />
12¼"<br />
To<br />
Oil Gauge<br />
OL-B-66<br />
46x4<br />
Straight<br />
Female<br />
Connection<br />
To Rocker<br />
Oil Adap<br />
15"<br />
To Cam<br />
Assy Tee<br />
54x4<br />
45° Elbow<br />
OL-26<br />
48x5x4<br />
Straight<br />
Adapter<br />
To<br />
Oil Pump<br />
Tee<br />
11"<br />
To<br />
Bulkhead<br />
Old Style<br />
OL-C-66<br />
45x4R<br />
Restricted<br />
Tee<br />
To<br />
Gov Tee<br />
15"<br />
To<br />
Crankcase<br />
54x4<br />
45° Elbow<br />
OL-36<br />
49x5x4<br />
90° Elbow<br />
To Oil<br />
Canister<br />
18"<br />
To<br />
Bulkhead<br />
Old Style<br />
2700x5<br />
Bulkhead<br />
Fitting<br />
OL-D-66<br />
To 45x4R<br />
Gov Tee<br />
16"<br />
To<br />
Oil Gauge<br />
50x4<br />
Female<br />
90° Elbow<br />
OL-46<br />
48x5x4<br />
Straight<br />
Adapter<br />
To Oil<br />
Canister<br />
11"<br />
To<br />
Bulkhead<br />
Old Style<br />
2700x5<br />
Bulkhead<br />
Fitting<br />
OL-E-66<br />
49x5x4<br />
90° Elbow<br />
To<br />
Water Filler<br />
18"<br />
To Water<br />
Gauge<br />
49x5x4<br />
90° Elbow<br />
OL-56<br />
54x4<br />
45° Elbow<br />
To Cam<br />
Assy Tee<br />
16"<br />
To Oil<br />
Collecttor<br />
Old Style<br />
54x4<br />
45° Elbow<br />
OL-F-66<br />
48x5x4<br />
Straight<br />
Connection<br />
OL-I-66<br />
To Oil<br />
Pump<br />
15"<br />
To<br />
Bulkhead<br />
6400x5<br />
Bulkhead<br />
Fitting<br />
Other Fittings<br />
14-46 Adapter Oil Line<br />
OL-I2-46 Bulkhead Fitting for OL-I-66 to Bulkhead<br />
118-B-96 Brass Pipe Nipple for Crankcase Tee<br />
118-C-96 Dbl Tapped Bushing for Crankcase Port<br />
119-RG-46 Male Branch Tee for Cam Assy Tee<br />
54x5x4<br />
45° Elbow<br />
OL-K-46<br />
48x4<br />
Straight<br />
Connection<br />
To<br />
Cam Assy<br />
To<br />
Crankcase<br />
Tee<br />
18"<br />
5¼"<br />
To<br />
Bulkhead<br />
To<br />
Cam<br />
Assy Tee<br />
(attaches to<br />
OLI-I2-46)<br />
49x4<br />
90° Elbow<br />
PF1- Pipe Nipple for Oil Pump to Tee<br />
1/4x2-80<br />
PF2-1/4 Close Nipple for Relief Valve<br />
PF3-1/8 Pipe Tee for Crankcase Junction<br />
PF3-1/4 Bulkhead Pipe Tee for Relief on Pump Line<br />
49x4 90° Elbow Convert OL-C-66 to OL-66<br />
49x5x4 90° Elbow Convert OL-E-66 to old style<br />
ASA-578 1/8" Street Elbow<br />
Note: To make OL-66 (Governor Tee to Cam Plate), use OL-C-66 and change fi ttings.<br />
102 C-SERIES SERVICE, OPERATION & PARTS MANUAL – AEPB1 1-800-331-3662
OLK-U-96<br />
12<br />
Complete Universal Oil Line Kit for C-96, C101 and C-106 <strong>Engine</strong>s<br />
OL-A-96<br />
OL-H-96<br />
Old Style<br />
49x4<br />
90° Elbow<br />
To Crankcase<br />
Tee<br />
10½"<br />
To Oil<br />
Collector<br />
49x4<br />
90° Elbow<br />
48x5x4<br />
Straight<br />
Connection<br />
To<br />
Oil Canister<br />
9½"<br />
To<br />
Bulkhead<br />
2700x5<br />
Bulkhead<br />
Fitting<br />
OL-B-96<br />
46x4<br />
Straight<br />
Female<br />
Connection<br />
To Rocker<br />
Oil Adap<br />
18½"<br />
To Cam<br />
Assy Tee<br />
54x4<br />
45° Elbow<br />
OL-K-96<br />
48x4<br />
Straight<br />
Connection<br />
To<br />
Crankcase<br />
Tee<br />
10½"<br />
To<br />
Cam<br />
Assy Tee<br />
49x4<br />
90° Elbow<br />
OL-C-96<br />
OL-N-96<br />
45x4R<br />
Restricted<br />
Tee<br />
To<br />
Gov Tee<br />
15½"<br />
To<br />
Crankcase<br />
54x4<br />
45° Elbow<br />
54x5x4<br />
45° Elbow<br />
To<br />
Cam Assy<br />
19"<br />
To<br />
Bulkhead<br />
(attaches to<br />
OLI-I2-46)<br />
OL-D-96<br />
To 45x4R<br />
Gov Tee<br />
20½"<br />
To<br />
Oil Gauge<br />
50x4<br />
Female<br />
90° Elbow<br />
OL-19<br />
54x4<br />
45° Elbow<br />
To<br />
Cam Assy<br />
Tee<br />
17"<br />
To Oil<br />
Collector<br />
Old Style<br />
54x4<br />
45° Elbow<br />
OL-E-96<br />
Old Style<br />
OL-29<br />
49x5x4<br />
90° Elbow<br />
To<br />
Water Filler<br />
20½"<br />
To Water<br />
Gauge<br />
49x5x4<br />
90° Elbow<br />
48x5x4<br />
Straight<br />
Connection<br />
To Oil<br />
Pump<br />
16"<br />
To<br />
Bulkhead<br />
OL-F-96<br />
Old Style<br />
48x5x4<br />
Straight<br />
Connection<br />
OL-G-96<br />
49x5x4<br />
90° Elbow<br />
To Oil<br />
Pump Tee<br />
To<br />
Oil Canister<br />
11¾"<br />
17½"<br />
To<br />
Bulkhead<br />
To<br />
Bulkhead<br />
6400x5<br />
Bulkhead<br />
Fitting<br />
Old Style<br />
2700x5<br />
Bulkhead<br />
Fitting<br />
Other Fittings<br />
14-46 Adapter Oil Line<br />
OL-I2-96 Bulkhead Fitting for OL-I-66 to Bulkhead<br />
118-C-96 Dbl Tapped Bushing for Crankcase Port<br />
119-RG-46 Male Branch Tee for Cam Assy Tee<br />
PF1- Pipe Nipple for Oil Pump to Tee<br />
1/4x2-80<br />
PF1-1/8x2 Pipe Nipple for Crankcase Tee<br />
PF2-1/4 Close Nipple for Relief Valve<br />
PF3-1/8 Pipe Tee for Crankcase Junction<br />
PF3-1/4 Bulkhead Pipe Tee for Relief on Pump Line<br />
49x5x4 90° Elbow Convert OL-E-96 to old style<br />
ASA-578 1/8" Street Elbow<br />
Note: To make OL-39 (Governor Tee to Cam Plate), use OL-D-96 and change fi ttings.<br />
To make OL-49 (Governor Tee to gauge panel on hopper), use OL-C-96 and change<br />
fi ttings.<br />
1-800-331-3662 ARROW ENGINE COMPANY<br />
103
13<br />
C-46 COMPLETE GASKET SET GSC-46<br />
12- 46(2)<br />
Cyl Sleeve Gasket<br />
Crankcase Assembly<br />
330-17-46<br />
Gasket<br />
Starfire Assembly<br />
215-46<br />
Governor Gasket<br />
Governor Assembly<br />
330-11-46<br />
Magneto to Bracket Gasket<br />
Magneto Accessories<br />
173-46<br />
Screen Cover Gasket<br />
Strainer Assembly<br />
208-46<br />
Governor Housing Gasket<br />
Governor Assembly<br />
261-A-46<br />
Gasket<br />
Old Style Nat Gas Carb<br />
8- 46<br />
Cover Gasket<br />
Crankcase Assembly<br />
ACE-409-46-NS<br />
Gasket<br />
Oil Level Gauge Assy<br />
41-46<br />
Old Style Oil Indicator Gaske<br />
32- 46<br />
Gasket<br />
Crankcase Assembly<br />
238-G-46<br />
Cylinder Head Gasket<br />
Cylinder Head Assembly<br />
ACE-415-46<br />
Gasket<br />
Oil Level Gauge Assy<br />
346-46<br />
Water Filler Gasket<br />
Pressure Cond Group<br />
24- 46<br />
Top Cover Gasket<br />
Crankcase Assembly<br />
2-206 (2)<br />
O-Ring<br />
Rocker Arm<br />
Repair Kit<br />
246-46<br />
Valve Cover Gasket<br />
Rocker Arm Assembly<br />
213-46 (2)<br />
Oil Press<br />
Gauge Gasket<br />
Gov Assembly<br />
35-46<br />
Gasket<br />
Oil Level Gauge Assy<br />
347- 46<br />
Radiator Tank to Crankcase Gasket<br />
Pressure Condensing Group<br />
261-46<br />
Carb to Eblow Gasket<br />
Carburetor Assembly<br />
22- 46<br />
Cover Gasket<br />
Crankcase Assembly<br />
314- 46<br />
Fuel Pump Gasket<br />
Crankcase Assembly<br />
336- 46<br />
Radiator Core Gasket<br />
Pressure Condensing Group<br />
104 C-SERIES SERVICE, OPERATION & PARTS MANUAL – AEPB1 1-800-331-3662
C-66 COMPLETE GASKET SET GSC-66<br />
13<br />
12- 66<br />
Cyl Sleeve Gasket<br />
Crankcase Assembly<br />
330-17-46<br />
Gasket<br />
Starfire Assembly<br />
215-46<br />
Governor Gasket<br />
Governor Assembly<br />
330-11-46<br />
Magneto to Bracket Gasket<br />
Magneto Accessories<br />
173-46<br />
Screen Cover Gasket<br />
Strainer Assembly<br />
208-46<br />
Governor Housing Gasket<br />
Governor Assembly<br />
41-46<br />
Old Style Oil Indicator Gasket<br />
8- 46<br />
Cover Gasket<br />
Crankcase Assembly<br />
ACE-409-46-NS<br />
Gasket<br />
Oil Level Gauge Assy<br />
346-46<br />
Water Filler Gasket<br />
Pressure Cond Group<br />
32- 46<br />
Gasket<br />
Crankcase Assembly<br />
238-G-66<br />
Cylinder Head Gasket<br />
Cylinder Head Assembly<br />
ACE-415-46<br />
Gasket<br />
Oil Level Gauge Assy<br />
261-46 (2)<br />
Carb to Eblow Gasket<br />
Carburetor Assembly<br />
24- 66<br />
Top Cover Gasket<br />
Crankcase Assembly<br />
2-206 (2)<br />
O-Ring<br />
Rocker Arm<br />
Repair Kit<br />
246-66<br />
Valve Cover Gasket<br />
Rocker Arm Assembly<br />
213-46 (2)<br />
Oil Press<br />
Gauge Gasket<br />
Gov Assembly<br />
35-46<br />
Gasket<br />
Oil Level Gauge Assy<br />
347- 66<br />
Radiator Tank to Crankcase Gasket<br />
Pressure Condensing Group<br />
22- 46<br />
Cover Gasket<br />
Crankcase Assembly<br />
314- 46<br />
Fuel Pump Gasket<br />
Crankcase Assembly<br />
336- 66<br />
Radiator Core Gasket<br />
Pressure Condensing Group<br />
1-800-331-3662 ARROW ENGINE COMPANY<br />
105
13<br />
C-96 COMPLETE GASKET SET GSC-96<br />
12- 96<br />
Cyl Sleeve Gasket<br />
Crankcase Assembly<br />
330-17-46<br />
Gasket<br />
Starfire Assembly<br />
215-46<br />
Governor Gasket<br />
Governor Assembly<br />
330-11-46<br />
Magneto to Bracket Gasket<br />
Magneto Accessories<br />
173-46<br />
Screen Cover Gasket<br />
Strainer Assembly<br />
208-46<br />
Governor Housing Gasket<br />
Governor Assembly<br />
41-46<br />
Old Style Oil Indicator Gasket<br />
8- 46<br />
Cover Gasket<br />
Crankcase Assembly<br />
ACE-409-46-NS<br />
Gasket<br />
Oil Level Gauge Assy<br />
346-46<br />
Water Filler Gasket<br />
Pressure Cond Group<br />
32- 96<br />
Gasket<br />
Crankcase Assembly<br />
238-G-96<br />
Cylinder Head Gasket<br />
Cylinder Head Assembly<br />
ACE-415-46<br />
Gasket<br />
Oil Level Gauge Assy<br />
261-96 (2)<br />
Carb to Eblow Gasket<br />
Carburetor Assembly<br />
24 - 96<br />
Top Cover Gasket<br />
Crankcase Assembly<br />
2-206 (2)<br />
O-Ring<br />
Rocker Arm<br />
Repair Kit<br />
246-96<br />
Valve Cover Gasket<br />
Rocker Arm Assembly<br />
213-46 (2)<br />
Oil Press<br />
Gauge Gasket<br />
Gov Assembly<br />
35-46<br />
Gasket<br />
Oil Level Gauge Assy<br />
347- 96<br />
Radiator Tank to Crankcase Gasket<br />
Pressure Condensing Group<br />
22- 96<br />
Cover Gasket<br />
Crankcase Assembly<br />
314- 46<br />
Fuel Pump Gasket<br />
Crankcase Assembly<br />
336- 66<br />
Radiator Core Gasket<br />
Pressure Condensing Group<br />
106 C-SERIES SERVICE, OPERATION & PARTS MANUAL – AEPB1 1-800-331-3662
C-101 & C-106 COMPLETE GASKET SET GSC-106<br />
13<br />
12- 106 (3)<br />
Cyl Sleeve Gasket<br />
Crankcase Assembly<br />
330-17-46<br />
Gasket<br />
Starfire Assembly<br />
215-46<br />
Governor Gasket<br />
Governor Assembly<br />
330-11-46<br />
Magneto to Bracket Gasket<br />
Magneto Accessories<br />
173-46<br />
Screen Cover Gasket<br />
Strainer Assembly<br />
208-106<br />
Governor Housing Gasket<br />
Governor Assembly<br />
41-46<br />
Old Style Oil Indicator Gasket<br />
8- 46<br />
Cover Gasket<br />
Crankcase Assembly<br />
ACE-409-46-NS(2)<br />
Gasket<br />
Oil Level Gauge Assy<br />
346-46<br />
Water Filler Gasket<br />
Pressure Cond Group<br />
32- 96<br />
Gasket<br />
Crankcase Assembly<br />
238-G-106<br />
Cylinder Head Gasket<br />
Cylinder Head Assembly<br />
336-A-106<br />
Gasket<br />
Radiator Core<br />
261-106 (2)<br />
Carb to Eblow Gasket<br />
Carburetor Assembly<br />
24-96<br />
Top Cover Gasket<br />
Crankcase Assembly<br />
246-106<br />
Outer Valve Cover Gasket<br />
Rocker Arm Assembly<br />
35-46<br />
Gasket<br />
Oil Level Gauge Assy<br />
2-206 (2)<br />
O-Ring<br />
Rocker Arm<br />
Repair Kit<br />
213-46 (2)<br />
Oil Press<br />
Gauge Gasket<br />
Gov Assembly<br />
246-A-106<br />
Inner Valve Cover Gasket<br />
Rocker Arm Assembly<br />
347- 96<br />
Radiator Tank to Crankcase Gasket<br />
Pressure Condensing Group<br />
22- 96<br />
Cover Gasket<br />
Crankcase Assembly<br />
314- 46<br />
Fuel Pump Gasket<br />
Crankcase Assembly<br />
336- 106<br />
Radiator Core Gasket<br />
Pressure Condensing Group<br />
1-800-331-3662 ARROW ENGINE COMPANY<br />
107
14<br />
An easy, inexpensive way to reduce production costs on pumping wells is to properly maintain<br />
the pumping engine. Both the slow speed single and twin cylinder type engines are designed<br />
to operate unattended, con tin u ous ly, for weeks at a time. However, periodic preventive<br />
maintenance will extend the life of the engines by two to three times, and substantially reduce<br />
repair costs.<br />
Ignition systems head the list of recommendations for complete engine checkups. Because<br />
more production hours are lost due to moisture in the ignition system than any other reason,<br />
an adequate cover should be provided to keep rain and moisture off the magneto, or alternator,<br />
if a breakerless ignition system is used. Wires should be inspected for cracks in insulation;<br />
and connections should be tight and solid. On shielded or low-tension systems, ignition<br />
coils should be mounted with the spark plug connections pointed down so they don’t collect<br />
moisture.<br />
Maintenance procedures may be<br />
DATES PERFORMED<br />
needed more frequently depending on<br />
operating conditions.<br />
DAILY<br />
<strong>Service</strong> and Maintenance Schedule<br />
WEEKLY<br />
MONTHLY<br />
Visually Check oil level<br />
Visually check water level.<br />
Visually check fan belt tension.<br />
Check clutch adjustment - clutch should snap in<br />
and out fi rmly.<br />
Visually inspect condenser fi ns for dirt and lint.<br />
Visually check drive belt tension - belts should<br />
not fl op or slip, but pull load.<br />
Inspect ignition wiring.<br />
Clean and gap spark plug.<br />
Check governor lubrication – remove oil line at<br />
governor to ascertain fl ow.<br />
Clean air fi lter.<br />
Clean breathers.<br />
Change oil.<br />
Change oil fi lter.<br />
3 MONTHS Check valve clearance.<br />
6 MONTHS Lubricate clutch main bearing.<br />
Lubricate clutch release bearing-one or two<br />
shots with grease gun.<br />
Lubricate clutch pilot bearing - one or two shots<br />
with a grease gun.<br />
ANNUALLY Clean and fl ush cooling system.<br />
Clean engine<br />
exterior<br />
Oil change<br />
Filter change<br />
Clean air cleaner<br />
Clean & flush<br />
cooling system<br />
Install new clutch<br />
plates<br />
108 C-SERIES SERVICE, OPERATION & PARTS MANUAL – AEPB1 1-800-331-3662
C-SERIES & L-SERIES ENGINE WARRANTY July 2008<br />
CONTINUOUS DUTY DEFINITION: The highest load and speed which can be applied, subject to Arrow <strong>Engine</strong> Company’s ratings in effect at time of sale.<br />
I. TERMS OF EXPRESS LIMITED WARRANTY<br />
Arrow <strong>Engine</strong> Company warrants that it will repair or replace, at its election and expense, any part of an engine, or product (hereinafter referred to as<br />
"Products") manufactured by Arrow <strong>Engine</strong> Company, which proves to have had a defect in material or workmanship. All warranty work must be preapproved<br />
by Arrow <strong>Engine</strong> Company.<br />
II. TERM LIMITATIONS OF EXPRESS LIMITED WARRANTY<br />
This coverage shall commence upon initial Product start-up date and shall expire upon the earlier of the following:<br />
1. 1 year after the initial Product start-up date; or<br />
2. 18 months after the original shipment date of the covered Products by Arrow <strong>Engine</strong> Company.<br />
3. Arrow warrants to the purchaser that the following parts in new engines manufactured by Arrow shall be free of defects in materials and workmanship for<br />
thirty-six (36) months from the date of factory shipment:<br />
Flywheel Housing Flywheels Water Hopper Cylinder-Head Casting Camblock<br />
Crankcase Casting Camshaft Connecting Rod Sub-Base of <strong>Engine</strong> Crankshaft<br />
III. ARROW ENGINE COMPANY’S RESPONSIBILITIES UNDER THE EXPRESS LIMITED WARRANTY<br />
Arrow <strong>Engine</strong> Company shall be responsible for:<br />
A. The repair or replacement, at Arrow <strong>Engine</strong> Company’s election, of covered defective parts and all reasonable labor required regarding a warranted failure<br />
during the express limited warranty and term. All such labor shall be provided by Arrow <strong>Engine</strong> Company’s authorized contractor or distributor.<br />
B. Reasonable and necessary travel (total mileage not to exceed 300 miles) and expenses incurred by Arrow <strong>Engine</strong> Company's authorized contractors or<br />
distributor. Additional mileage and/or travel by air, water or land will need preauthorization from Arrow <strong>Engine</strong> Company.<br />
C. Replacement of lubricating oil, coolant, filter elements, or other normal maintenance items that are contaminated and/or damaged as a direct result of a<br />
warranted failure.<br />
NOTWITHSTANDING THE FOREGOING, ARROW ENGINE COMPANY SHALL NOT BE RESPONSIBLE FOR LABOR COSTS ASSOCIATED<br />
WITH WARRANTY CLAIMS.<br />
IV. OWNER/ DISTRIBUTOR/ CONTRACTOR'S RESPONSIBILITIES UNDER THE EXPRESS LIMITED WARRANTY<br />
Owner shall be responsible for:<br />
A. The operation and maintenance of the Product within the guidelines established by Arrow <strong>Engine</strong> Company.<br />
B. Making the Product available to Arrow <strong>Engine</strong> Company or authorized contractors or distributors for any warranty repair, during normal business hours.<br />
C. All additional costs incurred for premium or overtime labor, should owner request that repairs be made on a premium overtime schedule.<br />
D. All costs incurred as the result of removal or reinstallation of the Product as may be required to effect any warranted repair.<br />
E. All administrative costs and expenses resulting from a warranted failure.<br />
F. Any costs of transportation, towing, repair facilities, or associated costs.<br />
G. Loss of revenue and loss of/or damage to real and/or personal property.<br />
H. All warranty work must be pre-approved by Arrow <strong>Engine</strong> Company<br />
I. Warranted repairs not to exceed 50% of the product (<strong>Engine</strong>) replacement cost without prior approval from Arrow <strong>Engine</strong> Company. Replacement cost<br />
equates to distributor net price from factory.<br />
J. Compliance with all local, state and federal laws.<br />
V. LIMITATION OF ARROW ENGINE COMPANY’S OBLIGATIONS<br />
The obligations of Arrow <strong>Engine</strong> Company under this express limited warranty shall be waived and voided, and Arrow <strong>Engine</strong> Company shall not, thereafter,<br />
be responsible for:<br />
A. Any failure resulting from owner or operator abuse or neglect, including but not by way of limitation, any operation, installation, application, or maintenance<br />
practice not in accordance with guidelines or specifications established by Arrow <strong>Engine</strong> Company; or<br />
B. Any failure resulting from unauthorized modifications or repairs of the Products or;<br />
C. Any failure resulting from overload, overspeed, overheat, accident, improper storage; or<br />
D. Failure of owner, contractor or distributor to promptly provide notice of a claimed defect - all warranty claims must be authorized, documented, and<br />
submitted within 30 days of failure date while under the warranty period. Claims submitted 90 days after the repair date are subject to a 20% processing fee.<br />
E. Failure of Products for which Arrow <strong>Engine</strong> Company did not receive properly completed start-up reports; or<br />
F. Repairs of a covered failure performed with non-genuine Arrow <strong>Engine</strong> Company parts; or<br />
G. Repairs of a covered failure performed by non-authorized contractors or distributors; or<br />
H. Failure to make Products available to Arrow <strong>Engine</strong> Company or its authorized representatives, or<br />
I. Failure to supply documents such as drawing and specifications relating to the specific application of the Products.<br />
VI. APPLICABILITY AND EXPIRATION<br />
The warranties set out above are extended to all owners in the original chain of distribution. The warranties and obligations of Arrow <strong>Engine</strong> Company shall expire<br />
and be of no further effect upon the dates of expiration of the applicable warranty periods. The foregoing sets forth Arrow <strong>Engine</strong> Company’s only obligations<br />
and owners’ exclusive remedy for breach of warranty, whether such claims are based on breach of contract, tort (including negligence and strict liability), or other<br />
theories, and the foregoing is expressly in lieu of other warranties whatsoever expressed, implied, and statutory, including without limitation, the IMPLIED WAR-<br />
RANTIES OF MERCHANTABILITY AND FITNESS.<br />
Notwithstanding the preceding, in no event shall Arrow <strong>Engine</strong> Company be liable for any direct, special, incidental or consequential damages (whether denominated<br />
in contract, tort, strict liability, negligence or other theories) arising out of this Agreement or the use of any Products provided under this Agreement.<br />
Any action arising hereunder or relating hereto, whether based on breach of contract, tort (including negligence and strict liability), or other theories must be commenced<br />
within one (1) year after the cause of action accrues or it shall be barred.<br />
With respect to products not manufactured by Arrow <strong>Engine</strong> Company, Arrow makes no representations or warranties of whatsoever nature, directly or indirectly,<br />
expressed or implied including but not limited to any representations or warranties with respect to suitability, durability, fitness for a particular purpose or merchantability,<br />
except to the extent that Arrow can enforce warranties provided by the manufacturers of such parts.