Fallout 3 - Experimental MIRV - Customwalkthrough.org
Fallout 3 - Experimental MIRV - Customwalkthrough.org
Fallout 3 - Experimental MIRV - Customwalkthrough.org

Create successful ePaper yourself
Turn your PDF publications into a flip-book with our unique Google optimized e-Paper software.
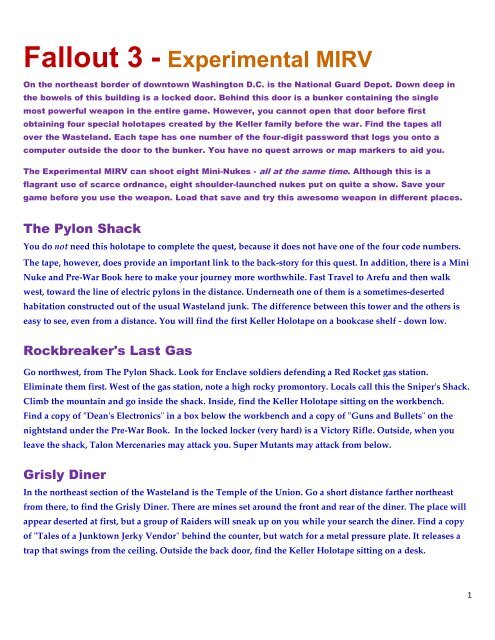
<strong>Fallout</strong> 3 - <strong>Experimental</strong> <strong>MIRV</strong><br />
On the northeast border of downtown Washington D.C. is the National Guard Depot. Down deep in<br />
the bowels of this building is a locked door. Behind this door is a bunker containing the single<br />
most powerful weapon in the entire game. However, you cannot open that door before first<br />
obtaining four special holotapes created by the Keller family before the war. Find the tapes all<br />
over the Wasteland. Each tape has one number of the four-digit password that logs you onto a<br />
computer outside the door to the bunker. You have no quest arrows or map markers to aid you.<br />
The <strong>Experimental</strong> <strong>MIRV</strong> can shoot eight Mini-Nukes - all at the same time. Although this is a<br />
flagrant use of scarce ordnance, eight shoulder-launched nukes put on quite a show. Save your<br />
game before you use the weapon. Load that save and try this awesome weapon in different places.<br />
The Pylon Shack<br />
You do not need this holotape to complete the quest, because it does not have one of the four code numbers.<br />
The tape, however, does provide an important link to the back-story for this quest. In addition, there is a Mini<br />
Nuke and Pre-War Book here to make your journey more worthwhile. Fast Travel to Arefu and then walk<br />
west, toward the line of electric pylons in the distance. Underneath one of them is a sometimes-deserted<br />
habitation constructed out of the usual Wasteland junk. The difference between this tower and the others is<br />
easy to see, even from a distance. You will find the first Keller Holotape on a bookcase shelf - down low.<br />
Rockbreaker's Last Gas<br />
Go northwest, from The Pylon Shack. Look for Enclave soldiers defending a Red Rocket gas station.<br />
Eliminate them first. West of the gas station, note a high rocky promontory. Locals call this the Sniper's Shack.<br />
Climb the mountain and go inside the shack. Inside, find the Keller Holotape sitting on the workbench.<br />
Find a copy of "Dean's Electronics" in a box below the workbench and a copy of "Guns and Bullets" on the<br />
nightstand under the Pre-War Book. In the locked locker (very hard) is a Victory Rifle. Outside, when you<br />
leave the shack, Talon Mercenaries may attack you. Super Mutants may attack from below.<br />
Grisly Diner<br />
In the northeast section of the Wasteland is the Temple of the Union. Go a short distance farther northeast<br />
from there, to find the Grisly Diner. There are mines set around the front and rear of the diner. The place will<br />
appear deserted at first, but a group of Raiders will sneak up on you while your search the diner. Find a copy<br />
of "Tales of a Junktown Jerky Vendor" behind the counter, but watch for a metal pressure plate. It releases a<br />
trap that swings from the ceiling. Outside the back door, find the Keller Holotape sitting on a desk.<br />
1
Hallowed Moors Cemetery<br />
Go north from Big Town or northwest from Meresti Train yard, which is north of Megaton. You will see what<br />
is left of a chapel, surrounded by gravestones. Super Mutants defend this destroyed church. Just inside the<br />
front door is a podium. On the podium is the Keller Holotape. Inside the podium is a "Big Book of Science"<br />
Consider releasing the Captive. Near the Captive, pick up a small crate containing two boxes of Abraxo<br />
Cleaner or detergent. Underneath that box, find two Stimpaks. Find a Mini Nuke inside a wooden crate on the<br />
table. Find three Frag Grenades in an overturned wooden crate, behind the table near two ammunition boxes.<br />
Find a Chinese Assault Rifle on the Makeshift Bedding in the center of the room. On the shelves near the<br />
Captive, is a "D.C. Journal of Internal Medicine".<br />
Anchorage Memorial<br />
East of Megaton, on the west bank of the Potomac, is Wilhelm's Wharf. Walk east from Wilhelm's Wharf,<br />
across the river bridge, to the Anchorage Memorial. This bronze monument commemorates the battles at the<br />
Anchorage Front Line in Alaska, during the war. The monument rests on a manmade island in the Potomac<br />
River. Someone has lined the small bridge with many Frag Mines. Watch out for Mirelurks. From the east side<br />
of the bridge, swim east across the narrow channel. You will absorb a few Rads. A Super Mutant and two<br />
Centaurs guard this site. Walk to the two tractor-trailer trucks, one tan and one blue. Behind the trucks, find a<br />
tent. Inside the tent, on the table, is the final Keller Holotape. Consider releasing the Captive.<br />
Look inside the tan trailer for some treasure.<br />
The National Guard Depot<br />
The rubble in Washington D.C. prevents an easy approach to the depot. If you skirt around the edges of the<br />
city, you will avoid much of that debris. Start at the Super Duper Mart, northeast of Megaton. Then cross the<br />
bridge northeast, over the Potomac River. On the other side of the river, begin a long trek, generally east,<br />
almost to the edge of the map. The armory is well marked, with a big sign on the front of the building and a<br />
fenced parking lot across the street containing large green military trucks.<br />
Get ready for a brutal fight against many types of robots and turrets as you work your way through this<br />
building. A Tesla Cannon or a Missile Launcher (take two - they break easily) work well against these very<br />
tough enemies, as long as you have enough space in front of you. However, if your opponent is too close, then<br />
you will take damage as well. At close quarters, a Gauss Rifle works better, because of its knockback<br />
capability. Lesser weapons will also work of course, but it will take you a lot longer to destroy the robots.<br />
When you get to the front door of the armory, save your game. Enter the front door and turn east. Throw a<br />
grenade there to explode the flammable gas. Notice that the south wall ends near the steps. Your first Sentry<br />
Bot is on the other side of that wall. Peek around the end of the wall and surprise the robot.<br />
2
Now go up the short flight of stairs to the top. Notice that the floors have collapsed in many places.<br />
Carefully jump over the pipe in front of you southwest. You might slip and fall down through two holes in<br />
the floors during this jump. If so, climb the north stairs, to find the armory entrance again, to the west.<br />
There is another way to get to the floor on the other side of the pipe. From the same floor as the armory<br />
entrance, walk all the way to the south wall (past the hole). Then take the stairway up.<br />
Now, on the other side of the pipe, go through the doorway to the west. Then go through a doorway north.<br />
You will find yourself in a small room with office cubicles. Go west, through this room and out through the<br />
north door at the end. Go west through the next large room, and then turn south around the corner.<br />
Destroy two turrets on the ceiling. Kill a Sentry Bot. Now walk south, as far as you can, to a set of stairs.<br />
Be on the lookout for a Sentry Bot as you walk down the stairs. Then walk as far east as you can. Zigzag<br />
through a dining room with two Nuka Cola machines, to a "Door to Depot Training Wing". On the other side<br />
of this door, if you did not find a Sentry Bot at the bottom of the stairs, it will be on the other side of the door.<br />
Go east, just past the hole in the wall. Then turn north and walk a short distance to a doorway. Beyond the<br />
doorway is a hallway with American flags at both ends, defended by a Sentry Bot and a turret. The closet<br />
across the hall has a computer terminal (average) that turns off the turret. The office at the top of the stairway<br />
at the east end of the hallway has a locked (average) safe with some Caps and Pre-war money.<br />
Now go west, down the hallway to the corner and then turn north. Walk to a doorway on the eastern wall.<br />
The room beyond has a lot of ordnance for you to loot. Turn right (east) the first chance you get, through a set<br />
of double-doors. The doors open to the firing range. Two Sentry Bots and a Mister Handy (or Protectron)<br />
defend the room from behind sandbag emplacements at the other end of the room. The left end of the firing<br />
booths gives you access to the room. Cross the room and exit through a door on the southeast wall. On the<br />
other side of that door, take four First Aid Kits. Then zigzag through the room, to a "Door to Depot Offices".<br />
Beyond that door, walk across the hallway and go through another door. Go south to a balcony overlooking a<br />
large room full of office cubicles. In the center of this room is another balcony, with a door on the south wall<br />
that you need to go through. You must go down one stairway and up another, to get to that doorway. There are<br />
two robots down below you, and also a pair of nasty turrets above that door on the south wall. Because the<br />
turrets are immobile, they are vulnerable to missiles. Behind a locked door (average) on the west end of the<br />
room is a computer terminal (average) that can turn off the turrets.<br />
Once you make it through that south door, continue past a large wooden u-shaped counter. Behind the counter<br />
are steps going up. At the top of the steps, fight two robots and then turn west, and go all the way to the wall.<br />
3
Now go north and duck your head down, under a big piece of collapsed ceiling. Circle around to the other side<br />
of it. Notice that the collapsed ceiling acts as a ramp to allow you access to the floor above. Go up the ramp,<br />
fight another Sentry Bot, and then go through the door at the top. Then take just a few more steps to a "Door to<br />
National Guard Depot".<br />
On the other side of that door, look west to see an electric switch mounted on the wall. Activate that switch.<br />
Now drop down, from the location of the switch, through two collapsed floors. Kill a Sentry Bot at the bottom.<br />
Go north, through a door with a pair of flashing lights above it, into a small metallic room. Find another<br />
electric switch on the north wall of that room. Activate this switch. A floor plate will slide back to reveal a set<br />
of stairs leading down.<br />
Go down those stairs to a door marked "Door to National Guard Armory". On the other side of the door is a<br />
"Utility Door". Activate the electrical switch to the right of the door. The door will open. Beyond it is a room<br />
full of weapons and ammunition. At the far south end of the room are a "Bunker Access Terminal" and a<br />
locked door to the bunker. Pick up the Small Guns Bobblehead on a shelf near the terminal.<br />
Activate the terminal and select "Enter Access Code". If you have the four Keller Holotapes containing the<br />
password numbers, the locked door will open. Inside, kill a ghoul Glowing One and then loot the room.<br />
Open a locked (average) safe for a few Caps and Pre-war money. In addition to the <strong>Experimental</strong> <strong>MIRV</strong> and<br />
five Mini Nukes, you will find the skeletal remains of three members of the Keller family.<br />
To get out of the building, retrace your steps to the door with the flashing lights. Go northeast through this<br />
room and look for a sign on the wall "Stairs". Go east, through the doorway next to the sign, to find a stairway.<br />
At the top of the stairs, walk north. Skirt around the holes in the floor until you reach the north wall.<br />
Turn west and walk to the double entrance doors from where you started.<br />
4
<strong>Fallout</strong> 3 - Anchorage War Memorial<br />
Mounted on what was previously Theodore Roosevelt Island in the Potomac, a bronze statue of three<br />
soldiers is still standing after 200 years exposed to the elements. The memorial commemorates the<br />
battle for Anchorage, Alaska, during the war. The pre-war government built a sprawling underground<br />
installation beneath the base of the monument. This structure may have doubled as a shelter during<br />
the war. It consists of four interior sections: Facility, Facility Bay, Offices, and Service Entrance.<br />
After the war, a group of Wastelanders encouraged the Mirelurk population to breed inside the<br />
facility. Those Wastelanders systematically harvested the Mirelurks, selling large quantities of their<br />
meat to the survivors of the war. This business was successful enough that it had to hire new<br />
workers. According to the note on Ted's corpse, he suspected one of those employees of sabotaging<br />
the operation. A note on the saboteur's corpse states that a competing food supplier was paying<br />
him. Somehow, the Mirelurks escaped confinement. They promptly killed everyone in the complex.<br />
Accessing the Island<br />
The monument rests on a manmade island in the middle of the Potomac River. A long bridge connects the<br />
island to the west bank of the river. On the bridge are many Frag Mines. There are four entrances into the<br />
facility: one on the northwest side of the monument which connects to the Facility, one on the southeast that<br />
connects to the Service Entrance, one to the south (underwater) that connects to the Facility Office, and<br />
one inside a concrete well on the west side of the monument - the Facility Bay. Use any of these entrances.<br />
Facility<br />
This is the living quarters and main workspace for the Wastelanders who ran the meat-processing facility.<br />
The area consists of two floors with minor loot strewn about. Exits on the east wall of both floors lead to the<br />
Facility Bay. On the Second Floor, there is a Workbench against the south wall with a Bottlecap Mine.<br />
Be wary of one Mirelurk inhabiting this floor.<br />
On the First floor (below the Second Floor), in the west room, is an unlocked safe containing a Door<br />
Component and a copy of a "Dean's Electronics" Skill Book. The room served as a medical clinic and has three<br />
Pre-War Books. There is a DC journal of Internal Medicine on a table with a battery-powered lamp, east of the<br />
safe. The book is hard to see, behind the lamp. Also on the First Floor, is a Nuka-Cola Vending Machine next<br />
to the stairwell on the north wall. Look behind that machine to find the "Holotape Access Code".<br />
5
Facility Bay<br />
This Bay serves as a hub that connects the other three areas together. The Bay consists of four floors, connected<br />
by a central stairway. You can identify the Second Floor by its three exits that lead to the Facility, Facility<br />
Offices and Service Entrance. The First Floor (below the second) has several Mirelurk spawning pods<br />
and an exit to the Service Entrance. The Third Floor (above the second) has an exit to the Facility. The Fourth<br />
Floor, at the very top of the stairs, exits to the outside. Access the computer terminal (average) next to the door,<br />
to unlock the door. Four Mirelurks patrol this area. Find the dead saboteur (with a note) on the top floor.<br />
Offices<br />
There are two offices. The one with the intact floor, just past the entrance, has a safe. There is a Nuka-Cola<br />
Vending Machine against the west wall, next to some Lockers and bathrooms at the end of a short hallway.<br />
The other office has a collapsed floor that serves as a ramp down to a large, natural, underground Mirelurk<br />
breeding cavern. You will find that radioactive water half-fills and, near the end, completely fills the cavern.<br />
Several Mirelurks live here. At the very end of the cave complex is an underwater exit to the Wasteland.<br />
Service Entrance<br />
This is easily the most confusing part of the underground. There are Three Floors. The First Floor connects,<br />
through a door on the west wall, to a small sewer area serving as a secondary breeding ground for the<br />
Mirelurks. You may have visited this area earlier in the Wasteland Survival Guide quest. Go through the door<br />
and travel west to the corner, and then right (north) to a four-way intersection. Continue straight through this<br />
intersection until the last door on your right (east). This door is marked as the Utility Closet.<br />
Open the closet with the Door Component that you pilfered from the safe in the clinic in the Memorial<br />
Facility; but only if you have a Repair Skill of 35 or above. If you have a Repair Skill of 95+, you do not need<br />
the Door Component to open the Utility Closet. Inside the closet find the Anchorage Stash Key, the Anchorage<br />
War Memorial Stash holotape, a Nuka Cola Quantum, a "U.S. Army: 30 Handy Flamethrower Recipes" Skill<br />
Book and "The Tenderizer" (a fancy sledgehammer).<br />
Downstairs, below the First Floor, is the Second Floor. This is the dining and kitchen area, containing three<br />
First Aid Kits. There is a door here leading to the Facility Bay. On the west wall is another door, behind which<br />
is a set of stairs leading down to a pair of small rooms. That pair of rooms is the Third Floor.<br />
Another access to the Third Floor is by a set of stairs near the kitchen in the northeast corner of the Second<br />
Floor. One room on the Third Floor has a set of three refrigerators. The one on the right is slightly smaller.<br />
It hides a secret compartment. You must have the Stash Key (found in the Utility Closet) in your inventory,<br />
to open the secret compartment. Inside are many Caps (amount varies) and a Recipe for Mirelurk Cakes.<br />
Chris Barton - Revised 04.11.2013<br />
6