Bioscrypt / L-1 Setup and Enrollment - Galaxy Control Systems
Bioscrypt / L-1 Setup and Enrollment - Galaxy Control Systems
Bioscrypt / L-1 Setup and Enrollment - Galaxy Control Systems
Create successful ePaper yourself
Turn your PDF publications into a flip-book with our unique Google optimized e-Paper software.
System <strong>Galaxy</strong> Quick Guide<br />
CONFIGURATION AND OPERATION<br />
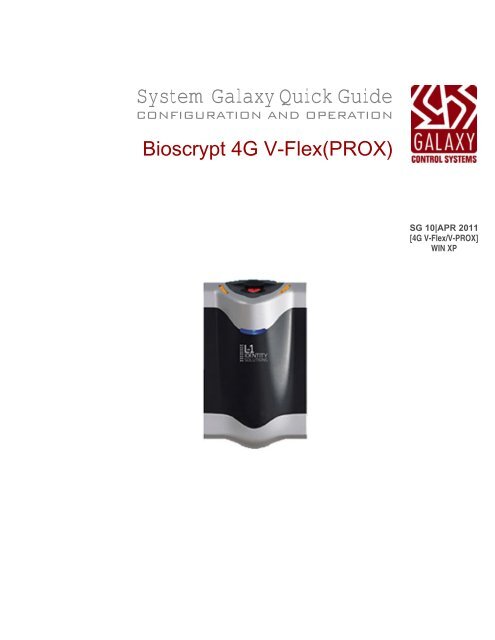
<strong>Bioscrypt</strong> 4G V-Flex(PROX)<br />
SG 10|APR 2011<br />
[4G V-Flex/V-PROX]<br />
WIN XP
System <strong>Galaxy</strong><br />
System <strong>Galaxy</strong> Quick Guide for <strong>Bioscrypt</strong> / L‐1 <strong>Setup</strong> <strong>and</strong> <strong>Enrollment</strong> System <strong>Galaxy</strong> Quick Guide<br />
Quick Guide<br />
BIOSCRYPT / L-1<br />
Configuration &<br />
Operation<br />
V‐Flex 4G, V‐PROX, Vers 4.1.10<br />
1 st Edition Apr 2011<br />
Revised July 2011<br />
<strong>Galaxy</strong> <strong>Control</strong> <strong>Systems</strong><br />
3 North Main Street<br />
Walkersville MD 21793<br />
www.galaxysys.com<br />
Information in this document is subject to change without notice.<br />
Therefore, no claims are made as to the accuracy or completeness of this document.<br />
<strong>Galaxy</strong> <strong>Control</strong> <strong>Systems</strong> makes no claims on the requirements or limitations of<br />
software or devices of 3 rd Party Manufacturers. Every effort is made to include all<br />
known requirements <strong>and</strong> capabilities as they relate to System <strong>Galaxy</strong>. Information<br />
herein may not supersede requirements of 3 rd party manufacturers.<br />
Copyright © 2011 <strong>Galaxy</strong> <strong>Control</strong> <strong>Systems</strong> All rights reserved<br />
No part of this document may be reproduced, copied, adapted, or transmitted, in<br />
any form or by any means, electronic or mechanical, for any purpose, without the<br />
express written consent of <strong>Galaxy</strong> <strong>Control</strong> <strong>Systems</strong>. Copyright protection claims<br />
include all forms <strong>and</strong> matters of copyrighted material <strong>and</strong> information, including but<br />
not limited to, material generated from the software programs, which are displayed<br />
on the screen such as icons, look <strong>and</strong> feel, etc.<br />
Trademarks<br />
Microsoft ® , Windows ® , Windows NT ® , MSDN ® <strong>and</strong> SQL Server TM are registered<br />
trademarks of Microsoft Corporation in the U.S. <strong>and</strong> other countries. DbaMgr2k may<br />
or may not be a registered trademark in the U.S. <strong>and</strong> other countries.<br />
<strong>Bioscrypt</strong> is a trademark of <strong>Bioscrypt</strong> Inc.<br />
Adobe ® , Acrobat ® are registered trademarks of Adobe <strong>Systems</strong> Inc.<br />
Graphics <strong>and</strong> illustrations by Technical Writer.<br />
Page 2 of 40
Table of Contents<br />
System <strong>Galaxy</strong> Quick Guide for <strong>Bioscrypt</strong> / L‐1 <strong>Setup</strong> <strong>and</strong> <strong>Enrollment</strong> System <strong>Galaxy</strong> Quick Guide<br />
1. INTRODUCTION TO THE BIOSCRYPT INTERFACE.................................................4<br />
INFORMATION COVERED IN THIS MANUAL.......................................................................................4<br />
TYPES OF BIOMETRIC CREDENTIALS SUPPORTED...........................................................................4<br />
OVERVIEW OF GALAXY ENROLLMENT PROCESS ........................................................5<br />
SYSTEM INTEGRATION VIA SHARED or LINKED SQL SERVERS...........................................................5<br />
HOW BIOMETRIC CREDENTIALS ARE MADE .....................................................................................5<br />
HOW BIOMETRIC CREDENTIALS ARE STORED .................................................................................5<br />
INTEGRATION REQUIREMENTS (order dependent) ...................................................6<br />
2. SYSTEM INSTALLATION ............................................................................................7<br />
INSTALL READER HARDWARE ........................................................................................................7<br />
READER WIRING CHART ................................................................................................................7<br />
INSTALL SYSTEM GALAXY v10.0 (or higher) .......................................................................................8<br />
INSTALL SECURE ADMIN DATABASE SERVER ..................................................................................8<br />
INSTALL SECURE ADMIN CLIENT ..................................................................................................13<br />
3. REGISTER & CONFIGURE V-Flex (Prox) Device in Secure Admin ......................15<br />
REGISTER L-1 READER IN SECURE ADMIN (SADB)..........................................................................15<br />
TCP/IP vs. USB ............................................................................................................................15<br />
IF using TCP/IP to detect <strong>and</strong> register, follow the step 6 below:................................................................17<br />
IF using USB to connect <strong>and</strong> register, follow the step 7 below:.................................................................18<br />
To continue registering, follow the steps below:....................................................................................19<br />
CONFIGURE L-1 DEVICE SETTINGS for V-FLEX (PROX) ....................................................................21<br />
Configuring Device Mode: ...............................................................................................................22<br />
Configuring Wieg<strong>and</strong> Format:...........................................................................................................23<br />
CREATING CUSTOM 32-BIT WIEGAND FORMAT...............................................................................25<br />
VIEW TEMPLATES IN L-1 READER .................................................................................................26<br />
4. SYSTEM GALAXY CONFIGURATION ......................................................................27<br />
REGISTER the L-1 READER IN SYSTEM GALAXY (SysGal database) ....................................................27<br />
ENABLE BIOSCRYPT AS THE ENROLLMENT SYSTEM AT SG WORKSTATION......................................28<br />
CONFIGURE THE READER PROPERTIES FOR AN L-1 READER IN SG.................................................29<br />
5. ENROLLING & MANAGING TEMPLATES................................................................30<br />
ENROLL FINGERPRINT [IDENTIFY MODE] IN CARDHOLDER SCREEN.................................................30<br />
ENROLL CARD AND FINGERPRINT [VERIFY MODE] IN SG CARDHOLDER ...........................................32<br />
See the Appendix (section 6 of this guide) for more indications <strong>and</strong> messages associated with<br />
connecting, capturing, saving <strong>and</strong> loading templates.LOADING ALL TEMPLATES UTILITY...................33<br />
LOADING ALL TEMPLATES UTILITY................................................................................................34<br />
6. APPENDIX: TROUBLESHOOTING ...........................................................................35<br />
GALAXY MESSAGE LOGGING (Communication <strong>Control</strong> Window)...........................................................35<br />
GALAXY USER MESSAGES - BY OPERATOR ACTION .......................................................................36<br />
REGISTER READER with USB (private LAN/ not using DHCP) ...............................................................39<br />
ADDING A LINKED SQL CONNECTION STRING TO SYSGAL...............................................................40<br />
Page 3 of 40
System <strong>Galaxy</strong> Quick Guide for <strong>Bioscrypt</strong> / L‐1 <strong>Setup</strong> <strong>and</strong> <strong>Enrollment</strong> System <strong>Galaxy</strong> Quick Guide<br />
1. INTRODUCTION TO THE BIOSCRYPT INTERFACE<br />
For convenience, this manual includes basic setup in SecureAdmin for the 4G V‐FLEX PROX Reader software<br />
that is required to integrate with System <strong>Galaxy</strong>. Consult the <strong>Bioscrypt</strong> Manuals for instructions on any<br />
SECURE ADMIN features not covered in this document.<br />
INFORMATION COVERED IN THIS MANUAL<br />
This manual covers the following …<br />
Hardware wiring from the 4G V‐FLEX PROX reader to the <strong>Galaxy</strong> access control panel<br />
Basic install steps for SecureAdmin Server/Client (as example – see Manufacturer’s Guide for in‐depth)<br />
Configuration of shared SQL Server settings<br />
Registering the 4G V‐FLEX PROX reader within the SecureAdmin<br />
Configuring 4G V‐FLEX PROX device’s Reader Mode <strong>and</strong> Wieg<strong>and</strong> Settings in SecureAdmin<br />
Registering <strong>and</strong> setting System <strong>Galaxy</strong> for Biometric Support using L‐1 Solutions<br />
Configuring <strong>Galaxy</strong> reader port to work with the 4G V‐FLEX PROX reader<br />
Enrolling credentials from within System <strong>Galaxy</strong><br />
Mass loading templates to a reader from System <strong>Galaxy</strong><br />
TYPES OF BIOMETRIC CREDENTIALS SUPPORTED<br />
System <strong>Galaxy</strong> 10 (SG 10) integrates with the <strong>Bioscrypt</strong> L‐1 V‐Flex 4G, V‐PROX reader as follows:<br />
CURRENTLY SUPPORTED ON WINDOWS XP ONLY<br />
READER MODE CREDENTIALS<br />
SECURE ADMIN<br />
CARD FORMAT<br />
SYSTEM GALAXY<br />
CARD FORMAT<br />
IDENTIFY (1:N) finger‐only 10K Templates Custom 32‐bit Wieg<strong>and</strong> (a) <strong>Galaxy</strong> St<strong>and</strong>ard<br />
VERIFY (1:1)<br />
Prox card + finger in device<br />
500K Templates<br />
26‐bit‐pass‐thru<br />
HID Corporate 1000<br />
26‐bit Wieg<strong>and</strong><br />
HID Corporate 1000<br />
Card Only (b) Prox card pass through Same as VERIFY mode<br />
(a) Custom 32‐bit Wieg<strong>and</strong> must be manually created in SecureAdmin (i.e. is not predefined); Note: the code is required<br />
for identification in access control panel ‐ a physical card is not issued.<br />
(b) Card Only mode, means the reader uses VERIFY mode, but disables biometric verification for all users. You must<br />
enroll both card <strong>and</strong> fingerprints for all users. Biometric verification is disabled after templates are loaded to the reader.<br />
All credentials are sent to the access control panel without finger verification.<br />
Page 4 of 40
System <strong>Galaxy</strong> Quick Guide for <strong>Bioscrypt</strong> / L‐1 <strong>Setup</strong> <strong>and</strong> <strong>Enrollment</strong> System <strong>Galaxy</strong> Quick Guide<br />
OVERVIEW OF GALAXY ENROLLMENT PROCESS<br />
Fingerprints must be enrolled from System <strong>Galaxy</strong>. SG does not pull templates from SADB. Card<br />
<strong>and</strong> Template data are stored in the SysGal database (i.e. not in the SADB).<br />
SYSTEM INTEGRATION VIA SHARED or LINKED SQL SERVERS<br />
System <strong>Galaxy</strong> uses Linked or Shared SQL server to SecureAdmin (SADB) connection to pull the List of L‐1<br />
Devices <strong>and</strong> IP Addresses for enrolling <strong>and</strong> mapping readers to doors. System <strong>Galaxy</strong> warns the operator at<br />
time of log‐in that biometric features are disabled if SQL Database connection cannot be established.<br />
HOW BIOMETRIC CREDENTIALS ARE MADE<br />
The System <strong>Galaxy</strong> captures the fingerprint/s <strong>and</strong> card code <strong>and</strong> assigns access privileges. The credential is<br />
automatically loaded to the reader when cardholder record is saved.<br />
HOW BIOMETRIC CREDENTIALS ARE STORED<br />
The fingerprint templates are also stored in blob format in the System <strong>Galaxy</strong> database.<br />
Page 5 of 40
System <strong>Galaxy</strong> Quick Guide for <strong>Bioscrypt</strong> / L‐1 <strong>Setup</strong> <strong>and</strong> <strong>Enrollment</strong> System <strong>Galaxy</strong> Quick Guide<br />
INTEGRATION REQUIREMENTS (order dependent)<br />
1. System <strong>Galaxy</strong> & SecureAdmin Databases are both compatible with SQL Server 2005 or 2008<br />
2. System <strong>Galaxy</strong> 10.0 server/database should be installed before the SecureAdmin Server.<br />
3. SecureAdmin software 4.1.10 is only supported on Windows XP<br />
4. SecureAdmin server / client 4.1.10 must be installed using the setup.exe - found in the Installers/L1 folder<br />
on the <strong>Galaxy</strong> DVD (disk 1).<br />
5. During the SecureAdmin server install, select DEFAULT CERTIFICATE.<br />
6. <strong>Systems</strong> must be properly configured to support SQL Server connection:<br />
a) For shared SQL Server Instance (default option): choose to install on existing SQL server. Supply<br />
the SysGal database connection parameters when prompted by SecureAdmin install program.<br />
b) For Linked Server: you can install SecureAdmin on separate servers <strong>and</strong> use a connection string to link<br />
the databases. Insert the SQL connection path in SysGal’s SADB_PATH column of the<br />
L1_SADB_INFO table. You must also enter a 1 in the L1_ENABLE column.<br />
String example: [server_name\instance_name].[database_name].[owner_name]<br />
7. Each L-1 Reader must be registered via server in the SecureAdmin software before SG can connect.<br />
a) Secure Registration is done with the USB Cable that comes with the reader.<br />
When the Device Driver Wizard opens, you must browse to the 4gserial folder (located on<br />
the SecureAdmin server in Program Files\<strong>Bioscrypt</strong>\SA\SecureAdmin Server\4gserial.<br />
b) The reader must be configured for TCP/IP communication using valid IP settings for the same<br />
broadcast domain as the <strong>Galaxy</strong> enrollment workstation.<br />
8. In SecureAdmin, each reader must be configured for the correct card format (“26bit Pass-thru”, HID Corp<br />
1000, <strong>and</strong> custom “<strong>Galaxy</strong> 32bit Wieg<strong>and</strong>” are supported).<br />
9. You must enroll fingers from the System <strong>Galaxy</strong> cardholder screen.<br />
10. Templates are stored in BLOB format in the <strong>Galaxy</strong> database.<br />
11. System <strong>Galaxy</strong> 10.0 supports enrollment <strong>and</strong> interoperation using IDENTIFY (finger-only) <strong>and</strong> VERIFY<br />
(prox+finger in reader) modes with the Base <strong>and</strong> Prox models of the V-flex <strong>and</strong> V-station. SG 10.0 does not<br />
support Smart Card enrollment. SG 10.0 does not support PIN modes or memory expansion in the Vstation.<br />
12. SG must be registered for Biometric Support (Corporate or Enterprise) in System Registration.<br />
13. SG must have L-1 Solutions chosen as the biometric system in System Settings screen.<br />
14. SG must have L-1 Solutions chosen for the reader technology, <strong>and</strong> the specific L-1 Reader Name must be<br />
assigned to the door in the Reader Properties screen. Load Templates must be “checked”.<br />
15. System <strong>Galaxy</strong> must be able to connect to the SADB when it starts up <strong>and</strong> operator signs in. If unable to<br />
connect, the software displays a warning that the L1 Features will be disabled,<br />
16. You can capture from 1 to 10 prints per card. Prints are captured in the <strong>Enrollment</strong> screen <strong>and</strong> held in<br />
memory until the APPLY button is pressed in the main Cardholder screen.<br />
17. Authorized templates are sent to each reader when the Cardholder APPLY button is pressed. Likewise,<br />
templates are removed from each reader when the APPLY button is pressed.<br />
“Authorized templates” must have (a) valid loop privileges, (b) valid access group, <strong>and</strong> (c) the<br />
Send Templates option “checked” in the Cardholder screen.<br />
NOTICE: the Load Templates option must be “checked” in the reader properties.<br />
18. The L1 Load Utility will ‘bulk’ load all authorized templates on a per reader basis.<br />
Page 6 of 40
System <strong>Galaxy</strong> Quick Guide for <strong>Bioscrypt</strong> / L‐1 <strong>Setup</strong> <strong>and</strong> <strong>Enrollment</strong> System <strong>Galaxy</strong> Quick Guide<br />
2. SYSTEM INSTALLATION<br />
INSTALL READER HARDWARE<br />
Also see the <strong>Bioscrypt</strong> documentation for additional wiring information.<br />
Wire the L‐1 Reader to the DPI board in the System <strong>Galaxy</strong> access control panel (508i or 600/635)<br />
Connect the L‐1 Reader to the network/LAN<br />
READER WIRING CHART<br />
1. The reader comes with a power supply. See the manufacturer’s documentation for how to control<br />
power to the reader.<br />
2. The reader comes with a USB serial cable that can be used to register the reader into the SADB<br />
3. The reader requires cat‐5e network cable / connection to the LAN. This is required in order to integrate<br />
the reader with System <strong>Galaxy</strong> enrollment.<br />
4. The reader also comes with a pigtail for wiring to an access control panel.<br />
The reader data <strong>and</strong> LED lines wire as shown in the chart below.<br />
L‐1 Pigtail (colors) 600 DPI (pinout) 508i (pin color)<br />
7 Wieg<strong>and</strong> LED In (Grey/Black) LED ( pin 1 ) LED (Brown)<br />
12 Wieg<strong>and</strong> DOUT‐0 (Green) Data 0 (pin 2) Data 0 (Green)<br />
14 Wieg<strong>and</strong> DOUT‐1 (White) Data 1 (pin 5) Data 1 (White)<br />
16 WGND (Black/White) GND (pin 4) GND (Yellow)<br />
NOTES:<br />
The L‐1 reader can be set to use DHCP enabled to acquire an IP Address.<br />
You must register the reader in Secure Admin before you can use it. This is done from the<br />
SecureAdmin software after the reader is installed on online.<br />
The L‐1 Reader is not setup from factory to use WIEGAND OUTPUT – this is done through<br />
SecureAdmin software.<br />
You can enroll fingerprints from the L‐1 Reader finger sensor (no extra scanner needed). The<br />
reader that is used for enrollment must be registered <strong>and</strong> able to connect to the client via USB<br />
or via TCP/IP.<br />
IMPORTANT: Do not use the SecureAdmin to enroll users; however these fingers do not transfer<br />
from the SecureAdmin database to the System <strong>Galaxy</strong> database. When making credentials <strong>and</strong><br />
capturing prints, you should use System <strong>Galaxy</strong> cardholder screen.<br />
The reader used to capture fingers does not have to be connected to an access panel, but it must<br />
be registered, powered on, <strong>and</strong> online via the cat‐5 network cable.<br />
If you enroll from a reader that is connected to a panel, it will cause the lock relay to activate<br />
(unlock door) each time you enroll or verify prints.<br />
Page 7 of 40
System <strong>Galaxy</strong> Quick Guide for <strong>Bioscrypt</strong> / L‐1 <strong>Setup</strong> <strong>and</strong> <strong>Enrollment</strong> System <strong>Galaxy</strong> Quick Guide<br />
INSTALL SYSTEM GALAXY v10.0 (or higher)<br />
System <strong>Galaxy</strong> must be installed using the GalSuite installer which is located on Disk‐1. The GalSuite installer<br />
is designed to auto‐run when Disk‐1 is inserted into the disk drive.<br />
Insert the GalSuite Disk‐1 <strong>and</strong> run each part in sequential order.<br />
1. Install Part 1 of the GalSuite from Disk‐1 (required to install Prerequisites Components)<br />
2. Install Part 2 of the GalSuite (required to install SQL Server/Components & Database)<br />
3. Install Part 3 of the GalSuite (required to install System <strong>Galaxy</strong> software & utilities)<br />
INSTALL SECURE ADMIN DATABASE SERVER<br />
This section covers the basic instructions to install the Secure Admin Database Server.<br />
1) On the GalSuite DVD in the INSTALLERS\L1 FOLDER<br />
2) Run the SETUP exe<br />
3) click Server Installation<br />
Page 8 of 40
System <strong>Galaxy</strong> Quick Guide for <strong>Bioscrypt</strong> / L‐1 <strong>Setup</strong> <strong>and</strong> <strong>Enrollment</strong> System <strong>Galaxy</strong> Quick Guide<br />
4) Accept the license agreement <strong>and</strong> advance to the next screen<br />
5) Choose the default install path in program files folder even on WIN‐7<br />
6) Connect to existing SQL Engine.<br />
a) To use shared server instance, (installing SECUREADMIN on the same server/instance as SysGal<br />
database, choose to install on selected SQL Server <strong>and</strong> choose the same instance that SysGal uses.<br />
Provide the Authenticated login parameters.<br />
Page 9 of 40
System <strong>Galaxy</strong> Quick Guide for <strong>Bioscrypt</strong> / L‐1 <strong>Setup</strong> <strong>and</strong> <strong>Enrollment</strong> System <strong>Galaxy</strong> Quick Guide<br />
b) IF YOU ARE USING LINKED SQL SERVER: you will need to edit the L1_SADB_PATH table.<br />
Open MS SQL Management Studio <strong>and</strong> Log in with the SA login <strong>and</strong> password<br />
Exp<strong>and</strong> the SysGal database <strong>and</strong> open the L1_SADB_PATH table.<br />
Type the numeric value 1 into the L1_ENABLED column (0 disables the connection string)<br />
Type the connection string into the SADB_PATH column using correct syntax.<br />
SYNTAX EXAMPLE: [server_name\instance_name].[database_name].[owner_name]<br />
Note: if you are using a SQL script to insert the path, you do not need quote marks around the<br />
number 1 to enable the path, but you do need single quotes around the path since it is a text string.<br />
7) Choose DEFAULT CERTIFICATE.<br />
8) Enter the Administrative login <strong>and</strong> password (remember this login, you will be required to enter it to<br />
sign into the Client software when the installations are complete)<br />
Page 10 of 40
System <strong>Galaxy</strong> Quick Guide for <strong>Bioscrypt</strong> / L‐1 <strong>Setup</strong> <strong>and</strong> <strong>Enrollment</strong> System <strong>Galaxy</strong> Quick Guide<br />
9) The Install Wizard will install the SecureAdmin Server.<br />
Page 11 of 40
System <strong>Galaxy</strong> Quick Guide for <strong>Bioscrypt</strong> / L‐1 <strong>Setup</strong> <strong>and</strong> <strong>Enrollment</strong> System <strong>Galaxy</strong> Quick Guide<br />
10) After installing the System <strong>Galaxy</strong> <strong>and</strong> SecureAdmin servers, you must enable read <strong>and</strong> write privileges<br />
of the SADB in the SQL Server engine.<br />
a) Open Management Studio <strong>and</strong> login/connect to the System <strong>Galaxy</strong> instance<br />
b) At the instance branch level, choose SECURITY > LOGINS<br />
c) Right‐click gcs_client login name <strong>and</strong> select PROPERTIES<br />
d) Choose USER MAPPINGS on the left menu<br />
e) Check the SADB database in the upper window<br />
f) the following roles must be checked/enabled: db_datawriter, db_datareader, db_backupoperator,<br />
<strong>and</strong> public<br />
g) click OK<br />
System <strong>Galaxy</strong> pulls the IP parameters, serial number, group <strong>and</strong> device names of each L‐1 Reader from the<br />
SADB. This data is used for mapping readers to doors, <strong>and</strong> connecting to readers for enrollment of finger<br />
templates <strong>and</strong> card codes.<br />
Page 12 of 40
System <strong>Galaxy</strong> Quick Guide for <strong>Bioscrypt</strong> / L‐1 <strong>Setup</strong> <strong>and</strong> <strong>Enrollment</strong> System <strong>Galaxy</strong> Quick Guide<br />
INSTALL SECURE ADMIN CLIENT<br />
This section covers the basic instructions to install the Secure Admin Client.<br />
1) Install the client software at the same workstation that will be a enrollment station<br />
2) Accept the license agreement <strong>and</strong> advance to the next screen<br />
3) Choose the default install path in program files folder even on WIN‐7<br />
Page 13 of 40
System <strong>Galaxy</strong> Quick Guide for <strong>Bioscrypt</strong> / L‐1 <strong>Setup</strong> <strong>and</strong> <strong>Enrollment</strong> System <strong>Galaxy</strong> Quick Guide<br />
4) Choose how to display fingerprint image <strong>and</strong> select DEFAULT CERTIFICATE as you advance through the<br />
next screens.<br />
5) Check the desktop ICON as desired<br />
6) Exit the Install Wizard when completed<br />
Page 14 of 40
System <strong>Galaxy</strong> Quick Guide for <strong>Bioscrypt</strong> / L‐1 <strong>Setup</strong> <strong>and</strong> <strong>Enrollment</strong> System <strong>Galaxy</strong> Quick Guide<br />
3. REGISTER & CONFIGURE V-Flex (Prox) Device in Secure Admin<br />
Before you can enroll templates from the System <strong>Galaxy</strong> software, you must properly register <strong>and</strong> configure<br />
the reader in the SecureAdmin database (SADB). Once the SecureAdmin configuration is completed, you<br />
can setup the reader in System <strong>Galaxy</strong>.<br />
This section covers:<br />
Registering an L‐1 Reader in SADB<br />
Configuring an L‐1 Prox (V‐Flex, Prox) for VERIFY mode (Card+Biometrics in Device)<br />
Configuring an L‐1 Prox (V‐Flex, Prox) for IDENTIFY mode<br />
REGISTER L-1 READER IN SECURE ADMIN (SADB)<br />
TCP/IP vs. USB<br />
1) Apply power to the L‐1 reader <strong>and</strong> connect your reader to the PC or LAN to register<br />
a) TCP/IP ‐ Connect the reader to the network using Cat5e cable. The reader should be on the<br />
same broadcast domain as the SecureAdmin Server/PC.<br />
b) USB ‐ Connect the reader to the PC using the USB cable that is provided with the reader).<br />
If the Device Driver Wizard opens, you must browse to the 4gserial folder, which is located on the<br />
SecureAdmin server in Program Files\<strong>Bioscrypt</strong>\SA\SecureAdmin Server\4gserial.<br />
2) Start / Login the Secure Admin software<br />
Page 15 of 40
System <strong>Galaxy</strong> Quick Guide for <strong>Bioscrypt</strong> / L‐1 <strong>Setup</strong> <strong>and</strong> <strong>Enrollment</strong> System <strong>Galaxy</strong> Quick Guide<br />
3) The Client software will open as follows when the login is correct:<br />
4) Exp<strong>and</strong> (open) the NETWORK menu by clicking on the Network button on the left side<br />
5) Choose Register via Server<br />
Page 16 of 40
System <strong>Galaxy</strong> Quick Guide for <strong>Bioscrypt</strong> / L‐1 <strong>Setup</strong> <strong>and</strong> <strong>Enrollment</strong> System <strong>Galaxy</strong> Quick Guide<br />
IF using TCP/IP to detect <strong>and</strong> register, follow the step 6 below:<br />
6) Choose Ethernet option<br />
a) Check Search Automatically to detect all readers on the broadcast domain.<br />
NOTE: it is alternately possible to enter a specific IP Address or an IP Range to search for<br />
devices. If you search by specific or range of addresses you should uncheck the automatic<br />
search option.<br />
b) Click [ SCAN ], the device will appear in the Available Devices list view.<br />
NOTE: the DHCP option might be enabled from the factory. If you do not have a DHCP<br />
server, or simply cannot detect the reader using TCP/IP, you can use the USB cable to<br />
connect to the device (see step 7 to detect the device via USB Cable).<br />
c) Click the Reader icon in the Registration Status column (icon shows a yellow plus sign if it is not<br />
registered).<br />
d) Advance to Step 8 to continue registration instructions.<br />
Page 17 of 40
System <strong>Galaxy</strong> Quick Guide for <strong>Bioscrypt</strong> / L‐1 <strong>Setup</strong> <strong>and</strong> <strong>Enrollment</strong> System <strong>Galaxy</strong> Quick Guide<br />
IF using USB to connect <strong>and</strong> register, follow the step 7 below:<br />
7) CHECK the Serial Connection / Com Port option in the left corner<br />
a) Set the Baud Rate to “Auto”.<br />
b) Click [ SCAN ], <strong>and</strong> the device will appear in the Available Devices list view.<br />
c) Click the Reader icon in the Registration Status column (icon shows a yellow plus sign if it is not<br />
registered).<br />
Page 18 of 40
System <strong>Galaxy</strong> Quick Guide for <strong>Bioscrypt</strong> / L‐1 <strong>Setup</strong> <strong>and</strong> <strong>Enrollment</strong> System <strong>Galaxy</strong> Quick Guide<br />
To continue registering, follow the steps below:<br />
8) UNCHECK the Obtain IP from DHCP if you do not intend to use DHCP addressing<br />
9) If you are using a static IP Address for the device, then set the IP Address, Subnet <strong>and</strong> Gateway as<br />
required to operate on your network. Data shown in the screenshot below is only an example.<br />
10) Click NEXT to continue<br />
11) Create a descriptive Device Name for the reader<br />
12) Assign the reader to a Group<br />
13) Click REGISTER<br />
Page 19 of 40
System <strong>Galaxy</strong> Quick Guide for <strong>Bioscrypt</strong> / L‐1 <strong>Setup</strong> <strong>and</strong> <strong>Enrollment</strong> System <strong>Galaxy</strong> Quick Guide<br />
14) The device will be added to the SecureAdmin database (SADB)<br />
15) CLICK OK to return to the NETWORK screen.<br />
To ensure that DHCP is set properly, go to the Device Settings page <strong>and</strong> open the<br />
Communications tab. Be sure that DHCP is set up as needed (UNCHECKED is off).<br />
16) The READER ICON will now show a yellow checkmark to indicate it is registered.<br />
Page 20 of 40
System <strong>Galaxy</strong> Quick Guide for <strong>Bioscrypt</strong> / L‐1 <strong>Setup</strong> <strong>and</strong> <strong>Enrollment</strong> System <strong>Galaxy</strong> Quick Guide<br />
CONFIGURE L-1 DEVICE SETTINGS for V-FLEX (PROX)<br />
1) Exp<strong>and</strong> the DEVICE SETTINGS menu (left panel)<br />
2) Double‐click on Device Network <strong>and</strong> double‐click on Default Group (or the group name you used)<br />
3) Double‐click on the reader name that you just registered ‐ this will populate the tabbed setup screens<br />
Page 21 of 40
System <strong>Galaxy</strong> Quick Guide for <strong>Bioscrypt</strong> / L‐1 <strong>Setup</strong> <strong>and</strong> <strong>Enrollment</strong> System <strong>Galaxy</strong> Quick Guide<br />
Configuring Device Mode:<br />
4) select the BIOMETRICS tab (beside the General tab)<br />
5) choose VERIFY or IDENTIFY as appropriate for the Device Mode<br />
a) VERIFY (1:1) – this enables the reader to use access cards in combination with fingerprints<br />
b) IDENTIFY (1:N) – this enables the reader to use fingerprints only (physical card not issued / used).<br />
NOTE: When using Identify mode, System <strong>Galaxy</strong> will still add a unique card code to the biometric<br />
credentials so that the access rules (schedules <strong>and</strong> door privileges) can be assigned to the user.<br />
6) Click APPLY to save.<br />
NOTE : Other settings may be adjusted as needed. You must consult the <strong>Bioscrypt</strong> manuals concerning<br />
options that are not discussed in this document.<br />
Page 22 of 40
System <strong>Galaxy</strong> Quick Guide for <strong>Bioscrypt</strong> / L‐1 <strong>Setup</strong> <strong>and</strong> <strong>Enrollment</strong> System <strong>Galaxy</strong> Quick Guide<br />
Configuring Wieg<strong>and</strong> Format:<br />
7) select the WIEGAND tab <strong>and</strong> set the Wieg<strong>and</strong> Format:<br />
a) If using VERIFY mode, choose PREDEFINED option<br />
Set the format to 26‐Bit Pass‐Thru for st<strong>and</strong>ard prox cards; or HID Corporate 35‐bits for<br />
Corp1000 cards.<br />
b) If using IDENTIFY mode, choose the CUSTOM option<br />
Set the format to <strong>Galaxy</strong> 32 bit. You have to create the 32‐bit format manually.<br />
See section about Creating Custom 32‐Bit Format.<br />
Page 23 of 40
System <strong>Galaxy</strong> Quick Guide for <strong>Bioscrypt</strong> / L‐1 <strong>Setup</strong> <strong>and</strong> <strong>Enrollment</strong> System <strong>Galaxy</strong> Quick Guide<br />
8) enable (CHECK) the Activate Wieg<strong>and</strong> Input option<br />
9) Enable (CHECK) the Activate Wieg<strong>and</strong> Output option <strong>and</strong> choose “Always…”<br />
10) Click APPLY to save settings<br />
NOTE: in the Wieg<strong>and</strong> Output Settings (button) you must have Verification Pass option set to NONE.<br />
Page 24 of 40
System <strong>Galaxy</strong> Quick Guide for <strong>Bioscrypt</strong> / L‐1 <strong>Setup</strong> <strong>and</strong> <strong>Enrollment</strong> System <strong>Galaxy</strong> Quick Guide<br />
CREATING CUSTOM 32-BIT WIEGAND FORMAT<br />
You must create a Custom 32‐bit Wieg<strong>and</strong> format if you are using IDENTIFY mode (fingerprint only) .<br />
(1) click the [CUSTOM WIEGAND SETTINGS] button ( bottom of the Wieg<strong>and</strong> screen )<br />
(2) click the EDIT (pencil icon), to open the Wieg<strong>and</strong> Format dialog<br />
(3) create a name <strong>and</strong> set the field Length = 32<br />
(4) in the Wieg<strong>and</strong> ID group, set Start = 0 ; set Length = 32<br />
(5) click APPLY to save (now you can use the custom 32bit format in step (7b) )<br />
Page 25 of 40
System <strong>Galaxy</strong> Quick Guide for <strong>Bioscrypt</strong> / L‐1 <strong>Setup</strong> <strong>and</strong> <strong>Enrollment</strong> System <strong>Galaxy</strong> Quick Guide<br />
VIEW TEMPLATES IN L-1 READER<br />
1) Exp<strong>and</strong> the TEMPLATES menu (left panel)<br />
2) Choose Templates<br />
3) exp<strong>and</strong> Device Network branch<br />
4) exp<strong>and</strong> the DefaultGroup – or‐ the group you that assigned to your reader<br />
5) Double‐click the reader name; the list of templates will populate the list view – these are currently<br />
stored in the reader memory.<br />
TIP the REFRESH button will renew the list.<br />
TIP the yellow checkmark icon will allow you to verify a print when you click it.<br />
TIP the Template ID field shows the Wieg<strong>and</strong> card code that was assigned in System <strong>Galaxy</strong><br />
TIP if you check the checkbox in the left‐h<strong>and</strong> column, <strong>and</strong> click DELETE you can remove a<br />
template from the reader.<br />
Page 26 of 40
System <strong>Galaxy</strong> Quick Guide for <strong>Bioscrypt</strong> / L‐1 <strong>Setup</strong> <strong>and</strong> <strong>Enrollment</strong> System <strong>Galaxy</strong> Quick Guide<br />
4. SYSTEM GALAXY CONFIGURATION<br />
REGISTER the L-1 READER IN SYSTEM GALAXY (SysGal database)<br />
Start / Login the System <strong>Galaxy</strong> software as a master operator at the main Communication Server<br />
Go to the CONFIGURE menu to start registration<br />
~ choose Configure > Options > Registration > System<br />
1. Choose the appropriate Product Level (per purchase order)<br />
2. Set the Workstation Count (per purchase order)<br />
3. Enter the Customer <strong>and</strong> Dealer name <strong>and</strong> phone<br />
4. Set the correct Expiration Date (per purchase order)<br />
5. CHECK the Biometric Interface Support<br />
6. set any other options as purchased<br />
7. Set the Maximum Readers AND the Maximum No. of Biometric Readers as purchased<br />
8. Enter the Registration Code you receive from Customer Service<br />
9. click APPLY to save changes<br />
Page 27 of 40
System <strong>Galaxy</strong> Quick Guide for <strong>Bioscrypt</strong> / L‐1 <strong>Setup</strong> <strong>and</strong> <strong>Enrollment</strong> System <strong>Galaxy</strong> Quick Guide<br />
ENABLE BIOSCRYPT AS THE ENROLLMENT SYSTEM AT SG WORKSTATION<br />
You must be logged into System <strong>Galaxy</strong> as a master operator at the workstation<br />
Go to Configure > Options > System Settings<br />
~ choose the General Tab<br />
1. Set the Biometric System to use ‘L‐1 <strong>Bioscrypt</strong>’<br />
2. Set the programming reader source as <strong>Control</strong>lers<br />
3. you can set up any other system options as appropriate if this is the first startup<br />
4. click APPLY to save changes<br />
5. shut down <strong>and</strong> restart the System <strong>Galaxy</strong> software<br />
Page 28 of 40
System <strong>Galaxy</strong> Quick Guide for <strong>Bioscrypt</strong> / L‐1 <strong>Setup</strong> <strong>and</strong> <strong>Enrollment</strong> System <strong>Galaxy</strong> Quick Guide<br />
CONFIGURE THE READER PROPERTIES FOR AN L-1 READER IN SG<br />
You must be logged into System <strong>Galaxy</strong> as a master operator at the main Communication Server<br />
You must have already added your Loop <strong>and</strong> <strong>Control</strong>ler(s) in System <strong>Galaxy</strong> software/database<br />
Go to the CONFIGURE menu to configure Reader Properties<br />
~ choose Configure > Hardware > Doors/Readers<br />
1. Select the Loop Name<br />
2. Select the <strong>Control</strong>ler Name<br />
3. select the Reader Name (edit the default name to make it more logical)<br />
4. set the Reader Type to L‐1 Identity Solutions<br />
5. select the General tab<br />
6. select the name of the Device Group that the L‐1 is registered to in Secure Admin software<br />
7. select the name of the Reader that the L‐1 is registered as in the Secure Admin software<br />
8. check the Load Biometric Templates option; (unchecked will stop templates from being<br />
loaded to the reader during enrollment or load utility)<br />
9. click APPLY to save<br />
Page 29 of 40
System <strong>Galaxy</strong> Quick Guide for <strong>Bioscrypt</strong> / L‐1 <strong>Setup</strong> <strong>and</strong> <strong>Enrollment</strong> System <strong>Galaxy</strong> Quick Guide<br />
5. ENROLLING & MANAGING TEMPLATES<br />
ENROLL FINGERPRINT [IDENTIFY MODE] IN CARDHOLDER SCREEN<br />
You must be logged into System <strong>Galaxy</strong> as an operator at the main <strong>Enrollment</strong> Workstation<br />
You must have already enabled the L‐1 <strong>Bioscrypt</strong> System at the workstation<br />
This is supported with <strong>Galaxy</strong> St<strong>and</strong>ard format that must have already been configured at the<br />
reader.<br />
Go to the CONFIGURE menu to open cardholder screen<br />
~ choose Configure > Cards > Cardholder<br />
1. click the ADD NEW button<br />
2. enter a cardholder name<br />
3. select the Card/Badge Settings tab<br />
4. add a Loop (you may add more than one loop)<br />
5. select an access group for each loop you gave to this card<br />
6. set the Card Technology<br />
‘<strong>Galaxy</strong> St<strong>and</strong>ard’ if using IDENTIFY / FINGER ONLY MODE<br />
26 bit Wieg<strong>and</strong>’ if using VERIFY MODE (PROX Card + finger in device)<br />
7. enter the card code (manually or select next code); card code must be unique in the system<br />
8. check the Send to Readers option; unchecked will stop prints from being loaded to readers<br />
Page 30 of 40
System <strong>Galaxy</strong> Quick Guide for <strong>Bioscrypt</strong> / L‐1 <strong>Setup</strong> <strong>and</strong> <strong>Enrollment</strong> System <strong>Galaxy</strong> Quick Guide<br />
9. click [Scan Fingers] button to open the L‐1 <strong>Enrollment</strong> Screen<br />
a. select the Device Group<br />
b. select the L‐1 Device<br />
c. click the [Connect] button<br />
d. click the finger button above the finger you wish to enroll<br />
e. click the [Enroll] button on the same finger you have chosen<br />
f. when prompted, you must place your print on the sensor of the L‐1 Reader<br />
g. when prompted, you must remove your finger from the reader<br />
h. repeat steps ‘d’ thru ‘g’ until you have captured all desired fingers<br />
i. click [OK] to exit the <strong>Enrollment</strong> screen<br />
10. click [APPLY] on the cardholder screen to save the templates to the SG database <strong>and</strong> send<br />
the card id <strong>and</strong> templates to the readers at the panels (based on the loops you assigned)<br />
Place Finger on Sensor<br />
NOTE if the finger is not clean or too dry, the L‐1 may report back that the fingerprint could not pass <strong>and</strong> will<br />
not be captured.<br />
If finger captures successfully, the L‐1 will report back that the fingerprint passed <strong>and</strong> the print will be held<br />
in the temporary memory at the computer until the record is fully saved. If you cancel or do not save the<br />
entire cardholder record, the fingerprint will have to be recaptured.<br />
NOTE: a black dot will appear on the tip of the finger image to indicate a template is saved for that finger.<br />
NOTE: you can verify (compare) prints from this screen also by clicking on the white dot above the finger<br />
<strong>and</strong> clicking the VERIFY button. Enrollee must place their finger on the reader sensor when prompted to<br />
make a comparison.<br />
Page 31 of 40
System <strong>Galaxy</strong> Quick Guide for <strong>Bioscrypt</strong> / L‐1 <strong>Setup</strong> <strong>and</strong> <strong>Enrollment</strong> System <strong>Galaxy</strong> Quick Guide<br />
ENROLL CARD AND FINGERPRINT [VERIFY MODE] IN SG CARDHOLDER<br />
You must be logged into System <strong>Galaxy</strong> as an operator at the main <strong>Enrollment</strong> Workstation<br />
You must have already enabled the L‐1 <strong>Bioscrypt</strong> System at the workstation<br />
This is supported with 26‐bit Wieg<strong>and</strong> <strong>and</strong> Corporate 1000 formats<br />
Go to the CONFIGURE menu to open cardholder screen<br />
~ choose Configure > Cards > Cardholder<br />
1. click the ADD NEW button<br />
2. enter a cardholder name<br />
3. select the Card/Badge Settings tab<br />
4. add a Loop (you may add more than one loop)<br />
5. select an access group for each loop you gave to this card<br />
6. check the Send to Readers option; unchecked will stop prints from being loaded to readers<br />
7. click [Scan Fingers…] button to open the L‐1 <strong>Enrollment</strong> Screen<br />
a. select the Device Group<br />
b. select the L‐1 Device<br />
c. click the [Connect] button; a message appears indicating connection established<br />
Page 32 of 40
System <strong>Galaxy</strong> Quick Guide for <strong>Bioscrypt</strong> / L‐1 <strong>Setup</strong> <strong>and</strong> <strong>Enrollment</strong> System <strong>Galaxy</strong> Quick Guide<br />
d. click the [Read Wieg<strong>and</strong> ID] Button <strong>and</strong> quickly present the HID card at the L‐1 Reader<br />
e. the Card ID <strong>and</strong> FAC are captured <strong>and</strong> populated in the appropriate fields<br />
f. select the Finger radio button (above the finger image) of the finger you wish to enroll<br />
g. click the [Enroll] button on the same finger you have just chosen<br />
h. when prompted, you must place your finger on the sensor of the L‐1 Reader; the<br />
reader will scan the finger<br />
i. when prompted, you must remove your finger from the reader; <strong>Galaxy</strong> will display a<br />
pass (or fail ) message based on reply from reader. If the finger quality fails, you will<br />
need to retry the capture. If the finger quality passes a black dot will appear on the tip<br />
of the finger image <strong>and</strong> a fingerprint will appear in the gray box on the right side.<br />
j. repeat steps ‘f’ thru ‘i’ to scan an additional additional finger<br />
k. click [OK] to exit the <strong>Enrollment</strong> screen<br />
8. click [APPLY] on the cardholder screen to save the templates to the SG database <strong>and</strong> send<br />
the card id <strong>and</strong> templates to the readers at the panels (based on the loops you assigned)<br />
9. The Communication <strong>Control</strong> Window (message tab) will display the messages that<br />
connection was established with each authorized reader <strong>and</strong> templates stored successfully.<br />
If you see a Template format error/corrupt template message in Comm. <strong>Control</strong> Window, check the offending reader’s<br />
template format. The error occurs for any reader whose template formats (BUR, VUR, etc.) is different than the<br />
enrollment reader. To resolve this, either use the same format at all readers or enroll an additional finger(s) directly<br />
from the reader whose template format differs.<br />
See the Appendix (section 6 of this guide) for more indications <strong>and</strong> messages associated with connecting,<br />
capturing, saving <strong>and</strong> loading templates.<br />
Page 33 of 40
System <strong>Galaxy</strong> Quick Guide for <strong>Bioscrypt</strong> / L‐1 <strong>Setup</strong> <strong>and</strong> <strong>Enrollment</strong> System <strong>Galaxy</strong> Quick Guide<br />
LOADING ALL TEMPLATES UTILITY<br />
Also see the <strong>Bioscrypt</strong> documentation for additional wiring information.<br />
Go to the UTILITY menu to open cardholder screen<br />
~ choose Utility > L‐1 / <strong>Bioscrypt</strong> > Load Templates to Device<br />
1. Select the DefaultGroup (or all groups; or the group you desire)<br />
2. Select the L‐1 Device (the reader you need); note that only the reader that are connected<br />
are shown. Readers whose properties are set to not load (SG Reader Property screen) will<br />
not appear in the list.<br />
3. click OK<br />
4. the templates will load <strong>and</strong> the Communication <strong>Control</strong> window will open to show logs<br />
5. click HIDE to close the Communication <strong>Control</strong> window<br />
Page 34 of 40
System <strong>Galaxy</strong> Quick Guide for <strong>Bioscrypt</strong> / L‐1 <strong>Setup</strong> <strong>and</strong> <strong>Enrollment</strong> System <strong>Galaxy</strong> Quick Guide<br />
6. APPENDIX: TROUBLESHOOTING<br />
GALAXY MESSAGE LOGGING (Communication <strong>Control</strong> Window)<br />
Open a Communication <strong>Control</strong> Window from the View menu in System <strong>Galaxy</strong> <strong>and</strong> select the Message tab.<br />
You can move the window to the side or downward, so you can access the data entry fields in the<br />
Cardholder enrollment screen.<br />
Table 1: Communication <strong>Control</strong> Message Log<br />
Comm. <strong>Control</strong> Message Log Meaning<br />
Communication Closed This message indicates the currently open connection<br />
to the reader is closed. This occurs when the SG<br />
operator exits the L1 <strong>Enrollment</strong> screen<br />
Communication established successfully This message indicates that SG has successfully<br />
connected to the L1 reader over TCP/IP. This occurs<br />
when the SG operator CONNECTS to the reader from<br />
the L1 <strong>Enrollment</strong> screen; <strong>and</strong> when the templates<br />
are loaded to the reader (either when Cardholder<br />
APPLY button is clicked or the Load Utility is sending)<br />
Device timed out wile waiting for user action This message indicates that the reader timed out.<br />
Time Out occurred because card was not presented<br />
to the reader correctly or within the time allotted; or<br />
the wrong card format/type card was presented.<br />
Error TCP/IP Socket This message indicates that the reader was not online<br />
to the SADB when System <strong>Galaxy</strong> was signed‐in <strong>and</strong><br />
connected to the SADB. Restart SG after restoring<br />
reader to online status.<br />
Finger not detected Finger was not placed on the sensor in time or at all.<br />
No response from device This message indicates that the reader is not online.<br />
Restore reader power or IP connection to recover.<br />
Template was erased on device successfully This message indicates that a template was deleted<br />
through the SG <strong>Enrollment</strong> screen.<br />
Template was stored on device successfully This message indicates that a template was capture<br />
<strong>and</strong> saved/loaded from SG Cardholder or Load Utility.<br />
Unable to access com port. This message indicates that the specific reader has<br />
not been selected before the operator clicks the<br />
CONNECT button.<br />
Page 35 of 40
System <strong>Galaxy</strong> Quick Guide for <strong>Bioscrypt</strong> / L‐1 <strong>Setup</strong> <strong>and</strong> <strong>Enrollment</strong> System <strong>Galaxy</strong> Quick Guide<br />
GALAXY USER MESSAGES - BY OPERATOR ACTION<br />
The following messages appear in the System <strong>Galaxy</strong> application <strong>and</strong> the Communication <strong>Control</strong> window<br />
during integrated operation. (the Comm. <strong>Control</strong> window opens from the View menu)<br />
Table 2: Connecting to L1 Reader in SG <strong>Enrollment</strong><br />
CONNECTING to READER ‐ L1 <strong>Enrollment</strong> screen<br />
OPERATOR ACTION<br />
SG INDICATION<br />
(L1 ENROLLMENT screen)<br />
click the CONNECT button when a Confirmation “{Reader} ‐ Communication<br />
{reader } is selected<br />
established successfully”.<br />
<br />
<br />
<br />
click CONNECT button when a<br />
{reader } is selected<br />
click CONNECT button when a<br />
{reader } is selected<br />
click CONNECT button when<br />
reader is not selected<br />
Error “[!] Error opening TCP/IP socket.”<br />
Reason: reader was offline in SADB at the<br />
time System <strong>Galaxy</strong> was started.<br />
Resolution: restore reader power &<br />
Ethernet connection. Restart <strong>Galaxy</strong>.<br />
Error “[!] No response from device.”<br />
Reason: reader has gone offline, lost<br />
power or Ethernet connection after<br />
System <strong>Galaxy</strong> was started or signed‐in.<br />
Resolution: restore reader to online<br />
status (power / Ethernet connection).<br />
Restart <strong>Galaxy</strong>.<br />
Error “[!] Unable to access com port.<br />
Possibly in use by another application.”<br />
Reason: reader is not selected.<br />
Resolution: select reader before<br />
connecting.<br />
Page 36 of 40<br />
MESSAGE LOG<br />
(COMM CONTROL screen)<br />
Communication<br />
established successfully<br />
Error opening TCP/IP<br />
socket.”<br />
No response from device.<br />
Unable to access com port.<br />
Possibly in use by another<br />
application.
System <strong>Galaxy</strong> Quick Guide for <strong>Bioscrypt</strong> / L‐1 <strong>Setup</strong> <strong>and</strong> <strong>Enrollment</strong> System <strong>Galaxy</strong> Quick Guide<br />
Table 3: Capture Card Code (VERIFY MODE)<br />
READ / CAPTURE CARD CODE ‐ L1 <strong>Enrollment</strong> screen<br />
SG INDICATION<br />
OPERATOR ACTION<br />
(L1 ENROLLMENT screen)<br />
Select [Read Wieg<strong>and</strong> ID ] button Card code <strong>and</strong> facility code are captured<br />
<br />
<strong>and</strong> populate Enroll ID & FAC field.<br />
No system message generated.<br />
Select [Read Wieg<strong>and</strong> ID ] button Error “[!] The device timed out while<br />
waiting for user action.”<br />
<br />
<br />
<br />
Select [Read Wieg<strong>and</strong> ID ] button<br />
Select [Read Wieg<strong>and</strong> ID ] button<br />
Reason:<br />
1. Card was not presented/or read.<br />
2. Card is the wrong format / type<br />
Resolution:<br />
1. Present card within time allotted<br />
2. Present the correct card type<br />
Error “[!] Card code is a duplicate. The<br />
card is assigned to ‘other name’.”<br />
Reason: card is already enrolled for the<br />
cardholder name that is shown.<br />
Resolution: get a new card or delete the<br />
existing card from the other cardholder.<br />
Error “[!] No Response.”<br />
Reason: reader has gone offline.<br />
Resolution: restore reader connection.<br />
Table 4: Enroll Finger Template (IDENTIFY OR VERIFY MODE)<br />
ENROLL FINGER ‐ L1 <strong>Enrollment</strong> screen<br />
<br />
<br />
<br />
<br />
OPERATOR ACTION<br />
Click a Finger ENROLL button<br />
(after connecting to reader (also after<br />
enrolling card code if in VERIFY mode))<br />
Prompt 1 = Place Finger on Sensor<br />
Prompt 2 = Remove Finger<br />
SG INDICATION<br />
(L1 ENROLLMENT screen)<br />
Prompt 3 = Enroll Passed<br />
(black dot appears on enrolled finger )<br />
PROMPT 3 = Enroll Failed<br />
(no black dot or template image)<br />
Reason: poor quality of print.<br />
Resolution: retry; use better finger;<br />
make sure sensor is clean, etc,<br />
Click a Finger ENROLL button Error “[!] No Finger Detected.”<br />
Click a Finger ENROLL button<br />
when Enroll ID is empty/blank.<br />
Reason: finger not placed on sensor.<br />
Resolution: retry;<br />
Error “[!] Please supply numeric Enroll ID<br />
larger than 0”.<br />
Reason: reader is in VERIFY mode.<br />
Resolution: enroll/read card code before<br />
you try to enroll a finger.<br />
Page 37 of 40<br />
MESSAGE LOG<br />
(COMM CONTROL screen)<br />
n/a<br />
The device timed out while<br />
waiting for user action.<br />
n/a<br />
No response from device.<br />
MESSAGE LOG<br />
(COMM CONTROL screen)<br />
n/a<br />
n/a<br />
Finger Not Detected<br />
n/a
System <strong>Galaxy</strong> Quick Guide for <strong>Bioscrypt</strong> / L‐1 <strong>Setup</strong> <strong>and</strong> <strong>Enrollment</strong> System <strong>Galaxy</strong> Quick Guide<br />
Table 5: Verify Finger Template<br />
VERIFY/COMPARE TEMPLATE ‐ L1 <strong>Enrollment</strong> screen<br />
OPERATOR ACTION<br />
SG SYSTEM MESSAGES<br />
(L1 ENROLLMENT screen)<br />
<br />
Select [Verify Template ] button<br />
Prompt 1 = Place Finger on Sensor<br />
Prompt 2 = Remove Finger<br />
Prompt 3 = Verify Passed<br />
(finger passes the verification check )<br />
PROMPT 3 = Verify Failed<br />
(finger fails the verification check)<br />
<br />
Select [Verify Template] button<br />
Table 6: Closing <strong>Enrollment</strong><br />
CLOSE L1 <strong>Enrollment</strong> screen<br />
<br />
OPERATOR ACTION<br />
Click [Close] button<br />
Reason: poor quality of print.<br />
Resolution: retry; ensure sensor is clean.<br />
Error “[!] Timed out waiting for user.”<br />
Reason: finger not presented or read.<br />
Resolution: retry; ensure sensor is clean.<br />
SG INDICATION<br />
(L1 ENROLLMENT screen)<br />
No system message generated.<br />
Operator returns to the main Cardholder screen when L1<br />
<strong>Enrollment</strong> screen closes.<br />
NOTE: At this time templates are held in memory.<br />
Page 38 of 40<br />
L1 MESSAGE LOG<br />
(COMM. CONTROL screen)<br />
n/a<br />
n/a<br />
n/a<br />
MESSAGE LOG<br />
(COMM CONTROL screen)<br />
Communication was<br />
closed.<br />
NOTE: Templates are sent to reader* <strong>and</strong> stored in <strong>Galaxy</strong> database as blob data when the operator clicks the APPLY button in<br />
the main cardholder screen.<br />
* Load/send templates option must be checked in the Cardholder screen <strong>and</strong> in the reader properties screen, reader<br />
must be online <strong>and</strong> able to receive data over IP; card must have loop <strong>and</strong> access privileges assigned.<br />
IMPORTANT: if you Cancel out of the main Cardholder screen after enrolling, the data being held in RAM will be<br />
dumped <strong>and</strong> nothing will be saved / sent to reader.<br />
Table 7: Save/Apply Cardholder <strong>and</strong> Send Templates to Reader<br />
APPLY EDITS/SEND TEMPLATES ‐ Cardholder Screen<br />
OPERATOR ACTION<br />
SG INDICATION<br />
(L1 ENROLLMENT screen)<br />
<br />
Click [Apply] button<br />
(after enrolling card<br />
<strong>and</strong>/or templates)<br />
NOTE: At this time, templates are sent to reader(s) <strong>and</strong><br />
stored as Blob data in <strong>Galaxy</strong> database.<br />
[!]<br />
MESSAGE LOG<br />
(COMM CONTROL screen)<br />
Template was stored<br />
successfully.<br />
Template format error message in Comm. <strong>Control</strong> Window occurs for any reader whose template formats (BUR, VUR,<br />
etc.) is different than the enrollment reader. To resolve this, either use the same format at all readers or enroll an<br />
additional finger(s) directly from the reader whose template format differs.<br />
Click [Apply] button<br />
(after deleting<br />
templates)<br />
No system message generated.<br />
NOTE: At this time, templates are removed from reader(s)<br />
<strong>and</strong> <strong>Galaxy</strong> database.<br />
Template was erased on<br />
device successfully.
System <strong>Galaxy</strong> Quick Guide for <strong>Bioscrypt</strong> / L‐1 <strong>Setup</strong> <strong>and</strong> <strong>Enrollment</strong> System <strong>Galaxy</strong> Quick Guide<br />
REGISTER READER with USB (private LAN/ not using DHCP)<br />
1. Do not connect L1 to the network cable yet (factory may have DHCP on)<br />
2. power up L1 reader (wait for all beeps to sound – this takes a couple of mins)<br />
3. connect by USB cable from L1 device to the PC<br />
4. when device wizard opens, browse to the 4gserial folder<br />
Program Files\<strong>Bioscrypt</strong>\SA\SecureAdmin Server\4gserial<br />
Note if you are using Windows7 you may need to copy the 4gserial driver to the<br />
Windows\System32 folder <strong>and</strong> then update the driver path to that location.<br />
5. complete the PC device driver setup<br />
6. look in the PC Device Manager to find out which COM port the 4gserial device is using<br />
7. start up (log into) SecureAdmin software<br />
8. choose the NETWORK menu <strong>and</strong> select REGISTER VIA SERVER<br />
9. “check” the COM port that the Device Manager identified as the 4gserial device<br />
(SecureAdmin will not filter out other active com ports)<br />
10. select AUTO for the baud rate<br />
11. click the SCAN button; the device will display in the list with a yellow plus symbol<br />
12. double‐click on the device icon that shows the yellow plus symbol<br />
13. click NEXT (do not program IP Address at this time)<br />
14. enter a device name <strong>and</strong> assign the default group<br />
15. click REGISTER to complete registration; click OK <strong>and</strong> close to exit.<br />
16. go to DEVICE SETTINGS menu, exp<strong>and</strong> the default group <strong>and</strong> double‐click the reader<br />
17. select the COMMUNICATION TAB <strong>and</strong> make sure DHCP option is unchecked<br />
18. now “check” ETHERNET option <strong>and</strong> add the network address parameters you desire<br />
19. click APPLY to save network settings<br />
20. go to NETWORK TREE <strong>and</strong> right‐click the reader, choose Change Connection<br />
21. select the ETHERNET option <strong>and</strong> put in the IP Address <strong>and</strong> click UPDATE<br />
Reader should be correctly connected <strong>and</strong> able to talk. This process is the one L‐1 Tech Support<br />
walked me through<br />
Page 39 of 40
System <strong>Galaxy</strong> Quick Guide for <strong>Bioscrypt</strong> / L‐1 <strong>Setup</strong> <strong>and</strong> <strong>Enrollment</strong> System <strong>Galaxy</strong> Quick Guide<br />
ADDING A LINKED SQL CONNECTION STRING TO SYSGAL<br />
After you install the <strong>Galaxy</strong> database server <strong>and</strong> the SecureAdmin Server, you must enable the linked SQL<br />
connection <strong>and</strong> add the connection string in the SysGal database.<br />
Open SQL Server Management Studio.<br />
Use the SA login to connect to the GCSSQLEXPRESS instance<br />
INSERT a 1 in the L1_ENABLED column <strong>and</strong> the correct SQL connection string into the SADB_PATH<br />
column of L1_SADB_INFO table in SysGal database<br />
Example syntax of SQL connection string:<br />
[server_name\instance_name].[database_name].[owner_name]<br />
NOTE - if you are using a shared (same) SQL instance, the connection string <strong>and</strong> L1 enabled value will be<br />
automatically inserted when you follow the database installation <strong>and</strong> configuration steps in this manual.<br />
Page 40 of 40


