Tight wire and slack rope - Fedec
Tight wire and slack rope - Fedec
Tight wire and slack rope - Fedec

You also want an ePaper? Increase the reach of your titles
YUMPU automatically turns print PDFs into web optimized ePapers that Google loves.
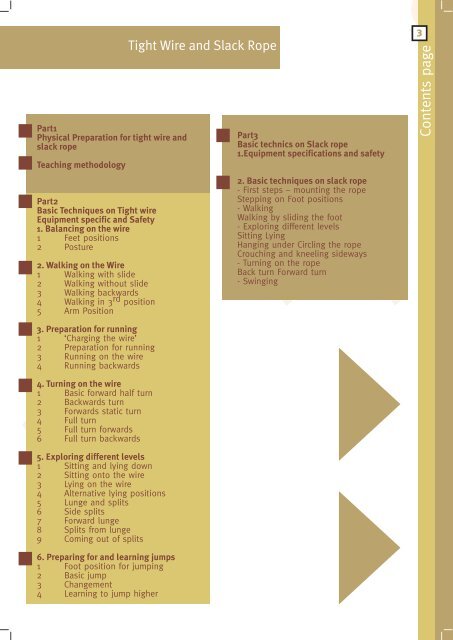
Part1<br />
Physical Preparation for tight <strong>wire</strong> <strong>and</strong><br />
<strong>slack</strong> <strong>rope</strong><br />
Teaching methodology<br />
Part2<br />
Basic Techniques on <strong>Tight</strong> <strong>wire</strong><br />
Equipment specific <strong>and</strong> Safety<br />
1. Balancing on the <strong>wire</strong><br />
1 Feet positions<br />
2 Posture<br />
2. Walking on the Wire<br />
1 Walking with slide<br />
2 Walking without slide<br />
3 Walking backwards<br />
4 Walking in 3 rd position<br />
5 Arm Position<br />
3. Preparation for running<br />
1 ‘Charging the <strong>wire</strong>’<br />
2 Preparation for running<br />
3 Running on the <strong>wire</strong><br />
4 Running backwards<br />
4. Turning on the <strong>wire</strong><br />
1 Basic forward half turn<br />
2 Backwards turn<br />
3 Forwards static turn<br />
4 Full turn<br />
5 Full turn forwards<br />
6 Full turn backwards<br />
5. Exploring different levels<br />
1 Sitting <strong>and</strong> lying down<br />
2 Sitting onto the <strong>wire</strong><br />
3 Lying on the <strong>wire</strong><br />
4 Alternative lying positions<br />
5 Lunge <strong>and</strong> splits<br />
6 Side splits<br />
7 Forward lunge<br />
8 Splits from lunge<br />
9 Coming out of splits<br />
6. Preparing for <strong>and</strong> learning jumps<br />
1 Foot position for jumping<br />
2 Basic jump<br />
3 Changement<br />
4 Learning to jump higher<br />
<strong>Tight</strong> Wire <strong>and</strong> Slack Rope<br />
Part3<br />
Basic technics on Slack <strong>rope</strong><br />
1.Equipment specifications <strong>and</strong> safety<br />
2. Basic techniques on <strong>slack</strong> <strong>rope</strong><br />
- First steps – mounting the <strong>rope</strong><br />
Stepping on Foot positions<br />
- Walking<br />
Walking by sliding the foot<br />
- Exploring different levels<br />
Sitting Lying<br />
Hanging under Circling the <strong>rope</strong><br />
Crouching <strong>and</strong> kneeling sideways<br />
- Turning on the <strong>rope</strong><br />
Back turn Forward turn<br />
- Swinging<br />
3<br />
Contents page
Manual for <strong>Tight</strong> Wire <strong>and</strong> Slack Rope 3<br />
TEACHING MANUAL FOR TIGHT WIRE AND SLACK ROPE<br />
Physical Preparation for <strong>Tight</strong> Wire <strong>and</strong> Slack Rope<br />
Dance training is very good preparation for both <strong>wire</strong> <strong>and</strong> <strong>rope</strong> as this trains the posture<br />
<strong>and</strong> legs in the correct way. If a student doesn’t have this background then it is important<br />
to train the postural muscles <strong>and</strong> the legs. Some aerobic training is also important as<br />
the student will be staying on the <strong>wire</strong> for a long time whilst training. For this reason,<br />
interval training can also be very useful.<br />
Interval training:<br />
Interval training requires the individual to repeat a number of exercise bouts for a set<br />
time with a certain rest interval between each bout. The rest interval can be completely<br />
sedentary, but often involves a lower rate of working to assist recovery or to increase<br />
the intensity of the work out. This type of training is also known as ‘Fartlek’.<br />
Two interval training schedules are presented below which could be relevant to working<br />
the <strong>wire</strong> <strong>and</strong> <strong>rope</strong>. One is specific the other more general <strong>and</strong> designed to increase<br />
aerobic power.<br />
1. Specific: Work <strong>and</strong> rest intervals are both 1min 30secs long<br />
Work interval 1: walking on <strong>wire</strong><br />
Rest interval 1: sitting with knees bent, back to wall<br />
Work interval 2: walking backwards on <strong>wire</strong><br />
Rest interval 2: as RI 1<br />
Work interval 3: running on <strong>wire</strong><br />
Rest interval 3: as RI 1<br />
Work interval 4: walking backwards on <strong>wire</strong><br />
Rest interval 4: as RI 1<br />
Work interval 5: walking on <strong>wire</strong><br />
Rest interval 5: as RI 1<br />
part1/ Physical Preparation<br />
1
part1/ Physical Preparation<br />
2. General endurance:<br />
5 x<br />
Work interval – sprint 10 secs<br />
Rest interval – jog 5 secs<br />
Repeat x 3<br />
Teaching Methodology<br />
There are obviously many approaches to teaching balancing on a <strong>wire</strong> or a <strong>rope</strong>, but<br />
certain practises might help the teacher to improve their students.<br />
Highly important for the potential performer on <strong>wire</strong> or <strong>rope</strong> is dance training. If a student<br />
begins to learn with a background of dance they will have a great advantage. For those<br />
who don’t it is important to include dance training in the normal sessions. Equally<br />
important <strong>and</strong> often synonymous with dance training is a sense of rhythm <strong>and</strong> musicality.<br />
A normal session on the <strong>wire</strong> should include a dance warm-up to music <strong>and</strong> once the<br />
first steps to balancing have been achieved <strong>and</strong> the student can walk comfortably on<br />
the <strong>wire</strong> then it is useful to use a metronome for basic training. During this the student<br />
must learn to cope with balance in his or her own way, but in such a way that the<br />
audience don’t notice.<br />
During a session the student should spend as much time on the <strong>wire</strong> as possible. Using<br />
the metronome helps by making the individual think of the timing <strong>and</strong> rhythm <strong>and</strong> not<br />
so much about the skills. In this way the skills are learned through proprioception <strong>and</strong><br />
become internalised. If the student has to think of what he or she is doing then they<br />
more than likely will fail.<br />
All movements can be practised on the floor to learn <strong>and</strong> internalise the basic actions,<br />
foot patterns for instance. Develop skills from the floor to a low <strong>wire</strong> <strong>and</strong> eventually the<br />
performing height. Always use safety mats <strong>and</strong> make sure the student is confident. Fear<br />
causes a breakdown in skill, <strong>and</strong> the fine control needed for balancing is impossible if<br />
the pulse is racing <strong>and</strong> the limbs shaking!<br />
Below is a suggested structure for a 2 hour session on <strong>wire</strong> or <strong>rope</strong>. There are obviously<br />
many other ways to structure a session.<br />
Warm – up, dance, with music 30 mins<br />
Basic skills (relevant to level of performer) 20 mins<br />
Already learned skills 20 mins<br />
New skills 20 mins<br />
Games <strong>and</strong> conditioning 20 mins<br />
Warm – down 10 mins<br />
For beginners with no background of dance or other acrobatic activities you will need<br />
to include separate sessions for stretching <strong>and</strong> improving posture/body condition within<br />
the programme.<br />
There is considerable debate to the merits of using a prop for balancing, such as a fan.<br />
Generally, it is not believed to be a good thing to use a balancing aid to begin. When<br />
the student has progressed beyond the basics then he or she can decide if they want<br />
to or not. If a fan is held in one h<strong>and</strong> then it is important that the other arm moves in<br />
an aesthetic way.<br />
Basic Rules for Learning <strong>Tight</strong> Wire<br />
2<br />
3<br />
Manual for <strong>Tight</strong> Wire <strong>and</strong> Slack Rope
Manual for <strong>Tight</strong> Wire <strong>and</strong> Slack Rope 3<br />
1. Before walking on the <strong>wire</strong>, try to st<strong>and</strong> on one foot <strong>and</strong> feel the balance. Try this<br />
on both feet. Experiment with the spring of the <strong>wire</strong>.<br />
2. When you begin to walk, make sure you have the correct posture<br />
3. All activities on the <strong>wire</strong>:<br />
- St<strong>and</strong>ing<br />
- Walking (forwards <strong>and</strong> backwards)<br />
- Turning (forwards <strong>and</strong> backwards)<br />
- umping<br />
Should all be done:<br />
- With the rhythm of the <strong>wire</strong><br />
- Without the rhythm<br />
- Against the rhythm<br />
- Changing the rhythm<br />
All of these at different speeds<br />
part1/ Physical Preparation<br />
3
EQUIPMENT SPECIFICATIONS AND SAFETY<br />
BASIC EQUIPMENT GUIDELINES:<br />
Wire thickness: This is usually 12 – 13mm<br />
Length: Usually between 5 – 7m<br />
Size of Platform: To personal taste but usually around 35cm diameter<br />
Tension: Variable according to taste<br />
Angle to fixing points: A low angle is better as this causes less stress on the fixing,<br />
generally no higher than 45º<br />
Springloading: Most modern <strong>wire</strong>s are sprung, but it is not absolutely<br />
necessary. Once again it depends on personal taste. If a<br />
spring is to be used then it is essential to use a tirfor to<br />
control the tension.<br />
Height: Beginners – around 50cm, progress to 1m. Competent performers<br />
2m<br />
SAFETY<br />
Environmental considerations:<br />
part2/ Basic Techniques on <strong>Tight</strong> Wire<br />
Visibility: To see the <strong>wire</strong> it is obviously necessary to have adequate<br />
lighting, also avoid lights shining in the eyes.<br />
Human traffic: It is important to control the passing by of other people. This<br />
can cause a distraction to the student. When planning where<br />
to put a <strong>wire</strong> set – up it is important to bear in mind the normal<br />
traffic routes for people<br />
Levels of Skill: No student should be progressed onto skills for which he or<br />
she is not ready. The progressive build up of skills, with success<br />
at each level is the only way to proceed safely.<br />
Respect for Students: Teachers should respect students fears <strong>and</strong> not bully them into<br />
trying skills for which they are not psychologically prepared.<br />
If a teacher feels a student is ready for a skill <strong>and</strong> the student<br />
is afraid to do it, then they should discuss the problem <strong>and</strong><br />
look for ways to increase the student’s confidence.<br />
Falling It is generally regarded as safe practice for tight <strong>wire</strong> to catch<br />
the <strong>wire</strong> when you fall. However it is not such a good idea to<br />
teach this at the earliest stages as it can result in students<br />
loosing balance <strong>and</strong> reaching down for the <strong>wire</strong> as a reflex<br />
action. It is better introduced at a later date when the student<br />
is beginning to work on higher <strong>wire</strong>s<br />
4<br />
3<br />
Manual for <strong>Tight</strong> Wire <strong>and</strong> Slack Rope
Manual for <strong>Tight</strong> Wire <strong>and</strong> Slack Rope 3<br />
part2/ Basic Techniques on <strong>Tight</strong> Wire<br />
Equipment considerations:<br />
Mats When learning skills or just practising generally, safety mats<br />
should be placed under the <strong>wire</strong>. There should also be a mat<br />
placed over the top of the safety mats to ensure there are no<br />
gaps. Avoid using grey mats as it is difficult to see the <strong>wire</strong><br />
with a grey background. When learning skills the mats should<br />
be at a height so that the student can st<strong>and</strong> with his or her<br />
legs either side of the <strong>wire</strong>.<br />
Lunges: Lunges can be used for learning advanced skills. It is important<br />
that the angle of the <strong>rope</strong> from the belt is not too small to<br />
avoid snagging. All couplings <strong>and</strong> belts should be checked on<br />
a regular basis, also check <strong>rope</strong>s for fraying. Only a qualified<br />
person should operate the lunge<br />
Clothing: Loose clothing should be avoided as it can catch. It is also<br />
not possible for the teacher to see mistakes in posture if the<br />
clothes are too loose. Shoes should be soft with a soft leather<br />
sole covering the instep. These should also have smooth seams<br />
to avoid catching. Either boots or shoes can be worn but they<br />
should not have a heel.<br />
Tension of Cable: <strong>Tight</strong>ening the cable too much can weaken fixings <strong>and</strong> cause<br />
other problems. Use a tensioner or a bottle screw to adjust<br />
the tension. Also check cables for fraying as there is 2 – 3<br />
tonnes of weight on the cable when you work on it. All<br />
equipment should be kept dry.<br />
This type of wall fixing needs to be able to take a huge strain. Fixings should be<br />
clearly marked to say if they have been officially tested to the safety st<strong>and</strong>ards required.<br />
5<br />
3
part2/ Basic Techniques on <strong>Tight</strong> Wire<br />
Tensioners (tirfor) can set the correct tension on the <strong>wire</strong><br />
6<br />
3<br />
Manual for <strong>Tight</strong> Wire <strong>and</strong> Slack Rope
Manual for <strong>Tight</strong> Wire <strong>and</strong> Slack Rope 3<br />
BASIC TECHNIQUES<br />
1/ BALANCING ON THE WIRE<br />
feet positions:<br />
Feet in line<br />
- The feet are in line with the <strong>wire</strong><br />
running through the centre of the foot<br />
<strong>and</strong> between the big toe <strong>and</strong> the rest<br />
of the toes.<br />
- The weight is evenly spread across<br />
the foot<br />
Feet in 3 rd Position<br />
- The feet are turned out <strong>and</strong> the <strong>wire</strong><br />
runs across the instep<br />
- Weight evenly distributed<br />
St<strong>and</strong>ing sideways<br />
- The <strong>wire</strong> runs across the insteps of<br />
both feet<br />
- The toes should press down to keep<br />
tension<br />
St<strong>and</strong>ing on toes sideways<br />
- The <strong>wire</strong> runs across the bottom of<br />
the joint between the toes <strong>and</strong> the<br />
main body of the foot.<br />
- Toes should be pressed down<br />
Preparation for jumping<br />
- Front foot as per normal in-line<br />
stance, back ankle is extended so<br />
that only the ball <strong>and</strong> toes are on the<br />
<strong>wire</strong>.<br />
part2/ Basic Techniques on <strong>Tight</strong> Wire<br />
7
part2/ Basic Techniques on <strong>Tight</strong> Wire<br />
Posture<br />
Posture is of great importance when working on the <strong>wire</strong>. Arching the lower back causes<br />
a core weakness <strong>and</strong> will inevitably lead to instability. Fig 1 shows an incorrect position<br />
where you can see a pronounced arch in the back.<br />
Fig 1 Fig 2<br />
Fig 2 shows correct posture with the hips tilted backwards <strong>and</strong> the spine much straighter<br />
than fig 1.<br />
There are a number of ways to educate the body to this position, some of these are<br />
described below.<br />
1. Trapping the mouse:<br />
The student lies on his or her back with the arms placed out to the side. Another<br />
person, either student or teacher then places their h<strong>and</strong> underneath the natural<br />
arch in the students back. The student must try to ‘trap’ the h<strong>and</strong> by tilting the<br />
hips backwards.<br />
Once this has been successfully achieved <strong>and</strong> understood then the exercise is<br />
repeated with the arms moving above the head. This is more difficult <strong>and</strong> is also<br />
dependent on the student’s range of movement in the shoulders. It is not necessary<br />
to have the arms completely flat to the floor.<br />
2. ‘Lifting the log’<br />
From the position described above with the back straight <strong>and</strong> the hips tilted<br />
backwards, the student is lifted by the feet into a shoulder st<strong>and</strong> position. The<br />
position of the back <strong>and</strong> hips must be maintained all the way up <strong>and</strong> down<br />
3. ‘Back to the wall’<br />
Now the student learns to st<strong>and</strong> <strong>and</strong> move the arms with correct posture. He or<br />
she st<strong>and</strong> with the back against the wall. A small piece of foam or a ‘t’ shirt is<br />
placed behind the lower back which must be kept in place while the student goes<br />
through number of movement of the arms. These can later be developed to<br />
include varying lifts <strong>and</strong> positions of the legs.<br />
8<br />
33<br />
Manual for <strong>Tight</strong> Wire <strong>and</strong> Slack Rope
Manual for <strong>Tight</strong> Wire <strong>and</strong> Slack Rope 3<br />
4. ‘Passing the body’<br />
part2/ Basic Techniques on <strong>Tight</strong> Wire<br />
This game involves 4 or 5 people. The one in the centre is the body <strong>and</strong> must<br />
maintain a straight body with the feet in the same place. It begins with the person<br />
directly behind taking the weight of the ‘body’ <strong>and</strong> leaning it backwards, the centre<br />
student is then passed around the circle. At any point the direction can be reversed<br />
or the body can be passed from back to front.<br />
These are all games to ensure that the student is well prepared in the correct<br />
posture for walking the <strong>wire</strong>, but probably the most useful is a regular basic dance<br />
class.<br />
2/ WALKING ON THE WIRE<br />
To begin, all techniques should be practised on the floor. This can be done on a chalk<br />
line drawn on the floor or on a <strong>rope</strong> stretched out on the floor. When ready the first<br />
steps onto the <strong>wire</strong> are taken.<br />
Once the basic in-line foot position is understood the student can begin to walk on the<br />
<strong>wire</strong>. There are 2 basic stages to this:<br />
1. Walking by sliding the foot forward<br />
2. Walking without sliding<br />
The first technique is easier for beginners as the foot has little time without contact on<br />
the <strong>wire</strong>.<br />
WALKING WITH SLIDE<br />
(FEET IN LINE)<br />
- Start first step very close to the<br />
platform<br />
- Fix the eyes on the platform ahead<br />
- Take the chest forward to put the<br />
weight on the front leg<br />
- Place the other leg, knee bent,<br />
immediately in front of the other foot,<br />
toe on the <strong>wire</strong><br />
- The front foot is placed on the<br />
<strong>wire</strong> just in front of the other<br />
foot with the <strong>wire</strong> running<br />
between the big toe <strong>and</strong> the<br />
other toes<br />
- Then slide it forwards bringing the<br />
weight onto it as the foot flattens<br />
onto the <strong>wire</strong>.<br />
1 2 3 4 5<br />
9
part2/ Basic Techniques on <strong>Tight</strong> Wire<br />
1) The weight is placed on the foot close to the platform<br />
2) The front foot is placed on the <strong>wire</strong> with only the ball of the foot touching, the<br />
weight is on the back foot.<br />
3) The front foot is slid forward until the ankle is completely extended. At this point<br />
most of the weight is on the back foot.<br />
4) The weight is transferred onto the front leg <strong>and</strong> the foot is placed down flat.<br />
Simultaneously the weight comes off the back foot <strong>and</strong> the ankle is extended so<br />
that only the ball of the foot is touching the <strong>wire</strong>.<br />
5) The weight is shifted slightly forwards as the back foot is slid along the <strong>wire</strong> to<br />
arrive right behind the heel of the front foot.<br />
Once the student is comfortable with this type of movement then a more normal walking<br />
pattern can be adopted with the feet in line.<br />
Walking Backwards:<br />
The technique for this is simply to reverse the above process for walking forwards. Obviously<br />
it is harder to do as the performer cannot see the <strong>wire</strong>. However the eyes should still remain<br />
fixed on the platform ahead. The <strong>wire</strong> is found with the feet.<br />
Walking feet turned out<br />
Walking feet turned out<br />
(3 rd Position)<br />
- The <strong>wire</strong> is found from underneath<br />
- The supporting leg remains slightly<br />
flexed<br />
1 2 3 4<br />
1) The instep of the right foot is placed on the <strong>wire</strong> in front (this can be slid to begin<br />
with)<br />
2) The weight is transferred to the right leg. The leg remains slightly flexed as the<br />
left foot is swung beneath the <strong>wire</strong> to:<br />
3) Repeated process with left foot, the leg is extended as before the weight is<br />
transferred onto it<br />
4) The weight is now over the flexed left leg<br />
Feet Position for walking in 3 rd position<br />
The weight is always on the front foot ( top picture corresponds to bottom picture).<br />
10<br />
3<br />
Manual for <strong>Tight</strong> Wire <strong>and</strong> Slack Rope
Manual for <strong>Tight</strong> Wire <strong>and</strong> Slack Rope 3<br />
Lunge, showing correct arm positioning<br />
part2/ Basic Techniques on <strong>Tight</strong> Wire<br />
Arm Position:<br />
The use of the arms is most important to balance <strong>and</strong> as seen in the section on<br />
biomechanics, affects not only the position of the centre of mass but can also rotate the<br />
body. The arm action most preferred is to keep the elbows still as much as possible at<br />
shoulder height <strong>and</strong> move the lower arms to maintain balance.<br />
Figs 3 – 6 show these positions which are the same for tight <strong>wire</strong> <strong>and</strong> <strong>slack</strong> <strong>rope</strong>.<br />
3/ PREPARATION FOR RUNNING<br />
Running is done with the feet turned out in 3 rd position. So it necessary first to learn<br />
to walk with the feet turned out (see above for foot position). In order to control the<br />
bounce of the <strong>wire</strong> the student should learn to walk ‘charging’ the <strong>wire</strong>. For this, the<br />
supporting leg is slightly bent <strong>and</strong> the weight is pushed down into the <strong>wire</strong>. The foot<br />
should find the <strong>wire</strong> from underneath.<br />
Walking – “Charging” the <strong>wire</strong><br />
- The support leg remains bent<br />
to take up the bounce of the <strong>wire</strong><br />
- The swinging leg goes under<br />
the <strong>wire</strong> <strong>and</strong> finds it from below<br />
As explained earlier in the biomechanics section , the centre of mass must be in front<br />
of the feet to create a position of imbalance. This is done by leaning forwards. To help<br />
underst<strong>and</strong> this, the teacher can pull the students shoulders forwards using a <strong>rope</strong><br />
11
part2/ Basic Techniques on <strong>Tight</strong> Wire<br />
Preparation for running<br />
- The <strong>rope</strong> is looped around the<br />
shoulders<br />
- The teacher maintains a constant<br />
pressure from the other end<br />
Running on the <strong>wire</strong><br />
1 2 3 4 5 6 7<br />
1. The body is leaned forward to allow the imbalance to move<br />
2. The first step through lunge<br />
3 – 4 The strides are lengthened with the legs remaining bent whilst taking weight<br />
5 – 7 The body begins to come upright, the steps shorter <strong>and</strong> eventually leaning<br />
backward to over come the forwards momentum <strong>and</strong> avoid running onto the<br />
platform<br />
Foot position <strong>and</strong> timing of the <strong>wire</strong><br />
1. The <strong>wire</strong> is down <strong>and</strong> the weight is on the front leg<br />
2. As the legs pass the <strong>wire</strong> is going up<br />
3. As the weight is placed on the front foot the <strong>wire</strong> is up<br />
4. The weight is placed on the front leg <strong>and</strong> the <strong>wire</strong> goes down<br />
Running backwards<br />
- Begin with lean backwards<br />
- Repeat in reverse actions for<br />
forwards run<br />
- Support leg must always bend<br />
to take up the spring in the <strong>wire</strong><br />
It is important to notice the posture during the backwards run. The backward momentum<br />
is achieved by leaning backwards, but the hips remain turned in <strong>and</strong> the back stays<br />
straight. The hips must lead the movement. See pictures below: The posture on the<br />
left is wrong <strong>and</strong> the right is correct.<br />
12<br />
3<br />
Manual for <strong>Tight</strong> Wire <strong>and</strong> Slack Rope
Manual for <strong>Tight</strong> Wire <strong>and</strong> Slack Rope 3<br />
part2/ Basic Techniques on <strong>Tight</strong> Wire<br />
Note that the <strong>rope</strong> can be used for walking backwards as well. On this occasion it offers<br />
resistance to the performer so he or she must press against it with the correct posture.<br />
4/ TURNING ON THE WIRE<br />
PREPARING FOR TURNS<br />
There are a number of different ways of turning on the <strong>wire</strong>, each of which should be<br />
explored <strong>and</strong> correctly performed on the floor first. These turns can be introduced once<br />
the performer is comfortable walking forwards <strong>and</strong> backwards on the <strong>wire</strong>. The most<br />
part to underst<strong>and</strong> is the placing of the feet.<br />
Basic Forward Half Turn:<br />
This turn takes the student from walking forwards to walking backwards. The skill, with<br />
the foot pattern is shown below:<br />
Forwards turn<br />
- Right foot is placed almost<br />
parallel with turned out back foot<br />
- As the body turns the left foot<br />
is placed behind the right <strong>and</strong><br />
the right foot turned into position<br />
Backwards Turn<br />
The backwards turn is technically easier as the feet are turning out, however the balance<br />
can be more difficult as the body is travelling backwards.<br />
13
part2/ Basic Techniques on <strong>Tight</strong> Wire<br />
Backwards turn<br />
- Right foot is laced behind <strong>and</strong><br />
turned out<br />
- As the body turns backwards<br />
the right foot is turned<br />
further <strong>and</strong> the left leg swings<br />
across the body<br />
- Continue walking forward<br />
Forwards static turn<br />
14<br />
Half turn on the <strong>wire</strong><br />
This turn is similar to the normal forwards turn but the performer turns on both feet <strong>and</strong><br />
returns from where he came. It is the first step to learning the full turn.<br />
Forward static turn<br />
- Step onto left foot with foot<br />
turned parallel to back foot as<br />
per previous forward turn<br />
- Pivot on both feet to turn 180º<br />
- Step back the way you came<br />
Full turn on the <strong>wire</strong>:<br />
There are two basic ways to perform a full turn on the <strong>wire</strong>. The forward version entails<br />
the above static forward turn followed by an immediate backward turn. The backwards<br />
version requires a backwards half turn followed by a forward stepping turn (Shown above<br />
as the first forward turn. Once again these should be stepped out on the floor, on a line<br />
or <strong>rope</strong> before being taken to the <strong>wire</strong>. Maintaining correct posture is very important<br />
during these more advanced turns.<br />
3<br />
Manual for <strong>Tight</strong> Wire <strong>and</strong> Slack Rope
Manual for <strong>Tight</strong> Wire <strong>and</strong> Slack Rope 3<br />
Full turn forwards:<br />
part2/ Basic Techniques on <strong>Tight</strong> Wire<br />
1 2 3 4 5 6 7 8 9<br />
during these more advanced turns.<br />
Figs 1 – 4 show the forwards static turn, 5-9 shows the backwards turn<br />
Full turn backwards<br />
1 2 3 4 5 6 7 8 9<br />
Figs 1-4 show the backward half turn, 5 – 9 the forwards walking turn."<br />
5/ EXPLORING DIFFERENT LEVELS<br />
Sitting <strong>and</strong> lying down:<br />
To add interest to a performance on the <strong>wire</strong> it is good to explore different levels. In<br />
preliminary exercises the student may practise squatting down <strong>and</strong> st<strong>and</strong>ing up. This is<br />
good training for balance but also for getting used to going down onto the <strong>wire</strong> in sit<br />
<strong>and</strong> lie.<br />
Squat, front foot flat Squat on toes<br />
15
part2/ Basic Techniques on <strong>Tight</strong> Wire<br />
To begin with one leg must be taken off the <strong>wire</strong> <strong>and</strong> dropped to the side, the student<br />
then squats down on one leg <strong>and</strong> sits back onto the <strong>wire</strong>.<br />
Sitting onto the <strong>wire</strong><br />
- Right leg is taken off the <strong>wire</strong><br />
<strong>and</strong> dropped to side<br />
- Squat down on left leg<br />
- Sit onto <strong>wire</strong><br />
- Extend left leg<br />
- Extend right leg<br />
Lying on the <strong>wire</strong><br />
- From sitting as above, slowly<br />
lie back<br />
- Use right leg for balance<br />
- In position cross right leg over<br />
left <strong>and</strong> use arms for balance<br />
Alternative lying positions<br />
Lunge <strong>and</strong> splits:<br />
The lunge position can be used as a position on its own or as a preliminary to descending<br />
into splits. Two different lunge positions are shown below, forwards <strong>and</strong> sideways You<br />
need to master squatting down before attempting these. The side lunge can be performed<br />
either side, the pictures show a transfer from right to left. Note that the body does not<br />
rise during this transfer.<br />
1 2 3 4<br />
16<br />
3<br />
Manual for <strong>Tight</strong> Wire <strong>and</strong> Slack Rope
Manual for <strong>Tight</strong> Wire <strong>and</strong> Slack Rope 3<br />
part2/ Basic Techniques on <strong>Tight</strong> Wire<br />
1) From squat, the left begins to extend, the body must be kept upright<br />
2) The left leg is fully extended <strong>and</strong> the lunge position reached<br />
3) The weight is transferred across both legs without raising the height of the body<br />
4) The left leg lunge is reached by extending the right leg<br />
This can also be used as a means of travelling along the <strong>wire</strong>, by repeating this action<br />
a number of times.<br />
Side split<br />
Forward lunge:<br />
- This is achieved by placing one<br />
leg behind the other (in this case<br />
the right leg). The foot is<br />
then slowly slid backwards along<br />
the <strong>wire</strong>.<br />
- The body must be kept upright<br />
- The hips must be kept square<br />
to maintain balance<br />
- The front foot is turned out<br />
Splits:<br />
As mentioned above the splits can be moved into from the forward lunge, this is achieved<br />
by pushing backwards with the left foot from the above position extending the left leg<br />
into splits.<br />
Splits from lunge<br />
- Extend forward leg<br />
- Slide back leg<br />
- Feet turned out<br />
- Body remains upright<br />
17
part2/ Basic Techniques on <strong>Tight</strong> Wire<br />
The splits can also be reached by sliding the front leg forwards or by sliding both at<br />
the same time, it is really a matter of personal preference. To get out of the position<br />
it is easiest to bend the front leg <strong>and</strong> then bring the back leg forward under the <strong>wire</strong><br />
to sit, as below.<br />
Coming out of splits<br />
- Bend the front leg hooking it<br />
under the <strong>wire</strong><br />
- Release the back leg lean back<br />
to sit<br />
6/ PREPARING FOR AND LEARNING JUMPS<br />
Once again it is best to go through all the technical aspects of jumping on the <strong>wire</strong><br />
whilst practising on the floor. After this a low <strong>wire</strong> should be used with safety mats up<br />
to a level which allows the student to step off comfortably without hindering the flexion<br />
of the <strong>wire</strong>. The normal take-off position for the feet in a jump is as shown at the<br />
beginning of this chapter, but for convenience is shown again below.<br />
Foot position for jumping L<strong>and</strong>ing position from jump<br />
From this position the student can flex the legs <strong>and</strong> make a small jump, l<strong>and</strong>ing in ‘5 th ’<br />
turned out position as below.<br />
Once this is consistent the student can progress to ‘changement’, where the position<br />
of the feet is changed during the jump. For this skill the student begins in turned out<br />
position. When this has become consistent then it can be repeated in a series of jumps.<br />
18<br />
3<br />
Manual for <strong>Tight</strong> Wire <strong>and</strong> Slack Rope
Manual for <strong>Tight</strong> Wire <strong>and</strong> Slack Rope 3<br />
Timing of the legs <strong>and</strong> the <strong>wire</strong> in the changement<br />
part2/ Basic Techniques on <strong>Tight</strong> Wire<br />
1 2 3 4<br />
1. At the beginning the weight is on both feet<br />
2. As the legs bend into plie, the <strong>wire</strong> goes down<br />
3. As the <strong>wire</strong> returns the legs are extended<br />
4. When the <strong>wire</strong> is fully up the feet are extended <strong>and</strong> the weight is going upwards<br />
During l<strong>and</strong>ing the feet are extended as they reach the <strong>wire</strong>, as the weight comes down<br />
<strong>and</strong> the <strong>wire</strong> bends the legs are bent as in (2) to absorb the l<strong>and</strong>ing. After this they are<br />
extended as in (1). Throughout the whole jump the back must remain straight as per<br />
classical ballet.<br />
Basic Jump<br />
Series of changement<br />
Learning to jump higher<br />
To gain the confidence <strong>and</strong> ability to jump high from the <strong>wire</strong> requires a slow development<br />
over time. To help with this the teacher can give the student something to jump over.<br />
Obviously this needs to be something which is easily removable <strong>and</strong> will impede the<br />
student if he or she catches it. A stick can be held in front. The height of this can easily<br />
be altered <strong>and</strong> it can be moved away during the jump if necessary.<br />
There are numerous other steps, jumps etc that can be done on the <strong>wire</strong>. If it can be<br />
done on a line on the floor then it is possible to do it on a <strong>wire</strong>. However, the basic<br />
movements have been covered here.<br />
19
part3/ Basic techniques on Slack Rope<br />
1/ Equipment specifications <strong>and</strong> safety<br />
BASIC EQUIPMENT GUIDELINES<br />
Specification of <strong>rope</strong>: Either <strong>rope</strong> or <strong>wire</strong> can be used, normally <strong>rope</strong> is<br />
static climbing <strong>rope</strong> 10 – 11mm<br />
A – Frames: A – Frames are usually around 2m in height, held off<br />
at the top with a single <strong>rope</strong> or <strong>wire</strong>. If the <strong>rope</strong> is<br />
very <strong>slack</strong> then it might become necessary to use two<br />
fixings at angles to stop the frame from moving<br />
sideways. When the <strong>rope</strong> is taut, the frames should<br />
be upright. It is also possible to fix the <strong>rope</strong> from wall<br />
or ceiling mountings. (See pictures)<br />
Degree of <strong>slack</strong>: This is to personal taste but normally the degree of<br />
<strong>slack</strong> is such that when the performer st<strong>and</strong>s in the<br />
middle of the <strong>rope</strong> the top of the A – frames is at<br />
about shoulder to head height.<br />
Height: When beginning it is recommended that the bottom<br />
part of the <strong>rope</strong> when under tension is about 10 cm<br />
from the mats. After this it is a matter of personal<br />
taste.<br />
SAFETY<br />
Matting: Matting for <strong>slack</strong> <strong>rope</strong> should be wider than for tight<br />
<strong>wire</strong> to take account of the movement of the <strong>rope</strong> <strong>and</strong><br />
swing. Safety mats should always be used when learning<br />
skills o the <strong>slack</strong> <strong>rope</strong><br />
Human traffic: As for tight <strong>wire</strong>, it is important to control the passing<br />
of other people especially when skills are being learned<br />
with a swing<br />
Levels of skill: Progression should be logical <strong>and</strong> consistent. Each<br />
stage should be mastered <strong>and</strong> practised until consistent<br />
before moving on.<br />
Lunges: Lunges can be used for learning skills, see notes in<br />
tight <strong>wire</strong> section<br />
Clothing: Students should not wear clothing that is too loose.<br />
Shoes should be similar to those worn for tight <strong>wire</strong><br />
but it is possible to work on the <strong>rope</strong> with only socks<br />
20<br />
3<br />
Manual for <strong>Tight</strong> Wire <strong>and</strong> Slack Rope
Manual for <strong>Tight</strong> Wire <strong>and</strong> Slack Rope 3<br />
part3/ Basic techniques on Slack Rope<br />
These pictures show <strong>rope</strong>s set at around a degree of <strong>slack</strong> so that the shoulders are<br />
in line with the top of the frames<br />
Possible fixings at top of frames<br />
21<br />
A-frame without tension<br />
Alternative method of fixing <strong>rope</strong>, from ceiling. Also note that the <strong>rope</strong> is much <strong>slack</strong>er
part3/ Basic techniques on Slack Rope<br />
2/ BASIC TECHNIQUES ON SLACK ROPE<br />
FIRST STEPS – MOUNTING THE ROPE<br />
To begin with it is best to fix the <strong>rope</strong> at a height where the lowest part is approximately<br />
10cm from the ground. First attempts at balance are made by stepping onto the <strong>rope</strong><br />
<strong>and</strong> balancing with one foot, in this way both the arms <strong>and</strong> the free leg can be used<br />
to balance. Unlike the tight <strong>wire</strong> balance on the <strong>slack</strong> <strong>rope</strong> is maintained by using the<br />
hips, but to begin use the arms as you would for tight <strong>wire</strong>. Beginners can use two<br />
sticks to help themselves balance<br />
Stepping on<br />
- The support foot on the <strong>rope</strong><br />
should be in line with the foot<br />
on the floor<br />
- Put the weight slowly onto the<br />
support foot <strong>and</strong> extend<br />
- Use the arms <strong>and</strong> the free leg<br />
to balance<br />
- Get used to balancing on each<br />
leg<br />
The various foot positions for the <strong>slack</strong> <strong>rope</strong> are shown below:<br />
Right foot, supporting left leg free<br />
- Rope runs between big toe<br />
<strong>and</strong> the other toes then along<br />
the centre of the foot<br />
Left leg supporting right leg free<br />
- As above<br />
Both feet in line<br />
- As both feet are on the <strong>rope</strong> it<br />
is not possible to balance with<br />
the free leg.<br />
- Use the hips to balance with<br />
help from the arms to begin<br />
22<br />
3<br />
Manual for <strong>Tight</strong> Wire <strong>and</strong> Slack Rope
Manual for <strong>Tight</strong> Wire <strong>and</strong> Slack Rope 3<br />
Both feet turned out (5 th position)<br />
- Rope runs under the arch of the<br />
feet<br />
- Ankles are slightly extended<br />
St<strong>and</strong>ing sideways<br />
- The balance is taken on the<br />
balls of the feet<br />
- The student should press the<br />
toes down to extend the ankles<br />
slightly<br />
part3/ Basic Techniques on Slack Rope<br />
The posture for <strong>slack</strong> <strong>rope</strong> is the same as tight <strong>wire</strong>. The back should be kept straight<br />
<strong>and</strong> the hips turned under. The difference is in the use of the arms, the <strong>slack</strong> <strong>rope</strong><br />
performer should get used to balancing without the arms <strong>and</strong> using the hips by putting<br />
pressure on the <strong>rope</strong> through each foot.<br />
It is useful to practice all these positions with the arms in different positions. Also practice<br />
different head positions, eyes open, eyes closed. This series of exercises can be made<br />
into a basic complex to be done each session at the beginning. Some of the positions<br />
are shown in the pictures below, the whole complex is shown on the DVD.<br />
WALKING<br />
As with the tight <strong>wire</strong> it is easier to start by sliding the feet along the <strong>rope</strong>. To begin<br />
with the student can traverse the <strong>rope</strong> with one leg leading all the time. The forward<br />
foot slides along the <strong>rope</strong> <strong>and</strong> the back foot slides in behind it. This can be followed<br />
by stepping <strong>and</strong> sliding the foot along the <strong>rope</strong>, then sliding the back foot up to the<br />
front then stepping again, as shown below.<br />
23
part3/ Basic Techniques on Slack Rope<br />
Before trying to walk the student can learn to transfer the balance from back foot to<br />
front foot by st<strong>and</strong>ing with the feet approximately 40cm apart <strong>and</strong> rocking from one to<br />
the other. As below:<br />
Rocking front to back<br />
- The weight is transferred onto<br />
the front leg <strong>and</strong> then to the<br />
back by exerting pressure on the<br />
<strong>rope</strong> with alternate legs<br />
Walking by sliding the feet<br />
1 2 3 4 5 6 7 8<br />
1. The back foot is drawn up behind the front, the weight is on the front foot<br />
2. The left leg moves in front of the right <strong>and</strong> the toes are placed on the <strong>rope</strong><br />
3. The left foot is slid forwards to make the step<br />
4. The weight begins to be transferred onto the left foot<br />
5. The weight is now almost completely on the left foot <strong>and</strong> the right foot begins<br />
to slide up behind it.<br />
6. The weight is now slightly forward <strong>and</strong> the right foot is ready to step in front<br />
7. The right toes are placed on the <strong>wire</strong> ready to slide<br />
8. The right foot has slid along the <strong>rope</strong> to complete a second step<br />
Once this has been mastered the student can progress to walking without sliding <strong>and</strong><br />
walking with the feet turned out.<br />
EXPLORING DIFFERENT LEVELS ON THE ROPE<br />
Sitting<br />
When learning to sit on the <strong>rope</strong> it is best to begin with about one third of the <strong>rope</strong><br />
behind you. This helps because the angle of the <strong>rope</strong> is steeper <strong>and</strong> the <strong>rope</strong> behind<br />
is relatively higher to your hips.<br />
24<br />
3<br />
Manual for <strong>Tight</strong> Wire <strong>and</strong> Slack Rope
Manual for <strong>Tight</strong> Wire <strong>and</strong> Slack Rope 3<br />
Sitting on the <strong>rope</strong><br />
- Position with one third of <strong>rope</strong><br />
behind<br />
- Start front foot forwards, back<br />
foot turned out<br />
- Squat down, back straight<br />
- Transfer weight to seat<br />
- To st<strong>and</strong> reverse the process<br />
Lying on the <strong>rope</strong><br />
part3/ Basic Techniques on Slack Rope<br />
To get to lying on the <strong>rope</strong> you have to sit first, as above. When the weight is on the<br />
seat you can lean back. The <strong>rope</strong> goes as close to the spine as possible, use one leg<br />
<strong>and</strong> the arms to maintain balance.<br />
Lying on the <strong>rope</strong><br />
- Start from sit<br />
- Use the free leg to help balance<br />
- When the balance is good bring<br />
the legs together<br />
Other skills from lying on the <strong>rope</strong><br />
Hanging under<br />
- The <strong>rope</strong> is hooked underneath<br />
the left leg <strong>and</strong> over the foot<br />
- The right leg is placed on top<br />
- Grasp the <strong>rope</strong> above the head<br />
- Rotate slowly <strong>and</strong> straighten the<br />
arms to hang<br />
25
part3/ Basic Techniques on Slack Rope<br />
Circling the <strong>rope</strong><br />
1. From sitting on the <strong>rope</strong><br />
2. Slide down until the <strong>rope</strong> is just above the hips<br />
3. Turn sideways extending the left leg over the <strong>rope</strong><br />
4. Hook the <strong>rope</strong> under the left knee <strong>and</strong> over the foot<br />
5. Release left h<strong>and</strong> <strong>and</strong> swing the right leg downwards<br />
6. Continue to use the right leg to give momentum to the circle<br />
7. As the body rises above the <strong>rope</strong> the performer can return to sit or<br />
8. Continue into another circle<br />
CROUCHING AND KNEELING SIDEWAYS<br />
From st<strong>and</strong>ing sideways bend the knees keeping the back straight. The <strong>rope</strong> should be<br />
just below the balls of the feet, as in the picture at the start of this chapter.<br />
26<br />
3<br />
Manual for <strong>Tight</strong> Wire <strong>and</strong> Slack Rope
Manual for <strong>Tight</strong> Wire <strong>and</strong> Slack Rope 3<br />
TURNING ON THE ROPE<br />
part3/ Basic Techniques on Slack Rope<br />
As on the <strong>wire</strong> there are different ways of turning on the <strong>rope</strong>. The easiest turns are<br />
the static ones. Normally the backwards turn is done first as this is probably the easiest.<br />
Back turn<br />
- The back foot is placed on the<br />
<strong>wire</strong> turned out<br />
- The weight is evenly distributed<br />
- As the body turns the feet turn<br />
- Final foot position is the<br />
opposite of the start position<br />
Forward turn<br />
- Step onto the front leg<br />
with the foot turned into the<br />
direction of turn<br />
- As the body turns the weight<br />
is on both feet<br />
- The feet turn as the body turns<br />
- On completion of the turn the<br />
weight is on the front foot<br />
SWINGING<br />
The lateral swing of the <strong>rope</strong> is begun by pushing through the leg with one hip <strong>and</strong><br />
then the other. Once the swing has increased then both feet can be used to increase<br />
it further or maintain a level. To stop the swing the legs push in opposition.<br />
27