Smart-UPS 250 - APC Media
Smart-UPS 250 - APC Media
Smart-UPS 250 - APC Media
You also want an ePaper? Increase the reach of your titles
YUMPU automatically turns print PDFs into web optimized ePapers that Google loves.
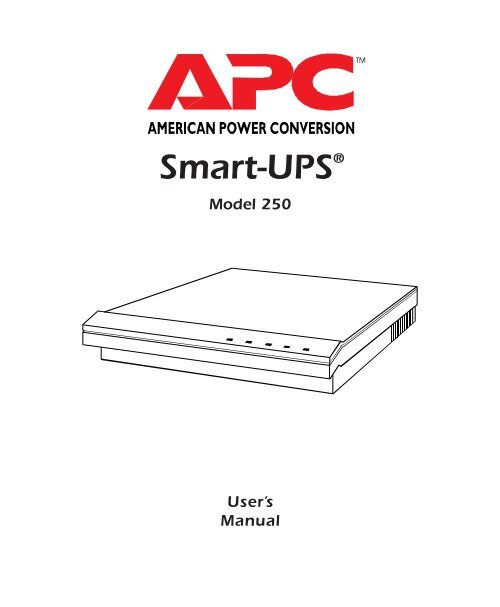
<strong>Smart</strong>-<strong>UPS</strong> ®<br />
Model <strong>250</strong><br />
User’s<br />
Manual
Important safety instructions!<br />
Please read this manual!<br />
Veuillez lire ce manuel!<br />
Bitte lesen Sie dieses Anleitungshandbuch!<br />
¡Se ruega leer este manual de instrucciones!<br />
This manual provides safety, installation, and operating instructions that will help you get the<br />
fullest performance and service life that the <strong>UPS</strong> has to offer.<br />
Please save this manual! It includes important instructions for the safe use of this <strong>UPS</strong>, and<br />
for obtaining factory service if necessary. Future service or storage issues may arise and require<br />
reference to this manual.<br />
Conserver ces instructions! Cette notice contient des instructions importantes concernant la<br />
sécurité.<br />
Radio frequency interference<br />
Warning: Changes or modifications to this unit not expressly approved by the party responsible<br />
for compliance could void the user’s authority to operate the equipment.<br />
Note: This equipment has been tested and found to comply with the limits for a Class B digital<br />
device, pursuant to Part 15 of the FCC Rules. These limits are designed to provide reasonable<br />
protection against harmful interference in a residential installation. This equipment generates,<br />
uses and can radiate radio frequency energy and, if not installed and used in accordance with<br />
the instructions, may cause harmful interference to radio communications.<br />
However, there is no guarantee that interference will not occur in a particular installation. If<br />
this equipment causes interference to radio or television reception, which can be determined<br />
by turning the equipment off and on, the user is encouraged to try to correct the interference by<br />
one or more of the following measures:<br />
• reorient the receiving antenna<br />
• increase the separation between the equipment and the receiver<br />
• connect the equipment into an outlet on a circuit different from that to<br />
which the receiver is needed<br />
• consult the dealer or an experienced radio/TV technician for help.<br />
Shielded communications interface cables must be used with this product.<br />
This digital apparatus does not exceed the Class B limits for radio noise emissions from digital apparatus<br />
set out in the Radio Interference Regulations of the Canadian Department of Communications.<br />
Le present appareil numerique n'emet pas de bruits radioelectriques depassant les limites<br />
applicables aux appareils numeriques de la Class B prescrites dans le Reglement sur le brouillage<br />
radioelectrique edicte par le ministere des Communications du Canada.<br />
Hiermit wird bescheinigt, dass der <strong>Smart</strong>-<strong>UPS</strong> <strong>250</strong> Ununterbrechbare Stromversorgungs-Gerät<br />
in Unereinstimmung mit den Bestimmungen der Vfg 1046/1984 funk-entstort ist. Der Deutschen<br />
Bundespost wurde das Inverkehrbringen diese Gerates angezeigt und die Berechtigung zur<br />
Uberprufung der Serie auf Einhaltung der Bestimmungen eingeraumt.<br />
VCCI-1*
Table of Contents<br />
1.0 Introduction .................................................................... 3<br />
1.1 Overview .......................................................................................................... 3<br />
1.2 <strong>Smart</strong>Boost ....................................................................................................... 4<br />
1.3 Battery replacement indicators and test ..................................................... 4<br />
1.4 Remote interfaces ............................................................................................ 4<br />
1.5 Extended capabilities ..................................................................................... 4<br />
2.0 Safety! Sécurité! Sicherheit! ¡Seguridad! ..................... 5<br />
3.0 Presentation .................................................................... 9<br />
3.1 <strong>250</strong>VA <strong>UPS</strong>—front panel ................................................................................ 9<br />
3.2 <strong>250</strong>VA <strong>UPS</strong>—rear panel ................................................................................. 9<br />
4.0 Installation .................................................................... 10<br />
4.1 Receiving inspection ..................................................................................... 10<br />
4.2 Placement ....................................................................................................... 10<br />
4.3 Connect <strong>UPS</strong> to service ................................................................................. 11<br />
4.4 Plug loads into <strong>UPS</strong> ...................................................................................... 12<br />
4.5 Switch on load equipment........................................................................... 12<br />
4.6 Enable <strong>UPS</strong> ..................................................................................................... 12<br />
4.7 Check site wiring fault indicator—100, 120 Vac versions only ............. 13<br />
5.0 Operation ...................................................................... 14<br />
5.1 Front-panel indicators .................................................................................. 14<br />
5.2 Test button functions .................................................................................... 15<br />
5.3 Audible alarms .............................................................................................. 17<br />
5.4 Option switches............................................................................................. 18<br />
5.5 Extended capabilities ................................................................................... 20<br />
6.0 <strong>UPS</strong> Monitoring ............................................................. 24<br />
6.1 Overview ........................................................................................................ 24<br />
6.2 Interface Kits .................................................................................................. 24<br />
6.3 PowerChute Software .................................................................................. 24<br />
6.4 Computer Interface port .............................................................................. 25<br />
7.0 Difficulty Difficulté Schwierigkeit Dificultad.............. 26<br />
7.1 Troubleshooting ............................................................................................. 30<br />
7.2 Battery replacement check .......................................................................... 33<br />
7.3 Obtaining service .......................................................................................... 34<br />
1
Table of Contents<br />
8.0 Storing the <strong>UPS</strong> ............................................................. 35<br />
8.1 Storage conditions ........................................................................................ 35<br />
8.2 Extended storage .......................................................................................... 35<br />
9.0 Specifications ................................................................. 36<br />
9.1 Input ................................................................................................................ 36<br />
9.2 Transfer characteristics ................................................................................ 36<br />
9.3 Output characteristics .................................................................................. 36<br />
9.4 Battery and charger ...................................................................................... 37<br />
9.5 Surge and noise suppression ...................................................................... 37<br />
9.6 Operating Environment ............................................................................... 37<br />
9.7 Physical ........................................................................................................... 38<br />
9.8 Approvals ....................................................................................................... 38<br />
9.9 Typical run times versus load ..................................................................... 38<br />
2
1.0 Introduction<br />
1.1 Overview<br />
This equipment is a high-performance, line-interactive, uninterruptible<br />
power source (<strong>UPS</strong>) designed to provide clean, reliable, AC power to<br />
computer loads. The <strong>UPS</strong>’s line-interactive circuit topology (see figure<br />
below) offers excellent efficiency, on-line voltage regulation, and fast utility<br />
fault response.<br />
The <strong>UPS</strong>’s DC-to-AC inverter is always connected to the output and when<br />
operating on-line, part of the inverter circuitry is used “in reverse” to<br />
continuously maintain optimum float charge on the battery. The inverter<br />
also protects the load from surges and EMI/RFI noise as part of an advanced<br />
hybrid surge suppression and filtering network.<br />
A unique mode of operation, called <strong>Smart</strong>Boost, regulates the load voltage<br />
by compensating for brownouts or sags without drawing power from the<br />
<strong>UPS</strong>’s battery. The <strong>UPS</strong> continuously monitors the line for utility failure<br />
and prepares the inverter frequency for synchronous transfer of the load.<br />
When a utility voltage failure occurs such as a blackout, severe brownout,<br />
or an overvoltage condition, the <strong>UPS</strong> transfers the load to battery power.<br />
Transfer to “on-battery” operation typically takes place within 2 milliseconds.<br />
The inverter’s output voltage waveshape is a low distortion sine<br />
wave. Resynchronization and transfer back to on-line operation is automatic<br />
when the line voltage returns to within normal limits.<br />
<br />
<br />
<br />
Ä<br />
+<br />
<br />
<br />
Å <br />
Æ <br />
ÆÅ<br />
ÂÅ<br />
<br />
Ä<br />
Å<br />
Line interactive <strong>UPS</strong> block diagram<br />
<br />
Ä<br />
<br />
3
1.0 Introduction<br />
1.2 <strong>Smart</strong>Boost<br />
<strong>Smart</strong>Boost allows continuous, on-line operation during extended brownouts<br />
or low line voltage conditions. The <strong>UPS</strong> compensates for reduced line<br />
voltage by boosting the load voltage to 12% above the input. This enhances<br />
<strong>UPS</strong> reliability because the battery is saved for complete utility failure.<br />
1.3 Battery replacement indicators and test<br />
The <strong>UPS</strong> provides visual and audible Replace Battery indications, based on<br />
a load test of the battery. The <strong>UPS</strong> exercises its battery during a startup selftest,<br />
and can detect a weak battery before it is put into service. In longterm,<br />
unattended operation the <strong>UPS</strong> automatically conducts this self test<br />
every 14 days.<br />
1.4 Remote interfaces<br />
The <strong>UPS</strong> has a remote interface capable of full bidirectional RS-232 communications.<br />
The RS-232 port can be used with PowerDoctor <strong>UPS</strong> monitoring<br />
software on a local DOS PC to log power quality data. PowerChute plus<br />
offers all the features of PowerDoctor, plus the ability to execute orderly<br />
and unattended network or multi-user computer system shutdowns during<br />
an extended power outage.<br />
A Simple Network Management Protocol (SNMP) adapter is available for<br />
remote load monitoring and management across Ethernet or Token Ring<br />
networks capable of routing IP messages. With a standard Network Management<br />
System (NMS) and the SNMP Adapter, you can manage multiple<br />
<strong>UPS</strong>s with a single interface—from across the building or across the world.<br />
1.5 Extended capabilities<br />
Advanced monitoring, power management, and operation customizing<br />
functions are available through the <strong>UPS</strong>’s remote interface. Monitored<br />
parameters include available run time, line voltage and frequency, output<br />
power and voltage, battery capacity and voltage, and internal temperature.<br />
Power management functions include scheduled shutdown, power failure<br />
simulation, and remote turn off. User customized functions include the<br />
automatic self-test and low-battery warning intervals; shutdown, turn-off<br />
and turn-on delay intervals; transfer voltage; utility-fault sensitivity; and<br />
audible alarm activation.<br />
4
2.0 Safety! ENGLISH<br />
CAUTION!<br />
Caution!<br />
■ To reduce the risk of electric shock, disconnect the Uninterruptible<br />
Power Source from the mains before installing computer interface signal<br />
cable (when used). Reconnect the power cord only after all signalling<br />
interconnections have been made.<br />
■ Connect the Uninterruptible Power Source to a two-pole, three-wire<br />
grounding mains receptacle. The receptacle must be connected to<br />
appropriate branch protection (fuse or circuit breaker). Connection to any<br />
other type of receptacle may result in a shock hazard and may violate local<br />
electrical codes.<br />
■ This Uninterruptible Power Source has an internal energy source<br />
(the battery) that cannot be de-energized by the user. The output may be<br />
energized when the unit is not connected to a mains supply.<br />
■ To properly deenergize the Uninterruptible Power Source in an<br />
emergency, move the rear panel I/O switch to the O (off) position and<br />
disconnect the power cord from the mains.<br />
■ Avoid installing the Uninterruptible Power Source in locations where<br />
there is water or excessive humidity.<br />
■ Do not allow water or any foreign object to get inside the<br />
Uninterruptible Power Source. Do not put objects containing liquid on or<br />
near the unit.<br />
■ To reduce the risk of overheating the Uninterruptible Power Source,<br />
avoid exposing the unit to the direct rays of the sun. Avoid installing the<br />
unit near heat emitting appliances such as a room heater or stove.<br />
5
2.0 Sécurité! FRANÇAIS<br />
ATTENTION!<br />
6<br />
Attention!<br />
■ Pour réduire le risque d’électrocution, débranchez la prise principale de<br />
la source d’alimentation permanente (Uninterruptible Power Source), avant<br />
d’installer le câble d’interface allant à l’ordinateur (si utilisé). Ne<br />
rebranchez le bloc d’alimentation qu’après avoir effectué toutes les connections.<br />
■ Branchez la source d’alimentation permanente (<strong>UPS</strong>) dans une prise de<br />
courant à 3 dérivations (deux pôles et la terre). Cette prise doit être munie<br />
d’une protection adéquate (fusible ou coupe-circuit). Le branchement dans<br />
tout autre genre de prise pourrait entraîner un risque d’électrocution et<br />
peut constituer une infraction à la réglementation locale concernant les<br />
installations électriques.<br />
■ Cette source d’alimentation permanente (<strong>UPS</strong>) est munie d’une source<br />
d’énergie interne (accumulateur) qui ne peut pas être désactivée par<br />
l’utilisateur. La prise de sortie peut donc être sous tension même lorsque<br />
l’appareil n’est pas branché.<br />
■ En cas d’urgence, pour désactiver correctement la source d’alimentation<br />
permanente (<strong>UPS</strong>), poussez l’interrupteur du panneau arrière sur la<br />
position O (Off) et débranchez le cordon d’alimentation principal.<br />
■ Ne pas installer la source d’alimentation permanente (<strong>UPS</strong>) dans un<br />
endroit où il y a de l’eau ou une humidité excessive.<br />
■ Ne pas laisser de l’eau ou tout objet pénétrer dans la source<br />
d’alimentation permanente (<strong>UPS</strong>). Ne pas placer de récipients contenant un<br />
liquide sur cet appareil, ni à proximité de celui-ci.<br />
■ Pour éviter une surchauffe de la source d’alimentation permanente<br />
(<strong>UPS</strong>), conservez-la à l’abri du soleil. Ne pas installer à proximité<br />
d’appareils dégageant de la chaleur tels que radiateurs ou appareils de<br />
chauffage.
2.0 Sicherheit! DEUTSCH<br />
VORSICHT!<br />
Vorsicht!<br />
■ Um die Gefahr eines elektrischen Schlages auf ein Minimum zu<br />
reduzieren, die unterbrechungsfreie Stromversorgung vom Stromnetz<br />
trennen, bevor ggf. ein Computer-Schnittstellensignalkabel angeschlossen<br />
wird. Das Netzkabel erst nach Herstellung aller Signalverbindungen<br />
wieder einstecken.<br />
■ Die unterbrechungsfreie Stromversorgung an eine geerdete zweipolige<br />
Dreiphasen-Netzsteckdose anschließen. Die Steckdose muß mit einem<br />
geeigneten Abzweigschutz (Sicherung oder Leistungsschalter) verbunden<br />
sein. Der Anschluß der unterbrechungsfreien Stromversorgung an einen<br />
anderen Steckdosentyp kann zu Stromschlägen führen und gegen die<br />
örtlichen Vorschriften verstoßen.<br />
■ Diese unterbrechungsfreie Stromversorgung besitzt eine interne Energiequelle<br />
(Batterie), die vom Benutzer nicht abgeschaltet werden kann. Der Ausgang kann<br />
eingeschaltet werden, wenn das Gerät nicht an das Stromnetz angeschlossen<br />
ist.<br />
■ Um die unterbrechungsfreie Stromversorgung im Notfall<br />
ordnungsgemäß abzuschalten, den I/O-Schalter an der Rückseite auf O<br />
(Aus) stellen und das Netzkabel aus der Steckdose ziehen.<br />
■ Die unterbrechungsfreie Stromversorgung nicht an einem Ort aufstellen,<br />
an dem sie mit Wasser oder übermäßig hoher Luftfeuchtigkeit in<br />
Berührung kommen könnte.<br />
■ Darauf achten, daß weder Wasser noch Fremdkörper in das Innere der<br />
unterbrechungsfreien Stromversorgung eindringen. Keine Objekte, die<br />
Flüssigkeit enthalten, auf oder neben die unterbrechungsfreie<br />
Stromversorgung stellen.<br />
■ Um ein Überhitzen der unterbrechungsfreien Stromversorgung zu verhindern,<br />
das Gerät vor direkter Sonneneinstrahlung fernhalten und nicht in der Nähe von<br />
wärmeabstrahlenden Haushaltsgeräten (z.B. Heizgerät oder Herd) aufstellen.<br />
7
2.0 ¡Seguridad! ESPAÑOL<br />
¡ATENCION!<br />
8<br />
¡Atencion!<br />
■ Para reducir el riesgo de descarga eléctrica, desconecte de la red la<br />
Fuente de energía ininterrumpible antes de instalar el cable de señalización<br />
de interfaz de la computadora (si se usa). Vuelva a conectar el conductor<br />
flexible de alimentación solamente una vez efectuadas todas las<br />
interconexiones de señalización.<br />
■ Conecte la Fuente de energía ininterrumpible a un tomacorriente bipolar<br />
y trifilar con neutro de puesta a tierra. El tomacorriente debe estar<br />
conectado a la protección de derivación apropiada (ya sea un fusible o un<br />
disyuntor). La conexión a cualquier otro tipo de tomacorriente puede<br />
constituir peligro de descarga eléctrica y violar los códigos eléctricos<br />
locales.<br />
■ Esta Fuente de energía ininterrumpible tiene una fuente de energía<br />
interna (la batería) que no puede ser desactivada por el usuario. La salida<br />
puede tener corriente aun cuando la unidad no se encuentre conectada al<br />
suministro de red.<br />
■ Para desactivar correctamente la Fuente de energía ininterrumpible en<br />
una situación de emergencia, coloque el interruptor I/O del panel posterior<br />
en la posición O (Off–desconectado) y desconecte de la red el conductor<br />
flexible de alimentación.<br />
■ No instale la Fuente de energía ininterrumpible en lugares donde haya<br />
agua o humedad excesiva.<br />
■ No deje que en la Fuente de energía ininterrumpible entre agua ni<br />
ningún objeto extraño. No ponga objetos con líquidos encima de la unidad<br />
ni cerca de ella.<br />
■ Para reducir el riesgo de sobrecalentamiento, no exponga la unidad a<br />
los rayos directos del sol ni la instale cerca de artefactos que emiten calor,<br />
como estufas o cocinas.
3.0 Presentation<br />
3.1 <strong>250</strong>VA <strong>UPS</strong>—front panel<br />
Front-panel indicators<br />
see Sec. 5.1, 5.2.1, 5.2.2<br />
3.2 <strong>250</strong>VA <strong>UPS</strong>—rear panel<br />
<strong>UPS</strong> Enable<br />
switch<br />
Site Wiring<br />
Fault light<br />
see Sec. 4.7<br />
Option<br />
switches<br />
see Sec. 5.4<br />
Test<br />
button<br />
see Sec. 5.2<br />
Circuit<br />
breaker<br />
Computer<br />
Interface port<br />
see Sec. 6.4<br />
IEC 320<br />
power inlet<br />
Load outlets<br />
NEMA 5-15R<br />
receptacles<br />
all versions<br />
100 & 120 Vac versions<br />
Load outlets<br />
IEC 320 ouput<br />
coulpers<br />
220/230/240 Vac version<br />
9
4.0 Installation<br />
4.1 Receiving inspection<br />
Once you remove the <strong>UPS</strong> from its shipping container, inspect it for damage<br />
that may have occurred while in transit. Immediately notify the carrier<br />
and place of purchase if any damage is found. The packing materials are<br />
made from recyclable materials and should be saved for reuse or disposed<br />
of properly.<br />
4.2 Placement<br />
You may install the <strong>UPS</strong> in any protected environment. The location should<br />
provide adequate air flow around the unit, in an atmosphere free from<br />
excessive dust.<br />
Note: Allow 1 inch (2.5 cm) minimum clearance on all sides for proper ventilation.<br />
Do not operate the <strong>UPS</strong> in an environment where the ambient temperature<br />
or humidity is outside the limits given in the Specifications section of this<br />
manual (see Sec. 9.6).<br />
10
4.0 Installation<br />
4.3 Connect <strong>UPS</strong> to service<br />
4.3.1 Connect to service<br />
■ 100, 120 Vac versions<br />
Plug the <strong>UPS</strong> into a two-pole, three-wire grounding receptacle only. Avoid<br />
the use of extension cords and adapter plugs.<br />
■ 220/230/240 Vac version<br />
The 220/230/240 Vac version <strong>UPS</strong> is not furnished with an input line cord.<br />
Instead, two output cords are supplied. However, in most installations you<br />
will not need to purchase a <strong>UPS</strong> input power cord. Simply swap the line<br />
cords from your equipment with the furnished output cords, and plug in<br />
the <strong>UPS</strong> using one of the equipment cords.<br />
If your equipment does not have a removable line cord, the provided<br />
rewireable plug may be installed on the line cord. Additional output cords<br />
and adapter plugs are available from your dealer and from the factory.<br />
The <strong>UPS</strong> may be configured to operate where 240 Vac, 50 Hz service is<br />
provided. When Option Switch 2 is set to the on position, the <strong>UPS</strong>’s transfer<br />
and on-battery output voltages are adjusted for proper operation on<br />
240 Vac service (see Sec. 5.4).<br />
11
4.0 Installation<br />
4.3.2 Charge the batteries<br />
The <strong>UPS</strong> recharges its batteries whenever it is plugged into a working<br />
outlet. Allow the <strong>UPS</strong> to charge its battery for at least 5 hours before use.<br />
The <strong>UPS</strong> was shipped from the factory with the batteries fully charged, but<br />
the batteries may lose some charge during shipping and storage. You may<br />
use the <strong>UPS</strong> without charging, but the Low-Battery indicator may light and<br />
backup time may be reduced until the batteries have charged.<br />
4.4 Plug loads into <strong>UPS</strong><br />
Plug all loads to be protected into the <strong>UPS</strong>. Do not exceed the <strong>UPS</strong>’s<br />
capacity as given in Section 9.3. Once switched on, the <strong>UPS</strong> monitors and<br />
displays the size of the applied load when you press and hold the rearpanel<br />
Test button (see Sec. 5.2).<br />
Note: Do not plug laser printers into this <strong>UPS</strong>. Laser printers<br />
can draw a considerable amount of power, which reduces<br />
the available backup time and, in some cases, causes the<br />
<strong>UPS</strong> to signal an overload.<br />
4.5 Switch on load equipment<br />
Switch on the equipment connected to the <strong>UPS</strong>. If you leave the load<br />
equipment switched on, you can use the <strong>UPS</strong>’s Enable switch as a master<br />
system on/off switch.<br />
4.6 Enable <strong>UPS</strong><br />
Move the <strong>UPS</strong> Enable switch to the on ( I ) position.<br />
At power-up, the <strong>UPS</strong> initiates a battery self-test. During<br />
the test, the <strong>UPS</strong> briefly operates the load from battery<br />
power. This test function ensures that the <strong>UPS</strong> is working<br />
properly and that its battery does not require replacement. If the battery is<br />
too weak to support the load during the test, the <strong>UPS</strong> immediately returns<br />
to on-line operation (the load is not affected). When the On Line indicator<br />
stops blinking, the test is done.<br />
12
4.0 Installation<br />
Note: If the red Overload indicator lights, the <strong>UPS</strong> is overloaded. Unplug<br />
equipment that does not require backing up, such as a printer, and restart<br />
the <strong>UPS</strong>. If the Replace Battery indicator lights, recharge the <strong>UPS</strong> overnight<br />
and retest.<br />
Note: Refer to Section 7.0 for troubleshooting information.<br />
4.7 Check site wiring fault indicator—100, 120 Vac versions only<br />
After you connect the loads to the <strong>UPS</strong> and turn on the<br />
<strong>UPS</strong>, the Site Wiring Fault indicator on the <strong>UPS</strong>’s rear panel<br />
should be checked. It will light when the <strong>UPS</strong> is plugged<br />
into an improperly wired wall outlet. Wiring faults detected<br />
include missing ground, hot-neutral polarity reversal, and overloaded<br />
neutral circuit.<br />
Note: If the <strong>UPS</strong> indicates a site wiring fault, a qualified electrician should be<br />
summoned to correct the building wiring.<br />
13
5.0 Operation<br />
5.1 Front-panel indicators<br />
5.1.1 Replace Battery indicator<br />
The Replace Battery indicator lights when the <strong>UPS</strong>’s battery fails<br />
the self-test. The indicator turns off after a successful self-test.<br />
5.1.2 Low Battery indicator<br />
The Low Battery indicator lights when less than 2 minutes of<br />
backup power are available from the battery.<br />
5.1.3 Overload indicator<br />
The Overload indicator lights when the load exceeds the <strong>UPS</strong>’s<br />
rating of <strong>250</strong> VA (175 W).<br />
5.1.4 On Battery indicator<br />
The On Battery indicator lights when the load has been transferred<br />
to <strong>UPS</strong> battery power, and the utility voltage is not within specified<br />
limits.<br />
5.1.5 On Line indicator<br />
The On Line indicator lights when the load is being supplied<br />
conditioned power from the utility service. This indicator blinks<br />
during self-test.<br />
14<br />
Replace Battery<br />
indicator<br />
see Sec. 5.1.1<br />
Low Battery<br />
indicator<br />
see Sec. 5.1.2<br />
Overload<br />
indicator<br />
see Sec. 5.1.3<br />
On Battery<br />
indicator<br />
see Sec. 5.1.4<br />
On Line<br />
indicator<br />
see Sec. 5.1.5
5.0 Operation<br />
5.2 Test button functions<br />
5.2.1 Line Voltage bar graph<br />
When you press and hold the rear-panel Test button, the LED front-panel<br />
indicators display a bar graph of the input line voltage connected to the <strong>UPS</strong>.<br />
<strong>UPS</strong> version Input Vac<br />
120 Vac 104 110 116 122 128<br />
100 Vac 90 96 102 108 114<br />
220/230/240 210 221 232 245 257<br />
This example shows the input line voltage is between 116 and 122 Vac (120 Vac<br />
<strong>UPS</strong>, see table for other versions).<br />
If no indicators light and the <strong>UPS</strong> is plugged into a known working outlet, the line<br />
voltage is extremely low. Low voltage could be the result of an overloaded branch<br />
circuit, a misadjusted service pole transformer, or an intentional local service<br />
brownout. The <strong>UPS</strong> compensates for this problem using <strong>Smart</strong>Boost to increase<br />
the supplied load voltage.<br />
If all five indicators light, the line voltage is high and should be checked by a<br />
qualified electrician.<br />
Note: After approximately 4 seconds, the <strong>UPS</strong> beeps and replaces the Line Voltage<br />
bar graph with the Output Voltage bar graph display (see Sec. 5.2.2).<br />
15
5.0 Operation<br />
5.2.2 Output Power bar graph<br />
When you press and hold the rear-panel Test button for at least 4 seconds,<br />
the LED indicators on the front panel display a bar graph of the power<br />
being drawn by the load connected to the <strong>UPS</strong>. The load is shown as a<br />
percentage of the <strong>UPS</strong>’s rated capacity.<br />
16<br />
17%<br />
34%<br />
51% 68%<br />
This example shows that the equipment plugged into the <strong>UPS</strong> is drawing<br />
between 68 and 85 percent of the <strong>UPS</strong>’s rated capacity. This is a typical load<br />
configuration.<br />
85%<br />
If all five indicators light, the load is drawing close to the <strong>UPS</strong>’s maximum<br />
capacity! You should thoroughly test your entire system to be sure the <strong>UPS</strong><br />
will not become overloaded. A thorough test includes running backup tape<br />
drives, disk drives, etc. If the <strong>UPS</strong> is overloaded, the Overload indicator<br />
lights and the <strong>UPS</strong> sounds an alarm.<br />
To avoid an overload, reduce the <strong>UPS</strong>’s load by unplugging non-critical<br />
components such as printers.<br />
Note: When you release the Test button after viewing the Output Power bar<br />
graph, the <strong>UPS</strong> performs a self-test. Refer to Section 5.2.3.<br />
5.2.3 <strong>UPS</strong> self-test<br />
When you press and hold the Test button for at least 4 seconds and then<br />
release it, the <strong>UPS</strong> performs a self-test. During this test the <strong>UPS</strong> operates<br />
the load from battery (On Battery indicator lights) for about 4 seconds and<br />
then returns to line power. If the battery cannot support the load during the<br />
test, the <strong>UPS</strong> immediately returns to on-line operation (the load is not<br />
affected). When the On Battery indicator goes out and the On Line indicator<br />
lights, the test is done.
5.0 Operation<br />
5.3 Audible alarms<br />
The <strong>UPS</strong> features an audible alarm that beeps to indicate certain conditions<br />
(see Secs. 5.3.1–5.3.4). Operation of the audible alarm is configurable using<br />
<strong>UPS</strong> monitoring software (see Sec. 5.5.4).<br />
5.3.1 On-battery alarm<br />
The <strong>UPS</strong> emits four short beeps every 30 seconds when the <strong>UPS</strong> is operating<br />
on battery power.<br />
5.3.2 Low battery<br />
The <strong>UPS</strong> beeps steadily to indicate that less than 2 minutes of power<br />
remains before shutdown from battery exhaustion.<br />
5.3.3 Replace battery<br />
The <strong>UPS</strong> emits short beeps for 1 minute if the <strong>UPS</strong>’s batteries fail the selftest.<br />
If the <strong>UPS</strong> is left operating in this condition, the <strong>UPS</strong> emits short beeps<br />
once every 5 hours until a successful battery test is completed.<br />
5.3.4 Overload<br />
The <strong>UPS</strong> emits a loud, sustained tone when overloaded. When the load<br />
exceeds the <strong>UPS</strong>’s rating during on-line operation, the alarm sounds until<br />
the overload is removed. If the overload occurs during on-battery operation,<br />
the alarm sounds until the <strong>UPS</strong> Enable switch on the rear panel is<br />
turned off.<br />
17
5.0 Operation<br />
5.4 Option switches<br />
The <strong>UPS</strong> has a set of four DIP switches on the rear panel which allow you<br />
to configure several options (see Secs. 5.4.1–5.4.4).<br />
Note: You can set option switches at any time, and the effect is immediate.<br />
Note: If all of the option switches are set to the on position, the option switches are<br />
disabled. However, the functions controlled by the option switches are still<br />
available using <strong>UPS</strong> monitoring software (see Sec. 5.5.4).<br />
5.4.1 Option Switch 1<br />
The <strong>UPS</strong> contains utility fault detection circuitry that is extremely sensitive<br />
to line voltage distortions including spikes, notches, sudden dips, and<br />
swells. The <strong>UPS</strong> is factory-set to react to such line voltage distortions by<br />
immediately transferring the load to on-battery operation, affording<br />
maximum protection for all load types. Where power quality is poor<br />
because of local cyclic heavy load-switching, or the use of inexpensive fuel<br />
generators, the <strong>UPS</strong> may frequently transfer to on-battery. If the <strong>UPS</strong> is<br />
powering loads that operate normally under such conditions, battery<br />
capacity may be spent unnecessarily.<br />
Setting Option Switch 1 to the on (down) position desensitizes the <strong>UPS</strong> to<br />
rapid low-amplitude line-voltage fluctuations, and increases the <strong>UPS</strong>’s<br />
upper transfer voltage by 3%, for a total of 13% above the nominal input<br />
voltage. This helps maintain maximum battery capacity for major utility<br />
failures.<br />
18
5.0 Operation<br />
5.4.2 Option Switch 2<br />
Option Switch 2 functions differently for different versions of the <strong>UPS</strong>.<br />
■ 100 Vac version<br />
No function; not used.<br />
■ 120 Vac version<br />
The <strong>UPS</strong>’s factory-set input voltage limits for on-line and <strong>Smart</strong>Boost<br />
operation are centered on the nominal input voltage of 120 Vac (see also<br />
Sec. 9.1). When Option Switch 2 is in the on (down) position, the upper and<br />
lower transfer voltages are lowered by 4% and centered on a nominal input<br />
of 115 Vac. This is useful where nominal input voltage is 110 to 115 Vac.<br />
■ 220/230/240 Vac version<br />
The <strong>UPS</strong>’s factory-set on-battery output voltage and input voltage limits for<br />
on-line and <strong>Smart</strong>Boost operation are designed for use in regions where the<br />
nominal line voltage is 220 to 230 Vac. When Option Switch 2 is set to the<br />
on (down) position, the upper and lower transfer voltages are raised by 4%<br />
and centered on a nominal input of 240 Vac. In addition, the on-battery<br />
output voltage is increased to 240 Vac.<br />
5.4.3 Option Switch 3<br />
When Option Switch 3 is set to the on (down) position, the <strong>UPS</strong>’s audible<br />
alarm is disabled for the first 30 seconds of on-battery operation. This<br />
function is useful where brief power interruptions are frequent and cause<br />
the alarm to become annoying.<br />
5.4.4 Option Switch 4<br />
No function; not used.<br />
19
5.0 Operation<br />
5.5 Extended capabilities<br />
Sections 5.5.1 through 5.5.4 briefly describe the <strong>UPS</strong>’s extended capabilities—advanced<br />
functions accessed using a computer running optional<br />
PowerDoctor or PowerChute plus <strong>UPS</strong> monitoring software. Refer to the<br />
monitoring software documentation for more information on these functions.<br />
Note: The extended capabilities of the <strong>UPS</strong> and operation of <strong>UPS</strong> monitoring<br />
software may be subject to change without notice.<br />
5.5.1 Status reporting<br />
■ General<br />
The <strong>UPS</strong> reports its electronics’ serial number, version number, date of<br />
manufacture, and date of last battery replacement.<br />
■ Operating status<br />
The <strong>UPS</strong> reports its current operating status including on-line, on-battery,<br />
<strong>Smart</strong>Boost, overloaded output, low battery, shut down, and internal fault.<br />
■ Test results<br />
The <strong>UPS</strong> reports the results of the last battery test. You may also test the<br />
operation of the <strong>UPS</strong>’s visual and audible indicators.<br />
5.5.2 Monitoring<br />
■ Run time<br />
When on-battery, the <strong>UPS</strong> continuously monitors the remaining run time in<br />
minutes. The <strong>UPS</strong> monitors available run time when operating on-line.<br />
■ Line voltage and frequency<br />
The <strong>UPS</strong> continuously monitors the rms line voltage and line frequency.<br />
Transients lasting less than 0.5 seconds are not reported. This information<br />
may be logged using <strong>UPS</strong> monitoring software, plotted using a spreadsheet<br />
application, and used to track power quality over extended periods.<br />
■ Minimum and maximum line voltage<br />
The <strong>UPS</strong> records the minimum and maximum line voltage to provide a<br />
snapshot of power quality over a user-specified interval. Transients lasting<br />
less than 0.5 seconds are not recorded.<br />
20
5.0 Operation<br />
■ Output power<br />
The <strong>UPS</strong> continuously monitors the power consumed by the load. The<br />
value given is a percentage of the full load rating of the <strong>UPS</strong>. This information<br />
may be logged using <strong>UPS</strong> monitoring software, plotted using a spreadsheet<br />
application, and used to track load usage over extended periods.<br />
■ Output voltage, internal temperature, battery voltage, battery capacity<br />
The <strong>UPS</strong> continuously monitors the rms output voltage, internal temperature<br />
(°C), battery voltage, and the remaining battery capacity as a percentage<br />
of the fully charged condition. This information is valuable for<br />
troubleshooting.<br />
5.5.3 Power management<br />
■ Shut down<br />
While the <strong>UPS</strong> is operating on-battery, you may direct it to shut down after<br />
a user-specified delay. Controlled shutdown of the <strong>UPS</strong> conserves battery<br />
capacity and helps to extend battery life.<br />
■ Shut down with delayed restart<br />
You may direct the <strong>UPS</strong> to shut down in any mode following a userspecified<br />
delay, and then restart after a user-specified interval. The restart<br />
delay may be used to stagger the power-up of multiple network servers<br />
protected by multiple <strong>UPS</strong>s.<br />
■ Simulate power failure<br />
You may direct the <strong>UPS</strong> to simulate a power failure by briefly operating<br />
on-battery. This function is useful for test purposes.<br />
■ Turn off<br />
You may direct the <strong>UPS</strong> to turn off immediately, or after a user-specified<br />
delay.<br />
21
5.0 Operation<br />
5.5.4 Operation customizing<br />
You may configure many <strong>UPS</strong> operations for specific applications. To use<br />
the customizing features of the <strong>UPS</strong>, you must set all option switches to the<br />
on (down) position. The functions ordinarily controlled by the switches are<br />
duplicated in the <strong>UPS</strong> monitoring software. Once any of the option<br />
switches are returned to the off (up) position, functionality of the option<br />
switches is restored.<br />
■ Battery test operation<br />
You can set the battery test to run automatically at startup, at startup and<br />
once every 7 days, at startup and once every 14 days, or never. The default<br />
setting is at startup and every 14 days.<br />
■ Transfer voltage<br />
You can configure the <strong>UPS</strong>’s upper and lower transfer voltages over a wide<br />
range (see Sec. 9.2.)<br />
■ On-battery output voltage (220/230/240 Vac version only)<br />
You may set the <strong>UPS</strong>’s on-battery output voltage to a nominal 220, 225, 230<br />
or 240 Vac. The default setting is 225 Vac.<br />
■ Utility failure sensitivity<br />
You may configure the <strong>UPS</strong>’s sensitivity to line-voltage distortions to allow<br />
use of the <strong>UPS</strong> in different electrical environments. You may choose high,<br />
medium, or low sensitivity settings. The high setting provides the best<br />
protection from all utility voltage distortions. The medium setting is<br />
intended for use where rapid low-amplitude line voltage fluctuations occur<br />
frequently as the result of motor load switching in air conditioners, elevators,<br />
etc. The low setting is intended for use when the <strong>UPS</strong> is operated from<br />
an inexpensive fuel powered generator. The default setting is high.<br />
■ Low battery warning interval<br />
The <strong>UPS</strong>’s low battery warning may be set to activate 2, 5, 7 or 10 minutes<br />
before shutdown. The default is 2 minutes.<br />
22
5.0 Operation<br />
■ Audible alarm operation<br />
The <strong>UPS</strong>’s audible alarm beeps four times every 30 seconds during onbattery<br />
operation. The alarm beeps continuously when low-battery conditions<br />
are reached. This is the default operation. You may configure the<br />
audible alarm operation such that response to utility failure is delayed by<br />
30 seconds, silenced until low-battery conditions are reached, or muted<br />
during both on-battery and low-battery conditions.<br />
■ Minimum battery capacity to restart<br />
You may configure the <strong>UPS</strong> so that it will not restart after restoration of the<br />
utility until the battery has recharged to 0%, 10%, 25%, or 90% of its capacity.<br />
This function helps eliminate short run times when repetitive utility<br />
failures occur. The default setting is 0%.<br />
■ Shut down, turn off delay<br />
You may set the <strong>UPS</strong>’s shutdown or turn-off delay interval to 20, 180, 300,<br />
or 600 seconds. The default setting is 20 seconds. Extension of the delay is<br />
useful when an operating system’s final shutdown routine is longer than<br />
20 seconds.<br />
■ Turn on delay<br />
You may set the <strong>UPS</strong>’s turn-on delay to 0, 60, 180, or 300 seconds. The<br />
default setting is 0 seconds.<br />
23
6.0 <strong>UPS</strong> Monitoring<br />
6.1 Overview<br />
A <strong>UPS</strong> system alone provides excellent protection from brief power problems.<br />
During an extended power outage, an unattended computer system<br />
will eventually shut down because of battery capacity exhaustion. To<br />
prevent data corruption when the <strong>UPS</strong> shuts down, the <strong>UPS</strong> must inform<br />
the computer of impending shutdown so the computer can take appropriate<br />
file-saving measures. This important function is called “<strong>UPS</strong> monitoring.”<br />
The <strong>UPS</strong>’s computer interface port allows it to communicates with the<br />
computer system.<br />
Some computer operating systems have built-in <strong>UPS</strong> monitoring. These<br />
systems require only a hardware interfaces for the <strong>UPS</strong>. PowerChute<br />
software is available to enhance built-in <strong>UPS</strong> monitoring, or to add the <strong>UPS</strong><br />
monitoring function to operating systems that do not provide it.<br />
6.2 Interface Kits<br />
Hardware interface kits are available for operating systems that provide<br />
<strong>UPS</strong> monitoring. Each kit includes a special interface cable to convert status<br />
signals from the <strong>UPS</strong> into signals the operating system recognizes. Systems<br />
for which interface kits are offered include Novell, LAN Manager, LAN<br />
Server, LANtastic, Banyan VINES, Windows NT, and IBM AS/400.<br />
6.3 PowerChute Software<br />
PowerChute software provides complete data protection for most operating<br />
systems. This software is a background process that monitors the <strong>UPS</strong><br />
through an RS-232 serial port on the host. PowerChute offers user notification<br />
of impending shutdown, power event logging, auto-restart upon<br />
power return, and <strong>UPS</strong> battery conservation features. For selected operating<br />
systems, PowerChute offers sophisticated power diagnostic and<br />
network power management features including interactive battery testing;<br />
scheduled server shutdowns, reboots, and battery testing; detailed power<br />
quality logging; and a remote, real-time, graphic power status display that<br />
show <strong>UPS</strong> loading and battery conditions. PowerChute is available for<br />
platforms including Novell, OS/2, Windows NT, AppleShare, XENIX, most<br />
UNIX-based operating systems, and DEC VAX/VMS.<br />
Caution: Use only factory supplied or authorized <strong>UPS</strong> monitoring cables.<br />
24
6.0 <strong>UPS</strong> Monitoring<br />
6.4 Computer Interface port<br />
The Computer Interface port is diagramed below. Those with technical<br />
abilities wishing to use this port in a special application should be aware of<br />
the following limitations and capabilities of the interface.<br />
■ Outputs at Pins 3, 5, and 6 are open collector outputs which must be<br />
pulled up to a common referenced supply no greater than +40 Vdc. The<br />
transistors are capable of a maximum noninductive load of 25 mAdc. Use<br />
only Pin 4 as the common.<br />
■ The output at Pin 2 generates a low-to-high RS-232 level upon transfer<br />
of the output load to <strong>UPS</strong> battery power. The pin is normally at a low<br />
RS-232 level.<br />
■ The <strong>UPS</strong> shuts down when a high RS-232 level is applied to Pin 1 for 4.5<br />
seconds. The <strong>UPS</strong> responds to this signal, after a delay, only during onbattery<br />
operation.<br />
■ An unregulated +18 Vdc appears at Pin 8 of the interface port whenever<br />
the <strong>UPS</strong> is powered. The supply is limited to 40 mAdc maximum.<br />
25
7.0 Difficulty ENGLISH<br />
CAUTION!<br />
26<br />
Caution!<br />
■ This Uninterruptible Power Source contains potentially hazardous voltages.<br />
Do not attempt to disassemble the unit. The unit contains no user serviceable<br />
parts. Repairs are performed only by factory trained service personnel.<br />
■ This Uninterruptible Power Source uses batteries. The batteries will eventually<br />
become too weak to provide rated autonomous operation. Due to the potential<br />
health and environmental hazards posed by the batteries, they may be replaced<br />
only at factory authorized Service Centers. To obtain battery replacement or repair<br />
service, please call the Customer Service telephone number written on the cover of<br />
this manual for information on the Service Center nearest you.<br />
■ The batteries used by this Uninterruptible Power Source are recyclable.<br />
Proper disposal of the batteries is required. The batteries contain lead and pose<br />
a hazard to the environment and human health if not disposed of properly.<br />
Please refer to local codes for proper disposal requirements or return the unit to<br />
a factory authorized Service Center for battery replacement or disposal.<br />
■ Battery replacement should be performed or supervised by personnel<br />
familiar with the danger of batteries and the required precautions. Keep<br />
unauthorized personnel away from batteries. When replacing batteries, use<br />
the same number and type of sealed lead acid batteries as were originally<br />
contained in your <strong>UPS</strong>.<br />
■ CAUTION—Do not dispose of batteries in a fire. The batteries may explode.<br />
■ CAUTION—Do not open or mutilate batteries. They contain an electrolyte<br />
which is toxic and harmful to the skin and eyes.<br />
■ CAUTION—A battery can present a risk of electrical shock and high short<br />
circuit current. When replacing batteries, wrist watches and jewelry such as rings<br />
should be removed. Use tools with insulated handles.
7.0 Difficulté FRANÇAIS<br />
ATTENTION!<br />
Attention!<br />
■ Cette source d’alimentation permanente (<strong>UPS</strong>) contient des circuits<br />
haute tension présentant un danger. Ne jamais essayer de le démonter. Il<br />
n’y a aucun composant qui puisse être réparé par l’utilisateur. Toutes les<br />
réparations doivent être effectuées par du personnel qualifié et agréé par le<br />
constructeur.<br />
■ Cette source d’alimentation permanente (<strong>UPS</strong>) contient des<br />
accumulateurs. Ces accumulateurs deviendront un jour trop faibles pour<br />
pouvoir assurer un fonctionnement autonome correct. En raison des<br />
risques que posent les accumulateurs à la santé et à l’environnement, ils ne<br />
peuvent être remplacés que dans les Centres de Service agréés par le<br />
fabriquant. Pour toute réparation ou remplacement des accumulateurs,<br />
composez le numéro du Service à la clientèle inscrit sur la couverture de ce<br />
manuel afin d’obtenir les coordonnées du Centre de Service le plus proche.<br />
■ Les accumulateurs contenus dans cette source d’alimentation sont<br />
recyclables. L’elimination des batteries est règlementée. Consulter les<br />
codes locaux à cet effet. Ils contiennent du plomb et représentent donc<br />
un risque pour l’homme et pour l’environnement si les règles de mise au<br />
rebut ne sont pas respectées. Veuillez retournez l’unité à un Centre de<br />
Service agréé lorsque vous désirerez remplacer ou vous débarrasser des<br />
accumulateurs usagés.<br />
■ ATTENTION—Pour le remplacement, utiliser le même nombre de<br />
batteries du modéle suivant: accumulateur au plomb.<br />
■ ATTENTION—Une batterie peut présenter un risque de choc<br />
electrique, de brûlure par transfert d’énergie. Suivre les précautions qui<br />
s’imposent.<br />
27
7.0 Schwierigkeit DEUTSCH<br />
VORSICHT!<br />
28<br />
Vorsicht!<br />
■ Im Inneren dieser unterbrechungsfreien Stromversorgung herrschen<br />
potentiell gefährliche Spannungen. Nicht versuchen, das Gerät zu öffnen.<br />
Es enthält keine vom Benutzer reparierbaren Teile. Reparaturen dürfen nur<br />
von ausgebildetem Kundendienstpersonal durchgeführt werden.<br />
■ Diese unterbrechungsfreie Stromversorgung enthält Batterien, die nach<br />
einer bestimmten Zeit so schwach werden, daß der autonome Nennbetrieb<br />
nicht mehr gewährleistet ist. Aufgrund der potentiellen Gesundheits- und<br />
Umweltgefahren, die von den Batterien ausgehen, dürfen sie nur in einem<br />
vom Werk autorisierten Kundendienstzentrum ausgewechselt werden.<br />
Wenn die Batterien ausgewechselt werden müssen oder Reparaturen fällig<br />
sind, die auf der Umschlagseite dieser Gebrauchsanweisung angegebene<br />
Kundendienst-Telefonnummer anrufen. Dort teilt man Ihnen mit, welches<br />
Kundendienstzentrum für Sie zuständig ist.<br />
■ Die Batterien in dieser unterbrechungsfreien Stromversorgung sind<br />
wiederverwertbar. Sie sind bleihaltig und stellen eine Gefahr für die<br />
Umwelt und die Gesundheit dar, wenn sie nicht ordnungsgemäß<br />
entsorgt werden. Das Gerät an ein vom Werk autorisiertes<br />
Kundendienstzentrum einsenden, um die Batterien auswechseln oder<br />
entsorgen zu lassen.
7.0 Dificultad ESPAÑOL<br />
¡ATENCION!<br />
¡Atencion!<br />
■ Esta Fuente de energía ininterrumpible contiene niveles de voltaje<br />
peligrosos en potencia. No intente desarmar la unidad, pues no contiene<br />
piezas que puedan ser reparadas por el usuario. Las reparaciones deben<br />
efectuarse únicamente por parte del personal de mantenimiento capacitado<br />
en la fábrica.<br />
■ Esta Fuente de energía ininterrumpible contiene baterías. Con el tiempo<br />
las baterías se gastan demasiado para poder sustentar el funcionamiento<br />
autónomo a la capacidad nominal. Debido a que presentan un peligro<br />
potencial para la salud y el medio ambiente, las baterías pueden<br />
reemplazarse únicamente en los Centros de Servicio autorizados por la<br />
fábrica. Para solicitar el reemplazo de baterías o servicio de reparaciones,<br />
se ruega llamar al número telefónico de Atención a los Clientes indicado en<br />
la tapa de este manual y averiguar el Centro de Servicio más cercano.<br />
■ Las baterías que se encuentran en esta Fuente de energía<br />
ininterrumpible son reciclables. Las baterías contienen plomo y<br />
constituyen un peligro para el medio ambiente y para la salud de las<br />
personas si no se las desechan como corresponde. Se ruega devolver la<br />
unidad a un Centro de Servicio autorizado por la fábrica para el<br />
reemplazo o la eliminación de las baterías.<br />
29
7.0 Difficulty<br />
7.1 Troubleshooting<br />
30<br />
PROBLEM: <strong>UPS</strong> will not turn on<br />
Possible cause: <strong>UPS</strong> Enable switch is in the off ( O ) position.<br />
Solution: Turn on the rear panel <strong>UPS</strong> Enable switch.<br />
Possible cause: <strong>UPS</strong>’s circuit breaker is tripped (button is extended).<br />
Solution: Reduce the <strong>UPS</strong>’s load by unplugging equipment and<br />
reset the circuit breaker (press button on rear panel).<br />
Possible cause: Very low utility voltage or dead outlet.<br />
Solution: Check outlet with a table lamp. If very dim, have<br />
utility voltage checked by an electrician.<br />
PROBLEM: <strong>UPS</strong> operates on-battery even though normal line<br />
voltage is thought to exist.<br />
Possible cause: <strong>UPS</strong>’s circuit breaker is tripped (button is extended).<br />
Solution: Unplug equipment to reduce the <strong>UPS</strong>’s load. Press the<br />
button on the rear panel to reset circuit breaker.<br />
Possible cause: Very high, low, or badly-distorted line voltage.<br />
Solution: Test the input voltage with <strong>UPS</strong>’s line voltage bar<br />
graph (see Sec. 5.2.1). Inexpensive fuel powered<br />
generators can cause distorted line voltages—set<br />
Option Switch 1 to the on (down) position.<br />
PROBLEM: <strong>UPS</strong> “beeps” occasionally.<br />
Possible cause: This is normal; the <strong>UPS</strong> is protecting your computer<br />
equipment from momentary sags or swells.<br />
PROBLEM: <strong>UPS</strong> beeps more than once or twice an hour.<br />
Possible cause: Chronically high or distorted line voltage.<br />
Solution: Set Option Switches 1 and 2 to match input voltage<br />
range. Alternatively, set Option Switch 3 to the on<br />
(down) position (see Sec. 5.4 and 5.5.4).
7.0 Difficulty<br />
7.1 7.1 T TTroubleshooting<br />
T oubleshooting (continued)<br />
PROBLEM: <strong>UPS</strong> does not provide expected back up time.<br />
Possible cause: <strong>UPS</strong>’s battery is weak from recent outage or wear.<br />
Solution: The battery needs recharging after an extended<br />
outage. The battery wears faster when put into service<br />
often and when used at higher temperatures.<br />
Possible cause: <strong>UPS</strong> is overloaded.<br />
Solution: Check load using <strong>UPS</strong>’s output power bar graph (see<br />
Sec. 5.2). Unplug non-critical equipment and printers.<br />
PROBLEM: <strong>UPS</strong> shuts down if the Test button is held for more<br />
than 4 seconds.<br />
Possible cause: <strong>UPS</strong> is overloaded.<br />
Solution: Reduce the <strong>UPS</strong>’s load by unplugging equipment.<br />
Check load using Output Power display (see Sec. 5.2).<br />
Possible cause: Weak battery.<br />
Solution: Allow <strong>UPS</strong> to charge for at least five hours. If problem<br />
persists, battery may need to be replaced.<br />
PROBLEM: Indicators on front panel flash in a “marquee” fashion.<br />
Possible cause: <strong>UPS</strong> has been shut down by computer software.<br />
Solution: <strong>UPS</strong> will restart when AC power returns.<br />
PROBLEM: All indicators are lit and <strong>UPS</strong> emits constant tone.<br />
Possible cause: Internal <strong>UPS</strong> fault.<br />
Solution: Do not attempt to use <strong>UPS</strong>. Turn off <strong>UPS</strong> and have it<br />
serviced immediately.<br />
PROBLEM: Site wiring fault light is lit—<strong>UPS</strong> operates normally.<br />
Possible cause: Building wiring error such as missing ground or hotneutral<br />
reversal.<br />
Solution: A qualified electrician should be summoned to correct<br />
the building wiring.<br />
31
7.0 Difficulty<br />
7.1 7.1 T TTroubleshooting<br />
T oubleshooting (continued)<br />
32<br />
PROBLEM: Replace Battery indicator is lit.<br />
Possible cause: Weak battery.<br />
Solution: Allow the battery to recharge for at least 5 hours. If<br />
the problem persists, the battery should be replaced.<br />
PROBLEM: Computer monitor interference.<br />
Possible cause: Some monitors are sensitive to emissions from the<br />
<strong>UPS</strong>.<br />
Solution: Move the <strong>UPS</strong> farther away from the monitor, or call<br />
customer service.
7.0 Difficulty<br />
7.2 Battery replacement check<br />
The <strong>UPS</strong> automatically performs a battery test at startup and again every<br />
14 days. This test briefly loads the batteries and can detect a weak battery<br />
before it is put into service during a power failure. If the battery is too<br />
weak to support the load during this test, the <strong>UPS</strong> instantly returns to online<br />
operation. The Replace Battery indicator lights when the batteries can<br />
no longer sustain sufficient charge for the <strong>UPS</strong> to provide power for more<br />
than half the normal time (see Sec. 9.9) during an extended utility failure.<br />
You can expect to receive 3 to 6 years of service from the <strong>UPS</strong>’s battery<br />
when used in a cool, dry location. Battery life is shortened when the <strong>UPS</strong> is<br />
operated in an environment where the ambient temperature is normally<br />
above 30°C (86°F).<br />
If the Replace Battery indicator lights, perform the following procedure to<br />
verify that the batteries need replacing.<br />
1. Use the <strong>UPS</strong>’s line voltage bar graph to check that the utility voltage is<br />
within a normal range (see Sec. 5.2.1). The <strong>UPS</strong> charges its battery more<br />
slowly when operated from very low input voltages. Where low line<br />
voltages and frequent disturbances are common, set the <strong>UPS</strong>’s Option<br />
Switch 1 to on (down; see Sec. 5.4).<br />
2. Allow the <strong>UPS</strong> to charge the battery for at least 5 hours after an extended<br />
utility failure.<br />
3. Turn the <strong>UPS</strong> off and then on to initiate a battery test.<br />
4. Check the Replace Battery indicator.<br />
■ If the Replace Battery indicator does not light after the battery test,<br />
the batteries do not require replacement. Extended storage without<br />
recharge, or successive power outages can cause false indications.<br />
■ If the Replace Battery indicator lights after the self test, the batteries<br />
are worn and need to be replaced.<br />
5. Call the Customer Service phone number listed on the cover of this<br />
manual to obtain information about battery replacement service or<br />
battery replacement kits.<br />
Note: Please see the battery cautions at the beginning of this section.<br />
33
7.0 Difficulty<br />
7.3 Obtaining service<br />
The troubleshooting chart in Section 7.1 covers most of the difficulties that<br />
you may encounter under conditions other than a failure of the <strong>UPS</strong> itself.<br />
For problems not covered in the chart, follow the procedure outlined<br />
below.<br />
If your <strong>UPS</strong> requires service:<br />
1. Refer to the troubleshooting chart (Sec 7.1) to eliminate any obvious<br />
causes.<br />
2. Verify that the circuit breaker is not tripped.<br />
■ A tripped circuit breaker is the most common <strong>UPS</strong> problem! You<br />
may reset the breaker after unplugging excessive loads from the <strong>UPS</strong>.<br />
3. Call the Customer Service Department to obtain a return material<br />
authorization number (RMA#).<br />
■ Before you call, note your <strong>UPS</strong> model, serial number, and date of<br />
purchase. Contact Customer Service at the phone number listed on the<br />
cover of this manual. Be prepared to provide a description of the<br />
problem. A technician will help you solve the problem over the phone, if<br />
possible, or will give you a RMA#.<br />
■ If the <strong>UPS</strong> is under warranty, repairs will be performed free of<br />
charge. If the warranty has expired, there will be a charge for repair.<br />
4. Pack the <strong>UPS</strong> in its original packaging. If you do not have the original<br />
shipping materials, ask the Customer Service technician about obtaining<br />
a new set.<br />
■ It is very important that you pack the <strong>UPS</strong> properly to avoid damage<br />
in transit. Never use styrofoam beads for packaging the <strong>UPS</strong> because it<br />
will settle through beads and become damaged. Damages sustained in<br />
transit are not covered under warranty. Enclose a letter in the package<br />
with your name, RMA#, address, copy of the sales receipt, description<br />
of the trouble, your phone number, and a check (if necessary).<br />
5. Mark your RMA# on the outside of the package.<br />
The factory cannot accept any package without this marking.<br />
6. Return your <strong>UPS</strong> by insured, prepaid carrier to the address on the rear<br />
of this manual.<br />
34
8.0 Storing the <strong>UPS</strong><br />
8.1 Storage conditions<br />
When you store the <strong>UPS</strong>, cover it and keep it upright in a cool, dry location.<br />
Store the <strong>UPS</strong> with its battery fully-charged. Before storage, allow the<br />
<strong>UPS</strong> to charge for at least 8 hours. Disconnect any accessories and cables<br />
connected at the computer interface port, because these may unnecessarily<br />
drain the battery charge.<br />
8.2 Extended storage<br />
■ To achieve optimal run time after extended storage, you should refresh<br />
the <strong>UPS</strong>’s batteries every 6 months in environments where the ambient<br />
temperature is –15 to +30°C (+5 to +86°F).<br />
■ For extended storage in environments where the ambient temperature is<br />
+30 to +45°C (+86 to +113°F), you should refresh the <strong>UPS</strong>’s batteries every<br />
3 months.<br />
35
9.0 Specifications<br />
9.1 Input <strong>UPS</strong> version (Vac): 100 120 220/230/240<br />
Nominal input voltage (Vac): single phase 100 120 230<br />
Nominal input frequency:<br />
Internally selected by microprocessor.<br />
50 or 60 Hz.<br />
Input protection:<br />
Push-to-reset circuit breaker.<br />
5 Amp 5 Amp 2.5 Amp<br />
Input connections: IEC 320 male inlet coupler. 120 and 100 Vac versions<br />
include 6 ft (2 m) line cord, with a NEMA 5-15P three pronged plug.<br />
9.2 Transfer characteristics<br />
Frequency limits for on-line operation: 50 or 60 Hz, ±5%<br />
Lower input voltage, on-line operation: 80 Vac 90 Vac 173 Vac<br />
Upper input voltage, on-line operation: 110 Vac 132 Vac 253 Vac<br />
<strong>Smart</strong>Boost operation line voltage (Vac): 80–90 90–103 173–196<br />
Transfer time: 2 ms typical;<br />
(1 ms is 0.001 seconds). 4 ms maximum.<br />
9.3 Output characteristics<br />
On-battery output voltage (Vac): 100 ±5% 115 ±5% 225 ±5%<br />
Maximum output current: 2.5 Amp 2.2 Amp 1.1 Amp<br />
Maximum load: <strong>250</strong> VA or<br />
175 W at 0.7 power factor<br />
On-battery Frequency: 50 or 60 Hz, ±0.1 Hz.<br />
Synchronized to mains frequency during brownout.<br />
On-battery waveshape: sinewave.<br />
Protection: Overcurrent and short-circuit protected, latching shutdown<br />
upon overload.<br />
Output connections: 100 and 120 Vac versions have two NEMA 5-15R<br />
receptacles. 220/230/240 Vac version has two IEC 320 output couplers and<br />
includes two 6 ft (2 m) output cords with IEC 320 couplers and one IEC<br />
rewireable plug adapter.<br />
36
9.0 Specifications<br />
9.4 Battery and charger <strong>UPS</strong> version (Vac): 100 120 220/230/240<br />
Battery type: Spill proof, maintenance free sealed lead-calcium.<br />
Typical battery life: 3 to 6 years.<br />
Battery life dependent on number of discharges and ambient temperature.<br />
Low battery signaling: Continuous visual and audible alarm 2 minutes<br />
before shutdown.<br />
Recharge time: 5 hours typical from total discharge. <strong>UPS</strong> may be used<br />
immediately after discharge but will provide shorter backup time.<br />
9.5 Surge and noise suppression<br />
Surge energy rating (Joules, maximum):<br />
One occurrence, 10/1000 µs waveform.<br />
160 320 320<br />
Surge current capability (maximum):<br />
One occurrence, 8/20 µs waveform.<br />
6500 Amp peak.<br />
Surge response time:<br />
common mode.<br />
0 ns (instantaneous) normal mode; less than 5 ns<br />
Surge voltage let-through:<br />
per ANSI C62.41 Cat. A 6 kV test.<br />
9.0 Specifications<br />
9.7 Physical<br />
Size (H´W´D): 2.4 ´ 11.9 ´ 15.5 in.<br />
(6.0 ´ 30.2 ´ 39.4 cm)<br />
Weight: 15 lbs (6.8 kg)<br />
Shipping weight: 19 lbs (8.6 kg)<br />
9.8 Approvals<br />
Safety approvals: UL per 1778, CSA per C22.2, TUV per IEC 950.<br />
EMC verification: FCC/DOC Class B certified, VCCI Class 2 compliance,<br />
VDE/EN55022 Class B verified.<br />
9.9 Typical run times versus load<br />
38<br />
Load Run Time Typical computer<br />
(VA † ) (minutes ‡ ) equivalents<br />
50 70 Typical ASCII terminal<br />
100 30 Apple Macintosh SE<br />
Apple Macintosh Classic<br />
150 15 PS/2 25 w/monochrome monitor<br />
Apple Macintosh SE/30<br />
200 8 DeskPro 386s w/VGA monitor<br />
Apple Macintosh IIsi w/color monitor<br />
<strong>250</strong> 6 Apple Macintosh IIci w/color monitor<br />
Compaq Presario 400/600 Series w/monitor<br />
† VA = volt-amperes; 0.7 VA = 1 Watt.<br />
‡ Run times are typical at 25°C (77°F).
Notes<br />
39
Notes<br />
40
Limited Warranty<br />
American Power Conversion (<strong>APC</strong>) warrants its products to be free from defects in materials<br />
and workmanship for a period of two years from the date of purchase. Its obligation under this<br />
warranty is limited to repairing or replacing, at its own sole option, any such defective products.<br />
To obtain service under warranty you must obtain a Returned Material Authorization (RMA)<br />
number from <strong>APC</strong> or an <strong>APC</strong> service center. Products must be returned to <strong>APC</strong> or an <strong>APC</strong><br />
service center with transportation charges prepaid and must be accompanied by a brief<br />
description of the problem encountered and proof of date and place of purchase. This warranty<br />
does not apply to equipment which has been damaged by accident, negligence, or misapplication<br />
or has been altered or modified in any way. This warranty applies only to the original purchaser<br />
who must have properly registered the product within 10 days of purchase.<br />
EXCEPT AS PROVIDED HEREIN, AMERICAN POWER CONVERSION MAKES NO<br />
WARRANTIES, EXPRESS OR IMPLIED, INCLUDING WARRANTIES OF<br />
MERCHANTABILITY AND FITNESS FOR A PARTICULAR PURPOSE. Some states do not<br />
permit limitation or exclusion of implied warranties; therefore, the aforesaid limitation(s) or<br />
exclusion(s) may not apply to the purchaser.<br />
EXCEPT AS PROVIDED ABOVE, IN NO EVENT WILL <strong>APC</strong> BE LIABLE FOR DIRECT,<br />
INDIRECT, SPECIAL, INCIDENTAL, OR CONSEQUENTIAL DAMAGES ARISING OUT OF<br />
THE USE OF THIS PRODUCT, EVEN IF ADVISED OF THE POSSIBILITY OF SUCH DAMAGE.<br />
Specifically, <strong>APC</strong> is not liable for any costs, such as lost profits or revenue, loss of equipment,<br />
loss of use of equipment, loss of software, loss of data, costs of substitutes, claims by third<br />
parties, or otherwise. This warranty gives you specific legal rights and you may also have other<br />
rights which vary from state to state.<br />
Life support policy<br />
As a general policy, American Power Conversion (<strong>APC</strong>) does not recommend the use of any of<br />
its products in life support applications where failure or malfunction of the <strong>APC</strong> product can be<br />
reasonably expected to cause failure of the life support device or to significantly affect its safety<br />
or effectiveness. <strong>APC</strong> does not recommend the use of any of its products in direct patient care.<br />
<strong>APC</strong> will not knowingly sell its products for use in such applications unless it receives in writing<br />
assurances satisfactory to <strong>APC</strong> that (a) the risks of injury or damage have been minimized, (b)<br />
the customer assumes all such risks, and (c) the liability of American Power Conversion is<br />
adequately protected under the circumstances.<br />
Examples of devices considered to be life support devices are neonatal oxygen analyzers, nerve<br />
stimulators (whether used for anesthesia, pain relief, or other purposes), autotransfusion devices,<br />
blood pumps, defibrillators, arrhythmia detectors and alarms, pacemakers, hemodialysis<br />
systems, peritoneal dialysis systems, neonatal ventilator incubators, ventilators for both adults<br />
and infants, anesthesia ventilators, and infusion pumps as well as any other devices designated<br />
as “critical” by the U.S. FDA.<br />
Hospital grade wiring devices and leakage current may be ordered as options on many <strong>APC</strong><br />
<strong>UPS</strong> systems. <strong>APC</strong> does not claim that units with this modification are certified or listed as<br />
Hospital Grade by <strong>APC</strong> or any other organization. Therefore these units do not meet the<br />
requirements for use in direct patient care.
( PHONE<br />
(800) 800-4272 in USA & Canada<br />
(401) 789-5735 worldwide<br />
* MAILING<br />
American Power Conversion<br />
132 Fairgrounds Road<br />
P.O. Box 278<br />
West Kingston, Rhode Island<br />
02892 USA<br />
( PHONE<br />
(+33) 1.64.62.59.00 in Europe<br />
(401) 789-5735 worldwide<br />
* MAILING<br />
American Power Conversion<br />
4, rue Ste Claire Deville<br />
Zac du Mandinet-Bâtiment Espace<br />
Lognes<br />
77447 Marne La Vallee Cédex 2<br />
France<br />
Please note: The troubleshooting chart in Section 7.0 offers solutions for most<br />
of the difficulties you may encounter with this <strong>UPS</strong>. Before calling the customer<br />
service number, please have available your <strong>UPS</strong>’s serial number (see label at<br />
the rear of the <strong>UPS</strong>).<br />
Serial number: ___________________<br />
Entire contents copyright © 1993 American Power Conversion. All rights reserved; reproduction in whole or in part<br />
without permission is prohibited. <strong>Smart</strong>-<strong>UPS</strong>, PowerDoctor, and PowerChute are registered trademarks of <strong>APC</strong>. SNMP<br />
Adapter and <strong>Smart</strong>Boost are trademarks of <strong>APC</strong>. All other trademarks are the property of their respective owners.<br />
990-2<strong>250</strong>-A-2 1/94


