Draadloze USB-hub Hub USB sans fil Kabelloser USB-Hub - medion
Draadloze USB-hub Hub USB sans fil Kabelloser USB-Hub - medion
Draadloze USB-hub Hub USB sans fil Kabelloser USB-Hub - medion

You also want an ePaper? Increase the reach of your titles
YUMPU automatically turns print PDFs into web optimized ePapers that Google loves.
<strong>Draadloze</strong> <strong>USB</strong>-<strong>hub</strong><br />
<strong>Hub</strong> <strong>USB</strong> <strong>sans</strong> <strong>fil</strong><br />
<strong>Kabelloser</strong> <strong>USB</strong>-<strong>Hub</strong><br />
MEDION ® E89030 (MD 86097)<br />
Gebruiksaanwijzing<br />
Mode d‘emploi<br />
Bedienungsanleitung
Sommaire<br />
Sommaire ............................................................. 1<br />
Vue d'ensemble de l'appareil ............................... 3<br />
À propos de cet appareil ....................................... 5<br />
Contenu de la livraison ................................................... 5<br />
Utilisation conforme ........................................................ 6<br />
Consignes de sécurité ........................................... 6<br />
Sécurité de fonctionnement ............................................ 7<br />
Installation du logiciel <strong>Hub</strong> <strong>USB</strong> ......................... 10<br />
Mise en service .................................................... 13<br />
Raccordement au secteur .............................................. 13<br />
Connexion WiFi (mode Point d'accès) ............... 14<br />
Intégration du <strong>hub</strong> <strong>USB</strong> dans un réseau existant<br />
(mode Station) ................................................... 17<br />
Utilisation du logiciel <strong>Hub</strong> <strong>USB</strong> ........................... 21<br />
La barre de menu .......................................................... 22<br />
Connexion et déconnexion d'appareils <strong>USB</strong> .................. 25<br />
Utilisation de la fonction Remote Audio ......................... 27<br />
Demande d'utilisation d'un port et déconnexion d'un<br />
port pour d'autres utilisateurs ....................................... 28<br />
Configuration du <strong>hub</strong> <strong>USB</strong> .................................. 30<br />
Affichage du menu de configuration ............................. 30<br />
- 1 -<br />
FR
Menu Wireless ............................................................... 32<br />
Menu System ................................................................ 37<br />
Configuration du WPS ........................................ 42<br />
Réinitialisation de l'appareil ............................... 45<br />
Service après-vente ............................................. 46<br />
Première aide en cas de dysfonctionnement .................. 46<br />
Données techniques ........................................... 48<br />
Nettoyage ........................................................... 50<br />
Recyclage ............................................................ 50<br />
- 2 -
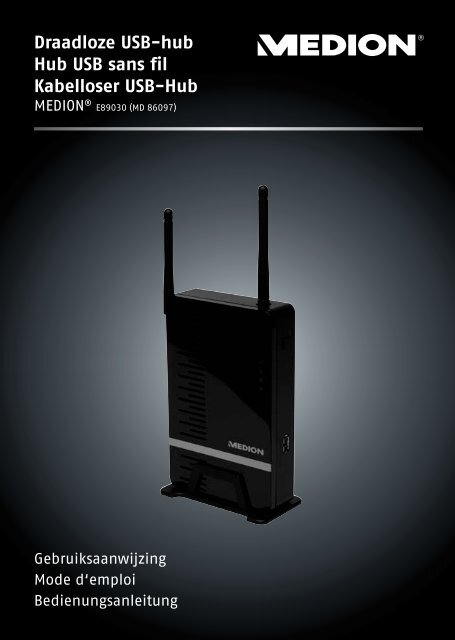
Vue d'ensemble de l'appareil<br />
1. Antenne WiFi<br />
2. LINE OUT (A) : branchement d'un appareil pour la<br />
lecture audio à distance (p. ex. amplificateur ou hautparleurs<br />
actifs)<br />
- 3 -<br />
FR
3. ETHERNET : port LAN<br />
4. RESET : bouton de reset<br />
5. <strong>USB</strong> 1,2,3 : ports <strong>USB</strong><br />
6. DC POWER : prise pour adaptateur secteur<br />
7. Pied<br />
8. Antenne WiFi<br />
9. Témoin WPS : allumé si fonction WPS activée<br />
10. Témoin LAN : allumé en cas de connexion LAN, clignote<br />
en cas de transfert de données<br />
11. Témoin de fonctionnement : allumé en cas<br />
d'alimentation en courant<br />
12. Témoin WiFi : allumé lorsque le système est prêt,<br />
clignote en cas de transfert de données<br />
13. Touche WPS : pour l'établissement d'une connexion<br />
WPS<br />
14. <strong>USB</strong> (F) : port <strong>USB</strong><br />
- 4 -
À propos de cet appareil<br />
Contenu de la livraison<br />
Veuillez vérifier si la livraison est complète et nous informer<br />
dans un délai de quinze jours à compter de la date d'achat<br />
si ce n'est pas le cas. Avec le produit que vous venez<br />
d'acheter, vous recevez :<br />
<strong>Hub</strong> <strong>USB</strong> <strong>sans</strong> <strong>fil</strong><br />
Adaptateur secteur (Ktec KSAD1200150W1EU)<br />
Pied<br />
CD avec logiciel<br />
Le présent mode d'emploi<br />
Documents relatifs à la garantie<br />
Reproduction du présent mode d'emploi<br />
Ce document contient des informations protégées par la<br />
loi. Tous droits réservés. La reproduction sous forme<br />
mécanique, électronique ou sous toute autre forme que ce<br />
soit est interdite <strong>sans</strong> l'autorisation préalable écrite du<br />
fabricant.<br />
- 5 -<br />
FR
Utilisation conforme<br />
Le <strong>hub</strong> <strong>USB</strong> <strong>sans</strong> <strong>fil</strong> sert au branchement d'appareils <strong>USB</strong> 1<br />
(mémoires de masse <strong>USB</strong> telles que disques durs externes ou clés<br />
<strong>USB</strong> ainsi qu'imprimantes <strong>USB</strong> et scanners <strong>USB</strong>) et transmet les<br />
signaux <strong>USB</strong> via une connexion WiFi à des ordinateurs qui sont<br />
reliés au <strong>hub</strong> <strong>USB</strong> via WiFi ou LAN. Les appareils <strong>USB</strong> peuvent ainsi<br />
être raccordés <strong>sans</strong> <strong>fil</strong> à un ordinateur. L'appareil comporte en<br />
outre une sortie audio par laquelle le signal audio d'un ordinateur<br />
enregistré peut être émis, à condition d'avoir procédé au réglage<br />
correspondant.<br />
Cet appareil est conçu uniquement pour un usage privé et<br />
non pour une utilisation à des fins professionnelles.<br />
Consignes de sécurité<br />
Veuillez lire attentivement ce chapitre ainsi que le mode<br />
d'emploi complet et respecter toutes les consignes<br />
indiquées. Vous garantirez ainsi un fonctionnement<br />
fiable et une longue durée de vie de votre <strong>hub</strong> <strong>USB</strong>.<br />
Ayez toujours ce mode d'emploi à portée de main à<br />
proximité de votre appareil et conservez-le<br />
soigneusement afin de pouvoir le remettre au nouveau<br />
propriétaire si vous donnez ou vendez l'appareil. En cas<br />
de problème avec l'appareil, veuillez vous adresser<br />
uniquement à nos partenaires de service agréés.<br />
1 La compatibilité d'autres appareils <strong>USB</strong> n'est pas garantie.<br />
- 6 -
Sécurité de fonctionnement<br />
Cet appareil n'est pas destiné à être utilisé par des<br />
personnes (y compris les enfants) dont les capacités<br />
physiques, sensorielles ou mentales sont limitées ou<br />
qui manquent d'expérience et/ou de connaissances,<br />
sauf si elles sont surveillées par une personne<br />
responsable de leur sécurité ou ont reçu de cette<br />
personne les instructions pour utiliser l'appareil.<br />
Surveillez les enfants afin de garantir qu'ils ne jouent<br />
pas avec l'appareil.<br />
Respectez également les instructions d'utilisation<br />
des appareils que vous raccordez au <strong>hub</strong> <strong>USB</strong>.<br />
Ne posez aucun récipient contenant du liquide (p.<br />
ex. un vase) sur ou à proximité de l'appareil. Le<br />
récipient pourrait se renverser et le liquide porter<br />
atteinte à la sécurité électrique.<br />
Conservez l'appareil à l'abri de l'humidité, des<br />
gouttes d'eau et éclaboussures. Protégez l'appareil<br />
des secousses, de la poussière, de la chaleur et du<br />
rayonnement direct du soleil afin d'éviter tout<br />
dysfonctionnement. L'appareil peut fonctionner à<br />
une température de 5 à 40° C.<br />
N'ouvrez jamais le boîtier de l'appareil. La garantie<br />
serait annulée et vous risqueriez en outre de détruire<br />
l'appareil.<br />
Après avoir transporté l'appareil, attendez qu'il soit<br />
à température ambiante pour le mettre en marche.<br />
En cas de fortes variations de température ou<br />
d'humidité, il est possible que de l'humidité se<br />
- 7 -<br />
FR
forme dans l'appareil par condensation, ce qui peut<br />
provoquer un court-circuit.<br />
L'appareil est prévu pour être raccordé à des<br />
ordinateurs respectant les exigences de la norme<br />
EN60950 (sources de courant à puissance limitée).<br />
Utilisez uniquement l'adaptateur secteur de type<br />
Ktec KSAD1200150W1EU fourni.<br />
La prise de courant doit se trouver à proximité de<br />
l'appareil et être facilement accessible.<br />
Disposez les câbles de manière à ce que personne ne<br />
puisse marcher ou trébucher dessus.<br />
Ne posez aucun objet sur les câbles, ils pourraient<br />
être endommagés.<br />
Pour éviter les charges statiques, ne pas utiliser<br />
l'appareil dans des conditions extrêmement sèches.<br />
Dans des conditions avec décharge électrostatique, des<br />
dysfonctionnements de l'appareil peuvent se produire.<br />
Dans ce cas, il est nécessaire de restaurer les réglages<br />
d'usine sur l'appareil.<br />
Sauvegarde des données<br />
Toute demande de dommages et intérêts en cas de perte de<br />
données et de dommages consécutifs en résultant est<br />
exclue. Après chaque actualisation de vos données, faites<br />
des copies de sauvegarde sur des supports de stockage<br />
externes tels que CD-R.<br />
- 8 -
Compatibilité électromagnétique<br />
Lors du branchement, vous devez respecter les directives<br />
relatives à la compatibilité électromagnétique (CEM).<br />
Prévoyez au moins un mètre de distance par rapport aux<br />
sources de brouillage haute fréquence et magnétiques<br />
éventuelles (téléviseur, haut-parleurs, téléphone portable,<br />
etc.) afin d'éviter tout dysfonctionnement et toute perte de<br />
données.<br />
- 9 -<br />
FR
Installation du logiciel <strong>Hub</strong> <strong>USB</strong><br />
Avant que vous puissiez capter des signaux <strong>USB</strong> via le<br />
réseau, le logiciel doit être installé sur tous les ordinateurs<br />
qui doivent utiliser le <strong>hub</strong> <strong>USB</strong>.<br />
1. Insérez le CD d'installation fourni. L'écran de démarrage<br />
s'affiche.<br />
2. Démarrez l'application d'installation en cliquant sur Install.<br />
La fenêtre Contrôle de compte utilisateur de Windows<br />
s'ouvre, où vous devez confirmer l'installation. Cliquez sur<br />
Oui.<br />
3. Sélectionnez votre langue nationale dans la fenêtre<br />
Choisissez la langue d’installation et cliquez sur<br />
Suivant.<br />
- 10 -
4. La fenêtre de bienvenue s'ouvre. Cliquez sur Next.<br />
5. Reprenez le chemin d'installation proposé en cliquant<br />
sur Next. Si vous voulez modifier le dossier pour<br />
l'installation, cliquez sur Change....<br />
- 11 -<br />
FR
6. Sélectionnez le dossier dans lequel le logiciel doit être<br />
installé et cliquez sur OK.<br />
7. Le logiciel peut maintenant être installé. Cliquez pour<br />
cela sur Install.<br />
8. Attendez que<br />
l'installation soit<br />
terminée puis cliquez<br />
sur Finish.<br />
Une fois l'installation<br />
finalisée, vous voyez<br />
apparaître une icône de<br />
programme sur le Bureau et<br />
une icône dans la barre des tâches :<br />
9. Vous pouvez alors démarrer le logiciel<br />
en double-cliquant sur une de ces<br />
icônes.<br />
- 12 -
Mise en service<br />
Raccordement<br />
au secteur<br />
1. Branchez le connecteur<br />
creux de l'adaptateur<br />
secteur dans la prise<br />
DC POWER de<br />
l'appareil.<br />
2. Branchez l'adaptateur<br />
secteur dans une prise<br />
de courant (230 VAC ~<br />
50/60 Hz) facilement<br />
accessible. L'appareil<br />
est alors prêt à<br />
fonctionner et le<br />
témoin POWER vert<br />
reste allumé en<br />
permanence.<br />
- 13 -<br />
FR
Connexion WiFi<br />
(mode Point d'accès)<br />
La connexion WiFi simple est judicieuse si votre ordinateur<br />
est relié à un routeur avec un câble (p. ex. pour l'accès à<br />
Internet) et que votre ordinateur dispose en outre d'un<br />
adaptateur réseau <strong>sans</strong> <strong>fil</strong> non utilisé.<br />
1. Allumez le <strong>hub</strong> <strong>USB</strong> en raccordant l'adaptateur secteur<br />
comme décrit à la page 13.<br />
2. Installez le logiciel <strong>Hub</strong> <strong>USB</strong> comme décrit à la page 9.<br />
3. Cliquez sur l'icône des<br />
réseaux <strong>sans</strong> <strong>fil</strong> dans la<br />
barre des tâches de votre<br />
système d'exploitation.<br />
- 14 -
4. La fenêtre pour les connexions réseau s'ouvre. Cliquez<br />
sur l'option W-LAN <strong>USB</strong> HUB.<br />
5. À la livraison, aucun cryptage n'est réglé. Windows<br />
affiche donc cette connexion comme étant insécurisée.<br />
Cliquez sur Connect. Le cryptage d'une connexion est<br />
expliqué à la page 32.<br />
- 15 -<br />
FR
6. Attendez que la connexion soit établie. L'état de la<br />
connexion vous est ensuite affiché.<br />
7. Pour régler les ports <strong>USB</strong>, démarrez le logiciel <strong>Hub</strong> <strong>USB</strong><br />
(voir page 20).<br />
- 16 -
Intégration du <strong>hub</strong> <strong>USB</strong> dans un<br />
réseau existant (mode Station)<br />
L'intégration dans un réseau existant est judicieuse si votre<br />
ordinateur accède déjà au routeur Internet via une<br />
connexion réseau <strong>sans</strong> <strong>fil</strong> (WiFi) et que le <strong>hub</strong> <strong>USB</strong> doit être<br />
relié en plus via WiFi.<br />
Réglage du mode Station<br />
Si votre ordinateur est relié à un routeur réseau qui utilise le<br />
Dynamic Host Configuration Protocol (DHCP), comme la<br />
- 17 -<br />
FR
plupart des réseaux, aucun réglage sur le routeur n'est<br />
nécessaire. Suivez les instructions suivantes :<br />
1. Raccordez le <strong>hub</strong> avec l'adaptateur secteur.<br />
2. Attendez que le témoin POWER s'allume en vert.<br />
3. Raccordez le <strong>hub</strong> <strong>USB</strong> avec un câble réseau (cette liaison<br />
est nécessaire uniquement pour la configuration du <strong>hub</strong><br />
<strong>USB</strong>).<br />
4. Raccordez le câble réseau à la prise réseau de votre<br />
ordinateur.<br />
5. Ouvrez votre navigateur Internet standard et saisissez<br />
l'adresse IP du <strong>hub</strong> <strong>USB</strong> dans la barre d'adresse.<br />
Appuyez sur la touche ENTER de l'ordinateur.<br />
Remarque : l'adresse IP du <strong>hub</strong> <strong>USB</strong> est indiquée dans<br />
le logiciel <strong>Hub</strong> <strong>USB</strong> (voir page 20).<br />
- 18 -
6. Saisissez un identifiant et un mot de passe puis cliquez<br />
sur OK pour accéder<br />
au menu de<br />
configuration. À la<br />
livraison, l'identifiant et<br />
le mot de passe sont :<br />
admin.<br />
7. Vérifiez si le témoin<br />
LAN est allumé,<br />
indiquant que la<br />
connexion LAN<br />
fonctionne.<br />
8. Dans le menu de configuration, sélectionnez l'option<br />
Wireless -> Wireless Operation Mode puis Station.<br />
9. Une fois Station sélectionné, cliquez sur Apply : un<br />
message à l'écran vous signale que le <strong>hub</strong> <strong>USB</strong> est<br />
redémarré.<br />
10. Attendez que l'appareil ait redémarré. Le mode Station<br />
est maintenant réglé sur le <strong>hub</strong> <strong>USB</strong>.<br />
- 19 -<br />
FR
Recherche de réseaux <strong>sans</strong> <strong>fil</strong> disponibles<br />
11. Une fois le <strong>hub</strong> <strong>USB</strong> redémarré, ouvrez le menu de<br />
configuration et sélectionnez l'option Wireless -> Basic.<br />
Cliquez sur Scan Wireless Network pour afficher tous les<br />
points d'accès ou signaux de routeur trouvés à portée du<br />
<strong>hub</strong> <strong>USB</strong>.<br />
Rescan : une nouvelle recherche de signaux est lancée.<br />
Join : entrer dans le réseau sélectionné.<br />
Close : fermer cette fenêtre d'affichage.<br />
12. Sélectionnez le réseau WiFi dans lequel le <strong>hub</strong> <strong>USB</strong> doit<br />
être intégré et cliquez sur Connect. La connexion <strong>sans</strong> <strong>fil</strong><br />
entre le <strong>hub</strong> <strong>USB</strong> et le routeur du réseau WiFi est établie<br />
et le <strong>hub</strong> <strong>USB</strong> est intégré dans le réseau WiFi.<br />
Attention : certains réseaux peuvent être cryptés et<br />
exiger la saisie d'une clé.<br />
13. Retirez le câble réseau du <strong>hub</strong> <strong>USB</strong>.<br />
- 20 -
Utilisation du logiciel <strong>Hub</strong> <strong>USB</strong><br />
Après l'installation, vous pouvez démarrer<br />
le logiciel avec le menu de démarrage ou en<br />
double-cliquant sur l'icône correspondante<br />
sur le Bureau ou dans la barre des tâches.<br />
Avec le logiciel, vous pouvez<br />
connecter/déconnecter un appareil <strong>USB</strong>,<br />
afficher l'état de la connexion ou demander l'accès à un<br />
appareil <strong>USB</strong>, si celui-ci est utilisé par un autre ordinateur.<br />
Le logiciel <strong>Hub</strong> <strong>USB</strong> (voir illustration ci-dessous) vous affiche<br />
un aperçu de la configuration de la connexion.<br />
- 21 -<br />
FR
La barre de menu<br />
<strong>Hub</strong><br />
Avec le logiciel <strong>USB</strong> <strong>Hub</strong>, vous pouvez rechercher d'autres<br />
<strong>hub</strong>s <strong>USB</strong> en cliquant sur <strong>Hub</strong> > Scan ou sur l'icône Scan<br />
dans la barre d'outils.<br />
- 22 -
Advanced<br />
Cliquez sur Advanced > Option dans la barre de menu pour<br />
effectuer les réglages suivants :<br />
La fenêtre Option s'ouvre.<br />
Déterminez si le logiciel <strong>Hub</strong><br />
<strong>USB</strong> doit être démarré au<br />
démarrage de Windows ou si<br />
une remarque doit apparaître<br />
lorsque la fonction Remote<br />
Audio est utilisée.<br />
- 23 -<br />
FR
Help<br />
- 24 -<br />
Pour afficher la signification<br />
des icônes pour les ports<br />
<strong>USB</strong>, cliquez sur Help ><br />
Status instruction.<br />
La fenêtre Status instruction<br />
s'ouvre. Il existe 4 icônes<br />
caractérisant l'état des ports<br />
<strong>USB</strong> :<br />
Une icône blanche<br />
signale un port non<br />
utilisé qui est donc<br />
encore disponible.<br />
Une icône verte signale<br />
un port que vous utilisez<br />
vous-même.<br />
Une icône rouge signale<br />
un port qui est utilisé<br />
par un autre ordinateur. Si vous souhaitez utiliser ce<br />
port, vous pouvez envoyer une demande à<br />
l'utilisateur correspondant afin qu'il libère l'accès à<br />
ce port.<br />
Une icône grise signale un appareil ne fonctionnant<br />
pas sur le port <strong>USB</strong> correspondant. Adressez-vous<br />
dans ce cas au fabricant de l'appareil.
Connexion et déconnexion<br />
d'appareils <strong>USB</strong><br />
Cliquez sur la case<br />
devant l'option « W-<br />
LAN <strong>USB</strong> <strong>Hub</strong> » pour<br />
connecter tous les<br />
appareils <strong>USB</strong> affichés.<br />
Vous pouvez afficher<br />
les propriétés d'un<br />
appareil raccordé en<br />
cliquant sur l'icône<br />
Properties dans la<br />
barre d'outils.<br />
- 25 -<br />
Pour connecter un<br />
appareil raccordé au<br />
<strong>hub</strong> <strong>USB</strong>, cochez la<br />
case devant l'appareil<br />
<strong>USB</strong> concerné en<br />
cliquant dessus.<br />
FR
La fenêtre Device Properties s'ouvre :<br />
Pour déconnecter un appareil <strong>USB</strong>, décochez la case<br />
devant l'entrée de l'appareil <strong>USB</strong> concerné.<br />
- 26 -
Utilisation de la fonction Remote<br />
Audio<br />
Le <strong>hub</strong> <strong>USB</strong> peut être utilisé comme un appareil audio à<br />
distance. Cochez la case « Remote Audio » en cliquant<br />
dessus pour restituer des signaux audio de l'ordinateur via<br />
la prise LINE OUT du <strong>hub</strong> <strong>USB</strong> sur un casque ou des hautparleurs.<br />
Dès que l'option « Remote Audio » est activée, une<br />
remarque vous signale que le <strong>hub</strong> <strong>USB</strong> est maintenant<br />
utilisé pour la sortie audio. Vous pouvez désactiver<br />
l'affichage de cette remarque dans le menu Advanced ><br />
Option.<br />
Remarque : tant que la fonction Remote Audio est<br />
activée, le son de la sortie audio de l'ordinateur est<br />
coupé.<br />
- 27 -<br />
FR
Demande d'utilisation d'un port et<br />
déconnexion d'un port pour d'autres<br />
utilisateurs<br />
Cliquez pour cela sur<br />
l'icône Request dans la<br />
barre d'outils.<br />
- 28 -<br />
Si vous souhaitez utiliser un<br />
port <strong>USB</strong> qui est déjà utilisé<br />
par un autre ordinateur,<br />
vous pouvez envoyer une<br />
demande à l'utilisateur<br />
concerné afin qu'il se<br />
déconnecte de ce port pour<br />
que vous puissiez vous en<br />
servir.
L'utilisateur de l'autre ordinateur voit apparaître une<br />
fenêtre dans laquelle il peut déconnecter le port <strong>USB</strong>.<br />
Si cet utilisateur clique sur Yes, sa connexion avec le <strong>hub</strong><br />
<strong>USB</strong> est coupée et établie avec votre ordinateur.<br />
- 29 -<br />
FR
Configuration du <strong>hub</strong> <strong>USB</strong><br />
Affichage du menu de configuration<br />
1. Ouvrez votre navigateur Internet standard et saisissez<br />
l'adresse IP du <strong>hub</strong> <strong>USB</strong> dans la barre d'adresse.<br />
Appuyez sur la touche ENTER de l'ordinateur.<br />
Remarque : l'adresse IP du <strong>hub</strong> <strong>USB</strong> est indiquée dans<br />
le logiciel <strong>Hub</strong> <strong>USB</strong> (voir page 20).<br />
2. Mais vous pouvez aussi ouvrir le menu de configuration<br />
par un clic de souris droit sur l'entrée du <strong>hub</strong> <strong>USB</strong> dans<br />
le logiciel <strong>Hub</strong> <strong>USB</strong> puis en sélectionnant l'option<br />
Configure W-LAN <strong>USB</strong> Remote <strong>Hub</strong>.<br />
- 30 -
3. Saisissez un identifiant et un mot de passe puis cliquez<br />
sur OK pour accéder au menu de configuration. À la<br />
livraison,<br />
l'identifiant et le<br />
mot de passe<br />
sont : admin.<br />
Le menu de<br />
configuration s'ouvre<br />
(voir page suivante).<br />
Ce menu comprend<br />
deux sections :<br />
Wireless et System.<br />
- 31 -<br />
FR
Menu Wireless<br />
Le menu Wireless contient 4 sous-menus.<br />
Operation Mode<br />
Dans le premier sous-menu Operation Mode, vous pouvez<br />
déterminer le mode de fonctionnement pour la connexion<br />
<strong>sans</strong> <strong>fil</strong>.<br />
Si le <strong>hub</strong> <strong>USB</strong> doit représenter un réseau <strong>sans</strong> <strong>fil</strong><br />
autonome avec lequel des ordinateurs établissent une<br />
connexion, sélectionnez Access Point<br />
(standardindstilling).<br />
Si vous souhaitez intégrer le <strong>hub</strong> <strong>USB</strong> comme client<br />
dans un réseau existant, sélectionnez Station. Vous<br />
trouverez d'autres remarques sur la configuration<br />
comme client sous « Intégration du <strong>hub</strong> <strong>USB</strong> dans un<br />
réseau existant (mode Station) » à la page 17.<br />
- 32 -
Basic Setting<br />
Dans le deuxième sous-menu Basic setting, vous<br />
déterminez le SSID (nom du réseau), le Channel (1-13) et<br />
l'Encryption Type.<br />
Effectuez les réglages correspondants et cliquez sur<br />
Apply.<br />
- 33 -<br />
FR
Si vous avez réglé le cryptage sur WEP ou WPA-PSK,<br />
vous devez en outre saisir une clé de sécurité.<br />
- 34 -
WPS<br />
Le <strong>hub</strong> <strong>USB</strong> <strong>sans</strong> <strong>fil</strong> supporte le protocole de sécurisation<br />
WPS le plus récent. À la livraison, la fonction WPS est<br />
désactivée. (Pour savoir comment utiliser la fonction WPS,<br />
voir page 42).<br />
Vous pouvez activer la fonction dans les paramètres WPS en<br />
cliquant sur le champ Enabled puis sur Apply.<br />
Pour modifier la clé WPS, cliquez sur Generate New PIN. Si<br />
vous souhaitez ajouter un autre appareil WPS pour la<br />
connexion rapide, cliquez sur Apply. Saisissez un code PIN<br />
dans la fenêtre PIN ID et cliquez sur Apply.<br />
- 35 -<br />
FR
Advanced<br />
Dans le sous-menu Advanced, vous pouvez activer ou<br />
désactiver la transmission de WiFi et SSID et procéder à<br />
d'autres réglages pour la transmission.<br />
- 36 -
Menu System<br />
Le menu System contient 4 sous-menus.<br />
LAN<br />
La première option concerne le réglage LAN. Vous pouvez<br />
ici déterminer comment le <strong>hub</strong> <strong>USB</strong> <strong>sans</strong> <strong>fil</strong> doit attribuer les<br />
adresses IP. À la livraison, Static IP est réglé et aucune autre<br />
configuration n'est nécessaire.<br />
Vous pouvez aussi activer ou désactiver le serveur DHCP intégré<br />
et définir le domaine pour l'adresse IP.<br />
- 37 -<br />
FR
Admin<br />
Dans le domaine « Admin » (administrateur), vous pouvez<br />
saisir le nom du <strong>hub</strong> <strong>USB</strong> <strong>sans</strong> <strong>fil</strong> qui apparaît dans le<br />
logiciel <strong>Hub</strong> <strong>USB</strong>. Vous pouvez ici également modifier le<br />
mot de passe en en saisissant un nouveau dans les champs<br />
New Password et Retype Password puis en cliquant sur<br />
Apply.<br />
Firmware<br />
Sous cette option, vous pouvez charger une mise à jour du<br />
firmware sur le <strong>hub</strong> <strong>USB</strong> <strong>sans</strong> <strong>fil</strong> afin de réinitialiser tous les<br />
réglages et de redémarrer le <strong>hub</strong> <strong>USB</strong>. Consultez le site Web<br />
de MEDION www.<strong>medion</strong>.com pour obtenir des<br />
informations sur les mises à jour disponibles ou adressezvous<br />
au service après-vente Medion.<br />
- 38 -
1. Pour actualiser le firmware, cliquez tout d'abord sur<br />
Browse… afin d'indiquer l'emplacement de stockage où<br />
se trouvent les fichiers de mise à jour. Cliquez ensuite<br />
sur Upgrade pour installer la mise à jour.<br />
2. La mise à jour est chargée. Attendez que l'opération soit<br />
terminée.<br />
- 39 -<br />
FR
ATTENTION : n'éteignez pas le <strong>hub</strong> <strong>USB</strong> <strong>sans</strong> <strong>fil</strong><br />
pendant la mise à jour du firmware ! Le système<br />
risquerait d'être irrévocablement supprimé.<br />
3. Une fois la mise à jour terminée, le <strong>hub</strong> <strong>USB</strong> <strong>sans</strong> <strong>fil</strong><br />
redémarre automatiquement.<br />
- 40 -
Languages<br />
Vous pouvez ici régler la langue devant être affichée dans<br />
les menus. Sélectionnez une langue et cliquez sur Apply.<br />
- 41 -<br />
FR
Configuration du WPS<br />
Le Wi-Fi Protected Setup (WPS) est un standard développé<br />
par la Wi-Fi Alliance pour la mise en place simple et<br />
sécurisée d'un réseau domestique <strong>sans</strong> <strong>fil</strong>. Les appareils<br />
avec fonction WPS peuvent ainsi se connecter<br />
automatiquement <strong>sans</strong> qu'un code PIN doive être saisi.<br />
Avant de pouvoir utiliser la fonction WPS, vous devez<br />
l'activer dans le menu Setup du <strong>hub</strong> <strong>USB</strong> ou de l'autre<br />
appareil compatible WPS (voir page 35).<br />
La connexion WPS peut être par principe établie de deux<br />
manières. L'avantage est que les appareils les plus divers de<br />
fabricants différents peuvent ainsi être connectés <strong>sans</strong><br />
grands efforts, à condition qu'ils supportent le standard<br />
WPS.<br />
Push Button Configuration (PBC)<br />
Pour régler la configuration PBC :<br />
1. Appuyez sur la touche WPS du <strong>hub</strong> <strong>USB</strong> <strong>sans</strong> <strong>fil</strong>.<br />
2. Appuyez sur la touche WPS correspondante de l'autre<br />
appareil WPS.<br />
3. L'appareil est reconnu et configuré automatiquement.<br />
- 42 -
Personal Identification Number (PIN)<br />
Vous pouvez régler la connexion WPS via la saisie d'un code<br />
PIN de deux manières :<br />
1. En saisissant le code PIN du <strong>hub</strong> <strong>USB</strong> <strong>sans</strong> <strong>fil</strong> dans la<br />
fenêtre de saisie correspondante de l'ordinateur. Vous<br />
trouverez le code PIN pour le <strong>hub</strong> <strong>USB</strong> <strong>sans</strong> <strong>fil</strong> sous WPS<br />
dans le menu de configuration du <strong>hub</strong> <strong>USB</strong> <strong>sans</strong> <strong>fil</strong>.<br />
2. Ou en saisissant le code PIN de l'autre appareil WPS sur le<br />
<strong>hub</strong> <strong>USB</strong> <strong>sans</strong> <strong>fil</strong> en cliquant sur Add Wireless Station<br />
dans le menu de configuration.<br />
- 43 -<br />
FR
3. Les deux appareils sont reconnus et établissent une<br />
connexion si le code PIN correct a été saisi.<br />
Pour pouvoir utiliser le standard WPS sur votre<br />
ordinateur, vous devez utiliser le système<br />
d'exploitation Windows Vista ou Windows 7.<br />
L'adaptateur réseau, la station de réseau, le routeur ou<br />
le point d'accès doivent aussi supporter le standard<br />
WPS.<br />
- 44 -
Réinitialisation de l'appareil<br />
Si l'appareil ne réagit plus ou qu'il présente d'autres<br />
dysfonctionnements, vous pouvez restaurer les réglages à<br />
la livraison.<br />
Appuyez pour cela pendant plus de 5 secondes sur la<br />
touche RESET avec un objet pointu (p. ex. un stylo à<br />
bille). Au bout de 10 secondes, le témoin WiFi s'éteint<br />
tout d'abord, puis le témoin POWER, et les deux se<br />
rallument.<br />
- 45 -<br />
FR
Service après-vente<br />
Première aide en cas de<br />
dysfonctionnement<br />
J'ai raccordé un appareil <strong>USB</strong> au <strong>hub</strong> <strong>USB</strong>, mais il<br />
n'est pas visible sur l'ordinateur<br />
Le logiciel Control Utility n'est pas installé.<br />
Installez le logiciel et démarrez-le.<br />
Le port du <strong>hub</strong> <strong>USB</strong> sur lequel vous avez raccordé<br />
l'appareil <strong>USB</strong> est utilisé par un autre ordinateur.<br />
Démarrez le logiciel Control-Utility et libérez l'accès à<br />
ce port pour votre ordinateur (voir page 24).<br />
Votre ordinateur n'est pas raccordé au <strong>hub</strong> <strong>USB</strong>. La<br />
connexion <strong>sans</strong> <strong>fil</strong> avec le <strong>hub</strong> <strong>USB</strong> a été coupée.<br />
Reconnectez-vous sur le réseau <strong>sans</strong> <strong>fil</strong> du <strong>hub</strong> <strong>USB</strong>.<br />
Vérifiez si l'adaptateur WiFi de votre ordinateur n'est<br />
pas désactivé et réactivez-le le cas échéant.<br />
Le réseau dans lequel je souhaite intégrer le <strong>hub</strong><br />
<strong>USB</strong> n'est pas visible<br />
Le SSID du réseau est invisible et n'apparaît donc<br />
pas non plus lors de la recherche des réseaux <strong>sans</strong> <strong>fil</strong><br />
disponibles.<br />
- 46 -
Réglez la transmission du SSID sur « Visible » sur le<br />
routeur du réseau dans lequel le <strong>hub</strong> <strong>USB</strong> doit être<br />
intégré.<br />
Le <strong>hub</strong> <strong>USB</strong> n'est pas reconnu par l'ordinateur<br />
Le <strong>hub</strong> <strong>USB</strong> n'est pas alimenté en courant.<br />
Allumez le <strong>hub</strong> <strong>USB</strong> en branchant le connecteur de<br />
l'adaptateur secteur et en raccordant l'adaptateur<br />
secteur au réseau électrique.<br />
Aucun son n'est restitué via la prise LINE OUT<br />
La fonction Remote Audio n'est pas activée dans<br />
votre système d'exploitation.<br />
Activez-la.<br />
Impossible d'établir une connexion avec un réseau<br />
sélectionné<br />
Le réseau avec lequel une connexion doit être établie<br />
est crypté et exige la saisie d'un mot de passe et/ou<br />
d'un identifiant.<br />
Renseignez-vous auprès de l'administrateur du réseau<br />
pour connaître les données d'accès de la connexion<br />
cryptée.<br />
- 47 -<br />
FR
Données techniques<br />
Modèle : MD 86097<br />
Audio<br />
Sortie : Prise jack stéréo 3,5 mm<br />
LAN<br />
10/100 Ethernet : 1 port RJ45 Ethernet 10/100<br />
<strong>USB</strong><br />
<strong>USB</strong> : 4 ports <strong>USB</strong> 1.1/2.0 type A<br />
WiFi<br />
Standard : IEEE 802.11 n/g/b<br />
Mode : Infrastructure<br />
Portée : À l'extérieur : 100 m (selon<br />
bâtiments alentours et<br />
environnement)<br />
Puissance RF : 11g/n:13 dBm (+1,0 / -1,0 dBm)<br />
11b : 16 dBm (+1,0 / -1,0 dBm)<br />
Cryptage : WEP 64 bits et 128 bits<br />
WPA-PSK / WPA2-PSK<br />
Fréquence : Bande de fréquence 2.4 GHz ISM<br />
(2.412~2.472 GHz)<br />
Antenne : 2 antennes dipôles 1,8 dBi<br />
- 48 -
Adaptateur secteur<br />
Modèle : KSAD1200150W1EU<br />
Fabricant : Ktec<br />
Entrée : 100~240 VAC, 0,4 A<br />
Sortie : 12 VDC/1,5 A<br />
Dimensions<br />
Boîtier : 12 x 18 x 3,3 cm<br />
Sous réserve de modifications techniques !<br />
Informations relatives à la conformité selon R&TTE<br />
En raison de la puissance de la solution WiFi intégrée (>100<br />
mW), en France, l'utilisation est autorisée uniquement à<br />
l'intérieur de bâtiments.<br />
Dans tous les autres pays de l'Union européenne, il n'existe<br />
actuellement aucune restriction. Pour l'utilisation dans<br />
d'autres pays, informez-vous sur place des prescriptions<br />
légales respectives en vigueur.<br />
Par la présente, la société MEDION AG déclare que le<br />
présent appareil est conforme aux exigences essentielles et<br />
autres dispositions pertinentes de la directive 1999/5/CE.<br />
Vous pouvez obtenir les déclarations de conformité<br />
complètes sur www.<strong>medion</strong>.com/conformity.<br />
- 49 -<br />
FR
Nettoyage<br />
Attention !<br />
Cet appareil ne contient aucune pièce devant<br />
être entretenue ou nettoyée.<br />
Veillez à ne pas salir le <strong>hub</strong> <strong>USB</strong>. N'utilisez ni solvants ni<br />
détergents corrosifs ou gazeux. Nettoyez si nécessaire le<br />
boîtier avec un chiffon humide.<br />
Recyclage<br />
Emballage<br />
Votre appareil se trouve dans un emballage de<br />
protection afin d'éviter qu'il ne soit endommagé au<br />
cours du transport. Les emballages sont fabriqués à<br />
partir de matériaux qui peuvent être recyclés<br />
écologiquement et remis à un service de recyclage<br />
approprié.<br />
Appareil<br />
Une fois l'appareil arrivé en fin de vie, ne le jetez<br />
en aucun cas avec les déchets domestiques, mais<br />
renseignez-vous auprès de votre municipalité<br />
pour savoir où se trouvent les points de collecte<br />
des déchets électriques et électroniques afin de<br />
garantir un recyclage réglementaire.<br />
- 50 -
Inhoud<br />
Inhoud .................................................................. 1<br />
Overzicht .............................................................. 3<br />
Over dit apparaat .................................................. 5<br />
Inhoud ............................................................................ 5<br />
Beoogd gebruik ............................................................... 6<br />
Veiligheidsadviezen .............................................. 6<br />
Veiligheid ........................................................................ 7<br />
Software <strong>USB</strong>-<strong>hub</strong> installeren ............................. 10<br />
Ingebruikname ................................................... 13<br />
Aansluiting op de netspanning ..................................... 13<br />
WLAN-verbinding (modus Access Point)) ............. 14<br />
De <strong>USB</strong>-<strong>hub</strong> aan een bestaand netwerk toevoegen<br />
(modus Station) .................................................. 17<br />
De <strong>USB</strong>-<strong>hub</strong>-software gebruiken ............................ 22<br />
De menubalk ................................................................ 23<br />
<strong>USB</strong>-apparaten aansluiten en afkoppelen ...................... 26<br />
Gebruik van de Remote Audio-functie ........................... 28<br />
Een aansluiting voor de toepassing aanvragen en voor<br />
andere verbreken .......................................................... 29<br />
De <strong>USB</strong>-<strong>hub</strong> configureren ................................... 31<br />
Het configuratiemenu weergeven ................................. 31<br />
- 1 -<br />
NL<br />
NL
Menu Wireless ............................................................... 33<br />
Menu Systeem .............................................................. 37<br />
WPS-configuratie ................................................ 41<br />
Het apparaat terugzetten ................................... 42<br />
Klantenservice .................................................... 44<br />
Eerste hulp bij storingen ................................................ 44<br />
Technische gegevens .......................................... 46<br />
Reinigen ............................................................. 48<br />
Recycling ............................................................ 48<br />
- 2 -
Overzicht<br />
1. WLAN-antenne<br />
2. LINE OUT (A): Voor het aansluiten van een apparaat<br />
voor de Remote Audio-weergave<br />
(bijv. versterker of actieve luidsprekers)<br />
- 3 -<br />
NL<br />
NL
3. ETHERNET: LAN-aansluiting<br />
4. RESET: Reset-schakelaar<br />
5. <strong>USB</strong> 1,2,3: <strong>USB</strong>-aansluitingen<br />
6. DC POWER: Aansluiting voor netadapter<br />
7. Standaard<br />
8. WLAN-antenne<br />
9. WPS LED: Brandt bij WPS-functie<br />
10. LAN LED: Brandt bij LAN-verbinding, knippert bij<br />
gegevensoverdracht<br />
11. Bedrijfs-led: Brandt bij voeding<br />
12. WLAN LED: Brandt als het systeem klaar is,<br />
knippert bij gegevensoverdracht<br />
13. WPS-toets: Voor het opbouwen van een WPSverbinding<br />
14. <strong>USB</strong> (F): <strong>USB</strong>-aansluiting<br />
- 4 -
Over dit apparaat<br />
Inhoud<br />
Controleer de verpakking op volledigheid en stel ons<br />
binnen 14 dagen na de aanschaf op de hoogte van<br />
eventuele ontbrekende onderdelen. Het door u gekochte<br />
pakket moet het volgende bevatten:<br />
<strong>Draadloze</strong> <strong>USB</strong>-<strong>hub</strong><br />
Netadapter (Ktec KSAD1200150W1EU)<br />
Standaard<br />
Cd met software<br />
Deze gebruiksaanwijzing<br />
Garantiepapieren<br />
Vermenigvuldiging van dit handboek<br />
Dit document bevat wettelijk beschermde informatie. Alle<br />
rechten voorbehouden. Vermenigvuldiging in<br />
mechanische, elektronische of elke andere vorm zonder de<br />
schriftelijke toestemming van de fabrikant is verboden.<br />
- 5 -<br />
NL<br />
NL
Beoogd gebruik<br />
De draadloze <strong>USB</strong>-<strong>hub</strong> dient voor het aansluiten van <strong>USB</strong>apparatuur<br />
1 (<strong>USB</strong>-massaopslagapparaten zoals externe harde<br />
schijven of <strong>USB</strong>-sticks, <strong>USB</strong>-printers of <strong>USB</strong>-scanners) en geeft de<br />
<strong>USB</strong>-signalen via een WLAN-verbinding door aan computers die<br />
met de <strong>USB</strong>-<strong>hub</strong> verbonden zijn via WLAN of LAN. <strong>USB</strong>-apparaten<br />
kunnen zo draadloos op een computer worden aangesloten.<br />
Bovendien heeft het apparaat een audiouitgang via welke, bij de<br />
juiste instelling, het audiosignaal van een aangemelde computer<br />
weergegeven kan worden.<br />
Dit apparaat is uitsluitend bedoeld voor privégebruik en is<br />
niet bedoeld voor zakelijke doeleinden.<br />
Veiligheidsadviezen<br />
Lees dit hoofdstuk en de hele handleiding zorgvuldig<br />
door en volg alle gegeven aanwijzingen op. Zo bent u<br />
verzekerd van een betrouwbare werking en een lange<br />
levensduur van uw <strong>USB</strong>-<strong>hub</strong>.<br />
Hou deze gebruiksaanwijzing steeds binnen<br />
handbereik bij uw apparaat en bewaar hem goed<br />
zodat u hem bij verkoop kunt doorgeven aan de<br />
nieuwe eigenaar. Neem bij problemen met het<br />
apparaat uitsluitend contact op met onze erkende<br />
servicepartners.<br />
1 De compatibiliteit met andere <strong>USB</strong>-apparaten is niet gegarandeerd.<br />
- 6 -
Veiligheid<br />
Dit apparaat mag niet worden gebruikt door<br />
personen (inclusief kinderen) met een beperkt<br />
lichamelijk, zintuiglijk of intellectueel vermogen<br />
en/of een tekort aan ervaring en/of kennis, tenzij<br />
onder toezicht van een voor hun veiligheid<br />
verantwoordelijke persoon, of tenzij die personen<br />
aanwijzingen hebben gekregen over het juiste<br />
gebruik van het apparaat. Kinderen dienen onder<br />
toezicht te staan om er zeker van te zijn dat zij niet<br />
met het apparaat gaan spelen.<br />
Houd u ook aan gebruiksaanwijzingen van de<br />
apparatuur die u op de <strong>USB</strong>-<strong>hub</strong> aansluit.<br />
Zet geen met vloeistof gevulde voorwerpen, zoals<br />
vazen, op het apparaat of in de onmiddellijke<br />
omgeving ervan. Het voorwerp kan omvallen, en de<br />
combinatie van vloeistof en elektriciteit is gevaarlijk.<br />
Stel het apparaat niet bloot aan vocht en druip- en<br />
spatwater. Vermijd schokken, stof, hitte en<br />
rechtstreeks zonlicht om functiestoringen te<br />
vermijden. De gebruikstemperatuur is 5 tot 40 °C.<br />
Open nooit de behuizing. Daardoor vervalt de<br />
garantie en het kan leiden tot onherstelbare schade<br />
aan het apparaat.<br />
Wacht na vervoer zo lang met de ingebruikname tot<br />
het apparaat de omgevingstemperatuur heeft<br />
aangenomen. Bij grote schommelingen in de<br />
temperatuur of luchtvochtigheid kan er door<br />
- 7 -<br />
NL<br />
NL
condensatie vochtvorming optreden waardoor er<br />
kortsluiting kan ontstaan.<br />
Voor de aansluiting op computers is het apparaat<br />
voorzien van een laagspanningsvoeding (Limited<br />
Power Source volgens EN60950).<br />
Gebruik uitsluitend de meegeleverde netadapter<br />
type Ktec KSAD1200150W1EU.<br />
Het stopcontact moet zich in de buurt van het<br />
apparaat bevinden en moet gemakkelijk bereikbaar<br />
zijn.<br />
Leg de kabels zo dat niemand erop kan trappen of<br />
erover kan struikelen.<br />
Zet geen voorwerpen op de kabels omdat deze<br />
anders beschadigd kunnen raken.<br />
Om statische elektriciteit te voorkomen moet u het<br />
apparaat niet gebruiken in een erg droge atmosfeer.<br />
Elektrostatische ontladingen kunnen storingen van het<br />
apparaat veroorzaken. In dat geval moet het apparaat<br />
op de fabrieksinstellingen worden teruggezet.<br />
Back-ups van gegevens<br />
In geen geval kan aanspraak gemaakt worden op<br />
schadevergoeding vanwege<br />
verlies van gegevens en daardoor ontstane schade<br />
. Maak na elke keer bijwerken van uw gegevens backups op<br />
externe opslagmedia (bijv. cd-r).<br />
- 8 -
Elektromagnetische compatibiliteit<br />
Bij het aansluiten moeten de richtlijnen voor<br />
elektromagnetische compatibiliteit (EMC) aangehouden<br />
worden. Zorg voor een afstand van minimaal één meter<br />
tussen het toestel en hoogfrequente en magnetische<br />
storingsbronnen (televisietoestel, luidsprekerboxen,<br />
mobiele telefoon, enz.) om functiestoringen en<br />
gegevensverlies te vermijden.<br />
- 9 -<br />
NL<br />
NL
Software <strong>USB</strong>-<strong>hub</strong> installeren<br />
Voordat u <strong>USB</strong>-signalen via het netwerk kunt ontvangen<br />
moet op alle computers die de <strong>USB</strong>-<strong>hub</strong> gebruiken de<br />
software geïnstalleerd worden.<br />
1. Plaats de meegeleverde installatie-cd. Het beginscherm<br />
wordt weergegeven.<br />
2. Start de installatietoepassing door op Installeren te<br />
klikken. Het venster Gebruikersaccountbeheer van<br />
Windows wordt weergegeven om de installatie te<br />
bevestigen. Klik op Ja.<br />
3. Kies in het venster Taal selecteren uw taal en klik op<br />
Doorgaan.<br />
- 10 -
4. Het welkomstscherm wordt weergegeven. Klik op<br />
Doorgaan.<br />
5. Neem het voorgestelde installatiepad over door op<br />
Doorgaan te klikken. Als u de map voor de installatie<br />
wilt wijzigen klikt u op Wijzigen....<br />
- 11 -<br />
NL<br />
NL
6. Kies de map waarin de software geïnstalleerd moet<br />
worden en klik op OK.<br />
7. De software kan nu geïnstalleerd worden. Klik<br />
daarvoor op Installeren.<br />
8. Wacht, tot de installatie klaar is en klik op Voltooien.<br />
Na afsluiting van de installatie worden op de desktop en in<br />
de taakbalk pictogrammen weergegeven.<br />
9. Vervolgens kunt u de software starten door te<br />
dubbelklikken op van een de pictogrammen.<br />
- 12 -
Ingebruikname<br />
Aansluiting op de netspanning<br />
1. Sluit de holle stekker<br />
van de netadapter<br />
aan op de connector<br />
DC POWER op het<br />
apparaat.<br />
2. Steek de netadapter<br />
in een goed<br />
bereikbaar<br />
stopcontact 230 V<br />
50/60 Hz. Het<br />
apparaat is nu klaar<br />
voor gebruik en de<br />
groene POWER LED<br />
brandt continu.<br />
- 13 -<br />
NL<br />
NL
WLAN-verbinding<br />
(modus Access Point))<br />
De eenvoudige WLAN-verbinding is gemakkelijk als uw pc<br />
via een kabel is aangesloten op een router (bijv. voor de<br />
toegang tot internet) en uw pc daarnaast een ongebruikte<br />
draadloze netwerkadapter heeft.<br />
1. Schakel de <strong>USB</strong>-<strong>hub</strong> in door de netadapter aan te<br />
sluiten zoals beschreven op pagina 13.<br />
2. Installeer de <strong>USB</strong>-<strong>hub</strong>-software zoals beschreven op<br />
pagina 10.<br />
3. Klik op het symbool voor<br />
draadloze netwerken in<br />
de taakbalk van uw<br />
besturingssysteem.<br />
- 14 -
4. Het venster voor netwerkverbindingen wordt<br />
weergegeven. Klik op het item W-LAN <strong>USB</strong> <strong>Hub</strong>.<br />
5. Bij aflevering is er geen versleuteling ingesteld.<br />
Windows toont deze verbinding daarom als onveilig.<br />
Klik op Verbinden. Het instellen van een versleuteling<br />
staat beschreven op pagina 34.<br />
- 15 -<br />
NL<br />
NL
6. Wacht tot de verbinding gemaakt is. Vervolgens<br />
wordt de verbindingsstatus weergegeven.<br />
7. Om de <strong>USB</strong>-aansluitingen in te stellen, start u de <strong>USB</strong>software<br />
(zie pagina 22).<br />
- 16 -
De <strong>USB</strong>-<strong>hub</strong> aan een bestaand<br />
netwerk toevoegen (modus<br />
Station)<br />
Het toevoegen aan een bestaand netwerk is gemakkelijk als<br />
uw pc al via een draadloze netwerkverbinding (WLAN)<br />
toegang heeft tot de internetrouter en de <strong>USB</strong>-<strong>hub</strong> extra via<br />
WLAN verbonden moet worden.<br />
- 17 -<br />
NL<br />
NL
De modus Station instellen<br />
Als uw pc is aangesloten op een netwerkrouter die het<br />
Dynamic Host Configuration Protocol (DHCP) gebruikt,<br />
zoals de meeste netwerken, dan hoeft er niets te worden<br />
ingesteld op de router. Voer de volgende instructies uit:<br />
1. Sluit de <strong>hub</strong> aan op de netadapter.<br />
2. Wacht tot de powerled groen brandt.<br />
3. Sluit de <strong>USB</strong>-<strong>hub</strong> aan met een netwerkkabel (Deze<br />
verbinding is alleen nodig voor de configuratie van de<br />
<strong>USB</strong>-<strong>hub</strong>).<br />
4. Sluit de netwerkkabel aan op de netwerkconnector<br />
van uw pc.<br />
5. Open uw standaard internetbrowser en voer in de<br />
adresbalk het IP-adres van de <strong>USB</strong>-<strong>hub</strong> in. Druk op de<br />
toets ENTER op de pc.<br />
Tip: Het IP-adres van de <strong>USB</strong>-<strong>hub</strong> wordt in de <strong>USB</strong>software<br />
weergegeven (zie pagina 22).<br />
- 18 -
6. Voer een gebruikernaam en een wachtwoord in en<br />
klik op OK, om naar het configuratiemenu te gaan. Bij<br />
aflevering zijn de gebruikernaam en het wachtwoord<br />
beide admin.<br />
7. Controleer of de<br />
LAN-led, die de<br />
werking van de LANverbinding<br />
aangeeft,<br />
brandt.<br />
8. Kies in het<br />
configuratiemenu<br />
het item<br />
Wireless -><br />
Bedrijfsmodus en<br />
vervolgens Station.<br />
9. Nadat u Station hebt gekozen klikt u op Toepassen en<br />
wordt er een mededeling weergegeven dat de <strong>USB</strong><strong>hub</strong><br />
opnieuw gestart wordt.<br />
10. Wacht tot het apparaat opnieuw gestart is. Op de<br />
<strong>USB</strong>-<strong>hub</strong> is nu de modus Station ingesteld.<br />
- 19 -<br />
NL<br />
NL
Zoeken naar beschikbare draadloze netwerken.<br />
11. Nadat de <strong>USB</strong>-<strong>hub</strong> opnieuw gestart is, opent u het<br />
configuratiemenu en kiest u het item Wireless -><br />
Basis.<br />
Klik op Netwerken zoeken om alle gevonden Access<br />
Point- of router-signalen weer te geven die binnen het<br />
bereik van de <strong>USB</strong>-<strong>hub</strong> beschikbaar zijn.<br />
Opnieuw zoeken: Het opnieuw zoeken naar signalen<br />
starten.<br />
Verbinden: Aanmelden bij het gekozen netwerk.<br />
Sluiten: Dit venster sluiten.<br />
12. Kies het WLAN-netwerk waarin de <strong>USB</strong>-<strong>hub</strong><br />
opgenomen moet worden en klik op Verbinden. Er<br />
wordt een draadloze verbinding gemaakt tussen de<br />
<strong>USB</strong>-<strong>hub</strong> en de router van het WLAN-netwerk en de<br />
<strong>USB</strong>-<strong>hub</strong> wordt in het WLAN-netwerk opgenomen.<br />
- 20 -
Sommige netwerken kunnen gecodeerd zijn, en voor<br />
deze moet een wachtwoord worden ingevoerd.<br />
13. Verwijder de netwerkkabel van de <strong>USB</strong>-<strong>hub</strong>.<br />
- 21 -<br />
NL<br />
NL
De <strong>USB</strong>-<strong>hub</strong>-software gebruiken<br />
Na de installatie kunt u de software via het<br />
startmenu of via dubbelklikken op een van<br />
de pictogrammen op de desktop of de<br />
taakbalk starten. Met de software kunt u<br />
een <strong>USB</strong>-apparaat verbinden/afkoppelen,<br />
de verbindingsstatus weergeven of toegang<br />
tot een <strong>USB</strong>-apparaat vragen als dit door een andere pc<br />
gebruikt wordt.<br />
De software van de <strong>USB</strong>-<strong>hub</strong> (zie onderstaande afbeelding)<br />
toont een overzicht van de verbindingsconfiguratie.<br />
- 22 -
De menubalk<br />
<strong>Hub</strong><br />
Via de software van de <strong>USB</strong>-<strong>hub</strong> kunt u zoeken naar andere<br />
<strong>USB</strong>-<strong>hub</strong>s door te klikken op <strong>Hub</strong> > Zoeken of op het Zoeksymbool<br />
op de werkbalk.<br />
- 23 -<br />
NL<br />
NL
Geavanceerd<br />
Klik op het item Geavanceerd > Voorkeuren in de menubalk<br />
om volgende instellingen uit te voeren:<br />
Het venster Voorkeuren<br />
wordt weergegeven. Stel in<br />
of de software van de <strong>USB</strong><strong>hub</strong><br />
bij het starten van<br />
Windows moet starten resp.<br />
of een bericht moet worden<br />
weergegeven als Remote<br />
Audio gebruikt wordt.<br />
Stel in of de <strong>USB</strong>-aansluiting<br />
resp. de <strong>USB</strong>-apparaten<br />
automatisch worden<br />
verbonden.<br />
- 24 -
Help<br />
Om de betekenis van de<br />
symbolen voor <strong>USB</strong>aansluitingen<br />
weer te geven<br />
klikt u op Help ><br />
Statusinformatie.<br />
Het venster Statusinformatie<br />
wordt weergegeven. Er zijn 4<br />
symbolen voor de status van<br />
de <strong>USB</strong>-aansluitingen:<br />
Een wit symbool toont<br />
een ongebruikte<br />
aansluiting die nog beschikbaar is.<br />
Een groen symbool<br />
toont een aansluiting die<br />
door u gebruikt wordt.<br />
Een rood symbool<br />
toont een aansluiting,<br />
die door een andere pc<br />
gebruikt wordt. Als u<br />
deze aansluiting wilt<br />
gebruiken kunt u een<br />
verzoek naar de<br />
betreffende deelnemer<br />
sturen om de<br />
aansluiting vrij te geven.<br />
Een grijs symbool toont een niet-werkend apparaat<br />
op de betreffende <strong>USB</strong>-aansluiting. Neem in dat<br />
geval contact op met de fabrikant van dit apparaat.<br />
- 25 -<br />
NL<br />
NL
<strong>USB</strong>-apparaten aansluiten en<br />
afkoppelen<br />
Als u op het vakje voor<br />
het item „W-LAN <strong>USB</strong><br />
<strong>Hub</strong>“ klikt worden alle<br />
weergegeven <strong>USB</strong>apparaten<br />
verbonden.<br />
U kunt de eigenschappen<br />
voor een aangesloten<br />
apparaat weergeven door<br />
op het symbool<br />
Eigenschappen in de<br />
werkbalk te klikken.<br />
Om een op de <strong>USB</strong>-<strong>hub</strong><br />
aangesloten apparaat te<br />
verbinden zet u een vinkje in<br />
het vakje voor het <strong>USB</strong>apparaat,<br />
door op het vakje te<br />
klikken.<br />
- 26 -
Het venster Apparaateigenschappen wordt<br />
weergegeven:<br />
Om de verbinding van een <strong>USB</strong>-apparaat te verbreken<br />
verwijdert u het vinkje in het vakje voor de invoer van<br />
het <strong>USB</strong>-apparaat.<br />
- 27 -<br />
NL<br />
NL
Gebruik van de Remote Audiofunctie<br />
De <strong>USB</strong>-<strong>hub</strong> kan gebruikt worden als een Remote Audioapparaat.<br />
Zet een vinkje in het vakje „Remote Audio“ door<br />
er op te klikken om audiosignalen van de pc via de<br />
aansluiting Line Out op de <strong>USB</strong>-<strong>hub</strong> naar een hoofdtelefoon<br />
of luidspreker door te geven.<br />
Als de Remote Audio-optie is ingeschakeld wordt er in een<br />
bericht aangegeven dat de <strong>USB</strong>-<strong>hub</strong> nu voor<br />
audioweergave gebruikt wordt. U kunt het weergegeven<br />
van dit bericht uitschakelen in het menu Geavanceerd ><br />
Voorkeuren.<br />
Tip: Als de Remote Audio-functie actief is, is de<br />
audiouitgang van de pc uitgeschakeld.<br />
- 28 -
Een aansluiting voor de toepassing<br />
aanvragen en voor andere verbreken<br />
Klik daarvoor op het symbool<br />
Verbinding verbreken op de<br />
werkbalk.<br />
Als u een <strong>USB</strong>-aansluiting wilt<br />
gebruiken die al door een<br />
ander gebruikt wordt, kunt u<br />
een verzoek naar de andere<br />
deelnemer sturen zodat deze<br />
de verbinding kan verbreken<br />
en voor uw toepassing vrij kan<br />
geven.<br />
- 29 -<br />
NL<br />
NL
De gebruiker van de andere pc krijgt een berichtvenster<br />
waarin hij de <strong>USB</strong>-verbinding kan verbreken.<br />
Als de andere gebruiker op Ja klikt wordt zijn verbinding<br />
met de <strong>USB</strong>-<strong>hub</strong> verbroken en met uw pc verbonden.<br />
- 30 -
De <strong>USB</strong>-<strong>hub</strong> configureren<br />
Het configuratiemenu weergeven<br />
1. Open uw standaard internetbrowser en voer in de<br />
adresbalk het IP-adres van de <strong>USB</strong>-<strong>hub</strong> in. Druk op de<br />
toets ENTER op de pc.<br />
Tip: Het IP-adres van de <strong>USB</strong>-<strong>hub</strong> wordt in de <strong>USB</strong>software<br />
weergegeven (zie pagina 22).<br />
2. Als alternatief kunt u ook het configuratiemenu<br />
openen door in de <strong>USB</strong>-<strong>hub</strong>software met de<br />
rechtermuisknop op de optie <strong>USB</strong>-<strong>hub</strong> te klikken en<br />
vervolgens de optie Configure W-LAN <strong>USB</strong> Remote<br />
<strong>Hub</strong> te selectere.<br />
- 31 -<br />
NL<br />
NL
3. Voer een<br />
gebruikernaam en<br />
een wachtwoord in<br />
en klik op OK, om<br />
naar het<br />
configuratiemenu te<br />
gaan. Bij aflevering<br />
zijn de<br />
gebruikernaam en<br />
het wachtwoord beide admin.<br />
Het configuratiemenu wordt weergegeven (zie volgende<br />
bladzijde).<br />
Het menu bestaat uit twee delen:<br />
Wireless en Systeem.<br />
- 32 -
Menu Wireless<br />
Het menu Wireless heeft 4 submenu's.<br />
Bedrijfsmodus<br />
In het eerste submenu Bedrijfsmodus kunt u de modus<br />
voor de draadloze verbinding instellen.<br />
Als de <strong>USB</strong>-<strong>hub</strong> een zelfstandig draadloos netwerk<br />
moet vormen waarmee computers een verbinding<br />
kunnen opbouwen kiest u Access Point<br />
(standaardinstelling).<br />
Als u de <strong>USB</strong>-<strong>hub</strong> als cliënt in een bestaand netwerk<br />
wilt opnemen kiest u Station. Meer aanwijzingen<br />
voor de client-configuratie staan onder De <strong>USB</strong>-<strong>hub</strong><br />
aan een bestaand netwerk toevoegen (modus Station<br />
op pagina 17.<br />
- 33 -<br />
NL<br />
NL
Basis<br />
In het tweede menu Basis stelt u de SSID (netwerknaam),<br />
het Kanaal (1 - 13) en de Soort versleuteling in.<br />
Voer de betreffende instellingen uit en klik op<br />
Toepassen.<br />
Als u de versleuteling hebt ingesteld op WEP of WPA-<br />
PSK moet u daarnaast een beveiligingssleutel invoeren.<br />
- 34 -
WPS<br />
De WLAN-<strong>USB</strong>-<strong>hub</strong> ondersteunt de meest actuele WPSversleuteling.<br />
De WPS-functie is bij aflevering uitgeschakeld.<br />
(Hoe u de WPS-functie gebruikt: Zie pagina 41).<br />
U kunt de functie in de WPS-instellingen inschakelen door<br />
te klikken op het veld Ingeschakeld en vervolgens op<br />
Toepassen.<br />
U kunt de WPS-sleutel wijzigen door op Nieuwe PIN<br />
genereren te klikken. Als u nog een WPS-apparaat voor de<br />
snelle verbinding wilt toevoegen klikt u op Toevoegen.<br />
Voer in het venster PIN ID een PIN een en klik op<br />
Toepassen.<br />
- 35 -<br />
NL<br />
NL
Geavanceerd<br />
In het submenu Geavanceerd kunt u het uitzenden van<br />
WLAN en SSID in- of uitschakelen en nog andere<br />
instellingen voor de overdracht invoeren.<br />
- 36 -
Menu Systeem<br />
Het menu Setting heeft 4 submenu's.<br />
LAN<br />
Het eerste item is de LAN-instelling. Hier kunt u instellen<br />
hoe de WLAN-<strong>USB</strong>-<strong>hub</strong> IP-adressen moet toekennen. Bij<br />
aflevering is Vaste IP ingesteld, en dan is er geen verdere<br />
configuratie nodig.<br />
U kunt ook de ingebouwde DHCP-server in- of uitschakelen en<br />
het bereik voor het IP-adres instellen.<br />
- 37 -<br />
NL<br />
NL
Administrator<br />
In het Administrator-deel kunt u de naam voor de WLAN-<br />
<strong>USB</strong>-<strong>hub</strong> invoeren die in de <strong>USB</strong>-<strong>hub</strong>-software wordt<br />
weergegeven. Daarnaast kunt u hier het wachtwoord<br />
wijzigen door in de velden Nieuw wachtwoord en<br />
Wachtwoord bevestigen een nieuw wachtwoord in te<br />
voeren en op Toepassen te klikken.<br />
Firmware<br />
Bij dit item kunt u een firmware-update voor de WLAN-<strong>USB</strong><strong>hub</strong><br />
uitvoeren om alle instellingen terug te zetten en de<br />
WLAN-<strong>USB</strong>-<strong>hub</strong> opnieuw te starten. Lees op de MEDIONinternetpagina<br />
www.<strong>medion</strong>.com meer informatie over<br />
beschikbare updates of neem contact op met de Medion<br />
Service.<br />
- 38 -
1. Om de firmware bij te werken klikt u eerst op<br />
Zoeken… om de opslaglocatie aan te geven waar de<br />
update-bestanden staan. Klik vervolgens op<br />
Bijwerken om de update te installeren.<br />
2. De update wordt geladen. Wacht tot dit proces is<br />
voltooid.<br />
LET OP: Schakel de WLAN-<strong>USB</strong>-<strong>hub</strong> tijdens de firmware<br />
update niet uit! Daardoor kan het systeem<br />
onherstelbaar worden gewist.<br />
3. Na het voltooien van de update-procedure start de<br />
WLAN-<strong>USB</strong>-<strong>hub</strong> automatisch opnieuw.<br />
- 39 -<br />
NL<br />
NL
Talen<br />
Hier kunt u taal instellen waarin de menu's worden<br />
weergegeven. Kies een taal en klik op Toepassen.<br />
- 40 -
WPS-configuratie<br />
De Wi-Fi Protected Setup (WPS) is een door de Wi-Fi<br />
Alliance ontwikkelde standaard voor het eenvoudig en<br />
veilig opzetten van een draadloos thuisnetwerk. Apparaten<br />
met een WPS-functie kunnen zo automatisch verbinding<br />
maken zonder dat er een PIN ingevoerd moet worden.<br />
Voordat u de WPS-functie kunt gebruiken moet in het<br />
setup-menu van de <strong>USB</strong>-<strong>hub</strong> resp. van het andere<br />
WPS-compatibele apparaat de WPS-functie<br />
ingeschakeld zijn (zie pagina 35).<br />
In principe kan de WPS-verbinding op twee manieren<br />
gemaakt worden. Het voordeel is dat zo de meest<br />
uiteenlopende apparaten van verschillende producenten<br />
met weinig moeite verbonden kunnen worden zolang ze<br />
de WPS-standaard ondersteunen.<br />
Push Button Configuration (PBC)<br />
Zo stelt u de PBC-configuratie in:<br />
1. Druk op de toets WPS op de WLAN-<strong>USB</strong>-<strong>hub</strong>.<br />
2. Druk op de betreffende WPS-toets op het andere<br />
WPS-apparaat.<br />
3. Het apparaat wordt herkend en automatisch<br />
geconfigureerd.<br />
- 41 -<br />
NL<br />
NL
Personal Identification Number (PIN)<br />
U kunt de WPS-verbinding via PIN-invoer op twee manieren<br />
instellen:<br />
1. Voer ofwel de PIN-code van de WLAN-<strong>USB</strong>-<strong>hub</strong> in het<br />
betreffende invoervenster op de computer in. De PIN<br />
voor de WLAN-<strong>USB</strong>-<strong>hub</strong> staat onder WPS in het<br />
configuratiemenu van de WLAN-<strong>USB</strong>-<strong>hub</strong>.<br />
2. Of u voert de PIN-code van het andere WPS-apparaat in<br />
op de WLAN-<strong>USB</strong>-<strong>hub</strong> door in het configuratiemenu op<br />
WLAN-station toevoegen te klikken.<br />
3. De beide apparaten worden herkend en bouwen, als<br />
de juiste PIN is ingevoerd, een verbinding op.<br />
Om de WPS-standaard op uw computer te kunnen<br />
gebruiken moet u Windows Vista of Windows 7 als<br />
besturingssysteem gebruiken.<br />
Daarnaast moeten de netwerkadapter, het<br />
netwerkstation en de router of het Access Point de<br />
WPS-standaard ondersteunen.<br />
Het apparaat terugzetten<br />
Als het apparaat niet meer bediend kan worden of er fouten<br />
optreden kunt u het apparaat terugzetten naar de toestand<br />
zoals afgeleverd.<br />
- 42 -
Druk daarvoor minimaal 5 seconden met een spits<br />
voorwerp (bijv. een balpen) de knop RESET in. Na 10<br />
seconden gaat eerst de WLAN-led uit en daarna de<br />
power-led, en deze schakelen daarna weer in.<br />
- 43 -<br />
NL<br />
NL
Klantenservice<br />
Eerste hulp bij storingen<br />
Ik heb een <strong>USB</strong>-apparaat op de <strong>USB</strong>-<strong>hub</strong><br />
aangesloten maar het is niet zichtbaar op de pc.<br />
De Control Utility-software is niet geïnstalleerd.<br />
Installeer de software en start de software op.<br />
De aansluiting op de <strong>USB</strong>-<strong>hub</strong> waarop u het <strong>USB</strong>apparaat<br />
hebt aangesloten wordt door een andere<br />
pc gebruikt.<br />
Start de Control-Utility-software en geef de<br />
aansluiting voor uw pc vrij (zie pagina 26).<br />
Uw pc is niet met de <strong>USB</strong>-<strong>hub</strong> verbonden. De<br />
draadloze verbinding naar de <strong>USB</strong>-<strong>hub</strong> is verbroken.<br />
Maak opnieuw verbinding met het draadloze netwerk<br />
van de <strong>USB</strong>-<strong>hub</strong>.<br />
Controleer of de WLAN-adapter van uw pc mogelijk<br />
uitgeschakeld is en schakel hem in.<br />
Het netwerk waarin ik de <strong>USB</strong>-<strong>hub</strong> wil opnemen is<br />
niet te zien<br />
De SSID van het netwerk is onzichtbaar en wordt<br />
daarom bij het zoeken naar beschikbare draadloze<br />
netwerken niet gevonden.<br />
- 44 -
Stel in de router van het netwerk, waarin de <strong>USB</strong>-<strong>hub</strong><br />
moet worden opgenomen, de overdracht van de<br />
SSID in op zichtbaar.<br />
De <strong>USB</strong>-<strong>hub</strong> wordt door de pc niet herkend<br />
De <strong>USB</strong>-<strong>hub</strong> krijgt geen stroom<br />
Schakel de <strong>USB</strong>-<strong>hub</strong> in door de stekker van de<br />
netadapter aan te sluiten en de stekker van de<br />
netadapter in het stopcontact te steken.<br />
Er wordt geen geluid weergegeven via de<br />
aansluiting Line Out<br />
Op uw besturingssysteem is de functie Remote<br />
Audio niet ingeschakeld.<br />
Schakel de functie Remote Audio op uw<br />
besturingssysteem in.<br />
Er kan geen verbinding gemaakt worden met een<br />
gekozen netwerk.<br />
Het netwerk waarmee een verbinding gemaakt moet<br />
worden, is versleuteld en er moet een wachtwoord<br />
en/of een gebruikernaam voor worden ingevoerd.<br />
Informeer bij de administrator van het netwerk naar<br />
de toegangsgegevens voor de versleutelde<br />
verbinding.<br />
- 45 -<br />
NL<br />
NL
Technische gegevens<br />
Model: MD 86097<br />
Audio<br />
Uitgang: 3,5 mm stereo aansluitbus<br />
LAN<br />
10/100 Ethernet 1 x 10/100 RJ45 ethernetaansluiting<br />
<strong>USB</strong><br />
<strong>USB</strong> 4 x <strong>USB</strong>-aansluitingen type A 1.1/2.0<br />
WLAN<br />
Standaard IEEE 802.11 n/g/b<br />
Bedrijfsmodus Infrastructuur<br />
Bereik In de open lucht: 100 m (afhankelijk<br />
van bebouwing en omgeving)<br />
RF-prestaties 11g/n:13 dBm (+1.0 / -1.0 dBm)<br />
11b: 16 dBm (+1.0 / -1.0 dBm)<br />
Codering WEP 64 bit en 128 bit<br />
WPA-PSK / WPA2-PSK<br />
Frequentie 2,4 GHz ISM frequentieband<br />
(2,412 ~ 2,472 GHz)<br />
Antenne 2 x 1,8 dBi dipool-antenne<br />
Netadapter<br />
Model: KSAD1200150W1EU<br />
- 46 -
Fabrikant: Ktec<br />
Netvoeding: 100 ~ 240 V AC, 0,4 A<br />
Uitgang: 12 V/1,5 A DC<br />
Afmetingen<br />
Behuizing 12 x 18 x 3,3 cm<br />
Technische wijzigingen voorbehouden.<br />
Conformiteitsgegevens volgens R&TTE<br />
Vanwege het vermogen van de ingebouwde Wireless LANoplossing<br />
(>100 mW) is het gebruik in Frankrijk alleen<br />
toegestaan binnen gebouwen.<br />
In alle andere EU-landen zijn er op dit moment geen<br />
beperkingen. Voor het gebruik in andere landen kunt u ter<br />
plaatse informeren naar de geldende wettelijke<br />
voorschriften.<br />
Hiermee verklaart MEDION AG dat deze apparaten voldoen<br />
aan de basisvoorwaarden en andere relevante voorschriften<br />
van richtlijn 1999/5/EG. De complete<br />
conformiteitsverklaringen zijn verkrijgbaar op<br />
www.<strong>medion</strong>.com/conformity.<br />
- 47 -<br />
NL<br />
NL
Reinigen<br />
Let op!<br />
Dit apparaat bevat geen onderdelen die moeten<br />
worden gereinigd of onderhouden.<br />
Zorg dat de <strong>USB</strong>-<strong>hub</strong> niet vuil wordt. Gebruik geen<br />
oplosmiddelen, bijtende of gasvormige<br />
schoonmaakmiddelen. Reinig de buitenkant eventueel met<br />
een vochtig doekje.<br />
Recycling<br />
Verpakking<br />
Uw apparaat bevindt zich in een verpakking ter<br />
bescherming tegen schade bij het transport. De<br />
verpakking bestaat uit materialen die op<br />
milieuvriendelijke wijze kunnen worden afgevoerd en<br />
op vakkundige wijze kunnen worden gerecycled.<br />
Apparaat<br />
Verwijder het apparaat aan het einde van de<br />
levensduur in geen geval als gewoon huisvuil,<br />
maar informeer bij uw gemeente naar een<br />
milieuvriendelijke recycling via inzamelpunten<br />
voor elektrische en elektronische apparatuur.<br />
- 48 -
Inhalt<br />
Inhalt .................................................................... 1<br />
Übersicht .............................................................. 3<br />
Über dieses Gerät .................................................. 5<br />
Lieferumfang ................................................................... 5<br />
Bestimmungsgemäßer Gebrauch .................................... 6<br />
Sicherheitshinweise .............................................. 6<br />
Betriebssicherheit ............................................................ 7<br />
<strong>USB</strong>-<strong>Hub</strong> Software installieren ............................ 10<br />
Inbetriebnahme .................................................. 15<br />
Netzanschluss ............................................................... 15<br />
WLAN-Verbindung (Zugangspunkt Betrieb) ......... 16<br />
<strong>USB</strong>-<strong>Hub</strong> in ein bestehendes Netzwerk einbinden<br />
(Station Betrieb) ................................................. 19<br />
Die <strong>USB</strong>-<strong>Hub</strong> Software verwenden ......................... 23<br />
Die Menüleiste .............................................................. 24<br />
<strong>USB</strong>-Geräte verbinden und trennen ............................... 27<br />
Verwenden der Remote Audio Funktion ........................ 29<br />
Einen Anschluss zur Verwendung anfordern und für<br />
andere trennen ............................................................. 30<br />
- 1 -<br />
DE<br />
DE
Den <strong>USB</strong>-<strong>Hub</strong> konfigurieren ................................ 32<br />
Das Konfigurationsmenü aufrufen ................................. 32<br />
Menü Wireless ............................................................... 33<br />
Menü System ................................................................ 39<br />
WPS Konfiguration ............................................. 44<br />
Das Gerät zurücksetzen....................................... 46<br />
Kundendienst ..................................................... 47<br />
Erste Hilfe bei Fehlfunktionen ........................................ 47<br />
Technische Daten ............................................... 49<br />
Reinigung ........................................................... 51<br />
Entsorgung ......................................................... 51<br />
- 2 -
Übersicht<br />
1. WLAN Antenne<br />
2. LINE OUT (A): Zum Anschluss eines Gerätes für die<br />
Remote-Audiowiedergabe<br />
(z. B. Verstärker oder aktive Lautsprecher)<br />
- 3 -<br />
DE<br />
DE
3. ETHERNET: LAN-Anschluss<br />
4. RESET: Resetschalter<br />
5. <strong>USB</strong> 1,2,3: <strong>USB</strong>-Anschlüsse<br />
6. DC POWER: Anschluss für Netzadapter<br />
7. Standfuss<br />
8. WLAN Antenne<br />
9. WPS LED: Leuchtet bei WPS Funktion<br />
10. LAN LED: Leuchtet bei LAN Verbindung, blinkt bei<br />
Datenübertragung<br />
11. Betriebs LED: Leuchtet bei Stromversorgung<br />
12. WLAN LED: Leuchtet wenn das System bereit ist,<br />
blinkt bei Datenübertragung<br />
13. WPS-Taste: Zum Aufbau einer WPS-Verbindung<br />
14. <strong>USB</strong> (F): <strong>USB</strong>-Anschluss<br />
- 4 -
Über dieses Gerät<br />
Lieferumfang<br />
Bitte überprüfen Sie die Vollständigkeit der Lieferung und<br />
benachrichtigen Sie uns bitte innerhalb von 14 Tagen nach<br />
dem Kauf, falls die Lieferung nicht komplett ist. Mit dem<br />
von Ihnen erworbenen Paket haben Sie erhalten:<br />
<strong>Kabelloser</strong> <strong>USB</strong>-<strong>Hub</strong><br />
Netzadapter (Ktec KSAD1200150W1EU)<br />
Standfuss<br />
CD mit Software<br />
Diese Bedienungsanleitung<br />
Garantieunterlagen<br />
Vervielfältigung dieses Handbuchs<br />
Dieses Dokument enthält gesetzlich geschützte<br />
Informationen. Alle Rechte vorbehalten. Vervielfältigung in<br />
mechanischer, elektronischer und jeder anderen Form ohne<br />
die schriftliche Genehmigung des Herstellers ist verboten.<br />
- 5 -<br />
DE<br />
DE
Bestimmungsgemäßer Gebrauch<br />
Der kabellose <strong>USB</strong>-<strong>Hub</strong> dient dem Anschluss von <strong>USB</strong>-Geräten 1<br />
(<strong>USB</strong>-Massenspeicher wie externe Festplatten oder <strong>USB</strong>-Sticks<br />
sowie <strong>USB</strong>-Druckern und <strong>USB</strong>-Scannern) und überträgt die <strong>USB</strong>-<br />
Signale über eine WLAN Verbindung an Rechner, die mit dem<br />
<strong>USB</strong>-<strong>Hub</strong> über WLAN oder LAN verbunden sind. <strong>USB</strong> Geräte<br />
können so kabellos an einen Rechner angeschlossen werden.<br />
Außerdem verfügt das Gerät über einen Audioausgang über den<br />
bei entsprechender Einstellung das Audiosignal eines<br />
angemeldeten Rechners ausgegeben werden kann.<br />
Dieses Gerät ist ausschließlich für den privaten Gebrauch<br />
und nicht für gewerbliche Zwecke bestimmt.<br />
Sicherheitshinweise<br />
Bitte lesen Sie dieses Kapitel und die ganze Anleitung<br />
aufmerksam durch und befolgen Sie alle aufgeführten<br />
Hinweise. So gewährleisten Sie einen zuverlässigen<br />
Betrieb und eine lange Lebenserwartung Ihres <strong>USB</strong>-<br />
<strong>Hub</strong>s.<br />
Halten Sie diese Bedienungsanleitung stets griffbereit in<br />
der Nähe Ihres Gerätes und bewahren diese gut auf,<br />
um sie bei einer Veräußerung dem neuen Besitzer<br />
weitergeben zu können. Wenden Sie sich bitte<br />
ausschließlich an unsere autorisierten Servicepartner,<br />
falls Sie Probleme mit dem Gerät haben.<br />
1 Die Kompatibilität anderer <strong>USB</strong>-Geräte ist nicht gewährleistet.<br />
- 6 -
Betriebssicherheit<br />
Das Gerät ist nicht dafür bestimmt, durch Personen<br />
(einschließlich Kinder) mit eingeschränkten<br />
physischen, sensorischen oder geistigen Fähigkeiten<br />
oder mangels Erfahrung und/oder mangels Wissen<br />
benutzt zu werden, es sei denn, sie werden durch<br />
eine für ihre Sicherheit zuständige Person<br />
beaufsichtigt oder erhielten von ihr Anweisungen,<br />
wie das Gerät zu benutzen ist. Kinder sollten<br />
beaufsichtigt werden, um sicherzustellen, dass sie<br />
nicht mit dem Gerät spielen.<br />
Befolgen Sie auch die Gebrauchsanweisungen der<br />
Geräte, die Sie mit dem <strong>USB</strong>-<strong>Hub</strong> verbinden.<br />
Stellen Sie keine mit Flüssigkeit gefüllten Gefäße, wie<br />
z.B. Vasen, auf das Gerät oder in die nähere<br />
Umgebung. Das Gefäß kann umkippen und die<br />
Flüssigkeit kann die elektrische Sicherheit<br />
beeinträchtigen.<br />
Halten Sie das Gerät von Feuchtigkeit, Tropf- und<br />
Spritzwasser fern. Vermeiden Sie Erschütterungen,<br />
Staub, Hitze und direkte Sonneneinstrahlung, um<br />
Betriebsstörungen zu verhindern. Die<br />
Betriebstemperatur beträgt 5 bis 40 °C.<br />
Öffnen Sie niemals das Gehäuse. Dies würde den<br />
Garantieanspruch beenden und möglicherweise zur<br />
Zerstörung des Gerätes führen.<br />
Warten Sie nach einem Transport solange mit der<br />
Inbetriebnahme, bis das Gerät die<br />
Umgebungstemperatur angenommen hat. Bei<br />
- 7 -<br />
DE<br />
DE
großen Temperatur- oder<br />
Feuchtigkeitsschwankungen kann es durch<br />
Kondensation zur Feuchtigkeitsbildung kommen, die<br />
einen elektrischen Kurzschluss verursachen kann.<br />
Das Gerät ist für den Anschluss an Computern mit<br />
Anschlussabsicherung (Limited Power Source im<br />
Sinn der EN60950) vorgesehen.<br />
Verwenden Sie nur den mitgelieferten Netzadapter<br />
Typ Ktec KSAD1200150W1EU.<br />
Die Steckdose muss sich in der Nähe des Gerätes<br />
befinden und leicht erreichbar sein.<br />
Verlegen Sie die Kabel so, dass niemand darauf<br />
treten, oder darüber stolpern kann.<br />
Stellen Sie keine Gegenstände auf die Kabel, da diese<br />
sonst beschädigt werden könnten.<br />
Um statische Aufladungen zu vermeiden, sollten Sie<br />
das Gerät nicht unter extrem trockenen Bedingungen<br />
betreiben.<br />
Unter Bedingungen mit elektrostatischer Entladung,<br />
kann es zu Fehlfunktionen des Gerätes kommen. In<br />
diesem Fall ist es erforderlich das Gerät auf die<br />
Werkseinstellungen zurückzusetzen.<br />
Datensicherung<br />
Die Geltendmachung von Schadenersatzansprüchen für<br />
Datenverlust und dadurch entstandene Folgeschäden ist<br />
ausgeschlossen. Machen Sie nach jeder Aktualisierung Ihrer<br />
Daten Sicherungskopien auf externe Speichermedien (z. B.<br />
CD-R).<br />
- 8 -
Elektromagnetische Verträglichkeit<br />
Beim Anschluss müssen die Richtlinien für<br />
elektromagnetische Verträglichkeit (EMV) eingehalten<br />
werden. Halten Sie mindestens einen Meter Abstand von<br />
hochfrequenten und magnetischen Störquellen (TV-Gerät,<br />
Lautsprecherboxen, Mobiltelefon usw.) ein, um<br />
Funktionsstörungen und Datenverlust zu vermeiden.<br />
- 9 -<br />
DE<br />
DE
<strong>USB</strong>-<strong>Hub</strong> Software installieren<br />
Bevor Sie <strong>USB</strong>-Signale über das Netzwerk empfangen<br />
können, muss die Software auf allen Rechnern installiert<br />
sein, die den <strong>USB</strong>-<strong>Hub</strong> nutzen sollen.<br />
1. Legen Sie die mitgelieferte Installations-CD ein. Der<br />
Startbildschirm erscheint.<br />
- 10 -
2. Starten Sie die Installationsanwendung, indem Sie auf<br />
Installieren klicken. Das Fenster Benutzerkontensteuerung<br />
von Windows erscheint, um die Installation zu bestätigen.<br />
Klicken Sie auf Ja.<br />
3. Wählen Sie im Fenster Sprache wählen Ihre<br />
Landessprache aus und klicken Sie auf Weiter.<br />
- 11 -<br />
DE<br />
DE
4. Das Begrüßungsfenster erscheint. Klicken Sie auf<br />
Weiter.<br />
5. Übernehmen Sie den vorgeschlagenen Installationspfad,<br />
indem Sie auf Weiter klicken. Wenn Sie den Ordner für<br />
die Installation ändern wollen, klicken Sie auf Ändern....<br />
- 12 -
6. Wählen Sie den Ordner aus, in dem die Software<br />
installiert werden soll und klicken Sie auf OK.<br />
7. Die Software kann nun installiert werden. Klicken Sie<br />
dazu auf Installieren.<br />
- 13 -<br />
DE<br />
DE
8. Warten Sie, bis<br />
die Installation<br />
beendet ist und<br />
klicken Sie auf<br />
Fertig stellen.<br />
Nach Abschluss der<br />
Installation<br />
erscheinen ein<br />
Programm-Symbol<br />
auf dem Desktop<br />
und ein Symbol in der Taskleiste:<br />
9. Nun können Sie die Software mit einem Doppelklick auf<br />
eines der Symbole starten.<br />
- 14 -
Inbetriebnahme<br />
Netzanschluss<br />
1. Verbinden Sie den<br />
Hohlstecker des<br />
Netzadapters mit der<br />
Buchse DC POWER am<br />
Gerät.<br />
2. Stecken Sie den<br />
Netzadapter in eine gut<br />
erreichbare Steckdose<br />
AC 230 V 50/60 Hz.<br />
Das Gerät ist nun<br />
betriebsbereit und die<br />
grüne POWER LED<br />
leuchtet dauerhaft.<br />
- 15 -<br />
DE<br />
DE
WLAN-Verbindung<br />
(Zugangspunkt Betrieb)<br />
Die einfache WLAN-Verbindung ist sinnvoll, wenn Ihr PC<br />
über ein Kabel an einen Router (z. B. für den Zugang zum<br />
Internet) angeschlossen ist und Ihr PC außerdem über<br />
einen ungenutzten Drahtlosnetzwerkadapter verfügt.<br />
1. Schalten Sie den <strong>USB</strong>-<strong>Hub</strong> ein, indem Sie den<br />
Netzadapter anschließen, wie auf Seite 15 beschrieben.<br />
2. Installieren Sie die <strong>USB</strong>-<strong>Hub</strong> Software, wie auf Seite 10<br />
beschrieben.<br />
3. Klicken Sie auf das Symbol<br />
für Drahtlosnetzwerke in<br />
der Taskleiste Ihres<br />
Betriebssystems.<br />
- 16 -
4. Das Fenster für Netzwerkverbindungen erscheint.<br />
Klicken Sie auf den Eintrag W-LAN <strong>USB</strong> HUB.<br />
5. Im Auslieferungszustand ist keine Verschlüsselung<br />
eingestellt. Windows zeigt diese Verbindung daher als<br />
unsicher an. Klicken Sie auf Verbinden. Wie Sie eine<br />
Verschlüsselung einstellen ist auf Seite 35 beschrieben.<br />
- 17 -<br />
DE<br />
DE
6. Warten Sie, bis die Verbindung hergestellt ist. Danach<br />
wird Ihnen der Verbindungsstatus angezeigt.<br />
7. Um die <strong>USB</strong>-Anschlüsse einzustellen, starten Sie die <strong>USB</strong>-<br />
Software (Siehe Seite 23).<br />
- 18 -
<strong>USB</strong>-<strong>Hub</strong> in ein bestehendes<br />
Netzwerk einbinden<br />
(Station Betrieb)<br />
Die Einbindung in ein bestehendes Netzwerk ist dann<br />
sinnvoll, wenn Ihr PC bereits über eine drahtlose<br />
Netzwerkverbindung (WLAN) den Zugang zum<br />
Internetrouter erhält und der <strong>USB</strong>-<strong>Hub</strong> zusätzlich über<br />
WLAN verbunden werden soll.<br />
- 19 -<br />
DE<br />
DE
Den Station Betrieb einstellen<br />
Wenn Ihr PC mit einem Netzwerk-Router verbunden ist, der<br />
das Dynamic Host Configuration Protocol (DHCP)<br />
verwendet, wie die meisten Netzwerke, müssen keine<br />
Einstellungen am Router vorgenommen werden. Führen Sie<br />
folgende Anweisungen aus:<br />
1. Verbinden Sie den <strong>Hub</strong> mit dem Netzadapter.<br />
2. Warten Sie, bis die Power LED grün leuchtet.<br />
3. Verbinden Sie den <strong>USB</strong>-<strong>Hub</strong> mit einem Netzwerkkabel<br />
(Diese Verbindung wird nur für die Konfiguration des<br />
<strong>USB</strong>-<strong>Hub</strong>s benötigt).<br />
4. Verbinden Sie das Netzwerkkabel mit der<br />
Netzwerkbuchse Ihres PCs.<br />
5. Öffnen Sie Ihren Standard-Internet Browser und geben<br />
Sie in der Adressleiste die IP-Adresse des <strong>USB</strong>-<strong>Hub</strong>s ein.<br />
Drücken Sie die Taste ENTER am PC.<br />
Hinweis: Die IP-Adresse des <strong>USB</strong>-<strong>Hub</strong>s wird in der <strong>USB</strong>-<br />
Software angezeigt (Siehe Seite 23).<br />
- 20 -
6. Geben Sie einen<br />
Benutzernamen und ein<br />
Passwort ein und klicken Sie<br />
auf OK, um in das<br />
Konfigurations-menü zu<br />
gelangen. Im Auslieferungszustand<br />
lauten<br />
Benutzername und Passwort<br />
admin.<br />
7. Überprüfen Sie, ob die LAN LED leuchtet, um die<br />
Funktion der LAN-Verbindung anzuzeigen.<br />
8. Wählen Sie im Konfigurationsmenü den Eintrag<br />
Wireless -> Betriebsmodus und dann Station.<br />
9. Nachdem Sie Station ausgewählt haben, klicken Sie auf<br />
Übernehmen und es erscheint eine Meldung, dass der<br />
<strong>USB</strong>-<strong>Hub</strong> neu gestartet wird.<br />
10. Warten Sie, bis das Gerät neu gestartet ist. Der Station<br />
Betrieb ist nun am <strong>USB</strong>-<strong>Hub</strong> eingestellt.<br />
- 21 -<br />
DE<br />
DE
Nach verfügbaren Drahtlosnetzwerken suchen<br />
11. Nachdem der <strong>USB</strong>-<strong>Hub</strong> neu gestartet ist, rufen Sie das<br />
Konfigurationsmenü auf und wählen Sie den Eintrag<br />
Wireless -> Basis.<br />
Klicken Sie auf Nach Netzwerken suchen, um alle<br />
gefundenen Access Point oder Router-Signale anzuzeigen,<br />
die in der Reichweite des <strong>USB</strong>-<strong>Hub</strong>s verfügbar sind.<br />
Erneut suchen: Eine erneute Suche nach Signalen starten.<br />
Verbinden: Dem ausgewählten Netzwerk beitreten.<br />
Schliessen : Dieses Anzeigefenster schließen.<br />
12. Wählen Sie das WLAN-Netzwerk aus, in das der <strong>USB</strong>-<br />
<strong>Hub</strong> eingebunden werden soll und klicken Sie auf<br />
Verbinden. Die Drahtlosverbindung zwischen <strong>USB</strong>-<strong>Hub</strong><br />
und dem Router des WLAN-Netzwerks wird hergestellt<br />
und der <strong>USB</strong>-<strong>Hub</strong> in das WLAN Netzwerk eingebunden.<br />
Beachten Sie, dass einige Netzwerke verschlüsselt sein<br />
können und die Eingabe eines Schlüssels erfordern.<br />
13. Entfernen Sie das Netzwerkkabel vom <strong>USB</strong>-<strong>Hub</strong>.<br />
- 22 -
Die <strong>USB</strong>-<strong>Hub</strong> Software verwenden<br />
Nach der Installation können Sie die<br />
Software über das Startmenü oder mit<br />
einem Doppelklick auf eines der Symbole<br />
auf dem Desktop oder der Taskleiste<br />
starten. Mit der Software können Sie ein<br />
<strong>USB</strong>-Gerät verbinden/trennen, den<br />
Verbindungsstatus anzeigen oder den Zugriff auf ein <strong>USB</strong>-<br />
Gerät anfordern, falls dieses von einem anderen PC<br />
verwendet wird.<br />
Die <strong>USB</strong>-<strong>Hub</strong> Software (siehe nachfolgendes Bild) zeigt<br />
Ihnen eine Übersicht der Verbindungskonfiguration an.<br />
- 23 -<br />
DE<br />
DE
Die Menüleiste<br />
<strong>Hub</strong><br />
Über die <strong>USB</strong>-<strong>Hub</strong> Software können Sie nach weiteren <strong>USB</strong>-<br />
<strong>Hub</strong>s suchen, indem Sie auf <strong>Hub</strong> > Suchen klicken oder auf<br />
das Suchen Symbol in der Werkzeugleiste.<br />
- 24 -
Erweitert<br />
Klicken Sie auf den Eintrag Erweitert > Voreinstellungen in<br />
der Menüleiste um folgende Einstellungen vorzunehmen:<br />
Das Fenster<br />
Voreinstellungen erscheint.<br />
Stellen Sie ein, ob die <strong>USB</strong>-<br />
<strong>Hub</strong> Software beim Starten<br />
von Windows starten soll<br />
bzw. ob ein Hinweis<br />
erscheinen soll, wenn<br />
Remote-Audio verwendet<br />
wird.<br />
- 25 -<br />
DE<br />
DE
Hilfe<br />
- 26 -<br />
Um die Bedeutung der<br />
Symbole für <strong>USB</strong>-<br />
Anschlüsse anzuzeigen,<br />
klicken Sie auf Hilfe ><br />
Statusinformationen.<br />
Das Statusinformationen<br />
Fenster erscheint. Es gibt 4<br />
Symbole für den Status der<br />
<strong>USB</strong>-Anschlüsse:<br />
Ein weißes Symbol<br />
zeigt einen<br />
unbenutzten<br />
Anschluss, der noch<br />
verfügbar ist.<br />
Ein grünes Symbol zeigt<br />
einen Anschluss, der<br />
von Ihnen verwendet<br />
wird.<br />
Ein rotes Symbol zeigt<br />
einen Anschluss, der von einem anderen PC<br />
verwendet wird. Wenn Sie diesen Anschluss<br />
verwenden wollen, können Sie eine Anfrage an den<br />
entsprechenden Teilnehmer senden, damit er den<br />
Anschluss freigibt.<br />
Ein graues Symbol zeigt ein nicht funktionierendes<br />
Gerät am entsprechenden <strong>USB</strong>-Anschluss. Wenden<br />
Sie sich in diesem Fall an den Hersteller dieses<br />
Gerätes.
<strong>USB</strong>-Geräte verbinden und trennen<br />
- 27 -<br />
Um ein an den <strong>USB</strong>-<br />
<strong>Hub</strong> angeschlossenes<br />
Gerät zu verbinden,<br />
setzen Sie einen Haken<br />
in dem Kästchen vor<br />
dem <strong>USB</strong>-Gerät, indem<br />
Sie auf das Kästchen<br />
klicken.<br />
Wenn Sie auf das Kästchen vor dem Eintrag „W-LAN <strong>USB</strong><br />
<strong>Hub</strong>“ klicken, werden alle angezeigten <strong>USB</strong>-Geräte<br />
verbunden.<br />
Sie können die<br />
Eigenschaften zu einem<br />
angeschlossenen Gerät<br />
anzeigen, indem Sie auf<br />
das Symbol<br />
Eigenschaften in der<br />
Werkzeugleiste klicken.<br />
DE<br />
DE
Das Fenster Geräteeigenschaften erscheint:<br />
Um die Verbindung eines <strong>USB</strong>-Gerätes zu trennen,<br />
entfernen Sie den Haken im Kästchen vor dem Eintrag<br />
des <strong>USB</strong>-Gerätes.<br />
- 28 -
Verwenden der Remote Audio<br />
Funktion<br />
Der <strong>USB</strong>-<strong>Hub</strong> kann als ein Remote Audio Gerät verwendet<br />
werden. Setzen Sie einen Haken in das Kästchen „Remote<br />
Audio“, indem Sie darauf klicken, um Audiosignale des PCs<br />
über die Buchse LINE OUT am <strong>USB</strong>-<strong>Hub</strong> an Kopfhörer oder<br />
Lautsprecher auszugeben.<br />
Sobald der Remote Audio Eintrag aktiviert ist, erscheint ein<br />
Hinweis darüber, dass nun der <strong>USB</strong>-<strong>Hub</strong> zur Audioausgabe<br />
verwendet wird. Sie können das Erscheinen dieses<br />
Hinweises im Menü Erweitert > Voreinstellungen<br />
ausschalten.<br />
Hinweis: Während die Remote Audio Funktion aktiv ist,<br />
ist der Audioausgang des PCs stumm geschaltet.<br />
- 29 -<br />
DE<br />
DE
Einen Anschluss zur Verwendung<br />
anfordern und für andere trennen<br />
Klicken Sie dazu auf<br />
das Symbol<br />
Verbindung<br />
trennen in der<br />
Werkzeugleiste.<br />
- 30 -<br />
Wenn Sie einen <strong>USB</strong>-<br />
Anschluss verwenden<br />
wollen, der bereits von<br />
anderen genutzt wird,<br />
können Sie eine<br />
Anfrage zum anderen<br />
Teilnehmer senden<br />
damit diese den<br />
Anschluss trennen und<br />
für Ihre Verwendung<br />
freigeben kann.
Der Benutzer des anderen PCs erhält ein Hinweisfenster, in<br />
dem er den <strong>USB</strong>-Anschluss trennen kann.<br />
Wenn der andere Benutzer auf Ja klickt, wird seine<br />
Verbindung zum <strong>USB</strong>-<strong>Hub</strong> getrennt und mit Ihrem PC<br />
verbunden.<br />
- 31 -<br />
DE<br />
DE
Den <strong>USB</strong>-<strong>Hub</strong> konfigurieren<br />
Das Konfigurationsmenü aufrufen<br />
1. Öffnen Sie Ihren Standard-Internet Browser und geben<br />
Sie in der Adressleiste die IP-Adresse des <strong>USB</strong>-<strong>Hub</strong>s ein.<br />
Drücken Sie die Taste ENTER am PC.<br />
Hinweis: Die IP-Adresse des <strong>USB</strong>-<strong>Hub</strong>s wird in der <strong>USB</strong>-<br />
Software angezeigt (Siehe Seite 23).<br />
2. Alternativ können Sie das Konfigurationsmenü auch<br />
aufrufen, indem Sie in der <strong>USB</strong>-<strong>Hub</strong> Software mit der<br />
rechten Maustaste auf den Eintrag des <strong>USB</strong>-<strong>Hub</strong>s klicken<br />
und anschließend den Eintrag Configure W-LAN <strong>USB</strong><br />
Remote <strong>Hub</strong> wählen.<br />
- 32 -
3. Geben Sie einen<br />
Benutzernamen und ein<br />
Passwort ein und klicken<br />
Sie auf OK, um in das<br />
Konfigurationsmenü zu<br />
gelangen. Im<br />
Auslieferungs-zustand<br />
lauten Benutzername und<br />
Passwort admin.<br />
Das Konfigurationsmenü erscheint (Siehe nächste Seite).<br />
Das Menü umfasst zwei Abschnitte:<br />
Wireless und System.<br />
Menü Wireless<br />
Das Menü Wireless umfasst 4 Untermenüs.<br />
Betriebsmodus<br />
Im ersten Untermenü Betriebsmodus können Sie die<br />
Betriebsart für die drahtlose Verbindung einstellen.<br />
- 33 -<br />
DE<br />
DE
Wenn der <strong>USB</strong>-<strong>Hub</strong> ein eigenständiges, drahtloses<br />
Netzwerk darstellen soll, zu dem Rechner eine<br />
Verbindung aufbauen, wählen Sie Zugangspunkt<br />
(Standardeinstellung).<br />
Wenn Sie den <strong>USB</strong>-<strong>Hub</strong> als Client in ein bestehendes<br />
Netzwerk einbinden wollen, wählen Sie Station.<br />
Weitere Hinweise zur Client-Konfiguration finden Sie<br />
unter <strong>USB</strong>-<strong>Hub</strong> in ein bestehendes Netzwerk<br />
einbinden<br />
(Station Betrieb) auf Seite 19.<br />
- 34 -
Basis<br />
Im zweiten Menü Basis stellen die SSID (Netzwerkname),<br />
den Kanal (1-13) und die Verschlüsselungsart ein.<br />
Nehmen Sie die entsprechenden Einstellungen vor<br />
und klicken Sie auf Übernehmen.<br />
- 35 -<br />
DE<br />
DE
Wenn Sie die Verschlüsselung auf WEP oder WPA-PSK<br />
eingestellt haben, müssen Sie außerdem einen<br />
Sicherheitsschlüssel eingeben.<br />
- 36 -
WPS<br />
Der WLAN-<strong>USB</strong> <strong>Hub</strong> unterstützt die aktuellste WPS<br />
Verschlüsselung. Die WPS-Funktion ist im<br />
Auslieferungszustand ausgeschaltet. (Wie Sie die WPS-<br />
Funktion verwenden: Siehe Seite 44).<br />
Sie können die Funktion in den WPS-Einstellungen<br />
einschalten, indem Sie auf das Feld Aktiviert und danach<br />
auf Übernehmen klicken.<br />
Sie können den WPS-Schlüssel ändern, indem Sie auf Neue<br />
PIN generieren klicken. Wenn Sie ein weiteres WPS-Gerät<br />
für die schnelle Verbindung hinzufügen wollen, klicken Sie<br />
auf Hinzufügen. Geben Sie im Fenster PIN ID einen PIN ein<br />
und klicken Sie auf Übernehmen.<br />
- 37 -<br />
DE<br />
DE
Erweitert<br />
Im Untermenü Erweitert können Sie die Übertragung von<br />
WLAN und SSID ein- oder ausschalten und weitere<br />
Einstellungen zur Übertragung vornehmen.<br />
- 38 -
Menü System<br />
Das Menü Setting umfasst 4 Untermenüs.<br />
LAN<br />
Der erste Eintrag ist die LAN-Einstellung. Hier können Sie<br />
einstellen, wie der WLAN-<strong>USB</strong> <strong>Hub</strong> IP-Adressen vergeben<br />
soll. Im Auslieferungszustand ist Feste IP eingestellt und es<br />
ist keine weitere Konfiguration erforderlich.<br />
Sie können auch den eingebauten DHCP-Server ein- oder<br />
ausschalten und den Bereich für die IP-Adresse festlegen.<br />
- 39 -<br />
DE<br />
DE
Administrator<br />
Im Administrator-Bereich können Sie den Namen für den<br />
WLAN-<strong>USB</strong> <strong>Hub</strong> eingeben, der in der <strong>USB</strong>-<strong>Hub</strong> Software<br />
erscheint. Außerdem können Sie hier das Password ändern,<br />
indem Sie in den Feldern Neues Passwort und Passwort<br />
bestätigen ein neues eingeben und auf Übernehmen<br />
klicken.<br />
Firmware<br />
In diesem Eintrag können Sie ein Firmware Update auf den<br />
WLAN-<strong>USB</strong>-<strong>Hub</strong> laden, um sämtliche Einstellungen<br />
zurückzusetzen und den WLAN-<strong>USB</strong>-<strong>Hub</strong> neu zu starten.<br />
Sehen Sie auf der MEDION-Webseite www.<strong>medion</strong>.com<br />
nach, um Informationen über verfügbare Updates zu<br />
erhalten oder wenden Sie sich an den Medion Service.<br />
- 40 -
1. Um die Firmware zu aktualisieren, klicken Sie zunächst<br />
auf Durchsuchen…, um den Speicherort anzugeben, an<br />
dem sich die Update-Dateien befinden. Klicken Sie<br />
danach auf Aktualisierung, um das Update<br />
aufzuspielen.<br />
2. Das Update wird geladen. Warten Sie, bis dieser Prozess<br />
abgeschlossen ist.<br />
- 41 -<br />
DE<br />
DE
ACHTUNG: Schalten Sie den WLAN-<strong>USB</strong> <strong>Hub</strong> nicht<br />
während des Firmware Updates aus! Dabei könnte das<br />
System unwiederbringlich gelöscht werden.<br />
3. Nach abgeschlossenem Update-Vorgang startet der<br />
WLAN-<strong>USB</strong>-<strong>Hub</strong> automatisch neu.<br />
- 42 -
Sprachen<br />
Hier können Sie die Sprache einstellen, in der die Menüs<br />
angezeigt werden sollen. Wählen Sie eine Sprache aus und<br />
klicken Sie auf Übernehmen.<br />
- 43 -<br />
DE<br />
DE
WPS Konfiguration<br />
Das Wi-Fi Protected Setup (WPS) ist ein von der Wi-Fi<br />
Alliance entwickelter Standard zum einfachen und sicheren<br />
Aufbau eines drahtlosen Heimnetzwerks. Geräte mit einer<br />
WPS-Funktion können sich so automatisch verbinden ohne<br />
dass ein PIN eingegeben werden muss.<br />
Bevor Sie die WPS-Funktion benutzen können, muss<br />
im Setup-Menü des <strong>USB</strong>-<strong>Hub</strong>s bzw. des anderen WPSfähigen<br />
Gerätes die WPS-Funktion aktiviert sein (siehe<br />
Seite 37).<br />
Grundsätzlich kann die WPS Verbindung auf zwei Arten<br />
hergestellt werden. Der Vorteil liegt darin, dass so<br />
verschiedenste Geräte unterschiedlicher Hersteller mit<br />
geringstem Aufwand verbunden werden können, solange<br />
sie den WPS-Standard unterstützen.<br />
Push Button Configuration (PBC)<br />
So stellen Sie die PBC-Konfiguration ein:<br />
1. Drücken Sie die Taste WPS am WLAN-<strong>USB</strong> <strong>Hub</strong>.<br />
2. Drücken Sie die entsprechende WPS-Taste am anderen<br />
WPS-Gerät.<br />
3. Das Gerät wird erkannt und automatisch konfiguriert.<br />
- 44 -
Personal Identification Number (PIN)<br />
Sie können die WPS-Verbindung über PIN-Eingabe auf zwei<br />
Arten einstellen:<br />
1. Entweder geben Sie den PIN Code des WLAN-<strong>USB</strong> <strong>Hub</strong>s<br />
im entsprechenden Eingabefenster am Computer ein.<br />
Den PIN für den WLAN-<strong>USB</strong> <strong>Hub</strong> finden Sie unter WPS<br />
im Konfigurationsmenü des WLAN-<strong>USB</strong> <strong>Hub</strong>s.<br />
2. Oder Sie geben den PIN Code des anderen WPS-Gerätes<br />
am WLAN-<strong>USB</strong> <strong>Hub</strong> ein, indem Sie im<br />
Konfigurationsmenü auf WLAN Station hinzufügen<br />
klicken.<br />
- 45 -<br />
DE<br />
DE
3. Die beiden Geräte werden erkannt und bauen eine<br />
Verbindung auf, wenn der richtige PIN eingegeben<br />
wurde.<br />
Um den WPS-Standard an Ihrem Computer nutzen zu<br />
können, müssen Sie Windows Vista oder Windows 7<br />
als Betriebssystem verwenden.<br />
Ebenso müssen der Netzwerkadapter, die<br />
Netzwerkstation, der Router oder Access Point den<br />
WPS-Standard unterstützen.<br />
Das Gerät zurücksetzen<br />
Sollte sich das Gerät nicht mehr bedienen lassen oder es zu<br />
Fehlern kommen, können Sie das Gerät auf den<br />
Auslieferungszustand zurücksetzen.<br />
Drücken Sie dazu für länger als 5 Sekunden die Taste<br />
RESET mit einem spitzen Gegenstand (z. B. einem<br />
Kugelschreiber) ein. Nach 10 Sekunden erlischt<br />
zunächst die WLAN-LED und dann die Power-LED, um<br />
sich dann wieder einzuschalten.<br />
- 46 -
Kundendienst<br />
Erste Hilfe bei Fehlfunktionen<br />
Ich habe ein <strong>USB</strong>-Gerät an den <strong>USB</strong>-<strong>Hub</strong><br />
angeschlossen, es ist jedoch nicht am PC sichtbar.<br />
Die Control Utility-Software ist nicht installiert.<br />
Installieren Sie die Software und starten Sie sie.<br />
Der Anschluss am <strong>USB</strong>-<strong>Hub</strong>, an den Sie <strong>USB</strong>-Gerät<br />
angeschlossen haben, wird von einem anderen PC<br />
verwendet.<br />
Starten Sie die Control-Utility-Software und geben Sie<br />
den Anschluss für Ihren PC frei (Siehe Seite 27).<br />
Ihr PC ist nicht mit dem <strong>USB</strong>-<strong>Hub</strong> verbunden. Die<br />
drahtlose Verbindung zum <strong>USB</strong>-<strong>Hub</strong> wurde<br />
getrennt.<br />
Verbinden Sie sich erneut mit dem Drahtlosnetzwerk<br />
des <strong>USB</strong>-<strong>Hub</strong>s.<br />
Überprüfen Sie, ob der WLAN-Adapter Ihres PCs evtl.<br />
ausgeschaltet ist und schalten Sie ihn ein.<br />
Das Netzwerk, in das ich den <strong>USB</strong>-<strong>Hub</strong> integrieren<br />
will, ist nicht zu sehen<br />
Die SSID des Netzwerks ist unsichtbar und es taucht<br />
daher auch nicht bei der Suche nach verfügbaren<br />
Drahtlosnetzwerken auf.<br />
- 47 -<br />
DE<br />
DE
Stellen Sie die im Router des Netzwerkes, in das der<br />
<strong>USB</strong>-<strong>Hub</strong> integriert werden soll, die Übermittelung<br />
der SSID auf sichtbar ein.<br />
Der <strong>USB</strong>-<strong>Hub</strong> wird vom PC nicht erkannt<br />
Der <strong>USB</strong>-<strong>Hub</strong> wird nicht mit Strom versorgt<br />
Schalten Sie den <strong>USB</strong>-<strong>Hub</strong> ein, indem Sie den Stecker<br />
des Netzadapters anschließen und den Netzadapter<br />
mit dem Stromnetz verbinden.<br />
Es wird kein Ton über den Anschluss LINE OUT<br />
ausgegeben<br />
Die Remote – Audio Funktion ist in Ihrem<br />
Betriebssystem nicht aktiviert.<br />
Schalten Sie die Remote-Audio Funktion in Ihrem<br />
Betriebssystem ein.<br />
Es kann keine Verbindung zu einem ausgewählten<br />
Netzwerk hergestellt werden<br />
Das Netzwerk, zu dem eine Verbindung hergestellt<br />
werden soll, ist verschlüsselt und erfordert die<br />
Eingabe eines Passworts und/oder eines<br />
Benutzernamens.<br />
Erkundigen Sie sich beim Administrator des<br />
Netzwerks nach den Zugangsdaten für die<br />
verschlüsselte Verbindung.<br />
- 48 -
Technische Daten<br />
Modell: MD 86097<br />
Audio<br />
Ausgang: 3.5 mm Stereo-Klinkenbuchse<br />
LAN<br />
10/100 Ethernet 1x 10/100 RJ45 Ethernet Anschluss<br />
<strong>USB</strong><br />
<strong>USB</strong> 4x Typ A <strong>USB</strong> 1.1/2.0 Anschlüsse<br />
WLAN<br />
Standard IEEE 802.11 n/g/b<br />
Betriebsmodus Infrastruktur<br />
Reichweite Im Freien: 100m (je nach Bebauung<br />
und Umgebung)<br />
RF Leistung 11g/n:13 dBm ( +1.0 / -1.0 dBm)<br />
11b: 16 dBm ( +1.0 / -1.0 dBm)<br />
Verschlüsselung WEP 64-bit und 128-bit<br />
WPA-PSK / WPA2-PSK<br />
Frequenz 2.4 GHz ISM Frequenzband<br />
(2.412~2.472 GHz)<br />
Antenne 2x 1.8 dBi Dipol-Antenne<br />
Netzadapter<br />
Modell: KSAD1200150W1EU<br />
- 49 -<br />
DE<br />
DE
Hersteller: Ktec<br />
Eingang: 100~240 V AC, 0.4 A<br />
Ausgang: 12 V/1.5 A DC<br />
Abmessungen<br />
Gehäuse 12 x 18 x 3.3 cm<br />
Technische Änderungen vorbehalten!<br />
Konformitätsinformation nach R&TTE<br />
Bedingt durch die Leistung der eingebauten Wireless LAN<br />
Lösung (>100mW) ist der Gebrauch in Frankreich nur<br />
innerhalb von Gebäuden gestattet.<br />
In allen anderen EU-Ländern gibt es zurzeit keine<br />
Einschränkungen. Für den Gebrauch in anderen Ländern<br />
informieren Sie sich vor Ort über die jeweils gültigen<br />
gesetzlichen Vorschriften.<br />
Hiermit erklärt die MEDION AG, dass sich diese Geräte in<br />
Übereinstimmung mit den grundlegenden Anforderungen<br />
und den übrigen einschlägigen Bestimmungen der<br />
Richtlinie 1999/5/EG befinden. Vollständige<br />
Konformitätserklärungen sind erhältlich unter<br />
www.<strong>medion</strong>.com/conformity.<br />
- 50 -
Reinigung<br />
Achtung!<br />
Dieses Gerät beinhaltet keine zu wartenden oder<br />
zu reinigenden Teile.<br />
Achten Sie darauf, dass der <strong>USB</strong>-<strong>Hub</strong> nicht verunreinigt<br />
wird. Verwenden Sie keine Lösungsmittel, ätzende oder<br />
gasförmige Reinigungsmittel. Reinigen Sie das Gehäuse ggf.<br />
mit einem angefeuchteten Tuch.<br />
Entsorgung<br />
Verpackung<br />
Ihr Gerät befindet sich zum Schutz vor<br />
Transportschäden in einer Verpackung.<br />
Verpackungen sind aus Materialien hergestellt, die<br />
umweltschonend entsorgt und einem fachgerechten<br />
Recycling zugeführt werden können.<br />
Gerät<br />
Entsorgen Sie das Gerät am Ende seiner Lebenszeit<br />
keinesfalls über den normalen Hausmüll, sondern<br />
erkundigen Sie sich bei Ihrer örtlichen Verwaltung<br />
über Wege einer umweltgerechten Entsorgung an<br />
Sammelstellen für Elektro- und Elektronikschrott.<br />
- 51 -<br />
DE<br />
DE
- 52 -
Licence GPL/LGPL<br />
Chère Cliente, Cher Client,<br />
Pour des raisons juridiques, la licence GPL/LGPL est<br />
reproduite ici dans la version originale anglaise. Les<br />
traductions dans d'autres langues ne sont pas des versions<br />
de la GPL autorisées par la FSF (Free Software Foundation).<br />
La prise de connaissance de la licence GPL/LGPL n'est pas<br />
importante pour l'utilisation de l'appareil, mais sert à<br />
l'obligation de publication en cas d'utilisation de logiciels<br />
Open Source.<br />
Si cela vous intéresse, vous pouvez télécharger le texte<br />
source de la GPL/LGPL utilisée sous le lien suivant :<br />
http://www.<strong>medion</strong>.com. Veuillez indiquer le numéro MD<br />
ou MSN correspondant dans le centre de téléchargement.<br />
Vous trouverez ces numéros sur l'appareil respectif. Mais<br />
nous pouvons aussi vous faire parvenir gratuitement par la<br />
poste un support de données contenant le texte source.<br />
Veuillez alors envoyer un e-mail à opensource@<strong>medion</strong>.com<br />
ou nous appeler au numéro de téléphone payant 02 43 16<br />
60 30 (appel non surtaxé).<br />
Vous trouverez d'autres informations sur les licences<br />
GPL/LGPL sur www.gnu.org.<br />
- 1 -<br />
DE<br />
DE<br />
GPL
GPL/LGPL-licentie<br />
Geachte klant,<br />
Om juridische redenen wordt hier de oorspronkelijke<br />
Engelse versie van de GPL/LGPL-licentie weergegeven.<br />
Vertalingen in andere talen zijn niet geautoriseerd door de<br />
FSF (Free Software Foundation).<br />
Kennisneming van de GPL/LGPL-licentie is niet van belang<br />
voor het gebruik van het apparaat, maar dient om te<br />
voldoen aan de publicatieverplichting bij gebruik van open<br />
source-software.<br />
Geïnteresseerden kunnen de broncode van de gebruikte<br />
GPL/LGPL downloaden via de volgende koppeling:<br />
http://www.<strong>medion</strong>.com. Gelieve in het Download Center<br />
het passende MD-nummer of MSN-nummer in te voeren.<br />
Die nummers zijn terug te vinden op het desbetreffende<br />
apparaat. Als alternatief kunnen wij u ook kosteloos via de<br />
post een opslagmedium met de broncode toesturen.<br />
Gelieve ons daartoe een e-mail te sturen op<br />
opensource@<strong>medion</strong>.com of ons te bellen op het<br />
betaalnummer 0900 - 2352534 (0,15 EUR/Min).<br />
Meer informatie over GPL/LGPL-licenties is terug te vinden<br />
op www.gnu.org.<br />
- 2 -
GPL/LGPL-Lizenzinformation<br />
Sehr geehrte Kundin, sehr geehrter Kunde,<br />
Im Folgenden wird hier aus juristischen Gründen die<br />
GPL/LGPL-Lizenz in der englischen Originalfassung<br />
abgebildet. Übersetzungen in andere Sprachen stellen keine<br />
von der FSF (Free Software Foundation) autorisierte<br />
Versionen der GPL dar.<br />
Die Kenntnisnahme der GPL/LGPL-Lizenz ist für den<br />
Gebrauch des Gerätes unerheblich, sondern dient der<br />
Verpflichtung zur Veröffentlichung bei der Verwendung von<br />
Open-Source Software.<br />
Bei Interesse können Sie den Quelltext der verwendeten<br />
GPL/LGPL unter folgendem Link herunterladen:<br />
http://www.<strong>medion</strong>.com. Bitte geben Sie im Download<br />
Center die entsprechende MD Nummer oder MSN Nummer<br />
an. Diese Nummern finden Sie auf dem jeweiligen Gerät.<br />
Alternativ können wir Ihnen einen Datenträger mit dem<br />
Quelltextinhalt kostenfrei per Post zusenden.<br />
Bitte senden Sie zu diesem Zweck eine Email an<br />
opensource@<strong>medion</strong>.com oder rufen Sie uns an unter der<br />
kostenpflichtigen Rufnummer 01805 / 633466 (0,14 €/Min.<br />
aus dem deutschen Festnetz, Mobilfunk max. 0,42 €/Min.).<br />
Weitere Informationen über die GPL/LGPL-Lizenzen finden<br />
Sie unter www.gnu.org.<br />
- 3 -<br />
DE<br />
DE<br />
GPL
GNU General Public Licence<br />
Version 2, June 1991<br />
Copyright (C) 1989,<br />
1991 Free Software Foundation, Inc.<br />
51 Franklin Street, Fifth Floor, Boston,<br />
MA 02110-1301, USA<br />
Everyone is permitted to copy and distribute verbatim copies of this<br />
license document, but changing it is not allowed.<br />
Preamble<br />
The licenses for most software are designed to take away your<br />
freedom to share and change it. By contrast, the GNU General<br />
Public License is intended to guarantee your freedom to share and<br />
change free software--to make sure the software is free for all its<br />
users. This General Public License applies to most of the Free<br />
Software Foundation‘s software and to any other program whose<br />
authors commit to using it. (Some other Free Software Foundation<br />
software is covered by the GNU Lesser General Public License<br />
instead.) You can apply it to your programs, too.<br />
When we speak of free software, we are referring to freedom, not<br />
price. Our General Public Licenses are designed to make sure that<br />
you have the freedom to distribute copies of free software (and<br />
charge for this service if you wish), that you receive source code or<br />
can get it if you want it, that you can change the software or use<br />
pieces of it in new free programs; and that you know you can do<br />
these things.<br />
To protect your rights, we need to make restrictions that forbid<br />
anyone to deny you these rights or to ask you to surrender the<br />
- 4 -
ights. These restrictions translate to certain responsibilities for you<br />
if you distribute copies of the software, or if you modify it.<br />
For example, if you distribute copies of such a program, whether<br />
gratis or for a fee, you must give the recipients all the rights that you<br />
have. You must make sure that they, too, receive or can get the<br />
source code. And you must show them these terms so they know<br />
their rights.<br />
We protect your rights with two steps: (1) copyright the software,<br />
and (2) offer you this license which gives you legal permission to<br />
copy, distribute and/or modify the software.<br />
Also, for each author‘s protection and ours, we want to make<br />
certain that everyone understands that there is no warranty for this<br />
free software. If the software is modified by someone else and<br />
passed on, we want its recipients to know that what they have is not<br />
the original, so that any problems introduced by others will not<br />
reflect on the original authors‘ reputations.<br />
Finally, any free program is threatened constantly by software<br />
patents. We wish to avoid the danger that redistributors of a free<br />
program will individually obtain patent licenses, in effect making the<br />
program proprietary. To prevent this, we have made it clear that any<br />
patent must be licensed for everyone‘s free use or not licensed at<br />
all.<br />
The precise terms and conditions for copying, distribution and<br />
modification follow.<br />
TERMS AND CONDITIONS FOR COPYING, DISTRIBUTION AND<br />
MODIFICATION<br />
0. This License applies to any program or other work which<br />
contains a notice placed by the copyright holder saying it may be<br />
distributed under the terms of this General Public License. The<br />
„Program“, below, refers to any such program or work, and a „work<br />
based on the Program“ means either the Program or any derivative<br />
work under copyright law: that is to say, a work containing the<br />
- 5 -<br />
DE<br />
DE<br />
GPL
Program or a portion of it, either verbatim or with modifications<br />
and/or translated into another language. (Hereinafter, translation is<br />
included without limitation in the term „modification“.) Each licensee<br />
is addressed as „you“.<br />
Activities other than copying, distribution and modification are not<br />
covered by this License; they are outside its scope. The act of<br />
running the Program is not restricted, and the output from the<br />
Program is covered only if its contents constitute a work based on<br />
the Program (independent of having been made by running the<br />
Program). Whether that is true depends on what the Program does.<br />
1. You may copy and distribute verbatim copies of the Program‘s<br />
source code as you receive it, in any medium, provided that you<br />
conspicuously and appropriately publish on each copy an<br />
appropriate copyright notice and disclaimer of warranty; keep intact<br />
all the notices that refer to this License and to the absence of any<br />
warranty; and give any other recipients of the Program a copy of<br />
this License along with the Program.<br />
You may charge a fee for the physical act of transferring a copy,<br />
and you may at your option offer warranty protection in exchange<br />
for a fee.<br />
2. You may modify your copy or copies of the Program or any<br />
portion of it, thus forming a work based on the Program, and copy<br />
and distribute such modifications or work under the terms of Section<br />
1 above, provided that you also meet all of these conditions:<br />
a) You must cause the modified <strong>fil</strong>es to carry prominent notices<br />
stating that you changed the <strong>fil</strong>es and the date of any change.<br />
b) You must cause any work that you distribute or publish, that in<br />
whole or in part contains or is derived from the Program or any part<br />
thereof, to be licensed as a whole at no charge to all third parties<br />
under the terms of this License.<br />
c) If the modified program normally reads commands interactively<br />
when run, you must cause it, when started running for such<br />
- 6 -
interactive use in the most ordinary way, to print or display an<br />
announcement including an appropriate copyright notice and a<br />
notice that there is no warranty (or else, saying that you provide a<br />
warranty) and that users may redistribute the program under these<br />
conditions, and telling the user how to view a copy of this License.<br />
(Exception: if the Program itself is interactive but does not normally<br />
print such an announcement, your work based on the Program is<br />
not required to print an announcement.)<br />
These requirements apply to the modified work as a whole. If<br />
identifiable sections of that work are not derived from the Program,<br />
and can be reasonably considered independent and separate works<br />
in themselves, then this License, and its terms, do not apply to<br />
those sections when you distribute them as separate works. But<br />
when you distribute the same sections as part of a whole which is a<br />
work based on the Program, the distribution of the whole must be<br />
on the terms of this License, whose permissions for other licensees<br />
extend to the entire whole, and thus to each and every part<br />
regardless of who wrote it.<br />
Thus, it is not the intent of this section to claim rights or contest your<br />
rights to work written entirely by you; rather, the intent is to exercise<br />
the right to control the distribution of derivative or collective works<br />
based on the Program.<br />
In addition, mere aggregation of another work not based on the<br />
Program with the Program (or with a work based on the Program)<br />
on a volume of a storage or distribution medium does not bring the<br />
other work under the scope of this License.<br />
3. You may copy and distribute the Program (or a work based on it,<br />
under Section 2) in object code or executable form under the terms<br />
of Sections 1 and 2 above provided that you also do one of the<br />
following:<br />
a) Accompany it with the complete corresponding machinereadable<br />
source code, which must be distributed under the terms of<br />
- 7 -<br />
DE<br />
DE<br />
GPL
Sections 1 and 2 above on a medium customarily used for software<br />
interchange; or,<br />
b) Accompany it with a written offer, valid for at least three years, to<br />
give any third party, for a charge no more than your cost of<br />
physically performing source distribution, a complete machinereadable<br />
copy of the corresponding source code, to be distributed<br />
under the terms of Sections 1 and 2 above on a medium<br />
customarily used for software interchange; or,<br />
c) Accompany it with the information you received as to the offer to<br />
distribute corresponding source code. (This alternative is allowed<br />
only for noncommercial distribution and only if you received the<br />
program in object code or executable form with such an offer, in<br />
accord with Subsection b above.)<br />
The source code for a work means the preferred form of the work<br />
for making modifications to it. For an executable work, complete<br />
source code means all the source code for all modules it contains,<br />
plus any associated interface definition <strong>fil</strong>es, plus the scripts used to<br />
control compilation and installation of the executable. However, as<br />
a special exception, the source code distributed need not include<br />
anything that is normally distributed (in either source or binary form)<br />
with the major components (compiler, kernel, and so on) of the<br />
operating system on which the executable runs, unless that<br />
component itself accompanies the executable.<br />
If distribution of executable or object code is made by offering<br />
access to copy from a designated place, then offering equivalent<br />
access to copy the source code from the same place counts as<br />
distribution of the source code, even though third parties are not<br />
compelled to copy the source along with the object code.<br />
4. You may not copy, modify, sublicense, or distribute the Program<br />
except as expressly provided under this License. Any attempt<br />
otherwise to copy, modify, sublicense or distribute the Program is<br />
void, and will automatically terminate your rights under this License.<br />
- 8 -
However, parties who have received copies, or rights, from you<br />
under this License will not have their licenses terminated so long as<br />
such parties remain in full compliance.<br />
5. You are not required to accept this License, since you have not<br />
signed it. However, nothing else grants you permission to modify or<br />
distribute the Program or its derivative works. These actions are<br />
prohibited by law if you do not accept this License. Therefore, by<br />
modifying or distributing the Program (or any work based on the<br />
Program), you indicate your acceptance of this License to do so,<br />
and all its terms and conditions for copying, distributing or modifying<br />
the Program or works based on it.<br />
6. Each time you redistribute the Program (or any work based on<br />
the Program), the recipient automatically receives a license from<br />
the original licensor to copy, distribute or modify the Program<br />
subject to these terms and conditions. You may not impose any<br />
further restrictions on the recipients‘ exercise of the rights granted<br />
herein. You are not responsible for enforcing compliance by third<br />
parties to this License.<br />
7. If, as a consequence of a court judgment or allegation of patent<br />
infringement or for any other reason (not limited to patent issues),<br />
conditions are imposed on you (whether by court order, agreement<br />
or otherwise) that contradict the conditions of this License, they do<br />
not excuse you from the conditions of this License.<br />
If you cannot distribute so as to satisfy simultaneously your<br />
obligations under this License and any other pertinent obligations,<br />
then as a consequence you may not distribute the Program at all.<br />
For example, if a patent license would not permit royalty-free<br />
redistribution of the Program by all those who receive copies<br />
directly or indirectly through you, then the only way you could<br />
satisfy both it and this License would be to refrain entirely from<br />
distribution of the Program.<br />
- 9 -<br />
DE<br />
DE<br />
GPL
If any portion of this section is held invalid or unenforceable under<br />
any particular circumstance, the balance of the section is intended<br />
to apply and the section as a whole is intended to apply in other<br />
circumstances.<br />
It is not the purpose of this section to induce you to infringe any<br />
patents or other property right claims or to contest validity of any<br />
such claims; this section has the sole purpose of protecting the<br />
integrity of the free software distribution system, which is<br />
implemented by public license practices. Many people have made<br />
generous contributions to the wide range of software distributed<br />
through that system in reliance on consistent application of that<br />
system; it is up to the author/donor to decide if he or she is willing to<br />
distribute software through any other system and a licensee cannot<br />
impose that choice.<br />
This section is intended to make thoroughly clear what is believed<br />
to be a consequence of the rest of this License.<br />
8. If the distribution and/or use of the Program is restricted in certain<br />
countries either by patents or by copyrighted interfaces, the original<br />
copyright holder who places the Program under this License may<br />
add an explicit geographical distribution limitation excluding those<br />
countries, so that distribution is permitted only in or among<br />
countries not thus excluded. In such case, this License incorporates<br />
the limitation as if written in the body of this License.<br />
9. The Free Software Foundation may publish revised and/or new<br />
versions of the General Public License from time to time. Such new<br />
versions will be similar in spirit to the present version, but may differ<br />
in detail to address new problems or concerns.<br />
Each version is given a distinguishing version number. If the<br />
Program specifies a version number of this License which applies to<br />
it and „any later version“, you have the option of following the terms<br />
and conditions either of that version or of any later version<br />
published by the Free Software Foundation. If the Program does<br />
- 10 -
not specify a version number of this License, you may choose any<br />
version ever published by the Free Software Foundation.<br />
10. If you wish to incorporate parts of the Program into other free<br />
programs whose distribution conditions are different, write to the<br />
author to ask for permission. For software which is copyrighted by<br />
the Free Software Foundation, write to the Free Software<br />
Foundation; we sometimes make exceptions for this. Our decision<br />
will be guided by the two goals of preserving the free status of all<br />
derivatives of our free software and of promoting the sharing and<br />
reuse of software generally.<br />
NO WARRANTY<br />
11. BECAUSE THE PROGRAM IS LICENSED FREE OF<br />
CHARGE, THERE IS NO WARRANTY FOR THE PROGRAM, TO<br />
THE EXTENT PERMITTED BY APPLICABLE LAW. EXCEPT<br />
WHEN OTHERWISE STATED IN WRITING THE COPYRIGHT<br />
HOLDERS AND/OR OTHER PARTIES PROVIDE THE PROGRAM<br />
„AS IS“ WITHOUT WARRANTY OF ANY KIND, EITHER<br />
EXPRESSED OR IMPLIED, INCLUDING, BUT NOT LIMITED TO,<br />
THE IMPLIED WARRANTIES OF MERCHANTABILITY AND<br />
FITNESS FOR A PARTICULAR PURPOSE. THE ENTIRE RISK AS<br />
TO THE QUALITY AND PERFORMANCE OF THE PROGRAM IS<br />
WITH YOU. SHOULD THE PROGRAM PROVE DEFECTIVE, YOU<br />
ASSUME THE COST OF ALL NECESSARY SERVICING, REPAIR<br />
OR CORRECTION.<br />
12. IN NO EVENT UNLESS REQUIRED BY APPLICABLE LAW<br />
OR AGREED TO IN WRITING WILL ANY COPYRIGHT HOLDER,<br />
OR ANY OTHER PARTY WHO MAY MODIFY AND/OR<br />
REDISTRIBUTE THE PROGRAM AS PERMITTED ABOVE, BE<br />
LIABLE TO YOU FOR DAMAGES, INCLUDING ANY GENERAL,<br />
SPECIAL, INCIDENTAL OR CONSEQUENTIAL DAMAGES<br />
ARISING OUT OF THE USE OR INABILITY TO USE THE<br />
PROGRAM (INCLUDING BUT NOT LIMITED TO LOSS OF DATA<br />
- 11 -<br />
DE<br />
DE<br />
GPL
OR DATA BEING RENDERED INACCURATE OR LOSSES<br />
SUSTAINED BY YOU OR THIRD PARTIES OR A FAILURE OF<br />
THE PROGRAM TO OPERATE WITH ANY OTHER PROGRAMS),<br />
EVEN IF SUCH HOLDER OR OTHER PARTY HAS BEEN<br />
ADVISED OF THE POSSIBILITY OF SUCH DAMAGES.<br />
END OF TERMS AND CONDITIONS<br />
LGPL VERSION 2.1<br />
GNU LESSER GENERAL PUBLIC LICENSE<br />
Version 2.1, February 1999<br />
Copyright (C) 1991, 1999 Free Software Foundation, Inc.<br />
51 Franklin Street, Fifth Floor, Boston, MA 02110-1301 USA<br />
Everyone is permitted to copy and distribute verbatim copies<br />
of this license document, but changing it is not allowed.<br />
[This is the first released version of the Lesser GPL. It also counts<br />
as the successor of the GNU Library Public License, version 2,<br />
hence<br />
the version number 2.1.]<br />
Preamble<br />
The licenses for most software are designed to take away your<br />
freedom to share and change it. By contrast, the GNU General<br />
Public Licenses are intended to guarantee your freedom to share<br />
and change free software--to make sure the software is free for all<br />
its users.<br />
This license, the Lesser General Public License, applies to some<br />
specially designated software packages--typically libraries--of the<br />
Free Software Foundation and other authors who decide to use it.<br />
You can use it too, but we suggest you first think carefully about<br />
whether this license or the ordinary General Public License is the<br />
better strategy to use in any particular case, based on the<br />
explanations below.<br />
- 12 -
When we speak of free software, we are referring to freedom of<br />
use, not price. Our General Public Licenses are designed to make<br />
sure that you have the freedom to distribute copies of free software<br />
(and charge for this service if you wish); that you receive source<br />
code or can get it if you want it; that you can change the software<br />
and use pieces of it in new free programs; and that you are<br />
informed that you can do these things.<br />
To protect your rights, we need to make restrictions that forbid<br />
distributors to deny you these rights or to ask you to surrender<br />
these rights. These restrictions translate to certain responsibilities<br />
for you if you distribute copies of the library or if you modify it.<br />
For example, if you distribute copies of the library, whether gratis or<br />
for a fee, you must give the recipients all the rights that we gave<br />
you. You must make sure that they, too, receive or can get the<br />
source code. If you link other code with the library, you must<br />
provide complete object <strong>fil</strong>es to the recipients, so that they can<br />
relink them with the library after making changes to the library and<br />
recompiling it. And you must show them these terms so they know<br />
their rights.<br />
We protect your rights with a two-step method: (1) we copyright the<br />
library, and (2) we offer you this license, which gives you legal<br />
permission to copy, distribute and/or modify the library.<br />
To protect each distributor, we want to make it very clear that there<br />
is no warranty for the free library. Also, if the library is modified by<br />
someone else and passed on, the recipients should know that what<br />
they have is not the original version, so that the original author‘s<br />
reputation will not be affected by problems that might be introduced<br />
by others.<br />
Finally, software patents pose a constant threat to the existence of<br />
any free program. We wish to make sure that a company cannot<br />
effectively restrict the users of a free program by obtaining a<br />
restrictive license from a patent holder. Therefore, we insist that any<br />
- 13 -<br />
DE<br />
DE<br />
GPL
patent license obtained for a version of the library must be<br />
consistent with the full freedom of use specified in this license.<br />
Most GNU software, including some libraries, is covered by the<br />
ordinary GNU General Public License. This license, the GNU<br />
Lesser General Public License, applies to certain designated<br />
libraries, and is quite different from the ordinary General Public<br />
License. We use this license for certain libraries in order to permit<br />
linking those libraries into non-free programs.<br />
When a program is linked with a library, whether statically or using<br />
a shared library, the combination of the two is legally speaking a<br />
combined work, a derivative of the original library. The ordinary<br />
General Public License therefore permits such linking only if the<br />
entire combination fits its criteria of freedom. The Lesser General<br />
Public License permits more lax criteria for linking other code with<br />
the library.<br />
We call this license the „Lesser“ General Public License because it<br />
does Less to protect the user‘s freedom than the ordinary General<br />
Public License. It also provides other free software developers Less<br />
of an advantage over competing non-free programs. These<br />
disadvantages are the reason we use the ordinary General Public<br />
License for many libraries. However, the Lesser license provides<br />
advantages in certain special circumstances.<br />
For example, on rare occasions, there may be a special need to<br />
encourage the widest possible use of a certain library, so that it<br />
becomes a de-facto standard. To achieve this, non-free programs<br />
must be allowed to use the library. A more frequent case is that a<br />
free library does the same job as widely used non-free libraries. In<br />
this case, there is little to gain by limiting the free library to free<br />
software only, so we use the Lesser General Public License.<br />
In other cases, permission to use a particular library in non-free<br />
programs enables a greater number of people to use a large body<br />
of free software. For example, permission to use the GNU C Library<br />
- 14 -
in non-free programs enables many more people to use the whole<br />
GNU operating system, as well as its variant, the GNU/Linux<br />
operating system.<br />
Although the Lesser General Public License is Less protective of<br />
the users‘ freedom, it does ensure that the user of a program that is<br />
linked with the Library has the freedom and the wherewithal to run<br />
that program using a modified version of the Library.<br />
The precise terms and conditions for copying, distribution and<br />
modification follow. Pay close attention to the difference between a<br />
„work based on the library“ and a „work that uses the library“. The<br />
former contains code derived from the library, whereas the latter<br />
must be combined with the library in order to run.<br />
TERMS AND CONDITIONS FOR COPYING, DISTRIBUTION AND<br />
MODIFICATION<br />
0. This License Agreement applies to any software library or other<br />
program which contains a notice placed by the copyright holder or<br />
other authorized party saying it may be distributed under the terms<br />
of this Lesser General Public License (also called „this License“).<br />
Each licensee is addressed as „you“.<br />
A „library“ means a collection of software functions and/or data<br />
prepared so as to be conveniently linked with application programs<br />
(which use some of those functions and data) to form executables.<br />
The „Library“, below, refers to any such software library or work<br />
which has been distributed under these terms. A „work based on<br />
the Library“ means either the Library or any derivative work under<br />
copyright law: that is to say, a work containing the Library or a<br />
portion of it, either verbatim or with modifications and/or translated<br />
straightforwardly into another language. (Hereinafter, translation is<br />
included without limitation in the term „modification“.)<br />
„Source code“ for a work means the preferred form of the work for<br />
making modifications to it. For a library, complete source code<br />
means all the source code for all modules it contains, plus any<br />
- 15 -<br />
DE<br />
DE<br />
GPL
associated interface definition <strong>fil</strong>es, plus the scripts used to control<br />
compilation and installation of the library.<br />
Activities other than copying, distribution and modification are not<br />
covered by this License; they are outside its scope. The act of<br />
running a program using the Library is not restricted, and output<br />
from such a program is covered only if its contents constitute a work<br />
based on the Library (independent of the use of the Library in a tool<br />
for writing it). Whether that is true depends on what the Library does<br />
and what the program that uses the Library does.<br />
1. You may copy and distribute verbatim copies of the Library‘s<br />
complete source code as you receive it, in any medium, provided<br />
that you conspicuously and appropriately publish on each copy an<br />
appropriate copyright notice and disclaimer of warranty; keep intact<br />
all the notices that refer to this License and to the absence of any<br />
warranty; and distribute a copy of this License along with the<br />
Library.<br />
You may charge a fee for the physical act of transferring a copy,<br />
and you may at your option offer warranty protection in exchange<br />
for a fee.<br />
2. You may modify your copy or copies of the Library or any portion<br />
of it, thus forming a work based on the Library, and copy and<br />
distribute such modifications or work under the terms of Section 1<br />
above, provided that you also meet all of these conditions:<br />
a) The modified work must itself be a software library.<br />
b) You must cause the <strong>fil</strong>es modified to carry prominent notices<br />
stating that you changed the <strong>fil</strong>es and the date of any change.<br />
c) You must cause the whole of the work to be licensed at no<br />
charge to all third parties under the terms of this License.<br />
d) If a facility in the modified Library refers to a function or a table of<br />
data to be supplied by an application program that uses the facility,<br />
other than as an argument passed when the facility is invoked, then<br />
you must make a good faith effort to ensure that, in the event an<br />
- 16 -
application does not supply such function or table, the facility still<br />
operates, and performs whatever part of its purpose remains<br />
meaningful.<br />
(For example, a function in a library to compute square roots has a<br />
purpose that is entirely well-defined independent of the application.<br />
Therefore, Subsection 2d requires that any application-supplied<br />
function or table used by this function must be optional: if the<br />
application does not supply it, the square root function must still<br />
compute square roots.)<br />
These requirements apply to the modified work as a whole. If<br />
identifiable sections of that work are not derived from the Library,<br />
and can be reasonably considered independent and separate works<br />
in themselves, then this License, and its terms, do not apply to<br />
those sections when you distribute them as separate works. But<br />
when you distribute the same sections as part of a whole which is a<br />
work based on the Library, the distribution of the whole must be on<br />
the terms of this License, whose permissions for other licensees<br />
extend to the entire whole, and thus to each and every part<br />
regardless of who wrote it.<br />
Thus, it is not the intent of this section to claim rights or contest your<br />
rights to work written entirely by you; rather, the intent is to exercise<br />
the right to control the distribution of derivative or collective works<br />
based on the Library.<br />
In addition, mere aggregation of another work not based on the<br />
Library with the Library (or with a work based on the Library) on a<br />
volume of a storage or distribution medium does not bring the other<br />
work under the scope of this License.<br />
3. You may opt to apply the terms of the ordinary GNU General<br />
Public License instead of this License to a given copy of the Library.<br />
To do this, you must alter all the notices that refer to this License,<br />
so that they refer to the ordinary GNU General Public License,<br />
version 2, instead of to this License. (If a newer version than<br />
- 17 -<br />
DE<br />
DE<br />
GPL
version 2 of the ordinary GNU General Public License has<br />
appeared, then you can specify that version instead if you wish.) Do<br />
not make any other change in these notices.<br />
Once this change is made in a given copy, it is irreversible for that<br />
copy, so the ordinary GNU General Public License applies to all<br />
subsequent copies and derivative works made from that copy.<br />
This option is useful when you wish to copy part of the code of the<br />
Library into a program that is not a library.<br />
4. You may copy and distribute the Library (or a portion or<br />
derivative of it, under Section 2) in object code or executable form<br />
under the terms of Sections 1 and 2 above provided that you<br />
accompany it with the complete corresponding machine-readable<br />
source code, which must be distributed under the terms of Sections<br />
1 and 2 above on a medium customarily used for software<br />
interchange.<br />
If distribution of object code is made by offering access to copy from<br />
a designated place, then offering equivalent access to copy the<br />
source code from the same place satisfies the requirement to<br />
distribute the source code, even though third parties are not<br />
compelled to copy the source along with the object code.<br />
5. A program that contains no derivative of any portion of the<br />
Library, but is designed to work with the Library by being compiled<br />
or linked with it, is called a „work that uses the Library“. Such a<br />
work, in isolation, is not a derivative work of the Library, and<br />
therefore falls outside the scope of this License.<br />
However, linking a „work that uses the Library“ with the Library<br />
creates an executable that is a derivative of the Library (because it<br />
contains portions of the Library), rather than a „work that uses the<br />
library“. The executable is therefore covered by this License.<br />
Section 6 states terms for distribution of such executables.<br />
When a „work that uses the Library“ uses material from a header<br />
<strong>fil</strong>e that is part of the Library, the object code for the work may be a<br />
- 18 -
derivative work of the Library even though the source code is not.<br />
Whether this is true is especially significant if the work can be linked<br />
without the Library, or if the work is itself a library. The threshold for<br />
this to be true is not precisely defined by law.<br />
If such an object <strong>fil</strong>e uses only numerical parameters, data structure<br />
layouts and accessors, and small macros and small inline functions<br />
(ten lines or less in length), then the use of the object <strong>fil</strong>e is<br />
unrestricted, regardless of whether it is legally a derivative work.<br />
(Executables containing this object code plus portions of the Library<br />
will still fall under Section 6.)<br />
Otherwise, if the work is a derivative of the Library, you may<br />
distribute the object code for the work under the terms of Section 6.<br />
Any executables containing that work also fall under Section 6,<br />
whether or not they are linked directly with the Library itself.<br />
6. As an exception to the Sections above, you may also combine or<br />
link a „work that uses the Library“ with the Library to produce a work<br />
containing portions of the Library, and distribute that work under<br />
terms of your choice, provided that the terms permit modification of<br />
the work for the customer‘s own use and reverse engineering for<br />
debugging such modifications.<br />
You must give prominent notice with each copy of the work that the<br />
Library is used in it and that the Library and its use are covered by<br />
this License. You must supply a copy of this License. If the work<br />
during execution displays copyright notices, you must include the<br />
copyright notice for the Library among them, as well as a reference<br />
directing the user to the copy of this License. Also, you must do one<br />
of these things:<br />
a) Accompany the work with the complete corresponding machinereadable<br />
source code for the Library including whatever changes<br />
were used in the work (which must be distributed under Sections 1<br />
and 2 above); and, if the work is an executable linked with the<br />
Library, with the complete machine-readable „work that uses the<br />
- 19 -<br />
DE<br />
DE<br />
GPL
Library“, as object code and/or source code, so that the user can<br />
modify the Library and then relink to produce a modified executable<br />
containing the modified Library. (It is understood that the user who<br />
changes the contents of definitions <strong>fil</strong>es in the Library will not<br />
necessarily be able to recompile the application to use the modified<br />
definitions.)<br />
b) Use a suitable shared library mechanism for linking with the<br />
Library. A suitable mechanism is one that (1) uses at run time a<br />
copy of the library already present on the user‘s computer system,<br />
rather than copying library functions into the executable, and (2) will<br />
operate properly with a modified version of the library, if the user<br />
installs one, as long as the modified version is interface-compatible<br />
with the version that the work was made with.<br />
c) Accompany the work with a written offer, valid for at least three<br />
years, to give the same user the materials specified in Subsection<br />
6a, above, for a charge no more than the cost of performing this<br />
distribution.<br />
d) If distribution of the work is made by offering access to copy from<br />
a designated place, offer equivalent access to copy the above<br />
specified materials from the same place.<br />
e) Verify that the user has already received a copy of these<br />
materials or that you have already sent this user a copy.<br />
For an executable, the required form of the „work that uses the<br />
Library“ must include any data and utility programs needed for<br />
reproducing the executable from it. However, as a special<br />
exception, the materials to be distributed need not include anything<br />
that is normally distributed (in either source or binary form) with the<br />
major components (compiler, kernel, and so on) of the operating<br />
system on which the executable runs, unless that component itself<br />
accompanies the executable.<br />
It may happen that this requirement contradicts the license<br />
restrictions of other proprietary libraries that do not normally<br />
- 20 -
accompany the operating system. Such a contradiction means you<br />
cannot use both them and the Library together in an executable that<br />
you distribute.<br />
7. You may place library facilities that are a work based on the<br />
Library side-by-side in a single library together with other library<br />
facilities not covered by this License, and distribute such a<br />
combined library, provided that the separate distribution of the work<br />
based on the Library and of the other library facilities is otherwise<br />
permitted, and provided that you do these two things:<br />
a) Accompany the combined library with a copy of the same work<br />
based on the Library, uncombined with any other library facilities.<br />
This must be distributed under the terms of the Sections above.<br />
b) Give prominent notice with the combined library of the fact that<br />
part of it is a work based on the Library, and explaining where to<br />
find the accompanying uncombined form of the same work.<br />
8. You may not copy, modify, sublicense, link with, or distribute the<br />
Library except as expressly provided under this License. Any<br />
attempt otherwise to copy, modify, sublicense, link with, or distribute<br />
the Library is void, and will automatically terminate your rights under<br />
this License. However, parties who have received copies, or rights,<br />
from you under this License will not have their licenses terminated<br />
so long as such parties remain in full compliance.<br />
9. You are not required to accept this License, since you have not<br />
signed it. However, nothing else grants you permission to modify or<br />
distribute the Library or its derivative works. These actions are<br />
prohibited by law if you do not accept this License. Therefore, by<br />
modifying or distributing the Library (or any work based on the<br />
Library), you indicate your acceptance of this License to do so, and<br />
all its terms and conditions for copying, distributing or modifying the<br />
Library or works based on it.<br />
10. Each time you redistribute the Library (or any work based on the<br />
Library), the recipient automatically receives a license from the<br />
- 21 -<br />
DE<br />
DE<br />
GPL
original licensor to copy, distribute, link with or modify the Library<br />
subject to these terms and conditions. You may not impose any<br />
further restrictions on the recipients‘ exercise of the rights granted<br />
herein. You are not responsible for enforcing compliance by third<br />
parties with this License.<br />
11. If, as a consequence of a court judgment or allegation of patent<br />
infringement or for any other reason (not limited to patent issues),<br />
conditions are imposed on you (whether by court order, agreement<br />
or otherwise) that contradict the conditions of this License, they do<br />
not excuse you from the conditions of this License. If you cannot<br />
distribute so as to satisfy simultaneously your obligations under this<br />
License and any other pertinent obligations, then as a consequence<br />
you may not distribute the Library at all. For example, if a patent<br />
license would not permit royalty-free redistribution of the Library by<br />
all those who receive copies directly or indirectly through you, then<br />
the only way you could satisfy both it and this License would be to<br />
refrain entirely from distribution of the Library.<br />
If any portion of this section is held invalid or unenforceable under<br />
any particular circumstance, the balance of the section is intended<br />
to apply, and the section as a whole is intended to apply in other<br />
circumstances.<br />
It is not the purpose of this section to induce you to infringe any<br />
patents or other property right claims or to contest validity of any<br />
such claims; this section has the sole purpose of protecting the<br />
integrity of the free software distribution system which is<br />
implemented by public license practices. Many people have made<br />
generous contributions to the wide range of software distributed<br />
through that system in reliance on consistent application of that<br />
system; it is up to the author/donor to decide if he or she is willing to<br />
distribute software through any other system and a licensee cannot<br />
impose that choice.<br />
- 22 -
This section is intended to make thoroughly clear what is believed<br />
to be a consequence of the rest of this License.<br />
12. If the distribution and/or use of the Library is restricted in certain<br />
countries either by patents or by copyrighted interfaces, the original<br />
copyright holder who places the Library under this License may add<br />
an explicit geographical distribution limitation excluding those<br />
countries, so that distribution is permitted only in or among<br />
countries not thus excluded. In such case, this License incorporates<br />
the limitation as if written in the body of this License.<br />
13. The Free Software Foundation may publish revised and/or new<br />
versions of the Lesser General Public License from time to time.<br />
Such new versions will be similar in spirit to the present version, but<br />
may differ in detail to address new problems or concerns.<br />
Each version is given a distinguishing version number. If the Library<br />
specifies a version number of this License which applies to it and<br />
„any later version“, you have the option of following the terms and<br />
conditions either of that version or of any later version published by<br />
the Free Software Foundation. If the Library does not specify a<br />
license version number, you may choose any version ever<br />
published by the Free Software Foundation.<br />
14. If you wish to incorporate parts of the Library into other free<br />
programs whose distribution conditions are incompatible with these,<br />
write to the author to ask for permission. For software which is<br />
copyrighted by the Free Software Foundation, write to the Free<br />
Software Foundation; we sometimes make exceptions for this. Our<br />
decision will be guided by the two goals of preserving the free<br />
status of all derivatives of our free software and of promoting the<br />
sharing and reuse of software generally.<br />
NO WARRANTY<br />
15. BECAUSE THE LIBRARY IS LICENSED FREE OF CHARGE,<br />
THERE IS NO WARRANTY FOR THE LIBRARY, TO THE EXTENT<br />
PERMITTED BY APPLICABLE LAW. EXCEPT WHEN<br />
- 23 -<br />
DE<br />
DE<br />
GPL
OTHERWISE STATED IN WRITING THE COPYRIGHT HOLDERS<br />
AND/OR OTHER PARTIES PROVIDE THE LIBRARY „AS IS“<br />
WITHOUT WARRANTY OF ANY KIND, EITHER EXPRESSED OR<br />
IMPLIED, INCLUDING, BUT NOT LIMITED TO, THE IMPLIED<br />
WARRANTIES OF MERCHANTABILITY AND FITNESS FOR A<br />
PARTICULAR PURPOSE. THE ENTIRE RISK AS TO THE<br />
QUALITY AND PERFORMANCE OF THE LIBRARY IS WITH YOU.<br />
SHOULD THE LIBRARY PROVE DEFECTIVE, YOU ASSUME<br />
THE COST OF ALL NECESSARY SERVICING, REPAIR OR<br />
CORRECTION.<br />
16. IN NO EVENT UNLESS REQUIRED BY APPLICABLE LAW<br />
OR AGREED TO IN WRITING WILL ANY COPYRIGHT HOLDER,<br />
OR ANY OTHER PARTY WHO MAY MODIFY AND/OR<br />
REDISTRIBUTE THE LIBRARY AS PERMITTED ABOVE, BE<br />
LIABLE TO YOU FOR DAMAGES, INCLUDING ANY GENERAL,<br />
SPECIAL, INCIDENTAL OR CONSEQUENTIAL DAMAGES<br />
ARISING OUT OF THE USE OR INABILITY TO USE THE<br />
LIBRARY (INCLUDING BUT NOT LIMITED TO LOSS OF DATA<br />
OR DATA BEING RENDERED INACCURATE OR LOSSES<br />
SUSTAINED BY YOU OR THIRD PARTIES OR A FAILURE OF<br />
THE LIBRARY TO OPERATE WITH ANY OTHER SOFTWARE),<br />
EVEN IF SUCH HOLDER OR OTHER PARTY HAS BEEN<br />
ADVISED OF THE POSSIBILITY OF SUCH DAMAGES.<br />
END OF TERMS AND CONDITIONS<br />
- 24 -
AA 09/12 A<br />
BE LU<br />
Medion B.V.<br />
John F.Kennedylaan 16a<br />
5981 XC Panningen<br />
Nederland<br />
België<br />
Hotline: 022006198<br />
Fax: 022006199<br />
Luxemburg<br />
Hotline: 34-20 808 664<br />
Fax: 34-20 808 665<br />
Internet<br />
www.<strong>medion</strong>.com/be – www.<strong>medion</strong>.com/lu/<br />
E-mail Support<br />
BE: Gebruikt u a.u.b. het contactformulier op onze website<br />
www.<strong>medion</strong>.com/be onder “service” en “contact”.<br />
Bitte benutzen Sie das Kontaktformular unter<br />
www.<strong>medion</strong>.com/be unter „service“ und „contact“.<br />
Pour nous contacter, merci de vous diriger sur notre site internet<br />
www.<strong>medion</strong>.com/be, rubrique „service“ et „contact“.<br />
LU: Bitte benutzen Sie das Kontaktformular unter<br />
www.<strong>medion</strong>.com/lu<br />
Pour nous contacter, merci de vous diriger sur notre site internet<br />
www.<strong>medion</strong>.com/lu