C y c l i s t Recumbent - Steve Briggs
C y c l i s t Recumbent - Steve Briggs
C y c l i s t Recumbent - Steve Briggs

Create successful ePaper yourself
Turn your PDF publications into a flip-book with our unique Google optimized e-Paper software.
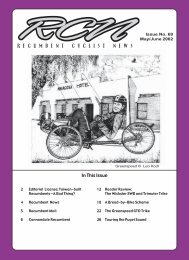
A handy Jig for accurately marking the position of the dead spot<br />
— made from scraps of wood stapled to a piece of cardboard<br />
cut to fit the frame.<br />
hour’s run. Two minutes in an hour. Sounds like nothing, right? But<br />
you have to understand that these reports are coming from riders who<br />
ride at an average speed of 25 mph just to get in the club.<br />
If you go to www.analyticcycling.com and take a look at what these<br />
numbers mean in terms of power, you will learn that these athletes are<br />
reporting a roughly 10% increase in power using Rotor cranks. That’s<br />
huge! It’s comparable to the difference you might expect from trading<br />
in your knobby tires for slicks, or adding a fairing. Getting another<br />
10% in performance is a spectacular improvement.<br />
500+ Miles later<br />
After over 500 miles on the Rotor System cranks, the biggest difference<br />
I noticed was in pushing the tough hills. My regular ride includes<br />
one hill that has always been my nemesis. This hill is so bad, it’s all I<br />
can do not to give up and walk. I used to grit my teeth and crawl up at<br />
4 mph riding my lowest gear. And when I finally made it to the top I<br />
would be gasping and wheezing so badly that I would have to take a<br />
look around to make sure nobody thought I was having a heart attack!<br />
With the Rotors I climb this same hill at nearly twice the speed (two<br />
gears higher up). I’m not sucking wind — and I am able to recover<br />
quickly and speed on my way.<br />
I also found a big improvement when sprinting against a rider at top<br />
cadence. I found that the less I thought about pedaling, and the more I<br />
went by instinct, the faster I could go. The Rotors whip you through<br />
the dead spot so quickly that at high cadence your legs are reset to the<br />
“push” position before you have time to do anything else but push<br />
again. I just let the Rotors take my cadence way up, focus on letting the<br />
big muscles fire like pistons, and watch my speed climb. Overall, my<br />
riding cadence has gone up at least 10%, and with it my speed.<br />
Without question, my knees feel better on the Rotors, especially when<br />
you consider how much more I’ve been pushing myself. I normally<br />
experience some pain at about 45 or 50 miles, and now I hardly feel<br />
any pain at all.<br />
Average Joes & Average Janes?<br />
So what do Rotors mean for the average Joes like me who don’t race<br />
time trials? Before I tried Rotors I thought they would not be worthwhile<br />
for an “average” rider, and that here’s some more fancy expensive<br />
gear that gives the high-end competition the few milliseconds advantage<br />
they need to win. But, now that I’ve tried them my thinking<br />
has changed completely. I now think that the “average” enthusiast prob-<br />
26 26 <strong>Recumbent</strong> Cyclist News<br />
ably has much more to gain from Rotors than the highly trained pros.<br />
It’s a bit like the invention of ABS brakes for cars. For years, drivers<br />
were taught to practice pumping the brakes to help bring the car to a<br />
controlled stop in wet or icy weather. And then along came ABS brakes<br />
and nearly all drivers, whether “average” or pro, are able to bring a car<br />
to a controlled stop. But they have to learn to apply steady pressure<br />
instead of pumping the brakes. In much the same way, pro riders have<br />
been trained for years to pedal smoothly through the dead spot, and to<br />
keep the power levels high through all parts of the cycle. And now<br />
along come the Rotors, and even the average rider can cycle like a pro<br />
by just doing what comes naturally. Sure, the pro might gain some<br />
from the Rotors, but the “average” rider is likely to benefit even more.<br />
ABS is just a better idea, and Rotors are just a better idea.<br />
Is It Worth The Weight?<br />
The Rotor crank replaces the standard crankset and bottom bracket<br />
and adds roughly a pound to the overall weight of your bike. Those of<br />
us who invested thousands of dollars to shave ounces off our 22-pound<br />
titanium or carbon bikes might shudder at the thought of adding a whole<br />
pound to the bike. After all, everyone knows that lighter bikes climbs<br />
better, right? Well, not exactly!<br />
If weight was all that mattered in climbing hills you’d see Lance<br />
Armstrong ditching pounds off his bike by getting rid of the derailleur,<br />
crank set, and cogs and bolting up the Pyrenees on a fixed gear track<br />
bike,. Sure the bike would be better if the transmission didn’t add any<br />
weight, but you don’t see many people who prefer climbing hills on a<br />
fixed-gear bike. The extra pounds are worthwhile because they are functional<br />
weight, weight that helps more than hurts in climbing hills.<br />
The Rotor crank, like the drivetrain, is functional weight that helps<br />
you climb hills. To push that extra pound up a 6% slope, your body has<br />
to put out one or two watts of extra power, just a small fraction (hardly<br />
even a percent) of the 150 to 600 watts riders typically exert climbing<br />
a hill. Compare that fraction of a percent cost to the 10% gain in power<br />
from the Rotor, and the bottom line is that Rotor cranks are more than<br />
worth their weight.<br />
Installing the Rotors<br />
You can get your Rotors via mail directly from RotorUSA, or from<br />
any bike shop. If you’re not a do-it-yourself type and would like a bike<br />
shop to install the Rotors, contact howie@ rotorbike.com to locate an<br />
experienced dealer in your area. Choosing a shop to install the Rotors<br />
is a bit like choosing a doctor for heart surgery: pick one that’s done it<br />
before and you’ll be better off. Any good bike shop can order Rotors<br />
directly at attractive dealer prices, and can install the cranks for you.<br />
Rotor is so confident you’re going to be happy with the results that<br />
they make it easy for you to try the Rotors risk-free: there’s a 30-day,<br />
no questions asked, money-back guarantee.<br />
I ordered my Rotors from RotorUSA direct. They come in a variety<br />
of crank lengths, and I ordered a ‘bent-friendly 165 mm. They came<br />
quickly, and beautifully packed. It took me about an hour to install the<br />
cranks. Rotor’s installation directions were clear and easy to follow.<br />
Even though the installation is a bit involved, it’s not something that’s<br />
especially hard. You just have to follow the directions very carefully.<br />
The trickiest part of installing Rotors on a bent is finding a way to<br />
mark the dead spot, a position that varies on a ‘bent from bike-to-bike,<br />
and rider-to-rider. Though the Rotor’s instructions provide a good technique<br />
for fitting a ‘bent, I found it easier to make myself a little jig out<br />
of a piece of cardboard, and use this to reliably mark the crank angle<br />
corresponding to the dead spot. The dead spot is easy enough to find<br />
spinning backwards on the bike, and once you find it, a friend can tape<br />
the outer chain ring to the front derailleur cage so you can hop off the<br />
bike and mark the corresponding crank position on the cardboard jig. I<br />
then followed the standard installation instructions, and an hour later I<br />
was ready to ride!