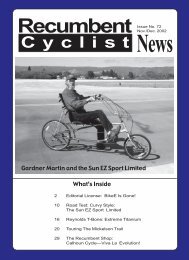
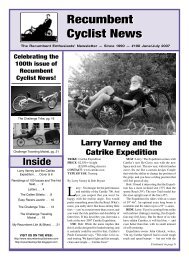
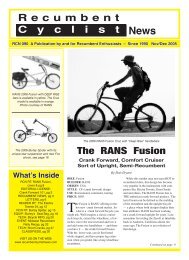
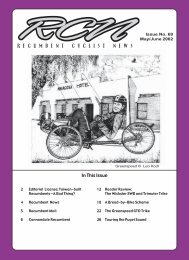
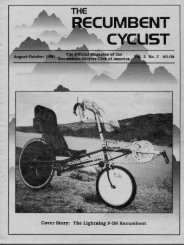
C y c l i s t Recumbent - Steve Briggs
C y c l i s t Recumbent - Steve Briggs
C y c l i s t Recumbent - Steve Briggs

You also want an ePaper? Increase the reach of your titles
YUMPU automatically turns print PDFs into web optimized ePapers that Google loves.
Outfitting Outfitting Your Your Home<br />
Home<br />
<strong>Recumbent</strong> <strong>Recumbent</strong> Shop<br />
Shop<br />
(Or (Or Tools Tools You You Need Need To To Buy)<br />
Buy)<br />
Even in this day of mainstream recumbency<br />
(well, sort of), it’s very important<br />
to understand how to work on your<br />
bike and to have a place to work on it — even<br />
if it’s just so that you can keep the bike clean<br />
or install some new tires.<br />
I know so many of you will scoff at this plan,<br />
but this is knowledge that you need. You just<br />
never know when you’ll have to do some roadside<br />
repair. Bicycles are essentially very simple<br />
machines, and the art of working on them can<br />
be a wonderful thing.<br />
In this article, we’ll try to help you set up a<br />
recumbent shop in your spare room or garage<br />
so that you can experience zen and the art of<br />
recumbent maintenance, or just have a place<br />
to work on your recumbent.<br />
Bike Stand<br />
The first thing you need is to find a way to<br />
prop your bike so that you can work on it. This<br />
sounds easy, but since recumbents come in all<br />
shapes and sizes, it can be more difficult than<br />
it sounds.<br />
Your first step is to contact your dealer or<br />
manufacturer to see if they have a repair stand<br />
adapter. Most don’t have them, but Burley offers<br />
one. Monotube and fat tube recumbents<br />
are the most difficult to place into stands. Most<br />
bicycle stands are made to adapt to standard<br />
bicycle seat-tubes — or use a seat-tube adapter.<br />
Most stands are designed to hold bikes that<br />
weigh 50 or 60 pounds and are of standard<br />
length. For long wheelbase (LWB) or tandems,<br />
a very stable stand is required. We have a pair<br />
of Black & Decker Workmate stands (fancy<br />
saw horses with clamps) that we use in our<br />
shop sometimes in combination with a Topeak<br />
Tune Up DX rear wheel holder/stand. This is<br />
a really cool stand, but ours broke after 2 weeks<br />
when a 40+ pound recumbent fell off of the<br />
stand. This stand is best used for lighter bikes.<br />
I’ll probably buy another one and fasten it<br />
down better (and not use it for 50 pound bikes).<br />
Trikes can also be difficult (forget about a<br />
typical repair stand). Your best bet might be a<br />
trainer on a table. Perhaps trike fans will write<br />
us with tips on how they do it.<br />
Park tools makes a line of affordable stands<br />
(PCS-series) starting from $100. Some Park<br />
models have jaws that open up to just 1-5/8”<br />
and others open to 3” (PCS-9 and PRS-15).<br />
Park is the most well known of the bicycle tool<br />
companies, but there are others as well.<br />
22 22 <strong>Recumbent</strong> Cyclist News<br />
By Bob Bryant<br />
• Park Tools/Repair stands<br />
www.parktool.com<br />
• Pedro’s<br />
www.pedros.com<br />
Flipping your bike upside-down like you did<br />
when you were a kid is not a good option. Also,<br />
don’t try suspending your bike with ropes from<br />
the ceiling or anything like that.<br />
I use a Topeak Prepstand Pro ($249.99). It<br />
accepts up to a 1.75” frame tube (clamp) and<br />
has a unique digital scale for weighing bikes<br />
and parts. So far, this is the best stand I’ve used.<br />
The scale is very accurate and way cool.<br />
• Topeak Prepstand<br />
www.topeak.com<br />
• Ultimate Bike Support Stand<br />
www.ussbike.com<br />
Angletech’s Kelvin Clark offers a version<br />
of the Ultimate Bike Support Stand that fits<br />
big tubes like the Bacchetta Aero and the like.<br />
• www.angletechcycles.com<br />
Email: angletech@att.net<br />
I. Tools To Buy: Basic<br />
Bicycle tools need to be separated into several<br />
different groups: I Basic; II Tune-Up; III<br />
Wheels; IV Frame builds; V Tools You May<br />
Already Have; VI; the final group is probably<br />
the most important — those to carry on your<br />
bike.<br />
The final section is your bike parts cache.<br />
• Floor pump with gauge<br />
• Tire patch kit<br />
• Hex wrenches to fit all parts on your bike<br />
(I like the “T” handle type with holder)<br />
(I have 2, 2.5, 3, 4, 5, 6, 8 and 10mm)<br />
• Open-ended wrenches<br />
(7, 8, 9, 10, 13, 14, 15 and 17mm)<br />
• 15mm pedal wrench (long; buy a good<br />
one)<br />
• Headset wrenches (You won’t need these<br />
if you have a threadless headset)<br />
• Chain tool<br />
• Spoke wrench<br />
• Shop Apron<br />
• Brush kit (Pedros makes a 5-brush kit)<br />
• Chain scrubber (a clean chain will keep<br />
your drivetrain clean and last longer)<br />
• Grease (bicycle-specific, like Phil Wood)<br />
• Grease (silicone for suspension forks or<br />
grip shifter lube)<br />
• Oil (Phil Wood Tenacious)<br />
• Baby powder (coating tubes & tire inner<br />
casings)<br />
• Rubbing alcohol (for bar grip removal)<br />
• Chain lube<br />
• Rags<br />
• Hand cleaner<br />
II. Tools To Buy: Tune Up<br />
These are tools for more advanced repairs<br />
and tuning up your own bike:<br />
• Shimano cable cutter (keeps cables from<br />
fraying)<br />
• Crank wrench (long 14mm)<br />
• Crank puller (I’ve needed these for road<br />
side repairs)<br />
• Bottom bracket tool (for your brand)<br />
• Cassette removal tool<br />
• Chain whip (holds cassette while<br />
you remove lock ring)<br />
• Chain elongation indicator<br />
(checks chain wear)<br />
• Torque wrench (tightens parts correctly)<br />
• Snap-ring pliers<br />
• Parts washer<br />
Park offers a 57-piece Professional Tool Kit<br />
that sells for around $790 and a 32-piece Advanced<br />
Mechanic Tool Kit for around $275.<br />
Pedro’s has a Master Tool Kit 2.0 for around<br />
$650.<br />
III. Tools To Buy: Wheels<br />
Wheel maintenance and building is a real<br />
art. I must admit to not having learned this,<br />
but I’ve always wanted to. It’s the last part of<br />
bike maintenance that I rely on others to do.<br />
• Wheel dishing tool<br />
• Spoke tension gauge<br />
• Truing stand (don’t buy a cheapie)<br />
IV. Tools To Buy: Frame Build<br />
• Metric taps<br />
• Headset press (install headsets)<br />
• Headset cup removal<br />
• Fork crown race punch<br />
• Cassette and bottom bracket tools.<br />
V. Tools You May Already Have<br />
• Needle-nosed pliers<br />
• Pliers (medium size)<br />
• RoboGrip Pliers (Craftsman, cool!)<br />
• 6” Adjustable wrench<br />
• Philips & standard screwdrivers<br />
(Be sure to get a small size to fit your<br />
derailleur adjusting screws)<br />
• Ball-peen hammer