Siemens AB - Bewator Group
Siemens AB - Bewator Group
Siemens AB - Bewator Group

Create successful ePaper yourself
Turn your PDF publications into a flip-book with our unique Google optimized e-Paper software.
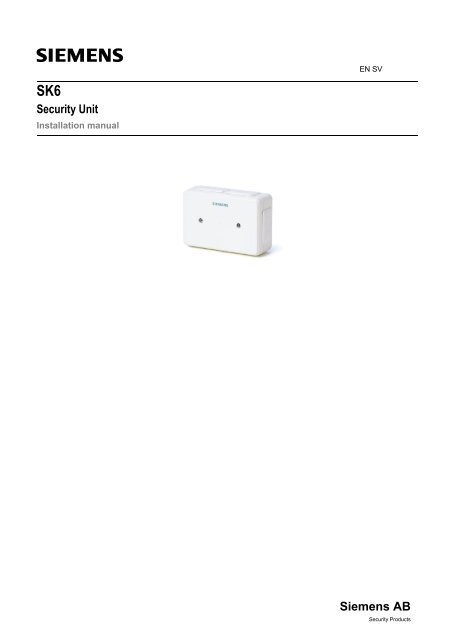
SK6<br />
Security Unit<br />
Installation manual<br />
EN SV<br />
<strong>Siemens</strong> <strong>AB</strong><br />
Security Products
ENGLISH – SK6 Installation manual<br />
Description<br />
The security unit SK6 is used in high security areas.<br />
It prevents unauthorised persons from opening the<br />
door by short-circuit the conductors to the electric<br />
release. It also protects for any manipulating the<br />
relay.<br />
The SK6 is tested against tamper attempt and relay<br />
manipulation for K44Duo, BM3/BM31, TP5/M65 and<br />
BC615 which are equipped with a tamper switch for<br />
external connection. Optionally it is possible to<br />
extend the relay manipulation protection by installing<br />
a reed-switch*).<br />
Note that the K42 does not need a reed-switch as<br />
the protection is built-in to the unit.<br />
It is recommended to wait at least 15 seconds after<br />
all wiring and power up before testing the units.<br />
*) See items 11 and 16 in illustration.<br />
Tamper control<br />
The security unit SK6 includes a relay that breaks<br />
the connection between the lock relay and the<br />
electric release when the protected unit’s housing is<br />
opened. This forms a “split-mount” solution.<br />
Note! This applies only for products with a tamper<br />
switch.<br />
Alarm output. If the cover of the protected unit is<br />
opened, the SK6 can also output a signal to an<br />
external alarm control system. The buzzer also<br />
starts to sound.<br />
Relay manipulation<br />
If the door unit does not include the metal parts to<br />
protect the lock relay from manipulation, SK6 offers<br />
the reed-switch option.<br />
K44Duo, BM3/BM31, TP5/M65 and<br />
BC615<br />
These units can optionally be installed with a reedswitch<br />
to sense any magnetic field manipulation of<br />
the lock relay.<br />
K42<br />
Via the built-in protection SK6 can determine if the<br />
activation of the lock relay is valid or not.<br />
Output signal<br />
Relay manipulation output. If the lock relay in<br />
the protected unit is manipulated (trying to unlock<br />
the door) there is a separate output signal.<br />
2<br />
Reset to normal<br />
There are two ways to reset the SK6 to normal<br />
function:<br />
Manual reset. The tamper alarm output is<br />
activated until a manual press on the button on<br />
the SK6 (see label on unit). The buzzer is also<br />
turned off.<br />
External signal. A signal from an external<br />
system may be connected to perform a reset.<br />
Note that if the protected unit is still in the wrong<br />
status when the reset occurs, there will be a new<br />
alarm generated (and buzzer sounds again).<br />
Safety<br />
General safety precautions<br />
Read the general safety precautions before<br />
operating the device.<br />
Follow all warnings and instructions marked on<br />
the device.<br />
Keep this document for reference.<br />
Always pass this document on together with the<br />
product.<br />
The device has been approved for use in the<br />
European Union. In countries outside the EU, the<br />
local conditions and regulations need to be<br />
checked before putting the device into service.<br />
Please also take into account any additional<br />
country-specific, local safety standards or<br />
regulations concerning project planning,<br />
operation and disposal of the product.<br />
The device should only be mounted indoors.<br />
Target group<br />
Installer with expert knowledge of building<br />
installation technique or electronic installations.<br />
Standards and guidelines<br />
This product complies with the requirements of the<br />
European Directives. The European declaration of<br />
conformity is available from:<br />
<strong>Siemens</strong> <strong>AB</strong>, Security Products<br />
Englundavägen 7<br />
SE-171 24 Solna, Sweden<br />
European Directive 2004/108/EC on Electromagnetic<br />
Compatibility (EMC):<br />
Compliance with the European Directive<br />
2004/108//EC has been proven by testing according<br />
to the following standards:<br />
Immunity EN61000-6-3<br />
Emission EN 50130-4<br />
Technical data<br />
Supply voltage (nom.*): 12 – 24 V AC/DC.<br />
Absolute voltage<br />
ratings**:<br />
10 – 35 VDC or<br />
8 – 24 VAC.<br />
Current consumption: Stand by power<br />
12V DC: 20 mA<br />
24V DC: 25 mA<br />
Full on<br />
12V DC: 50 mA<br />
24V DC: 85 mA<br />
Temperature range: 0 to +50°C<br />
Dimensions (H x W x D): 120 x 80 x 40 mm.<br />
* Nominal voltage has margins for transformer<br />
tolerances, mains supply variations and<br />
interruptions.<br />
** Absolute voltage has no margins and should be<br />
used for guidance only.<br />
Details of ordering<br />
Type Item Number Description<br />
SK6 S54513-F55-A1 Security Unit<br />
<strong>Siemens</strong> <strong>AB</strong><br />
Security Products 03.2012
ENGLISH – SK6 Installation manual<br />
Installing<br />
The SK6 is installed in the door environment and connected as below.<br />
1. The actual product to be protected.<br />
Note! For terminal numbers on<br />
connection board, see technical<br />
information for each product.<br />
2. The power supply is connected to SK6<br />
which feeds the protected unit. It is<br />
essential that the power is fed “through”<br />
the SK6 to achieve the protection.<br />
Note! Only one protected unit can be<br />
connected.<br />
If K44Duo controls two doors also two<br />
SK6 must be used. The reed-switch<br />
(parallel) and the tamper (serial) have<br />
to be connected to both SK6.<br />
3. Control signal from door opening relay<br />
in protected unit (shown at rest).<br />
4. Tamper switch in protected unit.<br />
(Breaks when housing is opened).<br />
Jumper J7 in SK6 controls the logic of<br />
the signal to SK6. Set to either<br />
Normally open or Normally closed<br />
function. Default NC.<br />
5. Potential-free lock relay output for<br />
connecting to lock.<br />
6. Alarm output. Connects to alarm<br />
system or the like. Changes at tamper<br />
attempt.<br />
7. Relay manipulation alarm output.<br />
Connects to alarm system or the like.<br />
Changes at manipulating of the relay in<br />
any way. See also item 11.<br />
8. External closing signal input for reset of<br />
alarm.<br />
9. SW1 is used for a manual reset of the<br />
alarm. See label on the housing.<br />
Note that if the protected unit is still in<br />
the wrong status a press on this button<br />
will reset – but a new alarm will occur.<br />
10. Jumper J10. Enable or disable of the<br />
internal relay manipulation monitoring.<br />
Default Disable.<br />
11. Additional, external closing signal input<br />
for monitoring other manipulation of a<br />
protected unit. E g via a reed-switch or<br />
similar capable of generating a signal.<br />
Default Normally open.<br />
Jumper J8 in SK6 controls the logic of<br />
the input. Set to either Normally open or<br />
Normally closed function. Default NO.<br />
12. Red LED when Lock relay active.<br />
13. Red LED when CPU is running.<br />
14. Green LED when Power is on.<br />
15. Buzzer.<br />
16. A reed-switch mounted to sense<br />
magnetic fields. See also item 11.<br />
Manipulating will close contact.<br />
Mounting of reed-switch<br />
In case of optionally using the supplied reedswitch<br />
kit, please consider how to mount it.<br />
The position of the reed-switch is dependant of<br />
the products. See the illustrations. In some<br />
cases the distance must be used.<br />
Note! Do NOT try to press the connector of the<br />
reed-switch with a tool.<br />
If there also is a magnetic shield protection kit to<br />
be used in conjunction with the reed-switch –<br />
please be cautious how to mount the reedswitch.<br />
<strong>Siemens</strong> <strong>AB</strong><br />
Security Products 03.2012<br />
3
SVENSKA – SK6 Installationshandbok<br />
Beskrivning<br />
Säkerhetskoppling SK6 används då man har extra<br />
höga säkerhetskrav. Den förhindrar för obehöriga att<br />
kunna öppna dörren genom att kortsluta ledningarna<br />
till ellås. Den skyddar för någon manipulering av<br />
reläet.<br />
SK6 är testad för sabotageförsök och<br />
relämanipulering av K44Duo, BM3/BM31, TP5 /M65<br />
och BC615 som är bestyckade med sabotagekontakt<br />
för extern anslutning. Valfritt är det möjligt att utöka<br />
skyddet för relämanipulering genom att installera ett<br />
reed-relä*).<br />
Notera att K42 inte behöver ett reed-relä eftersom<br />
skyddet är inbyggt i enheten.<br />
Det är rekommenderat att vänta åtminstone 15<br />
sekunder efter anslutning och strömförslag innan<br />
enheten testas.<br />
*) Se punkt 11 och 16 i illustrationen.<br />
Sabotagekontakt<br />
Säkerhetsenheten SK6 innehåller ett relä som bryter<br />
anslutningen mellan låsreläet och ellåset när den<br />
skyddade enhetens kapsling öppnas. Detta skapar<br />
ett "delat montage" lösning.<br />
Obs! Detta gäller endast produkter med en<br />
sabotagekontakt.<br />
Larmutgång. Om kapslingen på den skyddade<br />
enheten öppnas, kan SK6 också ge en signal till<br />
ett externt larmsystem. Summern börjar också<br />
ljuda.<br />
Relämanipulering<br />
Om dörrenheten inte inkluderar några metalldelar för<br />
att skydda låsreläet från manipulering, erbjuder SK6<br />
reed-relä optionen.<br />
K44Duo, BM3/BM31, TP5/M65 and<br />
BC615<br />
Dessa enheter kan valfritt installeras med ett reedrelä<br />
för att känna av magnetisk manipulering av<br />
låsreläet.<br />
K42<br />
Via den inbyggda skyddet kan SK6 avgöra om<br />
aktiveringen av låsreläet är giltig eller inte.<br />
Utgångssignal<br />
Relämanipulering utgång. Om låsreläet i den<br />
skyddade enheten manipuleras (försök att låsa<br />
upp dörren) ges en separat utsignal.<br />
4<br />
Återställa till normal<br />
Det finns två sätt att nollställa SK6 till normal<br />
funktion:<br />
Manuell återställning. Sabotagelarmutgången<br />
är aktiverad tills ett manuellt tryck på knappen på<br />
SK6 (se etikett på enheten). Summern stängs<br />
också av.<br />
Extern signal. En signal från ett extern system<br />
kan anslutas för att utföra en nollställning.<br />
Notera att om den skyddade enheten fortfarande är i<br />
fel status när nollställning sker, så genereras ett nytt<br />
larm (och summern ljuder igen).<br />
Säkerhet<br />
Generella säkerhetsföreskrifter<br />
Läs de generella säkerhetsföreskrifterna innan<br />
enheten används.<br />
Följ alla varningar och instruktioner som är<br />
märkta på enheten.<br />
Behåll detta dokument som referens.<br />
Bifoga alltid detta dokument med produkten.<br />
Enheten har godkänts för användning inom EU. I<br />
länder utanför EU måste lokala villkor och regler<br />
kontrolleras innan enheten tas i bruk.<br />
Ta med i beräkningen ytterligare landspecifika,<br />
lokala säkerhetsstandarder eller bestämmelser<br />
som gäller projektplanering, användning och<br />
kassering av produkten.<br />
Enheten bör endast monteras inomhus.<br />
Målgrupp<br />
Installatör med expertkunskap om bygginstallation<br />
och elektroniska installationer.<br />
Standarder och riktlinjer<br />
Produkten uppfyller kraven i EU-direktiven. EUdeklarationen<br />
om överensstämmelse kan erhållas<br />
från:<br />
<strong>Siemens</strong> <strong>AB</strong>, Security Products<br />
Englundavägen 7<br />
SE-171 24 Solna, Sweden<br />
EU-direktiv 2004/108/EC om elektromagnetisk<br />
kompatibilitet (EMC):<br />
Överensstämmelse med EU-direktiv 2004/108/EC<br />
råder genom att standarderna nedan uppfylls:<br />
Immunitet EN61000-6-3<br />
Emission EN 50130-4<br />
Tekniska data<br />
Matningsspänning (nom.<br />
*):<br />
Absoluta<br />
spänningsgränser **:<br />
12 – 24 V AC/DC.<br />
10 – 35 VDC eller<br />
8 – 24 VAC.<br />
Strömförbrukning: Viloström<br />
12V DC: 20 mA<br />
24V DC: 25 mA<br />
Full last<br />
12V DC: 50 mA<br />
24V DC: 85 mA<br />
Temperaturområde: 0 till +50°C<br />
Mått (H x B X D): 120 x 80 x 40 mm.<br />
* Nominell spänning har marginaler för<br />
transformatortoleranser, nätspänningsvariationer och<br />
avbrott.<br />
** Absoluta spänningsgränser har inga marginaler<br />
och bör användas endast för vägledning.<br />
Orderdetaljer<br />
Typ Artikel nr Beskrivning<br />
SK6 S54513-F55-A1 Säkerhetskoppling<br />
<strong>Siemens</strong> <strong>AB</strong><br />
Security Products 03.2012
SVENSKA – SK6 Installationshandbok<br />
Installation<br />
SK6 installeras i dörrmiljön och ansluts enligt nedan.<br />
1. Aktuell produkt som skall skyddas.<br />
Obs! För plint nummer på<br />
anslutningskort, se teknisk information<br />
för respektive produkt.<br />
2. Strömkällan ansluts till SK6 som sedan<br />
matar den skyddade enheten. Det är<br />
nödvändigt att strömmatningen sker<br />
"genom" SK6 för att uppnå skyddet.<br />
Obs! Endast en skyddad enhet kan<br />
anslutas.<br />
Om K44Duo styr två dörrar måste två<br />
SK6 användas. Reed-reläet (parallellt)<br />
och sabotagekontakt (seriellt) måste<br />
anslutas till båda SK6.<br />
3. Styrsignal från öppningsrelä i skyddad<br />
enhet (ritad i vila).<br />
4. Sabotagekontakt i skyddad enhet.<br />
Bruten när kapslingen är öppen<br />
Bygel J7 i SK6 styr logiken av signalen<br />
till SK6. Sätts till Normalt öppen eller<br />
Normalt sluten funktion. Fabriksinställd<br />
NC.<br />
5. Potentialfritt låsreläutgång för<br />
anslutning till lås.<br />
6. Larmutgång. Kopplas till inbrottslarm<br />
e.d. Växlar då sabotagekontakten<br />
aktiveras.<br />
7. Larmutgång för relämanipulering<br />
Kopplas till inbrottslarm e.d. Ändras vid<br />
manipulering av relä på något sätt. Se<br />
även punkt 11.<br />
8. Extern slutande signal för nollställning<br />
av larm.<br />
9. SW1 används för manuell nollställning<br />
av larm. Se etikett på kapslingen.<br />
Notera att om den skyddade fortfarande<br />
är i felaktigt läge kommer tryck på<br />
knappen att återställa - men ett nytt<br />
larm sker.<br />
10. Bygel J10. In- och urkoppling av den<br />
interna relämanipuleringsövervakningen.<br />
Fabriksinställd Disable..<br />
11. Ytterligare, extern slutande signal för<br />
övervakning av annan manipulering av<br />
skyddad enhet. T ex via en reed-switch<br />
eller liknande som kan generera en<br />
signal. Fabriksinställd Normalt sluten.<br />
Bygel J8 i SK6 styr logiken för<br />
ingången. Sätts till Normalt öppen eller<br />
Normalt sluten funktion. Fabriksinställd<br />
NO.<br />
12. Röd lysdiod när låsreläet är aktivt.<br />
13. Röd lysdiod när CPU är igång.<br />
14. Grön lysdiod när spänningen är på.<br />
15. Summer.<br />
16. Ett monterat reed-relä för att känna av<br />
magnetiska fält. Se även punkt 11.<br />
Manipulering aktiverar kontakten.<br />
Montering av reed-relä<br />
Ifall optionen att änvända meddlevererad reedrelä<br />
kit, ta hänsyn till hur det monteras.<br />
Positionen av reed-reläet beror på produkterna.<br />
See illustrationerna. I några fall måste distansen<br />
användas.<br />
Obs! Försök INTE att pressa reed-reläets<br />
kontakt med ett verktyg.<br />
Om det även finns ett magnetfältskydd, som ska<br />
användas tillsammans med reed-reläet – var<br />
varsam med hur reed-reläet monteras.<br />
<strong>Siemens</strong> <strong>AB</strong><br />
Security Products 03.2012<br />
5
Issued by<br />
<strong>Siemens</strong> <strong>AB</strong><br />
Security Products<br />
International Headquarters<br />
Englundavägen 7<br />
SE-171 24 Solna<br />
Tel. +46 8 629 0300<br />
www.siemens.com/securityproducts<br />
Document no. A6V10333742<br />
Edition 03.2012<br />
© 2012 Copyright by <strong>Siemens</strong> <strong>AB</strong><br />
Data and design subject to change without notice.<br />
Supply subject to availability.