Installation and Maintenance Thermofix - Fatra
Installation and Maintenance Thermofix - Fatra Installation and Maintenance Thermofix - Fatra
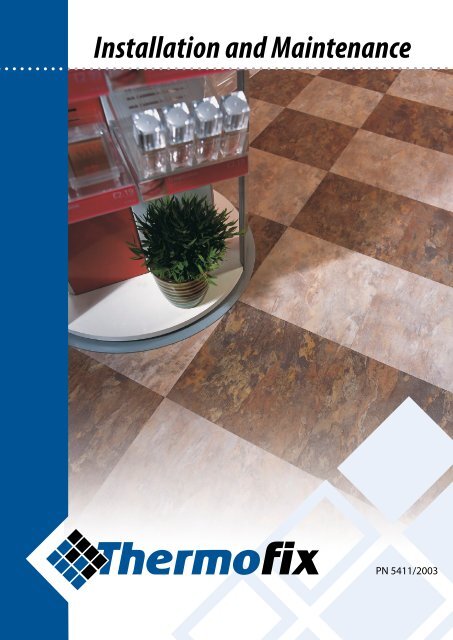
Installation and Maintenance PN 5411/2003
- Page 3 and 4: Table of Contents 1 GENERAL PART 1.
- Page 5 and 6: 2 Substrates / Sub-floors 2.1 Gener
- Page 7 and 8: 3 Tools and equipment A qualified f
- Page 9 and 10: 5 Installation of components 5.1 In
- Page 11 and 12: 5 cut tile. Lower the fixation plat
- Page 13 and 14: 7 • Moisture wiping A condition f
- Page 16: Fatra, a. s. tel.: +420-577 503 304
<strong>Installation</strong> <strong>and</strong> <strong>Maintenance</strong><br />
PN 5411/2003
Table of Contents 1 GENERAL PART<br />
1.1 Technical parameters .................................................................. 2<br />
1.2 Packaging........................................................................................ 2<br />
PN 5411/ 2003<br />
2 SUBSTRATES / SUB-FLOORS<br />
2.1 General ............................................................................................ 3<br />
2.2 Anhydrite substrates ................................................................... 3<br />
2.3 Magnesite screeds ....................................................................... 3<br />
2.4 Chipboard <strong>and</strong> cement chipboard<br />
substrates ........................................................................................ 4<br />
2.5 Substrates of ceramic <strong>and</strong> cement<br />
floor files <strong>and</strong> cast terrazzo ....................................................... 4<br />
2.6 Substrates of old floor coverings ............................................ 4<br />
3 TOOLS AND EQUIPMENT<br />
3.1 Substrate preparation ................................................................ 5<br />
3.2 Area measuring ............................................................................. 5<br />
3.3 Modification of dimensions ..................................................... 5<br />
3.4 <strong>Installation</strong> ...................................................................................... 5<br />
4 LAYING AND FIXING COMPONENTS<br />
4.1 Substrate preparation before adhesion .............................. 6<br />
4.2 Application of cement ............................................................... 6<br />
4.3 Floor rolling .................................................................................... 6<br />
4.4 Adhesives ....................................................................................... 6<br />
5 INSTALLATION OF COMPONENTS<br />
5.1 Inspection of delivery ................................................................. 7<br />
5.2 Conditioning components ....................................................... 7<br />
5.3 Laying of components ............................................................... 7<br />
5.4 Area measuring <strong>and</strong> marking .................................................. 7<br />
5.4.1 Measuring for laying tiles ............................................. 7<br />
5.4.2 Measuring for laying flooring boards ....................... 7<br />
5.5 <strong>Installation</strong> of components ...................................................... 8<br />
5.5.1 Installing the main field ................................................. 8<br />
5.5.1.1 Adhesion of tiles .................................................... 8<br />
5.5.1.2 Adhesion of wood planks .................................. 8<br />
5.5.2 Cutting peripheral tiles .................................................. 8<br />
5.5.2.1 Overlapping method ........................................... 8<br />
5.5.2.2 Method of a set of drawing instruments ...... 8<br />
5.5.2.3 Method of lever shears ....................................... 8<br />
5.5.3 Cementing peripheral components .......................... 9<br />
5.5.4 Laying components (tiles) in large areas ................. 9<br />
5.6 Finishing operations ................................................................... 9<br />
6 QUALITY INSPECTION AND<br />
FLOOR ASSESSMENT ............................................................. 9<br />
7 MAINTENANCE, TREATMENT AND<br />
RENOVATION OF FLOOR COVERINGS<br />
7.1 Cleaning <strong>and</strong> maintenance of the floor coverings ........10<br />
7.1.1 Cleaning after building completion ..........................10<br />
7.1.2 St<strong>and</strong>ard treatment ......................................................10<br />
8 RESISTANCE TO CHEMICAL AGENTS ....................11<br />
8.1 Organic substances ...................................................................12<br />
8.2 Aqueous solutions ....................................................................12<br />
1
1<br />
General part<br />
The specification is intended for laying components<br />
produced using the <strong>Thermofix</strong> technology.<br />
High-quality components have the character of a luxury<br />
floor covering. As to appearance as service life, they comply<br />
with the most stringent assessment criteria.<br />
The parts are manufactured in dimensions of 150x900 mm,<br />
450x450 mm <strong>and</strong> 300x300 mm with samples imitating natural<br />
materials.<br />
The floor covering is intended for all levels of load according<br />
to the classification described in ČSN EN 685 St<strong>and</strong>ard. It can<br />
be applied in the fields of household use, commercial use <strong>and</strong><br />
light industry.<br />
1.1 Technical parameters<br />
Total thickness 2.5 mm 2 mm<br />
Useful layer thickness 0.8 mm 0.4 mm<br />
Dimensions 150 x 900 mm 150 x 900 mm<br />
300 x 300 mm 300 x 300 mm<br />
450 x 450 mm 450 x 450 mm<br />
Classification Class 34, 43 Class 32, 41<br />
Specific technical parameters are specified in the<br />
appropriate PN (Company St<strong>and</strong>ard).<br />
1.2 Packaging<br />
2<br />
Dimensions (mm) Quantity in Cardboard box Quantity in Cardboard box (m2 ) Cardboard box Weight (kg)<br />
Thickness Thickness Thickness Thickness Thickness Thickness<br />
2.5 mm 2 mm 2.5 mm 2 mm 2.5 mm 2 mm<br />
Planks 150 x 900 26 32 3.51 4.32 13.50 14.00<br />
Tiles 300 x 300 40 48 3.60 4.32 14.00 14.00<br />
450 x 450 20 24 4.05 4.86 14.60 14.60<br />
PN 5411/ 2003
2<br />
Substrates / Sub-floors<br />
2.1 General<br />
Site conditions must comply with the requirements of BS<br />
8203:2001, the code of practise for the installation of floor<br />
coverings. it is normally the responsibility of the main building<br />
contractor to ensure the sub-floor in fit to receive a resilient<br />
(<strong>Thermofix</strong>) floor covering.<br />
To ensure good quality appearance <strong>and</strong> adhesion, the<br />
sub-floor must be hard, smooth, clean, dry <strong>and</strong> free from defects.<br />
The floor larger should not proceed unless before are satisfied<br />
with these conditions. Use of suitable levelling compounds in<br />
accordance with manufacturer´s instructions will ensure that no<br />
irregularities show through the surface of the finished floor. For<br />
all installations FATRA recommends the use of cementing, water<br />
based levelling compounds. Direct to earth concrete <strong>and</strong> stone<br />
sub-floors must incorporate an effective damp proof membrane<br />
to ensure that they will always bee sufficiently dry.<br />
New concrete sub-floor can contain a high percentage of<br />
residual moisture <strong>and</strong> should be allowed sufficient time to dry<br />
thoroughly.<br />
When it is impractical to wait until the concrete base has<br />
fully dried, moisture content should not exceed of 0.5 %, the<br />
use of a suitable surface damp proof membrane (DPM) is<br />
acceptable. It must be noted that once fully cured the DPM<br />
must be primed before a water-based self levelling compound<br />
is applied. The supplier of the levelling compound will advise<br />
on a suitable primer.<br />
Old concrete must be cleaned of all paint, grease, wax<br />
<strong>and</strong> any other foreign matter. A suitable levelling compound<br />
should be need to produce a smooth <strong>and</strong> level surface, with<br />
good bonding between concrete <strong>and</strong> levelling compound.<br />
Inspection of the quality of the substrate surface must be<br />
carried out using the correct equipment.<br />
• Smooth flat bottom 2 meters long with measuring wedges<br />
to check avenues<br />
• Measuring apparatus to determine moisture content of<br />
sub-floor<br />
• Thermometers <strong>and</strong> moisture-content indicators to<br />
measure humidity in rooms<br />
• Visual inspection<br />
2.2 Anhydrite substrates<br />
Anhydrite screed (AFE) is made of an anhydrite binder,<br />
aggregates (s<strong>and</strong>, gravel) <strong>and</strong> water. Additives are in order<br />
to modify chemical of physical properties of the screed, e.g.<br />
workability, hardening or solidification.<br />
The term “anhydrite screed” is often replaced by the term<br />
“calcium-sulphate screed”.<br />
Whilst natural anhydrite was used as a binder, synthetic<br />
types of anhydrite are used more frequently today. A mixture<br />
of anhydrite <strong>and</strong> exciter is called an anhydrite binder.<br />
Anhydrite screeds are being applied more often in<br />
buildings because of their easy <strong>and</strong> quick application.<br />
PN 5411/ 2003<br />
AFE are applied as a liquid self-levelling mixture. With<br />
respect to the processing method, it is possible to guarantee<br />
uniform values of strength <strong>and</strong> evenness tolerances that are<br />
not attainable in the case of mixtures with lower amount of<br />
mixed water. Additional deformations that could occur during<br />
maturing of st<strong>and</strong>ard cement screed do not take place in the<br />
case of AFE. The possibility of formation of large areas without<br />
joints is another benefit.<br />
It is necessary to point out that there are two disadvantages<br />
of applying floor coverings on AFE:<br />
• screed moisture,<br />
• surface strength.<br />
Before applying a floor covering on AFE, the floor layer<br />
should observe the following instructions <strong>and</strong> principles.<br />
An empiric rule is applied to determine the necessary<br />
drying time in order to achieve the acceptable residual<br />
moisture content of AFE with a thickness of up to 40 mm:<br />
approximately 1 week of drying for every 10 mm. If the<br />
thickness of AFE exceeds 40 mm, the drying time is prolonged<br />
more than proportionally, i.e. approximately two weeks for<br />
each additional 10 mm of screed thickness. These values<br />
obtained by practice assume st<strong>and</strong>ard climatic conditions. In<br />
case of abnormal climatic conditions such as high air humidity,<br />
the empiric rule mentioned above cannot be applied. The<br />
residual moisture content of AFE substrate may not exceed<br />
0.5% CM before application of impermeable floor coverings<br />
e.g. <strong>Thermofix</strong>.<br />
Electric moisture-content indicators are not suitable <strong>and</strong><br />
can be used only to find out individual results.<br />
CM method has to be used to determine the residual<br />
moisture content in the substrate.<br />
The surface strength is to be assessed using a pour in test.<br />
If there are unstable <strong>and</strong> defective zones on the surface, it is<br />
necessary to repair them.<br />
In any case, screed surfaces should be treated mechanically,<br />
e.g. by blasting or grinding to ensure a flat smooth finish.<br />
2.3 Magnesite screeds<br />
Magnesite screed is a product consisting of caustic<br />
magnesite, additives (silica, wood or cork powder) <strong>and</strong><br />
aqueous solution of a salt. usually of magnesium chloride.<br />
Caustic magnesite is finely milled stone powder that is<br />
products from natural magnesite.<br />
Magnesite screed with the density of up to 1,600 kg/m 3 is<br />
called xylolite screed.<br />
Single layer xylolite screeds are often used as a substrate<br />
for floor coverings; these may be applied after approximately<br />
three weeks provided the moisture content is lower than the<br />
value required by the st<strong>and</strong>ard.<br />
Specification of sufficient maturity of magnesite screed<br />
for application of floor coverings requires considerable<br />
experience.<br />
A softer substrate is often used under a relatively hard<br />
surface layers which are usually impregnated with wax or<br />
a similar agent. In both cases, it is necessary to prepare<br />
substrates for levelling with levelling material by removal of<br />
surface layers <strong>and</strong> using suitable penetration coats.<br />
3
2<br />
2.4 Chipboard <strong>and</strong> cement<br />
chipboard substrates<br />
Large-format boards should not be thinner than 18 mm<br />
<strong>and</strong> their density should be at least 700 kg/m 3 . We recommend<br />
using large-format boards with production dimensions of<br />
1,200 x 2,400 mm or 2,4 mm.<br />
The most suitable is the use of large-format components<br />
provided with a lock – tongue <strong>and</strong> groove or free groove<br />
<strong>and</strong> key. All joints must be filled with a suitable smoothing<br />
compound to ensure that good smooth quality surface is<br />
produced.<br />
The boards have to be mounted to the substrate with a<br />
spacing of 350 mm with finishing nails or with screws with<br />
counter-sink head with the minimum length of 2.5 multiple of<br />
the board thickness of with driving in clips.<br />
Components with a thickness of 18 mm can be used in case<br />
of floor beams with spacing up to 450 mm. In case of spacing<br />
of floor beams of 610 mm, components with a thickness of<br />
22 mm have to be used. Chipboards <strong>and</strong> cement chipboards<br />
may not contain such binders that impair adhesion of floor<br />
covering.<br />
2.5 Substrates of ceramic <strong>and</strong><br />
cement floor files <strong>and</strong> cast<br />
terrazzo<br />
All worn or damaged areas must be repaired. Loose<br />
jointing material should be removed from joints. It is necessary<br />
to degrease the surface using a degreasing agent soluble in<br />
water <strong>and</strong> to wash with a solution of washing soda dissolvent<br />
in hot water. The surface must be allowed to dry before<br />
application of a penetration coat <strong>and</strong> levelling compound with<br />
a thickness of approximately 3 mm. The surface can be scoured<br />
to improve adhesion of the levelling compound.<br />
2.6 Substrates of old floor coverings<br />
THERMOFIX floor coverings may not be applied on old floor<br />
coverings. If this is the case, the company <strong>Fatra</strong> refuses to bear<br />
any responsibility for the quality of the new floor covering.<br />
All old floor coverings should be removed if possible<br />
including cement.<br />
The removed old floor covering has to be disposed in an<br />
environmentally friendly way, e.g. by controlled incineration,<br />
dumping in a dumping site or recycling. It may never be bumt<br />
in the building site with other building waste.<br />
It is necessary to apply a levelling layer with a thickness of<br />
approximately 3 mm with penetration suitable for non-suction<br />
substrates on the substrate.<br />
4<br />
PN 5411/ 2003
3<br />
Tools <strong>and</strong> equipment<br />
A qualified floor layer should be provided with a basic set<br />
of tools that should be kept clean <strong>and</strong> in good condition.<br />
The specific selection of tools depends on the individual<br />
decision of the layer, the size of the installation <strong>and</strong> the extent<br />
of the required preparation.<br />
The basic set of tools:<br />
3.1 Substrate preparation<br />
PN 5411/ 2003<br />
Large brush<br />
Small brush<br />
Shovel<br />
Litter bin<br />
Bucket for mixing smoothing material<br />
Low-speed electric drill <strong>and</strong> mixing adapter<br />
Smoothing trowel<br />
De-aeration cylinder<br />
Grinding stone<br />
Vacuum cleaner<br />
3.2 Area measuring<br />
Yardstick, ruler<br />
Plotting string <strong>and</strong> chalk, vertical marking gauge<br />
Pencil<br />
3.3 Modification of dimensions<br />
Floor layer’s knives<br />
Bar drawing instrument<br />
Steel circular spring b<strong>and</strong><br />
Compass<br />
Circular knife for holes<br />
Meter<br />
Cutter for components<br />
Circular cutter<br />
Plane for floor component edge chamfering<br />
3.4 <strong>Installation</strong><br />
Toothed filling knife<br />
H<strong>and</strong> roller<br />
Sectional roller 68 kg<br />
Steel circular spring b<strong>and</strong><br />
Plane for edge chamfering<br />
H<strong>and</strong> roller<br />
Toothed filling knife<br />
Bar drawing instrument<br />
Vertical marking gauge<br />
Cutter for components<br />
Indexing cutter<br />
Floor layer’s knife - hook<br />
Floor layer’s knife - hook<br />
Circular knife for holes<br />
5
4<br />
Laying <strong>and</strong> fixing<br />
components<br />
The following information is to be used as a guide. Under<br />
all circumstances, it is necessary to take into consideration<br />
the recommendations <strong>and</strong> instructions of the adhesive<br />
manufacturer. Use only tested <strong>and</strong> approved adhesives.<br />
4.1 Substrate preparation before<br />
adhesion<br />
Sub-floors should be fully mature <strong>and</strong> have the specified<br />
strength, be free of cracks <strong>and</strong> holes. They should be clean <strong>and</strong><br />
free of dust, wax, grease, paints, varnishes, polishing agents,<br />
oils, hardening agents, packing materials <strong>and</strong> sealants as well<br />
as other materials which could adversely affect adhesion.<br />
Evenness <strong>and</strong> moisture content of the floor have to<br />
comply with ČSN 74 4505 (limit deviation max. 2 mm/2 m).<br />
All prostrusions have to be levelled. All cracks <strong>and</strong> hollow pits<br />
have to be filled with high quality filling <strong>and</strong> levelling material.<br />
Products using plaster are unacceptable for preparation of<br />
substrate layers <strong>and</strong> should not be used. The surface of the<br />
base layer must be dry <strong>and</strong> moisture free over the course<br />
of time to ensure trouble-free performance of the floor. The<br />
maximum permissible moisture content is 4 percent.<br />
4.2 Application of cement<br />
As a rule, we recommend all flooring <strong>and</strong> adhesive be<br />
conditioned for at least 24 hours at a temperature exceeding<br />
18 o C before <strong>and</strong> during application, adhesive is to be applied<br />
using a toothed head (knife) of the correct dimensions <strong>and</strong><br />
type as recommended by the manufacturer.<br />
After applying adhesive on the substrate, let it cure before<br />
floor laying. This time is defined by the manufacturer of the<br />
adhesive <strong>and</strong> serves for the discharge of excessive moisture<br />
from the adhesive thus ensuring optimum adhesion. After<br />
reaching the optimum moisture content, the “open” or<br />
“working” time begins. The adhesive manufacturer defines<br />
this time as the open laying interval. Consider the open time<br />
given by the manufacturer of the adhesive to be an informative<br />
value. The open time can be affected by the porosity of the<br />
substrate, temperature <strong>and</strong> relative humidity<br />
(Note: Definition of “open time” is – when adhesive is at a<br />
usable condition at it must be tacky.)<br />
Do not apply more adhesive than it is required for<br />
application of the corresponding amount of floor covering<br />
during completion at the open time.<br />
Excessive adhesive has to be removed from time to<br />
time. Water based adhesive can be removed easily using a<br />
clean moistened cloth. Dried water soluble adhesives can<br />
6<br />
be removed with a small amount of solvent cleaning agent<br />
recommended by the manufacturer of the adhesive over use<br />
of this cleaning agent can cause decolouration <strong>and</strong> softening<br />
of the surface of components.<br />
4.3 Floor rolling<br />
Immediately after applying components, it is necessary<br />
to roll the material using a sectional roller with a weight of<br />
68 kg. Rolling ensures good adhesive contact of tiles with the<br />
substrate, removes any trapped air <strong>and</strong> smoothes adhesive<br />
trowel marks.<br />
In areas subject to excessive heat or moisture, for example<br />
adjacent to plate glass windows, exposed to sunlight,<br />
or in shower rooms a two part rigid contact adhesive is<br />
recommended.<br />
Always comply <strong>and</strong> follow all relevant health <strong>and</strong> safety<br />
regulations relating to the use of adhesives.<br />
4.4 Adhesives<br />
There are many types of adhesives on the market <strong>and</strong><br />
their suitability depends on a number of factors. Sub-floor<br />
composition, type of floor covering, conditions of the building<br />
site <strong>and</strong> floor operational conditions.<br />
We recommend water based acrylic adhesives with a high<br />
initial tack.<br />
Detailed data on the type of adhesive use, ventilation<br />
<strong>and</strong> open times, type of trowel storage conditions <strong>and</strong> safety<br />
regulations, etc. are included in the manufacturer technical<br />
specification sheets <strong>and</strong> packaging labels.<br />
PN 5411/ 2003
5<br />
<strong>Installation</strong><br />
of components<br />
5.1 Inspection of delivery<br />
Before application, check the type number, batch number,<br />
quantity <strong>and</strong> whether boxes have been damaged.<br />
After delivery at the building site, it is necessary to condition<br />
the components <strong>and</strong> adhesives to a working temperature of at<br />
least 18 o C for at least 24 hours before application.<br />
5.2 Conditioning components<br />
The components have to be conditioned for at least<br />
24 hours before application. Conditioning takes place in<br />
the room where the components should be installed at a<br />
temperature of 18 – 26 o C, maximum 5 boxes at tiles can be<br />
stacked on one another. This temperature may not drop during<br />
application <strong>and</strong> consequent 24 hours after work completing.<br />
When installing on a substrate provided with a floor<br />
heating system, this heating should be turned off 48 hours<br />
before <strong>and</strong> 48 hours after installation. After turning on the<br />
floor heating system, the temperature of the system should<br />
be increased progressively, however, to a maximum of 28 o C.<br />
Adhesives intended for floor heating systems have to be used.<br />
5.3 Laying of components<br />
Check the condition of the sub-floor <strong>and</strong> remove faults (see<br />
Section 2.).<br />
Check the moisture content in the substrate, note the<br />
results <strong>and</strong> the method used.<br />
Before commencing application, we recommend<br />
performing a substrate acceptance inspection on the basis of<br />
a written record.<br />
The regular shape of components can emphasize<br />
deviations with respect to the axes of the building, which<br />
underline the necessity to plan appearance carefully. We<br />
recommend starting the laying in the centre of the room.<br />
5<br />
4<br />
3<br />
2<br />
11 10 9 8 7 6 5 4 3 2 1 2 3 4 5 6 7 8 9 10 11 12<br />
2<br />
3<br />
4<br />
5<br />
6<br />
7<br />
A<br />
PN 5411/ 2003<br />
D<br />
C<br />
5.4 Area measuring<br />
<strong>and</strong> marking<br />
5.4.1 Measuring for laying tiles (Fig. 1)<br />
• Measure the room in both directions.<br />
• Mark the central line A-B perpendicular with respect to the<br />
wall with entrance door with chalk.<br />
• Lay the components being along the central line A-B <strong>and</strong> check<br />
whether there are any resultant small pieces along the edges<br />
of the room. If this is the case, shift the central line in one or<br />
the other direction parallel with line A-B so that it would be<br />
necessary to modify end components only in a small extent.<br />
• Mark the central line C-D perpendicular with respect to<br />
line A-B with chalk. Check the perpendicular status using a<br />
large angle, compass or protector.<br />
• Lay the components loosely along the axial line C-D <strong>and</strong><br />
check whether there are any places for small pieces along<br />
the edges of the room. if this is the case, shift line C-D in<br />
one or the other direction as described above.<br />
5.4.2 Measuring for laying flooring boards (Fig. 2)<br />
• Measure the room in both directions.<br />
• Mark the central line A-B perpendicular with respect to the<br />
wall with entrance door <strong>and</strong> its centre with chalk.<br />
• Lay the components loosely along the central line A-B <strong>and</strong><br />
check whether there are any places for small pieces along<br />
the edges of the room. If this is the case, shift the central<br />
line in one or the other direction parallel with line A-B so<br />
that it would be necessary to modify end components only<br />
in a small extent.<br />
• Check whether there are any remaining spaces for small<br />
components in the cross direction along the edges of the<br />
room. If this is the case, shift the central line A-B.<br />
A<br />
Centre<br />
10 9 8 7 6 7 8 9 10<br />
4 3 2 1 1 2 3 4 5<br />
Fig. 1: Measuring for application of tiles Fig. 2: Measuring for laying flooring boards<br />
B<br />
Lay components loosely with the aim of testing the final<br />
impression in order to achieve a satisfactory appearance of the<br />
floor from all viewing angles.<br />
Tiles from three boxes should be mixed so, that shading,<br />
colouring <strong>and</strong> design repeats of the floor, gives a natural<br />
appearance.<br />
B<br />
7
5<br />
5.5 <strong>Installation</strong> of components<br />
5.5.1 Installing the main field<br />
8<br />
5.5.1.1 Adhesion of tiles<br />
The pattern on the tiles is formed by printing <strong>and</strong> the<br />
design effect can mean some tiles will have stronger print on<br />
them than others. To eliminate large areas of this effect it is<br />
necessary to unpack <strong>and</strong> mix the tiles prior to laying.<br />
As soon as the adhesive is in a suitable condition, apply<br />
the first tile in the initial point, i.e. at the point of intersection<br />
of both axes. Press thoroughly in the centre of the component<br />
<strong>and</strong> to force the air out in the direction towards edges.<br />
Fit another component with a potential alternation of<br />
colours <strong>and</strong> marbling <strong>and</strong> then place other components<br />
alternately from the left-h<strong>and</strong> <strong>and</strong> the right-h<strong>and</strong> sides. The<br />
components have to be set precisely along the line.<br />
Proceed along the other line in the same way<br />
perpendicularly with respect to the first line. Then complete<br />
the whole section progressively from the axial lines. Take care<br />
of proper adhesion of the components. Remove excessive<br />
cement from time to time.<br />
If a section is completed (excluding edge portions), it is<br />
necessary to roll it in both directions using the sectional roller<br />
of 68 kg. Repeat the procedure in individual sections until<br />
completing the main field (according to the size of the room).<br />
5.5.1.2 Adhesion of wood planks<br />
The pattern on the components is created r<strong>and</strong>omly. To<br />
eliminate variations, it is necessary to unpack components <strong>and</strong><br />
mix them while waiting for cement “fading”. As soon as the<br />
cement is in a condition suitable for cementing, apply the first<br />
component at the initial point, i.e. in the centre of the room. Press<br />
thoroughly in the centre of the component <strong>and</strong> then force the air<br />
out with your finger or a roller in the direction towards the edges.<br />
Place another component with potential alternation of<br />
colours <strong>and</strong> proceed along the axial line while applying two<br />
rows of components, each along one side of the line. The<br />
components have to be set precisely along the line.<br />
Then complete the whole section progressively from the<br />
axial line. Take care of proper adhesion of the components.<br />
Remove excess adhesive from time to time.<br />
If a section is completed (excluding edge portions), it is<br />
necessary to roll it in both directions using the sectional roller<br />
of 68 kg. Repeat the procedure in individual sections until<br />
completing the main field (according to the size of the room).<br />
5.5.2 Cutting peripheral tiles<br />
Different methods can be used to cut peripheral<br />
components. The appropriate method is usually selected<br />
according to ground plan shape <strong>and</strong> evenness of walls.<br />
5.5.2.1 Overlapping method (Fig. 3)<br />
To be used when the wall is parallel with the edge of<br />
the main field.<br />
• Lay the tile to be cut precisely on the last applied tile so<br />
both colour <strong>and</strong> pattern orientation match.<br />
• Lay another tile on the tile to be cut so that the external<br />
edge is leaning against the wall.<br />
• Using the lower edge of the upper tile, mark a line on the<br />
tile to be cut.<br />
• Cut the tile along the line, lay it freely in its position <strong>and</strong><br />
check fitting.<br />
• Repeat this procedure along the complete wall.<br />
5.5.2.2 Method of a set of drawing instruments (Fig. 4)<br />
To be used when the wall is not parallel with the edge<br />
of the main field.<br />
• Lay the tile to be cut precisely on the last applied tile so<br />
both colour <strong>and</strong> pattern orientation match.<br />
• Set the bar drawing instrument according to the dimension<br />
of the tile to be laid down.<br />
• Transfer the wall profile on the tile to be cut, at the same<br />
time, it is necessary to hold the bar drawing instrument<br />
vertically <strong>and</strong> perpendicularly with respect to the<br />
component edge.<br />
• Cut the tile along the line, lay it freely in its position <strong>and</strong><br />
check fitting.<br />
• Repeat this procedure along the complete wall.<br />
5.5.2.3 Method of lever shears<br />
To be used if the wall is parallel with the edge of the<br />
main field.<br />
• Make sure the fixation plate on the bottom of the lever<br />
shears is free. Set the lever shears on the edge of the last<br />
Fig. 3: Overlapping method Fig. 4: Method of a set of drawing instruments<br />
PN 5411/ 2003
5<br />
cut tile. Lower the fixation plate <strong>and</strong> set it on the tile edge.<br />
Pull back in order to fix the position.<br />
• Put the tile in the lever shears with its upper side down <strong>and</strong><br />
press so that the tile edge is snug against the wall. Take<br />
care to match both colour <strong>and</strong> pattern.<br />
• Cut the tile according to the required dimensions by<br />
pressing cutting edge down using the h<strong>and</strong>le.<br />
• Check dimensions by applying tile in their places.<br />
• Repeat procedure along the entire wall.<br />
Note: To copy protrusions such as door frames, it is possible<br />
to use both the overlapping method <strong>and</strong> a set of drawing<br />
instruments. A template can be made for complicated shapes.<br />
5.5.3 Cementing peripheral components<br />
As soon as the wall row is measured <strong>and</strong> laid down loosely,<br />
turn all components (tiles) in the direction inside so as not to<br />
disturb their measuring.<br />
Apply adhesive up to the edges. After adhesive fading, lay<br />
down the peripheral tiles. Remove excessive adhesive from<br />
time to time. Roll thoroughly using a sectional roller of 68 kg in<br />
both directions. Use a h<strong>and</strong> roller in inaccessible places. Repeat<br />
the procedure along all four walls. Roll the complete area again<br />
after 1 – 4 hours.<br />
5.5.4 Laying components (tiles) in large areas<br />
To keep straight line in case of large areas, proceed in the<br />
following way:<br />
• Determine the initial central point in order to prevent<br />
large amounts of waste from peripheral components (see<br />
Section 5.4.1).<br />
• Lay the first pyramid from the central line as indicated in<br />
Fig. 5 <strong>and</strong> Fig. 6.<br />
• Repeat the procedure on the other side of the central line.<br />
Increase pyramids progressively until only the setting of<br />
peripheral tiles remains.<br />
• Lay peripheral tiles (see Sections 5.5.2., 5.5.3.).<br />
5.6 Finishing operations<br />
There are no universal instructions for the best design<br />
procedure of floor covering installation. This depends in most<br />
cases on the imagination of the architect <strong>and</strong> the sill of the<br />
layer.<br />
It is possible to list only some options how to finish off the<br />
floor.<br />
Examples:<br />
• Plastic strip<br />
• Wooden strip<br />
• Floor covering b<strong>and</strong>s<br />
This is preferable to protect the floor from heavy traffic<br />
for 24 hours after installation. Floors must next be washed for<br />
48 hours. The ambient temperature during the working life of<br />
the floor should not exceed +5 o C <strong>and</strong> -40 o C<br />
PN 5411/ 2003<br />
6<br />
Quality inspection<br />
<strong>and</strong> floor assessment<br />
ČSN 74 4505 applies to acceptance inspection of the<br />
floor. The appearance of the floor is to be assessed under<br />
daytime light from a height of 160 cm rather than under direct<br />
sunshine.<br />
C<br />
7 6<br />
7<br />
5 4 5<br />
3 3<br />
1<br />
A<br />
6 4<br />
B<br />
2<br />
4 6<br />
3 3<br />
5 4 5<br />
7 6<br />
7<br />
Fig. 5: Pyramid method<br />
D<br />
26 25<br />
27 16 17 24<br />
28 15 10 9 18 23<br />
29 14 11 4 5 8 19 22<br />
30 13 12 3 2 1 6 7 20 21<br />
A B<br />
detail 1<br />
Fig. 6: Pyramid method – detail<br />
9
7<br />
<strong>Maintenance</strong>,<br />
treatment <strong>and</strong><br />
renovation of floor<br />
coverings<br />
Regular cleaning <strong>and</strong> maintenance is of high<br />
importance for all coverings as to appearance <strong>and</strong> service<br />
life. Floor coverings <strong>Thermofix</strong> are already equipped with<br />
a protective layer of PU varnish from production <strong>and</strong> it<br />
protects floor coverings against dirt penetration <strong>and</strong> it<br />
gives them regular <strong>and</strong> exactly definable look. As for such<br />
treated floor coverings, it is not necessary to carry out the<br />
so called first cleaning. Costs for other levels of cleaning,<br />
or intervals of these cleanings depend on the frequency<br />
of operation <strong>and</strong> the associated extent of the cleaned<br />
areas soiling. Through preventive measures, it is necessary<br />
to ensure that as little dirt as possible gets on the floor.<br />
If there are considerably loaded buildings, it is necessary<br />
to remember already during the designing to undertake<br />
effective measures to remove dirt at the entrance (cleaning<br />
area). Further on, it is necessary so that this cleaning area<br />
is included into common cleaning. If mats or carpets are<br />
used here, it is necessary to replace them as soon as they<br />
do not perform their functions to a sufficient extent.<br />
Selection of a suitable floor covering belongs among<br />
the most important preventive measures as it has an effect<br />
on later costs for cleaning <strong>and</strong> treatment. Type of floor<br />
covering, its quality, design <strong>and</strong> colour play an important<br />
role. It is generally known: multicoloured patterns of floor<br />
coverings are less sensitive than single coloured light<br />
designs.<br />
The following recommendations for cleaning <strong>and</strong><br />
treatment of <strong>Thermofix</strong> floor coverings are based on longterm<br />
practical experience <strong>and</strong> correspond to the state-ofthe-art.<br />
It is not possible to accept any guarantee for the<br />
mentioned above cleaning <strong>and</strong> maintenance means. In<br />
case of any doubts, the instructions of the appropriate<br />
manufacturer of cleaning agents are decisive.<br />
7.1 Cleaning <strong>and</strong> maintenance<br />
of the floor coverings<br />
When cleaning <strong>and</strong> maintaining <strong>Thermofix</strong> floor coverings,<br />
it is distinguished among:<br />
• cleaning after building completion<br />
• first treatment<br />
• continuous renovation<br />
• throughout renovation<br />
Plastic floor coverings are ready to be used only after performed<br />
cleaning <strong>and</strong> after building completion.<br />
10<br />
7.1.1 Cleaning after building completion<br />
Cleaning after building completion is performed as soon as<br />
the floor covering is applied. Dirt that got on the floor covering<br />
during <strong>and</strong> after application is removed with this cleaning. We<br />
recommend protecting already applied floor covering against<br />
damage by craftwork that follows with appropriate means,<br />
i.e. by covering the floor with paper cardboard <strong>and</strong> so on. It is<br />
necessary to adapt the costs <strong>and</strong> the cleaning method to the<br />
appropriate local conditions with respect to various types of<br />
dirt.<br />
It is usually sufficient to use basic cleaning agents without<br />
solvents that are added to water in doses complying with the<br />
manufacturer’s recommendations.<br />
Apply the cleaning agent on the floor, clean it manually<br />
or use a cleaning device after the action interval that is<br />
recommended in the instructions of the manufacturer <strong>and</strong><br />
remove the solution (wipe it away). Then wash the clean area<br />
thoroughly with clean water. In case of abnormal soiling <strong>and</strong><br />
larger areas, it is always necessary to perform cleaning with<br />
using a mechanism (cleaning automatic machine).<br />
Suitable recommended process (after building completion<br />
– it is possible to apply daily or according to the needs)<br />
1. Install safety marking (warning boards “danger of slipping”<br />
<strong>and</strong> so on)<br />
2. Remove <strong>and</strong> clean the mats <strong>and</strong> carpets from cleaning<br />
areas.<br />
3. Move away free furniture <strong>and</strong> temporarily placed facilities<br />
<strong>and</strong> objects.<br />
4. Remove dirt from hard-to-get-at places, i.e. with sweeping<br />
up or vacuuming.<br />
5. Remove dust <strong>and</strong> mechanical impurities from the surface<br />
with a sweeping mop <strong>and</strong> remove adhered dirt scratching<br />
it with a plastic or wooden spatula.<br />
6. Blend the cleaning agent according to the instructions on<br />
the product label.<br />
7. Apply the automatic machine cleaning of the floor<br />
covering with a red pad. At the same time with the process<br />
of cleaning, collect the dirty solution from the floor area. It<br />
is necessary to collect the dirt with an appropriate cotton<br />
mop with h<strong>and</strong> cleaning.<br />
8. Wipe out the edges of the cleaned area <strong>and</strong> gather excess<br />
water with the help of clean cotton mop <strong>and</strong> bucket <strong>and</strong><br />
wring it. Let the floor dry.<br />
9. Wipe out the dust with the help of a dust mop. Return<br />
the cleaned mats, free furniture <strong>and</strong> temporarily placed<br />
furniture <strong>and</strong> objects to their previous place.<br />
*Note: For cleaning after the building completion, it is possible<br />
to use commonly available cleaning agents that are defined by<br />
the manufacturer as suitable for cleaning <strong>and</strong> maintenance of<br />
PVC floor coverings with PU protective film.<br />
7.1.2 St<strong>and</strong>ard cleaning<br />
Regular cleaning in the determined time intervals for a<br />
longer time is understood as st<strong>and</strong>ard cleaning. Generally, the<br />
following methods are distinguished:<br />
PN 5411/ 2003
7<br />
• Moisture wiping<br />
A condition for use of this method is provision of the floor<br />
with a protective film. Dust <strong>and</strong> dirt is to be removed manually<br />
using a suitable method (sweeping or vacuuming) <strong>and</strong> means<br />
(dry sweeping mop, vacuum cleaner).<br />
• Wet wiping<br />
Even firmly adhered dirt can be removed by manual wet<br />
wiping if the floor is provided with a protective film. In case<br />
of more intensive soiling, a cleaning agent is to be added into<br />
water in accordance with the instructions of the manufacturer<br />
on the cleaning agent.<br />
When using polishing agents, it is also necessary to perform<br />
treatment in addition to cleaning. There must not be any marks<br />
or adhered dirt on the clean areas.<br />
It is not necessary to treat the <strong>Thermofix</strong> floor coverings<br />
with PU protective film. If, in spite of this, you decide to use<br />
maintenance agents, these must be labelled as suitable for PVC<br />
floor coverings with PU protective film by the manufacturer.<br />
• Polishing with polishing machines<br />
Machine treatment – polishing – can be used in larger<br />
buildings such as schools, hospitals, administrative buildings<br />
<strong>and</strong> wherever the machines can be used.<br />
8<br />
Resistance to<br />
chemical agents<br />
The floor covering is characterized by a high resistance<br />
to weak <strong>and</strong> diluted acids, alkalis <strong>and</strong> soaps. Oil products <strong>and</strong><br />
strong acids are not harmful if potential spillage is washed away<br />
immediately. Ketones, chlorinated solvents <strong>and</strong> other solvents<br />
may not come in contact with the floor covering. However,<br />
if this is the case, damage can be minimized by immediate<br />
washing with water. The floor covering may be used only after<br />
thorough evaporation of residues from the chemical agents.<br />
Some chemical agents contain very strong pigments that<br />
create spots on the floor covering even after brief contact.<br />
Rubber products (mostly dark <strong>and</strong> colourful rubber – rubber<br />
disks, protectors of appliances, shoe soles, etc.) cause non-<br />
PN 5411/ 2003<br />
A cleaning <strong>and</strong> polishing agent is put on floor areas <strong>and</strong><br />
immediately after it gets dry, it is cleaned with a slow moving<br />
cleaning machine with a polishing pad. It is cleaned <strong>and</strong> polished at<br />
the same time. A thin film of protective agent remains on the surface.<br />
of more intensive soiling an alkaline cleaning agent is to be added<br />
in water in accordance with the instructions of the manufacturer of<br />
the cleaning agent.<br />
When using polishing agents, it is also necessary to perform<br />
treatment in addition to cleaning.<br />
There may not be any marks <strong>and</strong> adhered dirt soft on the<br />
cleaned areas.<br />
• Polishing with polishing machines<br />
Machine treatment can be used in larger buildings such as<br />
schools, hospitals, administrative buildings <strong>and</strong> wherever machines<br />
can be used.<br />
A cleaning <strong>and</strong> polishing agent is sprayed on floor areas <strong>and</strong><br />
immediately cleaned with a slow moving machine with 3 m pads.<br />
Where greasy spills, exist a scrubber drier or rotary buffing machine<br />
with a blue 3 m pad is recommended.<br />
Floors without dressing can be cleaned using a scrubber drier<br />
or rotary buffing machine filled with natural detergent <strong>and</strong> blue<br />
3 m pads.<br />
removable colour change of the walking area upon contact<br />
with the floor covering, which can result in yellowing, browning<br />
to blackening of the surface of the floor covering at the point<br />
of contact with the rubber product.<br />
Wherever such types of materials are used, we recommend<br />
using a floor covering with dark colours to minimize the risk of<br />
stain formation.<br />
Burning ans smothering objects leave non-removable<br />
spots on the surface.<br />
The tables below provide an outline of general chemical<br />
resistance of floor coverings (description of the testing method<br />
– see note).<br />
11
8<br />
8.1 Organic substances<br />
TYPE OF CHEMICAL AGENT EFFECT PROVISION<br />
Aldehydes<br />
Esters<br />
Halogenated hydrocarbons<br />
Ketones<br />
Alcohols<br />
Ethers<br />
Glycols<br />
Hydrocarbons (aromatic <strong>and</strong> aliphatic)<br />
Kerosene<br />
Edible oil<br />
8.2 Aqueous solutions<br />
12<br />
Floor covering is penetrated after<br />
several minutes<br />
Release of plasticizers occurs after<br />
several days, which is accompanied<br />
by material shrinkage <strong>and</strong> brittleness.<br />
TYPE OF CHEMICAL AGENT EFFECT PROVISION<br />
Wipe away immediately.<br />
Wipe away immediately.<br />
Weak acid <strong>and</strong> alkalis No effect.<br />
Strong alkalis They damage gloss <strong>and</strong> can cause discolouring of some shades. Dilute <strong>and</strong> remove<br />
Strong acids Long contact can cause discolouring. Dilute <strong>and</strong> remove immediately.<br />
Pigments (indicative) Contact can cause discolouring. Dilute <strong>and</strong> remove immediately.<br />
Note: Resistance to chemical agents is to be tested in contact with a chemical agent for 24 hours under room temperature of 21 °C,<br />
washing with cold water then follows.<br />
The <strong>Fatra</strong> company wishes you pleasant work when applying our products.<br />
PN 5411/ 2003
<strong>Fatra</strong>, a. s.<br />
tel.: +420-577 503 304, 577 502 464, fax: + 420-577 502 476<br />
e-mail: lino.fatra@fatra.cz, www.fatra.cz/thermofix<br />
3. vydání<br />
© 2006


