TK 78 TK 82 - Con Farfisa il MADE IN ITALY vince
TK 78 TK 82 - Con Farfisa il MADE IN ITALY vince
TK 78 TK 82 - Con Farfisa il MADE IN ITALY vince

Create successful ePaper yourself
Turn your PDF publications into a flip-book with our unique Google optimized e-Paper software.
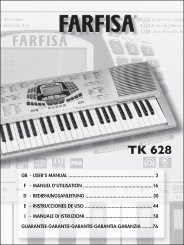
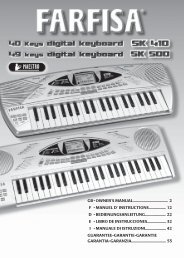
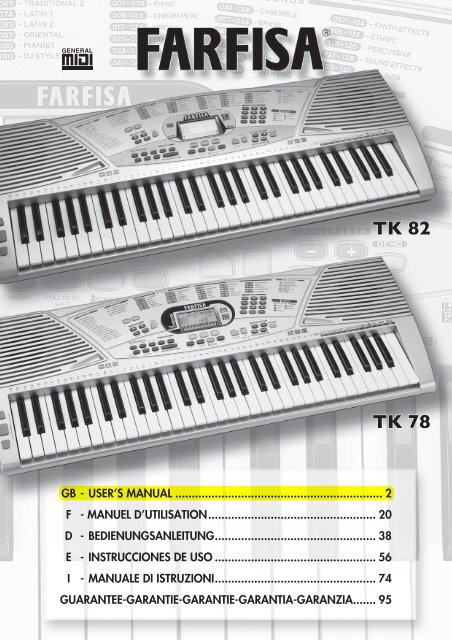
GB - USER’S MANUAL ............................................................... 2<br />
F - MANUEL D’UTILISATION................................................... 20<br />
D - BEDIENUNGSANLEITUNG................................................. 38<br />
E - <strong>IN</strong>STRUCCIONES DE USO ................................................. 56<br />
I - MANUALE DI ISTRUZIONI................................................. 74<br />
GUARANTEE-GARANTIE-GARANTIE-GARANTIA-GARANZIA....... 95<br />
<strong>TK</strong> <strong>82</strong><br />
<strong>TK</strong> <strong>78</strong>
1. TECHNICAL CARACTERISTICS ........................2<br />
2. <strong>IN</strong>TRODUCTION .....................................3<br />
MUSIC-STAND .......................................3<br />
POWER SUPPLY ......................................3<br />
MA<strong>IN</strong>S SUPPLY. .....................................3<br />
BATTERY SUPPLY ....................................3<br />
OPTIONAL ACCESSORIES. .............................3<br />
3. CONTROL PANEL ................................4<br />
4. SOCKETS. .......................................4<br />
5. DIRECTIONS ON THE KEYBOARD ....................5<br />
THE RHYTHM <strong>IN</strong>STRUMENTS Of THE MANUAL DRUM ........5<br />
LETTERS ON THE LEfT ................................5<br />
EffECTS Of THE DJ GROOVE (<strong>TK</strong> <strong>82</strong>). ...................5<br />
EffECTS Of THE DJ STYLE (<strong>TK</strong> <strong>78</strong>) ......................5<br />
THE DICTIONARY CHORDS ...........................5<br />
6. THE DISPLAY .........................................5<br />
7. HOW TO USE THE KEYBOARD ........................6<br />
SWITCH ON AND SWITCH Off .......................6<br />
DEMO – CHOSEN ExCERPT ...........................6<br />
VOLUMES ...........................................6<br />
SONGS. .............................................6<br />
THE SOUNDS ........................................7<br />
THE DUAL. ..........................................7<br />
THE TOUCH .........................................7<br />
THE TRANSPOSER ....................................7<br />
THE PIANO ..........................................7<br />
THE METRONOME. ...................................8<br />
THE KEYBOARD. .....................................8<br />
THE PITCH BEND<strong>IN</strong>G AND MODULATION CONTROLS .....8<br />
THE SOUNDS Of THE LEfT PART OR LOWER .............8<br />
THE STYLES .........................................9<br />
THE PIANIST STYLES ..................................9<br />
ARRANGER A, B. .....................................9<br />
LARGE ..............................................9<br />
EASY PLAY. ..........................................9<br />
TEMPO ..............................................9<br />
<strong>IN</strong>TRO / END<strong>IN</strong>G . . . . . . . . . . . . . . . . . . . . . . . . . . . . . . . . . . .10<br />
fILL <strong>IN</strong> ............................................10<br />
KEYBOARD: 61 professional keys (C-C) sensitive to touch<br />
(Dynamics)<br />
POLYPHONY: maximum 64 notes<br />
TOUCH: Immediate exclusion and restoration of sensitivity to<br />
touch. (Dynamics) - 5 dynamic levels (only for <strong>TK</strong> <strong>82</strong>)<br />
DISPLAY: backlit LCD 80 x 40 mm<br />
BASIC SOUNDS: 131 polyphonic tones<br />
MIXED SOUNDS: thousands of combinations of sounds<br />
EQUALISER: 4 equalization levels<br />
TRANSPOSER: range +/– 12 semitones<br />
PORTAMENTO: creates a pitch slide<br />
PIANO: immediate selection of the piano tone<br />
SOUNDS FOR ACCOMPANIMENT: 131 polyphonic tones<br />
EFFECTS: 8 CHORUSES, 8 REVERBS and SUSTA<strong>IN</strong> ON / Off<br />
STYLES: 100 rhythms including 4 Oriental, 8 Pianist and 5 Styles<br />
with 13 effects<br />
DJ GROOVE (<strong>TK</strong> <strong>82</strong>): Drum Machine effects on keyboard<br />
DJ STYLES (<strong>TK</strong> <strong>78</strong>): 5 styles with 13 effects, 3 dedicated sounds<br />
<strong>Con</strong>trols: START/STOP, DOWN BEAT, TEMPO +/–,<br />
KEY START/fILL <strong>IN</strong>, BREAK, <strong>IN</strong>TRO/END<strong>IN</strong>G<br />
METRONOME: with immediate control<br />
MANUAL DRUM: 48 rhythm percussions on the keyboard<br />
2<br />
<strong>IN</strong>DEX<br />
1. TECHNICAL CARACTERISTICS<br />
KEY START .........................................10<br />
BREAK . ............................................10<br />
fUNCTIONS .......................................10<br />
ARRANGER ON / Off. ............................10<br />
fREE CHORD ....................................10<br />
EASY CHORD. ...................................10<br />
SPLIT 19 or SPLIT 24 ..............................11<br />
DICTIONARY ....................................11<br />
DJ GROOVE (<strong>TK</strong> <strong>82</strong>) ...............................11<br />
DJ STYLE (<strong>TK</strong> <strong>78</strong>) .................................11<br />
GROUND ON / Off ..............................11<br />
SELECT LOWER ..................................11<br />
MANUAL DRUM ON / Off ........................11<br />
MEDLEY SONG ON / Off .........................11<br />
THE EffECTS .......................................12<br />
PORTAMENTO ON / Off ..........................12<br />
EQUALIZER SELECT. ..............................12<br />
REVERB SELECT ..................................12<br />
CHORUS SELECT .................................12<br />
TOUCH SELECT (<strong>TK</strong> <strong>82</strong>) ...........................12<br />
SEQUENCER ........................................12<br />
MAESTRO ..........................................12<br />
DISPLAY DIRECTIONS ...............................13<br />
1 ST LEVEL: TEMPO Of THE TUNE ...................13<br />
2 ND LEVEL: THE NOTES Of THE MELODY ............13<br />
3 RD LEVEL: THE SONG MELODY ....................13<br />
4 TH LEVEL: THE SONG CHORDS. ...................14<br />
5 TH LEVEL: ACCOMPANIMENT WITH ORCHESTRA. .......14<br />
8. TROUBLE SHOOT<strong>IN</strong>G GUIDE .......................14<br />
9. MA<strong>IN</strong>TENANCE AND REMARKS ....................15<br />
10. TABLE Of DICTIONARY. ............................15<br />
11. CONNECTION TO A PERSONAL COMPUTER. .......16<br />
12. DETAILED MIDI IMPLEMENTATION ..................92<br />
13. DRUM SET TABLE (Midi Channel 10) ..................92<br />
14. SOUNDS LIST ......................................93<br />
15. STYLES LIST ........................................94<br />
GUARANTEE ..........................................95<br />
SEQUENCER: REC and PLAY to record and listen<br />
AUTOMATIC ACCOMPANIMENT: free Chord, Easy Chord,<br />
Arranger A and B, LARGE<br />
<strong>Con</strong>trols: Volume of Sections, ARRANGER ON/Off, GROUND<br />
ON/Off, Split 19 / 24, full Keyb./Split<br />
General controls: ON/Off, Master Volume, Section Volume<br />
Select, Easy Play, Style, Song, Sound, Dual, Bending, Modulation<br />
DICTIONARY: Chord dictionary on the display<br />
DEMO: Demo song<br />
SONGS: 60 pre-recorded songs with Medley ON/Off<br />
MAESTRO: 5 learning levels<br />
AMPLIFICATION: Stereo 2,5+2,5 watt (RMS)<br />
Two high efficiency 100mm speakers<br />
POWER: 8 x 1,5 Volt IEC R14/C batteries<br />
AC/DC Adapter – Input Vdc= 12 V / I = 1,2 A<br />
PHONES/AUX-OUT: Output for headphones and external<br />
amplification.<br />
MIDI <strong>IN</strong>: <strong>Con</strong>nection from a MIDI unit and data reception<br />
MIDI OUT: <strong>Con</strong>nection to a MIDI unit and data transmission<br />
DIMENSIONS: (945 x 360 x 125) mm<br />
WEIGHT: 4,9 Kg<br />
BONTEMPI S.p.A. reserves all rights to modify specifications of this product without notice
MUSIC-STAND<br />
Insert the music-stand in the special holes located on the backside<br />
of the keyboard.<br />
POWER SUPPLY<br />
This electronic keyboard can function with mains or battery.<br />
MA<strong>IN</strong>S SUPPLY<br />
The instrument can be supplied<br />
by the AC/DC “AD<br />
<strong>IN</strong>PUT<br />
PEDAL<br />
PHONES<br />
OUT <strong>IN</strong><br />
DC 12V<br />
177.12” (Vdc MIDI =12V / I = SWITCH AUX. OUT (1)<br />
+<br />
1,2A) positive central adapter<br />
conforms to national and international safety regulations<br />
covering electrical appliances.<br />
RECOMMENDATIONS: The socket (1) for the adapter plug<br />
must be eas<strong>il</strong>y accessible. Inserting the plug into the socket at<br />
the back of the instrument automatically cuts off supply from<br />
the batteries. Ensure that the adapter is sufficiently vent<strong>il</strong>ated<br />
and that the vent<strong>il</strong>ation slits are not covered with objects such<br />
as newpapers, tablecloths, curtains, etc. Do not expose the<br />
adapter to drops or splashes of water.<br />
WARN<strong>IN</strong>G: All batteries or transformers with safety insulation<br />
must be checked regularly for faults in cable, wire, or plug insulation<br />
or other parts.<br />
BATTERY SUPPLY<br />
This instrument works with<br />
eight 1.5V IEC R14/C<br />
batteries (not supplied)<br />
which are inserted in the<br />
housing at the bottom.<br />
To open press on the part<br />
of the lid marked OPEN.<br />
fit the batteries as shown<br />
at the bottom of the housing.<br />
ADVICE ON US<strong>IN</strong>G THE BATTERIES<br />
• Take worn batteries out.<br />
• Recharge only “rechargeable” batteries and always in the<br />
presence of an adult.<br />
• Avoid using batteries of different types at the same time.<br />
• Do not use combinations of new and worn batteries.<br />
• Do not shortcircuit the power supply terminals.<br />
2. <strong>IN</strong>TRODUCTION<br />
WASTE DISPOSAL STANDARDS<br />
for information regarding the disposal of the items mentioned<br />
here below, please refer to Counc<strong>il</strong> Administration office regarding<br />
specialised waste collection centres.<br />
1 - DISPOSAL Of BATTERIES<br />
Protect the environment by disposing of<br />
batteries in the special containers provided<br />
for this use.<br />
2 - PACKAG<strong>IN</strong>G DISPOSAL<br />
Take the paper, cardboard and corrugated board to the appropriate<br />
waste collection centres. Plastic material must be placed<br />
in the relevant collection containers.<br />
The symbols indicating the various types of plastic are:<br />
Key for the different types of plastic materials:<br />
PET= Polyethylene terephtalate<br />
PE= Polyethylene, code 02 for PE-HD, 04 for PE-LD<br />
PVC=Polyvinyl chloride<br />
PP= Polypropylene<br />
PS= Polystyrene, Polystyrene foam<br />
O= Other polymers (ABS, Laminates, etc.)<br />
3 - WASTE DISPOSAL Of USED ELECTRICAL AND<br />
ELECTRONIC APPLIANCES<br />
All articles displaying this symbol on the body, packaging<br />
or instruction manual of same, must not be<br />
thrown away into normal disposal bins but brought<br />
to specialised waste disposal centres.<br />
Here, the various materials w<strong>il</strong>l be divided by characteristics<br />
and recycled, thus making an important contribution to environmental<br />
protection.<br />
<strong>IN</strong>STRUMENT IDENTIfICATION<br />
Always quote the serial number on the bottom of the keyboard<br />
in any correspondence.<br />
BONTEMPI S.p.A.<br />
VIALE DON BOSCO, 35<br />
62018 POTENZA PICENA (MC)<br />
<strong>ITALY</strong><br />
01<br />
PET<br />
02<br />
PE<br />
MODEL <strong>TK</strong> <strong>82</strong> SR<br />
RAT<strong>IN</strong>G 12V 12W<br />
SER. N°. G2858001<br />
OPTIONAL ACCESSORIES<br />
AD 177.12<br />
Mains supply adaptor.<br />
Output 12V / 1200 mA.<br />
03<br />
PVC<br />
AD 177.12<br />
05<br />
PP<br />
LE 127<br />
Metal legs.<br />
06<br />
PS<br />
BONTEMPI S.p.A.<br />
VIALE DON BOSCO, 35<br />
62018 POTENZA PICENA (MC)<br />
<strong>ITALY</strong><br />
07<br />
O<br />
MODEL <strong>TK</strong> <strong>78</strong> SR<br />
RAT<strong>IN</strong>G 12V 12W<br />
SER. N°. G2858001<br />
LE 127<br />
3<br />
ENGLISH
ON/OFF – Turns the instrument on and off.<br />
VOLUME MASTER – Selects the master volume.<br />
VOLUME SECTION – Selects the sections volume.<br />
METRONOME – Switches on and off the metronome<br />
beat.<br />
ARRANGER A/B – Selects the automatic accompaniment<br />
with A and B rhythms.<br />
ARRANGER LARGE – Selects the automatic accompaniment<br />
with Large rhythms.<br />
EASY PLAY – Depending on the style, selects right-hand<br />
and left-hand tone, the best tempo for the performance and<br />
sets the fREE CHORD setting on the keyboard. In the 60<br />
songs, it selects the sound and the tempo connected to the<br />
songs.<br />
TEMPO +/– - Sets the tempo for style performance, songs<br />
or metronome.<br />
<strong>IN</strong>TRO/END<strong>IN</strong>G – Prepares a musical intro or plays an<br />
ending when the rhythm is on.<br />
FILL <strong>IN</strong>/KEY START – Allows rhythm to be enabled by<br />
pressing one or more keys or enables changes wh<strong>il</strong>e rhythm<br />
is on.<br />
BREAK – Prepares a temporary variation of the rhythm style<br />
or a short intro.<br />
START/STOP – Starts/Stops a rhythm style or a song.<br />
<strong>IN</strong>PUT DC 12 V - Switches the instrument on with an AC/<br />
DC adapter.<br />
PHONES / AUX-OUT – Socket for headphones and Hi-fi;<br />
output impedance 150 Ohm – To play without disturbing and/<br />
or being disturbed, you can use a stereo headphone. When the<br />
cable is inserted the speaker is automatically excluded and all<br />
sections of the keyboard can be heard in the headphone. The<br />
socket also allows an additional stereo amplifier, a recorder, etc.<br />
to be connected.<br />
Warning: only connect stereo cables to the “PHONES/ AUx-<br />
4<br />
3. CONTROL PANEL<br />
4. SOCKETS<br />
STYLE – Selects the rhythm styles.<br />
SONG – Selects the pre-recorded (<strong>TK</strong> <strong>78</strong>)<br />
songs.<br />
SOUND – Selects the right-hand sound or two sounds to<br />
mix together.<br />
TOUCH – Turns the touch sensitivity on keys on and off<br />
(Dynamics).<br />
FULL KEYB. / SPLIT – Splits the keyboard between two<br />
sounds or to set just one.<br />
MAESTRO – Enters the 5 levels learning mode.<br />
DUAL – Allows mixing and the selection of two sounds.<br />
PIANO – Enables PIANO tone and identification of chords<br />
across the whole keyboard.<br />
DJ GROOVE (<strong>TK</strong> <strong>82</strong>) - Enable Drum Machine effects on<br />
keyboard.<br />
DJ STYLE (<strong>TK</strong> <strong>78</strong>) - Enables the DJ STYLE rhythm with dedicated<br />
sound and effects on the right-hand side of the keyboard.<br />
TRANSPOSER +/– - Allows pitch of notes to be changed.<br />
SEQUENCER REC – Records what is being played.<br />
SEQUENCER PLAY – Plays what has been recorded.<br />
DEMO – Plays the demo song.<br />
SELECT 0-9 and +/– - Selects functions, rhythms, songs and<br />
sounds.<br />
MIDI <strong>IN</strong> – Socket to connect a cable coming from a MIDI<br />
unit and to receive data.<br />
MIDI OUT - Socket to connect a cable going to a MIDI unit<br />
and to transmit data.<br />
PEDAL SWITCH - Socket to connect a SUSTA<strong>IN</strong> pedal.<br />
OUT <strong>IN</strong><br />
OUT” socket. MIDI<br />
SWITCH<br />
+<br />
PEDAL<br />
<strong>IN</strong>PUT<br />
DC 12V<br />
PHONES<br />
AUX. OUT
The rhythm instruments of the MANUAL DRUM<br />
With function 30 MANUAL DRUM ON enabled, each key is connected to a percussion instrument.<br />
Letters on the left<br />
Indicate the basic note for the<br />
name of the chord.<br />
5. DIRECTIONS ON THE KEYBOARD<br />
Effects of the DJ GROOVE (<strong>TK</strong> <strong>82</strong>)<br />
When DJ GROOVE is active, DRUM MACH<strong>IN</strong>E effects are activated on<br />
the keyboard.<br />
Effects of the DJ STYLE (<strong>TK</strong> <strong>78</strong>)<br />
When the DJ function is enabled, each key corresponds to a special<br />
effect.<br />
The DICTIONARY chords<br />
When function 26 DICTIONARY is enabled, the display shows name<br />
and composition of chords.<br />
6. THE DISPLAY<br />
1) Indicates the name<br />
of sounds, rhythm<br />
styles, volumes and<br />
16<br />
other functions.<br />
2) Indicates the selec- 15<br />
tion for the tone of<br />
the left side of the 14<br />
keyboard or Lower.<br />
3) Shows the selection<br />
of the two mixed<br />
sounds.<br />
4) Indication of “Intro”,<br />
1<br />
”Ending”, ”KeyStart”<br />
controls for the<br />
rhythm style.<br />
13 12<br />
5) Indication of enabled SEQUENCER: “Record” or<br />
“Play”.<br />
6) Indication of active automatic accompaniment and<br />
pattern (Arranger A, B, A-Large, B-Large).<br />
7) Indicates “PIANO” function is active.<br />
8) Indicates “DJ GROOVE” (<strong>TK</strong> <strong>82</strong>) or “DJ STYLE” (<strong>TK</strong> <strong>78</strong>)<br />
function is active.<br />
2 3 4 5<br />
6<br />
9) I n d i c a t e s<br />
“TRANSPOSER” is<br />
active (transposition<br />
high or low).<br />
10) Metronome icon,<br />
shows beat tempo.<br />
7 11) Indicates the tempo<br />
8<br />
of the rhythm style,<br />
of the song or of<br />
the metronome.<br />
12) 61 key keyboard<br />
showing notes that<br />
11 10 9<br />
are pressed or that<br />
have to be pressed if<br />
in MAESTRO mode.<br />
13) Indication of Split point (19 or 24).<br />
14) Indication of the identified chord and EASYCHORD<br />
function.<br />
15) Pentagram with notes displayed.<br />
16) Indicates an octave higher for the last 5 keys.<br />
5<br />
ENGLISH
SWITCH ON AND SWITCH OFF<br />
The instrument can be turned on and off by using the ON/OFF button. When turned<br />
on, the keyboard is set to operate with the PIANO sound, the 8 Beat 1<br />
rhythm and the song La Cucaracha.<br />
DEMO – Chosen excerpt<br />
Switching on the DEMO button, a melody that w<strong>il</strong>l emphasise the characteristics of<br />
the keyboard w<strong>il</strong>l play. To turn off the melody press the DEMO button.<br />
VOLUMES<br />
To regulate the volume of the instrument you must use buttons MASTER<br />
VOLUME + (to turn up) or MASTER VOLUME – (to turn down). By holding<br />
the button pressed down, the variation becomes continuous.<br />
To restore the standard volume press both MASTER VOLUME + and MASTER<br />
VOLUME – buttons together.<br />
SONGS<br />
The instrument contains 60 classic repertoire songs.<br />
To select the songs, enter a three digit number according to the SONGS list.<br />
001<br />
002<br />
003<br />
004<br />
005<br />
006<br />
007<br />
008<br />
009<br />
010<br />
Example: for song 027 Jingle Bells,<br />
• press the SONG button (light on);<br />
• enter SELECT, 0, 2, 7 on the numerical keyboard;<br />
• press the START/STOP button to start or stop the musical performance.<br />
When a song is being played, you can immediately listen to other songs by entering the number of the song you have chosen or by<br />
using the SELECT “– / +” buttons.<br />
The EASY PLAY control sets the melody of the song and the standard TEMPO on the keyboard.<br />
6<br />
LA CUCARACHA<br />
HAPPY BIRTHDAY<br />
WHEN THE SA<strong>IN</strong>TS...<br />
MELODIA<br />
MOZART op. 40<br />
CAN CAN<br />
GREENSLEEVES<br />
MY LORD<br />
JOHN BROWN'S BODY<br />
KATJUSCHA<br />
011<br />
012<br />
013<br />
014<br />
015<br />
016<br />
017<br />
018<br />
019<br />
020<br />
7. HOW TO USE THE KEYBOARD<br />
THE CAMPTOWN RACES<br />
AURA LEE<br />
HOME <strong>IN</strong> THE RANGE<br />
SANTA LUCIA<br />
DU, DU LIEGST MIR IM HERZEN<br />
DARK EYES<br />
ROMANZE <strong>IN</strong> F op.50<br />
WALTZ FROM SWAN LAKE<br />
LA PRIMAVERA<br />
ODE AN DIE FREUDE<br />
021<br />
022<br />
023<br />
024<br />
025<br />
026<br />
027<br />
028<br />
029<br />
030<br />
SONAT<strong>IN</strong>E <strong>IN</strong> G<br />
POLOVETZIAN DANCE<br />
MENUETT <strong>IN</strong> G<br />
WILDER REITER<br />
ALLEGRO<br />
ANDANTE<br />
J<strong>IN</strong>GLE BELLS<br />
STILLE NACHT<br />
O COME ALL . . .<br />
GOOD K<strong>IN</strong>G WENCESLAS<br />
031 TRÄUMEREI<br />
032<br />
033<br />
034<br />
035<br />
036<br />
037<br />
038<br />
039<br />
040<br />
MEXICAN HAT DANCE<br />
TW<strong>IN</strong>KLE TW<strong>IN</strong>KLE LITTLE STAR<br />
MARY HAD A LITTLE LAMB<br />
SUR LE PONT D'AVIGNON<br />
OH! CHRISTMAS TREE<br />
OH! SUSANNA<br />
LONDON BRIDGE<br />
MY DARL<strong>IN</strong>G CLEMENT<strong>IN</strong>E<br />
FRÈRE JACQUES<br />
041<br />
042<br />
043<br />
044<br />
045<br />
046<br />
047<br />
048<br />
049<br />
050<br />
YANKEE DOODLE<br />
RED RIVER VALLEY<br />
CIELITO L<strong>IN</strong>DO<br />
ARIA SULLA IV CORDA<br />
ROSE DEL SUD<br />
DANZA DELLE ORE<br />
ONDE DEL DANUBIO<br />
RADETZKY MARCH<br />
M<strong>IN</strong>UETTO (Bach)<br />
RONDÒ (Clementi)<br />
051<br />
052<br />
053<br />
054<br />
055<br />
056<br />
057<br />
058<br />
059<br />
060<br />
FASC<strong>IN</strong>ATION<br />
BARCAROLLE<br />
IL CARNEVALE DI VENEZIA<br />
IL BR<strong>IN</strong>DISI<br />
CANTATA<br />
ALOUETTE<br />
KOMM LIEBER MAI<br />
THE FARMER <strong>IN</strong> THE DELL<br />
LIGHTLY ROW<br />
LA DONNA È MOBILE
THE SOUNDS<br />
The keyboard features 131 sounds divided into 17 fam<strong>il</strong>ies (e.g. 025-032 GUITAR).<br />
They are selected when the SOUND button is on by entering a three digit number between 001 and 131 of the SOUNDS list<br />
you w<strong>il</strong>l find at the end of the Instructions Manual.<br />
Example: for NYLON GUITAR type in number 025 (0, 2, 5 with the SELECT keyboard.)<br />
If the display shows “Disable”, this means an incorrect number has been typed in.<br />
Sounds can be selected also by using the SELECT “+ / –” buttons.<br />
By entering code 29 you w<strong>il</strong>l enable the “SELECT LOWER” function, the keyboard w<strong>il</strong>l be split and<br />
you w<strong>il</strong>l also be able to choose different sounds for the left hand; enter the code for the chosen<br />
sound.<br />
IMPORTANT: With some sounds you might notice a slight difference of volume or sound quality when playing<br />
them in different areas of the keyboard. This is an inevitable consequence of multiple sampling and not a technical problem.<br />
THE DUAL<br />
With the DUAL control, you can mix two sounds and create thousands of combinations.<br />
To mix press DUAL; the display shows “SoundMix1”; select a sound and press the<br />
SOUND button: the display shows “SoundMix2”; select the second sound that<br />
w<strong>il</strong>l be mixed with the first one.<br />
To select other sounds, keep using the SOUND button.<br />
To return to just one sound, press the DUAL button again: the display shows<br />
“Sound”. To change the volume of the two sounds, to use the “+/–“ buttons of<br />
VOLUME SECTION and to select the first or second sound, keep SOUND<br />
button pressed.<br />
THE TOUCH<br />
By pressing the TOUCH button, you w<strong>il</strong>l enable and disable the keyboard’s sensitivity<br />
to touch (dynamics).<br />
THE TRANSPOSER<br />
The TRANSPOSER +/– controls shift the whole keyboard tonality by +/– 12<br />
semitones.<br />
By pressing one of the two buttons, the display temporar<strong>il</strong>y shows the current<br />
value.<br />
The TRANSPOSER variation is always indicated on the display by the “< Tr “ or “<br />
Tr > “ signs. By simultaneously pressing the “+/–“ buttons of TRANSPOSER, you w<strong>il</strong>l<br />
return to the standard 00 value.<br />
fAMILY SOUNDS LIST<br />
GUITAR<br />
025 - 032<br />
025 NYLON GUITAR<br />
026 STEEL GUITAR<br />
027 JAZZ GUITAR<br />
028 CLEAN GUITAR<br />
029 MUTED GUITAR<br />
030 OVERDR. GUITAR<br />
031 DISTORT. GUITAR<br />
032 HARMON. GUITAR<br />
THE PIANO<br />
With the PIANO button, the PIANO sound and the chord identifier w<strong>il</strong>l be immediately enabled on the whole<br />
keyboard.<br />
7<br />
ENGLISH
THE METRONOME<br />
The metronome helps you to learn the music, giving the beat during musical exercises and simulating the traditional time-marking<br />
instrument.<br />
It can be turned on and off with the METRONOME button. To change the tempo, use the “TEMPO +/–“ buttons. To set the volume,<br />
press the STYLE or SONG button and use the VOLUME SECTION +/– button.<br />
THE KEYBOARD<br />
It has 61 professional pace keys and can be used in the following ways:<br />
8<br />
Chart of general BEATS for the METRONOME.<br />
1. When simply turned on, one single sound is enabled over the whole keyboard, together with the chord identifier.<br />
2. By pressing the FULL KEYB/SPLIT button, the keyboard w<strong>il</strong>l be divided into two sections: one dedicated to<br />
accompaniment to form chords (keys on the left) and the other one to play the melody (keys on the right).<br />
It is possible to set the point where the keyboard w<strong>il</strong>l be divided into two modes:<br />
a. by entering 24, the display indicates “Split 19”; this<br />
means that the left part of the keyboard goes from the<br />
first to the nineteenth key.<br />
b. by entering 25, the display indicates “Split 24”; this<br />
means that the left part of the keyboard goes from the<br />
first to the twenty-fourth key.<br />
The keyboard on the display shows the division point<br />
with an arrow.<br />
Voice in musical scores<br />
Largo<br />
Larghetto<br />
Adagio<br />
Andante<br />
Moderato<br />
Allegro<br />
Presto<br />
Prestissimo<br />
Chords can be played in the FREE CHORD mode, which means in the traditional way, or in the EASY CHORD mode, which<br />
means in the simplified mode (see the EASY CHORD paragraph).<br />
THE BEND<strong>IN</strong>G AND MODULATION CONTROLS<br />
To the left of the keyboard there are three keys, two BEND (Pitch Bending) and one MODUL (Modulation).<br />
When playing a note and pressing one of the two BEND keys you w<strong>il</strong>l hear a variation in the frequency of<br />
the note. This simulates the “pulling” of a string on an instrument such as the guitar. The “Modulation” control<br />
modulates the frequency of the sound.<br />
THE SOUNDS OF THE LEFT PART OR LOWER<br />
The sounds for the ACCOMPANIMENT, when the rhythm is not playing, can be selected by entering 29 (SELECT LOWER) and<br />
the corresponding number in the SOUNDS list.<br />
To set the volume of the accompaniment section, use the VOLUME SECTION<br />
+ / – buttons;<br />
The display shows “Lower Vol” and the value of the volume.<br />
By keeping the button pressed, the variation w<strong>il</strong>l continue.<br />
To return to the standard volume, simultaneously press the + and – buttons of<br />
the VOLUME SECTION.<br />
TEMPO<br />
40 - 60<br />
60 - 66<br />
66 - 76<br />
76 - 108<br />
108 - 120<br />
120 - 168<br />
168 - 200<br />
200 - 240
THE STYLES<br />
The keyboard has 100 rhythmic styles enriched<br />
by automatic accompaniments and completed by<br />
drums.<br />
They are sub-divided into 12 fam<strong>il</strong>ies (e.g. 015-<br />
023 DANCE) , see the list on page 94.<br />
To select them press the STYLE button and then<br />
a 3 digit figure from the STYLES list.<br />
Example: to select DISCO 70 rhythm, digit number<br />
019 (0, 1, and 9).<br />
You can also select rhythms using buttons “+ / –” of SELECT.<br />
To start or to stop a rhythm press the START/STOP button.<br />
To increase or decrease the speed of the song press the two buttons TEMPO + and TEMPO – .<br />
By holding the button pressed down, the variation becomes continuous.<br />
To go back to standard rhythm press buttons TEMPO + and TEMPO – together.<br />
The metronome icon of the display shows the musical quarters and the beginning of every beat or measure.<br />
When a rhythm is on function and you select a new style this latter starts at the end of the previous<br />
rhythm pattern.<br />
To adjust the volume of the accompaniment section, use the VOLUME SECTION + / – buttons.<br />
The display w<strong>il</strong>l show “Acc. Vol.” with the value of the volume. By holding the button pressed down,<br />
the variation becomes continuous. To restore the standard volume press together buttons VOLUME<br />
SECTION + and VOLUME SECTION –.<br />
THE PIANIST STYLES<br />
The PIANIST styles are automatic accompaniments created with the piano alone.<br />
To select them, press the STYLE button and enter a three digit number from the<br />
PIANIST list. See the STYLES list at the end of the Instructions Manual.<br />
ARRANGER A, B<br />
By pressing the ARRANGER A / B control, you w<strong>il</strong>l be able to switch between a<br />
basic rhythm style and one with a variation.<br />
The display shows the selected mode by showing “Arranger A” or “Arranger B”.<br />
LARGE<br />
With the LARGE control, you can elaborate further on the arrangement of the rhythm style.<br />
The display shows “Large”.<br />
EASY PLAY<br />
Depending on the rhythm, EASY PLAY sets the tone for the right hand, the best<br />
tempo for the performance and splits the keyboard to play chords in the fREE<br />
CHORD mode.<br />
TEMPO<br />
The “ + / – ” TEMPO buttons can be used to set the tempo of the rhythm or of a song.<br />
fAMILY STYLES LIST<br />
DANCE<br />
015 - 023<br />
015 TECHNO<br />
016 HOUSE<br />
017 RAP<br />
018 SKA<br />
019 DISCO 70<br />
020 DISCO 1<br />
021 DISCO 2<br />
022 DISCO SAMBA<br />
023 HULLY GULLY<br />
fAMILY STYLES LIST<br />
PIANIST<br />
088 - 095<br />
088 8 BEAT<br />
089 16 BEAT<br />
090 BALLAD<br />
091 ROMANTIC<br />
092 SW<strong>IN</strong>G<br />
093 BLUES<br />
094 ROCK'N ROLL<br />
095 BOSSANOVA<br />
9<br />
ENGLISH
<strong>IN</strong>TRO / END<strong>IN</strong>G<br />
When a rhythm is stopped, by pressing the <strong>IN</strong>TRO button the display w<strong>il</strong>l show<br />
“Intro” and a rhythm style is predisposed, and a preliminary music sequence w<strong>il</strong>l<br />
then starts when you press the START / STOP or KEY START buttons.<br />
When a rhythm is on, by pressing the END<strong>IN</strong>G button, a final musical sequence<br />
stars.<br />
FILL <strong>IN</strong><br />
When a rhythm is on function and you press the FILL <strong>IN</strong> button you produce a rhythmic variation of the drums.<br />
KEY START<br />
The KEY START function can be switched on when the rhythm is not playing; the<br />
display shows “Key Start”.<br />
If the keyboard is split, you can activate the rhythm by playing a chord in the left part<br />
of the keyboard.<br />
If it is not split, play a chord including at least three keys anywhere on the keyboard.<br />
BREAK<br />
By pressing the BREAK control during the performance of a rhythm style, you w<strong>il</strong>l<br />
activate an orchestral ‘break’.<br />
By pressing BREAK when the rhythm is not playing, a brief introductive orchestral<br />
break w<strong>il</strong>l be executed. The display shows “Intro”.<br />
BREAK replaces the END<strong>IN</strong>G's execution<br />
FUNCTIONS<br />
ARRANGER ON / OFF<br />
When a rhythm is functioning it starts or stops the arrangement of the rhythm.<br />
To start press number 20 ARRANGER ON (usually on) and to stop press number 21<br />
ARRANGER OFF.<br />
FREE CHORD<br />
Chords are played in the traditional way and all the main chords are identified.<br />
It can be enabled by entering 22 FREE CHORD or by selecting EASY<br />
PLAY.<br />
The fREE CHORD mode works across the whole keyboard too when fULL<br />
KEYBOARD is on.<br />
The display shows the name of the chord.<br />
EASY CHORD<br />
This function allows you to compose chords on the left side<br />
of the keyboard with the simplified mode:<br />
one key w<strong>il</strong>l provide a major chord;<br />
two keys a minor chord and<br />
three keys a dominant 7th chord.<br />
It can be enabled by entering 23 EASY CHORD.<br />
The fundamental note of the chord (the most important one<br />
and the one that gives the name to the chord) is represented<br />
by the key pressed on the far left. for example, by pressing<br />
simultaneously C, D and E, you w<strong>il</strong>l get a C7 dominant chord.<br />
10<br />
MAJOR<br />
CHORD<br />
M<strong>IN</strong>OR<br />
CHORD<br />
Anglo-Saxon notation<br />
Latin notation<br />
German notation<br />
SEVENTH<br />
CHORD
SPLIT 19 or SPLIT 24<br />
It is possible to set the point where the keyboard w<strong>il</strong>l be divided in two ways:<br />
a. by entering 24, the display indicates “Split 19”; this means that the left side of the keyboard goes from the first to the nineteenth<br />
key.<br />
b. by entering 25, the display indicates “Split 24”; this means that the left side of the keyboard goes from the first to the<br />
twenty-fourth key.<br />
The keyboard on the display shows the division point with an arrow.<br />
Chords can be played in the fREE CHORD mode, which means in the traditional way, or in the EASY CHORD mode, which means<br />
in the simplified mode (see the EASY CHORD paragraph).<br />
DICTIONARY<br />
The DICTIONARY function shows the name of a chord, the notes that it includes on the pentagram and the keys required to compose<br />
the chord on the display. (See chart on page 15). It can be enabled by entering 26; the display shows “Dictionary”.<br />
By pressing a key within the first two octaves on the left, you can choose the basic tonality C, D, E, f, G, A or B with the corresponding<br />
“ ” (flats) or “ ” (sharps) and the kind of chord in the last octave on the right.<br />
DJ GROOVE (<strong>TK</strong> <strong>82</strong>)<br />
DJ GROOVE activates a DRUM MACH<strong>IN</strong>E on the keyboard.<br />
Each key corresponds to a percussion rhythm, a groove<br />
effect or vocal effects which can by played individually or<br />
combined.<br />
DJ STYLE (<strong>TK</strong> <strong>78</strong>)<br />
The DJ STYLE control activates the DJ effects on the last<br />
13 keys on the keyboard and sets a rhythmic style and a<br />
sound adapt for a DJ. The style and sound can however be<br />
changed and the DJ effects used in the same way.<br />
GROUND ON / OFF<br />
When a rhythm is active, and so is fREE CHORD, the GROUND provides a musical background for the arrangement.<br />
It can be enabled with 27 GROUND ON (it is usually active as a standard) and disabled with 28 GROUND OFF.<br />
SELECT LOWER<br />
The sounds for the ACCOMPANIMENT, when the rhythm is not playing, can be selected by entering 29 SELECT LOWER and the<br />
corresponding number in the SOUNDS list.<br />
To set the volume of the accompaniment section, use the VOLUME SECTION + / – buttons;<br />
The display shows “Lower Vol” and the value of the volume. By keeping the button pressed, the variation w<strong>il</strong>l continue.<br />
To return to the standard volume, simultaneously press the + and – buttons of the VOLUME SECTION.<br />
MANUAL DRUM ON / OFF<br />
The MANUAL DRUM allows you to play rhythm patterns using the keys indicated with the percussion instrument symbols.<br />
It can be enabled with 30 MANUAL DRUM ON and disabled with 31 MANUAL DRUM OFF.<br />
The display temporar<strong>il</strong>y shows “Drum On” or “Drum Off”<br />
To set the volume, use VOLUME SECTION wh<strong>il</strong>e the STYLE control is active and the led lit.<br />
At the end of the Instructions Manual, the ‘DRUM SET TABLE’ chart lists the rhythm instruments.<br />
The rhythm elements come out of the right or left speaker, with a stereophonic mix.<br />
MEDLEY SONG ON / OFF<br />
This function allows you to listen to all the songs one after the other, starting with the one you selected. It can be enabled by entering<br />
32 MEDLEY SONG ON and disabled with 33 MEDLEY SONG OFF.<br />
11<br />
ENGLISH
THE EFFECTS<br />
The effects modify the tone-colour characteristics of the sounds.<br />
PORTAMENTO ON / OFF<br />
The portamento creates a pitch slide between two keys; it is more evident when two keys far<br />
away one from the other are played. It can be enabled by entering 34 PORTAMENTO ON<br />
and disabled with 35 PORTAMENTO OFF.<br />
EQUALIZER SELECT<br />
It allows you to choose among four different equalisations that intensify treble or bass frequencies.<br />
By entering 36, the display shows “Disco”, and bass frequencies are more intense; middle frequencies are more intense with 37<br />
“Jazz” and 38 “Classic”; 39 “Flat” intensifies treble frequencies.<br />
IMPORTANT: When connecting the keyboard to an external amplification, it is better to choose a middle frequency equalisation and, most important,<br />
to set the initial volume level at minimum.<br />
REVERB SELECT<br />
The reverb effect allows you to hear sounds as if they were produced in a big hall. You can choose between eight different types of<br />
reverb. By entering 40 you w<strong>il</strong>l have “Room-1”, with 41 “Room-2”, with 42 “Room-3”, with 43 “Hall-1”, with 44 “Hall-2”, with<br />
45 “Plate”, with 46 “Delay”, with 47 “Pan Delay” and with 48 “Reverb Off” you can turn the reverb effect off.<br />
CHORUS SELECT<br />
The ‘chorus’ effects enrich the SOUNDS section with special modulations that penetrate to a greater or lesser degree depending<br />
on the selected sound.<br />
You can choose between eight different types of chorus. By entering 50 you can have the “Chorus-1” effect, with 51 “ Chorus-2”,<br />
with 52 “ Chorus-3”, with 53 “ Chorus-4”, with 54 “Feed Back”, with 55 “Flanger”, with 56 “Short Delay”, with 57 “FB<br />
Delay” and with 58 “Chorus Off” you can turn the chorus effect off.<br />
TOUCH SELECT (<strong>TK</strong> <strong>82</strong>)<br />
five dynamic levels can be chosen: typing in code 60 enables the VERY SOFT level; 61 the SOFT level, 62 the NORMAL level,<br />
63 the HARD level and 64 the HEAVY level. The 62 NORMAL level is usually activated.<br />
SEQUENCER<br />
The sequencer section allows you to record and listen to everything you play. The Sequencer also allows you to check your learning<br />
level; the musician can play the melody, record it wh<strong>il</strong>e listening to a song and then listen to the result.<br />
It can be enabled by pressing the REC. button. The display shows “Record On” to show that the Sequencer is active.<br />
Press REC. again to stop recording and then press PLAY to listen to what has been recorded.<br />
Press PLAY again to stop listening.<br />
You can memorize up to 500 events.<br />
When the memory is full, the display temporar<strong>il</strong>y shows “Sequen.Full” and the<br />
“Record” sign vanishes.<br />
After a recording session, wh<strong>il</strong>e PLAYis active, variations made on the control panel<br />
can alter recorded events.<br />
Recorded data is memorised as long as the keyboard is switched on. If nothing has<br />
been recorded in the Sequencer, by pressing PLAY the display w<strong>il</strong>l temporar<strong>il</strong>y show “SequenEmpty”.<br />
MAESTRO<br />
The MAESTRO section helps you in the music learning process just as if a real musical teacher<br />
were there with you, teaching you five fundamental aspects:<br />
1. Tempo 2. Notes 3. Melody 4. Chords 5. Accompaniment<br />
12
DISPLAY DIRECTIONS<br />
Press a key on the keyboard. The display shows which key you are pressing and the relative note w<strong>il</strong>l be shown on the pentagram.<br />
1 st level: Tempo of the song<br />
At the 1st level, you can become fam<strong>il</strong>iar with the melody notes and learn the tempo of the song.<br />
=== How to do it:<br />
After having chosen a tune, select level 1 first<br />
by pressing the MAESTRO button and then,<br />
when the display shows “LEVEL ?”, number<br />
1 of SELECT.<br />
Use the START/STOP control to start and<br />
stop the performance. You can quicken or slow<br />
down the tempo by using the TEMPO “+/–“<br />
buttons. The song begins with a musical introduction, shown in the middle of the display as “Intro”.<br />
When the “Intro” sign disappears, try playing the melody by pressing one or more keys and keeping time with the orchestra.<br />
During your performance, the display w<strong>il</strong>l show the correct notes of the melody.<br />
The accompaniment w<strong>il</strong>l automatically follow you.<br />
You w<strong>il</strong>l be able to change tune by pressing the corresponding button on the SONGS list, or by using the SELECT “+ / –“ buttons.<br />
If you wish to listen to the whole song, press START/STOP, then press SONG and then START/STOP again.<br />
2 nd level: The Notes of the melody<br />
When you are able to keep time you can try the 2nd level, which means playing the correct keys to perform the correct melody.<br />
=== How to do it:<br />
After having chosen a tune, select the 2nd level by pressing the MAESTRO button and then SELECT number 2.<br />
Use the START/STOP control to start and stop the performance.<br />
When the intro has ended, try playing the melody; this time you w<strong>il</strong>l have to press the correct buttons for the other ones not to play.<br />
The display w<strong>il</strong>l help by showing you the correct melody keys in advance.<br />
The accompaniment w<strong>il</strong>l automatically follow your performance.<br />
3 rd level: The song Melody<br />
This time the accompaniment w<strong>il</strong>l play normally, without waiting for you. This means you w<strong>il</strong>l have to perform the melody with the<br />
right keys wh<strong>il</strong>e keeping time, or else the song w<strong>il</strong>l sound out of tune.<br />
=== How to do it:<br />
After having chosen a song, select the 3rd level by pressing the MAESTRO button and then the SELECT number 3.<br />
Use the START/STOP control to start and stop the performance.<br />
When the intro has ended, try playing the melody of the song.<br />
The display w<strong>il</strong>l help by showing notes and keys for the melody.<br />
13<br />
ENGLISH
4 th level: The song Chords<br />
At this level the song w<strong>il</strong>l be played with the rhythm section and the melody; you w<strong>il</strong>l be able to play the accompaniment chords using the left<br />
side of the keyboard. If you do not play the right chord, the rhythm part w<strong>il</strong>l keep on going with the last chord and the melody w<strong>il</strong>l stop.<br />
=== How to do it:<br />
After having chosen a song, select the 4th level by pressing the MAESTRO button and then SELECT number 4.<br />
Use the START/STOP control to start and stop the performance. When starting you w<strong>il</strong>l always have a metronome counting for<br />
you. Play the first chord and then the others, following the directions shown on the display. If you play a wrong chord, the melody<br />
w<strong>il</strong>l not play, and if you play it at the wrong time, accompaniment and melody w<strong>il</strong>l be out of tempo.<br />
To make the first lessons easier, try slowing the tempo of the song, using the TEMPO + and – buttons.<br />
The display w<strong>il</strong>l help by showing the name of the chord, the keys and the notes on the pentagram.<br />
There are two ways of playing chords:<br />
• Free Chord for playing chords in the traditional way. • Easy Chord for playing simplified chords.<br />
To choose the desired mode, see the “fUNCTIONS” paragraph.<br />
5 th level: Accompaniment with orchestra<br />
At this level the song w<strong>il</strong>l be played with the drums rhythm section together with the melody and you w<strong>il</strong>l be able to play the accompaniment.<br />
Rhythm and melody w<strong>il</strong>l keep going so you w<strong>il</strong>l have to play the right chord in time, or else it w<strong>il</strong>l be out of tune.<br />
=== How to do it:<br />
After having chosen a song, select the 5th level by pressing the MAESTRO button and then the SELECT number 5. Use the START/<br />
STOP control to start and stop the performance.To start the complete accompaniment, play the first chord following the directions<br />
shown on the display. The display w<strong>il</strong>l help by showing the name of the chord, the keys and the notes on the pentagram.<br />
There are two ways of playing chords:<br />
• Free Chord for playing chords in the traditional way.<br />
• Easy Chord for playing simplified chords.<br />
To choose the desired mode, see the “fUNCTIONS” paragraph.<br />
Strip with numbers and letters<br />
Position the strip with numbers and letters above the<br />
keyboard as shown in the picture.<br />
The numbers on the strip correspond to the keys that<br />
have to be pressed in order to play the tune of the<br />
simplified scores contained in the enclosed "fARfISA<br />
Music Book".<br />
PROBLEM<br />
It does not switch on<br />
No sound when the keyboard is played.<br />
The automatic accompaniment does not play.<br />
No sound is produced when the MIDI data are reproduced<br />
from a computer.<br />
Reproduction on the keyboard produces an unnatural sound<br />
when the keyboard is connected to a computer.<br />
When a mob<strong>il</strong>e phone is used you can hear a noise.<br />
No sound is produced even when the keyboard is played or<br />
reproducing a song.<br />
The sound of the voice changes from note to note.<br />
Any other anomalies.<br />
14<br />
8. TROUBLE SHOOT<strong>IN</strong>G GUIDE<br />
POSSIBLE CAUSE AND SOLUTION<br />
Problem with the power supply.<br />
<strong>Con</strong>nect the adaptor correctly. Ensure that the battery poles (+/-) are facing the correct<br />
direction, and control that the batteries are charged.<br />
The volume is set at a level that is too low.<br />
Use the VOLUME MASTER keys to raise the volume.<br />
The accompaniment volume is set at 0.<br />
Use the VOLUME SECTION keys to raise the volume.<br />
The MIDI cables are not connected correctly.<br />
<strong>Con</strong>nect the MIDI cables correctly.<br />
The MIDI THRU function of the computer is activated.<br />
Deactivate the MIDI THRU function of the computer.<br />
The use of a mob<strong>il</strong>e phone near to the computer may cause interference. To prevent this<br />
problem, switch the mob<strong>il</strong>e phone off or use it at a distance from the keyboard.<br />
<strong>Con</strong>trol that the headphones are not connected to the PHONES/OUTPUT socket of<br />
the rear panel. When headphones are connected to this socket, no sound is transmitted.<br />
The method of sound generation uses multiple recordings (samples) of one instrument<br />
on the whole extension of the keyboard. It is therefore normal that the sound of the voice<br />
differs slightly from note to note.<br />
Switch off and then switch back on after a few seconds
When using electrical products, basic precautions must be followed,<br />
including the following:<br />
1. Read all the instructions before using the product.<br />
2. When the product is used by ch<strong>il</strong>dren, supervision by an<br />
adult is advised.<br />
3. Do not use the product near water, for example near a<br />
bath tub, washbowl, kitchen sink, or near a swimming pool<br />
etc., or in a wet or humid basement.<br />
4. When connecting to the mains<br />
supply ensure that:<br />
a) your hands are not wet (to<br />
avoid electric shocks);<br />
b) do not pull on the cable.<br />
5. This product, either by itself, or when connected to an<br />
external amplifier and headphones or speakers, is capable<br />
of producing sound levels that can cause damage to hearing.<br />
Do not operate it for a long period of time at high volume<br />
levels or in any case at an uncomfortable volume level.<br />
Especially when using headphones, always moderate the<br />
volume.<br />
6. The product should be positioned<br />
so that it’s location w<strong>il</strong>l<br />
provide adequate vent<strong>il</strong>ation.<br />
7. The product should be positioned<br />
away from heat sources<br />
such as radiators, heaters or<br />
other products that produce<br />
heat.<br />
8. This product should only be connected to a power supply<br />
of the voltage corresponding to that shown on the label on<br />
the instrument using an AC/DC adaptor. This label, containing<br />
all electrical data, relevant warning messages and the<br />
instrument identification data, can be found on the underside<br />
of the product.<br />
C<br />
Cm<br />
C7<br />
C7+<br />
Cm7<br />
Cdim<br />
Csus4<br />
C6<br />
C5<br />
9. MA<strong>IN</strong>TENANCE AND REMARKS<br />
• Keep this manual for future reference. •<br />
10. TABLE OF DICTIONARY<br />
C5<br />
C9<br />
C7 9<br />
C7 9<br />
C7 5<br />
C7 9 5<br />
C9 7+<br />
C7 9 5<br />
C7 9 5<br />
9. If the product is not used for long periods, the AC/DC<br />
adaptor should be unplugged from mains.<br />
10. The adaptor must be connected directly to the mains supply<br />
without any other plugs.<br />
11. Do not obstruct the air entry<br />
points of the feeder with objects<br />
such as curtains, cloths, etc.<br />
12. Do not place the adaptor<br />
behind furniture or in hidden places.<br />
13. Do not place sticky or adhesive objects on the keyboard,<br />
such as burning candles.<br />
14. Care should be taken to avoid foreign objects falling into or<br />
liquid being spl<strong>il</strong>t into the inside of the instrument through<br />
any of the slots or openings in the case.<br />
15. Ensure that the adapter is sufficiently vent<strong>il</strong>ated and that<br />
the vent<strong>il</strong>ation slits are not covered with objects such as<br />
newpapers, tablecloths, curtains, etc..<br />
16. Do not expose the keyboard or the adaptor to drops or<br />
sprays of any kind of liquid.<br />
17. This product should be referred to an approved service<br />
centre when: a) It has been exposed to rain. b) It appears<br />
to operate incorrectly or shows a marked change in performance.<br />
c) It has been dropped or if the case has been<br />
damaged. d) Objects have fallen into the instrument or<br />
liquid has been sp<strong>il</strong>t into or over it. e) The AC/DC adaptor<br />
has been damaged.<br />
18. Never attempt to repair your instrument yourself. Any<br />
operation should be referred to authorized personnel,<br />
otherwise the guarantee w<strong>il</strong>l be declared void.<br />
19. Do not use alcohol, solvents or sim<strong>il</strong>ar chemical substances<br />
for cleaning. Use a soft cloth dampened in a bland solution<br />
of water and neutral detergent. Dip the cloth in the solution<br />
and then wring it unt<strong>il</strong> it is nearly dry.<br />
C7 5<br />
C7 9 5<br />
Cm7+<br />
Cm9 7+<br />
Cm7 5<br />
Cm9 5<br />
C7 9sus4<br />
Cm6<br />
Cm6 9<br />
C7+ 5<br />
C7+ 5<br />
Cm7 9<br />
C7 4 9<br />
C7dim<br />
C6 9<br />
C7 4<br />
C7 9<br />
Cm7 5<br />
15<br />
ENGLISH
What is “MIDI”<br />
The initials MIDI are an abbreviation for "Musical Instrument Digital Interface" and represent a standard for the transmission<br />
of data via cable between a musical instrument (usually a keyboard) and a Personal Computer (or another musical<br />
instrument).<br />
The General MIDI System (General Midi)<br />
This keyboard adopts the MIDI General System (General Midi): a standard that allows to receive or send MIDI data<br />
(to a personal computer or to another keyboard) without having problems of compatib<strong>il</strong>ity deriving from the different<br />
brands of the product. The general MIDI system specifies factors like the numeration of sounds, the ava<strong>il</strong>able MIDI<br />
channels etc.<br />
The keyboard is provided with MIDI <strong>IN</strong> and OUT sockets which enable the user to connect it to a Personal Computer<br />
using a cable (not supplied). This can be connected as indicated in the figure: <strong>Con</strong>nect the <strong>IN</strong> and OUT plugs to the keyboard<br />
and the connector to the JOYSTICK socket (games socket) of the Personal Computer.<br />
SYSTEM REQUIREMENTS<br />
Personal Computer with Windows 95/98 operative system, Windows 2000/M<strong>il</strong>lennium, Windows XP equipped<br />
with a GAMES portal. It is indicated also as the JOYSTICK portal.<br />
PROCEDURE<br />
<strong>Con</strong>nect the cable to the MIDI <strong>IN</strong> and MIDI OUT portals of the keyboar. follow the instructions on the connectors.<br />
<strong>Con</strong>nect the connector to the JOYSTICK portal (as in the diagram shown below). This operation can be carried out even<br />
with the computer switched on.<br />
16<br />
OUT<br />
11. CONNECTION TO A PERSONAL COMPUTER<br />
<strong>IN</strong><br />
COMPUTER
To open the control panel, select:<br />
- START<br />
- then LAYOUT<br />
- and finally CONTROL PANEL.<br />
Double click on<br />
Sound and audio peripheral<br />
This window w<strong>il</strong>l open:<br />
CONFIGURATION OF THE COMPUTER - Windows XP<br />
Chose the AUDIO f<strong>il</strong>e<br />
It is necessary to select a peripheral that corresponds with the<br />
MIDI Music Reproduction MENU, which guides the MIDI data to<br />
the outside. The name of this peripheral varies according to the<br />
Audio f<strong>il</strong>e present in the computer; the most commonly found is<br />
MPU-401<br />
NOTE: If it is not possible to recognise the peripheral, try in turn all of<br />
those present (normally there are not more than two or three), unt<strong>il</strong> the<br />
correct one is found.<br />
Click on OK<br />
Now the computer is configured to use the external MIDI interface and<br />
every MIDI f<strong>il</strong>e w<strong>il</strong>l be reproduced on the keyboard.<br />
N.B.: even if the procedure is very simple, it can become difficult in the<br />
presence of particular computer configurations. In this case it is advisable<br />
to contact a computer technician who w<strong>il</strong>l eas<strong>il</strong>y be able to resolve the<br />
problem. (<strong>Con</strong>tinues on page 19 par. “System function test”).<br />
17<br />
ENGLISH
CONFIGURATION OF THE COMPUTER - Windows 2000 / M<strong>il</strong>lennium<br />
To open the control panel, select:<br />
- START then LAYOUT<br />
- and finally CONTROL PANEL.<br />
- Double click on Multimedia<br />
This window w<strong>il</strong>l open:<br />
18<br />
Chose the<br />
AUDIO f<strong>il</strong>e.<br />
It is necessary to<br />
select a peripheral<br />
that corresponds<br />
with the MIDI<br />
Music Reproduction MENU, which guides the MIDI data to the outside. The<br />
name of this peripheral varies according to the Audio f<strong>il</strong>e present in the<br />
computer; the most commonly found is MPU-401.<br />
NOTE: If it is not possible to recognise the peripheral, try in turn all of those<br />
present (normally there are not more than two or three), unt<strong>il</strong> the correct one<br />
is found. Click on OK<br />
Now the computer is configured to use the external MIDI interface and every<br />
MIDI f<strong>il</strong>e w<strong>il</strong>l be reproduced on the keyboard.<br />
N.B.: even if the procedure is very simple, it can become difficult in the presence<br />
of particular computer configurations. In this case it is advisable to contact a computer technician who w<strong>il</strong>l eas<strong>il</strong>y be<br />
able to resolve the problem. (<strong>Con</strong>tinues on page 19 par. “System function test”).<br />
CONFIGURATION OF THE COMPUTER - Windows 95 / 98<br />
To open the control panel, select:<br />
- START<br />
- then LAYOUT<br />
- and finally CONTROL PANEL.<br />
Double click on Multimedia<br />
Chose the MIDI<br />
f<strong>il</strong>e<br />
It is necessary to select a peripheral that corresponds with the MIDI Music<br />
Reproduction MENU, which guides the MIDI data to the outside.<br />
The name of this peripheral varies according to the Audio f<strong>il</strong>e present in the<br />
computer; the most commonly found is MPU-401<br />
NOTE: If it is not possible to recognise the peripheral, try in turn all of those<br />
present (normally there are not more than two or three), unt<strong>il</strong> the correct one<br />
is found.<br />
Click on OK<br />
This window w<strong>il</strong>l open:
Now the computer is configured to use the external MIDI interface and every MIDI f<strong>il</strong>e w<strong>il</strong>l be reproduced on the keyboard.<br />
N.B.: even if the procedure is very simple, it can become difficult in the presence of particular computer configurations.<br />
In this case it is advisable to contact a computer technician who w<strong>il</strong>l eas<strong>il</strong>y be able to resolve the problem.<br />
SYSTEM FUNCTION TEST<br />
On the computer’s hard disk, search for a MIDI f<strong>il</strong>e (*.mid).<br />
Double-click on the f<strong>il</strong>e name. Now the window of the W<strong>IN</strong>DOWS Media Player w<strong>il</strong>l<br />
appear. The keyboard w<strong>il</strong>l begin to play.<br />
Note: If a programme was installed on the computer that uses the Midi f<strong>il</strong>es, it is probable<br />
that the operation w<strong>il</strong>l activate that programme.<br />
In such a case, you can try out the system by manually activating the Media Player by<br />
loading it among the programmes.<br />
You can also use the programme that was activated automatically. But in this case the<br />
use of the external MIDI port must be reconfigured.<br />
Other connection options<br />
If the computer is not provided with the JOYSTICK socket but with MIDI <strong>IN</strong> and MIDI OUT sockets, it is an option to purchase<br />
two standard MIDI cables from your local personal computer centre or electrical outlet.<br />
for computers provided with sockets RS -422 / USB, etc. buy the most suitable cables and MIDI interface from the your<br />
local personal computer centre or electrical outlet.<br />
MIDI interface<br />
Possible malfunctions<br />
If the instrument does not play:<br />
• Check whether the Media Player programme is running; the bar should be moving.<br />
• Make sure that the MIDI properties in the multimedia section are configured correctly.<br />
• Make sure the cable is properly connected to the instrument (the writing MIDI In and MIDI Out on the labels placed<br />
on the plugs must be the same as the one on the instrument).<br />
• If another programme is active, check if the external Midi port was reconfigured.<br />
Usable Programmes<br />
In addition to W<strong>IN</strong>DOWS Media Player, many other computer programmes are commercially ava<strong>il</strong>able. They offer the<br />
possib<strong>il</strong>ity to expand the range of functions of the keyboard. Some allow the registration of pieces in Midi format. In other<br />
cases, it is possible to register on the computer what is being played on the keyboard. Later, the piece can be replayed,<br />
and its musical score can be visualised or printed. It is also possible to correct errors, change sounds, etc.<br />
Many of these software programmes are also ava<strong>il</strong>able on the Internet in Demo or Shareware format.<br />
How to find the Midi F<strong>il</strong>es<br />
On the Internet or in music stores, countless Midi f<strong>il</strong>es can be found for modern or classical music of all kinds. They can<br />
be played with the keyboard, or used as an orchestral base to play a melody.<br />
Note: The Midi f<strong>il</strong>es ava<strong>il</strong>able on the Internet have sometimes been made for specific instruments. Some are Midi devises<br />
that do not respect the MIDI standard, others have their own specific additional functions. In such cases, it is possible that<br />
the musical piece w<strong>il</strong>l not be played with the same sounds and effects that are supposed to be used. In any event, the<br />
keyboard respects the GM standard, and has many commonly used functions that can be seen on the map on the instrument’s<br />
manual.<br />
19<br />
ENGLISH
Midi Message<br />
NOTE OFF<br />
NOTE ON<br />
PROGRAM CHANGE<br />
PITCH BEND<br />
CTRL 06<br />
CTRL 07<br />
CTRL 10<br />
CTRL 11<br />
CTRL 64<br />
CTRL 100<br />
CTRL 101<br />
CTRL 120<br />
CTRL 121<br />
CTRL 123<br />
RPN 0000H<br />
Real Time Message “Start”<br />
Real Time Message “Stop”<br />
Real Time Message “Clock”<br />
Midi Code<br />
(decimal)<br />
35<br />
36<br />
37<br />
38<br />
39<br />
40<br />
41<br />
42<br />
43<br />
44<br />
45<br />
46<br />
47<br />
48<br />
49<br />
50<br />
51<br />
52<br />
53<br />
54<br />
55<br />
56<br />
57<br />
58<br />
59<br />
92<br />
Note<br />
B1<br />
C2<br />
C#2<br />
D2<br />
D#2<br />
E2<br />
F2<br />
F#2<br />
G2<br />
G#2<br />
A2<br />
A#2<br />
B2<br />
C3<br />
C#3<br />
D3<br />
D#3<br />
E3<br />
F3<br />
F#3<br />
G3<br />
G#3<br />
A3<br />
A#3<br />
B3<br />
12. DETAILED MIDI IMPLEMENTATION<br />
Hex code<br />
8nH kk vv<br />
9nH kk vv<br />
CnH pp<br />
EnH bl bh<br />
BnH 06H cc<br />
BnH 07H cc<br />
BnH 0AH cc<br />
BnH 0BH cc<br />
BnH 40H cc<br />
BnH 64H cc<br />
BnH 65H cc<br />
BnH <strong>78</strong>H 00H<br />
BnH 79H 00H<br />
BnH 7BH 00H<br />
BnH 65H 00H<br />
64H 00H 06H vv<br />
FAH<br />
FCH<br />
F8H<br />
Instrument<br />
Kick drum2<br />
Kick drum1<br />
Side Stick<br />
Snare Drum<br />
Hand Clap<br />
Snare Drum<br />
Low Floor<br />
Closed Hi Hat<br />
High Floor Tom<br />
Pedal Hi Hat<br />
Low Tom<br />
Open Hi Hat<br />
Low Mid Tom<br />
Hi Mid Tom<br />
Crash Cymbal 1<br />
High Tom<br />
Ride Cymbal 1<br />
Chinese Cymbal<br />
Ride Bell<br />
Tambourine<br />
Splash Cymbal<br />
Cowbell<br />
Crash Cymbal 2<br />
Vibraslap<br />
Ride Cymbal 2<br />
Description / Notes<br />
Midi channel n(0-15) - Note OFF #kk(1-127) - vv is don’t care.<br />
Midi channel n(0-15) - Note ON #kk(1-127) - Velocity vv(1-127). vv=0 means NOTE OFF<br />
Program (patch) change. Please refer to sounds list<br />
Pitch bend as specified by bh|bl (14 bits)<br />
Maximum swing is +/- 2 tone (power-up). Can be changed using " pitch bend<br />
sensitivity " (RPN 00 00) . Center position is 00H 40H.<br />
Data entry : provides data to RPN and NRPN MIDI<br />
Volume (default=100)<br />
Cc = Pan (default=64 center)<br />
Expression (default=127)<br />
Sustain (damper) pedal<br />
RPN LSB<br />
RPN MSB<br />
All sounds off<br />
Reset all controllers<br />
All notes off<br />
vv = Pitch bend sensitivity in semitones (default=2)<br />
Start (only sent, not received)<br />
Stop (only sent, not received)<br />
Clock (only sent, not received)<br />
13. DRUM SET TABLE (MIDI CHANNEL 10)<br />
Midi Code<br />
(decimal)<br />
60<br />
61<br />
62<br />
63<br />
64<br />
65<br />
66<br />
67<br />
68<br />
69<br />
70<br />
71<br />
72<br />
73<br />
74<br />
75<br />
76<br />
77<br />
<strong>78</strong><br />
79<br />
80<br />
81<br />
<strong>82</strong><br />
83<br />
Note<br />
C4<br />
C#4<br />
D4<br />
D#4<br />
E4<br />
F4<br />
F#4<br />
G4<br />
G#4<br />
A4<br />
A#4<br />
B4<br />
C5<br />
C#5<br />
D5<br />
D#5<br />
E5<br />
F5<br />
F#5<br />
G5<br />
G#5<br />
A5<br />
A#5<br />
B5<br />
Instrument<br />
Hi Bongo<br />
Low Bongo<br />
Mute Hi <strong>Con</strong>ga<br />
Open Hi <strong>Con</strong>ga<br />
Low <strong>Con</strong>ga<br />
High Timbale<br />
Low Timbale<br />
High Agogo<br />
Low Agogo<br />
Cabasa<br />
Maracas<br />
Short Whistle<br />
Long Whistle<br />
Short Guiro<br />
Long Guiro<br />
Claves<br />
Hi Wood Block<br />
Low Wood Block<br />
Mute Cuica<br />
Open Cuica<br />
Mute Triangle<br />
Open Triangle<br />
Metronome Tic<br />
Metronome Toc
PIANO<br />
001 - 008<br />
CHROM<br />
PERCUSSION<br />
009 - 016<br />
ORGAN<br />
017 - 024<br />
GUITAR<br />
025 - 032<br />
BASS<br />
033 - 040<br />
STR<strong>IN</strong>GS<br />
041 - 048<br />
ENSEMBLE<br />
049 - 056<br />
BRASS<br />
057 - 064<br />
001 GRAND PIANO<br />
002 BRIGHT PIANO<br />
003 EL. GRD PIANO<br />
004 HONKY TONK<br />
005 EL. PIANO 1<br />
006 EL. PIANO 2<br />
007 HARPSICHORD<br />
008 CLAV<strong>IN</strong>ET<br />
009 CELESTA<br />
010 GLOCKENSPIEL<br />
011 MUSIC BOX<br />
012 VIBRAPHONE<br />
013 MARIMBA<br />
014 XYLOPHONE<br />
015 TUBULAR BELLS<br />
016 DULCIMER<br />
017 DRAWBAR ORGAN<br />
018 PERCUSS. ORGAN<br />
019 ROCK ORGAN<br />
020 CHURCH ORGAN<br />
021 REED ORGAN<br />
022 ACCORDION<br />
023 HARMONICA<br />
024 TANGO ACCORD.<br />
025 NYLON GUITAR<br />
026 STEEL GUITAR<br />
027 JAZZ GUITAR<br />
028 CLEAN GUITAR<br />
029 MUTED GUITAR<br />
030 OVERDR. GUITAR<br />
031 DISTORT. GUITAR<br />
032 HARMON. GUITAR<br />
033 ACOUSTIC BASS<br />
034 F<strong>IN</strong>GER BASS<br />
035 PICKED BASS<br />
036 FRETLESS BASS<br />
037 SLAP BASS 1<br />
038 SLAP BASS 2<br />
039 SYNTH BASS 1<br />
040 SYNTH BASS 2<br />
041 VIOL<strong>IN</strong><br />
042 VIOLA<br />
043 CELLO<br />
044 CONTRABASS<br />
045 TREMOLO STR<br />
046 PIZZICATO STR<br />
047 HARP<br />
048 TIMPANI<br />
049 STR<strong>IN</strong>GS ENSAMBLE 1<br />
050 STR<strong>IN</strong>GS ENSAMBLE 2<br />
051 SYNTH STR<strong>IN</strong>GS 1<br />
052 SYNTH STR<strong>IN</strong>GS 2<br />
053 CHOIR AAHS<br />
054 VOICE OOHS<br />
055 SYNTH VOICE<br />
056 ORCHESTRA HIT<br />
057 TRUMPET<br />
058 TROMBONE<br />
059 TUBA<br />
060 MUTED TRUMPET<br />
061 FRENCH HORN<br />
062 BRASS SECTION<br />
063 SYNTH BRASS 1<br />
064 SYNTH BRASS 2<br />
14. SOUNDS<br />
FAMILY SOUNDS LIST FAMILY SOUNDS LIST<br />
REED<br />
065 - 072<br />
W<strong>IN</strong>D<br />
073 - 080<br />
SYNTH LEAD<br />
081 - 088<br />
SYNTH PAD<br />
089 - 096<br />
SYNTH<br />
EFFECTS<br />
097 - 104<br />
ETHNIC<br />
105 - 112<br />
PERCUSSIVE<br />
113 - 120<br />
SOUND<br />
EFFECTS<br />
121 - 128<br />
DJ SOUNDS<br />
129 - 131<br />
065 SOPRANO SAX<br />
066 ALTO SAX<br />
067 TENOR SAX<br />
068 BARITONE SAX<br />
069 OBOE<br />
070 ENGLISH HORN<br />
071 BASSOON<br />
072 CLAR<strong>IN</strong>ET<br />
073 PICCOLO<br />
074 FLUTE<br />
075 RECORDER<br />
076 PAN FLUTE<br />
077 BLOWN BOTTLE<br />
0<strong>78</strong> SHAKUHACHI<br />
079 WHISTLE<br />
080 OCAR<strong>IN</strong>A<br />
081 SQUARE<br />
0<strong>82</strong> SAWTOOTH<br />
083 CALLIOPE<br />
084 CHIFFER LEAD<br />
085 CHARANG<br />
086 LEAD VOICE<br />
087 FIFTHS SAW<br />
088 BASS LEAD<br />
089 NEW AGE<br />
090 WARM PAD<br />
091 POLYSYNTH<br />
092 SPACE VOICE<br />
093 BLOWED GLASS<br />
094 METALLIC PAD<br />
095 HALO PAD<br />
096 SWEEP PAD<br />
097 ICE RA<strong>IN</strong><br />
098 SOUNDTRACK<br />
099 CRYSTAL<br />
100 ATMOSPHERE<br />
101 BRIGHTNESS<br />
102 GOBL<strong>IN</strong>S<br />
103 ECHO DROPS<br />
104 SCI-FI<br />
105 SITAR<br />
106 BANJO<br />
107 SHAMISEN<br />
108 KOTO<br />
109 KALIMBA<br />
110 BAG PIPE<br />
111 FIDDLE<br />
112 SHANAI<br />
113 T<strong>IN</strong>KLE BELL<br />
114 AGOGO<br />
115 STEEL DRUMS<br />
116 WOODBLOCK<br />
117 TAIKO DRUM<br />
118 MELODIC TOM<br />
119 SYNTH DRUM<br />
120 REVERSE CYMBAL<br />
121 GUITAR FRET N.<br />
122 BREATH NOISE<br />
123 SEASHORE<br />
124 BIRD TWEET<br />
125 TELEPHONE R<strong>IN</strong>G<br />
126 HELICOPTER<br />
127 APPLAUSE<br />
128 GUN SHOT<br />
129 DJ SND 1<br />
130 DJ SND 2<br />
131 DJ SND 3<br />
93
94<br />
8/16 BEAT<br />
001 - 008<br />
ROCK<br />
009 - 014<br />
DANCE<br />
015 - 023<br />
SW<strong>IN</strong>G<br />
024 - 032<br />
AMERICA<br />
033 - 044<br />
TRADITIONAL 1<br />
045 - 054<br />
001<br />
002<br />
003<br />
004<br />
005<br />
006<br />
007<br />
008<br />
009<br />
010<br />
011<br />
012<br />
013<br />
014<br />
015<br />
016<br />
017<br />
018<br />
019<br />
020<br />
021<br />
022<br />
023<br />
024<br />
025<br />
026<br />
027<br />
028<br />
029<br />
030<br />
031<br />
032<br />
033<br />
034<br />
035<br />
036<br />
037<br />
038<br />
039<br />
040<br />
041<br />
042<br />
043<br />
044<br />
045<br />
046<br />
047<br />
048<br />
049<br />
050<br />
051<br />
052<br />
053<br />
054<br />
8 BEAT 1<br />
8 BEAT2<br />
8 BEAT3<br />
8 BEAT 4<br />
16 BEAT 1<br />
16 BEAT 2<br />
16 BEAT 3<br />
POP BALLAD<br />
ROCK<br />
HARD ROCK<br />
NEW AGE<br />
SOUL<br />
FUNKY<br />
FUSION<br />
TECHNO<br />
HOUSE<br />
RAP<br />
SKA<br />
DISCO 70<br />
DISCO 1<br />
DISCO 2<br />
DISCO SAMBA<br />
HULLY GULLY<br />
BIG BAND 1<br />
BIG BAND 2<br />
ELECTRIC JAZZ<br />
MEDIUM SW<strong>IN</strong>G<br />
JAZZ BLUES<br />
SHUFFLE<br />
FOXTROT 1<br />
FOXTROT 2<br />
JAZZ WALTZ<br />
BLUES<br />
ROCK'N ROLL<br />
CHARLESTON<br />
DIXIE<br />
QUICK STEEP<br />
BOOGIE 1<br />
TWIST<br />
RHYTHM & BLUES<br />
BLUE GRASS<br />
COUNTRY WEST<br />
COUNTRY WALTZ<br />
STEELER<br />
FOLK WALTZ<br />
WALTZ<br />
MUSETTE<br />
WIEN WALTZ<br />
SYMPH. WALTZ<br />
SLOW WALTZ 1<br />
SLOW WALTZ 2<br />
MAZURKA<br />
TANGO<br />
POLKA<br />
15. STYLES<br />
FAMILY SYLES LIST FAMILY SYLES LIST<br />
TRADITIONAL 2<br />
055 - 065<br />
LAT<strong>IN</strong> 1<br />
066 - 074<br />
LAT<strong>IN</strong> 2<br />
075 - 083<br />
ORIENTAL<br />
084 - 087<br />
PIANIST<br />
088 - 095<br />
DJ STYLES<br />
096 - 100<br />
055<br />
056<br />
057<br />
058<br />
059<br />
060<br />
061<br />
062<br />
063<br />
064<br />
065<br />
066<br />
067<br />
068<br />
069<br />
070<br />
071<br />
072<br />
073<br />
074<br />
075<br />
076<br />
077<br />
0<strong>78</strong><br />
079<br />
080<br />
081<br />
0<strong>82</strong><br />
083<br />
084<br />
085<br />
086<br />
087<br />
088<br />
089<br />
090<br />
091<br />
092<br />
093<br />
094<br />
095<br />
096<br />
097<br />
098<br />
099<br />
100<br />
PASO DOBLE<br />
MARCH<br />
MARCH 6/8<br />
BALLAD<br />
RHUMBA 1<br />
RHUMBA 2<br />
BEGU<strong>IN</strong>E 1<br />
HAPPY POLKA<br />
SLOW ROCK 1<br />
SLOW ROCK 2<br />
TARANTELLA<br />
SAMBA 1<br />
SAMBA 2<br />
BOSSA<br />
SALSA 1<br />
SALSA 2<br />
CHA CHA CHA 1<br />
CHA CHA CHA 2<br />
MERENGUE 1<br />
MERENGUE 2<br />
MAMBO<br />
REGGAE<br />
BOLERO<br />
MEXICAN<br />
GUARACHA<br />
BACHATA<br />
CALYPSO<br />
LAMBADA<br />
MACARENA<br />
7 / 8 LAZ<br />
BOLORO<br />
ISTSOKAK<br />
SOPAR<br />
8 BEAT<br />
16 BEAT<br />
BALLAD<br />
ROMANTIC<br />
SW<strong>IN</strong>G<br />
BLUES<br />
ROCK'N ROLL<br />
BOSSANOVA<br />
DJ GARAGE<br />
DJ HIP HOP<br />
DJ PROGRESSIVE<br />
DJ TECHNO<br />
DJ TRIBE
GUARANTEE • GARANTIE • GARANTIE • GARANTIA • GARANZIA<br />
Cut out this coupon and return it, by post, to your local <strong>Farfisa</strong> office (see <strong>Farfisa</strong> - Organization in your country)<br />
GB<br />
Découper ce coupon et l’expedier, sous enveloppe, à l’adresse figurant dans la liste par pays des distributeurs <strong>Farfisa</strong><br />
F<br />
Diesen Coupon bitte abtrennen und per Post an die zuständige <strong>Farfisa</strong> -F<strong>il</strong>iale senden (s. <strong>Farfisa</strong> - Organisation in Ihrem Land)<br />
D<br />
Recorte el siguiente cupon y envielo a la oficina autorizada de <strong>Farfisa</strong> (ver la organización <strong>Farfisa</strong> en su pais)<br />
E<br />
Ritagliare <strong>il</strong> presente tagliando e spedirlo in busta chiusa alla competente sede della <strong>Farfisa</strong> (v. <strong>Farfisa</strong> - Organization in your country)<br />
I<br />
✂<br />
NAME OF PURCHASER:<br />
NOM ET PRENOM<br />
DE L’ACHETEUR:<br />
NAME DES KÄUFERS:<br />
NOMBRE DEL<br />
COMPRADOR<br />
NOME E COGNOME<br />
DELL’ACQUIRENTE:<br />
ADDRESS:<br />
ADRESSE:<br />
ANSCHRIFT:<br />
DIRECCION:<br />
<strong>IN</strong>DIRIZZO:<br />
Reta<strong>il</strong>er’s stamp or name and address where you have bought the product:<br />
Cachet ou nom et adresse du magasin où vous avez acheté le produit:<br />
Stempel oder Name und Adresse des Händlers bei dem das Produkt gekauft wurde:<br />
Sello o nombre y dirección del vendedor en el que se compró el producto:<br />
Timbro o nome ed indirizzo del rivenditore dove è stato aquistato <strong>il</strong> prodotto:<br />
DATE OF PURCHASE: DATE D’ACHAT:<br />
KAUFDATUM: FECHA ADQUISICIóN:<br />
DATA D’ACQUISTO:<br />
MODEL: TYPE: TYP:<br />
MODELO: MODELLO: <strong>TK</strong> <strong>82</strong> / <strong>TK</strong> <strong>78</strong><br />
95<br />
✂
irthday • anniversaire • Geburtstag • cumpleaños • verjaardag<br />
• compleanno<br />
✂<br />
yes • oui • ja • si • ja • si no • non • nein • no • nee • no<br />
96<br />
Christmas •Nöel •Weihnachten •Navidad •St. Nicolaas/Kerst •Natale<br />
In occasion of: • A l’ occasion de: • Zum Anlass von:<br />
•¿En qué ocasión? • Ter gelegenheid van: • In quale occasione?<br />
Can you already play an instrument? • <strong>Con</strong>nais-tu déjà la musique? •<br />
Spielen Sie ein anderes Musikinstrument? • ¿<strong>Con</strong>oce ya la música? •<br />
Kent U het notenschrift? • <strong>Con</strong>osce già la musica?<br />
by others •autres •oder andere •otras personas •door anderen •da altri<br />
at friends/relatives • dans la maison d’un ami/d’un parent<br />
• im Hause von Freuden/Verwandten • en casa de amigos/parientes<br />
• bij vrienden/bekenden • in casa di amici/parenti<br />
by relatives or friends •par un relation ou un ami •Verwandte oder Freunde<br />
•parientes/amigos •door fam<strong>il</strong>ieleden of vrienden •da parenti/amici<br />
by the parents or grandparents •parents ou grands-parents •die Eltern oder Großeltern<br />
•los padres/los abuelos •de ouders of grootouders •dai genitori/nonni<br />
demonstration • dans une demonstration • in einem<br />
Propagandastand eines Warenhauses • en demonstración<br />
• demonstraties • in dimostrazione<br />
by the user • par vous-même • der Spieler-/in • la persona que lo<br />
usa • de gebruiker zelf • dall’ut<strong>il</strong>izzatore stesso<br />
at a point of sale • dans un point de vente • in einem Geschäft<br />
• en un punto de venta• winkel • in un punto vendita<br />
Who has bought the product? • Par qui à été acheté le produit? • Wer hat<br />
das Produkt gekauft? • ¿Quien compró el producto? • Wie heeft het product<br />
gekocht? • Da chi è stato acquistato <strong>il</strong> prodotto?<br />
advertising • en pubblicité • in einer Werbung • en publicidad<br />
• advertenties • in pubblicità<br />
User’s sex • Votre sexe • Weiblich/Männlich • Sexo de quien lo usa • Sex<br />
van de gebruiker • Sesso dell’ut<strong>il</strong>izzatore<br />
I’ve seen the keyboard the first time in: • A été vu pour la première<br />
fois: • ich habe die Orgel zum ersten Mal gesehen: • ¿Donde la via por<br />
primera vez? • Ik heb het keyboard voor het eerst gezien in: • Dove<br />
l'ha visto per la prima volta?<br />
User’s age • Votre age • Alter des Spielers/in<br />
• Edad de quien lo usa • Leeftijd • Età dell’ut<strong>il</strong>izzatore<br />
other and precisely: • autres occasions: • anderes:<br />
• otras es decir: • andere gelegenheid: • altro e cioè:<br />
✂<br />
QUESTIONNAIRE • QUESTIONAIRE • FRAGEBOGEN • CUESTIONARIO • QUESTIONARIO
GB - GUARANTEE<br />
This guarantee is valid when it is duly completed in all parts and returned, by post, within 15 days of purchase directly to your local <strong>Farfisa</strong> office<br />
(see <strong>Farfisa</strong> - Organization in your country). It is recommanded you keep the purchase receipt or invoice received, so as to show in case<br />
of repair under guarantee. This 24 month manufactures guarantee covers faults in materials or production. Any faults must be reported<br />
directly to the reta<strong>il</strong>er, <strong>Farfisa</strong> w<strong>il</strong>l supply replacement parts free of charge within the guarantee period. This guarantee is invalid if the instrument<br />
is damaged through accident, negligence, improper use, tampering, or damaged due to improper packing when being returned.<br />
F - GARANTIE<br />
Cette garantie est valable lorsqu’elle est dûment completée et retournée, sous enveloppe, dans les 15 jours de l’achat directement à l’adresse figurant<br />
dans la liste par pays des distributeurs <strong>Farfisa</strong>. Il est recommandé de garder le ticket de caisse ou facture délivrés au moment de<br />
l’achat, afin de les présenter en cas de réparation sous garantie. Cette garantie de 24 mois couvre les défauts de matériel ou de production.<br />
Les vices rendant impropre le matériel doivent étre notifiés au revendeur chez lequel ce matériel a été acheté. Les pièces défectueuses seront<br />
réparées ou remplacées gratuitement. La main d’oeuvre et le transport seront à la charge de l’ut<strong>il</strong>isateur. La garantie sera déclarée non valable si<br />
l’instrument est endommagé pendant son transport, s’<strong>il</strong> y a négligence, usage impropre ou intervention personnelle ou non agréée. Les présentes<br />
conditions de garantie ne font pas obstacles aux conditions légales prévues par les articles 1641 et suivants du code civ<strong>il</strong>.<br />
D - GARANTIE<br />
Die Garantie ist nur dann gültig, wenn die Garantiekarte in allen Te<strong>il</strong>en ordnungsgemäß ausgefüllt und innerhalb von 14 Tagen per Post direkt an<br />
die zuständige <strong>Farfisa</strong>-F<strong>il</strong>iale eingesandt wird. Es wird empfohlen, den Kaufbeleg aufzubewahren, damit im Falle einer Reklamation<br />
die Garantieleistung wirksam wird. Ein Garantieanspruch von 24 Monaten ab Kaufdatum besteht nur bei Mängeln, die auf Material - oder<br />
Fertigungsfehlern beruhen. Die Erfüllung der Garantieleistungen obliegt dem Händler, bei dem das Produkt gekauft wurde. Durch einen erfüllten<br />
Garantieanspruch verlängert sich die Garantie weder für das Produkt noch für die nachbesserten Te<strong>il</strong>e. Der Garantieanspruch ist nicht berechtigt<br />
bei unsachgemäßer Behandlung oder Benutzung, bei Reparaturen, Reparaturversuchen oder technischen Änderungen bzw.bei Transportschäden<br />
und Schäden in Folge von höherer Gewalt.<br />
E - GARANTIA<br />
Esta garantia es valida cuando se incluye correctamente la información solicitada y se devuelve, por correo, a la oficina autorizada de <strong>Farfisa</strong> (ver<br />
la organización en su pais), dentro de los 15 dias inmediatos despues de la compra. Le recomendamos que conserve el recibo de la compra,<br />
para poder demostrar que el teclado se encuentra en garantia. Esta garantia, relativa a los componentes en lo que se refiere a<br />
defectos de fabricación o de los materiales, es valida por un periodo de 24 meses a partir de la fecha de adquisición. Las partes averiadas serán<br />
reparadas o sostituidas gratuitamente. El transporte del instrumento y la mano de obra será por cuenta del cliente. Esta garantia se cubre por<br />
mediación del vendedor (concesionarios o vendedores autorizados). La garantia no será válida si el instrumento ha sido dañado - en el transporte,<br />
accidente, negligencia, uso indebido, etc. (Garantia válida de acuerdo con la nueva ley).<br />
I - GARANZIA<br />
La presente garanzia è valida se comp<strong>il</strong>ata in ogni sua parte ed inviata in busta chiusa entro 15 giorni dall’acquisto alla competente sede della<br />
<strong>Farfisa</strong> (vedi <strong>Farfisa</strong> - Organization in your country). Si raccomanda di conservare lo scontrino fiscale o fattura ricevuti al momento<br />
dell’acquisto da esibire nel caso di eventuale riparazione in garanzia. La presente garanzia copre per la durata di 24 mesi, esclusivamente<br />
i difetti di fabbricazione o di materiale. La segnalazione del difetto deve essere fatta direttamente al rivenditore. Le parti difettose saranno<br />
riparate o sostituite gratuitamente. Il costo della manodopera e del trasporto saranno a carico dell’acquirente. La garanzia è nulla se lo strumento<br />
risulta danneggiato per incidente di trasporto, incuria, cattivo uso e manomissioni (garanzia secondo le leggi vigenti).<br />
ORGANIZATION<br />
<strong>IN</strong> YOUR<br />
COUNTRY<br />
ITALIA: BONTEMPI S.p.a.<br />
Viale Don Bosco, 35<br />
62018 - Potenza Picena (MC)<br />
✆ 0733. 885.1<br />
Fax 0733.885.302<br />
www.farfisa.eu<br />
E-ma<strong>il</strong>: info@farfisa.eu<br />
DEUTSCHLAND:<br />
RRV Marketing & Vertrieb<br />
Münchner Str. 19 a<br />
D - <strong>82</strong>319 STARNBERG<br />
✆ (08151) <strong>78</strong>163<br />
Fax (08151) 444765<br />
E-ma<strong>il</strong>: info-bontempi@t-online.de<br />
FRANCE: K’COSTA SARL. 52<br />
Route Nationale, 39190<br />
Beaufort . FRANCE<br />
✆ 03.84.25.18.18<br />
Fax 03.84.25.18.19<br />
E-ma<strong>il</strong>: b.bretin@k-costa.com<br />
SVIZZERA/SUISSE/SCHWEIZ/<br />
ÖSTERREICH: BONTEMPI<br />
SAHLI Vertrieb GmbH<br />
Flugbrunnenstrasse 2<br />
Postfach 296 CH - 3065 BOLLIGEN<br />
✆ (031) 381.36.38<br />
Fax (031) 381.79.20<br />
E-ma<strong>il</strong>: bontempi@bluewin.ch<br />
ESPAÑA:<br />
SIGMA IBERIA S.L.<br />
Calle Castelló, 59 Bajo<br />
28001 MADRID<br />
Tel. & Fax: 900900950<br />
E-ma<strong>il</strong>: comercial@sigmaita.com<br />
UNITED K<strong>IN</strong>GDOM:<br />
COMUS (U.K.) LTD. 168<br />
Lomeshaye<br />
Business V<strong>il</strong>lage,Turner RD<br />
NELSON, LANCS - BB9 7DR<br />
✆ (0)12<strong>82</strong> 606600<br />
Fax (0)12<strong>82</strong> 606660<br />
E-ma<strong>il</strong>: bontempi@comus.uk.net<br />
97
GB/USAF D - WIR EMPFEHLEN IHNEN, DEN NAMEN UND<br />
NLDK <br />
E P GR - ΣAΣ ΣΥΝIΣTOΥME NA<br />
KPATHΣETE THN ΔIEΥΘΥNΣH MAΣ IΣΩΣ THN XPEIAΣTEITE ΣTO MEΛΛS SF - PYYDÄMME SÄILYTTÄMÄAN MAAHANTUOJAN NIMEN JA OSDITTEN<br />
N I - SI RACCOMANDA DI CONSERVARE IL NOME E L'<strong>IN</strong>DIRIZZO DEL PRODUTTORE.<br />
BONTEMPI S.p.A. <br />
Printed in Italy cod. 20117020