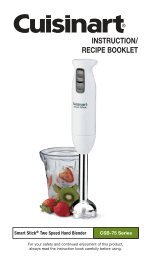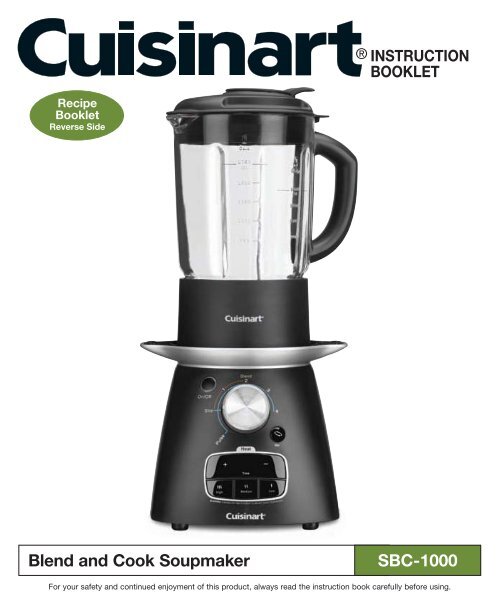
Cuisinart SBC-1000 Blend and Cook Soupmaker
Cuisinart SBC-1000 Blend and Cook Soupmaker
Cuisinart SBC-1000 Blend and Cook Soupmaker

Create successful ePaper yourself
Turn your PDF publications into a flip-book with our unique Google optimized e-Paper software.
Recipe<br />
Booklet<br />
Reverse Side<br />
INSTRUCTION<br />
BOOKLET<br />
<strong>Blend</strong> <strong>and</strong> <strong>Cook</strong> <strong>Soupmaker</strong> <strong>SBC</strong>-<strong>1000</strong><br />
For your safety <strong>and</strong> continued enjoyment of this product, always read the instruction book carefully before using.
IMPORTANT SAFEGUARDS<br />
When using an electrical appliance, basic safety<br />
precautions should always be followed, including the<br />
following:<br />
1. READ ALL INSTRUCTIONS BEFORE USING.<br />
2. To protect against the risk of electrical shock, do not<br />
put motor base of blender in water or other liquids.<br />
3. Close supervision is necessary when any appliance<br />
is used by or near children.<br />
4. Unplug from outlet when not in use, before putting<br />
on or taking off parts, <strong>and</strong> before cleaning or<br />
removing contents from blender jar. Never put<br />
h<strong>and</strong>s into the blender jar or h<strong>and</strong>le the blades<br />
with appliance plugged in.<br />
5. Avoid contact with moving parts.<br />
6. Do not operate any appliance with a damaged cord<br />
or plug, or after the appliance malfunctions or is<br />
dropped or damaged in any manner. Return<br />
appliance to nearest <strong>Cuisinart</strong> service facility for<br />
examination, repair, <strong>and</strong>/or mechanical or electrical<br />
adjustment.<br />
7. The use of attachments, including canning or<br />
ordinary jars, not recommended or sold by <strong>Cuisinart</strong><br />
may cause fire, electrical shock, or risk of injury to<br />
persons.<br />
8. Do not use outdoors.<br />
9. Do not let cord hang over edge of counter or table<br />
or touch hot surfaces.<br />
10. Keep h<strong>and</strong>s <strong>and</strong> utensils out of jar while<br />
blending, to reduce the risk of severe injury to<br />
persons or damage to blender itself. A plastic or<br />
wooden spatula may be used but must be used only<br />
when the blender is turned off.<br />
11. When blender is plugged in <strong>and</strong> ON/OFF button is<br />
flashing, do not touch cutting assembly, interfere<br />
with blade movement, or remove blender jar cover.<br />
Accidentally touching a speed button may activate<br />
the blender.<br />
12. BLADES ARE SHARP. HANDLE CAREFULLY.<br />
13. To reduce the risk of injury, never place cutting<br />
assembly on base unless the blender jar is properly<br />
attached.<br />
14. Always operate blender with the lid in place.<br />
15. Never leave your blender unattended while it is<br />
running.<br />
16. Twist locking ring on firmly. Injury can result if moving<br />
blades accidentally become exposed.<br />
1<br />
17. Regarding your cord set: A longer cord has been<br />
provided so that you will have flexibility in positioning<br />
your blender. Exercise care when using the longer<br />
cord to avoid entangling or tripping over the cord.<br />
The longer cord should be arranged so that it will<br />
not drape over the counter or tabletop, where it can<br />
be pulled on by children or tripped over.<br />
18. Wash the blender jar, jar collar with black assembly,<br />
lid <strong>and</strong> measuring cup before first use.<br />
19. WARNING: TO REDUCE THE RISK OF ELECTRICAL<br />
SHOCK OR FIRE, DO NOT REMOVE THE BASE<br />
PANEL. NO USER-SERVICEABLE PARTS ARE<br />
INSIDE. REPAIR SHOULD BE DONE ONLY BY<br />
AUTHORIZED PERSONNEL.<br />
20. WARNING: FLASHING LIGHT INDICATES READY<br />
TO OPERATE. DO NOT TOUCH BLADES.<br />
21. Ensure all packaging materials <strong>and</strong> any promotional<br />
labels or stickers are removed from the <strong>Cuisinart</strong> ®<br />
<strong>Blend</strong> <strong>and</strong> <strong>Cook</strong> <strong>Soupmaker</strong> before first use.<br />
22. Always inspect the appliance before use for noticeable<br />
signs of damage. Do not use if damaged or if<br />
the appliance has been dropped. In the event of<br />
damage, or if the appliance develops a fault, contact<br />
<strong>Cuisinart</strong> Customer Service.<br />
23. While unit is in use, the surfaces will become<br />
extremely hot. Do not touch hot surfaces.<br />
Always use h<strong>and</strong>les. Heating plate <strong>and</strong> complete<br />
jar collar assembly become very hot.<br />
24. For domestic use only.<br />
25. This appliance should be used only for preparation<br />
of drinks / food as described within the instructions<br />
for use that accompany it. Please retain these<br />
instructions for future reference.<br />
26. Always ensure that your h<strong>and</strong>s are dry before removing<br />
the plug from the outlet. Never pull the plug out<br />
of the outlet by the cord.<br />
27. Do not connect this appliance to an external timer<br />
or remote control system.<br />
28. Extreme caution must be used when moving an<br />
appliance containing hot oil or other hot liquids.<br />
29. Do not place on or near a hot gas or electric burner<br />
or in a heated oven.<br />
30. To disconnect, turn any control to off, then remove<br />
plug from wall outlet.<br />
31. Do not use appliance for other than intended use.<br />
32. Do not submerge the jar collar with blade assembly<br />
in water or place in dishwasher.<br />
33. When blending hot liquids ensure vents in lid<br />
opening are clear <strong>and</strong> intended pour spouts are<br />
closed (lid is secured).
SAVE THESE INSTRUCTIONS<br />
FOR HOUSEHOLD USE ONLY<br />
SPECIAL CORD SET<br />
INSTRUCTIONS<br />
NOTICE<br />
For your protection, this unit is equipped with a<br />
3-conductor cord set that has a molded 3-prong<br />
grounding-type plug, <strong>and</strong> should be used in combination<br />
with a properly connected grounding-type outlet<br />
as shown in Figure A.<br />
1. A short power supply cord (or detachable power supply<br />
cord) is to be provided to reduce risks resulting from<br />
becoming entangled in or tripping over a longer cord.<br />
2. Longer detachable power supply cords or extension<br />
cords are available <strong>and</strong> may be used if care is exercised<br />
in their use.<br />
3. If a long detachable power supply cord or extension<br />
cord is used:<br />
a) The marked electrical rating of the detachable<br />
power supply cord or extension cord should be<br />
at least as great as the electrical rating of the<br />
appliance;<br />
b) If the appliance is of the grounded type, the extension<br />
cord should be a grounded type 3-wire cord;<br />
<strong>and</strong><br />
c) The longer cord should be arranged so that it will<br />
not drape over the counter top or table top where<br />
it can be pulled on by children or tripped over.<br />
NOTE: Do not remove the grounding prong.<br />
CAUTION: Before using an adapter, it must be<br />
determined that the outlet cover plate screw is<br />
properly grounded. If in doubt,<br />
consult a licensed electrician.<br />
Never use an adapter unless<br />
you are sure it is properly<br />
grounded.<br />
Note: Use of an adapter is not<br />
Figure A<br />
permitted in Canada.<br />
2<br />
UNPACKING INSTRUCTIONS<br />
1. Place the gift box containing your <strong>Cuisinart</strong> ®<br />
blender on a flat, sturdy surface before unpacking.<br />
2. Remove instruction booklet <strong>and</strong> other printed<br />
materials from the top of corrugated insert.<br />
Next remove the top corrugated insert.<br />
3. Carefully lift blender base from box <strong>and</strong> set aside.<br />
4. Carefully remove lower corrugated insert<br />
containing the blender jar assembly. Be careful not<br />
to tip the jar when moving.<br />
To assemble the blender, follow the Assembly<br />
Instructions on page 4 in this instruction booklet.<br />
Replace all corrugated inserts in the box <strong>and</strong> save the<br />
box for repackaging.<br />
Before using for the first time: Wash all parts<br />
according to the Cleaning <strong>and</strong> Maintenance section on<br />
page 6 of this booklet to remove any dust or residue.<br />
TABLE OF CONTENTS<br />
Important Safeguards .........................1<br />
Unpacking Instructions ........................2<br />
Features <strong>and</strong> Benefits .........................3<br />
Assembly . ..................................4<br />
Helpful Reminders . ...........................4<br />
Getting to Know Your Control Panel .............5<br />
<strong>Cook</strong>ing <strong>and</strong> <strong>Blend</strong>ing . ........................6<br />
<strong>Blend</strong>ing Cold Ingredients . .....................6<br />
Cleaning <strong>and</strong> Maintenance .....................6<br />
DOs <strong>and</strong> DON’Ts ............................7<br />
Warranty Information . .........................8
FEATURES AND BENEFITS<br />
1. Press-on Lid<br />
Tightfitting seal resists leakage <strong>and</strong> vents<br />
in lid opening allow steam to escape.<br />
2. Lid Opening<br />
Allows you to add ingredients when<br />
measuring cup is removed from lid.<br />
3. Removable Measuring Cup<br />
Allows you to measure up to 3 ounces of<br />
ingredients to add through the lid opening.<br />
4. Thermal Shock-Resistant Glass<br />
<strong>Blend</strong>ing/<strong>Cook</strong>ing Jar<br />
Has a unique, sturdy, wide-mouth design.<br />
Holds 48 oz. of hot liquids <strong>and</strong> 56 oz. of cold.<br />
Hot <strong>and</strong> cold markings are on the jar.<br />
5. Leak-Proof Rubber Gasket (not shown)<br />
Holds the glass jar snugly in position<br />
for safe operation.<br />
6. Jar Collar with Heating Plate<br />
<strong>and</strong> Blade Assembly<br />
7. Easy-Clean Non Stick Heating Plate<br />
(not shown) Lets you sauté, simmer, boil <strong>and</strong><br />
reheat right in blender.<br />
8. High-Quality Cutting Assembly with<br />
Stainless Steel Blades (not shown)<br />
Is strong enough for all blending tasks,<br />
including tough jobs like crushing ice.<br />
9. Electronic Touchpad Controls<br />
a. On/Off Button<br />
Turns blender on or off.<br />
b. <strong>Blend</strong>ing Control<br />
Choose desired speed 1 to 4 or pulse<br />
to blend ingredients to the desired<br />
consistency. Use speeds 1 through 3<br />
for blending hot ingredients.<br />
c. Stir Button<br />
Gently stirs ingredients as they cook.<br />
d. Countdown Timer Control<br />
Select up to 30 minutes in 1-minute<br />
increments. Must be used to operate<br />
the temperature controls.<br />
e. Temperature Control<br />
High, Medium <strong>and</strong> Low settings.<br />
Must be used to activate heating.<br />
10. Heavy-Duty Motor Base<br />
11. Slip-Proof Feet<br />
Prevent movement during use <strong>and</strong> prevent<br />
damaging marks on countertops or tables.<br />
3<br />
12. Heavy-Duty Cleaning Brush<br />
to help clean heating plate <strong>and</strong> blades thoroughly.<br />
13. BPA-Free (not shown)<br />
All parts that come in contact with food<br />
are BPA-free.<br />
1.<br />
4.<br />
9a.<br />
9b.<br />
9e.<br />
10.<br />
10<br />
3.<br />
2.<br />
6.<br />
9c.<br />
9d.<br />
11.<br />
12.<br />
Note: Blades are sharp. H<strong>and</strong>le carefully.<br />
CAUTION: Collar assembly is hot when making soup.<br />
H<strong>and</strong>le very carefully.
ASSEMBLY<br />
To use your <strong>Cuisinart</strong> ®<br />
<strong>Blend</strong> <strong>and</strong> <strong>Cook</strong> <strong>Soupmaker</strong>, begin<br />
by assembling the blender jar.<br />
1. Place jar collar with blade<br />
assembly (a) on a flat, sturdy<br />
surface.<br />
2. Carefully place the rubber gasket<br />
(b) inside the jar collar.<br />
3. Place the blender jar (c) on the<br />
collar <strong>and</strong> turn clockwise until<br />
tight.<br />
Note: Blades are sharp. H<strong>and</strong>le<br />
carefully.<br />
4. Place lid (d) on jar <strong>and</strong> push until<br />
secure. Place measuring cup (e) in<br />
the lid opening <strong>and</strong> press into lid.<br />
5. When placing jar onto base, be<br />
sure arrow on jar collar, located<br />
just below the h<strong>and</strong>le, is aligned<br />
with arrow on base (Fig. 1). Place<br />
jar onto base, making sure the 3<br />
interlocking pins on the underside<br />
of the collar (Fig. 2) fit into the<br />
rectangular rubber connector on<br />
the base (Fig. 3).<br />
NOTE: If jar does not sit flush on<br />
base, do not force it! Remove jar <strong>and</strong><br />
slightly turn the clutch (Fig. 4), located<br />
in the center of the top of the base.<br />
CAUTION: Do not adjust jar collar<br />
clutch after cooking, as it may be hot.<br />
HELPFUL REMINDERS<br />
<br />
ingredients can be added during blending by<br />
simply lifting the measuring cup, adding ingredients<br />
through lid opening, <strong>and</strong> replacing the measuring<br />
cup.<br />
CAUTION: Be sure lid is on <strong>and</strong> measuring cup<br />
is in lid opening when blending hot liquids.<br />
Lid should always be in place while the unit is on.<br />
CAUTION: Collar is hot when making soup.<br />
H<strong>and</strong>le carefully.<br />
Keep h<strong>and</strong>s away from the underside of collar.<br />
The surface will also be very hot.<br />
e.<br />
d.<br />
c.<br />
b.<br />
a.<br />
4<br />
Fig. 1<br />
Fig. 2<br />
Fig. 3<br />
Fig. 4<br />
CAUTION: Do not place blender jar on base while<br />
motor is running.<br />
<br />
removing blender jar from base. Simply lift blender<br />
jar from motor base.<br />
CAUTION: Do not put your h<strong>and</strong> on top of<br />
blender while blending. Hot steam can come<br />
through vents.<br />
<br />
(page 6), prior to your first use.
GETTING TO KNOW YOUR CONTROL PANEL<br />
1.<br />
6.<br />
1. Power On/Off Button – Press<br />
the button to turn on. The red<br />
LED light will flash; the unit is<br />
now in St<strong>and</strong>by mode. If the<br />
On/Off button is pressed while<br />
in St<strong>and</strong>by mode, the unit will<br />
turn off.<br />
2. <strong>Cook</strong>ing Timer Control –<br />
NOTE: Timer must be set before<br />
temperature can be set. When<br />
the unit is in St<strong>and</strong>by mode, the<br />
cooking time can be set by<br />
pressing the + or – buttons.<br />
Time counts up or down<br />
in one-minute increments,<br />
up to 30 minutes. (Note: If –<br />
button is pressed first, 30<br />
minutes will be displayed.)<br />
Hold button down to scroll<br />
through minutes, or press<br />
<strong>and</strong> release to advance<br />
one minute at a time.<br />
3. Temperature Controls –<br />
NOTE: <strong>Cook</strong>ing time must<br />
be selected before setting<br />
temperature. The unit will start<br />
its heating or cooking cycle<br />
when High, Medium or Low<br />
5<br />
5.<br />
4.<br />
3.<br />
2.<br />
temperature is selected. The<br />
temperature can be changed<br />
at any time during the heating<br />
or cooking cycle. The heater<br />
can be manually turned off<br />
by pressing the Temperature<br />
control currently in use (this<br />
will be illuminated) or pressing<br />
the power On/Off button. If the<br />
power On/Off button is used<br />
to turn off the heater, the unit<br />
will power off <strong>and</strong> must be<br />
restarted for blending. NOTE:<br />
<strong>Blend</strong>ing <strong>and</strong> cooking cannot<br />
operate simultaneously.<br />
4. Stir Button – The Stir function<br />
does just what it says, allowing<br />
you to stir ingredients at a low<br />
speed. It can be operated at<br />
any time during the cooking<br />
or blending cycle. It can also<br />
be operated in St<strong>and</strong>by mode<br />
when ingredients are being<br />
added to the glass jar. It is a<br />
manually operated function;<br />
it will stir only when pressed,<br />
giving you complete control.<br />
5. <strong>Blend</strong>ing Control – The<br />
<strong>Blend</strong>ing control has 4 speeds<br />
– 1 is the lowest setting, 4 is<br />
the highest. When in St<strong>and</strong>by<br />
mode, the <strong>Blend</strong>ing function<br />
is active <strong>and</strong> operable. NOTE:<br />
<strong>Blend</strong>ing <strong>and</strong> cooking cannot<br />
operate simultaneously. When<br />
blending hot items such as<br />
soups or sauces, only use<br />
speeds 1 through 3; cooking<br />
will be non-operational.<br />
6. Pulse – The Pulse setting<br />
can only be used in St<strong>and</strong>by<br />
mode. This function creates<br />
a burst of power for quick<br />
blending. Rotate counterclockwise,<br />
release <strong>Blend</strong>ing<br />
control <strong>and</strong> repeat as desired.<br />
You determine the duration of<br />
each pulse. The Pulse function<br />
is best for breaking apart larger<br />
pieces of food. NOTE: Pulsing<br />
<strong>and</strong> cooking cannot operate<br />
simultaneously.
COOKING AND BLENDING<br />
1. Place the motor base of your blender on a flat, sturdy<br />
surface. It is important that the surface be clean<br />
<strong>and</strong> dry. Assemble the blender by following the<br />
Assembly instructions (page 4). Once the jar is<br />
assembled <strong>and</strong> is in position on the motor base,<br />
plug the blender into an electrical outlet.<br />
2. Press the On/Off button. The blender is now in<br />
St<strong>and</strong>by mode.<br />
3. Select the required time per the recipe. This can<br />
be adjusted throughout the cooking process, but<br />
a time must be selected to start the heater initially.<br />
4. Add ingredients according to the recipe. You may<br />
add more ingredients by lifting the measuring cup<br />
from the lid <strong>and</strong> dropping ingredients through the<br />
lid opening. When making soup, fill the contents<br />
of the glass jar only to the 48-oz. level marked HOT.<br />
Always replace the measuring cup after adding<br />
ingredients. See Recipe Tips <strong>and</strong> Hints for cooking<br />
soups (recipe book, page 2).<br />
CAUTION: Do not put h<strong>and</strong>s into blender jar with<br />
blender plugged in.<br />
NOTE: Do not use anything other than the measuring<br />
cup to cover or close lid opening. This prevents<br />
obstruction to necessary steam vents.<br />
CAUTION: When blending hot liquids ensure vents<br />
in lid opening are clear <strong>and</strong> intended pour spouts<br />
are closed (lid is secured).<br />
5. To remove blender jar lid, lift edge of cover upwards.<br />
Lifting from measuring cup will not remove lid.<br />
CAUTION: Be careful of hot steam when removing lid.<br />
6. To stir ingredients while cooking, use the Stir button.<br />
7. When cooking time has finished, the blender will<br />
beep 4 times.<br />
8. To blend soup always start on speed 1, gradually<br />
increasing to speed 2 or 3. Use only these recommended<br />
speeds when blending hot items. Turn the<br />
<strong>Blend</strong>ing control dial to stop when the desired consistency<br />
is reached.<br />
9. Unplug the blender from the electrical outlet. Never<br />
remove the blender jar from the motor base until the<br />
blender is off. Do not twist the blender collar from<br />
the blender jar when removing jar from motor base.<br />
CAUTION: When removing the jar use caution.<br />
The area underneath the collar may be<br />
extremely hot.<br />
BLENDING COLD INGREDIENTS<br />
1. Place the motor base of your blender on a flat,<br />
sturdy surface. It is important that the surface be<br />
clean <strong>and</strong> dry. Assemble the blender by following<br />
6<br />
the Assembly instructions (page 4). Once the jar is<br />
assembled <strong>and</strong> is in position on the motor base,<br />
plug the blender into an electrical outlet.<br />
2. Press the On/Off button. The blender is now in<br />
St<strong>and</strong>by mode.<br />
3. Add all necessary ingredients to the blender jar <strong>and</strong><br />
replace the cover. You may add more ingredients by<br />
lifting the measuring cup <strong>and</strong> dropping ingredients<br />
through the lid opening. Replace the measuring cup<br />
after adding ingredients. Do not put h<strong>and</strong>s into<br />
blender jar with blender plugged in.<br />
NOTE: Add liquid ingredients first then follow with<br />
solid ingredients. This will provide more consistent<br />
blending <strong>and</strong> prevent unnecessary stress on the<br />
motor.<br />
4. To remove blender jar lid, lift the edge of lid upwards.<br />
Lifting from measuring cup will not remove lid.<br />
5. Turn the <strong>Blend</strong>ing control dial to your desired speed<br />
or use the Pulse function. Turn the <strong>Blend</strong>ing control<br />
dial to Stop when the desired consistency is<br />
reached.<br />
6. The Stir function can be used as well for gentle<br />
blending.<br />
NOTE: To dislodge food, do not use a spatula<br />
until you have turned the blender off, use a plastic<br />
or wooden spatula to help remove food lodged<br />
around the cutting assembly. Replace the lid <strong>and</strong><br />
measuring cup <strong>and</strong> continue blending, if necessary.<br />
Make sure the spatula is not inside the blender jar<br />
before blending.<br />
7. Unplug the blender from the electrical outlet. Never<br />
remove the blender jar from the motor base until the<br />
blender is off. Do not twist the blender collar from<br />
the blender jar when removing jar from motor base.<br />
CLEANING AND MAINTENANCE<br />
NOTE: Jar collar with blade assembly is NOT dishwasher<br />
safe. Do not submerge in water or other liquids.<br />
CAUTION: Be extremely careful when cleaning<br />
around the blades. They are very sharp.<br />
Always unplug your <strong>Cuisinart</strong> ® <strong>Blend</strong> <strong>and</strong> <strong>Cook</strong><br />
<strong>Soupmaker</strong> from the electrical outlet before cleaning.<br />
The blender is made of corrosion-resistant parts that are<br />
easy to clean. Before first use <strong>and</strong> after every use, clean<br />
each part thoroughly. Periodically check all parts before<br />
reassembly. If any part is damaged or blender<br />
jar is chipped or cracked, DO NOT USE BLENDER.<br />
Remove the blender jar from the motor base by lifting<br />
straight up <strong>and</strong> away. Twist off the jar collar with blade<br />
assembly by turning counterclockwise. Carefully remove<br />
the rubber gasket.
CAUTION: When removing the jar use caution. The<br />
area underneath the collar may be extremely hot.<br />
Place the blender jar, lid, rubber gasket <strong>and</strong> measuring<br />
cup in the upper rack of the dishwasher or wash in<br />
warm, soapy water; rinse <strong>and</strong> dry thoroughly.<br />
To thoroughly clean the heating plate, we recommend<br />
that you use the cleaning brush that is included with<br />
your blender. Be sure to let the heating plate cool before<br />
cleaning with the cleaning brush, as the brush is not<br />
heatproof.<br />
NOTE: Do not clean the heating plate with any abrasive<br />
tools so as not to scrape the easy-clean coating.<br />
TIP: To wash jar assembly, add a drop of dishwashing<br />
liquid <strong>and</strong> 8 ounces of warm water. Run on speed 1 for<br />
30 to 60 seconds. Repeat, using clean tap water. Do not<br />
use heat controls when cleaning. Empty blender jar <strong>and</strong><br />
carefully disassemble jar from the collar with blade<br />
assembly. Rinse <strong>and</strong> dry all parts thoroughly or allow to<br />
air dry.<br />
CAUTION: H<strong>and</strong>le the cutting assembly carefully.<br />
It is SHARP <strong>and</strong> may cause injury. Do not attempt<br />
to remove blades from cutting assembly.<br />
Finally, wipe the motor base clean with a damp cloth<br />
to remove any residue, <strong>and</strong> dry thoroughly. Never<br />
submerge the motor base in water or other liquids,<br />
or place in a dishwasher. Any other servicing should<br />
be performed by an authorized service representative.<br />
DOs <strong>and</strong> DON’Ts<br />
WHEN USING YOUR BLEND AND<br />
COOK SOUPMAKER<br />
DO:<br />
<br />
voltage as that stated on the bottom of the blender<br />
motor base.<br />
<br />
surface.<br />
<br />
blender jar first, then add remaining ingredients.<br />
This will ensure that ingredients are uniformly<br />
mixed.<br />
<br />
inch (1.3 cm) to 1 inch (2.5 cm) to achieve a more<br />
uniform result.<br />
<br />
to 3 ounces of liquid ingredients. Replace measuring<br />
cup after ingredients have been added.<br />
7<br />
<br />
when the blender is turned off. Never use metal<br />
utensils, as damage may occur to the blender jar,<br />
heating plate or cutting assembly.<br />
<br />
the lid on.<br />
<br />
attached to blender jar.<br />
<br />
rubber gasket before cleaning. Make sure unit has<br />
cooled.<br />
<br />
sides of the blender jar occasionally.<br />
<br />
so the blades stop rotating between pulses.<br />
<br />
to ensure even cooking.<br />
DON’T:<br />
<br />
<br />
motor base without the blender jar attached.<br />
<br />
dough, or beat egg whites.<br />
<br />
blender jar cover on the blender jar while blending.<br />
<br />
blender jar when removing blender jar from motor<br />
base. Simply lift blender jar from motor base.<br />
<br />
most desired results in seconds, not minutes.<br />
<br />
blender off immediately, unplug the unit <strong>and</strong><br />
remove a portion of the food, then continue.<br />
<br />
the motor is on.<br />
<br />
recommended by <strong>Cuisinart</strong>. Doing so may result<br />
in injury.<br />
<br />
blender is plugged in.<br />
<br />
<br />
<br />
cooking in the blender.<br />
<br />
immediately after heating or cooking foods. It will<br />
be very hot!
WARRANTY<br />
LIMITED THREE-YEAR<br />
WARRANTY<br />
This warranty is available to consumers only. You are a<br />
consumer if you own a <strong>Cuisinart</strong> ® <strong>Blend</strong> <strong>and</strong> <strong>Cook</strong><br />
<strong>Soupmaker</strong> that was purchased at retail for personal, family,<br />
or household use. Except as otherwise required under<br />
applicable state law, this warranty is not available to retailers<br />
or other commercial purchasers or owners. We warrant that<br />
your <strong>Cuisinart</strong> ® <strong>Blend</strong> <strong>and</strong> <strong>Cook</strong> <strong>Soupmaker</strong> will be free of<br />
defects in material or workmanship under normal home use<br />
for three years from the date of original purchase.<br />
We recommend that you visit our website, www.cuisinart.<br />
com for a fast, efficient way to complete your product<br />
registration. However, product registration does not eliminate<br />
the need for the consumer to maintain the original proof of<br />
purchase in order to obtain the warranty benefits. In the event<br />
that you do not have proof of purchase date, the purchase date<br />
for purposes of this warranty will be the date of manufacture.<br />
If your blender should prove to be defective within the<br />
warranty period, we will repair it or, if we think it necessary,<br />
replace it. To obtain warranty service, please call our<br />
Consumer Service Center toll-free at 1-800-726-0190 or<br />
write to: <strong>Cuisinart</strong>, 7811 North Glen Harbor Blvd., Glendale,<br />
AZ 85307.<br />
To facilitate the speed <strong>and</strong> accuracy of your return, please<br />
enclose $10.00 for shipping <strong>and</strong> h<strong>and</strong>ling of the product.<br />
Be sure to include a return address, daytime phone number,<br />
description of the product defect, product serial number<br />
(stamped on bottom of product base), <strong>and</strong> any other<br />
information pertinent to the product’s return. Please pay<br />
by check or money order. (California residents need only<br />
supply proof of purchase <strong>and</strong> should call 1-800-726-0190<br />
for shipping instructions).<br />
NOTE: For added protection <strong>and</strong> secure h<strong>and</strong>ling of any<br />
<strong>Cuisinart</strong> product that is being returned, we recommend<br />
you use a traceable, insured delivery service. <strong>Cuisinart</strong><br />
cannot be held responsible for in-transit damage or for<br />
packages that are not delivered to us. Lost <strong>and</strong>/or damaged<br />
products are not covered under warranty.<br />
Your <strong>Cuisinart</strong> ® <strong>Blend</strong> <strong>and</strong> <strong>Cook</strong> <strong>Soupmaker</strong> has been<br />
manufactured to strict specifications <strong>and</strong> has been designed<br />
for use with the <strong>Cuisinart</strong> ® <strong>Blend</strong> <strong>and</strong> <strong>Cook</strong> <strong>Soupmaker</strong><br />
accessories <strong>and</strong> replacement parts. These warranties<br />
expressly exclude any defects or damages caused by<br />
Any other trademarks or service marks referred to herein are<br />
the trademarks or service marks of their respective owners.<br />
8<br />
accessories, replacement parts, or repair service other<br />
than those that have been authorized by <strong>Cuisinart</strong>. These<br />
warranties do not cover any damage caused by accident,<br />
misuse, shipment, or other than ordinary household use.<br />
These warranties exclude all incidental or consequential<br />
damages. Some states do not allow the exclusion of or<br />
limitation of incidental or consequential damages,<br />
so the foregoing limitation may not apply to you.<br />
CALIFORNIA RESIDENTS ONLY<br />
California law provides that for In-Warranty Service,<br />
California residents have the option of returning a<br />
nonconforming product (A) to the store where it was<br />
purchased or (B) to another retail store that sells <strong>Cuisinart</strong><br />
products of the same type. The retail store shall then,<br />
according to its preferences, either repair the product,<br />
refer the consumer to an independent repair facility, replace<br />
the product, or refund the purchase price less the amount<br />
directly attributable to the consumer’s prior usage of the<br />
product. If either of the above two options does not result<br />
in the appropriate relief to the consumer, the consumer<br />
may then take the product to an independent repair facility<br />
if service or repair can be economically accomplished.<br />
<strong>Cuisinart</strong> <strong>and</strong> not the consumer will be responsible for<br />
the reasonable cost of such service, repair, replacement,<br />
or refund for nonconforming products under warranty.<br />
California residents may also, at their preference, return<br />
nonconforming products directly to <strong>Cuisinart</strong> for repair or,<br />
if necessary, replacement by calling our Consumer Service<br />
Center toll-free at 1-800-726-0190. <strong>Cuisinart</strong> will be<br />
responsible for the cost of the repair, replacement, <strong>and</strong><br />
shipping <strong>and</strong> h<strong>and</strong>ling for such nonconforming products<br />
under warranty.<br />
BEFORE RETURNING YOUR CUISINART PRODUCT<br />
If you are experiencing problems with your <strong>Cuisinart</strong><br />
product, we suggest that you call our Consumer Service<br />
Center at 1-800-726-0190 before returning the product for<br />
servicing. Often, our Consumer Service Representatives can<br />
help solve the problem without having the product serviced.<br />
If servicing is needed, a Representative can confirm whether<br />
the product is under warranty <strong>and</strong> direct you to the nearest<br />
service location.<br />
Important: If the nonconforming product is to be serviced by<br />
someone other than <strong>Cuisinart</strong>’s Authorized Service Center,<br />
please remind the servicer to call our Consumer Service<br />
Center at 1-800-726-0190 to ensure that the problem is<br />
properly diagnosed, the product is serviced with the correct<br />
parts, <strong>and</strong> to ensure that the product is still under warranty.<br />
© 2011 <strong>Cuisinart</strong><br />
150 Milford Road<br />
East Windsor, NJ 08520<br />
Printed in China<br />
11CE113411<br />
E IB-10066B
<strong>Blend</strong> <strong>and</strong> <strong>Cook</strong> <strong>Soupmaker</strong>
RECIPE TIPS<br />
It is easy to prepare your favorite soup <strong>and</strong> sauce<br />
recipes in the <strong>Blend</strong> <strong>and</strong> <strong>Cook</strong> <strong>Soupmaker</strong> by following<br />
these simple tips.<br />
For soup/sauce making:<br />
<br />
Approximately 5 to 10 minutes is a good start to<br />
<br />
<br />
<br />
<br />
<br />
incorporate ingredients with the oil/butter.<br />
<br />
jar should always be covered when using the Stir<br />
function.<br />
<br />
need to cook <strong>and</strong> set unit to High to bring to a boil.<br />
We recommend stirring once or twice during this<br />
<br />
ingredients.<br />
<br />
depending on the amount of ingredients in the<br />
blender jar.<br />
<br />
<br />
time. Extra time can always be added at the<br />
end if additional cooking is necessary. Again<br />
we recommend an occasional stir during the<br />
cooking process.<br />
<br />
<br />
1 <strong>and</strong> gradually increase to speed 3 if necessary.<br />
<strong>Blend</strong> until smooth.<br />
<br />
<br />
once cooking is complete.<br />
<br />
<br />
<br />
<br />
soup/sauce until ready to blend or serve.<br />
<br />
be reduced by 1 ⁄3<br />
lessened when the blender cover is in place.<br />
<br />
remove the measuring cup during the cooking<br />
<br />
2<br />
<br />
it is necessary to stir every few minutes during<br />
<br />
milk proteins from scalding on the bottom.<br />
<br />
blender jar is secured tightly on blender base before<br />
<br />
<strong>Blend</strong>ing cold ingredients:<br />
Grinding/Chopping Nuts - <br />
nuts into the blender jar <strong>and</strong> cover blender. <strong>Blend</strong><br />
on speed 2 for 20 to 30 seconds until desired grind/<br />
chop is achieved. For best results process small<br />
<br />
Bread, <strong>Cook</strong>ie or Cracker Crumbs - Break or<br />
<br />
<br />
blender jar. <strong>Blend</strong> on Speed 2 for 10 to 20 seconds.<br />
<br />
Crushing Ice - <br />
<br />
about 4 to 6 times <strong>and</strong> then blend on Speed 2 until<br />
<br />
Pulse fewer times if coarsely chopped ice is desired.<br />
Grating Fresh Citrus Zest - <br />
blender jar <strong>and</strong> cutting assembly must be clean<br />
<br />
<br />
<br />
<br />
<br />
<br />
recipe) into the blender jar. Cover blender jar. Run on<br />
<br />
Baby Food - <br />
<br />
<br />
blend on speed 2 until completely smooth or desired<br />
consistency is reached. Scrape the jar with a spatula<br />
<br />
<br />
one tablespoon at a time. Always consult with your<br />
pediatrician/family physician concerning the best<br />
foods for your baby <strong>and</strong> when to introduce new<br />
foods to his/her diet.
Grinding Hard Cheese - <br />
<br />
blender jar. Pulse 3 to 4 times to break up cheese.<br />
<strong>Blend</strong> on Speed 3 to 4 until desired grind is reached.<br />
<br />
cheese at a time.<br />
Grinding Spices - <br />
cutting assembly must be clean <strong>and</strong> dry. Put ¼ to<br />
<br />
Pulse 3 to 4 times to break up <strong>and</strong> then blend on<br />
Speed 2 to 3 for about 20 to 40 seconds.<br />
Whipping Cream - <br />
cutting assembly in refrigerator for 15 minutes. Put<br />
1 cup heavy or whipping cream into blender jar.<br />
<br />
not overblend – bits of butter will begin to form.)<br />
<br />
teaspoons of vanilla or other flavoring. Consistency<br />
with be that of a thickened but not fluffy whipped<br />
<br />
or coffee drinks.<br />
<br />
<br />
use it.<br />
<br />
<br />
making smoothies <strong>and</strong> frosty beverages to prevent<br />
diluting the drink.<br />
<br />
<br />
<strong>and</strong> <strong>Blend</strong> on Speed 1 for 30 seconds or more as<br />
<br />
thoroughly before the next use.<br />
3<br />
High<br />
<br />
<br />
QUICK REFERENCE GUIDE – BLENDER<br />
<br />
is in St<strong>and</strong>by mode<br />
<br />
<br />
In St<strong>and</strong>by mode turn dial to<br />
<br />
Repeat as needed<br />
<br />
on Speed 2 or until desired consis<br />
tency is reached<br />
<br />
<br />
<br />
<br />
<br />
SPEED SELECTION GUIDE<br />
Refer to this guide to choose the best blender speed for your desired result.<br />
Ingredient/Recipe Speed Result<br />
Reconstituting<br />
<br />
1 to 2 <br />
1 <br />
Salad dressings 1<br />
<br />
or less at a time)<br />
Heavy or whipping cream 1<br />
<br />
<br />
1 cup or less at a time)<br />
<br />
<br />
or salt from recipe)<br />
<br />
health drinks<br />
Baby food/fruit <strong>and</strong><br />
<br />
TEMPERATURE GUIDE<br />
2<br />
2<br />
High temperature<br />
<br />
<br />
Completely blended <strong>and</strong><br />
emulsified<br />
Coarse to fine<br />
<br />
<br />
<br />
Coarse to fine as desired<br />
<br />
1 to 2 Uniformly fine<br />
1 to 4<br />
<br />
thick<br />
1 to 2 Smooth <strong>and</strong> creamy<br />
1 to 4 <br />
Hard cheeses<br />
Spices<br />
Ice<br />
<br />
blend on 3 to 4<br />
<br />
blend on 2 to 3<br />
Pulse then blend<br />
on 2<br />
Coarse to fine<br />
Coarse to fine<br />
Coarse crush to snowy<br />
<br />
Perfect Simmer temperature<br />
<br />
Steeping
RECIPES<br />
Drinks<br />
................................ 5<br />
Super Green Smoothie ........................... 5<br />
Berry Cherry Smoothie ........................... 5<br />
Fresh Fruit Smoothie ............................ 5<br />
Protein to Go Smoothie .......................... 6<br />
......................... 6<br />
................................ 6<br />
Breakfast <strong>and</strong> Brunch<br />
Apple Filling for Crêpes . ......................... <br />
Crêpe Batter ................................... <br />
Whole Wheat Buttermilk Pancakes . ................ <br />
4<br />
...................... 6<br />
..................... 6<br />
.................................. 6<br />
Chai .......................................... 7<br />
Hot Chocolate .................................. 7<br />
...................... 7<br />
................................... 7<br />
Blueberry Sauce ................................ 9<br />
Warm Peach Compote ........................... 9<br />
Frittata with Greens <strong>and</strong> Parmesan ................. 9<br />
Starters<br />
Roasted Vegetable Spread ....................... 10 Zucchini Custards .............................. 10<br />
Soups<br />
Parsnip <strong>and</strong> Apple Soup . .........................11<br />
Chilled Borscht .................................11<br />
Carrot <strong>and</strong> Ginger Soup ..........................11<br />
................................... 12<br />
Chicken Noodle Soup ........................... 12<br />
Roasted Red Pepper Soup . ...................... 12<br />
.................................. 13<br />
Corn <strong>and</strong> Clam Chowder ........................ 13<br />
Dressings <strong>and</strong> Sauces<br />
Basic Vinaigrette ............................... 17<br />
Warm Vinaigrette .............................. 17<br />
........................... 17<br />
........................ <br />
Desserts<br />
.................. 20<br />
.................... 20<br />
Coconut Custards . ............................. 20<br />
. ........................ 21<br />
............... 13<br />
Green Pea <strong>and</strong> Spinach Soup .................... 14<br />
.......................... 14<br />
Creamy Greens Soup ........................... 14<br />
....... 15<br />
Pasta e Fagiole . ............................... 15<br />
Root Vegetable Soup ........................... 16<br />
................................... 16<br />
Red Chile Sauce ............................... <br />
........................... <br />
Romesco Sauce ............................... 19<br />
Salsa Verde ................................... 19<br />
. .................. 21<br />
Crème Anglaise ................................ 21<br />
Pumpkin Bread Pudding . ........................ 22<br />
.................... 22
Drinks<br />
Basil Lemonade<br />
The slight hint of basil in this homemade lemonade<br />
is a refreshing change to a classic.<br />
<br />
6 ounces fresh lemon juice<br />
8 ounces simple syrup (page 6)<br />
6 large basil leaves<br />
12 ounces seltzer<br />
1. Put ingredients into the blender jar in order listed.<br />
<br />
for 1 minute.<br />
3. Serve over ice.<br />
<br />
<br />
Nutritional information per serving:<br />
<br />
<br />
Super Green Smoothie<br />
<br />
more vegetables into your diet.<br />
<br />
1½ cups apple juice<br />
1 cup pineapple juice<br />
1 cup 1-inch cubed fresh mango (about 1 small fruit)<br />
1½ cups frozen mango pieces<br />
2 bananas, cut into 1-inch pieces<br />
3 kiwis, peeled <strong>and</strong> cut into 1-inch pieces<br />
1 cup loosely packed parsley, stems trimmed<br />
2 generous h<strong>and</strong>fuls fresh baby spinach<br />
<br />
jar in order listed.<br />
<br />
<br />
the spinach through the lid opening. Raise once again to<br />
<br />
about another 60 to 75 seconds.<br />
3. Serve immediately.<br />
Nutritional information per serving:<br />
<br />
<br />
5<br />
Berry Cherry Smoothie<br />
<br />
to start the day.<br />
<br />
½ cup coconut water<br />
½ cup plain yogurt<br />
2 bananas, cut into 1-inch pieces<br />
1 cup fresh strawberries, hulled <strong>and</strong> quartered<br />
1 cup frozen blueberries<br />
1 cup frozen cherries<br />
1 to 2 tablespoons honey (optional)<br />
1. Put ingredients into the blender jar in order listed.<br />
<br />
3. Serve immediately.<br />
Nutritional information per serving:<br />
<br />
<br />
Fresh Fruit Smoothie<br />
Layers of fresh fruit blend in just seconds<br />
to make this all-fruit smoothie.<br />
<br />
½ cup orange juice<br />
1 cup 1-inch cubed cantaloupe<br />
1 medium banana, cut into 1-inch slices<br />
1 cup 1-inch cubed mango (about 1 small fruit)<br />
¾ cup 1-inch cubed pineapple<br />
1 cup raspberries or mixed berries (fresh or frozen)<br />
¾ cup 1-inch cubed pineapple<br />
(fresh or canned, drained)<br />
1 cup navel orange segments<br />
1 cup hulled <strong>and</strong> halved strawberries<br />
1 cup ice cubes (about 6 st<strong>and</strong>ard)<br />
1. Put ingredients into the blender jar in order listed.<br />
<br />
3. Serve immediately.<br />
Note: Be sure the fruit is really ripe for the sweetest<br />
smoothie.<br />
Nutritional information per serving:
Protein to Go Smoothie<br />
<br />
<br />
1½ cups soy, almond or hemp milk<br />
(cow’s milk may also be used)<br />
½ cup plain or vanilla yogurt<br />
1 banana, quartered<br />
1 frozen banana, cut into ½-inch pieces<br />
1½ cups mixed frozen berries<br />
2 tablespoons protein powder<br />
2 tablespoons honey (optional)<br />
1. Put ingredients into the blender jar in order listed.<br />
<br />
3. Serve immediately.<br />
Nutritional information per serving:<br />
<br />
<br />
Classic Frozen Margarita<br />
<br />
<br />
1 cup fresh lime juice<br />
1¼ cups tequila<br />
1 cup Triple Sec<br />
¼ cup simple syrup, chilled (page 6)<br />
4 cups st<strong>and</strong>ard ice cubes<br />
1. Put ingredients in the blender jar in order listed.<br />
<br />
<br />
to be stirred before serving.<br />
Nutritional information per serving:<br />
<br />
<br />
Frozen Mudslide<br />
A delicious version of an adult milkshake.<br />
<br />
¼ cup Kahlúa<br />
¼ cup vodka<br />
2 tablespoons Irish cream liqueur<br />
4 cups vanilla ice cream<br />
1. Put ingredients into the blender jar in order listed.<br />
<br />
3. Serve immediately.<br />
Nutritional information per serving:<br />
<br />
<br />
6<br />
Ginger Jasmine Mar-“tea”-ni<br />
The jasmine notes balance the fruit well in this exotic cocktail.<br />
<br />
2 ounces chilled jasmine tea<br />
4 ounces vodka<br />
2 ounces ginger simple syrup, chilled (recipe follows)<br />
½ ounce peach schnapps<br />
½ ounce fresh squeezed orange juice<br />
(juice from about ½ small orange)<br />
ice<br />
<br />
2. <strong>Blend</strong> on speed 2 to completely combine.<br />
3. Fill a cocktail shaker with ice. Place cocktail ingredients into<br />
the shaker. Shake well <strong>and</strong> pour evenly between 2 martini<br />
glasses. Serve immediately.<br />
Nutritional information per serving:<br />
<br />
<br />
Simple Syrup (with variations)<br />
<br />
from cocktails to iced tea.<br />
<br />
2 cups water<br />
2 cups granulated sugar<br />
1. Put the water <strong>and</strong> sugar into the blender jar. Set timer for 10<br />
<br />
combine.<br />
<br />
3. Cool before using.<br />
Ginger Syrup -<br />
<br />
<br />
before using.<br />
Lavender Syrup -<br />
<br />
Strain <strong>and</strong> chill before using.<br />
Mocha Shake<br />
This thick <strong>and</strong> rich shake will take care of your<br />
chocolate craving immediately.<br />
<br />
½ cup reduced-fat milk<br />
4 teaspoons instant espresso<br />
¼ cup chocolate syrup<br />
4 cups premium ice cream (we recommend<br />
1½ cups chocolate <strong>and</strong> 2½ cups vanilla)<br />
1. Put the milk <strong>and</strong> espresso into the blender jar. <strong>Blend</strong> on
homogenous.<br />
3. Serve immediately.<br />
Nutritional information per serving:<br />
<br />
<br />
Chai<br />
<br />
reduced fat or soy milk may be substituted.<br />
<br />
4½ cups half & half<br />
½ tablespoon pure vanilla extract<br />
12 bags black tea<br />
½ teaspoon freshly ground black pepper<br />
½ teaspoon ground cloves<br />
1 teaspoon ground cinnamon<br />
6 star anise pods<br />
2 1x1-inch piece of peeled fresh ginger<br />
¼ teaspoon orange zest<br />
4 tablespoons honey<br />
1. Put half & half <strong>and</strong> vanilla into the blender jar. Set timer for 20<br />
minutes <strong>and</strong> temperature on High until milk is hot <strong>and</strong> foamy.<br />
Stir mixture every few minutes.<br />
<br />
<br />
opening as the stir function will break up the tea bags.<br />
<br />
steep the ingredients.<br />
<br />
<br />
discarding the bags.<br />
5. Stir in tea <strong>and</strong> honey <strong>and</strong> serve.<br />
Nutritional information per serving:<br />
<br />
<br />
Hot Chocolate<br />
<br />
<br />
3½ cups whole milk<br />
4 teaspoons cocoa powder<br />
8 ounces semisweet chocolate,<br />
finely chopped (may use chocolate chips)<br />
<br />
<br />
<br />
the cocoa powder <strong>and</strong> chocolate <strong>and</strong> set timer for 15 minutes<br />
<br />
7<br />
few minutes during cooking time to blend ingredients.<br />
3. Serve immediately once time expires.<br />
Nutritional information per serving:<br />
<br />
<br />
Orange White Hot Chocolate<br />
Orange <strong>and</strong> white chocolate together<br />
make a delicious combination.<br />
<br />
3½ cups whole milk<br />
8 ounces white chocolate,<br />
finely chopped (may use white chocolate chips)<br />
1 teaspoon pure orange extract<br />
<br />
<br />
<br />
<br />
constantly until the chocolate has fully melted. Add the<br />
orange extract <strong>and</strong> stir every few minutes during cooking<br />
time to blend.<br />
3. Serve immediately.<br />
Nutritional information per serving:<br />
<br />
<br />
Mulled Wine<br />
<br />
<br />
<br />
<br />
1 bottle of red wine<br />
3 cinnamon sticks<br />
pinch ground nutmeg<br />
8 whole cloves<br />
1 orange, zested<br />
½ cup packed light brown sugar<br />
7 slices orange peel, for serving<br />
<br />
<br />
cinnamon sticks. Cover <strong>and</strong> set timer for 5 minutes <strong>and</strong><br />
<br />
but not boiling.<br />
<br />
spices to steep in the wine.<br />
<br />
peel.<br />
Nutritional information per serving:
Breakfast <strong>and</strong> Brunch<br />
Apple Filling for Crêpes<br />
<br />
<br />
<br />
3 tablespoons unsalted butter, cut into tablespoons<br />
3 Granny Smith apples, peeled, cored,<br />
<strong>and</strong> cut into ½-inch dice<br />
1∕3 cup granulated sugar<br />
¾ teaspoon ground cinnamon<br />
pinch table salt<br />
1. Put the butter in the blender jar. Set timer for 15 minutes <strong>and</strong><br />
<br />
<br />
<br />
<br />
<br />
before adding the next batch. Stir between each addition 3 to<br />
5 times.<br />
<br />
long pulses to achieve an even consistency.<br />
<br />
<br />
while the mixture is cooking.<br />
5. Serve warm or at room temperature.<br />
Nutritional information per serving (2 tablespoons):<br />
<br />
<br />
Crêpe Batter<br />
<br />
<br />
<br />
or savory (eggs <strong>and</strong> ham; vegetables <strong>and</strong> holl<strong>and</strong>aise).<br />
<br />
¼ cup unsalted butter, cut into tablespoons<br />
1 cup reduced-fat milk, room temperature<br />
¾ cup unbleached, all-purpose flour<br />
½ teaspoon salt<br />
1 tablespoon granulated sugar<br />
3 large eggs, room temperature<br />
1 teaspoon pure vanilla extract<br />
1 teaspoon unsalted butter, room temperature<br />
<br />
1. Put butter in the blender jar. Set timer for 4 minutes <strong>and</strong><br />
<br />
<br />
the blender jar <strong>and</strong> then blend on speed 1. Scrape the sides<br />
of the blender jar <strong>and</strong> blend to incorporate any ingredients<br />
that may be clinging to the jar.<br />
<br />
then the vanilla. Raise to speed 3 to fully blend the mixture<br />
so it has no lumps.<br />
<br />
<br />
necessary to remove any lumps.<br />
<br />
<br />
<br />
<br />
<br />
finish the other side for an additional minute. Continue<br />
cooking crêpes until the batter is gone.<br />
<br />
Nutritional information per crêpe:<br />
<br />
<br />
Whole Wheat Buttermilk Pancakes<br />
<br />
<br />
<br />
1¾ cups whole wheat flour<br />
2 tablespoons granulated sugar<br />
2 teaspoons baking powder<br />
¼ teaspoon baking soda<br />
½ teaspoon table salt<br />
½ teaspoon orange zest<br />
2 tablespoons unsalted butter<br />
1 large egg<br />
1½ cups buttermilk<br />
½ cup plain yogurt<br />
1 tablespoon extra virgin olive oil<br />
1 teaspoon pure vanilla extract<br />
<br />
<br />
reserve.<br />
2. Put the butter in the blender jar. Set timer for 1 minute <strong>and</strong>
Scrape down blender jar <strong>and</strong> then add remaining dry<br />
ingredients <strong>and</strong> then pulse to combine. Be careful not to<br />
<br />
<br />
pancakes onto preheated greased pan to cook.<br />
Nutritional information per pancake:<br />
<br />
<br />
Blueberry Sauce<br />
<br />
<br />
<br />
<br />
4 cups (2 pints) fresh blueberries<br />
¼ cup pure maple syrup<br />
pinch sea salt<br />
½ tablespoon fresh lemon juice<br />
½ tablespoon cornstarch<br />
<br />
with the measuring cup removed.<br />
<br />
<br />
<br />
<br />
for 30 seconds.<br />
<br />
store in the refrigerator for up to one week. Can be served<br />
warm or at room temperature.<br />
Nutritional information per serving (2 tablespoons):<br />
<br />
<br />
Warm Peach Compote<br />
This is delicious served warm over oatmeal<br />
<br />
<br />
<br />
¼ cup water<br />
1 pound (about 3 to 4 small to medium) peaches,<br />
cut into ½-inch dice<br />
3 tablespoons honey<br />
pinch sea salt<br />
¼ teaspoon ground cinnamon<br />
½ cup walnut pieces<br />
<br />
the measuring cup removed.<br />
<br />
<br />
9<br />
<br />
consistency.<br />
4. Serve warm or chilled.<br />
Nutritional information per serving (2 tablespoons):<br />
<br />
<br />
Frittata with Greens <strong>and</strong> Parmesan<br />
Frittatas are a great alternative to traditional omelets.<br />
<br />
<br />
nonstick cooking spray<br />
1 tablespoon extra virgin olive oil<br />
1 shallot, cut into ½-inch pieces<br />
1 garlic clove, smashed<br />
3 to 4 tablespoons water<br />
(heartier greens require more water)<br />
8 ounces mixed greens<br />
(collards, beet, kale, escarole, chicory, etc.),<br />
discard rough stems, cut or tear into large pieces<br />
12 large eggs<br />
¾ cup whole or reduced-fat milk<br />
½ teaspoon kosher or sea salt<br />
1 to 2 pinches freshly ground black pepper<br />
8 medium to large fresh basil leaves<br />
3 to 4 ounces Parmesan, finely grated<br />
<br />
® GreenGourmet ® Skillet is the<br />
perfect pan for this recipe) with nonstick cooking spray.<br />
2. Put the oil in the blender jar. Set timer for 5 minutes <strong>and</strong><br />
<br />
<br />
until the vegetables have softened.<br />
<br />
add the water through the lid opening. Bring the water to a<br />
boil <strong>and</strong> then add the greens. Allow greens to wilt with unit<br />
still on high.<br />
<br />
<strong>and</strong> basil. <strong>Blend</strong> on speeds 2 to 3 for 30 seconds to combine.<br />
5. Set the prepared skillet over medium heat. Pour mixture into<br />
<br />
adjusting heat as necessary to prevent the bottom from<br />
getting too dark.<br />
<br />
<br />
<br />
serving.<br />
Nutritional information per serving (based on 12 servings):
Starters<br />
Roasted Vegetable Spread<br />
<br />
<br />
<br />
<br />
<br />
2 tablespoons extra virgin olive oil, divided<br />
½ medium red onion, cut into ½-inch pieces<br />
6 garlic cloves, smashed<br />
1 tablespoon water<br />
½ medium eggplant, cut into ½-inch pieces<br />
1 tablespoon balsamic vinegar<br />
2 roasted red peppers (jarred or fresh), drained<br />
<strong>and</strong> cut into ½-inch pieces<br />
¼ teaspoon sea salt<br />
¼ teaspoon freshly ground black pepper<br />
8 large fresh basil leaves<br />
½ tablespoon capers, drained<br />
1. Put 1 tablespoon of the oil in the blender jar. Set timer for 30<br />
<br />
add the onion <strong>and</strong> garlic. Cover the blender jar <strong>and</strong> stir 2 to 3<br />
<br />
<br />
<br />
occasion until the eggplant is soft <strong>and</strong> completely<br />
<br />
sides if needed.<br />
<br />
blend on speeds 1 to 2 until desired consistency is reached –<br />
this spread is delicious slightly chunky or smooth depending<br />
on personal preference.<br />
<br />
<br />
Nutritional information per serving (2 tablespoons):<br />
<br />
<br />
10<br />
Zucchini Custards<br />
<br />
<br />
<br />
<br />
½ tablespoon unsalted butter<br />
1 small onion, cut into ½-inch pieces<br />
2 small zucchini, shredded <strong>and</strong> drained in a col<strong>and</strong>er<br />
or paper towel to remove any excess moisture<br />
2 to 3 ounces feta, crumbled<br />
11∕3 cups heavy cream<br />
4 large eggs<br />
¼ teaspoon sea salt, plus more to taste<br />
pinch freshly ground black pepper<br />
1. Preheat oven to 400°F.<br />
2. Put the butter into the blender jar. Set timer for 5 minutes <strong>and</strong><br />
<br />
<br />
<br />
allow mixture to cool for about 5 minutes.<br />
<br />
<br />
each one.<br />
<br />
pepper. <strong>Blend</strong> on speed 2 for 20 seconds. Pour evenly over<br />
<br />
<br />
or until a knife when inserted into custard comes out clean.<br />
Nutritional information per serving:
Soups<br />
Parsnip <strong>and</strong> Apple Soup<br />
<br />
<br />
<br />
1 tablespoon unsalted butter<br />
1 small shallot, cut into ½-inch pieces<br />
3 cups chicken broth, low sodium<br />
½ teaspoon kosher salt<br />
1 pound parsnips, thinly sliced<br />
1 small apple, peeled, cored <strong>and</strong><br />
cut into 1-inch pieces<br />
1 small potato, peeled <strong>and</strong> cut into 1-inch pieces<br />
1 teaspoon fresh thyme leaves<br />
<br />
<br />
add the shallot. Cover the blender jar <strong>and</strong> stir 2 to 3 times to<br />
<br />
softened.<br />
<br />
<br />
<br />
<br />
<br />
<br />
<br />
Nutritional information per serving (1 cup):<br />
<br />
<br />
Chilled Borscht<br />
<br />
<br />
<br />
<br />
1 tablespoon olive oil<br />
1 small shallot, cut into ½-inch pieces<br />
2 medium carrots, thinly sliced<br />
2½ cups chicken broth, low sodium<br />
1½ pounds beets, scrubbed well <strong>and</strong> peeled,<br />
cut into ½-inch pieces<br />
½ teaspoon kosher salt<br />
pinch freshly ground black pepper<br />
1 teaspoon fresh lemon juice<br />
<br />
<br />
<br />
<br />
<br />
11<br />
<br />
<br />
<br />
<br />
<br />
<strong>Blend</strong> starting with speed 1 gradually rising to speed 3 until<br />
<br />
<br />
Nutritional information per serving (1 cup):<br />
<br />
<br />
Carrot <strong>and</strong> Ginger Soup<br />
<br />
<br />
1 tablespoon unsalted butter or olive oil<br />
1 garlic clove<br />
1 small onion (about 3 ounces),<br />
cut into ½-inch pieces<br />
½ ounce ginger, cut into ½-inch pieces<br />
1½ pounds carrots, cut into ½-inch pieces<br />
¼ teaspoon ground cinnamon<br />
1∕8 teaspoon ground allspice<br />
pinch freshly ground nutmeg<br />
1 thyme sprig, leaves removed <strong>and</strong> stem discarded<br />
½ teaspoon kosher salt<br />
3 cups chicken broth, low sodium<br />
<br />
<br />
<br />
<br />
<br />
<br />
a few times to combine ingredients. Set timer for 20 minutes<br />
<br />
<br />
or twice while soup is simmering.<br />
<br />
<br />
<br />
<br />
<br />
<br />
Nutritional information per serving (1 cup):
Lentil Soup<br />
A delicious version of a classic.<br />
<br />
1 tablespoon olive oil<br />
1 small onion, cut into ½-inch pieces<br />
1 small carrot, cut into a ½-inch dice<br />
2 garlic cloves<br />
1 bay leaf<br />
½ pound dried brown lentils<br />
3 to 4 cups chicken or vegetable stock or broth<br />
(stock makes a more flavorful soup)<br />
¾ teaspoon kosher salt<br />
¼ teaspoon freshly ground black pepper<br />
<br />
<br />
<br />
bursts to break up the onions. Add the carrot <strong>and</strong> garlic <strong>and</strong><br />
<br />
softened.<br />
<br />
<br />
<br />
<br />
<br />
<br />
<br />
<br />
desired.<br />
Nutritional information per serving (1 cup):<br />
<br />
<br />
Chicken Noodle Soup<br />
<br />
can be made any night of the week.<br />
<br />
1 tablespoon unsalted butter<br />
1 small onion, cut into ½-inch pieces<br />
4 cups chicken broth, low sodium<br />
2 medium carrots, cut into ¼-inch rounds<br />
2 celery stalks, cut into ¼-inch dice<br />
½ teaspoon kosher salt, plus more to taste<br />
¼ teaspoon freshly ground black pepper<br />
2 to 3 sprigs fresh thyme, leaves removed<br />
<strong>and</strong> stems discarded<br />
¾ to 1 pound mixed chicken breasts <strong>and</strong> thighs,<br />
boneless <strong>and</strong> skinless, cut into ½-inch pieces<br />
½ cup medium egg noodles<br />
3 to 4 sprigs fresh parsley, leaves removed <strong>and</strong> chopped<br />
12<br />
<br />
<br />
<br />
<br />
stirring occasionally.<br />
<br />
mix. Set timer for 15 minutes <strong>and</strong> temperature on High to<br />
<br />
<br />
<br />
through the lid opening.<br />
<br />
through the lid opening.<br />
<br />
seasoning as desired.<br />
Nutritional information per serving (1 cup):<br />
<br />
<br />
Roasted Red Pepper Soup<br />
<br />
<br />
½ tablespoon olive oil<br />
1 garlic clove<br />
2 shallots, cut into ½-inch pieces<br />
1 teaspoon fresh thyme leaves<br />
4 roasted red bell peppers, seeded<br />
(may used jarred, or home made)<br />
<strong>and</strong> cut into 1-inch pieces<br />
1 tablespoon sherry<br />
2½ cups chicken broth, low sodium<br />
½ teaspoon kosher or sea salt<br />
1 to 2 pinches freshly ground black pepper<br />
¼ teaspoon orange zest<br />
1. Put the olive oil to the blender jar. Set timer for 15 minutes<br />
<br />
<br />
<br />
<br />
2. Put the roasted peppers <strong>and</strong> all of the remaining ingredients<br />
<br />
<br />
<br />
<br />
<br />
<br />
Nutritional information per serving (1 cup):
Tomato Soup<br />
<br />
<br />
<br />
<br />
1¼ cups vegetable stock<br />
½ small onion, cut into ½-inch pieces<br />
1 small carrot, cut into ½-inch pieces<br />
1 small celery stalk, cut into ½-inch pieces<br />
1 teaspoon dried basil<br />
½ teaspoon dried marjoram<br />
1 tablespoon unbleached, all-purpose flour<br />
1 can (28-ounce) whole plum tomatoes in purée<br />
2 whole sun-dried tomatoes<br />
1∕8 teaspoon baking soda<br />
½ teaspoon kosher salt<br />
½ teaspoon freshly ground black pepper<br />
1. Put all of the ingredients into the blender jar. Cover <strong>and</strong> stir to<br />
mix.<br />
<br />
<br />
<br />
<br />
<br />
<br />
Nutritional information per serving (1 cup):<br />
<br />
<br />
Corn <strong>and</strong> Clam Chowder<br />
<br />
<br />
1 tablespoon unsalted butter<br />
1 small onion, cut into ½-inch pieces<br />
1 large bell pepper, seeded<br />
<strong>and</strong> cut into ½-inch pieces<br />
1½ cups whole milk<br />
½ cup heavy cream<br />
2 cans (6.5-ounce) chopped clams,<br />
juice <strong>and</strong> clams divided<br />
½ pound potatoes, peeled <strong>and</strong> cut into ½-inch dice<br />
½ teaspoon kosher or sea salt<br />
¼ teaspoon freshly ground black pepper<br />
3 to 4 sprigs fresh thyme, leaves removed <strong>and</strong><br />
stems discarded<br />
1∕8 teaspoon cayenne, or to taste<br />
2 to 3 ears fresh corn, kernels cut <strong>and</strong> cobs<br />
discarded (about 2 cups kernels)<br />
1 celery stalk, thinly sliced<br />
2 scallions, white <strong>and</strong> green parts, thinly sliced<br />
13<br />
1. Put the butter in the blender jar. Set timer for 12 minutes <strong>and</strong><br />
<br />
the onion <strong>and</strong> pepper. Cover the blender jar <strong>and</strong> stir a few<br />
<br />
occasionally.<br />
<br />
<br />
<br />
<br />
<br />
for 3 minutes <strong>and</strong> temperature on High to bring soup to a<br />
<br />
<br />
<br />
<br />
clams to warm through.<br />
<br />
<br />
amount of heavy cream <strong>and</strong> decrease the milk<br />
proportionately.<br />
Nutritional information per serving (1 cup):<br />
<br />
<br />
Lightened Broccoli <strong>and</strong> Potato Soup<br />
<br />
<br />
<br />
2 cups vegetable broth<br />
1 garlic clove<br />
½ small onion, cut into ½-inch pieces<br />
2 tablespoons sherry<br />
1 teaspoon sea or kosher salt<br />
½ teaspoon freshly ground black pepper<br />
6 ounces red potatoes, peeled<br />
<strong>and</strong> cut into ½-inch pieces<br />
¾ pound broccoli, cut into ½ to 1-inch pieces<br />
½ teaspoon lemon zest<br />
2 ounces Cheddar, shredded<br />
<br />
broccoli into the blender jar. Cover <strong>and</strong> set timer for 10<br />
minutes <strong>and</strong> temperature on High.<br />
<br />
to mix for about 15 seconds. Set timer for 30 minutes <strong>and</strong><br />
<br />
cooking process.<br />
<br />
<br />
completely smooth.<br />
<br />
Nutritional information per serving (1 cup):
Green Pea <strong>and</strong> Spinach Soup<br />
<br />
<br />
1 tablespoon olive oil<br />
1 garlic clove<br />
1 small to medium leek, cut into ½-inch pieces<br />
2½ cups chicken broth, low sodium<br />
½ teaspoon kosher salt<br />
pinch freshly ground black pepper<br />
1 pound green peas, fresh or frozen (about 3 cups)<br />
1½ teaspoons fresh lemon juice<br />
4 ounces fresh spinach (about 4 packed cups)<br />
8 to 10 medium fresh mint leaves<br />
1. Put the oil into the blender jar. Set timer for 6 minutes <strong>and</strong><br />
<br />
<br />
<br />
<br />
<br />
<br />
<br />
<br />
<br />
or until completely smooth.<br />
<br />
Nutritional information per serving (1 cup):<br />
<br />
<br />
Asparagus Leek Soup<br />
<br />
although it is delicious any time of year.<br />
<br />
1 tablespoon unsalted butter<br />
1 garlic clove<br />
1 medium to large leek, white <strong>and</strong> light green parts<br />
only, washed well <strong>and</strong> cut into ½-inch pieces<br />
1 pound asparagus (about 1 small bunch),<br />
rough ends trimmed <strong>and</strong> cut into ½-inch pieces<br />
2 tablespoons cognac or dry white wine<br />
1 small red potato (about 2 ounces), peeled<br />
<strong>and</strong> cut into ½-inch pieces (hold in water<br />
to prevent oxidation)<br />
¾ teaspoon kosher salt<br />
¼ teaspoon freshly ground black pepper<br />
1-½ cups vegetable broth<br />
½ teaspoon fresh lemon juice<br />
14<br />
<br />
<br />
<br />
<br />
<br />
down with a heatproof spatula.<br />
<br />
asparagus <strong>and</strong> toss with a spatula to coat with the leeks <strong>and</strong><br />
butter. Add the cognac or wine once there are 3 minutes<br />
remaining.<br />
<br />
the blender jar. Cover <strong>and</strong> set time to 10 minutes on High.<br />
<br />
<br />
during the cooking process.<br />
<br />
<br />
<br />
<br />
Nutritional information per serving (1 cup):<br />
<br />
<br />
Creamy Greens Soup<br />
<br />
<br />
<br />
1 tablespoon olive oil<br />
2 garlic cloves<br />
1 small shallot, cut into ½-inch pieces<br />
1 small leek, white part only, cut into ½-inch slices<br />
2 cups vegetable broth<br />
½ teaspoon kosher salt<br />
¼ teaspoon freshly ground black pepper<br />
8 ounces kale (or other leafy greens), hard stems<br />
discarded <strong>and</strong> roughly chopped, divided<br />
2 to 3 ounces Italian parsley (about ½ large bunch),<br />
stems reserved for other use <strong>and</strong> roughly<br />
chopped, divided<br />
1∕3 cup heavy cream<br />
<br />
<br />
<br />
<br />
<br />
blender jar if necessary.<br />
<br />
<br />
<br />
half of the kale <strong>and</strong> parsley. Cover <strong>and</strong> set timer for 20
emove the cover <strong>and</strong> add the remaining greens <strong>and</strong> parsley.<br />
Replace cover <strong>and</strong> stir until completely incorporated.<br />
<br />
<br />
<br />
<br />
<br />
Nutritional information per serving (1 cup):<br />
<br />
<br />
Curried Coconut <strong>and</strong> Butternut Squash<br />
Soup<br />
<br />
<br />
1 tablespoon butter or ghee*<br />
1 small onion, cut into ½-inch pieces<br />
½ jalapeño, seeded <strong>and</strong> cut into ½-inch pieces<br />
1 ½-inch piece of ginger, peeled <strong>and</strong> halved<br />
1 garlic clove<br />
1 tablespoon curry powder<br />
1 can (13.5-ounce) coconut milk<br />
½ cup chicken broth, low sodium<br />
¼ teaspoon kosher salt<br />
1 pound peeled, seeded butternut squash<br />
cut into 1½-inch cubes (about 1 small squash)<br />
1. Put the butter or ghee into the blender jar. Set timer for 15<br />
<br />
<br />
<br />
to break up <strong>and</strong> coat with the butter. Add the curry powder<br />
<strong>and</strong> stir to combine. Scrape down the sides of the jar if<br />
<br />
occasionally.<br />
<br />
<br />
<br />
<br />
<br />
occasionally during the cooking process.<br />
<br />
<br />
<br />
*Ghee is an Indian clarified butter found in the specialty food<br />
section of supermarkets or health food stores.<br />
Nutritional information per serving (1 cup):<br />
<br />
<br />
15<br />
Pasta e Fagiole<br />
This hearty Italian favorite is a meal in itself.<br />
<br />
1 tablespoon olive oil<br />
½ small onion, cut into ½-inch pieces<br />
3 garlic cloves<br />
1 small carrot, thinly sliced<br />
1 small celery stalk, thinly sliced<br />
1 can (15.5-ounce) cannelini beans,<br />
drained but not rinsed, divided<br />
1 can (14-ounce) diced tomatoes, drained<br />
2 cups vegetable broth<br />
¼ teaspoon kosher or sea salt<br />
1∕8 teaspoon freshly ground black pepper<br />
pinch red pepper flakes<br />
½ cup dried pasta (macaroni,<br />
or other hollowed pasta)<br />
4 basil leaves, thinly sliced<br />
grated Parmesan, to taste (for serving)<br />
1. Put the oil into the blender jar. Set timer for 10 minutes <strong>and</strong><br />
<br />
<br />
<br />
<br />
to soften.<br />
<br />
<strong>and</strong> tomatoes. Stir 2 to 3 times to break up. Add remaining<br />
<br />
<br />
<br />
<br />
soup is simmering.<br />
<br />
<br />
<br />
extra cooking time.<br />
5. Add the pasta before serving. Set timer to 10 minutes <strong>and</strong><br />
<br />
<br />
<br />
<br />
<br />
<br />
<br />
<br />
broth will need to be added before serving.<br />
Nutritional information per serving (1 cup):
Root Vegetable Soup<br />
<br />
<br />
1 tablespoon olive oil<br />
1 garlic clove<br />
1 small shallot, cut into ½-inch pieces<br />
3 cups vegetable broth<br />
½ teaspoon kosher or sea salt<br />
1 to 2 pinches freshly ground black pepper<br />
1 small rutabaga (about 6 ounces),<br />
cut into 1-inch pieces<br />
1 small turnip (about 6 to 8 ounces),<br />
cut into 1-inch pieces<br />
1 small sweet potato or yam<br />
(about 7 to 8 ounces), cut into 1-inch pieces<br />
2 medium carrots, cut into 1-inch pieces<br />
1 medium parsnip, cut into 1-inch pieces<br />
½ teaspoon ground cinnamon<br />
3 to 4 sprigs fresh thyme, leaves removed<br />
<strong>and</strong> stems discarded<br />
2 to 3 pinches cayenne, or to taste<br />
<br />
<br />
<br />
<br />
<br />
<br />
remaining ingredients. Set timer for 30 minutes <strong>and</strong><br />
<br />
<br />
speed 3 for 2 minutes or until completely smooth.<br />
<br />
Nutritional information per serving (1 cup):<br />
<br />
<br />
16<br />
Spinach Dal<br />
<br />
<br />
<br />
for some color <strong>and</strong> extra nutrients.<br />
<br />
1 tablespoon ghee* or butter<br />
1 ½-inch piece fresh ginger, peeled <strong>and</strong> halved<br />
1 small onion, cut into ½-inch pieces<br />
½ jalapeño, seeded <strong>and</strong> cut into ½-inch pieces<br />
2 garlic cloves<br />
½ teaspoon ground cumin<br />
1 teaspoon garam masala**<br />
pinch turmeric<br />
¾ teaspoon kosher or sea salt<br />
3 cups water<br />
1½ cups dried red lentils<br />
1 small dried chile, left whole<br />
4 ounces fresh spinach<br />
1. Put the ghee or butter into the blender jar. Set timer for 30<br />
<br />
<br />
<br />
<br />
<br />
<br />
<br />
allowing flavors to develop. Stir every few minutes.<br />
<br />
<br />
<br />
<br />
<br />
<strong>and</strong> stir in the spinach in two batches.<br />
<br />
*Ghee is an Indian clarified butter found in the specialty food<br />
section of supermarkets or health food stores.<br />
**Garam masala is a blend of Indian spices. It can be<br />
purchased in Indian markets <strong>and</strong> most grocery stores.<br />
Nutritional information per serving (1 cup):
Dressings <strong>and</strong> Sauces<br />
Basic Vinaigrette<br />
<br />
<br />
Provence for the combined basil/thyme/marjoram is an easy way<br />
<br />
need to have on h<strong>and</strong>.<br />
<br />
¼ cup red wine vinegar<br />
1 teaspoon Dijon-style mustard<br />
¼ cup fresh parsley<br />
½ teaspoon dried basil<br />
½ teaspoon dried thyme<br />
¼ teaspoon dried tarragon<br />
¼ teaspoon ground white pepper<br />
½ teaspoon kosher salt<br />
¾ cup extra virgin olive oil<br />
<br />
<br />
<br />
the sides of the jar as necessary).<br />
<br />
measuring cup from the cover of the blender. <strong>Blend</strong> on speed<br />
<br />
<br />
<br />
Nutritional information per serving (1 tablespoon):<br />
<br />
<br />
Warm Vinaigrette<br />
This delicious vinaigrette will become<br />
a favorite after the first bite.<br />
<br />
¾ cup extra virgin olive oil, divided<br />
1 garlic clove<br />
1 small shallot, cut into ½-inch pieces<br />
2 tablespoons Dijon-style mustard<br />
¼ teaspoon kosher or sea salt<br />
pinch freshly ground black pepper<br />
3 tablespoons champagne vinegar<br />
1. Put one teaspoon of olive oil into the blender jar <strong>and</strong> set on<br />
<br />
<br />
17<br />
<br />
<br />
reserved olive oil. Stir to combine.<br />
<br />
<br />
blend an additional 30 seconds after all has been added.<br />
<br />
constantly until dressing is heated through.<br />
Nutritional information per serving (1 tablespoon):<br />
<br />
<br />
Walnut-Parsley Pesto<br />
<br />
<br />
<br />
½ cup walnuts, lightly toasted<br />
1 garlic clove<br />
2 cups loosely packed fresh parsley<br />
(about 1 small bunch)<br />
¼ cup grated Parmesan<br />
¼ teaspoon kosher or sea salt<br />
pinch freshly ground black pepper<br />
½ teaspoon lemon zest<br />
1½ teaspoons fresh lemon juice<br />
½ to ¾ cup extra virgin olive oil, divided<br />
1. Put the walnuts in the blender jar. Run on speeds 1 to 3 for<br />
<br />
2. With the unit running on speed 1. Carefully remove the<br />
measuring cup from the cover of the blender. Gradually add<br />
<br />
<br />
jar as necessary.<br />
<br />
to mix. Add the lemon juice <strong>and</strong> blend on speed 1. Remove<br />
<br />
<br />
the mixer is running. Scrape down as necessary <strong>and</strong> let run<br />
until desired consistency. Add remaining oil for thinner<br />
consistency.<br />
<br />
<br />
<br />
<br />
Nutritional information per serving (1 tablespoon):
Green Goddess Dressing<br />
<br />
2. Put the olive oil into the blender jar <strong>and</strong> set timer for 3<br />
<br />
<br />
<br />
<br />
soft.<br />
1<br />
1<br />
garlic clove<br />
green onion/scallion, cut into 1-inch pieces<br />
<br />
<br />
2 anchovy fillets<br />
occasionally.<br />
2 tablespoons fresh tarragon<br />
(leaves from about 4 sprigs)<br />
<br />
<br />
10 medium to large fresh basil leaves<br />
smooth.<br />
¼ cup fresh parsley<br />
<br />
1 tablespoon fresh lemon juice<br />
Nutritional information per serving (2 tablespoons):<br />
1 avocado, each half cut into 4 pieces<br />
<br />
¼ cup plain yogurt or sour cream<br />
<br />
1 tablespoon extra virgin olive oil<br />
pinch kosher or sea salt<br />
Light Marinara Sauce<br />
pinch freshly ground black pepper<br />
<br />
4 to 6 tablespoons water, divided<br />
<br />
<br />
<br />
<br />
of the jar as necessary.<br />
1<br />
5<br />
½<br />
tablespoon extra virgin olive oil<br />
garlic cloves<br />
small onion, cut into ½-inch pieces<br />
2. Add additional water as needed to reach the desired<br />
¼ teaspoon kosher salt, divided<br />
<br />
1 can (28-ounce) whole plum tomatoes in purée<br />
Nutritional information per serving (2 tablespoons):<br />
½ teaspoon freshly ground black pepper<br />
½ teaspoon dried oregano<br />
<br />
1 to 2 tablespoons granulated sugar<br />
Red Chile Sauce<br />
6 large leaves fresh basil, torn into small pieces<br />
1. Put the oil into the blender jar. Cover <strong>and</strong> set timer for 10<br />
<br />
<br />
garlic <strong>and</strong> onion. Stir a few times to coat with the oil <strong>and</strong> to<br />
<br />
<br />
9 dried chiles (any mix of Anaheim,<br />
New Mexico <strong>and</strong>/or Ancho)<br />
<br />
<br />
<br />
1 tablespoon olive oil<br />
<br />
2<br />
2<br />
½<br />
2<br />
small shallots, cut into ½-inch pieces<br />
garlic cloves<br />
teaspoon kosher salt, divided<br />
tablespoons dark brown sugar<br />
the lid while cooking. Be sure to replace to stir occasionally<br />
while cooking.<br />
<br />
<br />
<br />
2 cups chicken broth, low sodium<br />
<br />
1. Reconstitute chiles: place them in a bowl <strong>and</strong> pour boiling<br />
water over them so they are completely submerged. Cover<br />
bowl with foil or an inverted plate. Allow the chiles to sit until<br />
<br />
<br />
<br />
consistency is achieved.<br />
<br />
Nutritional information per serving (¼ cup):<br />
reserve.
Romesco Sauce<br />
<br />
<br />
<br />
1 tablespoon extra virgin olive oil<br />
2 shallots, cut into ½-inch pieces<br />
6 garlic cloves<br />
2∕3 cup almonds, toasted<br />
2 cups white bread, crust removed<br />
<strong>and</strong> cut into ½-inch pieces (about 2 st<strong>and</strong>ard slices)<br />
1 can (28-ounce) whole plum tomatoes, drained<br />
2 roasted red peppers<br />
¼ cup sherry vinegar<br />
¼ cup sherry<br />
½ cup chicken or vegetable broth<br />
1 teaspoon smoked paprika<br />
1 teaspoon kosher salt<br />
¼ teaspoon freshly ground black pepper<br />
1. Put the oil into the blender jar. Cover <strong>and</strong> set timer for 5<br />
<br />
<br />
<br />
<br />
or until chopped. Add the remaining ingredients in the order<br />
<br />
<br />
<br />
1 minute.<br />
<br />
Nutritional information per serving (¼ cup):<br />
<br />
<br />
19<br />
Salsa Verde<br />
<br />
<br />
<br />
1 tablespoon extra virgin olive oil<br />
1 medium onion, cut into ½-inch pieces<br />
1 pound tomatillos, cut into ½-inch pieces<br />
3 garlic cloves<br />
2 to 3 jalapeño or serrano peppers, seeded<br />
<strong>and</strong> cut into ½-inch pieces<br />
½ cup lightly packed fresh cilantro<br />
juice from ½ lime<br />
¼ teaspoon sea or kosher salt<br />
2 teaspoons honey<br />
1. Put the olive oil into the blender jar. Set timer for 20 minutes<br />
<br />
<br />
about 1 ⁄3<br />
<br />
<br />
remaining ingredients <strong>and</strong> blend on speeds 2 to 4 for about 1<br />
<br />
<br />
Nutritional information per serving (2 tablespoons):
Desserts<br />
Chocolate Banana Crème Brûlée<br />
<strong>Cuisinart</strong> ® <br />
kids <strong>and</strong> adults will love it.<br />
<br />
2 cups heavy cream<br />
1 cup whole milk<br />
1 teaspoon pure vanilla extract<br />
4 ounces milk chocolate, roughly chopped<br />
6 large egg yolks<br />
8 tablespoons granulated sugar, divided<br />
1 banana, cut into ½-inch slices<br />
1. Preheat oven to 325°F with the rack in the middle position.<br />
<br />
<br />
every few minutes.<br />
<br />
<br />
<br />
<br />
4. Evenly divide the mixture among 6 shallow ramekins. Skim<br />
the foam off of the top with a spoon or by blotting with a<br />
paper towel. Place the ramekins in a rimmed baking pan <strong>and</strong><br />
then add water until it goes up the sides of the ramekins by<br />
¼ inch.<br />
<br />
temperature <strong>and</strong> then chill overnight.<br />
<br />
<br />
<br />
forth about 1 inch above the ramekin.<br />
Nutritional information per serving:<br />
<br />
<br />
Cinnamon-Maple Applesauce<br />
A healthy afternoon treat for you <strong>and</strong> your family.<br />
<br />
½ cup water<br />
4 medium to large apples (about 1½ pounds),<br />
peeled, cored <strong>and</strong> cut into 1-inch pieces<br />
1 teaspoon ground cinnamon<br />
1 to 2 pinches ground nutmeg<br />
1 to 2 pinches ground cloves<br />
1 to 2 pinches kosher or sea salt (optional)<br />
1 to 2 teaspoons fresh lemon juice<br />
1 to 2 tablespoons pure maple syrup (optional)<br />
20<br />
1. Put the water into the blender jar. Set timer for 12 minutes<br />
<br />
<br />
<br />
<br />
homogenous.<br />
<br />
blend on speed 1 until desired consistency is reached.<br />
Nutritional information per serving (½ cup):<br />
<br />
<br />
Coconut Custards<br />
The coconut gives these custards a delicious rich texture.<br />
<br />
1 can (13.5-ounce) unsweetened coconut milk<br />
2∕³ cup heavy cream<br />
½ teaspoon pure vanilla extract<br />
¼ teaspoon coconut extract<br />
½ cup unsweetened shredded coconut<br />
2 large eggs<br />
4 large egg yolks<br />
½ cup granulated sugar<br />
¼ teaspoon table salt<br />
1. Preheat oven to 300°F. Pour 1 inch of warm water into a<br />
<br />
<br />
<br />
on High.<br />
<br />
<br />
<br />
boiling.<br />
<br />
minutes.<br />
<br />
<br />
<br />
<br />
gradually add the egg mixture through lid opening. Continue<br />
<br />
homogenous.<br />
6. Pour the mixture through a fine strainer set over a mixing<br />
<br />
<br />
then spoon off the top layer of foam from the mixture.<br />
<br />
ounces each). Place individual custards into the prepared<br />
<br />
<br />
centers will still move slightly when shaken).
plastic <strong>and</strong> refrigerate at least 2 hours before serving.<br />
Nutritional information per serving:<br />
<br />
<br />
Lemon-Lavender Sorbet<br />
The subtle floral notes of the lavender work nicely with the lemon<br />
in this refreshing sorbet.<br />
<br />
2½ cups Lavender Simple Syrup (page 6)<br />
3¾ cups fresh lemon juice (from about 10 to 12 lemons)<br />
1. Combine all ingredients <strong>and</strong> mix well.<br />
® <br />
<br />
<br />
<br />
<br />
<br />
<br />
Nutritional information per serving (based on ½ cup):<br />
<br />
<br />
Mascarpone-Honey Panna Cotta<br />
<br />
<br />
<br />
2 tablespoons water<br />
1¼ teaspoons unflavored powdered gelatin<br />
2 cups heavy cream, divided<br />
½ cup granulated sugar<br />
¹∕3 cup nonfat plain yogurt<br />
¾ cup mascarpone<br />
1 teaspoon pure vanilla extract<br />
3 tablespoons honey<br />
<br />
<br />
about 15 minutes.<br />
2. Put 1 cup of the cream <strong>and</strong> all of the sugar into the blender<br />
jar. Set timer for 2 minutes <strong>and</strong> temperature on High to<br />
<br />
the unit off <strong>and</strong> add the gelatin mixture. Stir to combine.<br />
3. Add the remaining cream <strong>and</strong> all of the other ingredients to<br />
<br />
until well combined.<br />
21<br />
<br />
Chill overnight.<br />
Nutritional information per serving:<br />
<br />
<br />
Crème Anglaise<br />
<br />
<br />
2 cups whole milk<br />
2 cups heavy cream<br />
1 cup granulated sugar, divided<br />
pinch table salt<br />
1 whole vanilla bean, halved <strong>and</strong> seeds scraped<br />
(pod saved for another use or discarded)<br />
5 large egg yolks<br />
1½ teaspoons pure vanilla extract<br />
<br />
seeds into the blender jar. Cover <strong>and</strong> blend on speed 1 for<br />
<br />
<br />
<br />
extract into a bowl <strong>and</strong> whisk until light <strong>and</strong> thickened.<br />
Reserve.<br />
<br />
<br />
<br />
the lid opening in the cover.<br />
<br />
<br />
<br />
few minutes.<br />
5. Sauce is done when it can coat the back of the spoon – the<br />
<br />
able to tell when it's done – the mixture leaves a thickened<br />
<br />
<br />
6. Pour the mixture through a fine mesh strainer. Bring to room<br />
temperature. Cover <strong>and</strong> chill for at least 2 hours or overnight.<br />
<br />
following the instructions for your ice cream maker.<br />
Nutritional information per serving (based on ½ cup ice cream):<br />
<br />
<br />
Nutritional information per serving (based on 2 tablespoons sauce):
Pumpkin Bread Pudding<br />
<br />
<br />
<br />
<br />
1 tablespoon unsalted butter<br />
1 pound challah loaf, cut into 2-inch cubes<br />
1 can (12-ounce) evaporated lowfat milk<br />
1¼ cups heavy cream<br />
6 large eggs<br />
½ tablespoon pure vanilla extract<br />
1 can (15 ounce) pumpkin purée<br />
(about 1½ to 1¾ cups)<br />
½ cup plus 2 tablespoons granulated sugar<br />
1½ teaspoons ground cinnamon<br />
¹∕8 teaspoon ground allspice<br />
¹∕8 teaspoon ground ginger<br />
pinch freshly ground nutmeg<br />
<br />
<br />
bowl.<br />
2. Put the remaining ingredients into the blender jar in the order<br />
listed <strong>and</strong> cover. Starting on speed 1 <strong>and</strong> gradually raising to<br />
<br />
seconds.<br />
3. Pour egg mixture over the bread cubes <strong>and</strong> toss together so<br />
that all of the bread cubes are coated with egg mixture<br />
<br />
<br />
to room temperature for 30 minutes before proceeding).<br />
<br />
<br />
with a rim that is at least 2 inches. Place in the oven <strong>and</strong><br />
carefully pour warm water into the larger outer pan until the<br />
<br />
<br />
minutes. Bread pudding is done when internal temperature<br />
reaches 140˚F. Remove from oven <strong>and</strong> allow the bread<br />
pudding to rest for about 20 minutes on a rack before<br />
serving. Serve with sweetened whipped cream.<br />
Nutritional information per serving (based on 12 servings):<br />
<br />
<br />
22<br />
Dairy-Free Chocolate Mousse<br />
<br />
<br />
1 cup soy milk<br />
12 ounces semi-sweet chocolate<br />
(roughly chopped) or chocolate chips<br />
¹∕ ³ cup granulated sugar<br />
½ tablespoon pure vanilla extract<br />
1 package silken tofu (14 to 16 ounces),<br />
drained <strong>and</strong> cut into 1-inch cubes<br />
1. Put the soy milk into the blender jar. Cover <strong>and</strong> Set timer for<br />
<br />
<br />
<br />
homogenous.<br />
<br />
blender lid <strong>and</strong> add the tofu cubes through the lid opening<br />
with the unit on speed 1.<br />
<br />
1 minute.<br />
<br />
on the counter to remove any air bubbles. Wrap with plastic<br />
<strong>and</strong> refrigerate for at least 2 hours before serving.<br />
Nutritional information per serving: