Fagor Electric Multi-Cooker
Fagor Electric Multi-Cooker
Fagor Electric Multi-Cooker

Create successful ePaper yourself
Turn your PDF publications into a flip-book with our unique Google optimized e-Paper software.
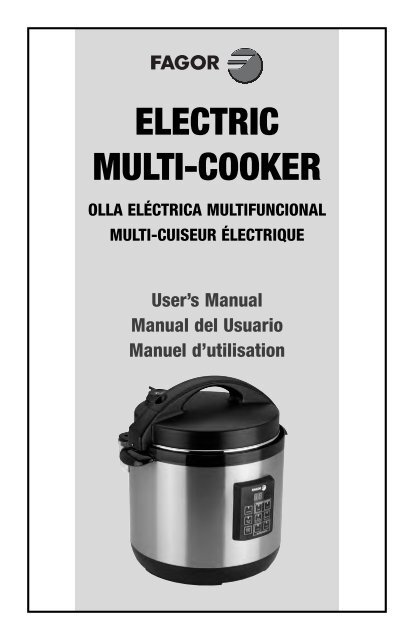
ELECTRIC<br />
MULTI-COOKER<br />
OLLA ELÉCTRICA MULTIFUNCIONAL<br />
MULTI-CUISEUR ÉLECTRIQUE<br />
User’s Manual<br />
Manual del Usuario<br />
Manuel d’utilisation
Contents<br />
Important Safeguards .............................................................................................. 3<br />
Features and Functions ............................................................................................ 5<br />
Getting Started.......................................................................................................... 7<br />
Pressure <strong>Cooker</strong> Program ........................................................................................ 8<br />
Rice Cooking Program ............................................................................................. 9<br />
Slow Cooking Program ........................................................................................... 10<br />
Warm Program ........................................................................................................ 11<br />
Brown Program....................................................................................................... 11<br />
Delay Time Program ............................................................................................... 12<br />
Cleaning and Maintenance .................................................................................... 13<br />
Recommended Cooking Times .............................................................................. 15<br />
Hints and Tips ......................................................................................................... 16<br />
ESPAÑOL ................................................................................................................. 17<br />
FRANÇAIS ................................................................................................................ 35<br />
Limited Warranty .................................................................................................... 52<br />
1<br />
ENGLISH
ENGLISH<br />
Thank you for purchasing this state of the art <strong>Fagor</strong> <strong>Electric</strong> <strong>Multi</strong>cooker!<br />
The <strong>Fagor</strong> <strong>Electric</strong> <strong>Multi</strong>-cooker can be used to pressure cook,<br />
steam, brown, cook rice and slow cook foods to perfection. The<br />
user friendly electronic controls are simple and straightforward,<br />
allowing you to set recipe times with ease. Plus, the convenient<br />
“time delay” and “keep warm” settings provide you with cooking<br />
flexibility that meets your busy schedule.<br />
This user’s manual contains information on the use and care of<br />
this product. Please read this manual carefully before operating<br />
the <strong>Fagor</strong> <strong>Multi</strong> cooker to ensure proper usage and maintenance.<br />
Carefully following the directions in this booklet will enable you to<br />
optimize the performance and lifespan of the unit.<br />
2
IMPORTANT SAFEGUARDS<br />
The product you have purchased is a state of the art appliance. It adheres to all of<br />
the latest safety and technology standards; however, as with any electric appliance,<br />
there are some potential risks. Only operate this <strong>Multi</strong>-cooker in accordance with<br />
the instructions provided and only for its intended household use.<br />
PLEASE READ THE INSTRUCTIONS BELOW BEFORE USING THE<br />
APPLIANCE FOR THE FIRST TIME.<br />
• Read all of the instructions contained in this manual before using the appliance.<br />
• This product is not intended for commercial or outdoor use; it is only for<br />
household and indoor use.<br />
• Do not operate the unit if the electric cord or plug is damaged. If the appliance<br />
is not working properly, has been dropped or damaged, left outdoors or<br />
submerged in water, discontinue use immediately and contact our customer<br />
service at (800)-207 0806.<br />
• The <strong>Multi</strong>-cooker has a polarized AC (Alternating Current) plug, one blade is<br />
wider than the other. It will only fit in a polarized outlet in one way as safety<br />
feature. Reverse the plug if the plug does not fit fully in the outlet. If it still does<br />
not fit in the outlet, contact a qualified electrician. Do not attempt to override<br />
this safety feature.<br />
• Do not let the electric cord hang over the edge of the table or counter.<br />
• Do not let the electric cord touch hot surfaces.<br />
• If using an extension cord to connect the <strong>Multi</strong>-cooker, please note that a<br />
damaged extension cord can cause the unit to malfunction. Always check<br />
your extension cord for damage and be sure it is compliant with the required<br />
voltage. Be sure not to place the cord where someone can trip over it.<br />
• Do not place the <strong>Multi</strong>-cooker near heat-emitting devices such as heaters, gas<br />
cooktops or electric burners.<br />
• Always use the <strong>Multi</strong>-cooker in a well ventilated area.<br />
• Using accessories or replacement parts that are not recommended or sold by<br />
the manufacturer may cause damage to the <strong>Multi</strong>-cooker or personal injury.<br />
• Children need close adult supervision at all times when they are in or around<br />
the kitchen. Keep this appliance out of the reach of children.<br />
• This appliance is not intended for use by persons (including children) with<br />
reduced physical, sensory or mental capabilities, or lack of experience and<br />
knowledge, unless they have been given supervision or instruction concerning<br />
use of the appliance by a person responsible for their safety.<br />
3<br />
ENGLISH
ENGLISH<br />
• While in operation, do not cover the appliance or position it near flammable<br />
materials including curtains, draperies, walls, and fabric upholstered furniture.<br />
• Always cook in the removable cooking pot of the <strong>Multi</strong>-cooker. Cooking without<br />
the removable cooking pot may cause an electric shock.<br />
• Never deep fry or pressure fry in the cooker. It is dangerous and may cause a<br />
fire and serious damage.<br />
• Do not attempt to remove the lid while the unit is under pressure (Pressure<br />
cooking or Rice Cooking programs)<br />
• Never cover or block the pressure valve with anything. This may cause<br />
overpressurizing and lead to serious accidents.<br />
• While you’re cooking, the lid and the outer stainless steel surface of the cooker<br />
might get hot. Handle with care and carry or move the cooker using only the<br />
side handles. Be very cautious when moving any appliance containing hot food<br />
or liquids.<br />
• Keep hands and face away from pressure regulator knob when releasing<br />
pressure from the cooker to avoid being scalded by hot steam.<br />
• After cooking, use extreme caution when removing the lid. Serious burns can<br />
result from residual steam escaping from inside the unit. Lift the lid facing<br />
away from you and allow the drops of water to trickle back from the lid into the<br />
cooker.<br />
• Make sure the <strong>Multi</strong>-cooker is turned off before unplugging it from the outlet.<br />
• Always unplug and let cool before cleaning and removing parts. Never attempt<br />
to unplug the unit by pulling on the power cable. Keep unplugged when not in<br />
use.<br />
• To reduce the risk of an electric shock, never immerse the plug, power cable or<br />
housing in water or any other liquid. Only the inner cooking pot can be placed<br />
in the dishwasher.<br />
• Only qualified experts may repair and perform maintenance work on the electric<br />
<strong>Multi</strong>-cooker using authentic FAGOR replacement and accessory parts. Never<br />
attempt to dissemble and repair the <strong>Multi</strong>-cooker yourself.<br />
SAVE THESE INSTRUCTIONS<br />
4
Features and Functions<br />
Top of the lid<br />
(2) Self- Locking pin<br />
Bottom of the lid<br />
(4) Floating valve<br />
Body of <strong>Multi</strong>-cooker<br />
(3) Cool-touch handle<br />
(9) Temperature sensor<br />
(9) Heating element<br />
(10) Removable cooking pot<br />
5<br />
Pressure regulating knob (1)<br />
Cool-touch handle (3)<br />
Silicone gasket (5)<br />
Safety Pressure valve (6)<br />
Anti-blocking case (7)<br />
(can be pulled up to remove)<br />
Condensation reservoir (8)<br />
(can be removed)<br />
Stationary pot (11)<br />
(cannot be removed)<br />
Control panel (12)<br />
WARM<br />
DELAY<br />
TIME<br />
START<br />
STOP<br />
PRESSURE COOKING<br />
LOW HIGH<br />
RICE<br />
COOKER<br />
BROWN<br />
LOW HIGH<br />
SLOW COOKING<br />
ENGLISH
ENGLISH<br />
1. Pressure Regulating Knob: Turn the knob to the “Pressure” position when<br />
cooking under pressure or using the rice cooking function. Turn the knob to<br />
the “Steam” position to release the pressure after pressure cooking or when<br />
using the slow cooker or warm functions.<br />
2. Self-Locking Pin: The lid will lock automatically when you slide it in place.<br />
While cooking under pressure you will not be able to open the lid until all of<br />
the pressure is released.<br />
3. Cool-touch handles: The cool to the touch handles of the multi cooker allows<br />
for easy handling and opening of the pot.<br />
4. Floating Valve: The safety-floating valve controls the amount of pressure<br />
inside the cooker by allowing excess pressure to be released.<br />
5. Silicone Gasket: Creates an airtight seal needed for the <strong>Multi</strong>-cooker to build<br />
up pressure. Check the gasket for tears or cracks before using the pressure<br />
cooking or rice cooking function.<br />
6. Safety Pressure Valve: The safety pressure valve allows excess pressure to<br />
escape from the cooker when it is being used for pressure cooking. It works<br />
independently of the floating valve.<br />
7. Anti-Blocking Case: Pull it towards yourself to release the pressure regulator<br />
knob for cleaning.<br />
8. Condensation Reservoir: Collects excess condensation during cooking. If<br />
there is some liquid in the reservoir after cooking, simply empty it.<br />
9. Heating element and Temperature sensor: Both elements regulate the<br />
cooking temperature inside the pot.<br />
10. Removable Cooking Pot: Aluminum pot with Teflon Classic non-stick<br />
coating; dishwasher safe removable pot will make clean-up a breeze.<br />
11. Stationary Pot: This pot cannot be removed from the electric multi-cooker<br />
and should never be used for cooking. For cooking, only use the removable<br />
cooking pot.<br />
12. Control Panel: The easy to use controls allow you to select the different<br />
programs available with a touch of a finger. Available for selection are: two<br />
pressure settings, rice cooking, two slow cook settings, brown and warm<br />
functions, and a timer.<br />
Pressure settings - High: use this function to cook at high pressure,<br />
equivalent to 9 psi (pounds of pressure per square inch). Every time you<br />
press the high pressure button, the cooking time will increase by 1 minute.<br />
Pressure settings - Low: use this function to cook at low pressure,<br />
equivalent to 5 psi (pounds of pressure per square inch). Every time you<br />
press the low pressure button, the cooking time will increase by 1 minute.<br />
This pressure setting is more suitable to cook delicate foods such as tender<br />
vegetables or certain types of fish.<br />
6
Rice cooking: This is a simple 6-minute program for cooking dishes such<br />
as rice, polenta and risotto.<br />
Slow Cooking: cooks your food slowly, for up to 9.5 hours, at a temperature<br />
of 190°F (LOW) or 212°F (HIGH). Slow cooking helps food retain maximum<br />
flavor and tenderness. Press the button to increase the cooking time by<br />
30-minute increments.<br />
Warm: reheats or keeps cooked food warm until you are ready to enjoy it.<br />
There isn’t a maximum time limit for the warm function.<br />
Brown: allows you to brown or sauté your food before cooking.<br />
Delay Time: allows you to delay the cooking process up to 8 hours.<br />
CAUTION: DO NOT USE THE DELAY TIME FUNCTION WHEN COOKING<br />
FOODS THAT MIGHT SPOIL IF LEFT OUT AT ROOM TEMPERATURE.<br />
Getting Started<br />
Read the safety instructions found in this manual before plugging in and operating.<br />
Before using the <strong>Multi</strong>-cooker for the first time, follow these steps:<br />
1. Remove all packing materials and literature from within the <strong>Multi</strong>-cooker. Lift<br />
the inner cooking pot and remove any pieces of paper from under it. Remove<br />
the plastic protection from the control panel and any stickers from the lid or<br />
stainless steel housing.<br />
2. Wash all removable parts in warm soapy water. Rinse and dry all parts<br />
thoroughly. Wipe the stainless steel outer housing with a clean damp cloth.<br />
NEVER submerge the stainless steel outer housing in water or any other<br />
liquid. Only the removable cooking pot is dishwasher safe.<br />
3. Make sure the silicone gasket is seated properly inside the lid. To make sure<br />
it has been fitted correctly, fill the removable cooking pot with water up to<br />
two thirds full, and cook on HIGH PRESSURE for 15 minutes. Release the<br />
pressure by turning the pressure regulator knob to STEAM. The steam is<br />
released and the floating valve will drop. If steam is not being released, the<br />
gasket probably hasn’t been fitted correctly and the cooker hasn’t built up any<br />
pressure: re-adjust the gasket to make sure it is fitted properly, and repeat this<br />
step.<br />
4. Let the appliance cool to room temperature and then empty and clean.<br />
7<br />
ENGLISH
ENGLISH<br />
Pressure <strong>Cooker</strong> Program<br />
This program will allow you to cook foods under pressure in much less time, as<br />
cooking time is reduced up to 70% compared to traditional cooking methods.<br />
Pressure cooking is Fast, Easy, Healthy!<br />
1. Before every use, make sure the silicone gasket and the pressure regulating<br />
valves are clean and in place.<br />
2. Plug the cord into a wall outlet.<br />
3. Position the removable cooking pot in the <strong>Multi</strong>-cooker, and add the<br />
ingredients following the recipe. When cooking foods under pressure, a<br />
minimum of 1 cup (8 oz) of liquid is required.<br />
SAFETY NOTES:<br />
• Do not fill the pot more than 2/3 full with food and liquid. Do not fill the<br />
unit more than ½ full when cooking foods that expand during cooking.<br />
• The following foods should not be cooked under pressure: applesauce,<br />
cranberries, pearl barley, oatmeal, split peas, noodles, pasta or rhubarb.<br />
These foods tend to foam, froth and sputter, and may block the pressure<br />
valve.<br />
4. Place the lid on the <strong>Multi</strong>-cooker; align the protruding part of the handle with<br />
the condensation collector, and turn it counterclockwise until it locks into<br />
place. The locking pin will click into place.<br />
5. Turn the pressure regulator knob to PRESSURE.<br />
6. Choose the desired cooking mode by pressing either the HIGH or LOW<br />
pressure button on the control panel. The light on the HIGH/LOW button will<br />
flash and the digital display will show 1. This equals 1-minute cooking time.<br />
7. Set the desired time by pressing the high or low button once for each<br />
additional minute or by continuously holding the button down. The longest<br />
cooking time is 99 minutes.<br />
8. Press the START/STOP button to begin cooking. The indicator light will stop<br />
flashing. If you forget to select a desired cooking time or forget to press the<br />
START/STOP button, the unit will beep twice and the digital display will read<br />
0.0 after 30 seconds.<br />
9. The unit will begin to count down in minutes once the appropriate pressure<br />
has been reached. The floating valve will rise when the pressure is reached.<br />
WARNING: NEVER TRY TO FORCE THE LID OPEN WHILE YOU ARE<br />
COOKING UNDER PRESSURE. THIS CAN RESULT IN A SERIOUS ACCIDENT.<br />
WARNING: NEVER DEEP FRY OR PRESSURE FRY IN THE MULTI-COOKER.<br />
IT IS DANGEROUS AND MAY CAUSE A FIRE AND SERIOUS DAMAGE.<br />
8
10. The <strong>Multi</strong>-cooker will beep once the cooking time ends. It will turn the<br />
automatic “Warm” function on until you press the START/STOP button to<br />
cancel the program. After pressing the START/STOP button, release the<br />
pressure. You have two options for releasing the pressure:<br />
a. Quick release method: release the pressure immediately by turning the<br />
pressure regulator knob to STEAM. All the pressure will be released in seconds.<br />
CAUTION: THE STEAM COMING OUT OF THE COOKER WILL BE HOT,<br />
AND MIGHT CONTAIN DROPLETS OF HOT LIQUID. ALWAYS TURN THE<br />
JET OF STEAM AWAY FROM YOUR FACE AND HANDS.<br />
b. Natural release method: let the pressure drop naturally without turning the<br />
pressure regulator knob to “Steam”. This will take several minutes, during<br />
which the food inside will continue cooking. Some recipes (such as risotto)<br />
benefit from this extra cooking time. You will know when the pressure has<br />
been released because the floating valve will drop and you will be able to<br />
open the lid.<br />
NOTE: If you do not press the START/STOP button at the end of the cooking time,<br />
the <strong>Multi</strong>-cooker will beep periodically to remind you that the cooking has ended.<br />
11. Once all the pressure is released, remove the lid by turning it clockwise, lifting<br />
it up and tilting it away from you to avoid being scalded by some remaining<br />
steam or hot water condensation dripping from the inner part of the lid.<br />
WARNING: AFTER COOKING, THE INNER COOKING POT WILL BE HOT. USE<br />
POTHOLDERS TO HANDLE IT OR LET IT COOL DOWN BEFORE REMOVING.<br />
Rice Cooking Program<br />
This is a 6-minute program for cooking dishes such as rice, polenta and risotto.<br />
If you prefer your grain steamed instead of cooked, use a removable steamer<br />
basket (not included).<br />
1. Position the removable cooking pot in the <strong>Multi</strong>-cooker.<br />
2. Add at least 8 oz. of water or cooking liquid to the cooking pot.<br />
3. Add the appropriate amount of grain to the liquid, following the grain to liquid<br />
ratio indicated by the recipe. Do not fill the pot more than half-full.<br />
4. Place the lid on the <strong>Multi</strong>-cooker; align the handle with the condensation<br />
collector, and turn it counterclockwise until it locks into place. The locking pin<br />
will click into place. Turn the pressure regulator knob to PRESSURE.<br />
5. Press the RICE COOK button. The light on the RICE COOK button will flash<br />
and the digital display will read “6”<br />
9<br />
ENGLISH
ENGLISH<br />
6. Press the START/STOP button to begin cooking. The indicator light will stop<br />
flashing. The program will cook for 6 minutes from the moment it builds the<br />
right amount of pressure. If you forget to press the START/STOP button, the<br />
unit will beep twice and the digital display will read 0.0 after 30 seconds.<br />
7. When the cooking time ends, the unit will beep and automatically turn the “Warm”<br />
function on until you press the START/STOP button to cancel the program.<br />
Basic guidelines to use the automatic rice cooking program for different<br />
types of rice:<br />
• 1½ cup rice to 3½ cups liquid for risotto (we suggest to leave it sitting for extra<br />
3-5 minutes after cooking time is up)<br />
• 1½ cup rice to 2½ cups liquid for sushi (with short-grain sushi rice)<br />
• 1½ cup rice to 1½ - 2 cups liquid for regular, fluffy rice<br />
Slow Cooking Program<br />
This setting will allow you to cook slow cooker classics such as pot roasts, soups<br />
and stews in up to 9 and a half hours. Load your ingredients in the morning and<br />
dinner will be waiting for you.<br />
1. Place the removable cooking pot in the <strong>Multi</strong>-cooker.<br />
2. Place the food to be slow cooked in the cooking pot.<br />
3. Place the lid on the <strong>Multi</strong>-cooker; align the handle with the condensation<br />
collector, and turn it counterclockwise until it locks into place. The locking pin<br />
will click into place. Turn the pressure regulator knob to STEAM.<br />
4. Choose the desired cooking mode by pressing either the HIGH or LOW slow<br />
cooking button on the control panel. The light on the HIGH/LOW button will<br />
flash and the digital display will show “.5”. This equals one half hour of cooking<br />
time.<br />
5. Set the desired time by pressing the SLOW COOK button once for each<br />
additional half hour or by continuously holding the button down. The longest<br />
cooking time is 9.5hours at either 190°F (LOW) or 212°F (HIGH).<br />
6. Press the START/STOP button to begin cooking. The indicator light will stop<br />
flashing. If you forget to select a desired cooking time or forget to press the<br />
START/STOP button, the unit will beep twice and the digital display will read<br />
0.0 after 30 seconds.<br />
7. The unit will begin to count down in half hour increments after the temperature<br />
reaches either 190°F (LOW) or 212°F (HIGH).<br />
8. When the cooking time is up the unit will beep and go automatically into “Warm”<br />
function until you press the START/STOP button to cancel the program.<br />
10
Warm Program<br />
This program reheats or keeps cooked food warm.<br />
1. Place cooked food in the removable cooking pot.<br />
2. Place the lid on the <strong>Multi</strong>-cooker; align the handle with the condensation<br />
collector, and turn it counterclockwise until it locks into place. The locking pin<br />
will click into place.<br />
3. Turn the pressure regulator knob to STEAM.<br />
4. Press the WARM button. The light on the warm button will flash and the digital<br />
display will read 0.0.<br />
5. Press the START/STOP button to begin the program. The indicator light will<br />
stop flashing.<br />
6. Since pressure is not built up while warming the food, you can open the lid to<br />
check if your food is warm enough. To turn the program off, simply press the<br />
START/STOP button.<br />
NOTE: When you are using the pressure cooking, the rice cooking or the slow<br />
cooking programs, the Warm setting will automatically start after the cooking<br />
time ends. The selected program’s LED light will turn off, and the Warm function<br />
light will turn on. The food will stay warm until you press the START/STOP button.<br />
Brown Program<br />
This program allows you to brown food before cooking. Brown your meat or<br />
poultry for the best flavor and texture, unless otherwise indicated in the recipe.<br />
Pat dry food with a paper towel before browning. For best results, make sure the<br />
oil is hot before adding your meat or poultry. Brown the food in batches to keep<br />
the correct oil temperature for even browning.<br />
1. Place the removable cooking pot in its place.<br />
2. Add the appropriate amount of oil as indicated in the recipe.<br />
3. Press the BROWN button. The light on the BROWN button will flash and the<br />
display will read 0.0. The lid should remain off.<br />
4. Press the START/STOP button. The indicator light will stop flashing and the<br />
cooker will start heating the oil.<br />
5. After about one minute of preheating, add food and begin browning.<br />
11<br />
ENGLISH
ENGLISH<br />
6. Once you are done browning, press the START/STOP button to cancel the<br />
brown function. Now you can use any of the cooking programs –pressure, rice<br />
or slow cooking- to continue preparing the recipe. Follow the instructions for<br />
each program.<br />
Delay Time Program<br />
This function allows you to delay the cooking process up to 8 hours in half hour<br />
increments. You can use the delay time setting with following programs: slow<br />
cook, rice cook, high and low pressure cooking.<br />
CAUTION: DO NOT LEAVE PERISHABLE FOODS SUCH AS MEAT, POULTRY,<br />
FISH, CHEESE AND DAIRY PRODUCTS AT ROOM TEMPERATURE FOR MORE<br />
THAN 2 HOURS (OR MORE THAN 1 HOUR WHEN THE ROOM TEMPERATURE<br />
IS ABOVE 90°F). WHEN COOKING WITH THESE FOODS, DO NOT SET THE<br />
DELAY TIME FUNCTION FOR MORE THAN 1-2 HOURS.<br />
1. Press the DELAY TIME button. The light under the button will blink and the<br />
panel will read “.5” meaning half an hour of delay. Press the button until you<br />
reach the desired delay time.<br />
2. Select the desired cooking program and cooking time by pressing the<br />
corresponding program button (high/low pressure, rice cooking or slow<br />
cooker) following the instructions for each program.<br />
3. Press the START/STOP button. The <strong>Multi</strong>-cooker will begin cooking after the<br />
delay set time has elapsed.<br />
FOR EXAMPLE: say it is 10am and you want your dinner to be ready by 6pm.<br />
Your recipe calls for 12 minutes of high pressure cooking. You can program your<br />
delay time for 7 and a half hours and then the pressure cooking program for 12<br />
minutes. You do this by pressing the delay time button until the panel reads 7.5<br />
and then the high pressure setting button until it reads 12. Next you press the<br />
start/stop button, and you’re all set. The cooker will start cooking at 5:30 pm and<br />
your dinner will be ready at 5:42pm. The automatic warm function will ensure that<br />
it doesn’t get cold!<br />
12
Cleaning and Maintenance<br />
Do not wash any parts of the <strong>Multi</strong>-cooker in the dishwasher except for the<br />
removable cooking pot. Always wash the <strong>Multi</strong>-cooker thoroughly after every use,<br />
or if it has not been used for an extended period.<br />
1. Unplug and let the unit cool before cleaning.<br />
2. Remove the removable cooking pot and wash with warm soapy water or in<br />
the dishwasher. Rinse and dry thoroughly.<br />
3. Wipe the outer housing with a clean damp cloth. Do not submerge in water.<br />
4. Remove the condensation reservoir by pulling it down. Wash with warm,<br />
soapy water. Rinse and dry thoroughly. Replace by pushing into place.<br />
5. Turn the lid upside down; grip the silicone gasket and pull up to remove.<br />
Clean the silicone gasket with warm soapy water. Rinse and dry thoroughly.<br />
Replace the gasket by positioning it inside the edge of the lid and pushing it<br />
down. Make sure the groove in the center of the gasket is positioned around<br />
the metal ring on the inside edge of the lid. NOTE: The silicone gasket must<br />
always be properly positioned on the underside of the lid; otherwise the unit<br />
will not work. Check periodically to make sure that it is clean, flexible, and not<br />
cracked or torn. (See “Getting started” section in this manual.)<br />
6. If the silicone gasket appears damaged, cracked or torn, do not use the unit<br />
and contact our customer service department at 1-800-207-0806.<br />
7. For optimal performance, the bottom of the <strong>Multi</strong>-cooker, in the area under<br />
the removable cooking pot where the temperature sensor and heating pad are<br />
located must be cleaned after each use. Wipe with a soft damp cloth and be<br />
sure to dry thoroughly.<br />
8. Never use abrasive cleaners or scouring pads to clean any of the parts.<br />
13<br />
ENGLISH
ENGLISH<br />
Cleaning the Pressure Regular Knob<br />
ALWAYS check that the pressure regulator knob and the pressure safety valves<br />
are in good working order before each use.<br />
1. After the unit has cooled, remove the lid.<br />
2. Press down and at the same time turn the pressure regulator knob<br />
counterclockwise past STEAM to CLEAN setting and carefully lift to remove.<br />
Look through the holes to make sure there is no particle build up, and put it<br />
under running water.<br />
3. Turn the lid over and place on a table top. Pull out the anti-locking case. Using<br />
a brush or toothpick, check and remove any food or foreign particles that may<br />
be lodged in the floating valve. Replace the anti-locking case by pressing<br />
down.<br />
4. Replace the pressure regulator knob by lining the two notches up to the<br />
inside wall of the pressure regulator chamber in the lid and turning clockwise.<br />
The white button on the lid should line up with the pressure or steam setting<br />
on the pressure regulator knob. If it doesn’t, remove the knob again and try<br />
realigning the notches the other way around.<br />
14
Recommended Cooking Times<br />
Pressure cooking times are approximate times. Use these times as general<br />
guidelines. Size and variety will alter cooking times.<br />
VEGETABLES HIGH PRESSURE<br />
Apples, chunks (low pressure) 2 minutes<br />
Artichokes, whole 8-10 minutes<br />
Asparagus, whole 1-2 minutes<br />
Beans<br />
Beets<br />
2-3 minutes<br />
¼ inch slices 3-4 minutes<br />
Whole, peeled 12-15 minutes<br />
Broccoli, florets or spears 2-3 minutes<br />
Brussels sprouts, whole 3-4 minutes<br />
Cabbage, quartered 3-4 minutes<br />
Carrots, ¼ inch slices 1-2 minutes<br />
Cauliflower, florets 2-4 minutes<br />
Corn on the cob 3-5 minutes<br />
Eggplant, 1 ¼ inch 2-3 minutes<br />
Peas, shelled<br />
Potatoes<br />
1-1½ minutes<br />
Pieces, slices 5-8 minutes<br />
Whole, small 5-8 minutes<br />
Whole, medium 10-12 minutes<br />
Spinach, fresh<br />
Squash<br />
2-3 minutes<br />
Fall, 1 inch chunks 4-6 minutes<br />
Summer, sliced 1-2 minutes<br />
RICE HIGH PRESSURE<br />
Brown 15-20 minutes<br />
White 6 minutes<br />
15<br />
MEAT AND POULTRY HIGH PRESSURE<br />
Beef, Pork, Lamb (1-2 inch cubes)<br />
Beef / Veal<br />
15-20 minutes<br />
Roast, brisket 50-60 minutes<br />
Shank 1 ½ inch thick 25-35 minutes<br />
Meatballs, browned 8-10 minutes<br />
Lamb, boneless roast<br />
Pork<br />
45-55 minutes<br />
Loin roast 40-50 minutes<br />
Smoked but 20-25 minutes<br />
Ham shank<br />
Chicken<br />
30-40 minutes<br />
Boneless breast, thigh 8-10 minutes<br />
Pieces 10-12 minutes<br />
Whole 15-20 minutes<br />
Turkey breast, whole 30-40 minutes<br />
FISH<br />
Steaks, fillets<br />
HIGH PRESSURE<br />
¾ inch 4 minutes<br />
1 inch 5 minutes<br />
1 ¼ inch 6 minutes<br />
½ inch 7 minutes<br />
ENGLISH
ENGLISH<br />
Hints and Tips<br />
• To ensure best cooking performance when cooking under pressure, always<br />
use at least 8 oz. of water or liquid in your recipes to create enough steam to<br />
produce pressure.<br />
• When using the high and low pressure settings, the timer should not begin<br />
counting down until there is enough pressure. If after a reasonable time the<br />
counter hasn’t started counting down, it can mean one of three things:<br />
– you haven’t turned the dial to a pressure setting<br />
– the gasket has not been fitted properly into the lid<br />
– there isn’t enough cooking liquid<br />
• When cooking under pressure, if you are unsure of the cooking time, it is better<br />
to under cook and use the quick release method and check for doneness.<br />
• Never fill the <strong>Multi</strong>-cooker more than 2/3 full. The <strong>Multi</strong>-cooker must have<br />
enough liquid space within the unit to generate steam or the food will not cook<br />
properly. If you are cooking foods that expand during cooking, do not fill more<br />
than half full.<br />
• If the electric circuit is overloaded with other appliances, your <strong>Multi</strong>-cooker<br />
appliance may not operate. The <strong>Multi</strong>-cooker should be operated on a separate<br />
electrical circuit.<br />
• Tougher, less expensive cuts of meat are better suited for the pressure cooking<br />
program because cooking under pressure breaks the fibers down for more<br />
tender results.<br />
• Fresh fruit should be cooked on low pressure.<br />
• Add a tablespoon of oil to the water to reduce the amount of foam produced by<br />
dry beans.<br />
16
Limited Warranty<br />
This manufacturer’s product warranty extends to the original consumer purchaser<br />
of the product. Neither the retailer nor any other company involved in the sale or<br />
promotion of this product is a co-warrantor of this manufacturer warranty.<br />
WARRANTY DURATION: All materials and workmanship are warranted to the<br />
original consumer purchaser for a period of one (1) year from the original purchase<br />
date.<br />
WARRANTY COVERAGE: This product is warranted against defective materials<br />
or workmanship. This warranty is void if the product has been damaged by<br />
accident, in shipment, unreasonable use, misuse, neglect, improper service,<br />
commercial use, repairs by unauthorized personnel or other causes not arising<br />
out of defects in materials or workmanship. This warranty is effective only if<br />
the product is purchased and operated in the USA, and does not extend to<br />
any units which have been used in violation of written instructions furnished by<br />
manufacturer or to units which have been altered or modified or to damage to<br />
products or parts thereof which have had the serial number removed, altered,<br />
defaced or rendered illegible.<br />
WARRANTY DISCLAIMERS: This warranty is in lieu of all warranties expressed or<br />
implied and no representative or person is authorized to assume for manufacturer<br />
any other liability in connection with the sale of our products. There shall be no<br />
claims for defects or failure under any theory of tort, contractor commercial law<br />
including, but not limited to, negligence, gross negligence, strict liability, breach<br />
of warranty and breach of contract.<br />
WARRANTY PERFORMANCE: During the above one-year warranty period, a<br />
product with a defect will be either repaired or replaced with a reconditioned<br />
comparable model (at manufacturer’s option). The repaired or replacement<br />
product will be in warranty for the balance of the one year warranty period<br />
and an additional one-month period. No charge will be made for such repair or<br />
replacement.<br />
SERVICE AND REPAIR: If service is required for an appliance, you should first<br />
call toll free 1-800-207-0806 between the hours of 8:30 am and 5:30 pm Eastern<br />
Standard Time and ask for CUSTOMER SERVICE. Please refer to “<strong>Fagor</strong> <strong>Electric</strong><br />
<strong>Multi</strong>-cooker item # 670040230” when you call.<br />
NOTE: Manufacturer cannot assume responsibility for loss or damage during<br />
incoming shipment. For your protection, carefully package the product for<br />
shipment, and insure it with the carrier. Be sure to enclose the following items<br />
with your appliance: your full name, return address and daytime phone number;<br />
a note describing the problem you experienced; a copy of your sales receipt or<br />
other proof of purchase to determine warranty status. C.O.D. shipments cannot<br />
be accepted.<br />
52
FAGOR ELECTRIC MULTI-COOKER<br />
WARRANTY REGISTRATION CARD<br />
MR./MRS./MS.: ________________________________________________________<br />
TELEPHONE: __________________________________________________________<br />
ADDRESS: ___________________________________________________________<br />
DATE OF PURCHASE: ___________________________________________________<br />
NAME OF STORE WHERE BOUGHT: __________________________________________<br />
NAME OF PRODUCT: ____________________________________________________<br />
EMAIL: ______________________________________________________________<br />
NOTE: Please complete and mail this warranty registration card immediately to protect your warranty service.<br />
FAGOR WARRANTY REGISTRATION<br />
PO BOX 94, LYNDHURST, NJ 07071<br />
✃
The manufacturer reserves the right to modify the<br />
terms described in this manual.<br />
El fabricante se reserva el derecho de modifi car<br />
los modelos descritos en el presente libro de<br />
instrucciones.<br />
Le fabricant se reserve le droit de modifi er les<br />
modèles décrits dans la brochure.<br />
www.fagoramerica.com<br />
1.800.207.0806