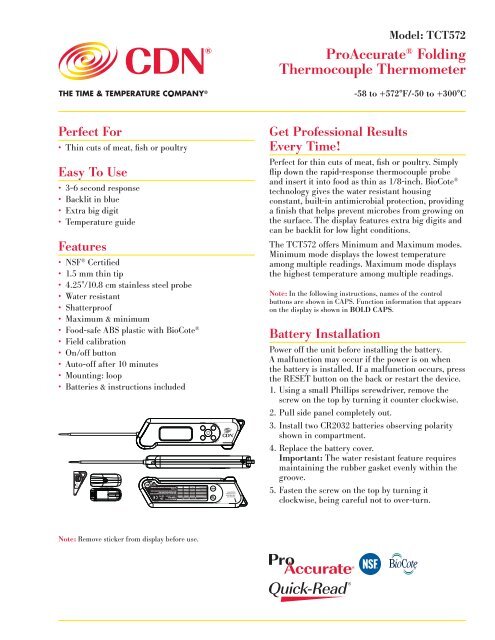
CDN ProAccurate Folding Thermocouple Thermometer Model TCT572
CDN ProAccurate Folding Thermocouple Thermometer Model TCT572
CDN ProAccurate Folding Thermocouple Thermometer Model TCT572
- No tags were found...

You also want an ePaper? Increase the reach of your titles
YUMPU automatically turns print PDFs into web optimized ePapers that Google loves.
Perfect For<br />
• Thin cuts of meat, fish or poultry<br />
Easy To Use<br />
• 3-6 second response<br />
• Backlit in blue<br />
• Extra big digit<br />
• Temperature guide<br />
Features<br />
• NSF ® Certified<br />
• 1.5 mm thin tip<br />
• 4.25"/10.8 cm stainless steel probe<br />
• Water resistant<br />
• Shatterproof<br />
• Maximum & minimum<br />
• Food-safe ABS plastic with BioCote ®<br />
• Field calibration<br />
• On/off button<br />
• Auto-off after 10 minutes<br />
• Mounting: loop<br />
• Batteries & instructions included<br />
Note: Remove sticker from display before use.<br />
<strong>Model</strong>: <strong>TCT572</strong><br />
<strong>ProAccurate</strong> ® <strong>Folding</strong><br />
<strong>Thermocouple</strong> <strong>Thermometer</strong><br />
Get Professional Results<br />
Every Time!<br />
Perfect for thin cuts of meat, fish or poultry. Simply<br />
flip down the rapid-response thermocouple probe<br />
and insert it into food as thin as 1/8-inch. BioCote ®<br />
technology gives the water resistant housing<br />
constant, built-in antimicrobial protection, providing<br />
a finish that helps prevent microbes from growing on<br />
the surface. The display features extra big digits and<br />
can be backlit for low light conditions.<br />
The <strong>TCT572</strong> offers Minimum and Maximum modes.<br />
Minimum mode displays the lowest temperature<br />
among multiple readings. Maximum mode displays<br />
the highest temperature among multiple readings.<br />
Note: In the following instructions, names of the control<br />
buttons are shown in CAPS. Function information that appears<br />
on the display is shown in BOLD CAPS.<br />
Battery Installation<br />
-58 to +572°F/-50 to +300°C<br />
Power off the unit before installing the battery.<br />
A malfunction may occur if the power is on when<br />
the battery is installed. If a malfunction occurs, press<br />
the RESET button on the back or restart the device.<br />
1. Using a small Phillips screwdriver, remove the<br />
screw on the top by turning it counter clockwise.<br />
2. Pull side panel completely out.<br />
3. Install two CR2032 batteries observing polarity<br />
shown in compartment.<br />
4. Replace the battery cover.<br />
Important: The water resistant feature requires<br />
maintaining the rubber gasket evenly within the<br />
groove.<br />
5. Fasten the screw on the top by turning it<br />
clockwise, being careful not to over-turn.
Operating Instructions<br />
A. On/Off<br />
1. Press the POWER button to turn the<br />
thermometer on.<br />
2. The <strong>TCT572</strong> will automatically turn off after 10<br />
minutes of inactivity.<br />
3. Press the POWER button again to turn the<br />
thermometer off and conserve battery life.<br />
B. Temperature Scale<br />
To select temperature reading in Fahrenheit<br />
or Celsius:<br />
1. Press the °F/°C button to change the scale.<br />
The °F or °C symbol changes on the display<br />
and a beep sounds.<br />
C. LCD Backlight <strong>Thermometer</strong><br />
1. Press the LIGHT button to turn the backlight<br />
on<br />
2. The backlight will stay on for 5 seconds.<br />
D. Temperature Measurement<br />
Important: The probe may be damaged if measurement<br />
temperature is lower than -58°F/-50°C OR higher than<br />
+572°F/+300°C.<br />
Note: The <strong>TCT572</strong> is intended for food service use — do not<br />
use for safety related applications.<br />
1. Flip down the probe until fully extended.<br />
2. Insert the probe at least 0.25"/6.3 mm into<br />
the food.<br />
3. The current cooking temperature appears<br />
on the display.<br />
4. Wearing a heat resistant glove, flip the probe<br />
back into the case when finished.<br />
Important: Do not twist the probe or rotate it in<br />
wrong direction. Exceptional stress on probe may<br />
cause it to break.<br />
CAUTION: Probe may be HOT after use. Always wear a<br />
heat resistant glove to touch the stainless steel probe or<br />
sensor cable during or just after cooking. Do not touch<br />
with bare hands.<br />
E. Maximum Mode<br />
1. Press the MAX/MIN button once. MAX appears<br />
on the display along with the last highest/<br />
maximum temperature.<br />
2. To clear the MAX/MIN reading, Press the<br />
MAX/MIN button once, then press the CLEAR<br />
button. “–––” appears on the display.<br />
F. Minimum Mode<br />
1. Press the MAX/MIN button twice. MIN appears<br />
on the display along with the last lowest/<br />
minimum temperature.<br />
2. To clear the MAX/MIN reading, Press the<br />
MAX/MIN button twice, then press the CLEAR<br />
button. “–––” appears on the display.<br />
G. Recalibration<br />
1. Place the stem into a mixture of 3 parts ice and<br />
1 part water.<br />
2. Press the OFFSET button for 2 seconds and<br />
until the beep sounds. The display will animate<br />
and display 0.0°F/°C.<br />
3. Press the OFFSET button repeatedly as needed<br />
to offset the factory calibration from -3.2 °F/<br />
-2.0 °C to +3.2 °F/+2.0 °C.<br />
H. Battery Status<br />
1. When the voltage on the battery is low, LO<br />
flashes on the display along with the battery<br />
status icon<br />
I. Reset<br />
1. Press the RESET button to reset the<br />
thermometer to factory defaults.<br />
Note: Clean the thermometer probe before each use.<br />
Note for Induction Cooktops: Sometimes, the induction<br />
cooktop magnetic field may interfere with digital thermometers.<br />
If there is interference, briefly turn off the induction cooktop to<br />
get a digital thermometer reading or use a dial thermometer.<br />
Important: DO NOT LEAVE THERMOMETER CASE IN<br />
HOT OVEN. CASE IS NOT HEAT RESISTANT. HAND<br />
WASH AND DRY. DO NOT IMMERSE HOUSING IN<br />
LIQUID.<br />
Tip: Meat should be allowed to “rest” for 10 to 15 minutes after<br />
it is removed from oven. This allows time for the meat’s internal<br />
temperature to stabilize and the juices to redistribute. This will<br />
result in a roast that is both juicier and easier to carve.
Care of Your Product<br />
• Do not submerge any part of the thermometer in<br />
water.<br />
• Wipe clean with a damp cloth.<br />
• Store the thermometer at room temperature<br />
between -4 to +149°F/–20 to +65°C..<br />
Specifications<br />
Operating Range: -58 to +572°F/-50 to +300°C<br />
Display Range: -58 to +572°F/-50 to +300°C<br />
Power: 2 CR2032<br />
Precautions<br />
• Dispose of used battery promptly and keep away<br />
from children.<br />
• Always wear a heat resistant glove to touch the<br />
stainless steel probe during or just after cooking.<br />
Do not touch with bare hands.<br />
• Keep the batteries, stainless steel probe and sensor<br />
cable away from children.<br />
• Clean the probe and dry thoroughly after use.<br />
• Do not clean the case with abrasive or corrosive<br />
compound, which may scratch the plastic and<br />
corrode the electronic circuits.<br />
• Do not subject the unit to excessive force shock,<br />
dust, temperature or humidity, which may result in<br />
malfunction, shorter electronic life span, damaged<br />
battery and distorted parts.<br />
• Do not tamper with the unit’s internal components.<br />
Doing so will invalidate the warranty on the unit<br />
and may cause unnecessary battery damage and<br />
distorted parts.<br />
• Do not subject the unit to excessive exposure to<br />
direct sunlight. The unit is not waterproof — do<br />
not immerse it into water or expose to heavy rain.<br />
• To avoid deformation, do not place the unit in<br />
extreme temperatures. Never burn the probe<br />
directly over the fire. Do not use the probe when<br />
the temperature is above 572°F/300°C. Doing so<br />
will deteriorate the probe.<br />
• Do not use the thermometer in a microwave oven.<br />
• Always read the users manual thoroughly before<br />
operating.
USDA SAFE FOOD TEMPERATURES<br />
* Beef, Veal, Lamb – well ......160°F. ..71°C<br />
* Beef, Veal, Lamb – medium ..145°F. ..63°C<br />
* Beef, Veal, Lamb – rare ......140°F. ..60°C<br />
Poultry. ...................165°F. ..74°C<br />
* Pork/Ham – pre-cooked .....145°F. ..63°C<br />
Ground Meat ...............160°F. ..71°C<br />
* 3 minutes rest time<br />
CANDY TEMPERATURE GUIDE<br />
Jelly ..............220°F ....... 104°C<br />
Thread. .......230–234°F ....110–112°C<br />
Soft Ball. ......234–240°F ....112–115°C<br />
Firm Ball ......244–248°F ... 118–120°C<br />
Hard Ball. .....250–266°F ....121–130°C<br />
Soft Crack .....270–290°F ....132–143°C<br />
Hard Crack ....300–310°F ... 149–154°C<br />
Caramelize ....316–338°F ....158–170°C<br />
HIGH ALTITUDE ADJUSTMENT<br />
FOR CANDY-MAKING<br />
STAGE 2,000 feet 5,000 feet 7,500 feet<br />
Soft Ball 230–236°F 224–230°F 219–225°F<br />
Firm Ball 238–244°F 232–238°F 227–233°F<br />
Hard Ball 246–264°F 240–258°F 235–253°F<br />
Soft Crack 266–286°F 260–286°F 255–275°F<br />
Hard Crack 296–306°F 290–300°F 285–295°F<br />
*USDA does not endorse any product, service or organization.<br />
CE Note: This device could be sensitive to electrostatic<br />
discharge. If electrostatic discharge or malfunctioning occurs,<br />
please re-install the battery to reset this unit.<br />
CAUTION: Avoid keeping the thermometer too close to objects<br />
that continuously generate high heat for long periods (i.e., hot<br />
plate). This can cause the thermometer to overheat.<br />
Antimicrobial properties are built-in<br />
to inhibit the growth of bacteria that<br />
may affect this product. According<br />
to EPA guidelines we cannot claim<br />
that the antimicrobial properties in<br />
this product protect users or others<br />
against bacteria, viruses, germs,<br />
or other disease organisms. This<br />
product does not protect users or<br />
others against food-borne bacteria. Always clean and wash this<br />
product thoroughly before and after each use.<br />
The information in this document has been reviewed and is<br />
believed to be accurate. However, neither the manufacturer nor<br />
its affiliates assume any responsibility for inaccuracies, errors<br />
or omissions that may be contained herein. In no event will<br />
the manufacturer or its affiliates be liable for direct, indirect,<br />
special, incidental or consequential damages arisen by using<br />
this product or resulting from any defect/omission in this<br />
document, even if advised of the possibility of such damages.<br />
The manufacturer and its affiliates reserve the right to<br />
make improvements or changes to this document and the<br />
products and services described at any time, without notice<br />
or obligation.<br />
5-Year Limited Warranty: Any instrument that<br />
proves to be defective in material or workmanship<br />
within five years of original purchase will be<br />
repaired or replaced without charge upon receipt of<br />
the unit prepaid at: <strong>CDN</strong>, PO Box 10947, Portland,<br />
OR 97296-0947. This warranty does not cover<br />
damage in shipment or failure caused by tampering,<br />
obvious carelessness or abuse.<br />
© 01-2013 Component Design Northwest, Inc. Made in China CD9999250en - 1/13 EHC 614 885-2497