Residual Strength and Fatigue Lifetime of ... - Solid Mechanics
Residual Strength and Fatigue Lifetime of ... - Solid Mechanics
Residual Strength and Fatigue Lifetime of ... - Solid Mechanics

Create successful ePaper yourself
Turn your PDF publications into a flip-book with our unique Google optimized e-Paper software.
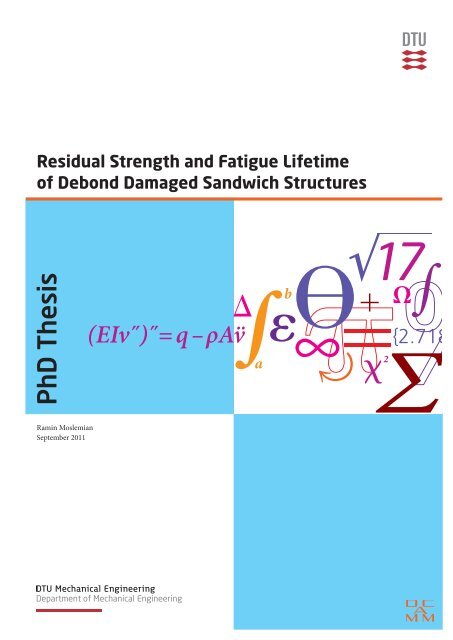
<strong>Residual</strong> <strong>Strength</strong> <strong>and</strong> <strong>Fatigue</strong> <strong>Lifetime</strong><br />
<strong>of</strong> Debond Damaged S<strong>and</strong>wich Structures<br />
PhD Thesis<br />
Ramin Moslemian<br />
September 2011
<strong>Residual</strong> <strong>Strength</strong> <strong>and</strong> <strong>Fatigue</strong> <strong>Lifetime</strong> <strong>of</strong><br />
Debond Damaged S<strong>and</strong>wich Structures<br />
Ramin Moslemian<br />
TECHNICAL UNIVERSITY OF DENMARK<br />
DEPARTMENT OF MECHANICAL ENGINEEING<br />
SECTION OF COASTAL, MARITIME AND STRUCTURAL ENGINEERING<br />
SEPTEMBER 2011
Published in Denmark by<br />
Technical University <strong>of</strong> Denmark<br />
Copyright © Ramin Moslemian 2011<br />
All rights reserved<br />
Section <strong>of</strong> Coastal, Maritime <strong>and</strong> Structural Engineering<br />
Department <strong>of</strong> Mechanical Engineering<br />
Technical University <strong>of</strong> Denmark<br />
Nils Koppels Alle, Building 403, DK-2800 Kgs. Lyngby, Denmark<br />
Phone +45 4525 1360, Telefax +45 4588 4325<br />
Email: info.skk@mek.dtu.dk<br />
WWW: http://www.mek.dtu.dk<br />
Publication Reference Data<br />
Moslemian, R.<br />
<strong>Residual</strong> <strong>Strength</strong> <strong>and</strong> <strong>Fatigue</strong> <strong>Lifetime</strong> <strong>of</strong> Debond Damaged<br />
S<strong>and</strong>wich Structures<br />
PhD Thesis<br />
Technical University <strong>of</strong> Denmark, Section <strong>of</strong> Coastal, Maritime<br />
<strong>and</strong> Structural Engineering<br />
September 2011<br />
ISBN 978-87-90416-73-7<br />
Keywords: <strong>Fatigue</strong>, Fracture, S<strong>and</strong>wich Structures, Composite<br />
Materials, Debonding
Preface<br />
This thesis is submitted as a partial fulfillment <strong>of</strong> the requirements for the Danish Ph.D. degree.<br />
The work was conducted at the Section <strong>of</strong> Coastal, Maritime <strong>and</strong> Structural Engineering,<br />
Department <strong>of</strong> Mechanical Engineering, Technical University <strong>of</strong> Denmark, during the period<br />
from January 2008 to September 2011. The project was supervised by Associate Pr<strong>of</strong>essor<br />
Christian Berggreen, Pr<strong>of</strong>essor Leif A. Carlsson, Senior Scientist Bent F. Sørensen <strong>and</strong> Senior<br />
Scientist Kim Branner.<br />
My sincere thanks go to Associated Pr<strong>of</strong>essor Christian Berggreen for his supervision during the<br />
entire project, encouragement, <strong>and</strong> many illuminating discussions about different topics from<br />
practical matters regarding the experiments to theoretical discussions about fracture mechanics.<br />
His support <strong>and</strong> guidance is highly appreciated. Many thanks to Pr<strong>of</strong>essor Leif A. Carlsson from<br />
Florida Atlantic University, for his insightful comments <strong>and</strong> constructive criticism. Special<br />
thanks go to Assistant Pr<strong>of</strong>essor Amilcar Quispitupa at the Department <strong>of</strong> Mechanical<br />
Engineering, DTU for interesting discussions <strong>and</strong> priceless helps during the experiments. I am<br />
further grateful to Pr<strong>of</strong>essor Jørgen Juncher Jensen, head <strong>of</strong> the Section <strong>of</strong> Coastal, Maritime <strong>and</strong><br />
Structural Engineering, Department <strong>of</strong> Mechanical Engineering, DTU for facilitating a friendly<br />
trouble-free atmosphere at the working environment <strong>and</strong> to other colleagues at the Department as<br />
well.<br />
Part <strong>of</strong> this thesis was conducted abroad during seven months at the Department <strong>of</strong> Mechanical<br />
Engineering, University <strong>of</strong> Delaware, USA under the supervision <strong>of</strong> Pr<strong>of</strong>essor Anette Karlsson. I<br />
would like to thank Anette for all her guidance, <strong>and</strong> for introducing the cycle jump technique to<br />
me which is the main foundation under the second part <strong>of</strong> this thesis. Very special thanks go to<br />
Pr<strong>of</strong>essor Brian Hayman from Department <strong>of</strong> Mathematics, University <strong>of</strong> Oslo, Norway (earlier<br />
at Det Norske Veritas) for providing test specimens <strong>and</strong> precious discussions. Thanks to PhD<br />
c<strong>and</strong>idate Marcello Manca <strong>and</strong> MSc student Sota Sugimoto for helping me with conducting<br />
fatigue experiments.<br />
Finally my very special thanks go to Leila for being there for me <strong>and</strong> her support during the last<br />
years <strong>of</strong> the study.<br />
i
This page is intentionally left blank.<br />
ii
Executive Summary<br />
S<strong>and</strong>wich composites have been widely used in recent years for weight critical structures such as<br />
airplanes, wind turbine blades <strong>and</strong> high speed vessels because <strong>of</strong> superior stiffness/weight ratio<br />
compared to conventional metallic structures. S<strong>and</strong>wich composites, composed <strong>of</strong> different<br />
materials with very different stiffness properties, are prone to different <strong>and</strong> peculiar damages.<br />
Face/core debonding is one <strong>of</strong> the most common damages s<strong>and</strong>wich composites can experience.<br />
A face/core debond may initiate due to different reasons such as problems during the<br />
manufacturing process or due to impact loading. Face/core debonding can be very critical for the<br />
structural performance as the basic s<strong>and</strong>wich principle is compromised due to absence <strong>of</strong><br />
connection between the face <strong>and</strong> the core resulting in a lack <strong>of</strong> structural carrying capacity <strong>and</strong><br />
integrity.<br />
A question that arises with all applications <strong>of</strong> s<strong>and</strong>wich composites is that <strong>of</strong> damage tolerance:<br />
how is the structural performance influenced by the presence <strong>of</strong> production defects or in-service<br />
damages? The aim <strong>of</strong> this thesis is to develop methodologies to answer this question.<br />
Traditionally costly <strong>and</strong> extensive experiments have been conducted for the assessment <strong>of</strong><br />
damaged structure especially when they are exposed to cyclic loading. In this thesis as an<br />
alternative approach to reduce the cost <strong>and</strong> amount <strong>of</strong> experimental work, the main focus has<br />
been directed towards the development <strong>of</strong> numerical schemes replacing costly experiments.<br />
However to examine the accuracy <strong>and</strong> efficiency <strong>of</strong> the developed numerical schemes, they are<br />
all validated against experiments.<br />
The thesis is divided into two main parts. In the first part debonded s<strong>and</strong>wich columns <strong>and</strong><br />
panels exposed to static loads are analyzed based on a fracture mechanics based numerical<br />
scheme. To validate the developed scheme, compression tests are conducted on debond damaged<br />
s<strong>and</strong>wich columns <strong>and</strong> panels. Furthermore, the face/core interface fracture toughness <strong>of</strong> the<br />
tested columns <strong>and</strong> panels are determined <strong>and</strong> applied in the finite element models to estimate<br />
failure loads. A good accuracy achieved in failure load estimations illustrates the efficiency <strong>of</strong><br />
the developed scheme. However in some cases the simulations <strong>of</strong> the debonded s<strong>and</strong>wich panels<br />
show around 46% deviation in the determination <strong>of</strong> the failure loads compared to the<br />
experiments, indicating that the developed scheme should be used carefully.<br />
In the second part <strong>of</strong> the thesis fatigue lifetime <strong>of</strong> debond damaged s<strong>and</strong>wich composites is<br />
studied. To make the finite element simulation <strong>of</strong> fatigue crack growth practical, a cycle jump<br />
iii
method to accelerate the simulation is developed <strong>and</strong> incorporated in the fracture mechanics<br />
based numerical scheme developed in the first part <strong>of</strong> the thesis. It is shown that by utilizing the<br />
cycle jump method up to 99% <strong>of</strong> the computation time can be saved by eliminating the need for<br />
the simulation <strong>of</strong> every individual cycle. Using the developed numerical scheme, fatigue crack<br />
growth in the face/core interface <strong>of</strong> debonded s<strong>and</strong>wich X-joints <strong>and</strong> panels is simulated <strong>and</strong><br />
compared with the conducted fatigue experiments. As inputs to the numerical scheme, crack<br />
growth rate relations for the interface <strong>of</strong> the analyzed s<strong>and</strong>wich X-joints <strong>and</strong> panels are<br />
determined at different mode-mixites. A good accuracy <strong>of</strong> the simulations compared to the<br />
fatigue experiments suggests that the developed accelerated fatigue crack growth scheme is a<br />
reliable tool for the damage assessment <strong>of</strong> debonded s<strong>and</strong>wich composites exposed to cyclic<br />
loading.<br />
iv
This page is intentionally left blank.<br />
v
Synopsis<br />
S<strong>and</strong>wich kompositter er i de seneste år <strong>of</strong>te blevet brugt til vægt-kritiske strukturer såsom fly,<br />
vindmøllevinger og højhastigheds-skibe på grund af det overlegne stivhed/vægt-forhold i forhold<br />
til konventionelle metalliske strukturer. S<strong>and</strong>wich-kompositter, sammensat af forskellige<br />
materialer med meget forskellige stivheds-egenskaber, er tilbøjelige til at få forskellige og<br />
varierende skadestyper. Skader i samlingen mellem dæklag og kerne er en af de mest<br />
almindelige skadestyper s<strong>and</strong>wich kompositter kan opleve. Skader i samlingen mellem dæklag<br />
og kerne kan initieres på grund af forskellige årsager, såsom problemer i fremstillingsprocessen<br />
eller belastningers indvirkningen på samlingen. Skader i samlingen mellem dæklag og kerne kan<br />
være meget afgørende for den strukturelle styrke, da det grundlæggende s<strong>and</strong>wich-princip er<br />
kompromitteret på grund af den manglende forbindelse mellem dæklag og kerne, hvilket<br />
resulterer i en mangel på strukturel bæreevne og integritet.<br />
Et spørgsmål der opstår ved alle anvendelser af s<strong>and</strong>wich-kompositter er skades-tolerance:<br />
Hvordan er den strukturelle integritet påvirket af tilstedeværelsen af produktionsfejl eller driftskader?<br />
Formålet med denne afh<strong>and</strong>ling er at udvikle metoder til besvarelse af dette spørgsmål.<br />
Traditionelt er dyre og omfattende eksperimenter blevet udført for at vurdere den strukturelle<br />
integritet af beskadigede strukturer, især når disse udsættes for cyklisk belastning. I denne<br />
afh<strong>and</strong>ling modeller, som et alternativ til at reducere omkostningerne og størrelsen af<br />
eksperimenter, præsenteret. Hovedvægten er lagt på udviklingen af numeriske simuleringsmodeller<br />
som kan erstatte eksperimenter, men for at undersøge nøjagtigheden og effektiviteten af<br />
de udviklede modeller er de alle valideret imod eksperimenter.<br />
Afh<strong>and</strong>lingen er opdelt i to hoveddele. I den første del analyseres s<strong>and</strong>wich søjler og paneler<br />
med skader udsat for statiske belastninger baseret på brudmekanisk numerisk modeller. For at<br />
validere de udviklede modeller, er der udført komprimerings-forsøg på beskadigede s<strong>and</strong>wichsøjler<br />
og paneler. Brudenergien for dæklag/kerne samlingen i de testede søjler og paneler er målt<br />
og derefter anvendt i finite element modeller til at estimere brudlasten. En god nøjagtighed ved<br />
beregningen af brudlasten tyder på, at de udviklede modeller er anvendelige. I vise tilfælde<br />
afviger simuleringerne af skadede s<strong>and</strong>wichpaneler dog med omkring 46% i forhold til<br />
vi
eksperimenterne. Dette ses som et tegn på, at i mere komplekse geometrier bør de udviklede<br />
modeller bruges med forsigtighed.<br />
I den <strong>and</strong>en del af afh<strong>and</strong>lingen er udmattelses-levetid af beskadigede s<strong>and</strong>wich kompositter<br />
undersøgt. For at gøre finite element simuleringen af udmattelses-revnevækst praktisk, er der<br />
udviklet en ”cycle jump” metode for at accelerere simuleringen. Denne er blevet indarbejdet i de<br />
i den første del af afh<strong>and</strong>lingen udviklede numeriske modeller. Det er vist, at ved at benytte<br />
”cycle jump” metoden kan op til 99% af beregnings-tiden spares, da behovet for simulering af<br />
hver enkelt cykel elimineres. Ved hjælp af de udviklede numeriske modeller er udmattelsesrevnevækst<br />
i dæklag/kerne samlingen for s<strong>and</strong>wich X-samlinger og paneler simuleret og derefter<br />
sammenlignet med de gennemførte udmattelses-eksperimenter. En god nøjagtighed i<br />
simuleringerne i forhold til udmattelses-eksperimenterne viser, at de udviklede accelererede<br />
udmattelses-revnevækst-modeller er et pålideligt værktøj ved skadesvurdering af s<strong>and</strong>wichkonstruktioner<br />
udsat for cykliske belastninger.<br />
vii
This page is intentionally left blank.<br />
viii
Publications<br />
[P1] R. Moslemian, C. Berggreen, L. A. Carlsson <strong>and</strong> F. Aviles, “Failure Investigation <strong>of</strong><br />
Debonded S<strong>and</strong>wich Columns: An Experimental <strong>and</strong> Numerical Study”, Journal <strong>of</strong><br />
<strong>Mechanics</strong> <strong>of</strong> Materials <strong>and</strong> Structures, Vol. 4, No. 7-8, 1469–1487 (2009).<br />
[P2] R. Moslemian, A. Karlsson <strong>and</strong> C. Berggreen, “Accelerated <strong>Fatigue</strong> Crack Growth<br />
Simulation in a Bimaterial Interface”, International Journal <strong>of</strong> <strong>Fatigue</strong>, Vol. 33(12),<br />
1526-1532 (2011).<br />
[P3] R. Moslemian, C. Berggreen, A. Quispitupa <strong>and</strong> B. Hayman, “Damage Tolerance <strong>of</strong><br />
Uniformly Compression Loaded Debond Damaged S<strong>and</strong>wich Panels - an Experimental<br />
<strong>and</strong> Numerical Study”, Journal <strong>of</strong> S<strong>and</strong>wich Materials <strong>and</strong> Structures, Accepted.<br />
[P4] R. Moslemian <strong>and</strong> C. Berggreen, “Interface <strong>Fatigue</strong> Crack Propagation in S<strong>and</strong>wich X-<br />
Joints”, International Journal <strong>of</strong> <strong>Fatigue</strong>, to be submitted.<br />
[P5] R. Moslemian, C. Berggreen, “Experimental <strong>and</strong> Numerical Investigation <strong>of</strong> <strong>Fatigue</strong><br />
Crack Growth in S<strong>and</strong>wich Panels”, International Journal <strong>of</strong> <strong>Fatigue</strong>, to be submitted.<br />
[P6] R. Moslemian, A. Karlsson <strong>and</strong> C. Berggreen, “Analysis <strong>of</strong> Face/Core Debond<br />
Propagation in S<strong>and</strong>wich Panels Exposed to Cyclic Loading”, Engineering Fracture<br />
<strong>Mechanics</strong>, to be submitted.<br />
ix
Contents<br />
Preface<br />
Executive Summary<br />
Synopsis (in Danish)<br />
Publications<br />
Contents<br />
Symbols<br />
1. Introduction 1<br />
1.1 Background <strong>and</strong> Motivations ……………………………………………….. 1<br />
1.2 Thesis Overview ……………………………………………………………. 3<br />
1.3 Linear Elastic Fracture <strong>Mechanics</strong> …………………………………………. 5<br />
1.4 Linear Elastic Fracture <strong>Mechanics</strong> in the Interfaces ……………………….. 7<br />
1.5 <strong>Fatigue</strong> Crack Propagation in S<strong>and</strong>wich Composites ……………………… 10<br />
2 Face/Core Debond Propagation in S<strong>and</strong>wich Columns 16<br />
2.1 Background <strong>and</strong> Objectives ………………………………………………… 16<br />
2.2 Experimental Set-up ………………………………………………………... 17<br />
x<br />
i<br />
iii<br />
vi<br />
ix<br />
x<br />
xv
2.3 Experimental Results ……………………………………………………….. 19<br />
2.4 Characterization <strong>of</strong> Face/Core Interface Fracture Resistance ………………. 22<br />
2.5 Finite Element Model <strong>of</strong> the Debonded Columns ………………………….. 29<br />
2.6 Comparison <strong>of</strong> Numerical <strong>and</strong> Experimental Results ………………………. 31<br />
2.7 Conclusions …………………………………………………………………. 37<br />
3 Failure <strong>of</strong> Uniformly Compressed Debond Damaged S<strong>and</strong>wich Panels 39<br />
3.1 Background …………………………………………………………………. 39<br />
3.2 Test Specimens ……………………………………………………………... 40<br />
3.3 Characterization <strong>of</strong> Face/Core Interface ……………………………………. 43<br />
3.4 Panel Tests ………………………………………………………………….. 49<br />
3.5 Panel Analysis ………………………………………………………………. 53<br />
3.6 Conclusion …………………………………………………………………. 60<br />
4 <strong>Fatigue</strong> Crack Growth Simulation in a Bimaterial Interface 63<br />
4.1 Background …………………………………………………………………. 63<br />
4.2 Cycle Jump Method ………………………………………………………… 65<br />
4.3 2D Face/Core <strong>Fatigue</strong> Crack Growth in S<strong>and</strong>wich Beams ………………… 67<br />
4.4 3D Face/core fatigue crack growth in s<strong>and</strong>wich panels ……………………. 74<br />
4.5 Conclusion ………………………………………………………………… 85<br />
xi
5 Face/core Interface <strong>Fatigue</strong> Crack Propagation in S<strong>and</strong>wich Structures 88<br />
5.1 Background …………………………………………………………………. 88<br />
5.2 Face/Core <strong>Fatigue</strong> Crack Growth in S<strong>and</strong>wich X-Joints …………………… 90<br />
5.2.1 Experimental Study <strong>of</strong> the STT Specimens …………………………….. 91<br />
5.2.2 <strong>Fatigue</strong> Characterization <strong>of</strong> the Face/Core Interface …………………… 102<br />
5.2.3 Finite Element Modeling <strong>of</strong> the STT Specimen ……………………….. 110<br />
5.3 <strong>Fatigue</strong> Crack Growth in the Face/Core Interface <strong>of</strong> S<strong>and</strong>wich Panels ……. 114<br />
5.3.1 <strong>Fatigue</strong> Experiments on S<strong>and</strong>wich Panels ……………………………… 114<br />
5.3.2 Finite Element Modeling <strong>of</strong> the Debonded Panels ……………………... 120<br />
5.4 Conclusion …………………………………………………………………. 124<br />
6 Conclusions <strong>and</strong> Future Work 128<br />
6.1 Buckling Driven Face/Core Debond Propagation in S<strong>and</strong>wich Structures … 128<br />
6.2 <strong>Fatigue</strong> Crack Growth in Bimaterial Interfaces …………………………….. 130<br />
6.3 Face/Core Interface <strong>Fatigue</strong> Crack Growth in S<strong>and</strong>wich Structures ……….. 131<br />
6.4 Future Works ……………………………………………………………….. 133<br />
References 137<br />
A Additional Results from the Column Compression Tests 145<br />
A.1 Debonded Columns with H45 Core ……………………………………………. 145<br />
xii
A.2 Debonded Columns with H100 Core …………………………………………. 146<br />
A.3 Debonded Columns with H200 Core …………………………………………. 147<br />
A.4 Initial Imperfections in Debonded Columns …………………………………. 148<br />
A.5 Out-<strong>of</strong>-plane deflection <strong>of</strong> Debonded Columns ………………………………. 150<br />
B Additional Results from the Panel Compression Tests 155<br />
B.1 Load vs. In-plane Displacement Curves ………………………………………. 155<br />
B.2 Out-<strong>of</strong>-plane Deflection vs. Load Curves ……………………………………. 157<br />
B.3 Out-<strong>of</strong>-plane Deflection <strong>of</strong> the Debonded Panels ……………………………. 159<br />
C Additional Results from the Tests on the STT Specimens 163<br />
B.1 Axial Displacement vs. Force Curves from the Static Tests …………………. 163<br />
xiii
This page is intentionally left blank.<br />
xiv
Symbols<br />
Roman Symbols<br />
A extensional stiffness<br />
a crack lenght<br />
B coupling stiffness<br />
Bct<br />
thickness <strong>of</strong> the CT specimen<br />
b width <strong>of</strong> the MMB specimen<br />
bs<br />
width <strong>of</strong> the steel specimen<br />
C1<br />
compliances <strong>of</strong> the first sub-beams in MMB specimen<br />
C2<br />
compliances <strong>of</strong> the second sub-beams in MMB specimen<br />
C3<br />
compliances <strong>of</strong> the third sub-beams in MMB specimen<br />
CMeasured measured compliance<br />
CMMB<br />
compliance <strong>of</strong> the MMB s<strong>and</strong>wich specimen<br />
Crig<br />
compliance <strong>of</strong> the MMB test rig<br />
Csteel<br />
compliance <strong>of</strong> the steel specimen<br />
c lever arm distance in the MMB test set-up<br />
D bending stiffness<br />
Ddenond bending stiffness <strong>of</strong> the debonded part <strong>of</strong> the MMB specimen<br />
Dintact<br />
bending stiffness <strong>of</strong> the intact part <strong>of</strong> the MMB specimen<br />
E Young’s modulus<br />
Ef<br />
Young’s modulus <strong>of</strong> the face sheet<br />
Ec<br />
Young’s modulus <strong>of</strong> the core<br />
Er<br />
Error in each cycle<br />
Est<br />
<br />
F<br />
Young’s modulus <strong>of</strong> steel<br />
overall average error<br />
Force<br />
G the energy release rate<br />
Gc<br />
facture toughness<br />
Gf<br />
shear modulus <strong>of</strong> the face sheet<br />
Gxz<br />
shear modulus <strong>of</strong> the core<br />
GMMB<br />
the energy release rate <strong>of</strong> the MMB specimen<br />
GIC<br />
interface fracture toughness under pure mode I<br />
GI<br />
mode I strain energy release rate<br />
GII<br />
mode II strain energy release rate<br />
mode III strain energy release rate<br />
GIII<br />
xv
H11<br />
bimaterial constant<br />
H22<br />
bimaterial constant<br />
h characteristic length<br />
hc<br />
core thickness<br />
hf<br />
face thickness<br />
K complex stress intensity factor<br />
KI<br />
mode I stress intensity factor<br />
KII<br />
mode II stress intensity factor<br />
k non-dimensional curve fitting parameter<br />
L length <strong>of</strong> the specimen<br />
M moment<br />
Njump<br />
number <strong>of</strong> jumped cycles<br />
Nref<br />
total number <strong>of</strong> cycles<br />
P load<br />
Pcr<br />
buckling load<br />
Pmax<br />
maximum fatigue load<br />
qy<br />
control parameter<br />
R computational efficiency ratio<br />
r radius<br />
Sij<br />
compliance matrix element<br />
S12<br />
discrete slope <strong>of</strong> the state variable increment between cycle one <strong>and</strong> two<br />
S23<br />
discrete slope <strong>of</strong> the state variable increment between cycle two <strong>and</strong> three<br />
Sjump<br />
estimated slope after a cycle jump<br />
T none-singular stress parallel to crack surface<br />
t time<br />
Ws<br />
required energy for creation <strong>of</strong> new surfaces<br />
x distance from crack tip<br />
y state variable<br />
yjump<br />
estimated state variable from the cycle jump analysis<br />
estimated state variable from the reference analysis<br />
yref<br />
Greek Symbols<br />
material mismatch parameter<br />
potential energy<br />
deflection<br />
ij<br />
Kronecker’s delta<br />
max<br />
maximum displacement<br />
x<br />
opening relative displacement <strong>of</strong> the crack flanks<br />
y<br />
sliding relative displacement <strong>of</strong> the crack flanks<br />
z<br />
out-<strong>of</strong>- plane relative displacement <strong>of</strong> the crack flanks<br />
tcyc<br />
time <strong>of</strong> each cycle<br />
tjump<br />
cycle jump time<br />
cycle jump time for state variable y<br />
ty,ump<br />
xvi
oscillatory index<br />
ratio between compliance matrix elements<br />
Poisson’s ratio<br />
elastic foundation modulus parameter<br />
stress<br />
ij<br />
cr<br />
wrinkling load<br />
angle<br />
finite width correction factor<br />
Mode-mixity phase<br />
load partitioning parameter<br />
xvii
This page is intentionally left blank.<br />
xviii
Chapter 1<br />
Introduction<br />
1.1 Background <strong>and</strong> Motivation<br />
Because <strong>of</strong> a high stiffness <strong>and</strong> strength to weight ratio, s<strong>and</strong>wich structures have received<br />
increasing attention in a variety <strong>of</strong> weight critical structures like wind turbine blades, airplanes<br />
<strong>and</strong> ships. A s<strong>and</strong>wich structure comprises two strong <strong>and</strong> stiff face sheets separated by a light<br />
core. The face sheets carry applied in-plane <strong>and</strong> bending loads <strong>and</strong> the core resists shear loads.<br />
The three layers are typically glued together which forms additional glue layers in the s<strong>and</strong>wich.<br />
The sheet materials can be metalic or non-metalic. The matalic face sheets include steel,<br />
aluminium etc., whereas the non-metalic face sheets are normally the fibre reinforced composites<br />
(FRP). The main types <strong>of</strong> the core are the corrogated, the honeycomb, the balsa <strong>and</strong> the foam<br />
cores. The corrogated cores are to a great extent used in heavy industries like shipbuilding as<br />
well as packing industries. The honeycomb cores are more expensive <strong>and</strong> typically used in<br />
aeronaticall industries because <strong>of</strong> their superior performace compared to weight. The balsa <strong>and</strong><br />
foam cores <strong>of</strong>fer a good performance compared to price <strong>and</strong> are widely used in maritime<br />
strcutures <strong>and</strong> wind turbine blades.<br />
Because <strong>of</strong> being composed <strong>of</strong> very dissimilar materials, s<strong>and</strong>wich structures have peculiar<br />
damage modes (Zenkert, 1997):<br />
Face/core failure<br />
Core shear failure<br />
Face wrinkling<br />
Face/core debonding<br />
Global buckling<br />
Shear crimping<br />
Face dimpling<br />
Core indentation<br />
1
These peculiar damage modes <strong>of</strong>ten result in considering higher safety factors during a design<br />
process compared to similar metallic structures, which makes a detailed study <strong>of</strong> failure modes<br />
<strong>of</strong> s<strong>and</strong>wich structures essential if maximum structural efficiency is to be reached. Face/core<br />
debonding <strong>and</strong> its propagation are among the most critical damages a s<strong>and</strong>wich structures may<br />
experience, as structural integrity is closely linked to the adequacy <strong>of</strong> the bonding in the<br />
face/core interface in these structures. Debonds may emerge due to production defects, in-service<br />
overloading <strong>and</strong> local loads like impact, see Figure 1.1. A debond may be initiated directly in the<br />
face/core interface, in the core just below the resin-rich cells or in the face sheet (for composite<br />
face sheets). If a debond emerges in any <strong>of</strong> these locations, depending on the loading at the crack<br />
tip <strong>and</strong> toughness <strong>of</strong> other neighbouring layers, it may continue propagating in the original<br />
debond position or kink into the core, interface or face sheet, see Figure 1.2. Studies have shown<br />
that face/core debonding considerably reduces the load carrying capacity <strong>of</strong> s<strong>and</strong>wich structures<br />
(Nøkkentved et al., 2005, <strong>and</strong> Berggreen et al., 2005). A question that arises for debond<br />
damaged s<strong>and</strong>wich structures is that <strong>of</strong> damage tolerance: how is the structural performance<br />
influenced by the presence <strong>of</strong> debonding? The question <strong>of</strong> damage tolerance does not only apply<br />
to the design <strong>and</strong> optimisation <strong>of</strong> s<strong>and</strong>wich strcutures, but is also relevant to the residual strength<br />
<strong>and</strong> lifetime <strong>of</strong> already in service structures with minor or major damages. In recent years, a<br />
number <strong>of</strong> analytical <strong>and</strong> numerical studies have been conducted to predict the initiation <strong>and</strong><br />
propagation <strong>of</strong> debonds in s<strong>and</strong>wich structures exposed to static loading, e.g. Kardomateas <strong>and</strong><br />
Huang (2003), Sankar <strong>and</strong> Narayan (2001), Chen <strong>and</strong> Bai (2002) <strong>and</strong> Avilés <strong>and</strong> Carlsson<br />
(2007). Furthermore, experiments have been performed to determine the residual strength <strong>and</strong><br />
identify the failure mechanisms <strong>of</strong> debonded s<strong>and</strong>wich structures, e.g. Avery <strong>and</strong> Sankar (2000),<br />
Vadakke <strong>and</strong> Carlsson (2004) <strong>and</strong> Xie <strong>and</strong> Vizzini (2005).<br />
Linear Elastic Fracture <strong>Mechanics</strong> (LEFM) has been extensively used to model debond initiation<br />
<strong>and</strong> propagation where the energy dissipation zone (fracture process zone) is relatively small<br />
compared to specimen dimensions, (Hutchinson <strong>and</strong> Suo, 1992). Furthermore, several studies<br />
have dealt with the determination <strong>of</strong> the fracture toughness <strong>of</strong> face/core interface in s<strong>and</strong>wich<br />
structures, e.g. Cantwell <strong>and</strong> Davies (1996), Li <strong>and</strong> Carlsson (1999) <strong>and</strong> Østergaard et al. (2007).<br />
In s<strong>and</strong>wich structures with composite face sheets the fracture process zone becomes large due to<br />
kinking <strong>of</strong> the crack into the composite face sheet <strong>and</strong> consequent fibre bridging which violates<br />
LEFM assumptions, see Figure 1.2. As an alternative to LEFM, cohesive zone modelling has<br />
been used in the literature, e.g. Lundsgaard-Larsen et al. (2008, 2010) <strong>and</strong> Østergaard et al.<br />
(2008) to model face/core debonding in the presence <strong>of</strong> fibre bridging.<br />
In few studies experiments have been conducted to some extent in order to examine the accuracy<br />
<strong>of</strong> the developed analysis methods in debonded s<strong>and</strong>wich structures e.g. see Berggreen et al.<br />
(2005), Jolma et al. (2007) <strong>and</strong> Aviles et al. (2006). However, despite all the proposed numerical<br />
<strong>and</strong> analytical methods, a comprehensive study <strong>of</strong> debond damaged s<strong>and</strong>wich structures,<br />
addressing systematically issues like debond propagation, characterisation <strong>of</strong> the fracture<br />
2
toughness <strong>of</strong> the interface at different mode-mixities <strong>and</strong> finally validation <strong>of</strong> these methods<br />
against experiments is still missing.<br />
Regarding the analysis <strong>of</strong> s<strong>and</strong>wich composites exposed to cyclic loading only a limited number<br />
<strong>of</strong> studies are found in the literature. <strong>Fatigue</strong> analyses <strong>of</strong> undamaged s<strong>and</strong>wich beams have been<br />
conducted by beam bending tests by Shenoi et al. (1995), Burman <strong>and</strong> Zenkert (1997), Kenny et<br />
al. (2002, 2005), Kulkarni et al. (2003) <strong>and</strong> Zenkert et al. (2011). The objective <strong>of</strong> these studies<br />
was to analyse the fatigue response <strong>of</strong> foam cores subjected to shear loading. In the case <strong>of</strong><br />
debond damaged s<strong>and</strong>wich structures subjected to cyclic loading, fatigue experiments have been<br />
conducted by Shipsha et al. (1999, 2000, 2003) on debond damaged s<strong>and</strong>wich beams to<br />
determine stress-life S-N diagrams, crack growth rates <strong>and</strong> indentify fatigue crack growth<br />
mechanisms. Burman et al. (1997, 2000) also conducted four-point bending tests on debond<br />
damaged s<strong>and</strong>wich beams. However, all these studies have considered loading cases with pure<br />
mode I or II dominated loading at the crack tip <strong>and</strong> not a general mixed-mode condition.<br />
Figure 1.1: Debond in the structure <strong>of</strong> a ship after removal <strong>of</strong> the face sheet, from Berggreen<br />
(2005).<br />
Figure 1.2: Three different scenarios for face/core debond propagation.<br />
3
1.2 Overview <strong>of</strong> the Thesis<br />
In this thesis a step-by-step analysis approach has been adopted for the analysis <strong>of</strong> debonded<br />
s<strong>and</strong>wich structures exposed to static <strong>and</strong> cyclic loading. The thesis is divided into two main<br />
parts. The first part addresses debonded s<strong>and</strong>wich structures exposed to quasi-static loading. The<br />
analysis initially considers debonded s<strong>and</strong>wich columns <strong>and</strong> then further develops to geometries<br />
like debonded panels. The second part <strong>of</strong> this thesis addresses the failure <strong>of</strong> debond damaged<br />
s<strong>and</strong>wich structures exposed to fatigue loading. The thesis consists <strong>of</strong> six chapters as follows:<br />
1. Introduction<br />
2. Face/Core Debond Propagation in S<strong>and</strong>wich Columns<br />
3. Failure <strong>of</strong> Uniformly Compressed Debond Damaged S<strong>and</strong>wich Panels<br />
4. <strong>Fatigue</strong> Crack Growth Simulation in a Bimaterial Interface<br />
5. Face/core Interface <strong>Fatigue</strong> Crack Propagation in S<strong>and</strong>wich Structures<br />
6. Conclusion <strong>and</strong> Future Work<br />
The first <strong>and</strong> the last chapters are introduction <strong>and</strong> final remarks <strong>and</strong> comments on future work.<br />
In Chapters 2 <strong>and</strong> 3 failure <strong>of</strong> debonded s<strong>and</strong>wich composites exposed to static loading is<br />
investigated. Chapter 2 contains an analysis <strong>of</strong> buckling driven crack propagation in foam cored<br />
s<strong>and</strong>wich columns with face/core debonds. LEFM <strong>and</strong> the finite element method are applied in<br />
order to analyse the behaviour <strong>of</strong> debonded s<strong>and</strong>wich columns with various PVC core materials<br />
<strong>and</strong> glass/epoxy face sheets. Associated compression tests are carried out to validate the<br />
numerical results. In Chapter 3 the numerical analysis method developed in Chapter 2 is<br />
extended further from column to panel level, <strong>and</strong> buckling driven debond propagation in<br />
s<strong>and</strong>wich panels with a circular debond is studied. Furthermore, the simulation results are<br />
validated against compression tests on debonded s<strong>and</strong>wich panels with various PVC <strong>and</strong> PMI<br />
core materials <strong>and</strong> debond diameters. In Chapters 4 <strong>and</strong> 5 the numerical tools which have been<br />
developed earlier to determine fracture parameters like the energy release rate <strong>and</strong> mode-mixity<br />
are utilised to simulate fatigue debond growth in s<strong>and</strong>wich composites. In Chapter 4 a numerical<br />
method is developed to overcome the obstacle <strong>of</strong> computational limitations. The method<br />
accelerates the simulation <strong>of</strong> fatigue crack growth by eliminating the need for simulation <strong>of</strong> all<br />
individual cycles. The acceleration method is verified by reference simulations <strong>of</strong> all individual<br />
cycles, at the end <strong>of</strong> the chapter. The developed numerical scheme is utilised to simulate 2D<br />
fatigue face/core debond growth in s<strong>and</strong>wich X-joints in Chapter 5. Additionally, the simulations<br />
are validated against fatigue tests conducted on the S<strong>and</strong>wich Tear Test (STT) specimen<br />
representing an idealised s<strong>and</strong>wich X-joint. Finally, the developed numerical scheme is further<br />
extended from beam to panel level to simulate 3D fatigue debond growth in s<strong>and</strong>wich panels.<br />
S<strong>and</strong>wich panels with circular debonds are tested under cyclic loading <strong>and</strong> the debond growth is<br />
monitored utilising a Digital Image Correlation (DIC) system. Consequently, the crack growth<br />
rate measured in the experiments is used to validate the developed numerical scheme.<br />
4
These numerical <strong>and</strong> experimental studies provide a better underst<strong>and</strong>ing <strong>of</strong> the behaviour <strong>of</strong><br />
debond damaged s<strong>and</strong>wich composites under static or fatigue loading. Moreover, they develop<br />
reliable analysis tools for assessing the damage tolerance <strong>and</strong> fatigue lifetime <strong>of</strong> debonded<br />
s<strong>and</strong>wich composites.<br />
Since Linear Elastic Fracture <strong>Mechanics</strong> (LEFM) for the interfaces is the main theoretical<br />
foundation <strong>of</strong> this thesis, it will be presented in the next section <strong>of</strong> the Introduction. Finally, a<br />
brief history <strong>of</strong> fatigue analysis in s<strong>and</strong>wich composites will be presented in the last section <strong>of</strong><br />
the Introduction.<br />
1.3 Linear Elastic Fracture <strong>Mechanics</strong><br />
Griffith in 1920 established the foundations <strong>of</strong> fracture mechanics. He applied a stress analysis <strong>of</strong><br />
an elliptical hole from Inglis (1913) to the unstable crack propagation problem. Based on the<br />
principle <strong>of</strong> energy conservation <strong>of</strong> thermodynamics, Griffith proposed the energy balance<br />
concept for fracture. According to Griffith’s theory, a crack may be formed or propagate if the<br />
potential energy change provided by strain energy <strong>and</strong> external forces, resulting from crack<br />
growth, is enough to overcome the surface energy <strong>and</strong> generate new surfaces. In 1948 Irwin<br />
extended Griffith’s concept to metals by including plastic energy dissipation at the crack tip. In<br />
1956 Irwin proposed the Griffith energy or energy release rate G as a measure <strong>of</strong> available<br />
energy for crack growth as<br />
<br />
<br />
where is the potential energy <strong>and</strong> dA is the crack area increment. According to Equation (1.1)<br />
the critical energy release rate Gc or fracture toughness can be defined as<br />
<br />
<br />
where Ws is the required energy for creation <strong>of</strong> new surfaces.<br />
Generally, a crack may experience three types <strong>of</strong> loading, see Figure 1.3. Mode I loading where<br />
the applied load tends to open the crack, mode II loading where the in-plane shear loading tends<br />
to slide one crack face against the other <strong>and</strong> mode III corresponding to the out-<strong>of</strong>-plane shear <strong>and</strong><br />
sliding <strong>of</strong> the crack flanks. A crack may be loaded in any <strong>of</strong> these three modes or in a mixedmode<br />
combination <strong>of</strong> them. In 2D modelling <strong>of</strong> a crack problem, only the first two modes are<br />
typically used.<br />
5<br />
(1.1)<br />
(1.2)
Figure 1.3: Fracture modes, from Berggreen (2005).<br />
A stress singularity at the crack tip for a 2D problem, introduced by each mode <strong>of</strong> loading, can<br />
be defined in a polar coordinate system as<br />
<br />
<br />
<br />
where is Kronecker’s delta, T the non-singular stress parallel to the crack surface. r <strong>and</strong> are<br />
radius <strong>and</strong> angle in a polar coordinate system with origin at the crack tip. <strong>and</strong> <br />
are two functions defining the shape <strong>of</strong> the stress field, see Figure 1.4. KI <strong>and</strong> KII are the mode I<br />
<strong>and</strong> II stress intensity factors. If the definition <strong>of</strong> three crack tip loading modes is applied to the<br />
stress field, then the pure mode I stress field will be symmetric with respect to the crack line with<br />
<strong>and</strong> for =0, <strong>and</strong> the pure mode II is anti-symmetric with <strong>and</strong><br />
for =0. Consequently, KI <strong>and</strong> KII can be defined as<br />
<br />
<br />
(1.4)<br />
Figure 1.4: Homogeneous near-crack tip definitions.<br />
The theory described above is known as homogeneous linear elastic fracture mechanics, which is<br />
applicable to the fracture <strong>of</strong> homogeneous solids where the plasticity at the crack tip is very<br />
small compared to the crack geometry.<br />
6<br />
r<br />
(1.3)
1.4 Linear Elastic Fracture <strong>Mechanics</strong> in Material<br />
Interfaces<br />
Linear elastic fracture mechanics (LEFM) addresses the fracture <strong>of</strong> solids in which the size <strong>of</strong> the<br />
zone dominated by non-linear inelastic deformations close to the crack tip is small compared to<br />
the crack length. When a crack propagates in homogeneous solids it mostly occurs in opening<br />
mode I loading. Even if there is an initial mixed-mode loading at the crack tip, the crack will<br />
eventually kink into a path with pure mode I loading. However, in an interface crack between<br />
two dissimilar materials this is not the case <strong>and</strong> the crack tip loading is a mixed-mode loading<br />
even if the global load is pure mode I. This is to due asymmetries <strong>of</strong> moduli <strong>and</strong> Poisson’s ratios<br />
along the interface, where both shear <strong>and</strong> normal stresses exist in the crack front (He <strong>and</strong><br />
Hutchinson, 1989). A strong dependency <strong>of</strong> the fracture toughness <strong>and</strong> mode-mixity has been<br />
observed in different experimental investigations, e.g. Liechti <strong>and</strong> Chai (1992), making the<br />
mode-mixity phase angle an important parameter for the characterisation <strong>of</strong> interface cracks.<br />
Figure 1.5: Interface crack geometry.<br />
A general interface crack problem assumes that a crack is located between two orthotropic elastic<br />
materials denoted as #1 <strong>and</strong> #2, as shown in Figure 1.5. Two materials are joined along a straight<br />
interface <strong>and</strong> the crack tip is located at x=0. The displacement <strong>and</strong> stress fields close to the crack<br />
tip can be described according to Suo (1989):<br />
<br />
<br />
<br />
<br />
<br />
<br />
where y <strong>and</strong> x are the opening <strong>and</strong> sliding relative displacements <strong>of</strong> the crack flanks, <strong>and</strong><br />
are normal <strong>and</strong> shear stresses. K is the complex stress intensity factor defined as<br />
(1.7)<br />
7<br />
(1.5)<br />
(1.6)
In Equations (1.5) <strong>and</strong> (1.6) H11, H22 <strong>and</strong> the oscillatory index are bimaterial constants<br />
determined from the elastic stiffnesses <strong>of</strong> material 1 <strong>and</strong> 2:<br />
<br />
<br />
where <strong>and</strong> n are non-dimensional orthotropic constants given in terms <strong>of</strong> the elements S11 <strong>and</strong><br />
S22 <strong>of</strong> the compliance matrix:<br />
<br />
<br />
<br />
<br />
<strong>and</strong> The compliance elements for plane stress conditions are given by<br />
<br />
<br />
<br />
<br />
<br />
<br />
<br />
<br />
8<br />
(1.8)<br />
(1.9)<br />
(1.10)<br />
(1.11)<br />
(1.12)<br />
For the plane strain condition a correction to the compliance terms is given as<br />
<br />
<br />
where i <strong>and</strong> j are related to the x- <strong>and</strong>-y directions in the coordinate system shown in Figure 1.5.<br />
The oscillatory index, , in Equations (1.6) <strong>and</strong> (1.7) is given as<br />
(1.13)<br />
<br />
<br />
(1.14)<br />
<br />
where<br />
<br />
<br />
The complex stress intensity factor can be related to the strain energy release rate by (Suo,<br />
1989):<br />
<br />
<br />
The mode-mixity phase angle as suggested by Hutchinson <strong>and</strong> Suo (1992) can be defined as<br />
(1.15)<br />
(1.16)
(1.17)<br />
<br />
where h is the characteristic length <strong>of</strong> the crack problem chosen somewhat arbitrarily. The<br />
characteristic length is chosen as face sheet thickness throughout this thesis. The strain energy<br />
release rate <strong>and</strong> mode-mixity phase angle may also be derived in terms <strong>of</strong> the opening <strong>and</strong><br />
sliding relative displacements <strong>of</strong> the crack flanks as<br />
<br />
<br />
<br />
<br />
<br />
<br />
<br />
9<br />
(1.18)<br />
(1.19)<br />
Equations (1.18) <strong>and</strong> (1.19) are only functions <strong>of</strong> relative opening <strong>and</strong> sliding displacements at<br />
the crack flanks <strong>and</strong> may conveniently be used in the finite element method for determination <strong>of</strong><br />
the strain energy release rate <strong>and</strong> mode-mixity phase angle. However, in an interface both the<br />
strain energy release rate <strong>and</strong> the phase angle close to the crack tip behave in an oscillatory<br />
manner (Williams, 1959), see Figure 1.6. This oscillation is physically impossible since it<br />
calculates that the upper <strong>and</strong> lower surfaces <strong>of</strong> the crack will wrinkle <strong>and</strong> penetrate into each<br />
other close to the crack tip. It is shown that the extent <strong>of</strong> the oscillatory region is <strong>of</strong> the order <strong>of</strong><br />
10 -6 <strong>of</strong> the crack length (Erdogan, 1963). Engl<strong>and</strong> (1965) determined the distance from the crack<br />
tip, which after the first interpenetration occurs in the order <strong>of</strong> 10 -4 <strong>of</strong> the crack length. This<br />
mathematical error needs to be avoided for determination <strong>of</strong> realistic mode-mixity <strong>and</strong> strain<br />
energy release rate.<br />
Berggreen et al. (2005) compared different numerical methods for avoiding the mathematical<br />
oscillatory error, including the Virtual Crack Extension method (Parks, 1974, <strong>and</strong> Hellen, 1975)<br />
<strong>and</strong> the Virtual Crack Closure technique (Beuth, 1996). Furthermore, Berggreen (2005)<br />
developed the Crack Surface Displacement Extrapolation (CSDE) method for avoiding this<br />
imaginary oscillation. The CSDE method is schematically presented in Figure 1.6. The crack<br />
surface displacement extrapolation method exploits the observation that the variation <strong>of</strong> modemixity<br />
phase angle <strong>and</strong> energy release is linear in the K dominated region before the oscillation<br />
zone close to the crack tip. This linear variation may be used to extrapolate the mode-mixity<br />
phase angle <strong>and</strong> the energy release rate to the crack tip position <strong>and</strong> avoid the oscillatory part.<br />
The CSDE method is used throughout this thesis for determination <strong>of</strong> the mode-mixity phase<br />
angle <strong>and</strong> energy release rate.
Figure 1.6: Schematic illustration <strong>of</strong> the CSDE method.<br />
1.5 <strong>Fatigue</strong> Crack Propagation in S<strong>and</strong>wich Structures<br />
Specimens with pre-cracks are normally used to study crack propagation rates for a given<br />
material. In these specimens one or more cracks are artificially created <strong>and</strong> by applying cyclic<br />
load the crack growth is measured. The Single Edge Notched Bending specimen (SENB) <strong>and</strong> the<br />
Compact Tension specimen (CT), as shown in Figure 1.7, are two st<strong>and</strong>ard specimen types used<br />
for measurement <strong>of</strong> mode I crack growth rate.<br />
Figure 1.7: The single edge notched bending specimen (SENB) <strong>and</strong> the compact tension<br />
specimen (CT).<br />
The resulting crack growth rate, da/dN, is usually plotted against the stress intensity factor K<br />
defined as Kmax-Kmin in a load cycle.<br />
10
Figure 1.8: Typical fatigue crack growth rate vs. K diagram.<br />
The crack growth rate diagram is divided into an initiation phase (I), a stable crack growth phase<br />
(II) <strong>and</strong> an unstable crack growth phase (III), as shown in Figure 1.8. The initial phase includes<br />
non-continuous fracture processes with a very low crack growth rate. The stress intensity factor<br />
range in this phase approaches the fatigue crack growth threshold, Kth. The linear intermediate<br />
phase is the most interesting phase due to the linear relation between the logarithm <strong>of</strong> the crack<br />
propagation rate <strong>and</strong> the logarithm <strong>of</strong> the stress intensity factor. This phase covers a large range<br />
<strong>of</strong> stress intensity factors <strong>and</strong> crack propagation in this phase is generally more stable than in the<br />
two other phases. The linear phase <strong>of</strong> the diagram, also named the Paris regime, can be written as<br />
<br />
<br />
where m is the slope <strong>of</strong> the linear phase <strong>and</strong> c is the crack growth rate for K=1.<br />
11<br />
(1.20)<br />
In phase III the crack grows fast <strong>and</strong> in an unstable manner. The effect <strong>of</strong> the loading ratio,<br />
R=Fmin/Fmax, on the crack growth rate is shown in Figure 1.8. It is seen for a given crack growth<br />
rate that the K value increases with increased loading ratio. The influence <strong>of</strong> the loading ratio is<br />
due to the fact that the crack growth is mainly determined by the maximum stress intensity factor<br />
value for each fatigue cycle, Kmax, <strong>and</strong> its proximity to the fracture toughness <strong>of</strong> the material, Kc.<br />
In homogeneous materials due to the fact that the crack only experiences opening mode I<br />
loading, the crack growth rate diagram is unique. On the contrary, in an interface due to the<br />
existence <strong>of</strong> mixed-mode loading at the crack tip <strong>and</strong> the resistance <strong>of</strong> other layers toward<br />
kinking <strong>of</strong> the crack, different crack growth rate relations exist for different mode-mixities.
The compact tension specimen (CT) is typically used to measure the fatigue crack growth rate in<br />
metals in the Paris regime (regime II) according to the test procedure specifications ASTM<br />
E647-93. The stress intensity factor <strong>of</strong> the CT specimen can be determined by<br />
<br />
<br />
<br />
(1.21)<br />
<br />
where Bct is thickness <strong>of</strong> the specimens <strong>and</strong> is a finite width correction factor, given by<br />
<br />
<br />
<br />
<br />
<br />
<br />
<br />
<br />
<br />
<br />
<br />
<br />
<br />
12<br />
<br />
<br />
<br />
<br />
<br />
<br />
(1.22)<br />
Burman et al. (1998) used the CT specimen with some dimensional modifications to extract both<br />
the mode I fracture toughness <strong>and</strong> the mode I crack growth rate <strong>of</strong> H100 PVC foam, see Figure<br />
1.9.<br />
Figure 1.9: Modified CT specimen, after Burman et al. (1998).<br />
The resulting crack growth rate data for H100 PVC foam was more scattered compared to typical<br />
fatigue crack growth rate diagrams, which can be attributed to the brittleness <strong>of</strong> the PVC foam<br />
material. Zenkert et al. (2008, 2010) also studied the fatigue response <strong>of</strong> various closed-cell foam<br />
materials under tension, compression <strong>and</strong> shear loading.<br />
In the case <strong>of</strong> an interface crack, the crack growth rate is a function <strong>of</strong> both the stress intensity<br />
factor <strong>and</strong> mode-mixity. There is no st<strong>and</strong>ard testing procedure for the measurement <strong>of</strong> face/core<br />
interface fatigue crack growth rate in s<strong>and</strong>wich structures. However, in recent years several precracked<br />
test specimens including the Cracked S<strong>and</strong>wich Beam (CSB) (Carlsson et al., 1991), the
s<strong>and</strong>wich Double Cantilever Beam (DCB) (Prasad <strong>and</strong> Carlsson, 1994), the modified Tilted<br />
S<strong>and</strong>wich Debond specimen (TSD) (Berggreen <strong>and</strong> Carlsson, 2010), the Single Cantilever Beam<br />
(SCB) (Cantwell <strong>and</strong> Davies, 1994, 1996), the Three-Point S<strong>and</strong>wich Beam (TPSB) (Cantwell<br />
<strong>and</strong> co-authors, 1999, 2001), the s<strong>and</strong>wich DCB subjected to Uneven Bending Moment named<br />
DCB-UBM (Lundsgaard et al., 2008) <strong>and</strong> the s<strong>and</strong>wich Mixed Mode Bending (Quispitupa et al.,<br />
2009) have been proposed for interface fracture toughness characterisation <strong>of</strong> s<strong>and</strong>wich<br />
structures. Many <strong>of</strong> these specimens can be applied to fatigue crack propagation testing as well,<br />
see Figure 1.10.<br />
Among these test specimens, Shipsha et al. (1999) used DCB <strong>and</strong> CSB specimens to measure<br />
face/core interface fatigue crack growth rates in foam cored s<strong>and</strong>wich beams under pure mode I<br />
<strong>and</strong> II loading. The disadvantage <strong>of</strong> utilising the CSB, DCB, TPSB <strong>and</strong> SCB specimens is the<br />
impossibility <strong>of</strong> mode-mixity variation for a fixed specimen geometry <strong>and</strong> material<br />
configuration. Utilising the CSB specimen, only mode II dominated crack growth rates <strong>and</strong><br />
fracture toughness can be measured while with the DCB <strong>and</strong> TPSB only mode I dominant<br />
loading <strong>of</strong> the crack tip is possible. The TSD specimen may be used to measure the fracture<br />
toughness in a wide range <strong>of</strong> mode-mixities. However, since the mode-mixity is a function <strong>of</strong><br />
crack length in this specimen, it is not directly suitable for st<strong>and</strong>ard interface fatigue<br />
characterisation at a specific mode-mixity. As to the DCB-UBM <strong>and</strong> MMB specimens, apart<br />
from being able to load the crack at different mode-mixities, the mode-mixity also remains<br />
constant as the crack grows, which makes these specimens ideal c<strong>and</strong>idates for the measurement<br />
<strong>of</strong> interface fatigue crack growth rates. The DCB-UBM specimen has not been used for fatigue<br />
tests yet. However, Quispitupa et al. (2008) used the s<strong>and</strong>wich Mixed Mode Bending (MMB)<br />
specimen to measure face/core interface crack growth rates for a range <strong>of</strong> mode-mixities. The<br />
MMB test rig allows for adjustment <strong>of</strong> the mixed-mode ratio simply by changing the location <strong>of</strong><br />
the support at point A, see Figure 1.10. The MMB test rig is used in this thesis to measure<br />
fracture toughness in Chapter 3 <strong>and</strong> crack growth rates in Chapter 5. In Chapter 2 as an<br />
alternative method, the TSD specimen is used to measure the face/core fracture toughness <strong>of</strong> the<br />
s<strong>and</strong>wich configurations.<br />
13
A<br />
Figure 1.10: CSB, DCB, TSD, DCB-UBM, SCB <strong>and</strong> MMB test specimens.<br />
14
This page is intentionally left blank.<br />
15
Chapter 2<br />
Buckling Driven Face/Core Debond<br />
Propagation in S<strong>and</strong>wich Columns<br />
2.1 Background <strong>and</strong> Objectives<br />
It is known that the bond between the face sheets <strong>and</strong> core is a potential weak link in a s<strong>and</strong>wich<br />
structure see e.g. Xie <strong>and</strong> Vizzini (2005) <strong>and</strong> Veedu <strong>and</strong> Carlsson (2005). In the case <strong>of</strong> in-plane<br />
loading, the behaviour <strong>of</strong> s<strong>and</strong>wich beams <strong>and</strong> columns containing imperfections or interfacial<br />
cracks has been investigated to a certain extent. Hohe <strong>and</strong> Becker (2001) conducted an analytical<br />
investigation to study the effect <strong>of</strong> intrinsic microscopic face/core debonds. Kardomateas <strong>and</strong><br />
Huang (2003) studied buckling <strong>and</strong> postbuckling behaviour <strong>of</strong> debonded s<strong>and</strong>wich beams by a<br />
perturbation procedure based on non-linear beam equations. Sankar <strong>and</strong> Narayan (2001) studied<br />
the compressive behaviour <strong>of</strong> debonded s<strong>and</strong>wich columns by testing <strong>and</strong> numerical analysis.<br />
Most <strong>of</strong> their columns failed by buckling <strong>of</strong> the debonded face sheet. Vadakke <strong>and</strong> Carlsson<br />
(2004) similarly studied the compression failure <strong>of</strong> s<strong>and</strong>wich columns with a face/core debond.<br />
They investigated the effect <strong>of</strong> core density <strong>and</strong> debond length on the compressive strength <strong>of</strong><br />
s<strong>and</strong>wich columns. Results <strong>of</strong> their experiments showed that failure occurred by buckling <strong>of</strong> the<br />
debonded face sheet, followed by rapid debond growth towards the ends <strong>of</strong> the specimen. They<br />
also showed that the compression strength <strong>of</strong> the s<strong>and</strong>wich columns decreases significantly with<br />
increasing debond size. Furthermore, columns with high-density cores experienced less strength<br />
reduction at any given debond size. Østergaard (2008) used a cohesive zone model for debonded<br />
columns <strong>and</strong> investigated the relation between global buckling behaviour <strong>and</strong> cohesive layer<br />
properties. The study showed that the compression strength reduction caused by a debond can be<br />
explained by two mechanisms: First from the interaction <strong>of</strong> local debond <strong>and</strong> global column<br />
buckling <strong>and</strong> secondly from the development <strong>of</strong> a damage zone at the debond crack tip. Only a<br />
few works have assessed in detail the determination <strong>of</strong> fracture parameters like energy release<br />
16
ate, phase angle <strong>and</strong> debond propagation load in debond damaged s<strong>and</strong>wich structures subjected<br />
to in-plane loading, <strong>and</strong> validated the results against experiments see e.g. Berggreen <strong>and</strong><br />
Simonsen (2005) <strong>and</strong> Sallam <strong>and</strong> Simitses (1985). A good starting point for detailed fracture<br />
analysis <strong>of</strong> s<strong>and</strong>wich structures is specimens like columns <strong>and</strong> beams which can be modelled<br />
using the 2D finite element models which has not been thoroughly examined in the literature.<br />
In this chapter, as our starting point, failure <strong>of</strong> compression loaded s<strong>and</strong>wich columns with an<br />
implanted through-width face/core debond is examined. Compression tests were conducted on<br />
s<strong>and</strong>wich columns containing face/core debonds. The strains <strong>and</strong> out-<strong>of</strong>-plane displacements <strong>of</strong><br />
the debonded region were monitored using Digital Image Correlation (DIC) technique. Finite<br />
element analysis <strong>and</strong> linear elastic fracture mechanics were employed to estimate the critical<br />
instability load <strong>and</strong> compression strength <strong>of</strong> the columns. Tilted S<strong>and</strong>wich Debond (TSD)<br />
specimens were applied for determination <strong>of</strong> the fracture toughness <strong>of</strong> the interface in a modemixity<br />
similar to tested s<strong>and</strong>wich columns. Energy release rate <strong>and</strong> mode-mixity were<br />
determined <strong>and</strong> compared to fracture toughness data obtained from TSD tests, predicting<br />
propagation loads. Instability loads <strong>of</strong> the columns were determined from the out-<strong>of</strong>-plane<br />
displacements using the Southwell method. Results show that the finite element estimates <strong>of</strong><br />
debond propagation <strong>and</strong> instability loads are in overall agreement with experimental results. The<br />
proximity <strong>of</strong> the debond propagation loads <strong>and</strong> the instability loads shows the importance <strong>of</strong><br />
instability in connection with the debond propagation <strong>of</strong> s<strong>and</strong>wich columns.<br />
2.2 Experimental Setup<br />
S<strong>and</strong>wich panels consisting <strong>of</strong> 2 mm thick plain-woven E-glass/epoxy face sheets over 50 mm<br />
thick Divinycell H45, H100 <strong>and</strong> H200 PVC foam cores were manufactured using vacuum<br />
assisted resin transfer molding <strong>and</strong> cured at room temperature. A face/core debond was defined<br />
by inserting strips <strong>of</strong> Teflon film, 30 m thick, between face <strong>and</strong> core in desired locations in the<br />
panels. The widths <strong>of</strong> the Teflon strip were 25.4, 38.1 <strong>and</strong> 50.8 mm. The width defines the length<br />
<strong>of</strong> the debond in the column specimens subsequently cut from the panels. It was observed that<br />
the single Teflon layer insert used to define the face/core debond did not perfectly release the<br />
bond between the face <strong>and</strong> core. To achieve a non-sticking, traction-free debond in the<br />
specimens, the debond was mechanically released by wedging knives with very thin blades (0.35<br />
<strong>and</strong> 0.43 mm thick). The width <strong>and</strong> length <strong>of</strong> the columns were 38 <strong>and</strong> 153 mm, respectively.<br />
Figure 2.1 shows a column specimen cut from a panel. A test rig was designed <strong>and</strong> manufactured<br />
for axial compression testing <strong>of</strong> the columns, see Figure 2.2 (a). The test rig includes four 25 mm<br />
diameter solid steel rods to maintain alignment <strong>of</strong> the upper <strong>and</strong> lower plates <strong>of</strong> the test rig<br />
during compressive loading. Linear bearings were attached to the upper plate to minimise<br />
friction. Steel clamps <strong>of</strong> a width <strong>of</strong> 80 mm were attached to the upper <strong>and</strong> lower plates <strong>of</strong> the<br />
fixture to clamp the columns. The test rig was inserted into an MTS 810 100 kN capacity servohydraulic<br />
universal testing machine, see Figure 2.2 (b). A 2 MPixel digital image correlation<br />
17
(DIC) measurement system (ARAMIS 2M) was used to monitor 3D surface displacements <strong>and</strong><br />
surface strains during the experiments. Testing <strong>of</strong> the columns was conducted using ramp<br />
displacement control with a piston loading rate <strong>of</strong> 0.5 mm/min. A sample rate <strong>of</strong> one image per<br />
second was used in the DIC measurements. Three replicate tests were conducted for each<br />
specimen configuration.<br />
The material properties <strong>of</strong> the face sheets, assumed to be in-plane isotropic, were determined by<br />
tensile tests based on the ASTM st<strong>and</strong>ard D3039. The compression strength <strong>of</strong> the face sheets<br />
was measured on laminate specimens cut from the actual s<strong>and</strong>wich face sheet using the ASTM<br />
st<strong>and</strong>ard IITRI (D3410) test fixture. Core material properties were obtained from the<br />
manufacturer (DIAB, Divinycell H Technical Data, Labholm), see Table 2.1. Symbols E <strong>and</strong> G<br />
represent Young’s <strong>and</strong> shear moduli, Poisson’s ratio, max the compression strength <strong>of</strong> the core<br />
<strong>and</strong> the tensile <strong>and</strong> compression strengths <strong>of</strong> the face sheets. GIC is the mode I fracture toughness<br />
<strong>of</strong> the core material (Li <strong>and</strong> Carlsson, 1999).<br />
2.1: Face <strong>and</strong> core material properties from experiments conducted on samples from the face<br />
sheet <strong>and</strong> fracture toughness, from Li <strong>and</strong> Carlsson (1999).<br />
Material E (MPa) G (MPa) max (MPa) GIc (J/m 2 )<br />
Face: E-glass/epoxy 10360 3816 0.31 168 (T)/ 95.4 (C) N/A<br />
Core: H45 50 15 0.33 0.6 (C) 150<br />
Core: H100 135 35 0.33 2 (C) 310<br />
Core: H200 240 85 0.33 4.8 (C) 625<br />
Figure 2.1: A column test specimen with H100 core <strong>and</strong> 38.1 mm debond.<br />
18
Figure 2.2: (a) Schematic representation <strong>of</strong> test fixture (b) actual test setup.<br />
2.3 Experimental Results<br />
Figure 2.3 shows typical load vs. axial displacement <strong>and</strong> load vs. out-<strong>of</strong>-plane displacement<br />
curves for columns with a 50.8 mm debond <strong>and</strong> H45, H100 <strong>and</strong> H200 cores. The out-<strong>of</strong>-plane<br />
deflection refers to the centre <strong>of</strong> the debond, for additional results see Apendix A.<br />
Load (kN)<br />
10<br />
8<br />
6<br />
4<br />
2<br />
0<br />
(a)<br />
H200<br />
H100<br />
H45<br />
(a)<br />
0 0.2 0.4 0.6 0.8 1<br />
Axial displacement (mm)<br />
Figure 2.3: (a) Load vs. axial displacement (b) out-<strong>of</strong>-plane deflection at the debond centre vs.<br />
load for columns with a debond length <strong>of</strong> 50.8 mm.<br />
Figure 2.3 (a) shows that the columns respond in a fairly linear fashion after the initial stiffening<br />
region until collapse. Figure 2.3 (b) shows that the out-<strong>of</strong>-plane deflection increases slowly with<br />
increasing load until the maximum load. It will later be shown that the point <strong>of</strong> maximum load<br />
19<br />
3<br />
Out-<strong>of</strong>-plane deflection<br />
(mm)<br />
2<br />
1<br />
0<br />
(b)<br />
H200<br />
H100<br />
H45<br />
(b)<br />
0 5<br />
Load (kN)<br />
10
corresponds to the onset <strong>of</strong> debond propagation. Figure 2.3 (b) shows that the critical<br />
propagation load increases as the core density is increased. Figure 2.4 shows DIC images <strong>of</strong> out<strong>of</strong>-plane<br />
displacement in a column with an H45 core <strong>and</strong> a 50.8 mm debond just before <strong>and</strong> after<br />
debond propagation. During the compression tests the DIC measurements furthermore revealed<br />
that opening <strong>of</strong> the debond was not perfectly symmetric, see Figure 2.4 (a). This can be<br />
attributed to a slight misalignment <strong>of</strong> the fibres in the face sheets <strong>and</strong> lack <strong>of</strong> perfectly uniform<br />
load introduction at the ends <strong>of</strong> the columns. Figure 2.5 shows DIC images <strong>of</strong> initial out-<strong>of</strong>-plane<br />
imperfection <strong>of</strong> two columns with H100 cores <strong>and</strong> 50.8 mm debonds, released using the thin<br />
(0.35 mm) <strong>and</strong> thicker (0.43 mm) blades, respectively. The inital imperfection amplitudes are<br />
approximately 0.25 <strong>and</strong> 0.51 mm. A Photron APX-RS high-speed camera was used to track the<br />
debond propagation at a frame rate <strong>of</strong> 1000 images per second. Figure 2.6 shows the debond 1<br />
ms before <strong>and</strong> right after the debond propagation. A slight opening <strong>of</strong> the debond is seen before<br />
propagation. Slight crack kinking into the core, resulting in the crack propagating just beneath<br />
the interface on the core side, was observed in most <strong>of</strong> the column specimens with H45 core.<br />
Some specimens with H100 core displayed this failure mode as well, see Figure 2.7. The fracture<br />
toughness <strong>of</strong> the H45 core (150 J/m 2 , see Table 2.1) is likely less than that <strong>of</strong> the face/core<br />
interface, which could explain the observed crack propagation path. A detailed kinking analysis,<br />
similar to what was presented in Li <strong>and</strong> Carlsson (1999), must be carried out to investigate this<br />
further. This is, however, out <strong>of</strong> the scope <strong>of</strong> this study. All columns with H200 core <strong>and</strong> 25.4<br />
mm debond failed by compression failure <strong>of</strong> the face sheet above the debond location, see Figure<br />
2.8. This can be explained by the proximity between the debond propagation load <strong>of</strong> the<br />
debonded face sheet <strong>and</strong> the compression failure load <strong>of</strong> the face sheet, which can be calculated<br />
from the compression strength <strong>and</strong> the cross section area <strong>of</strong> the face sheet, see Table 2.1. Face<br />
compression failure was also observed for one <strong>of</strong> the columns with H100 core <strong>and</strong> 25.4 mm<br />
debond length. The H200 column specimens with 38.1 <strong>and</strong> 50.8 mm debonds failed by debond<br />
propagation although kinking was not observed, thus, promoting crack propagation directly in<br />
the face/core glue interface. Moreover, the observed crack propagation rate was less for the H200<br />
specimens, indicating a tough interface.<br />
(a) (b)<br />
Figure 2.4: Debond opening (a) prior to propagation (b) after propagation for a column with<br />
H100 core <strong>and</strong> 50.8 mm debond length from DIC measurements.<br />
20
(a) (b)<br />
Figure 2.5: Initial imperfections in columns with H100 core <strong>and</strong> 50.8 mm debond where the<br />
debond was released using (a) a thin blade (0.35 mm) (b) a thicker blade (0.43 mm).<br />
Figure 2.6: High-speed images, which show the debond in a column with H45 core <strong>and</strong> 50.8<br />
mm debond length 1 ms before propagation <strong>and</strong> right after propagation has taken place.<br />
21
Figure 2.7: Crack kinking into the core in a column with H100 core <strong>and</strong> 25.4 mm debond.<br />
Figure 2.8: Face compression failure in a column with H200 core <strong>and</strong> 25.4 mm debond.<br />
2.4 Characterisation <strong>of</strong> Face/Core Interface Fracture<br />
Resistance<br />
The aim <strong>of</strong> this section is to determine the fracture toughness <strong>of</strong> the face/core interface in a<br />
mode-mixity identical to the one in the column specimens at the onset <strong>of</strong> crack propagation using<br />
22
the TSD specimen. The measured fracture toughness will be used in the next section to predict<br />
debond propagation load. The Tilted S<strong>and</strong>wich Debond (TSD) specimen was introduced in 1999<br />
by Li <strong>and</strong> Carlsson for fracture testing <strong>of</strong> s<strong>and</strong>wich specimens. To achieve a range <strong>of</strong> modemixities<br />
at the crack tip the s<strong>and</strong>wich specimen is tilted so that the debonded face is subjected to<br />
an axial load, in addition to the normal load. A schematic representation <strong>of</strong> the conventional TSD<br />
specimen is given in Figure 2.9.<br />
Figure 2.9: Schematic illustration <strong>of</strong> the conventional TSD specimen.<br />
Stress intensity factors for the TSD specimens may be determined as follows (Hutchinson <strong>and</strong><br />
Suo, 1992):<br />
<br />
<br />
<br />
<br />
<br />
<br />
where <strong>and</strong> KI <strong>and</strong> KII are mode I <strong>and</strong> II components <strong>of</strong> the stress intensity factor <strong>and</strong> hf<br />
is the face sheet thickness. F <strong>and</strong> M are edge force <strong>and</strong> moment applied to the loaded face sheet,<br />
respectively. is the oscillatory index given for isotropic materials in Equation (1.14). The<br />
mismatch parameter is given by<br />
23<br />
(2.1)
(2.2)<br />
where <strong>and</strong> for plane stress <strong>and</strong> plane strain, respectively. E <strong>and</strong> are<br />
Young’s modulus <strong>and</strong> Poisson’s ratio, respectively. Normal force <strong>and</strong> moment in the TSD<br />
specimen can be determined from the vertical force P <strong>and</strong> the tilt angle by<br />
(2.3)<br />
(2.4)<br />
For the reduced formulation where ==0<br />
<br />
<br />
<br />
<br />
<br />
<br />
<br />
Finally, the energy release rate can be calculated by<br />
<br />
<br />
<br />
<br />
<br />
Regarding the mode-mixity it was revealed that the mode-mixity for a conventional TSD<br />
specimen remains quite unaffected by the tilt angle (Li <strong>and</strong> Carlsson, 2001). Furthermore, it was<br />
discovered that the unreinforced TSD specimens display positive mode-mixity phase angles for<br />
tilt angles up to around 80 for all analysed PVC core materials, thus provoking the crack to kink<br />
into the core (Berggreen <strong>and</strong> Carlsson, 2010). To increase the range <strong>of</strong> achieved mode-mixities<br />
by the TSD specimen, two modified designs <strong>of</strong> the TSD specimen were proposed by Berggreen<br />
<strong>and</strong> Carlsson (2010). In the first modified design the upper face sheet <strong>of</strong> the TSD specimen is<br />
reinforced by a thick stiff steel plate to increase the stiffness <strong>of</strong> the loaded face sheet as shown in<br />
Figure 2.10. It was shown that by reinforcing the upper face sheet with a stiff steel plate the<br />
range <strong>of</strong> phase angles is exp<strong>and</strong>ed because <strong>of</strong> increasing shear loading <strong>and</strong> crack tip root rotation<br />
in the specimen.<br />
24<br />
(2.5)<br />
(2.6)<br />
(2.7)
Figure 2.10: Schematic presentation <strong>of</strong> the first modified TSD specimen.<br />
Further modifications were made by reducing the global shear deformation <strong>of</strong> the core by<br />
reinforcing the left edge <strong>of</strong> the TSD specimen by placing a metal block, see Figure 2.11. To<br />
avoid compression failure <strong>of</strong> the core at the right end <strong>of</strong> the reinforced TSD specimen due to<br />
rotation <strong>of</strong> the reinforced face sheet, a short link is pin-attached between the rigid base <strong>of</strong> the test<br />
rig <strong>and</strong> the centre <strong>of</strong> the steel reinforcement bar on both sides <strong>of</strong> the TSD specimen, see Figure<br />
2.11.<br />
Figure 2.11: Schematic presentation <strong>of</strong> the second modified TSD specimen.<br />
25
A modified version <strong>of</strong> the tilted s<strong>and</strong>wich debond (TSD) specimen, shown in Figure 2.10, was<br />
used to determine the fracture toughness <strong>of</strong> the interface. The determined fracture toughness will<br />
be used later to determine the crack propagation load in the column specimens applying the finite<br />
element method. Finite element analysis <strong>of</strong> the modified TSD specimen was carried out in order<br />
to determine the appropriate tilt angle to match the mode-mixity phase angles for the tested<br />
columns. A 2D finite element model with a highly refined mesh in the crack tip region, smallest<br />
element size <strong>of</strong> 3.33 m, was developed in the commercial code, ANSYS version 11, using 8node<br />
iso-parametric elements (PLANE82), see Figure 2.12. The energy release rate (G) <strong>and</strong> the<br />
mode-mixity phase angle () were determined from relative nodal pair displacements along the<br />
crack flanks obtained from the finite element analysis using the CSDE method outlined in the<br />
introduction. The characteristic length h is arbitrarily chosen as the face sheet thickness.<br />
Figure 2.12: Finite element model used in analysis <strong>of</strong> the modified TSD specimen with neartip<br />
mesh refinement. The smallest element size is 3.33 m.<br />
The mode-mixity phase angle <strong>of</strong> each column specimen was extracted at a load corresponding to<br />
the onset <strong>of</strong> debond propagation (from the experiments) using finite element modelling (to be<br />
presented later). The extracted phase angles were exploited in finite element models <strong>of</strong> the TSD<br />
specimens to determine the matching tilt angle at a crack length <strong>of</strong> 50 mm for specimens with<br />
H45 core <strong>and</strong> 63.5 mm for specimens with H100 <strong>and</strong> H200 cores. The face sheets were 1.5 mm<br />
thick, <strong>and</strong> the core thickness 25 mm. A 12.7 mm thick steel bar <strong>of</strong> the same width <strong>and</strong> length as<br />
the s<strong>and</strong>wich specimen (25.4 x 180 mm) was used to reinforce the loaded face sheet. The<br />
material properties <strong>of</strong> the face sheets <strong>and</strong> cores in the TSD specimens are identical to those <strong>of</strong> the<br />
columns specimens. The resulting specifications for the TSD specimen including the calibrated<br />
tilt angle are given in Table 2.2.<br />
Table 2.2: TSD specimen dimensions <strong>and</strong> tilt angles.<br />
Core Initial crack length (mm) Phase angle, deg Tilt angle (), deg<br />
H45 50 -24<br />
55<br />
H100 63.5 -29<br />
60<br />
H200 63.5 -37<br />
70<br />
TSD specimens <strong>of</strong> a length <strong>of</strong> 180 mm <strong>and</strong> a width <strong>of</strong> 25.4 mm were cut from panels prepared<br />
with one face sheet only. Figure 2.13 shows the TSD test setup with an H100 TSD specimen<br />
26
tilted 60. The bottom core surface <strong>of</strong> the specimen was bonded to a steel plate bolt connected to<br />
the test rig. Prior to bonding, the bonding surfaces were thoroughly s<strong>and</strong>ed <strong>and</strong> cleaned with<br />
acetone to promote adhesion. Hysol EA-9309 aerospace epoxy paste adhesive was used for<br />
bonding. The steel bar contained a through-width hole near the end in order to allow pin load<br />
application. All tests were conducted at a rate <strong>of</strong> 1 mm/min, <strong>and</strong> three replicate specimens were<br />
tested.<br />
Figure 2.13: Modified TSD test setup.<br />
Figure 2.14 shows typical load vs. displacement curves for TSD specimens with H45, H100 <strong>and</strong><br />
H200 foam cores. The load-displacement plots are fairly linear until the point <strong>of</strong> crack<br />
propagation, where the load suddenly drops. The load required to propagate the crack<br />
significantly increases as the core density is increased. Compared to conventional TSD<br />
specimens without steel reinforcement, see e.g. Li <strong>and</strong> Carlsson (2001), substantially larger loads<br />
are required to generate crack growth in the steel reinforced specimens, as a result <strong>of</strong> the large<br />
bending <strong>and</strong> shear stiffnesses <strong>of</strong> the steel reinforced upper face sheet. The crack propagation<br />
behaviour for the H45 specimens was rather unstable, with the crack suddenly growing 25-50<br />
mm at each crack increment, which allowed only about three crack increments before the crack<br />
reached more than 70% <strong>of</strong> the total specimen length, where the test was stopped. For the<br />
specimens with H45 foam core, the crack propagated beneath the face/core interface, on the core<br />
side, Figure 2.15 (a), which is consistent with the observations from the column tests <strong>and</strong> the<br />
27
previous observations <strong>of</strong> crack path behaviour for low-density foam cores, see e.g. Li <strong>and</strong><br />
Carlsson (1999). For specimens with H100 core, unstable crack growth was more pronounced,<br />
with the crack growing about 50 mm at each increment, allowing only two crack increments<br />
before the crack reached 70% <strong>of</strong> the specimen length. For the H100 specimens the crack location<br />
was again beneath the face/core interface, however, now slightly closer to the face sheet, just<br />
below the resin-rich layer on the core side, see Figure 2.15 (b). The H200 specimens failed at<br />
considerably higher loads (> 4 kN) by sudden delamination between the plies <strong>of</strong> the upper face<br />
sheet, causing a large unstable crack, reaching almost to the end <strong>of</strong> the specimen at one crack<br />
increment, see Figure 2.15 (c). Given such an unstable crack growth behaviour with a few crack<br />
increments per specimen, the use <strong>of</strong> st<strong>and</strong>ard data reduction methods such as “compliance<br />
calibration” or “modified beam theory” becomes questionable for this test. Thus, the fracture<br />
toughness <strong>of</strong> the face/core interface was determined from finite element analysis <strong>of</strong> the TSD<br />
specimen with the critical load as input. The calculated fracture toughness values <strong>and</strong> phase<br />
angles are listed in Table 2.3.<br />
Load (kN)<br />
1.2<br />
0.8<br />
0.4<br />
ao=50.8 mm<br />
a1=67.2 mm<br />
a3=88.1 mm<br />
a4=121 mm<br />
0<br />
0 0.4 0.8 1.2 1<br />
Vertical displacement (mm)<br />
Load (kN)<br />
3<br />
2<br />
1<br />
0<br />
0 Vertical 1displacement 2 (mm)<br />
Figure 2.14: Load vs. vertical displacement diagram for TSD specimens: (a) H45, (b) H100<br />
<strong>and</strong> (c) H200.<br />
Table 2.3: Calculated phase angles <strong>and</strong> fracture toughnesses at measured fracture loads.<br />
TSD specimen Phase angle, deg Fracture toughness (J/m 2 )<br />
H45 -24<br />
176±35<br />
H100 -29 672±69<br />
H200 -37 ---<br />
For the H200 specimens kinking <strong>of</strong> the crack into the face sheet occurred, so that the fracture<br />
toughness <strong>of</strong> the face/core interface could not be determined. Consequently, it was not possible<br />
to predict the face/core debond propagation load for the columns with H200 core.<br />
28<br />
ao=63.5 mm<br />
a1=124 mm<br />
a3=149 mm<br />
(a) (b) (c)<br />
Load (kN)<br />
5<br />
4<br />
3<br />
2<br />
1<br />
a o = 63.5 mm<br />
0<br />
0 1 2<br />
Vertical displacement (mm)
(a) (b)<br />
Figure 2.15: Crack propagation paths in TSD specimens: (a) H45 (b) H100 <strong>and</strong> (c) H200<br />
core.<br />
2.5 Finite Element Model <strong>of</strong> the Debonded Columns<br />
Finite element modelling <strong>of</strong> the column specimens was done in the commercial finite element<br />
code ANSYS version 11. Because <strong>of</strong> material, geometrical <strong>and</strong> loading symmetries, only the<br />
upper half-symmetry section <strong>of</strong> the column geometry was modelled, see Figure 2.16. The<br />
columns were assumed to contain an initial imperfection in the form <strong>of</strong> a half-wave eigen mode<br />
shape, determined from eigen buckling analysis. Overlapping <strong>of</strong> crack flanks was avoided by use<br />
29<br />
(c)
<strong>of</strong> contact elements (CONTACT173 <strong>and</strong> TARGET170), <strong>and</strong> displacement controlled<br />
geometrical non-linear analysis was conducted. To simulate the boundary conditions in the<br />
experimental setup, nodes on the top side <strong>of</strong> the columns, in contact with the top ending plate <strong>of</strong><br />
the test rig, were displaced uniformly in the direction <strong>of</strong> loading. Furthermore, the nodes in<br />
contact with the lateral clamp surfaces were constrained to have zero lateral displacement.<br />
Symmetry boundary conditions were applied to the symmetry plane. Hence, displacements <strong>of</strong> the<br />
nodes on the symmetry plane were assumed to be zero in the loading direction, see Figure 2.16.<br />
Due to the need <strong>of</strong> a high mesh density at the crack front when performing the fracture<br />
mechanics analysis, a submodelling technique was developed, where displacements calculated<br />
on the cut boundaries <strong>of</strong> the global model with a coarse mesh were specified as boundary<br />
conditions for the submodel. Submodelling is based on St. Venant's principle, which states that if<br />
an actual distribution <strong>of</strong> forces is replaced by a statically equivalent system, the distributions <strong>of</strong><br />
stresses <strong>and</strong> strains are altered only near the regions <strong>of</strong> load application. The approach assumes<br />
that the stress concentration around the crack tip is highly localised; therefore, if the boundaries<br />
<strong>of</strong> the submodel are sufficiently far away from the crack tip, reasonably accurate results may be<br />
obtained in the submodel. Interpolated displacement results at the cut boundaries in the global<br />
model were used as boundary conditions in the submodel at different load steps. A 20-node<br />
isoparametric element (solid 95) was used in the finite element model. The finite element model<br />
<strong>and</strong> submodel are shown in Figure 2.17. In the global model <strong>and</strong> the submodel, the size <strong>of</strong> the<br />
elements along the crack flanks near the crack tip is 0.2 <strong>and</strong> 0.01 mm, respectively. The energy<br />
release rate <strong>and</strong> the mode-mixity are determined on the basis <strong>of</strong> relative nodal pair displacements<br />
along the crack flanks obtained from the finite element analysis <strong>and</strong> the CSDE method as<br />
explained in the introduction.<br />
Figure 2.16: Applied boundary conditions in the finite element model <strong>of</strong> the columns.<br />
30
Figure 2.17: Finite element models. (a) Half-model showing the mesh in the global model.<br />
The smallest element size is 0.2 mm. (b) Submodel showing the refined mesh. The element size<br />
close to the crack tip is 10 m.<br />
2.6 Comparison <strong>of</strong> Numerical <strong>and</strong> Experimental Results<br />
Results from the experimental testing <strong>and</strong> numerical modelling presented above are compared.<br />
The focus is divided into three parts: The effect <strong>of</strong> imperfections on the instability behaviour, the<br />
through-width variation <strong>of</strong> energy release rate <strong>and</strong> mode-mixity <strong>and</strong>, finally, the influence <strong>of</strong><br />
imperfections on the debond propagation. In order to examine the effect <strong>of</strong> initial imperfection<br />
on the instability behaviour <strong>of</strong> the specimens, columns with initial imperfection amplitudes <strong>of</strong><br />
0.1, 0.2 <strong>and</strong> 0.4 mm were analysed numerically <strong>and</strong> compared with test results. The columns<br />
tested had in average an imperfection magnitude <strong>of</strong> 0.2 mm. Figure 2.18 shows the deformed<br />
shape <strong>of</strong> a debonded s<strong>and</strong>wich column with H100 core containing a 50.8 mm face/core debond<br />
<strong>and</strong> 0.2 mm initial imperfection amplitude. The imperfection resembles a half-sine wave with the<br />
maximum deflection at the centre, consistent with DIC measurements described above. Figure<br />
2.19 shows load vs. out-<strong>of</strong>-plane deflection for columns with H100 core <strong>and</strong> 25.4, 38.1 <strong>and</strong> 50.8<br />
mm debonds determined from numerical analysis at imperfection amplitudes <strong>of</strong> 0.1, 0.2 <strong>and</strong> 0.4<br />
mm <strong>and</strong> testing (two or three replicates are shown). The numerical <strong>and</strong> the test results show that<br />
31<br />
(a)<br />
(b)
the debond opening initially increases slowly with increasing load, but then increases rapidly as<br />
the maximum load is approached. At the maximum load, which corresponds to the onset <strong>of</strong><br />
propagation, the load decreases due to the displacement controlled loading <strong>and</strong> debond<br />
propagation resulting in increased compliance, while the out-<strong>of</strong>-plane displacement <strong>of</strong> the<br />
debonded face rapidly increases. The load reduction is shown only for the experimental results,<br />
as only initiation <strong>of</strong> debond propagation is modelled numerically (no crack propagation<br />
algorithms are implemented in the finite element model). It is seen that the initial imperfection<br />
magnitude does not influence the out-<strong>of</strong>-plane deflection <strong>of</strong> the columns very much. A<br />
bifurcation instability <strong>of</strong> the debonded face sheet is not observed until the propagation point.<br />
Evidently, the presence <strong>of</strong> initial imperfection transforms the behaviour <strong>of</strong> the debonded face<br />
sheet into compression loading <strong>of</strong> a curved column. The failure load is found from fracture<br />
mechanics analysis, when the crack tip loading reaches the fracture toughness. Because <strong>of</strong> the<br />
imperfection present in the debonded face sheet, the critical instability load is extracted from<br />
both experimental <strong>and</strong> finite element results applying the Southwell method (Southwell, 1932).<br />
The Southwell method is a graphical method which estimates the instability load <strong>of</strong> imperfect<br />
structural columns. Southwell showed that the deflection, , at the centre <strong>of</strong> an imperfect<br />
column, loaded by a load P, is given by<br />
<br />
<br />
<br />
where Pcr is the instability load, <strong>and</strong> is proportional to the initial imperfection ( ). By plotting<br />
vs. /P, Pcr,, the instability load, can be determined by the slope <strong>of</strong> the line (the so-called<br />
Southwell plot method).<br />
Figure 2.18: Deformed shape <strong>of</strong> a column with H100 core containing a 50.8 mm face/core<br />
debond after local buckling <strong>of</strong> the debonded face sheet.<br />
32<br />
(2.8)
Out-<strong>of</strong>-plane displacement (mm)<br />
4<br />
3<br />
2<br />
1<br />
0<br />
Column1<br />
FEA, IMP=0.1 mm<br />
FEA, IMP=0.2 mm<br />
FEA, IMP=0.4 mm<br />
Debond= 25.4 mm<br />
0 4 8 12 16<br />
Load (kN)<br />
Out-<strong>of</strong>-plane displacement (mm)<br />
4<br />
3<br />
2<br />
1<br />
0<br />
(a)<br />
Figure 2.19: Finite element <strong>and</strong> experimental results for out-<strong>of</strong>-plane vs. load diagram for<br />
columns with H100 core <strong>and</strong> (a) 25.4 mm debond (b) 38.1 mm debond (c) 50.8 mm debond.<br />
The average initial imperfection magnitude in the tested columns is 0.2 mm.<br />
Numerical <strong>and</strong> experimental results are compared in terms <strong>of</strong> instability load values listed in<br />
Table 2.4. For the finite element analysis results, a 0.2 mm initial imperfection was selected,<br />
which is consistent with experimental values. From the results listed in Table 2.4, it is seen that<br />
experimental <strong>and</strong> numerical instability loads are in good agreement. Further, it is seen that the<br />
instability load drops significantly as the debond length increases, which is well-known for any<br />
buckling problem.<br />
33<br />
Out-<strong>of</strong>-plane displacement (mm)<br />
Column1<br />
Column2<br />
Column3<br />
FEA, IMP=0.1<br />
FEA, IMP=0.2<br />
FEA, IMP=0.4<br />
Debond= 50.8 mm<br />
4<br />
3<br />
2<br />
1<br />
0<br />
Column1<br />
Column2<br />
Column3<br />
FEA, IMP=0.1<br />
FEA, IMP=0.2<br />
FEA, IMP=0.4<br />
Debond= 38.1 mm<br />
0 2 4 6 8 10<br />
Load (kN)<br />
0 4 8 12<br />
(c)<br />
Load (kN)<br />
(b)
Table 2.4: Instability loads determined from Southwell plots applied to experimental <strong>and</strong> finite<br />
element results using 0.2 mm initial imperfection.<br />
Experiment Finite element analysis<br />
Debond length (mm) Debond length (mm)<br />
25.4 38.1 50.8 25.4 38.1 50.8<br />
Core Instability load (kN) Instability load (kN)<br />
H45 12.9±1.5 10.1±1.1 6.1±0.9 14.1 8.5 5.6<br />
H100 14.8±0.8 10.5±1.7 8.7±0.6 15.2 11.6 8.8<br />
H200 -- 13±1.2 8.5±0.3 -- 13.8 9<br />
Energy release rate <strong>and</strong> mode-mixity were determined across the width <strong>of</strong> the columns.<br />
Generally it is assumed that the edges <strong>of</strong> the columns are under plane stress <strong>and</strong> the interior is in<br />
plane strain. Thus, in the analysis <strong>of</strong> energy release rate <strong>and</strong> phase angle a plane stress<br />
formulation was adopted for nodes on the specimen edges <strong>and</strong> a plane strain formulation for the<br />
interior points. Figure 2.20 presents the distributions <strong>of</strong> energy release rate normalised with the<br />
interface fracture toughness, Gc, <strong>and</strong> phase angle across the width <strong>of</strong> a column with H45 core <strong>and</strong><br />
50.8 mm debond. Similar results were obtained for columns with other core materials <strong>and</strong><br />
debond lengths. Figure 2.20 shows the classical thumb-nail distribution <strong>of</strong> the energy release<br />
rate, normalised with the fracture toughness <strong>of</strong> the interface, increasing from the edges towards<br />
the centre <strong>of</strong> the specimen. The phase angle also displays a maximum in the interior. The<br />
magnitude <strong>of</strong> the phase angle, however, is minimum in the interior, which means that the loading<br />
in the centre is more mode I dominated than the edges. Based on the results shown in Figure 2.20<br />
the debond propagation is expected to initiate in the interior. Thus, in the debond propagation<br />
analysis, the plane strain formulation in the centre <strong>of</strong> the specimen was employed.<br />
G/Gc<br />
1.1<br />
1<br />
0.9<br />
0.8<br />
0.7<br />
0 0.2 0.4 0.6 0.8 1<br />
x/b<br />
(a)<br />
Figure 2.20: Distribution <strong>of</strong> energy release rate (a) <strong>and</strong> phase angle (b) across the column<br />
width for a column with H45 core <strong>and</strong> 50.8 mm debond.<br />
34<br />
Phase angle (deg)<br />
-21<br />
-22<br />
-23<br />
-24<br />
-25<br />
-26<br />
x/b<br />
0 0.2 0.4 0.6 0.8 1<br />
(b)
Figure 2.21 shows energy release rate <strong>and</strong> mode-mixity in terms <strong>of</strong> phase angle vs. load for<br />
columns with a 50.8 mm debond <strong>and</strong> H45, H100 <strong>and</strong> H200 cores. Figure 2.21 (a) shows that G<br />
increases significantly in a certain load regime which can be associated with the opening <strong>of</strong> the<br />
debond. The fracture toughness values shown in Figure 2.21 (a) were determined by the TSD<br />
tests, described in Section 4. The reduction <strong>of</strong> phase angle as the load increases, Figure 2.21 (b),<br />
shows that the crack tip loading becomes more shear dominated at high loads.<br />
G (J/m 2 )<br />
1200<br />
800<br />
400<br />
0<br />
H45<br />
H100<br />
H200<br />
(-24º) H45<br />
(-29º) H100<br />
Gc(-29), H100<br />
G c(-24), H45<br />
0 3 6 9 12<br />
Load (kN)<br />
(a)<br />
Phase angle (deg.)<br />
Figure 2.21: (a) Energy release rate vs. load <strong>and</strong> (b) phase angle vs. load for columns with a<br />
50.8 mm debond <strong>and</strong> H45, H100 <strong>and</strong> H200 cores.<br />
In order to investigate the influence <strong>of</strong> the initial imperfection on G <strong>and</strong> , columns with H100<br />
core <strong>and</strong> 38.1 mm debond with three initial imperfection magnitudes (0.1, 0.2 <strong>and</strong> 0.5 mm) were<br />
analysed. Figure 2.22 shows G <strong>and</strong> vs. load for these columns. From Figure 2.22 (a) it is seen<br />
that G is not highly sensitive to the initial imperfection magnitude. The phase angle, Figure 2.22<br />
(b), is sensitive to the initial imperfection at small loads, but appears to converge to a value about<br />
-30 ° at higher loads, which indicates that the mode-mixity is less influenced by the initial<br />
imperfection at higher loads.<br />
The crack propagation load was estimated using fracture toughness data from the TSD tests.<br />
Energy release rate <strong>and</strong> mode-mixity in terms <strong>of</strong> phase angle were determined in the interior<br />
(centre) <strong>of</strong> the columns. Numerically predicted <strong>and</strong> experimentally determined propagation<br />
loads, which means the maximum load in the load vs. axial displacement diagrams (Figure 2.3<br />
(a)), for the debonded columns are listed in Table 2.5.<br />
35<br />
-18<br />
-22<br />
-26<br />
-30<br />
-34<br />
-38<br />
Load (kN)<br />
0 3 6 9 12<br />
(b)<br />
H45<br />
H100<br />
H200
G (J/m2)<br />
600<br />
400<br />
200<br />
0<br />
H100<br />
IMP=0.1mm<br />
IMP=0.2mm<br />
IMP=0.5mm<br />
(a)<br />
0 2 4 6 8 10<br />
Load (kN)<br />
Figure 2.22: (a) Energy release rate vs. load <strong>and</strong> (b) phase angle vs. load for a column with<br />
H100 core <strong>and</strong> 38.1 mm debond with different initial imperfection magnitudes.<br />
Table 2.5: Numerically predicted <strong>and</strong> experimentally measured debond propagation loads.<br />
Experiment Finite element analysis<br />
Debond length (mm) Debond length (mm)<br />
25.4 38.1 50.8 25.4 38.1 50.8<br />
Core Debond propagation load (kN) Debond propagation load (kN)<br />
H45 13.5±1 9.8±1.4 6.3±1.1 10.6 7.1 5.4<br />
H100 13.8±0.9 10±1.2 8±0.9 16.8 11.2 9.1<br />
H200 -- 12.3±1.7 8.1±1.2 -- -- --<br />
The FEA predictions <strong>of</strong> debond propagation loads agree reasonably with the experimentally<br />
measured ones. It is clearly observed that the debond propagation load in the debonded columns<br />
decreases as the debond length increases. Furthermore, the propagation load increases with<br />
increased core density as a result <strong>of</strong> the increasing fracture resistance with core density.<br />
However, some inconsistencies are seen in the experimental results. For example the measured<br />
debond propagation loads for columns with H100 <strong>and</strong> H200 cores <strong>and</strong> 50.8 mm debond length<br />
are almost identical. These inconsistencies could be attributed to the local material distortions at<br />
the crack tip caused by the use <strong>of</strong> a blade to release the face/core debond <strong>and</strong> the resin-rich area<br />
at the tip <strong>of</strong> the insert film. The proximity <strong>of</strong> the debond propagation loads <strong>and</strong> the instability<br />
loads in Tables 2.4 <strong>and</strong> 2.5 show that the local instability load could be used as a measure <strong>of</strong><br />
debonded column strength for this particular column case. This is, however, not a general<br />
conclusion valid for all debonded column cases where other failure mechanisms, such as<br />
compression failure, occur prior to local buckling instability.<br />
36<br />
Phase angle (deg.)<br />
-10<br />
-20<br />
-30<br />
-40<br />
0 2 4<br />
Load (kN)<br />
6 8 10<br />
(b)<br />
IMP=0.1mm<br />
IMP=0.2mm<br />
IMP=0.5mm<br />
H100
2.7 Conclusion<br />
The first step in a step by step analysis <strong>of</strong> debonded s<strong>and</strong>wich structures is to analyse simple<br />
structures like s<strong>and</strong>wich columns <strong>and</strong> beams. In this case the analysis is less complicated<br />
compared to the analysis <strong>of</strong> debonded s<strong>and</strong>wich panels because <strong>of</strong> the possibility <strong>of</strong> having a fine<br />
mesh at the crack tip <strong>and</strong> a more detailed analysis due to less complex geometry. The<br />
compressive failure mechanisms <strong>of</strong> foam cored s<strong>and</strong>wich columns containing a face/core debond<br />
were experimentally <strong>and</strong> numerically investigated in this chapter. S<strong>and</strong>wich columns with<br />
glass/epoxy face sheets <strong>and</strong> H45, H100 <strong>and</strong> H200 PVC foam cores were tested in a specially<br />
designed test rig.<br />
Most <strong>of</strong> the tested columns failed by debond propagation at the face/core interface or just below<br />
the interface towards the column ends. Bifurcation type buckling instability <strong>of</strong> the debonded face<br />
sheet was not observed before the debond propagation was initiated. It is believed that the initial<br />
imperfections are mostly responsible for this behaviour, which is similar to compression <strong>of</strong> a<br />
curved beam. Slight crack kinking into the core, resulting in the crack propagating below the<br />
interface on the core side, was observed in most <strong>of</strong> the column specimens with H45 core <strong>and</strong><br />
some columns with H100 core. All columns with H200 core <strong>and</strong> 25.4 mm debond failed by<br />
compression failure <strong>of</strong> the face sheet above the debond location, which can be attributed to the<br />
proximity between the debond propagation load <strong>of</strong> the debonded face sheet <strong>and</strong> the compression<br />
failure load <strong>of</strong> the face sheet. Face compression failure was also observed for one <strong>of</strong> the columns<br />
with H100 core <strong>and</strong> 25.4 mm debond length.<br />
Instability <strong>and</strong> crack propagation loads <strong>of</strong> the columns were predicted based on a geometrically<br />
non-linear finite element analysis <strong>and</strong> linear elastic fracture mechanics. Modified TSD specimens<br />
were tested in different tilt angles to measure the fracture toughness <strong>of</strong> the interface at the<br />
calculated mode-mixity phase angles for the column specimens associated with the debond<br />
propagation. Comparison <strong>of</strong> the measured out-<strong>of</strong>-plane deflection, instability, <strong>and</strong> debond<br />
propagation loads from experiments <strong>and</strong> finite element analyses showed fair agreement. For<br />
most <strong>of</strong> the investigated column specimens, it was shown that the instability <strong>and</strong> debond<br />
propagation loads are very reasonable estimates <strong>of</strong> the ultimate failure load, unless the other<br />
failure mechanisms occur prior to buckling instability.<br />
37
This page is intentionally left blank.<br />
38
Chapter 3<br />
Failure <strong>of</strong> Uniformly Compressed Debond<br />
Damaged S<strong>and</strong>wich Panels<br />
3.1 Background<br />
In the previous chapter a detailed analysis <strong>of</strong> face/core fracture in s<strong>and</strong>wich columns under<br />
compression was presented. A finite element model <strong>of</strong> the columns was developed <strong>and</strong> utilised to<br />
determine fracture parameters like the energy release rate <strong>and</strong> mode-mixity phase angle. In order<br />
to predict the crack propagation load, face/core interface fracture toughness <strong>of</strong> the columns was<br />
determined using the TSD specimen. Furthermore, the developed finite element model was<br />
validated against compression tests on debonded columns with different cores <strong>and</strong> debond<br />
lengths. The next step in studing the interface fracture <strong>of</strong> s<strong>and</strong>wich structures is to extend the<br />
analysis from simple geometries like beams <strong>and</strong> columns to geometries like panels.<br />
In recent years, efforts have been made to investigate the effect <strong>of</strong> face/core debonding on the<br />
residual strength <strong>of</strong> s<strong>and</strong>wich panels. Berggreen <strong>and</strong> co-authors (2005) in different studies<br />
investigated the failure <strong>of</strong> debonded s<strong>and</strong>wich panels loaded with non-uniform compressive <strong>and</strong><br />
lateral pressure loading. They additionally proposed a new method for determining numerically<br />
the mode-mixity at the crack tip. Avilés <strong>and</strong> Carlsson (2007) focused on s<strong>and</strong>wich panels<br />
containing circular embedded debonds. They conducted uniform compression tests <strong>and</strong> finite<br />
element analysis to determine the residual strength <strong>of</strong> the damaged panels. Chen <strong>and</strong> Bai (2002)<br />
conducted finite element analysis to study the postbuckling behaviour <strong>of</strong> face/core debonded<br />
s<strong>and</strong>wich panels on the basis <strong>of</strong> the von Karman non-linearity assumption <strong>and</strong> the zigzag<br />
deformation theory combined with a debonding model <strong>and</strong> a multi-scalar damage model. Despite<br />
all the numerical <strong>and</strong> experimental studies, a comprehensive study <strong>of</strong> debond damaged s<strong>and</strong>wich<br />
panels, <strong>and</strong> analysis <strong>of</strong> issues like debond propagation, characterisation <strong>of</strong> the fracture toughness<br />
<strong>of</strong> the interface at different mode-mixities <strong>and</strong> finally validation <strong>of</strong> these methods against<br />
experiments is still missing.<br />
39
Hayman (2007) has described a damage assessment procedure for s<strong>and</strong>wich structures, which<br />
was originally developed for naval ships, but has potential for application to other structures with<br />
similar construction. The procedure exploits the fact that s<strong>and</strong>wich structures in ship’s hulls are<br />
to a large extent built up <strong>of</strong> a limited number <strong>of</strong> fairly large, flat panels that are supported at their<br />
edges. These panels are subjected primarily to local transverse pressure loadings <strong>and</strong> to in-plane<br />
loadings which are associated with global bending <strong>of</strong> the hull girder. Many cases <strong>of</strong> production<br />
defects <strong>and</strong> in-service damage initially involve a region <strong>of</strong> the panel that is small compared to the<br />
length <strong>and</strong> breadth <strong>of</strong> the panel. In such cases damage assessment requires use <strong>of</strong> a local strength<br />
reduction factor Rl, defined as the ratio between the far-field applied stress (or strain) causing<br />
failure in the presence <strong>of</strong> the damage to the corresponding value in the absence <strong>of</strong> the damage.<br />
The effect <strong>of</strong> the damage on the strength <strong>of</strong> both the panel <strong>and</strong> the structure as a whole may be<br />
determined from this local strength reduction factor Rl, which depends on the type <strong>and</strong> size <strong>of</strong> the<br />
damage, the material lay-up <strong>and</strong> the predominant stress state (tension, compression, shear) in the<br />
damage location.<br />
In this chapter, the above-mentioned damage assessment approach is adopted <strong>and</strong> strength<br />
reduction factors are determined for debond damaged s<strong>and</strong>wich panels under uniform<br />
compression loading, by a combination <strong>of</strong> finite element modelling <strong>and</strong> testing. Uniform<br />
compression tests were conducted on intact s<strong>and</strong>wich panels with three different types <strong>of</strong> core<br />
material (H130, H250 <strong>and</strong> PMI) <strong>and</strong> on similar panels with circular face/core debonds having<br />
three different diameters. The strains <strong>and</strong> out-<strong>of</strong>-plane displacements <strong>of</strong> the panel surface were<br />
monitored using the digital image correlation (DIC) technique. Mixed Mode Bending (MMB)<br />
tests were conducted to determine the fracture toughness <strong>of</strong> the interface <strong>of</strong> the panels for a full<br />
range <strong>of</strong> negative mode-mixities. Finite element analysis <strong>and</strong> linear elastic fracture mechanics<br />
were applied to determination <strong>of</strong> the critical buckling load <strong>and</strong> compression strength <strong>of</strong> the<br />
panels. Finally, the modelling approaches <strong>and</strong> failure criteria are discussed.<br />
Numerically determined crack propagation loads in most <strong>of</strong> the cases show fair agreement with<br />
experimental results, but in a few cases up to 45% deviation is seen between numerical <strong>and</strong><br />
experimental results. This can mainly be ascribed to the large scatter in the measured interface<br />
fracture toughness <strong>and</strong> differing crack tip details. Tentative strength reduction curves are<br />
presented, but uncertainty concerning the intact strengths <strong>of</strong> the applied materials needs to be<br />
removed before these can be used with confidence.<br />
3.2 Test Specimens<br />
Uniform compression loading tests were conducted on intact s<strong>and</strong>wich panels <strong>and</strong> panels with a<br />
predefined debond. A total <strong>of</strong> 30 panels were manufactured, each 460 mm long <strong>and</strong> 380 mm<br />
wide. The face sheets were <strong>of</strong> glass-reinforced plastics (GFRP) consisting <strong>of</strong> Devold AMT noncrimp<br />
fabrics <strong>and</strong> two different types <strong>of</strong> vinylester resin with the following lay-ups:<br />
40
Type A: Three layers <strong>of</strong> DBLT-850 quadriaxial (0/90/+45/-45) glass with Dion 9102<br />
vinylester<br />
Type B: As type A but with Dion 9500 rubber-modified vinylester<br />
Type C: Three layers <strong>of</strong> DBL-800 triaxial (0/0/+45/-45) glass with Dion 9102 vinylester<br />
In addition, a layer <strong>of</strong> chopped str<strong>and</strong> mat (CSM) was placed between each face sheet <strong>and</strong> the<br />
s<strong>and</strong>wich core. The core materials were PVC (H130 <strong>and</strong> H250) <strong>and</strong> PMI (51-IG) foams. The<br />
thicknesses <strong>of</strong> the core <strong>and</strong> the face sheets were 30 mm <strong>and</strong> approximately 2 mm, respectively,<br />
see Figure 3.1. All panels were reinforced with wooden inserts at the top <strong>and</strong> bottom edges <strong>of</strong> the<br />
panel to avoid crushing <strong>of</strong> the core at the loaded edges. The panels were resin injection molded<br />
<strong>and</strong> cured with vacuum consolidation. Furthermore, the top <strong>and</strong> bottom edges <strong>of</strong> the panels were<br />
machined straight <strong>and</strong> parallel following the specimen manufacturing.<br />
Figure 3.1: Geometry <strong>of</strong> panel specimens <strong>and</strong> an image <strong>of</strong> a manufactured panel with a<br />
debond diameter <strong>of</strong> 200 mm.<br />
Debond defects with three diameters (100, 200 <strong>and</strong> 300 mm) were introduced during the<br />
manufacturing process by laying a circular piece <strong>of</strong> 0.025 mm thick Airtech release film on the<br />
core <strong>and</strong> sealing the edges with resin before lamination. However, after manufacturing <strong>of</strong> the<br />
panels it was observed that the face sheet was partially bonded to the core in the debonded area,<br />
probably due to small perforations <strong>of</strong> the release film. To release the partial adhesion, a small<br />
hole with a 2 mm diameter was drilled into the backside through the thickness <strong>of</strong> the panels <strong>and</strong><br />
the debonded face sheet was pushed, using a thin metallic bar, to a point where all partial<br />
cohesions were eliminated. The panel test specimens are listed in Table 3.1. Fracture mechanical<br />
characterisation tests were performed in connection with the debond studies. For these tests, special<br />
s<strong>and</strong>wich beam specimens were manufactured with face sheet lay-ups <strong>of</strong> type A, B <strong>and</strong> C <strong>and</strong> cores<br />
<strong>of</strong> a thickness <strong>of</strong> 10 <strong>and</strong> 20 mm.<br />
41
Table 3.1: Panel test specimens.<br />
Lay-up type Core material Debond diameter (mm) No. <strong>of</strong> specimens<br />
100 2<br />
A H130<br />
200<br />
300<br />
2<br />
2<br />
Intact 3<br />
100 2<br />
B H250<br />
200<br />
300<br />
2<br />
2<br />
Intact 3<br />
100 3<br />
C PMI 51 IG<br />
200<br />
300<br />
3<br />
3<br />
Intact 3<br />
Each layer <strong>of</strong> DBLT-850 fabric contains approximately 835 g/m 2 glass reinforcement <strong>and</strong> each<br />
layer <strong>of</strong> DBL-800 has approximately 810 g/m 2 . Each face has in addition a 100 g/m 2 layer <strong>of</strong><br />
chopped str<strong>and</strong> mat (CSM) placed against the core at the interface. Typical properties for the<br />
laminates are given in Table 3.2.<br />
Table 3.2: Face sheet material properties from experiments conducted on samples from the<br />
face sheet.<br />
Material property Type A/B Type C<br />
Elastic modulus, x-direction (GPa) 19.4 26.4<br />
Elastic modulus, y-direction (GPa) 19.4 11.7<br />
Elastic modulus, z-direction (GPa) 9.2 9.2<br />
Poisson’s ratio xy 0.316 0.514<br />
Poisson’s ratio xz 0.32 0.32<br />
Poisson’s ratio yz 0.32 0.32<br />
Shear modulus, xy (GPa) 7.4 7.4<br />
Shear modulus, xz (GPa) 3.0 3.0<br />
Shear modulus, yz (GPa) 3.0 3<br />
Tensile strength (MPa) 294/313 490<br />
Compression strength (MPa) 300/320 463<br />
These in-plane properties are based on tests performed on similar laminates, but without a CSM<br />
layer. These laminates had a 53.8% fibre volume ratio, resulting in a thickness <strong>of</strong> 0.61 mm or<br />
0.59 mm for each layer <strong>of</strong> DBLT-850 or DBL-800 reinforcement, respectively. The thicknesses per<br />
layer for the laminates in the tested panels were observed to be slightly higher than the calculated<br />
thicknesses. This appears to have been mainly due to the extra CSM layer. Burn-<strong>of</strong>f tests performed<br />
on specimens taken from the face sheets indicated fibre volume contents between 51.5% <strong>and</strong> 55.3%,<br />
42
the lowest values being for the Type C (triaxial DBL-800) laminates. The core materials are<br />
Divinycell PVC foams <strong>of</strong> type H130 <strong>and</strong> H250, <strong>and</strong> Rohacell PMI foam <strong>of</strong> type 51-IG. The<br />
properties for the core materials, taken from the manufacturers’ data sheets, are given in Table 3.3.<br />
Core<br />
type<br />
Nominal density<br />
(kg/m 3 )<br />
Table 3.3: Material properties <strong>of</strong> the cores.<br />
Compressive modulus<br />
(MPa)<br />
43<br />
Shear modulus<br />
(MPa)<br />
Compressive strength<br />
(MPa)<br />
H130 130 170 50 3<br />
H250 250 300 104 6.2<br />
PMI 52.1 70 19 0.9<br />
3.3 Characterisation <strong>of</strong> Face/Core Interface<br />
The interface fracture toughness characterisation <strong>of</strong> the foam cored s<strong>and</strong>wich specimens was<br />
performed using the Mixed Mode Bending (MMB) test rig <strong>and</strong> the MMB s<strong>and</strong>wich specimen<br />
(Quispitupa et al., 2009 <strong>and</strong> 2010), as shown in Figure 3.2. The MMB test rig was originally<br />
developed for mixed-mode fracture testing <strong>of</strong> monolithic composites (Reeder et al., 1990 <strong>and</strong><br />
Ozdil et al., 2000) <strong>and</strong> has recently become an ASTM st<strong>and</strong>ard test method D6671-01. The<br />
MMB test rig allows adjustment <strong>of</strong> the mixed-mode ratio by changing the lever arm distance c as<br />
shown in Figure 3.2. Quispitupa et al. (2009) further developed the MMB test rig for fracture<br />
testing <strong>of</strong> s<strong>and</strong>wich structures. The st<strong>and</strong>ard MMB composite test specimen is a rectangular<br />
unidirectional beam specimen with a predefined delamination located at the midplane. In the<br />
MMB s<strong>and</strong>wich specimen the initial crack is located in the face/core interface at the top <strong>of</strong> the<br />
specimen, see Figure 3.2. The compliance <strong>of</strong> the MMB s<strong>and</strong>wich specimen is determined by<br />
(Quispitupa et al., 2009):<br />
<br />
<br />
<br />
<br />
<br />
<br />
<br />
<br />
where <strong>and</strong> P are the deflection <strong>of</strong> the loading point <strong>and</strong> the applied load, respectively, c is the<br />
lever arm distance, L the half-span length <strong>and</strong> is the load partitioning parameter at the left<br />
support (see Figure 3.2) given by<br />
3<br />
a 1 a 1<br />
<br />
3 D2<br />
k G f h f Gxzhc<br />
3<br />
3<br />
(3.2)<br />
a 1 a 1 a 1 a 1<br />
<br />
<br />
3 D k G h G h 3 D k G h<br />
2<br />
f<br />
f<br />
xz<br />
c<br />
1<br />
f<br />
f<br />
where the subscripts 1 <strong>and</strong> 2 refer to the face sheet <strong>and</strong> the core, respectively, a is the crack<br />
length, k is the shear correction factor, k=1.2, D2=D-B 2 /A, D1=1/(Efhf 3 /12), hf <strong>and</strong> hc are the face<br />
(3.1)
sheet <strong>and</strong> the core thickness, respectively, Gxz is the shear modulus <strong>of</strong> the core, Gf is the shear<br />
modulus <strong>of</strong> the face sheet <strong>and</strong> Ef <strong>and</strong> Ec are the face <strong>and</strong> core moduli.<br />
Figure 3.2: Mixed mode bending test rig for s<strong>and</strong>wich specimens.<br />
The A, B <strong>and</strong> D terms are the extensional, coupling <strong>and</strong> bending stiffnesses <strong>of</strong> any given<br />
laminated beam given by<br />
A E h E h<br />
f<br />
f<br />
c<br />
c<br />
Ec<br />
E f<br />
B hf<br />
hc<br />
2<br />
(3.4)<br />
1 3 2<br />
3 2<br />
D Efhf3hfhcEchc3hfhc 12<br />
(3.5)<br />
where K is the elastic foundation modulus<br />
Ec<br />
b<br />
K <br />
hc<br />
2<br />
C1, C2 <strong>and</strong> C3 are compliances <strong>of</strong> the subbeams defined as<br />
<br />
<br />
<br />
<br />
<br />
<br />
<br />
<br />
<br />
<br />
<br />
<br />
(3.8)<br />
<br />
<br />
<br />
Saddle<br />
<br />
<br />
<br />
P<br />
<br />
<br />
<br />
<br />
C<br />
L<br />
<br />
<br />
44<br />
L<br />
Hinge<br />
a<br />
(3.3)<br />
(3.6)<br />
(3.7)<br />
(3.9)
is the elastic foundation modulus parameter defined as<br />
<br />
3<br />
hf bE f<br />
3K<br />
<strong>and</strong> Ddebpnded <strong>and</strong> Dintact are the bending stiffness <strong>of</strong> the debonded <strong>and</strong> intact parts <strong>of</strong> the MMB<br />
specimen (Quispitupa et al., 2009):<br />
45<br />
(3.10)<br />
<br />
2 B <br />
D <br />
<br />
debonded 1 D <br />
A <br />
(3.11)<br />
3 3<br />
E f hf<br />
2 E f hf<br />
Echc<br />
Dintact<br />
hchf <br />
2<br />
6 12<br />
(3.12)<br />
The energy release rate can be expressed as<br />
(3.13)<br />
<br />
When the expressions for the compliance <strong>and</strong> the energy release rate are known, it is possible to<br />
determine the crack length at a given load <strong>and</strong> deflection <strong>and</strong> fracture toughness as the crack<br />
grows. However, to fully characterise the face/core interface the mode-mixity must be evaluated<br />
as well. Since there is no analytical expression for the interface mode-mixity, it is usually<br />
determined by use <strong>of</strong> the finite element method. For static characterisation, the fracture<br />
toughness <strong>of</strong> the interface can be determined by Equation (3.13) <strong>and</strong> the mode-mixity is<br />
evaluated using finite element modelling <strong>and</strong> the CSDE method as explained before. For fatigue<br />
characterisation <strong>of</strong> the interface, Equation (3.1) is used to determine the crack length from the<br />
compliance <strong>of</strong> the MMB specimens evaluated from the actual applied load <strong>and</strong> displacement <strong>of</strong><br />
the test specimen. Fracture testing <strong>of</strong> the MMB specimens was performed at a cross-head rate <strong>of</strong><br />
1 mm/min. Figure 3.3. shows typical load vs. displacement curves for representative loading<br />
conditions <strong>and</strong> specimens. In Figure 3.3 the point where the crack starts to propagate is marked<br />
with an open circle (“”). The load vs. displacement curves are fairly linear up to the point <strong>of</strong><br />
crack propagation. It is seen that the load drops due to a change in the specimen stiffness as the<br />
crack propagates. The critical failure load was marked according to the ASTM D6671/D 6671M-<br />
06 recommendation (the load at which the compliance has increased by 5%) <strong>and</strong> complemented<br />
by visual inspection. These critical failure loads (Pc) were used in the determination <strong>of</strong> the<br />
face/core interface fracture toughness (Gc), according to the procedure outlined by Quispitupa et<br />
al., (2009).
Load (N)<br />
250<br />
200<br />
150<br />
100<br />
50<br />
0<br />
H130 Core<br />
=-28<br />
0 1 2 3 4 5<br />
Displacement (mm)<br />
Load (N)<br />
250<br />
200<br />
150<br />
100<br />
50<br />
H250 Core<br />
=-29<br />
0<br />
0 1 2 3 4<br />
Displacement (mm)<br />
Figure 3.3: Typical experimental load vs. displacement curves (“” indicates the onset <strong>of</strong><br />
crack growth) for specimens with (a) H130 core (b) H250 core <strong>and</strong> (c) PMI core.<br />
Since the face/core interface toughness is strongly dependent on the mode-mixity at the crack tip,<br />
the mode-mixity was determined from finite element analysis <strong>of</strong> the MMB specimens for all<br />
loading conditions <strong>and</strong> materials tested in this study. A finite element model <strong>of</strong> the MMB<br />
specimen was developed in the commercial finite element code, ANSYS, using 4-node<br />
isoparametric elements (SOLID42), see Figure 3.4. Geometrically non-linear analysis <strong>of</strong> the<br />
MMB specimen was performed with displacement controlled loading. The mode-mixity phase<br />
angle () was determined from relative nodal pair displacements along the crack flanks obtained<br />
from the finite element analysis, applying the crack surface displacement extrapolation (CSDE)<br />
method presented in the Introduction <strong>of</strong> this thesis. The characteristic length h is arbitrarily<br />
chosen as the face sheet thickness in this study.<br />
Figure 3.4: Finite element model <strong>of</strong> the MMB s<strong>and</strong>wich specimen. The smallest element size is<br />
3.33 m.<br />
46<br />
Load (N)<br />
150<br />
100<br />
50<br />
0<br />
PMI Core<br />
=-20<br />
(a) (b) (c)<br />
0 0.5 1 1.5 2 2.5<br />
Displacement (mm)
Figure 3.5 shows the face/core debond fracture toughnesses vs. phase angle for specimens with<br />
H130, H250 <strong>and</strong> PMI 51 IG cores. The mechanical properties for these materials were listed in<br />
Tables 3.2 <strong>and</strong> 3.3. It should be noted that the DBL reinforcement in lay-up C was oriented with<br />
the 0º plies parallel to the load direction in the panel tests <strong>and</strong> transverse to the beams in the<br />
MMB fracture specimens, thus simulating the fibre orientation in the 3 <strong>and</strong> 9 o’clock positions<br />
along the circular debond in the panels. Figure 3.5 reveals that the face/core interface fracture<br />
toughness is strongly dependent on the mode-mixity at the crack tip for all s<strong>and</strong>wich composites<br />
examined herein, especially in mode II dominated loading, i.e. increased shear loading at the<br />
crack tip. However, this dependency is weak in mode I dominated loadings, i.e. low magnitudes<br />
<strong>of</strong> mode-mixity, where roughly constant fracture toughness is observed, see Figure 3.5. A<br />
phenomenological relationship between fracture toughness <strong>and</strong> mode-mixity proposed by<br />
Hutchinson <strong>and</strong> Suo (1992) is used to fit the experimental data by Equation (3.14). A fitted curve<br />
(by visual inspection) is represented by a continuous line in Figure 3.5, for the three s<strong>and</strong>wich<br />
composites being examined, i.e. specimens with H130, H250 <strong>and</strong> PMI cores. In addition, the<br />
upper <strong>and</strong> lower bounds are shown as dashed lines. A large scatter in the fracture toughness vs.<br />
phase angle results is observed, which is expected in s<strong>and</strong>wich composites due to different<br />
manufacturing defects <strong>and</strong> crack propagation paths at the face/core interface.<br />
2<br />
tan <br />
G 1 1k Gc IC<br />
(3.14)<br />
In Equation (3.14), GIC is the interface fracture toughness in pure mode I <strong>and</strong> k is a nondimensional<br />
curve fitting parameter. Here, since in mode I dominated loading, a roughly constant<br />
fracture toughness is observed, GIC is assumed to be the minimum fracture toughness value for<br />
the material being evaluated. Thus, when =0, Gc() = GIC.<br />
(a) (b) (c)<br />
Figure 3.5: Fracture toughness vs. phase angle results <strong>and</strong> curves for specimens with (a)<br />
H130 (b) H250 <strong>and</strong> (c) PMI cores.<br />
Based on the face/core debond fracture toughness vs. phase angle results shown in Figure 3.5,<br />
the parameters for Equation (3.14) are provided in Table 3.4 for each s<strong>and</strong>wich configuration.<br />
47
Table 3.4: Parameters in the face/core interface fracture toughness function, Equation (3.14).<br />
Core<br />
GIC (J/m 2 )<br />
Average fit<br />
GIC (J/m 2 )<br />
Lower bound<br />
GIC (J/m 2 )<br />
Upper bound<br />
k<br />
H130 450 280 620 0.45<br />
H250 500 350 660 0.55<br />
PMI 115 80 150 0.55<br />
Figure 3.6 illustrates the typical crack path observed in the MMB specimens with PMI core. As it<br />
is seen, the crack grows below resin-rich cells in the core for all measured mode-mixities.<br />
Figure 3.6: Crack path for an MMB specimen with PMI core.<br />
For specimens with H130 core <strong>and</strong> mode-mixity phase angle <strong>of</strong> 0° >> -20°, the crack path was<br />
located below the face/core interface, see Figure 3.7. However, for the mode-mixity phase angle<br />
<strong>of</strong> -25° >> -65°, as shown in Figure 3.8, the crack path was in the actual face/core interface. As<br />
mentioned earlier, a toughening mechanism due to the increased negative mode-mixity is<br />
observed in this core material as well. This trend in the fracture toughness vs. mode-mixity was<br />
previously reported for other debonded s<strong>and</strong>wich materials tested at controlled mode-mixities,<br />
see Berggreen et al. (2005).<br />
Figure 3.7: Crack path for an MMB specimen with H130 core below the face/ core interface.<br />
48
Figure 3.8: Crack path for an MMB specimen with H130 core in the face/core interface.<br />
For specimens with H250 core, the crack propagated in the interface for all measured modemixities<br />
as shown in Figure 3.9. In these specimens the fracture toughness increased with<br />
increasing magnitude <strong>of</strong> the negative mode-mixity phase angle at the crack tip similar to the<br />
specimens with PMI <strong>and</strong> H130 cores. Additionally, it was observed that in longer crack lengths<br />
(4mm), fibre bridging started to emerge, which can be attributed to the CSM layer placed in the<br />
face/core interface during the manufacturing process <strong>of</strong> the MMB specimens. The fibre bridging<br />
enhances the fracture toughness by creating a large fracture process zone <strong>and</strong>, thus, the modemixity<br />
might lose its validity. Since the fracture experiments are focused on fracture initiation<br />
<strong>and</strong> not propagation, no analysis for fibre bridging is presented in this study.<br />
3.4 Panel Tests<br />
Figure 3.9: Crack path for an MMB specimen with H250 core.<br />
Figure 3.10 shows the test rig designed to introduce a uniform in-plane compressive load to the<br />
edges <strong>of</strong> either plane or singly curved s<strong>and</strong>wich panels. The test rig was inserted into a four-<br />
column Instron 8508 servo-hydraulic testing machine with a maximum capacity <strong>of</strong> 5 MN.<br />
However, a 1 kN Instron load cell was used for the tests to increase the accuracy <strong>of</strong> the load<br />
measurements. A 4 Mpix Digital Image Correlation (DIC) measurement system (ARAMIS 4M)<br />
49
was used to monitor 3D surface displacements <strong>and</strong> 2D surface strains continuously during the<br />
experiments. The DIC camera position <strong>and</strong> the test rig are seen in Figure 3.10. A ramp<br />
displacement controlled loading with a rate <strong>of</strong> 1 mm/min was applied in all tests. A sample rate<br />
<strong>of</strong> one image per second was used for the DIC measurements. The DIC system was used to<br />
measure the initial imperfection in the surface <strong>of</strong> the panels. Figure 3.11 shows the initial<br />
imperfection measurement for a panel with H130 core <strong>and</strong> a debond diameter <strong>of</strong> 200 mm.<br />
(a) (b)<br />
Figure 3.10: (a) Test rig <strong>and</strong> (b) test setup.<br />
Figure 3.11: Initial imperfection from DIC measurements in a panel with H130 core <strong>and</strong> a<br />
debond diameter <strong>of</strong> 200 mm.<br />
All debonded panels failed by propagation <strong>of</strong> the debond to the edges <strong>of</strong> the panels. Figure 3.12<br />
shows typical out-<strong>of</strong>-plane deflections <strong>of</strong> the debonded panels before <strong>and</strong> after debond<br />
propagation measured by the DIC system. Prior to debond propagation, a large debond opening<br />
can be seen corresponding to the buckling <strong>of</strong> the debonded face sheet.<br />
50
(a) (b)<br />
Figure 3.12: Out-<strong>of</strong>-plane deflection from DIC measurements <strong>of</strong> a panel with H130 core <strong>and</strong><br />
a debond diameter <strong>of</strong> 100 mm (a) prior to propagation <strong>and</strong> (b) after propagation.<br />
Figure 3.13 shows typical load vs. axial displacement <strong>and</strong> load vs. out-<strong>of</strong>-plane displacement<br />
curves for panels with a 100 mm debond <strong>and</strong> H250, H130 <strong>and</strong> PMI cores, for additional results<br />
see Apendix B. The out-<strong>of</strong>-plane deflection refers to the centre <strong>of</strong> the debond. The debond<br />
opening initially increases very slowly with increasing load until a bifurcation load level<br />
corresponding to the local buckling <strong>of</strong> the debonded face sheet. After buckling the debond<br />
opening increases rapidly in the postbuckling regime approaching the debond propagation load<br />
level. At the onset <strong>of</strong> propagation, the load decreases due to the displacement controlled loading<br />
<strong>and</strong> debond propagation resulting in increased compliance, while the out-<strong>of</strong>-plane displacement<br />
<strong>of</strong> the debonded face rapidly increases.<br />
(a) (b)<br />
Figure 3.13: Typical (a) load vs. axial displacement <strong>and</strong> (b) load vs. out-<strong>of</strong>-plane displacement<br />
for panels with a debond diameter <strong>of</strong> 100 mm.<br />
All intact panels with H130 <strong>and</strong> H250 cores failed by compression failure <strong>of</strong> a face sheet close to<br />
the wooden inserts, see Figure 3.14 (a). This can be attributed to additional peeling stresses<br />
51
arising due to the junction between the insert <strong>and</strong> the core <strong>and</strong> to a slight unintentional mismatch<br />
between the core <strong>and</strong> the insert thicknesses, see Hayman et al. (2007). The intact panels with<br />
PMI core failed by a combination <strong>of</strong> shear crimping <strong>and</strong> global buckling, see Figures 3.14 (b)<br />
<strong>and</strong> 3.14 (c). Figure 3.15 shows the debond propagation load vs. the debond diameter, in each<br />
case the mean result for two or three specimen replicates is used. It appears that the debond<br />
propagation load decreases significantly with increasing debond diameter.<br />
Face sheet compression<br />
failure<br />
Figure 3.14: (a) Compression failure <strong>of</strong> a face sheet in an intact panel with H130 core (b)<br />
global bucking <strong>and</strong> (c) shear crimping <strong>of</strong> intact PMI panels.<br />
Failure load (kN)<br />
500<br />
400<br />
300<br />
200<br />
100<br />
0<br />
(a)<br />
Global buckling<br />
0 50 100 150 200 250 300<br />
Debond Diameter (mm)<br />
3.15: Measured propagation load vs. debond diameter. Measured failure loads for the intact<br />
panels can be identified for a debond diameter <strong>of</strong> 0 mm.<br />
The theoretical compressive failure loads for the intact panels, based on the material compressive<br />
strengths in Table 3.1, are shown in Table 3.4 together with the measured values. This table also<br />
shows the load at which wrinkling <strong>of</strong> the face sheets <strong>and</strong> shear crimping is predicted for each<br />
case. Wrinkling load <strong>of</strong> the face sheets is determined based on a formula proposed by H<strong>of</strong>f et al.<br />
(1945):<br />
52<br />
(b)<br />
H130<br />
H250<br />
PMI<br />
Shear crimping<br />
(c)
(3.15)<br />
cr<br />
0. 5 3 E f EcGc<br />
where Ef <strong>and</strong> Ec are modulus <strong>of</strong> elasticity <strong>of</strong> the face sheets <strong>and</strong> core <strong>and</strong> Gc is the shear modulus<br />
<strong>of</strong> the core. It is seen that wrinkling is likely to have influenced the strength <strong>of</strong> the A panels <strong>and</strong><br />
both wrinkling <strong>and</strong> crimping are likely to have influenced the strength <strong>of</strong> the C panels. The<br />
observed behaviour raises an important question concerning the value <strong>of</strong> intact strength that<br />
should be used in determining a local strength reduction factor Rl. Should this be based on the<br />
compressive strength <strong>of</strong> a laminate measured in tests on small laminate samples in which all<br />
types <strong>of</strong> buckling are prevented, or should it be based on the compressive strength actually<br />
observed for the tested panel? Most types <strong>of</strong> buckling are dependent on the size <strong>of</strong> the panel <strong>and</strong><br />
its boundary conditions. Moreover, they are not affected by very local losses <strong>of</strong> stiffness. Thus, it<br />
seems appropriate to base Rl on the basic compressive strength <strong>of</strong> the laminate <strong>and</strong> rather<br />
perform separate checks <strong>of</strong> possible effects <strong>of</strong> buckling. An exception to this is local wrinkling <strong>of</strong><br />
the face sheet, which is independent <strong>of</strong> panel size <strong>and</strong> boundary conditions <strong>and</strong> in practice may<br />
provide a modified material strength to replace the value measured in tests on small laminate<br />
samples.<br />
3.5: Measured <strong>and</strong> theoretical failure loads for intact panels.<br />
Lay-up Measured failure<br />
Theoretical failure loads (kN)<br />
type load (kN) Compressive failure Shear crimping Face sheet wrinkling<br />
A 325 448 642 409<br />
B 357 502 1335 663<br />
C 279 636 243 229<br />
3.5 Panel Analysis<br />
A 3D finite element model was developed in the commercial finite element code, ANSYS<br />
version 11, using 8-node isoparametric elements (SOLID45). Geometrically non-linear analysis<br />
<strong>of</strong> the debonded panels was performed with displacement controlled loading. The panels were<br />
assumed to contain an initial imperfection in the form <strong>of</strong> a half-sinusoidal wave as determined<br />
from eigenbuckling mode shapes. The magnitude <strong>of</strong> the initial imperfection is obtained from<br />
DIC measurement <strong>of</strong> the test specimens shown in Figure 3.11. Because <strong>of</strong> geometry <strong>and</strong> loading<br />
symmetry only a quarter <strong>of</strong> the panel was modelled. Symmetry boundary conditions were<br />
applied to the symmetry planes. Due to the need for a high mesh density at the crack tip when<br />
performing the fracture mechanics analysis, a submodelling technique was employed. The finite<br />
element model <strong>and</strong> submodel are shown in Figure 3.16.<br />
53
(a)<br />
Debonded face sheet<br />
Figure 3.16: Finite element model <strong>of</strong> a panel with a debond diameter <strong>of</strong> 100 mm. (a)<br />
Submodel min. element length 0.02mm (b) global mode min. element length 0.25 mm.<br />
Figure 3.17 shows load vs. out-<strong>of</strong>-plane deflection <strong>of</strong> the centre <strong>of</strong> the dobond for panels with<br />
200 mm debond <strong>and</strong> PMI, H130 <strong>and</strong> H250 cores determined from experiments <strong>and</strong> finite<br />
element analysis. In Figure 3.17 the point where the crack starts to propagate in the tested panels<br />
is marked with an open circle (“”). The load reduction at the onset <strong>of</strong> propagation is shown only<br />
for the experimental results, as only initiation <strong>of</strong> debond propagation is modelled numerically (no<br />
crack propagation algorithms are implemented in the finite element model).<br />
(a) (b) (c)<br />
3.17: Finite element <strong>and</strong> experimental results for out-<strong>of</strong>-plane displacement vs. load diagram<br />
for panels with 200 mm debond <strong>and</strong> (a) H130 (b) H250 <strong>and</strong> (c) PMI core.<br />
Experimental buckling load <strong>of</strong> the debonded panels <strong>and</strong> numerical buckling loads determined by<br />
linear eigenbuckling analysis as well as non-linear finite element analysis are given in Table 3.6.<br />
It is seen that the buckling loads <strong>of</strong> the panels with 100 mm debond diameter increase<br />
significantly with increasing core stiffness, but for the larger debonds the increase is smaller. The<br />
numerical <strong>and</strong> experimental buckling loads show fair agreement.<br />
54<br />
200<br />
200<br />
200<br />
200<br />
(b)
3.6: Numerical <strong>and</strong> experimental buckling loads.<br />
Buckling loads (kN)<br />
Core type Debond diameter (mm)<br />
Experiment Non-linear FE eigenbuckling FE<br />
H130<br />
100<br />
200<br />
106.5±4.5<br />
27±1<br />
100<br />
26<br />
94.5<br />
26.9<br />
300 15 12 12.9<br />
H250<br />
100<br />
200<br />
121±9<br />
24±1<br />
104<br />
28<br />
100<br />
28<br />
300 16 13 12.5<br />
PMI<br />
100<br />
200<br />
85.5±3.5<br />
28.5±3.5<br />
94<br />
28<br />
109<br />
33.8<br />
300 11.5±4.5 14 15.9<br />
In order to estimate the crack propagation load <strong>of</strong> the panels, the energy release rate <strong>and</strong> phase<br />
angle were determined along the debond front. The energy release rate (G) was determined from<br />
relative nodal pair displacements along the crack flanks obtained from the finite element<br />
analysis. The energy release rate <strong>and</strong> mode-mixity phase angle are given by Equation (1.18) <strong>and</strong><br />
(1.19) in the Introduction <strong>of</strong> this thesis. h, which is the characteristic length <strong>of</strong> the crack problem,<br />
is chosen as the face sheet thickness. In Figure 3.18 the normalised energy release rate <strong>and</strong> phase<br />
angle with respect to the maximum determined energy release rate <strong>and</strong> phase angle along the<br />
debond front are plotted in polar diagrams for the H130 panels with 100 mm, 200 mm <strong>and</strong> 300<br />
mm debond diameter in a load level close to the experimental debond propagation load.<br />
Maximum energy release rate <strong>and</strong> minimum phase angle occur in the 0-degree debond front,<br />
implying the onset <strong>of</strong> debond propagation in this location, which is similar to experimental<br />
observations, see Figure 3.12. The same conclusion may be drawn for the panels with PMI <strong>and</strong><br />
H250 core.<br />
90<br />
1<br />
120<br />
135<br />
0.8<br />
150<br />
0.6<br />
0.4<br />
165<br />
0.2<br />
180<br />
0<br />
105<br />
195<br />
210<br />
225<br />
240<br />
255<br />
75 60<br />
15<br />
0<br />
345<br />
330<br />
315<br />
300<br />
285<br />
120<br />
1<br />
90<br />
75<br />
60<br />
45<br />
30<br />
135<br />
150<br />
0.5<br />
45<br />
30<br />
105<br />
(a) (b)<br />
270<br />
270<br />
100 mm 200 mm 300 mm<br />
100 mm 200 mm 300 mm<br />
3.18:(a) Normalised energy release rate (G/Gmax) <strong>and</strong> (b) normalised phase angle (/max)<br />
for H130 panels with debond diameters <strong>of</strong> 100 mm, 200 mm <strong>and</strong> 300 mm.<br />
55<br />
165<br />
180<br />
195<br />
210<br />
225<br />
240<br />
255<br />
0<br />
-0.5<br />
15<br />
0<br />
345<br />
330<br />
315<br />
300<br />
285
Figure 3.19 shows the determined energy release rate vs. load curves for the panels with 100,<br />
200 <strong>and</strong> 300 mm diameter. The fracture toughness values shown in Figure 3.19 were determined<br />
from the MMB tests at a -20 phase angle, which is close to the numerically determined phase<br />
angle at the experimental debond propagation load, described previously. It appears that the<br />
energy release rate increases significantly at a load level which can be associated with the<br />
buckling <strong>of</strong> the debond. The horizontal line in the diagrams shows the average fracture toughness<br />
<strong>of</strong> the interface <strong>of</strong> the panels for the determined phase angle. The point where the fracture<br />
toughness line <strong>and</strong> energy release rate curve intersect eachother indicates the debond propagation<br />
load.<br />
(a) (b) (c)<br />
3.19: Energy release rate vs. load for panels with (a) PMI (b) H130 <strong>and</strong> (c) H250 core.<br />
Numerically predicted <strong>and</strong> experimentally determined propagation loads for the debonded panels<br />
are listed in Table 3.7. Due to large scatter in the measured interface fracture toughnesses, the<br />
crack propagation load was determined for a maximum, average <strong>and</strong> minimum measured<br />
fracture toughness level. It is seen that based on the average <strong>of</strong> the measured fracture<br />
toughnesses level, the FEA predictions are 7-46% higher than the experimental ones. For the<br />
minimum fracture toughness the deviation is between 3-33% <strong>and</strong> for the maximum 14-65%. This<br />
deviation may be partly due to differing crack tip details <strong>and</strong> crack growth mechanisms between<br />
the panels <strong>and</strong> the MMB specimens. The distortions in the debond crack tip are due to<br />
mechanical releasing <strong>of</strong> the debonds, making the debonds not perfectly circular, as well as some<br />
partial adhesions in the debonded area in the experiments as mentioned earlier, which are not<br />
taken into account in the finite element modelling. A further cause <strong>of</strong> inaccuracy in the<br />
predictions could be different debond growth mechanisms between the panels <strong>and</strong> the MMB<br />
fracture toughness characterisation tests. To investigate this issue some <strong>of</strong> the tested panels were<br />
cut, <strong>and</strong> debond propagation paths in the 0 debond front location where the debond starts to<br />
propagate were compared with the MMB specimens tested under mode I dominated loading.<br />
Figure 3.20 shows debond propagation paths in the panels <strong>and</strong> the MMB specimens. In the<br />
panels <strong>and</strong> the MMB specimens with H130 <strong>and</strong> PMI cores the debond kinks into the core <strong>and</strong><br />
propagates beneath the face/core interface. However, in the panels <strong>and</strong> the MMB specimens with<br />
H250 core the debond propagates directly in the interface, which can be explained by the higher<br />
56
fracture toughness <strong>of</strong> the H250 core compared to H130 <strong>and</strong> PMI cores. Fibre bridging was<br />
observed after around 4-5 mm <strong>of</strong> crack propagation in the panels with H250 core. The similarity<br />
between the debond propagation paths in the MMB specimens <strong>and</strong> the panels refutes the role <strong>of</strong><br />
the different propagation paths in the inaccuracy <strong>of</strong> the determined debond propagation loads.<br />
Table 3.7: Numerical <strong>and</strong> experimental debond propagation loads.<br />
Panel Debond diameter (mm)<br />
H130<br />
H250<br />
PMI<br />
57<br />
Debond propagation load (kN)<br />
Experiments FE (min./ave./max.) Ratio FE/exp.<br />
50 --- 270/304/324 ---<br />
100 162.5 168/186/202 1.03/1.14/1.24<br />
200 92.5 123/135/151 1.33/1.46/1.63<br />
300 80 102/116/132 1.27/1.45/1.65<br />
50 --- 314/328/341 ---<br />
100 166 193/205/214 1.16/1.23/1.29<br />
200 114.5 135/147/155 1.18/1.28/1.35<br />
300 105 114/123/129 1.08/1.17/1.23<br />
50 --- 181/186/193 ---<br />
100 108.3 112/116/124 1.03/1.07/1.14<br />
200 70.3 76/81/87 1.08/1.15/1.23<br />
300 49 63/66/72 1.28/1.34/1.47
H130 MMB H130 Panel<br />
H250 MMB<br />
Interface crack growth<br />
3.20: Debond propagation paths in MMB specimens <strong>and</strong> panels.<br />
In order to investigate the effect <strong>of</strong> initial imperfection magnitude on the behaviour <strong>of</strong> the panels,<br />
PMI panels with 100 mm debond <strong>and</strong> different initial imperfection magnitudes were analysed.<br />
Figures 3.21 (a) <strong>and</strong> 3.21 (b) show the energy release rate vs. load <strong>and</strong> phase angle vs. load<br />
curves for panels with different initial imperfection magnitudes. It is seen that the energy release<br />
rate is not sensitive to the initial imperfection magnitude. The phase angle, Figure 3.21 (b), is<br />
sensitive to the initial imperfection under small loads, but appears to converge to a value about<br />
0° under higher loads, indicating that the mode-mixity is less influenced by initial imperfection<br />
under higher loads.<br />
58<br />
H250 Panel<br />
PMI MMB PMI Panel<br />
Interface crack growth
(a) (b)<br />
3.21: (a) Energy release rate vs. load <strong>and</strong> (b) mode-mixity vs. load for panels with PMI core<br />
<strong>and</strong> 100 mm debond with different initial imperfection magnitudes.<br />
As mentioned previously, compiling a plot <strong>of</strong> strength reduction factor Rl against debond<br />
diameter presents some difficulty. However, Figure 3.22 shows a strength reduction factor based<br />
on the intact strength corresponding to compressive material failure as shown in Table 3.4, which<br />
is in turn based on the laminate compressive strengths presented in Table 3.1. The reduced<br />
strength values are based on the measured debond propagation loads, with the values for 50 mm<br />
debonds interpolated with the aid <strong>of</strong> the FE simulations. This figure is tentative in view <strong>of</strong> the<br />
uncertainties regarding the intact strengths <strong>and</strong> also the differences between test <strong>and</strong> analysis<br />
results reported above.<br />
3.22: Local strength reduction factors for panels with debonds.<br />
59
3.6 Conclusion<br />
In this chapter the compressive failure <strong>of</strong> foam cored s<strong>and</strong>wich panels containing a face/core<br />
circular debond was experimentally <strong>and</strong> numerically investigated. S<strong>and</strong>wich panels with<br />
glass/polyester face sheets <strong>and</strong> H130, H250 <strong>and</strong> PMI foam cores were tested in a specially<br />
designed test rig. All debonded panels failed by the propagation <strong>of</strong> the debond to the edges <strong>of</strong> the<br />
panels. All intact panels with H130 <strong>and</strong> H250 cores failed by the compressive failure <strong>of</strong> a face<br />
sheet very close to the wooden inserts, which can be attributed to additional peeling stresses<br />
arising due to the junction between the insert <strong>and</strong> the core <strong>and</strong> to a slight unintentional mismatch<br />
between the core <strong>and</strong> insert thicknesses. Intact panels with PMI core failed by a combination <strong>of</strong><br />
shear crimping <strong>and</strong> global buckling. MMB characterisation tests were conducted to measure the<br />
fracture toughness <strong>of</strong> the face/core interface for a span <strong>of</strong> mode-mixity phase angles. Results<br />
showed increasing fracture toughness for increasing magnitude <strong>of</strong> the phase angle. A large<br />
scatter was observed in the fracture toughness results due to brittleness <strong>of</strong> the core material,<br />
different manufacturing defects <strong>and</strong> dissimilarity in crack propagation paths at the face/core<br />
interface.<br />
Instability <strong>and</strong> crack propagation loads <strong>of</strong> the panels were estimated based on geometrically nonlinear<br />
finite element analysis <strong>and</strong> linear elastic fracture mechanics. A numerical scheme similar<br />
to the one developed in Chapter 2, based on submodelling was used for the simulations. In some<br />
<strong>of</strong> the panels the FEA predictions are up to 46% higher than the experimental ones, which can be<br />
attributed to the large scatter in the measured fracture toughness using MMB fracture toughness<br />
results <strong>and</strong> differing crack tip details between the panels <strong>and</strong> the MMB specimens due to<br />
mechanical releasing <strong>of</strong> the debonded area. However, in most <strong>of</strong> the panels better agreement, up<br />
to 20% deviation, is observed between numerical <strong>and</strong> experimental results. To investigate the<br />
debond propagation path in the tested panels, some <strong>of</strong> the panels were cut <strong>and</strong> it was observed<br />
that the debond propagation path is similar between the panels <strong>and</strong> the MMB specimens. It was<br />
observed that in the panels <strong>and</strong> the MMB specimens with PMI core <strong>and</strong> panels with H130 core,<br />
the debond kinks into the core <strong>and</strong> propagates beneath the face/core interface. However, in the<br />
MMB specimens with H130 core two different crack growth paths were observed. In the H130<br />
MMB specimens with the mode-mixity phase angle <strong>of</strong> 0° >> -20° (similar to the panels), the<br />
crack path was located below the face/core interface. However, when the magnitude <strong>of</strong> the<br />
mode-mixity phase angle was increased to -25° >> -65°, the crack path was directly in the<br />
face/core interface. In the panels <strong>and</strong> the MMB specimens with H250 core the debond<br />
propagates directly in the interface. This may be explained by the higher fracture toughness <strong>of</strong><br />
the H250 core compared to H130 <strong>and</strong> PMI cores. Fibre bridging was observed after more than 4-<br />
5 mm crack growth in the MMB specimens <strong>and</strong> panels with H250 core. The similarity between<br />
the debond propagation paths in the MMB specimens <strong>and</strong> the panels refutes the role <strong>of</strong> the<br />
different propagation paths in the inaccuracy <strong>of</strong> the determined debond propagation loads.<br />
60
To examine the effect <strong>of</strong> initial imperfection magnitude on the behaviour <strong>of</strong> the panels, panels<br />
with different initial imperfection magnitudes were analysed. It was shown that the initial<br />
imperfection magnitude has no significant effect on the energy release rate. Regarding the modemixity<br />
the effect becomes less important at higher loads. Finally, based on experimental <strong>and</strong><br />
numerical results, the strength reduction factor Rl was plotted against debond diameter. The plot<br />
is tentative due to the uncertainties regarding the intact strengths as well as the differences<br />
between test <strong>and</strong> analysis results.<br />
61
This page is intentionally left blank.<br />
62
Chapter 4<br />
<strong>Fatigue</strong> Crack Growth Simulation in a<br />
Bimaterial Interface<br />
4.1 Background<br />
Interface fatigue crack growth is one <strong>of</strong> the most critical damages that layered structures, such as<br />
monolithic fibre reinforced or s<strong>and</strong>wich composites, may experience. Design against fatigue<br />
failure <strong>of</strong> these types <strong>of</strong> structures is associated with many challenges due to the complexity <strong>of</strong><br />
the interface fracture problem. To assess the lifetime <strong>and</strong> behaviour <strong>of</strong> layered structures exposed<br />
to cyclic loading, experiments are typically conducted on intact specimens <strong>and</strong> on specimens<br />
with a pre-existing (known) crack. This requires special testing facilities <strong>and</strong> is usually very<br />
costly <strong>and</strong> time-consuming. Due to the difficulties <strong>and</strong> expenses associated with conducting<br />
fatigue experiments, considerable efforts have been made in recent years to simulate fatigue<br />
crack growth by applying numerical methods. Maziere <strong>and</strong> Fedelich (2010) simulated 2D fatigue<br />
crack propagation using the finite element method <strong>and</strong> implementation <strong>of</strong> the strip-yield model.<br />
Their model assumes that, at each cycle, the crack growth results from the variation <strong>of</strong> the crack<br />
tip opening displacement (CTOD). They used cohesive elements with linear-elastic, perfectlyplastic<br />
behaviour to simulate crack growth. Kiyak et al. (2008) simulated fatigue crack growth<br />
under low cycle fatigue at a high temperature in a single crystal superalloy. To simulate the crack<br />
growth, they implemented a node release technique <strong>and</strong> released the nodes in each cycle<br />
according to an experimentally measured crack growth rate. The simulation results were<br />
compared with results from experiments on the single edge notch specimens <strong>of</strong> the Ni-based<br />
single crystal superalloy PWA1483 at 950C on the basis <strong>of</strong> computed crack tip opening<br />
displacement (CTOD). Shi <strong>and</strong> Zhang (2009) simulated the interfacial crack growth <strong>of</strong> fibre<br />
reinforced composites under tension–tension cyclic loading using the finite element method. In<br />
their model, the energy release rate is calculated <strong>and</strong> applied to Paris’ law in order to calculate<br />
the crack growth rate. Ramanujam et al. (2008) studied the fatigue growth <strong>of</strong> fibre reinforced<br />
63
composite laminates under thermal cyclic loading using combined experimental <strong>and</strong><br />
computational investigations.<br />
In all the above-mentioned studies, the simulation <strong>of</strong> fatigue crack growth was limited to only a<br />
few cycles due to the need <strong>of</strong> a high mesh density at the crack tip <strong>and</strong> subsequently required high<br />
computational time. This illustrates the main obstacle confronting any attempt to combine<br />
fracture mechanics <strong>and</strong> the finite element method to simulate fatigue crack growth. To overcome<br />
the problem <strong>of</strong> simulating many cycles different concepts <strong>of</strong> cycle jumps have been proposed by<br />
several researchers. The cycle jump concept was first developed <strong>and</strong> applied by Billardon et al.<br />
(1989). They called the approach the jump-in-cycle procedure. The Large Time Increments<br />
method (LATIN) was proposed two years later by Boisse et al. (1990) <strong>and</strong> used by Cognard et al.<br />
(1999) for thermo-mechanical problems. In the large time increments method the equations <strong>of</strong><br />
the initial boundary value problem are divided into two groups: (1) linear equations which are<br />
global <strong>and</strong> (2) non-linear equations, which are local. Even though the theory <strong>of</strong> the LATIN<br />
method is sound, after the implementation into commercial FEA s<strong>of</strong>tware it turned out to be<br />
computationally heavy <strong>and</strong> not so beneficial. Kiewel et al. (2000) developed a method for<br />
extrapolation <strong>of</strong> a group <strong>of</strong> internal variables over a certain range <strong>of</strong> cycles. The extrapolation is<br />
based on spline functions used to evaluate the state variables over jumped cycles for each<br />
integration point in the finite element model. Fish et al. (2002) developed a new scheme for cycle<br />
jumps where the time is decomposed into two scales: one micro-chronological (fast) <strong>and</strong> one<br />
macro-chronological (slow). The fast micro-chronological time corresponds to the cyclic<br />
behaviour, <strong>and</strong> the slow macro-chronological time to the global behaviour <strong>of</strong> the structure. Van<br />
Paepegem et al. (2001) proposed a new cycle jump method based on extrapolation <strong>of</strong> the damage<br />
parameter exploiting the explicit Euler integration formula. At each integration point <strong>of</strong> the finite<br />
element model a local jump length is determined by imposing an input maximum jump allowed<br />
by the user for the damage variable. The global jump length is then evaluated based on the<br />
cumulative statistical distribution <strong>of</strong> local jumps. Cojocaru <strong>and</strong> Karlsson (2006) employed the<br />
cycle jump method to simulate the response <strong>of</strong> thermal barrier coatings (TBC) under cyclic<br />
thermal loading, where the structure evolves due to changing material properties during high<br />
temperature. In this case, damage mechanics was not used. They proposed a control function that<br />
automatically monitors the length <strong>of</strong> the cycle jump to ensure a realistic solution. Results showed<br />
their cycle jump scheme is computationally effective <strong>and</strong> accurate.<br />
In this chapter, the cycle jump method developed by Cojocaru <strong>and</strong> Karlsson (2006) is adopted<br />
with some modifications to take into account the change in the geometry <strong>of</strong> the finite element<br />
model due to the fatigue crack propagation. Two finite element routines are developed to<br />
simulate 2D <strong>and</strong> 3D accelerated bimaterial fatigue crack growth. In the first routine the crack<br />
only propagates at one point at the crack tip, but in the second a crack front is modelled <strong>and</strong> its<br />
growth at different points in different directions is simulated.<br />
64
4.2 The Cycle Jump Method<br />
In structures subjected to cyclic loading, parameters, such as deflection, stress, strain, material<br />
properties <strong>and</strong>/or geometry (for example cracks), typically evolve over time. This evolution<br />
results in both global <strong>and</strong> local changes <strong>of</strong> the structural behaviour, where the global changes<br />
correspond to a general long-term trend, which can be expressed in terms <strong>of</strong> mathematical<br />
functions. Based on these mathematical functions, extrapolation schemes can be employed to<br />
determine the long-term response <strong>of</strong> the structure. Such an extrapolation scheme can be used in<br />
numerical simulations to accelerate the analysis <strong>and</strong> make it computationally effective. The cycle<br />
jump scheme developed by Cojocaru et al. (2006) will be summarised here for the completeness<br />
<strong>of</strong> the presentation. As proposed by Cojocaru et al. in order to accelerate fatigue simulation, a set<br />
<strong>of</strong> initial load cycles is simulated, using the finite element method, <strong>and</strong> the global evolution<br />
function is established for each state variable monitored. This global evolution function is then<br />
used to extrapolate the state variables over a number <strong>of</strong> cycles. The key question here is the<br />
accuracy <strong>of</strong> the extrapolated variables. To examine <strong>and</strong> control the accuracy <strong>of</strong> the extrapolations<br />
the number <strong>of</strong> jump cycles is determined by a criterion with a control parameter. The determined<br />
extrapolated state is used as an initial state for additional finite element simulations <strong>and</strong> next<br />
cycle jumps, see Figure 4.1.<br />
Figure 4.1: Schematic presentation <strong>of</strong> the cycle jump method, after Cojocaru et al. (2006).<br />
Assuming that a finite element analysis has been conducted for at least three computed load<br />
cycles, see Figure 4.2, for each state variable monitored, y=y(t), where t is time, the discrete<br />
slope can be defined for every two adjacent cycles as<br />
65
S<br />
S<br />
y(<br />
t ) y(<br />
t )<br />
( t ) <br />
2 1<br />
12 2<br />
(4.1)<br />
tcyc<br />
y(<br />
t ) y(<br />
t )<br />
( t ) <br />
3 2<br />
23 3<br />
(4.2)<br />
tcyc<br />
where tcyc t2<br />
t1<br />
t3<br />
t2<br />
is the time <strong>of</strong> each cycle.<br />
Figure 4.2: Schematic presentation <strong>of</strong> the cycle jump method, after Cojocaru et al. (2006).<br />
The parameter qy is introduced as the maximum relative error to control the accuracy <strong>of</strong> the<br />
simulation by the following criterion:<br />
S<br />
jump<br />
( t<br />
3<br />
t<br />
y,<br />
jump ) S<br />
S ( t )<br />
23<br />
3<br />
23<br />
( t3<br />
)<br />
q<br />
y<br />
where qy is the maximum allowed relative error, t y,<br />
jump the number <strong>of</strong> jumped cycles (assuming<br />
tcyc=1) <strong>and</strong> S jump is the estimated slope after the jump for the state variable y, using linear<br />
extrapolation given by<br />
S ( t ) S ( t )<br />
( ) ( ) <br />
<br />
(4.4)<br />
23 3 12 2<br />
S jump t3<br />
t y,<br />
jump S23<br />
t3<br />
t y,<br />
jump<br />
tcyc<br />
The introduced criterion ensures that the slope <strong>of</strong> the increment <strong>of</strong> the variable y after the cycle<br />
jump is “close enough” to its slope before the jump. qy is specified by the user for each state<br />
parameter such as deflection or material properties. From Equations (4.3) <strong>and</strong> (4.4) the allowed<br />
jump for each extrapolated parameter is determined by<br />
66<br />
S<br />
S<br />
23<br />
12<br />
y(<br />
t3)<br />
y(<br />
t2)<br />
( t3)<br />
<br />
tcyc<br />
y(<br />
t2)<br />
y(<br />
t1)<br />
( t2)<br />
<br />
t<br />
cyc<br />
(4.3)
S23(<br />
t3<br />
)<br />
t y,<br />
jump q yt<br />
cyc<br />
(4.5)<br />
S ( t ) S ( t )<br />
23<br />
3<br />
12<br />
2<br />
Since the cycle jump is determined for a set <strong>of</strong> state variables, the allowed jump t jump is chosen<br />
as the minimum <strong>of</strong> the computed allowed jump times for each variable:<br />
jump<br />
t t <br />
t t<br />
/ <br />
cyc min y,<br />
jump cyc<br />
(4.6)<br />
To extrapolate the state variables after each jump the Heun integrator is used :<br />
S23( t3<br />
) S jump ( t t<br />
jump t jump<br />
1<br />
y <br />
2<br />
( t3<br />
t<br />
jump ) y(<br />
t3<br />
) <br />
3 )<br />
(4.7)<br />
By substituting Equation (4.4) into Equation (4.7):<br />
y(<br />
t<br />
2<br />
jump<br />
3 t<br />
jump ) y(<br />
t3<br />
) S23(<br />
t3<br />
) t<br />
jump S23( t3<br />
) S12(<br />
t2<br />
) <br />
(4.8)<br />
2tcyc<br />
The above extrapolation scheme is most suitable for structures with slowly evolving properties,<br />
in a quasi-linear manner. In case <strong>of</strong> more non-linear behaviour, higher order integrators could be<br />
implemented. However, the extrapolation scheme is able to capture highly non-linear behaviour<br />
by conducting shorter or no jumps. This, <strong>of</strong> course, does not save so much computational time,<br />
but ensures at least an acceptable solution.<br />
After having introduced the controlled cycle jump procedure, it is now <strong>of</strong> interest to investigate<br />
the extrapolation accuracy <strong>and</strong> the computational efficiency <strong>of</strong> the cycle jump method<br />
implemented in a finite element fatigue crack growth routine. Two different finite element<br />
routines incorporating the cycle jump method have been developed in this chapter. The first<br />
routine is based on a 2D finite element model suitable for 2D <strong>and</strong> axisymmetric fatigue crack<br />
growth, <strong>and</strong> the second is based on a 3D finite element model which can be used in any 3D<br />
fatigue crack growth simulation.<br />
4.3 Face/Core <strong>Fatigue</strong> Crack Growth in S<strong>and</strong>wich Beams<br />
The cycle jump method described before will now be implemented in a FE-based numerical<br />
routine for investigating fatigue crack propagation in the face/core interface <strong>of</strong> a s<strong>and</strong>wich beam.<br />
Interface fatigue crack growth in a s<strong>and</strong>wich beam consisting <strong>of</strong> 2.8 mm thick plain-woven Eglass/epoxy<br />
face sheets over a 50 mm thick Divinycell H130 PVC foam core is simulated by a<br />
commercial finite element code, ANSYS version 11. Face sheet <strong>and</strong> core material properties are<br />
67<br />
( t<br />
)
listed in Table 4.1. The length <strong>and</strong> width <strong>of</strong> the beam are 215 mm <strong>and</strong> 65 mm respectively. The<br />
beam contains an initial 10 mm long face/core crack. 8-node isoparametric elements (PLANE82)<br />
are used in the finite element model. The finite element model <strong>of</strong> the beam is shown in Figure<br />
4.3. The strain energy release rate <strong>and</strong> mode-mixity are calculated from the finite element<br />
analysis at the end <strong>of</strong> each cycle. Utilising the relationships between crack growth rate <strong>and</strong> strain<br />
energy release rate for a range <strong>of</strong> mode-mixities as inputs to the FE routine, the crack increment<br />
for each cycle is determined <strong>and</strong> the finite element model with a new crack length is updated. A<br />
remeshing algorithm is employed to simulate the crack growth. Due to the current lack <strong>of</strong><br />
suitable experimental fatigue crack growth rate data, the crack growth rate vs. strain energy<br />
release rate is for simplicity assumed to be constant for mode-mixity phase angles larger <strong>and</strong><br />
smaller than -10 <strong>and</strong> chosen arbitrarily as<br />
da<br />
dN<br />
da<br />
dN<br />
0 . 001G<br />
for k>-10 (4.9)<br />
0 . 0008G<br />
for k
Figure 4.3: Finite element model <strong>of</strong> the s<strong>and</strong>wich beam. The smallest element size is 3.33 m.<br />
Figure 4.4: Route diagram <strong>of</strong> the developed fatigue crack growth scheme.<br />
69<br />
x<br />
y
The strain energy release rate, G, <strong>and</strong> the mode-mixity phase angle, , are determined from<br />
relative nodal pair displacements along the crack flanks obtained from the finite element analysis<br />
by application <strong>of</strong> the CSDE method outlined in the Introduction <strong>of</strong> this thesis. h, which is the<br />
characteristic length <strong>of</strong> the crack problem, is chosen as the face sheet thickness. The strain<br />
energy release rate <strong>and</strong> the mode-mixity phase angle are used as the two state variables for the<br />
extrapolation <strong>and</strong> cycle jump in the cycle jump method. These two parameters are selected since<br />
they are the only required parameters for determination <strong>of</strong> the crack growth length.<br />
Figures 4.5 (a) <strong>and</strong> (b) show the strain energy release rate <strong>and</strong> phase angle diagrams as a function<br />
<strong>of</strong> the crack length obtained from the numerical simulations <strong>of</strong> the analysed debonded s<strong>and</strong>wich<br />
beam at the maximum loading amplitude. The energy release rate increases with increasing crack<br />
length up to 60 mm <strong>and</strong> then decreases. This can be attributed to the increasing membrane forces<br />
as the crack length increases. Due to small membrane forces in the first cycles with increasing<br />
crack length, the deflection at the crack tip increases, resulting in higher strain energy release<br />
rate. However, as the crack length grows, the membrane forces increase <strong>and</strong> a larger part <strong>of</strong> the<br />
total strain energy in the specimen goes into stretching <strong>of</strong> the debonded face sheet rather than<br />
creating new crack surfaces, which results in a decreasing energy release rate at the crack tip.<br />
Figure 5 (b) shows that the phase angle increases with increasing crack length, indicating that the<br />
crack tip loading is less mode I dominated at larger crack lengths. The negative phase angle<br />
shows the tendency <strong>of</strong> the crack to kink towards the face sheet.<br />
(a) (b)<br />
Figure 4.5: (a) Strain energy release rate vs. crack length (b) phase angle vs. crack length<br />
diagrams for the debonded s<strong>and</strong>wich beam at maximum loading amplitude.<br />
The fatigue crack growth simulation was conducted on the s<strong>and</strong>wich beam for 500 cycles. To<br />
study the effect <strong>of</strong> the control parameter on the accuracy <strong>and</strong> speed <strong>of</strong> the simulation, simulations<br />
with different control parameters, qy, were conducted. A reference simulation <strong>of</strong> all individual<br />
cycles was performed to verify the accuracy <strong>of</strong> the simulations by application <strong>of</strong> the cycle jump<br />
method. Figures 4.6 (a) <strong>and</strong> (b) show the deflection <strong>of</strong> the loading point (Y deflection) as a<br />
function <strong>of</strong> cycles for two different control parameters, qG=q=0.05 <strong>and</strong> qG=q=0.2.<br />
70
(a) (b)<br />
Figure 4.6: Deflection <strong>of</strong> the face sheet at the point <strong>of</strong> loading (Y deflection) vs. number <strong>of</strong><br />
cycles for (a) control parameter qG=q= 0.05 <strong>and</strong> (b) qG=q= 0.2.<br />
More cycles are needed in the simulation with smaller control parameters qG=q=0.05 as<br />
expected, but the calculated deflections agree well with the reference analysis. When the control<br />
parameters are increased to qG=q=0.2 fewer simulation cycles are needed, but as it is seen from<br />
Figure 4.6 (b), the deflection <strong>of</strong> the debonded face sheet in the simulation using the cycle jump<br />
method is lower than in the reference simulation, which shows the inaccuracy <strong>of</strong> the simulation.<br />
Figure 4.7 presents G vs. number <strong>of</strong> cycles. Even though G has a highly non-linear behaviour,<br />
the cycle jump method is able to capture this behaviour by conducting small or no jumps. In the<br />
simulation with the control parameters qG=q=0.05 there is fair agreement between the reference<br />
analysis <strong>and</strong> the cycle jump simulation, see Figure 4.7 (a). However, the results from the<br />
simulation with the control parameters qG=q=0.2 show some inaccuracies, see Figure 4.7 (b).<br />
(a)<br />
(b)<br />
Figure 4.7:G at the crack tip vs. cycles for (a) control parameters qG=q= 0.05 <strong>and</strong> (b)<br />
qG=q= 0.2.<br />
Crack length vs. cycle diagrams for the two control parameters qG=q=0.05 <strong>and</strong> qG=q=0.2 are<br />
shown in Figure 4.8. In the initial cycles (up to 200 cycles) the crack growth rate is large due to a<br />
71
high growth rate <strong>of</strong> G (see Figure 4.7), but approaching the end <strong>of</strong> 500 cycles with decreasing<br />
G, crack increment becomes smaller. The simulation with qG=q=0.05 follows the reference<br />
simulation with good agreement, but the simulation with qG=q=0.2 shows again less accuracy.<br />
(a)<br />
(b)<br />
Figure 4.8: Crack length vs. number <strong>of</strong> cycles for control parameters (a) qG=q = 0.05 <strong>and</strong> (b)<br />
qG=q = 0.2.<br />
Figure 4.9 presents the phase angle vs. number <strong>of</strong> cycles. The same conclusion may be drawn<br />
upon the accuracy <strong>of</strong> the simulation using the cycle jump method <strong>and</strong> the two control parameters<br />
qG=q=0.05 <strong>and</strong> qG=q=0.2.<br />
(a)<br />
(b)<br />
Figure 4.9: (a) Mode- mixity phase angle vs. number <strong>of</strong> cycles for the reference analysis <strong>and</strong><br />
the analyses with qG=q=0.05 <strong>and</strong> qG=q=0.2 as control parameters.<br />
To measure the computational efficiency <strong>of</strong> the cycle jump method for analyses with different<br />
control parameters, the ratio R is introduced:<br />
N jump<br />
R (4.11)<br />
N<br />
ref<br />
where Njump is the number <strong>of</strong> jumped cycles <strong>and</strong> Nref is the total number <strong>of</strong> cycles in the reference<br />
72
analysis. A larger N shows increased computational efficiency. To measure the accuracy <strong>of</strong> the<br />
simulations the relative error is defined as<br />
yref<br />
y jump<br />
Er <br />
100<br />
(4.12)<br />
y<br />
ref<br />
where yref <strong>and</strong> yjump are the measured parameters from the reference <strong>and</strong> cycle jump analysis,<br />
respectively. The overall average error <strong>of</strong> the cycle jump method is determined as<br />
<br />
Er<br />
N<br />
Er (4.13)<br />
N<br />
where N is the number <strong>of</strong> simulated cycles <strong>and</strong> Er is the average error <strong>of</strong> each cycle. Number <strong>of</strong><br />
jumped cycles, computational efficiency, average relative error for G, crack length <strong>and</strong> phase<br />
angle for simulations with different control parameters are listed in Table 4.2. The computational<br />
efficiency <strong>of</strong> the simulation increases by increasing control parameters, but the accuracy <strong>of</strong> the<br />
simulation decreases. It is seen that for qG=q=0.05, with reasonably good accuracy, using the<br />
cycle jump method, only 175 cycles are required for the simulation <strong>of</strong> 500 cycles, resulting in a<br />
65% reduction in computational time.<br />
Table 4.2: Number <strong>of</strong> jumped cycles, computational efficiency, average relative error for G,<br />
crack length <strong>and</strong> phase angle.<br />
Control<br />
parameter<br />
qG=q<br />
Number <strong>of</strong><br />
simulated<br />
cycles<br />
Number <strong>of</strong><br />
jumps<br />
occurred<br />
R<br />
73<br />
Average<br />
relative error <strong>of</strong><br />
G (%)<br />
Average<br />
relative error<br />
<strong>of</strong> crack<br />
length (%)<br />
Average<br />
relative<br />
error <strong>of</strong><br />
phase<br />
angle (%)<br />
0.025 234 37 0.53 1.30 0.77 0.87<br />
0.05 175 25 0.65 1.39 1.06 1.22<br />
0.1 115 16 0.77 5.79 4.83 4.82<br />
0.2 70 12 0.86 5.96 7.46 5.55
4.4 Face/Core <strong>Fatigue</strong> Crack Growth in S<strong>and</strong>wich Panels<br />
In this section the 2D fatigue crack growth finite element routine is further developed to account<br />
for 3D fatigue crack growth. Here, instead <strong>of</strong> having a crack tip <strong>and</strong> one point <strong>of</strong> crack<br />
propagation, a crack front propagates in different points in different directions. As schematically<br />
described in Figure 4.10, an iterative procedure is devised to couple the debond propagation<br />
routine <strong>and</strong> the cycle jump method, including a control criterion to ensure accuracy <strong>and</strong><br />
computational efficiency <strong>of</strong> the simulation as described earlier in this chapter.<br />
Figure 4.10: Route diagram <strong>of</strong> the 3D fatigue debond growth <strong>and</strong> cycle jump routines.<br />
Initially, a set <strong>of</strong> station points defining the debond shape is chosen <strong>and</strong> the finite element model<br />
<strong>of</strong> the debonded panel is generated. The debond front is defined by passing a spline through the<br />
station points. To evaluate the direction <strong>of</strong> debond propagation, the normal <strong>and</strong> tangential<br />
directions <strong>of</strong> the debond front at each station point are determined <strong>and</strong> an orthogonal mesh at the<br />
debond front is imposed. The debond only propagates at the station points used to define the<br />
debond front. The finite element model is solved for the first three cycles. The strain energy<br />
74
elease rate <strong>and</strong> mode-mixity phase angle at each station point along the debond front are<br />
evaluated, <strong>and</strong> by means <strong>of</strong> experimentally determined relationships between crack growth rate<br />
<strong>and</strong> strain energy release rate for a range <strong>of</strong> mode-mixity phase angles as inputs to the FE<br />
routine, the crack growth at each station point in the debond front is determined. After evaluating<br />
the debond growth at each station point, a new debond front is defined by passing a spline<br />
through the new location <strong>of</strong> the station points. By means <strong>of</strong> a control function introduced earlier<br />
(Equation (4.5)) ensuring the accuracy <strong>and</strong> efficiency <strong>of</strong> the simulation, the number <strong>of</strong> cycle<br />
jumps is evaluated <strong>and</strong> state variables <strong>and</strong> the new position <strong>of</strong> the station points defining the<br />
debond front are estimated after the cycle jump. With the new debond shape defined after the<br />
cycle jump, the debonded panel is reconstructed <strong>and</strong> new normal <strong>and</strong> tangential directions <strong>of</strong> the<br />
debond front are determined, <strong>and</strong> the procedure is repeated for the next iteration.<br />
The efficiency <strong>of</strong> the devised methodology is examined by the simulation <strong>of</strong> s<strong>and</strong>wich panels<br />
with an elliptical face/core debond at the centre <strong>of</strong> the panels, exposed to cyclic loading. To<br />
study the effect <strong>of</strong> debond geometry, panels with different elliptical debond shapes are analysed.<br />
The s<strong>and</strong>wich panels are fully constrained at all four edges <strong>and</strong> the centre <strong>of</strong> the debond is loaded<br />
by a cyclic load. Due to geometry <strong>and</strong> loading symmetry, only a quarter panel is modelled <strong>and</strong><br />
symmetry boundary conditions are applied to the symmetry planes, see Figure 4.11. A schematic<br />
presentation <strong>of</strong> the boundary conditions imposed on the finite element model is given in Figure<br />
4. 11. Finite element models with different element densities were generated <strong>and</strong> analysed to<br />
ensure the sufficiency <strong>of</strong> the mesh refinement. The mesh refinement convergence analysis<br />
showed that a minimum element edge length <strong>of</strong> 0.02 mm at the crack tip is needed for an<br />
accurate simulation.<br />
75
Debond<br />
310 mm<br />
Symmetry B. C.<br />
a<br />
Figure 4.11: Quarter finite element model <strong>of</strong> the debonded panels with an elliptical debond.<br />
The smallest element size is 10 m.<br />
In the majority <strong>of</strong> recent studies (see e.g. Gaudenzi et al., 2001, Riccio et al., 2001, <strong>and</strong> Shen et<br />
al., 2001), due to difficulties associated with tracing the orientation <strong>of</strong> the new debond front after<br />
the crack growth, it was assumed that the normal <strong>and</strong> tangential directions <strong>of</strong> the debond front do<br />
not change during the crack growth. This assumption is correct for the initiation <strong>of</strong> the debond<br />
growth in the first cycles, but for the subsequent debond growth the normal <strong>and</strong> perpendicular<br />
directions <strong>of</strong> the debond front are not similar to the initial debond. To avoid adopting this<br />
assumption, a remeshing algorithm imposing an orthogonal mesh with edges parallel <strong>and</strong><br />
perpendicular to the actual debond front is implemented as illustrated in Figure 4.12.<br />
76<br />
Clamp B. C.<br />
x<br />
310 mm<br />
x<br />
y<br />
z<br />
y
Figure 4.12: Orthogonal mesh at the debond front.<br />
The mode I+II strain energy release rate, GI+II, <strong>and</strong> the associated mode-mixity phase angle, I+II,<br />
are determined from relative nodal pair displacements, obtained from the finite element analysis<br />
using the CSDE method, as outlined in the introduction. The mode I+II energy release rate <strong>and</strong><br />
the related phase angle are given by<br />
2 14 H11<br />
2<br />
G <br />
<br />
I II<br />
GI<br />
GII<br />
y x<br />
8H11x<br />
H 22<br />
2<br />
<br />
<br />
<br />
<br />
77<br />
(4.14)<br />
<br />
1<br />
tan H 22 x x 1<br />
I II<br />
<br />
ln<br />
tan 2 (4.15)<br />
<br />
11 <br />
<br />
H y h <br />
where y <strong>and</strong> x are the opening <strong>and</strong> sliding relative displacement <strong>of</strong> the crack flanks (see Figure<br />
4.13), H11, H22 <strong>and</strong> the oscillatory index are bimaterial constants determined from the elastic<br />
stiffnesses <strong>of</strong> the face <strong>and</strong> core, see the introduction chapter. h is the characteristic length <strong>of</strong> the<br />
crack problem. h has no direct physical meaning. Thus, it is here arbitrarily chosen as the face<br />
sheet thickness.<br />
To investigate the effect <strong>of</strong> mode III loading at the debond front, the mode III strain energy<br />
release rate, GIII, is evaluated. The mode III energy release rate is given by (Suo, 1990):<br />
G<br />
III<br />
2<br />
z<br />
<br />
8x( B1<br />
B2<br />
)<br />
(4.16)<br />
where z is the out-<strong>of</strong>-plane (crack plane) relative displacement <strong>of</strong> the crack flanks as shown in<br />
Figure 4.13, <strong>and</strong> x is the distance <strong>of</strong> the nodal pairs from the crack tip as shown in Figure 4.13.<br />
Subscript 1 <strong>and</strong> 2 refer to two materials in a bimaterial interface, <strong>and</strong> B is the inverse <strong>of</strong> an<br />
equivalent shear modulus given by (Suo, 1990):
B <br />
2 1/<br />
2<br />
( S44<br />
S55<br />
S45)<br />
(4.17)<br />
where S44, S55 <strong>and</strong> S45 are compliance elements given by<br />
1<br />
S 44 <br />
G<br />
23<br />
1<br />
S55 (4.18)<br />
G<br />
13<br />
S45 is zero for on-axis directions but appears for <strong>of</strong>f-axis directions if G13G23. The total strain<br />
energy release rate is given by<br />
G G G<br />
(4.19)<br />
I<br />
II<br />
Mode II<br />
III<br />
x deflection at the crack tip<br />
Figure 4.13: Definition <strong>of</strong> x, y <strong>and</strong> z at the crack tip.<br />
The decomposition <strong>of</strong> the strain energy release rate to two components <strong>of</strong> GI+II <strong>and</strong> GIII is<br />
considered more useful for practical applications due to a present lack <strong>of</strong> experimental<br />
characterisation aimed at measuring the effect <strong>of</strong> GIII in terms <strong>of</strong> crack growth rate. In all recent<br />
studies the main focus has been on measuring the crack growth rate under pure mode I, II or<br />
mixed-mode loading at the crack tip. Due to difficulties associated with the mode III loading <strong>of</strong><br />
the crack tip, this component has always been neglected. Thus, in the numerical routine<br />
presented, only the GI+II component <strong>of</strong> the energy release rate is used in the crack growth<br />
algorithm. This may introduce inaccuracy in the debond growth simulation if the mode III<br />
energy release rate contribution is large. These possible inaccuracies will be discussed later in<br />
this chapter.<br />
Debonded s<strong>and</strong>wich panels consisting <strong>of</strong> 2 mm thick plain-woven E-glass/polyester face sheets<br />
over 50 mm thick Divinycell H45 PVC foam are considered the simulation. Face sheet <strong>and</strong> core<br />
material properties are similar to those <strong>of</strong> the s<strong>and</strong>wich beam specimen analysed earlier, as listed<br />
78<br />
Mode I<br />
y deflection at the crack tip<br />
Mode III<br />
z deflection at the crack tip
in Table (4.1). The debonded panels are square with a side length <strong>of</strong> 310 mm. An elliptical<br />
face/core debond with a short radius (b) <strong>of</strong> 45 mm <strong>and</strong> a large radius (a) <strong>of</strong> 76.5 is created at the<br />
centre <strong>of</strong> the panel. 8-node isoparametric brick elements (SOLID45) are used in the finite<br />
element model. Due to the current lack <strong>of</strong> suitable experimental fatigue crack growth rate data,<br />
the crack growth rate vs. strain energy release rate is simply assumed to be constant for modemixity<br />
phase angles larger <strong>and</strong> smaller than -10 degrees <strong>and</strong> chosen arbitrarily as<br />
da<br />
dN<br />
da<br />
dN<br />
2<br />
0. 000005GI<br />
II<br />
for >-10 (4.20)<br />
2<br />
0. 000002GI<br />
II<br />
for -10 (4.21)<br />
where GI+II is the difference between maximum <strong>and</strong> minimum strain energy release rate in each<br />
cycle <strong>and</strong> da/dN is the crack growth rate. The simulation is conducted in load control with a<br />
maximum amplitude <strong>of</strong> 0.35 kN <strong>and</strong> loading ratio <strong>of</strong> R=Fmin/Fmax=0.1.<br />
To investigate the distribution <strong>of</strong> mode I, II <strong>and</strong> III components <strong>of</strong> strain energy release rate <strong>and</strong><br />
mode-mixity phase angle along the debond front, radar diagrams from the analysis <strong>of</strong> the<br />
debonded panels exposed to maximum amplitude <strong>of</strong> the fatigue load are shown in the following<br />
figures. Debonded panels with a short radius <strong>of</strong> 45 mm <strong>and</strong> a ratio <strong>of</strong> large radius/short radius<br />
(a/b) <strong>of</strong> 1.7, 1.4 <strong>and</strong> 1.1 are analysed. In the diagrams 0 <strong>and</strong> 90 degrees correspond to the points<br />
on the debond front on the short <strong>and</strong> large radiuses <strong>of</strong> the ellipse. Figures 4.14 (a) <strong>and</strong> 4.14 (b)<br />
illustrate the distribution <strong>of</strong> mode I+II energy release rate (GI+II) <strong>and</strong> the related phase angle in<br />
the first cycle along the debond front. Maximum GI+II <strong>and</strong> mode-mixity phase angle occur at the<br />
short ellipse radius because <strong>of</strong> smaller crack length <strong>and</strong> decrease towards the larger radius. This<br />
can be attributed to the development <strong>of</strong> membrane forces in the face sheet at larger radiuses. As<br />
the radius <strong>of</strong> the ellipse increases the membrane forces become larger, <strong>and</strong> a subsequently larger<br />
part <strong>of</strong> the strain energy in the specimen should be used to stretch the debonded face sheet rather<br />
than create new crack surfaces, decreasing the energy release rate at the crack tip. As the ratio<br />
a/b decreases to one (circle) distribution <strong>of</strong> both GI+II <strong>and</strong> mode-mixity, the phase angle becomes<br />
more even as expected. The mode-mixity phase angle for all a/b ratios is between -5 <strong>and</strong> -10<br />
degrees along the debond front, which indicates a mode I dominated loading at the crack tip.<br />
The mode III strain energy release rate along the debond front is shown in Figure 4.15. In the<br />
symmetry plane (0 <strong>and</strong> 90 degrees) - due to the symmetry effect <strong>and</strong> the boundary conditions -<br />
the out-<strong>of</strong>-plane deformation (crack plane) at the crack flanks is zero <strong>and</strong> consequently the mode<br />
III strain energy release rate is zero. The maximum GIII on the panels with an a/b ratio <strong>of</strong> 1.7 is<br />
almost 9% <strong>of</strong> the maximum GI+II , implying the importance <strong>of</strong> mode III loading at the crack tip in<br />
the elliptical debond case with a large a/b ratio. The mode III strain energy release rate is very<br />
small for the a/b ratio <strong>of</strong> 1.1 <strong>and</strong> is not shown in the diagrams. For debonds with a small a/b ratio<br />
the debond is close to a circle <strong>and</strong> the mode III effects are insignificant. Figure 4.15 reveals that<br />
the maximum mode III crack tip loading occurs close to the longer radius <strong>of</strong> the ellipse (around<br />
79
75), which illustrates possible inaccuracies in the measurement <strong>of</strong> the debond growth at these<br />
points due to the negligence <strong>of</strong> GIII in the debond growth FE routine.<br />
120<br />
135<br />
105<br />
G(J/m 2 )<br />
(a)<br />
165<br />
180<br />
195<br />
150<br />
600<br />
450<br />
300<br />
150<br />
0<br />
90<br />
75 60<br />
45<br />
30<br />
15<br />
0<br />
345<br />
210<br />
330<br />
225<br />
315<br />
240<br />
255<br />
270<br />
300<br />
285<br />
a/b=1.7 a/b=1.4 a/b=1.1<br />
Figure 4.14: Distribution <strong>of</strong> (a) GI+II <strong>and</strong> (b) related phase angle in the debond front.<br />
165<br />
180<br />
195<br />
150<br />
120<br />
135<br />
105<br />
60<br />
40<br />
20<br />
0<br />
90<br />
To evaluate the accuracy <strong>of</strong> the implemented cycle jump method, the fatigue debond propagation<br />
simulation was conducted for 500 cycles. To study the effect <strong>of</strong> the control parameter on the<br />
accuracy <strong>and</strong> computational efficiency <strong>of</strong> the simulation, simulations with different control<br />
parameters, qy, were conducted. A reference simulation, simulating all individual cycles was<br />
performed to verify the accuracy <strong>of</strong> the simulations based on the cycle jump method. The debond<br />
growth at different points along the debond front vs. cycles is shown in Figure 4.16 (a) from the<br />
reference simulation. Because <strong>of</strong> a larger strain energy release rate, the debond front in the 0degree<br />
position (short radius <strong>of</strong> the ellipse) grows more than at the other points. The crack<br />
80<br />
()<br />
165<br />
180<br />
195<br />
75 60<br />
150<br />
120<br />
135<br />
105<br />
-5<br />
-6<br />
-7<br />
-8<br />
-9<br />
-10<br />
90<br />
75<br />
60<br />
45<br />
30<br />
15<br />
0<br />
345<br />
210<br />
330<br />
225<br />
315<br />
240<br />
255<br />
270<br />
285<br />
300<br />
a/b=1.7 a/b=1.4 a/b=1.1<br />
45<br />
30<br />
210<br />
330<br />
225<br />
315<br />
240<br />
255<br />
270<br />
300<br />
285<br />
a/b=1.7 a/b=1.4<br />
Figure 4.15: Distribution <strong>of</strong> mode III strain energy release rate in the debond front.<br />
(b)<br />
15<br />
0<br />
345
growth descreases as the 90-degree position (large radius <strong>of</strong> the ellipse) is approached. Figure<br />
4.16 (b) illustrates the variation <strong>of</strong> the mode III strain energy release rate as the debond<br />
propagates. The mode III effects decrease significantly as the debond propagates <strong>and</strong> turns into a<br />
circle from its initial elliptical shape.<br />
80<br />
Debond front locations at:<br />
(a)<br />
60<br />
(b) 9 27 45<br />
Crack length (mm)<br />
70<br />
60<br />
50<br />
40<br />
0 18 36<br />
54 72 90<br />
0 100 200 300 400 500<br />
0 100 200 300 400 500<br />
Cycle<br />
Cycle<br />
Figure 4.16: (a) Debond growth <strong>and</strong> (b) mode III strain energy release rate vs. cycles at<br />
different points along the debond front from the reference simulation.<br />
Figures 4.17 (a) <strong>and</strong> 4.18 (b) show GI+II <strong>and</strong> phase angle vs. cycles from the reference<br />
simulation. The largest change in both diagrams occurs in the debond front location close to 0<br />
degree due to the large crack growth in this location. It is seen that GI+II decreases from 0 until<br />
approximately 54 <strong>and</strong> increases as the 90 degree position is approached. The mode-mixity<br />
variation along the debond front decreases as the debond shape changes from an ellipse to a<br />
circle.<br />
G I+II (J/m 2 )<br />
500<br />
400<br />
300<br />
200<br />
100<br />
0<br />
Debond front locations at:<br />
Debond front locations at:<br />
0 18 36<br />
54 72 90<br />
(a)<br />
0 100 200 300 400 500<br />
Cycle<br />
Figure 4.17: (a) GI+II <strong>and</strong> (b) phase angle vs. cycles at different points along the debond front<br />
from the reference simulation.<br />
81<br />
G III (J/m 2 )<br />
Phase angle (degree)<br />
50<br />
40<br />
30<br />
20<br />
10<br />
0<br />
-4<br />
-5<br />
-6<br />
-7<br />
-8<br />
-9<br />
63 81<br />
Cycle<br />
0 100 200 300 400 500<br />
(b)<br />
Debond front locations at:<br />
0 18 36<br />
54 72 90
Figure 4.18 (a) presents the deflection at the loading point (Z deflection) as a function <strong>of</strong> cycles<br />
for the reference <strong>and</strong> the cycle jump simulation with the control parameters qG=q=2.5. It is seen<br />
that the evaluated deflections from the cycle jump method agree well with the reference<br />
simulation. By use <strong>of</strong> the control parameters qG=q=2.5, the cycle jump method simulation<br />
requires 171 cycles to simulate 500 cycles, resulting in a 66% reduction in the computational<br />
time with excellent accuracy. The debond growth in three crack front locations along the debond<br />
is shown in Figure 4.18 (b) based on the reference <strong>and</strong> the cycle jump simulations with the<br />
control parameters qG=q=2.5. It appears that in all locations the cycle jump simulations<br />
estimates the debond growth with excellent accuracy. The same conclusion can be drawn for the<br />
mode I+II strain energy release rate <strong>and</strong> phase angle as shown in Figure 4.19.<br />
Figure 4.18: (a) Deflection at the loading point (Z deflection) <strong>and</strong> (b) debond growth vs. cycles<br />
for the reference <strong>and</strong> cycle jump simulations with control parameters qG=q=2.5.<br />
G I+II (J/m 2 )<br />
(a)<br />
500<br />
400<br />
300<br />
200<br />
100<br />
0<br />
0 Reference 54 Reference<br />
72 Reference 0CJ qG=q=2.5<br />
52CJ qG=q=2.5 72CJ qG=q=2.5<br />
(a)<br />
0 100 200 300 400 500<br />
Cycle<br />
Figure 4.19: (a) GI+II <strong>and</strong> (b) phase angle vs. cycles for the reference <strong>and</strong> cycle jump<br />
simulations with control parameters qG=q=2.5.<br />
Crack length (mm)<br />
82<br />
75<br />
65<br />
55<br />
45<br />
Phase angle (degree)<br />
-4<br />
-5<br />
-6<br />
-7<br />
-8<br />
-9<br />
0 Reference 54 Reference<br />
72 Reference 0CJ qG=q=2.5<br />
54CJ qG=q=2.5 72CJ qG=q=2.5<br />
0 100 200 300 400 500<br />
Cycle<br />
Cycle<br />
0 100 200 300 400 500<br />
(b)<br />
(b)<br />
0 Reference 54 Reference<br />
72 Reference 0CJ qG=q=2.5<br />
54CJ qG=q=2.5 72CJ qG=q=2.5
As described before in Equations (4.11)-(4.13) the number <strong>of</strong> jumped cycles, the computational<br />
efficiency, the average relative error, for the debond growth for simulations with different<br />
control parameters are listed in Table 4.3. It is seen that by increasing the control parameter, the<br />
number <strong>of</strong> simulated cycles decreases significantly, but the accuracy <strong>of</strong> the simulation decreases<br />
as well. Nevertheless, the average error in the evaluation <strong>of</strong> the debond length is less than 0.1%<br />
for all control parameters. It should be noted that for qG=q=4 with a good accuracy <strong>and</strong> by use<br />
<strong>of</strong> the cycle jump method, only 145 cycles are required for the simulation <strong>of</strong> 500 cycles, which<br />
results in a 71% reduction in the computational time.<br />
Table 4.3: Number <strong>of</strong> jumped cycles, computational efficiency <strong>and</strong> average relative error for<br />
the debond length.<br />
Control parameter<br />
qG=q<br />
Number <strong>of</strong><br />
simulated cycles<br />
Number <strong>of</strong> jumps<br />
occurred<br />
83<br />
R<br />
Average relative error<br />
<strong>of</strong> crack length (%)<br />
1 303 16 0.39 0.03<br />
2.5 171 17 0.66 0.05<br />
4 145 15 0.71 0.08<br />
<strong>Fatigue</strong> debond growth is simulated for 2500 cycles using the control parameter qG=q=4 <strong>and</strong><br />
the a/b ratio <strong>of</strong> 1.7, 1.4, 1.1 <strong>and</strong> 1. Figures 4.20 <strong>and</strong> 4.21 show the debond radius in different<br />
crack front locations along the debond. During the initial cycles, the debond growth is small in<br />
the proximity <strong>of</strong> the large radius <strong>of</strong> the ellipse, but as the debond propagates the radius at<br />
different points along the debond front converges, which leads to a change in the debond shape<br />
from ellipse to circle.<br />
Debond radius (mm)<br />
100<br />
90<br />
80<br />
70<br />
60<br />
50<br />
a/b=1.7 a/b=1.4<br />
90<br />
0 27<br />
45 72<br />
90<br />
40<br />
40<br />
0 500 1000 1500 2000 2500<br />
0 500 1000 1500 2000 2500<br />
Cycle<br />
Cycle<br />
(a)<br />
(b)<br />
Figure 4.20: Debond radius vs. cycle for s<strong>and</strong>wich panels with elliptical debond with an a/b<br />
ratio <strong>of</strong> (a) a/b=1.7 <strong>and</strong> (b) a/b=1.4.<br />
Debond radius (mm)<br />
100<br />
80<br />
70<br />
60<br />
50<br />
0 27<br />
45 72<br />
90
Debond radius (mm)<br />
100<br />
90<br />
80<br />
70<br />
60<br />
a/b=1.1 a/b=1<br />
90<br />
0 27<br />
50<br />
45<br />
90<br />
72<br />
50<br />
40<br />
40<br />
0 500 1000 1500 2000 2500<br />
0 500 1000 1500 2000 2500<br />
Cycle<br />
Cycle<br />
(a)<br />
(b)<br />
Figure 4.21: Debond radius vs. cycle for s<strong>and</strong>wich panels with elliptical debond with an a/b<br />
ratio <strong>of</strong> (a) a/b=1.1 <strong>and</strong> (b) a/b=1.<br />
For debonded panels with a/b=1.1, the radius in locations along the debond front converges fast.<br />
For the circular debond, due to similar energy release rate <strong>and</strong> phase angle in different locations<br />
along the debond front, the debond shape does not change as the debond grows, <strong>and</strong> remains<br />
circular. The number <strong>of</strong> simulation cycles <strong>and</strong> the computational efficiency <strong>of</strong> the simulations are<br />
shown in Table 4.4. By exploiting the cycle jump method, an approximate 80% reduction in<br />
computational time is achieved. Furthermore, it appears that despite using the same control<br />
parameter, the number <strong>of</strong> simulated cycles is different for panels with different debond a/b ratio<br />
because <strong>of</strong> different behaviour <strong>of</strong> the state variables (energy release rate <strong>and</strong> phase angle) for<br />
each case.<br />
Table 4.4: Number <strong>of</strong> jumped cycles <strong>and</strong> computational efficiency for the simulation <strong>of</strong><br />
debonded panels with the control parameter qG=q=4 for 2500 cycles.<br />
a/b Number <strong>of</strong> simulated cycles R=Njumped/Ntotal<br />
1.7 588 0.77<br />
1.4 376 0.85<br />
1.1 288 0.89<br />
1 415 0.83<br />
84<br />
Debond radius (mm)<br />
100<br />
80<br />
70<br />
60
4.5 Conclusion<br />
A cycle jump method for accelerated simulation <strong>of</strong> fatigue crack growth in a bimaterial interface<br />
was presented in this chapter. The proposed method is based on finite element analysis for a set<br />
<strong>of</strong> cycles to establish a trend line, extrapolating the trend line which spans many cycles, <strong>and</strong> use<br />
the extrapolated state as an initial state for additional finite element simulations. Two finite<br />
element routines for accelerated fatigue crack growth simulation were developed. The first<br />
routine is suitable for 2D crack growth <strong>and</strong> the second is applicable to any 3D fatigue crack<br />
growth simulation with an arbitrary crack front shape. To assess the computational efficiency<br />
<strong>and</strong> accuracy <strong>of</strong> the developed finite element routines, they were used to simulate face/core<br />
interface fatigue crack growth in a s<strong>and</strong>wich beam (2D) <strong>and</strong> a s<strong>and</strong>wich panel (3D). The results<br />
were compared with a reference analysis simulating all individual cycles.<br />
By application <strong>of</strong> the cycle jump method, fatigue crack growth in the interface <strong>of</strong> a s<strong>and</strong>wich<br />
beam was simulated for 500 cycles as a numerical example. The computational efficiency <strong>and</strong><br />
accuracy <strong>of</strong> the cycle jump method was discussed <strong>and</strong> verified based on the three parameters:<br />
crack length, difference between maximum <strong>and</strong> minimum energy release rate in a cycle (G) <strong>and</strong><br />
mode-mixity phase angle against the reference analysis. The effect <strong>of</strong> the control parameters<br />
governing the implementation <strong>of</strong> the cycle jump method on the computational efficiency <strong>and</strong><br />
accuracy was studied. The results suggest that the computational efficiency <strong>of</strong> the simulations<br />
increases considerably with increasing the control parameters. However, the accuracy <strong>of</strong> the<br />
simulations decreases for crack length, G <strong>and</strong> mode-mixity phase angle determination. For the<br />
control parameters qG=q=0.05 the cycle jump method requires 175 cycles to simulate 500<br />
cycles, resulting in a 65% reduction in computational time with reasonably good accuracy<br />
(around 1% error).<br />
The second routine (3D) was used to simulate fatigue debond propagation in s<strong>and</strong>wich panels<br />
with an elliptical face/core debond at the centre <strong>of</strong> the panels. To make the simulation suitable<br />
for practical applications <strong>and</strong> due to lack <strong>of</strong> experimental methods for characterization <strong>of</strong> the<br />
effect <strong>of</strong> the mode III energy release rate, GIII, on the crack growth rate, only mode I <strong>and</strong> II<br />
components <strong>of</strong> the strain energy release rate were used in the crack growth routine. However, to<br />
analyse the effect <strong>of</strong> mode III loading at the crack tip, the mode III strain energy release rate was<br />
determined along the debond front. It was shown that the mode III crack tip loading is<br />
considerable close to the longer radius <strong>of</strong> the ellipse for an elliptical debond with large a/b radius<br />
ratios, which implies the importance <strong>of</strong> the development <strong>of</strong> new experimental methods for<br />
characterisation <strong>of</strong> the effect <strong>of</strong> mode III loading at the crack tip on the crack growth rate in such<br />
debond geometries.<br />
To examine the accuracy <strong>and</strong> computational efficiency <strong>of</strong> the developed 3D cycle jump method,<br />
a reference simulation, simulating all individual cycles <strong>and</strong> simulations based on the cycle jump<br />
method with different control parameters were conducted. It was shown that with good accuracy<br />
85
using the cycle jump method, more than a 70% reduction in the computational time can be<br />
achieved. Finally, debonded panels with different elliptical shape debonds were simulated for<br />
2500 cycles by application <strong>of</strong> the cycle jump method, which illustrated similar beneficial<br />
reductions in the computational time. This study illustrates that the cycle jump method is a<br />
reliable method for accelerating fatigue crack growth simulations with good accuracy, but to<br />
develop an authentic life prediction method fatigue experiments should be conducted to validate<br />
<strong>and</strong> modify the developed scheme.<br />
86
This page is intentionally left blank.<br />
87
Chapter 5<br />
Face/Core Interface <strong>Fatigue</strong> Crack<br />
Propagation in S<strong>and</strong>wich Structures<br />
5.1 Background<br />
<strong>Fatigue</strong> behaviour <strong>of</strong> s<strong>and</strong>wich structures has been <strong>of</strong> great interest to researchers recently.<br />
S<strong>and</strong>wich specimens with <strong>and</strong> without initial damages have been fatigue tested <strong>and</strong> analysed by<br />
various authors. <strong>Fatigue</strong> analysis <strong>of</strong> undamaged s<strong>and</strong>wich beams has typically been carried out<br />
by beam bending tests to investigate the fatigue response <strong>of</strong> foam cores subjected to shear<br />
loading. Shenoi et al. (1995) conducted flexural fatigue tests on s<strong>and</strong>wich composites with glass<br />
aramid/epoxy face sheets <strong>and</strong> cross link foam. They used a ten-point configuration with simply<br />
supported ends approximating a uniformly distributed load over the span <strong>of</strong> the beam. Burman et<br />
al. (1997) analysed the fatigue response <strong>of</strong> H100 PVC <strong>and</strong> Rohacell WF51 foams by four-point<br />
bending tests on undamaged s<strong>and</strong>wich beams. Kanny <strong>and</strong> Mahfuz (2002, 2005) studied the<br />
fatigue behaviour <strong>of</strong> s<strong>and</strong>wich beams exposed to flexural loading with different loading<br />
frequencies. They found that by increasing the loading frequency, the crack growth rates in the<br />
tested s<strong>and</strong>wich beams decrease. Kulkarni et al. (2003) studied fatigue crack growth in foam<br />
cored s<strong>and</strong>wich composites exposed to flexural cyclic loading in a modified three-point bending<br />
test rig. It was observed that the first visible damage was face/core debonding in the centre <strong>of</strong> the<br />
s<strong>and</strong>wich beams. Zenkert et al. (2011) studied the failure mode shift from core shear failure to<br />
face sheet tensile failure, as a function <strong>of</strong> load amplitude in GFRP/foam cored s<strong>and</strong>wich beams.<br />
Bezazi <strong>and</strong> co-authors (2007 <strong>and</strong> 2009) investigated experimentally <strong>and</strong> analytically the fatigue<br />
behaviour <strong>of</strong> s<strong>and</strong>wich composites in a three-point bending test rig. Mahi et al. (2004) studied<br />
the flexural behaviour <strong>of</strong> s<strong>and</strong>wich composites exposed to cyclic loading in a three-point bending<br />
test rig. He proposed a damage accumulation model for the s<strong>and</strong>wich specimens <strong>and</strong> used the<br />
model to analyse the fatigue life <strong>of</strong> s<strong>and</strong>wich composites. Quispitupa <strong>and</strong> Shafigh (2006)<br />
conducted fatigue tests on s<strong>and</strong>wich beams via three-point bending. They observed both global<br />
mode I <strong>and</strong> mode II cracking in the face/core interface <strong>of</strong> the specimens. In the case <strong>of</strong> debond<br />
88
damaged s<strong>and</strong>wich composites subjected to cyclic loading, a limited number studies can be<br />
found in the literature. <strong>Fatigue</strong> experiments have been carried out by Shipsha et al. (1999, 2000,<br />
2003) on debond damaged s<strong>and</strong>wich beams to determine stress-life S-N diagrams, crack growth<br />
rates <strong>and</strong> indentify fatigue crack growth mechanisms. They evaluated face/core interface crack<br />
growth rates under global mode I <strong>and</strong> II loading by use <strong>of</strong> the Double Cantilever Beam (DCB)<br />
<strong>and</strong> Cracked S<strong>and</strong>wich Beams (CSB), respectively. Additionally, he studied the fatigue<br />
behaviour <strong>of</strong> foam cored s<strong>and</strong>wich beams in the presence <strong>and</strong> absence <strong>of</strong> initial damage under<br />
shear loading in a specially designed four-point bending test rig. Burman et al. (1997, 2000) also<br />
conducted four-point bending tests on debond damaged s<strong>and</strong>wich beams. They tested s<strong>and</strong>wich<br />
beams in a modified four-point bending test rig with different loading amplitudes. At higher load<br />
amplitudes the failure mode was core shear failure, but at smaller load amplitudes the failure<br />
mode was governed by tensile failure <strong>of</strong> the face sheet. Bozhevolnaya <strong>and</strong> co-authors (2009)<br />
conducted three-point bending fatigue tests on s<strong>and</strong>wich beams with peel stoppers. They<br />
reported that even though the peel stoppers have no significant effect on the fatigue life <strong>of</strong> the<br />
s<strong>and</strong>wich beams, they may prevent cracks from propagating in the face/core interface. Berkowits<br />
<strong>and</strong> Johnson (2005) carried out fatigue tests on double cantilever beams (DCB) <strong>of</strong> honeycomb<br />
core <strong>and</strong> carbon/epoxy face sheets. They used the compliance <strong>of</strong> the DCB specimen to determine<br />
the crack length <strong>and</strong> the crack growth rates. Liu <strong>and</strong> Holmes (2007) investigated fatigue crack<br />
propagation in thin-foil Ni-base <strong>and</strong> honeycomb core s<strong>and</strong>wich structures. Edge-notched<br />
honeycomb core s<strong>and</strong>wich panels were tested under tension-tension <strong>and</strong> tension-compression<br />
fatigue loading.<br />
All the above-mentioned studies are either purely experimental, or the proposed numerical or<br />
analytical methods for modelling the fatigue behaviour <strong>of</strong> s<strong>and</strong>wich structures are limited to a<br />
specific loading condition or geometry (e.g. beams). Thus, a more general approach is desirable.<br />
In Chapter 4 a general scheme for an accelerated simulation <strong>of</strong> fatigue crack growth in bimaterial<br />
interfaces was proposed. The main idea behind the proposed method is that once a specific<br />
interface has been characterised under cyclic loading, the extracted crack growth rates vs. energy<br />
release rates for different explicit mode-mixity phase angles can be utilised to simulate fatigue<br />
crack growth, <strong>and</strong> thus fatigue lifetime, <strong>of</strong> any structural component with an arbitrary loading<br />
condition as long as a similar face/core interface exists.<br />
In this chapter the proposed numerical scheme is applied to analysis <strong>of</strong> face/core interface fatigue<br />
crack growth in foam cored s<strong>and</strong>wich components. Moreover, the proposed numerical scheme<br />
will be validated against fatigue tests conducted on debonded s<strong>and</strong>wich beams <strong>and</strong> panels. In the<br />
first part <strong>of</strong> this chapter face/core fatigue crack growth in s<strong>and</strong>wich X-joints is studied<br />
experimentally. Furthermore, the face/core interface <strong>of</strong> the X-joints is characterised under cyclic<br />
loading. The obtained fatigue crack growth rates data is subsequently used as input for the 2D<br />
fatigue crack growth finite element routine developed in the previous chapter. In the second part<br />
89
<strong>of</strong> this chapter, s<strong>and</strong>wich panels with a circular face/core debond exposed to cyclic loading are<br />
tested <strong>and</strong> simulated by use <strong>of</strong> the developed 3D fatigue crack growth finite element routine.<br />
5.2 Face/Core <strong>Fatigue</strong> Crack Growth in S<strong>and</strong>wich X-<br />
Joints<br />
S<strong>and</strong>wich X-joints are widely applied to s<strong>and</strong>wich structures in order to connect panels which<br />
are attached perpendicularly to the face sheets <strong>of</strong> each other. An example <strong>of</strong> an application can<br />
be found in naval ships constructed <strong>of</strong> fibre composite s<strong>and</strong>wich materials, here among other<br />
locations an X-joint exists where the end bulkhead <strong>of</strong> the superstructure is attached to the deck,<br />
with an internal bulkhead placed in the same vertical plane below the deck. This joint will be<br />
subjected to alternating tensile <strong>and</strong> compressive loading in the vertical direction for respectively<br />
hogging <strong>and</strong> sagging bending deformation <strong>of</strong> the hull girder. When the core material is polymer<br />
structural foam, such joints are <strong>of</strong>ten strengthened by the insertion <strong>of</strong> a higher-density core<br />
material or core inserts <strong>of</strong> a stiffer material in the deck panel in the immediate region <strong>of</strong> the joint,<br />
see Hayman et al. (2007). The load transferred through X-joints can be tension or compression.<br />
Compressive load may lead to core indentation or crushing, whereas tensile loads may cause<br />
face/core debonding. Berggreen et al. (2007) proposed the S<strong>and</strong>wich Tear Test (STT) specimen<br />
representing a debonded s<strong>and</strong>wich X-joint under tensile load, see Figure 5.1.<br />
In this section interface fatigue crack growth in s<strong>and</strong>wich X-joints is studied experimentally<br />
using a series <strong>of</strong> STT specimens. The STT specimens include variants with three different core<br />
densities <strong>and</strong> are tested under static <strong>and</strong> fatigue loading. Furthermore, the experimental results<br />
will be used to validate the numerical fatigue crack growth scheme presented in Chapter 4.<br />
Finally, a detailed analysis <strong>of</strong> the fatigue crack growth in s<strong>and</strong>wich X-joints will be presented<br />
<strong>and</strong> efficiency, accuracy <strong>and</strong> limitations <strong>of</strong> the proposed numerical scheme will be discussed.<br />
(a)<br />
Face/core debond<br />
Figure 5.1: Simplified geometry <strong>and</strong> boundary conditions for (a) s<strong>and</strong>wich X-joints <strong>and</strong> (b)<br />
S<strong>and</strong>wich Tear Test (STT) specimen.<br />
90<br />
(b)
5.2.1 Experimental Study <strong>of</strong> the STT Specimens<br />
Static <strong>and</strong> fatigue tests were conducted on STT specimens to study the residual lifetime <strong>of</strong><br />
debond damaged s<strong>and</strong>wich X-joints. Fifteen foam cored STT specimens with glass/polyester<br />
face sheets were manufactured for static <strong>and</strong> fatigue tests. The polyester resin is Polylite 413-<br />
575, which is specially designed for vacuum injection due to its low viscosity. The s<strong>and</strong>wich<br />
faces consist <strong>of</strong> four DBLT quadraxial mats from Devold Amt, each <strong>of</strong> a thickness <strong>of</strong> 0.75 mm<br />
<strong>and</strong> a dry area weight <strong>of</strong> 850 g/m2 <strong>and</strong> the fibre directions relative to the longitudinal direction <strong>of</strong><br />
the specimen [90,45,0,-45], where the -45 degree ply is placed closest to the core. The core<br />
materials applied include Divinycell PVC foams <strong>of</strong> the types H45, H100 <strong>and</strong> H250 with nominal<br />
densities <strong>of</strong> 45, 100 <strong>and</strong> 250 kg/m 3 , respectively. The core thickness is 50 mm. The properties <strong>of</strong> the<br />
core <strong>and</strong> face materials are given in Table 5.1. Face sheet material properties are obtained from the<br />
tests conducted on samples from the face sheet.<br />
Table 5.1: Face <strong>and</strong> core material properties.<br />
Material E (MPa) G (MPa) <br />
Face sheet 19400 7400 0.31<br />
Core: H45 50 15 0.33<br />
Core: H100 130 35 0.33<br />
Core: H250 300 104 0.33<br />
A selection <strong>of</strong> manufactured STT specimens is shown in Figure 5.2. All specimens were reinforced<br />
by wooden inserts at the ends to avoid crushing <strong>of</strong> the core when mounting them in the STT test<br />
rig. The debond defect was introduced during the manufacturing process by inserting a sheet <strong>of</strong><br />
0.025 mm thick Airtech release film on the core <strong>and</strong> sealing the edges with resin before vacuum<br />
injection. The panels were resin injected molded <strong>and</strong> cured with vacuum consolidation. The STT<br />
specimens were cut from the manufactured panels. The release film was placed along 480 mm <strong>of</strong><br />
the specimen length so that the crack only propagates in one side, see Figure 5.2. The reason for<br />
not just testing simply a half part <strong>of</strong> the specimen where the crack propagates is that as the crack<br />
propagates the membrane forces in the face sheet becomes larger, generating harmful side forces<br />
on the testing machine actuator. The side loads can therefore be decreased by carrying the loads<br />
by the tension in the part <strong>of</strong> the face sheet which is not glued to the core.<br />
91
H250 Specimen<br />
H100 Specimen<br />
H45 Specimen<br />
z<br />
y<br />
x<br />
50<br />
480<br />
Wood Wood insert<br />
insert Release Teflon film film<br />
Foam<br />
Foam<br />
core<br />
core<br />
Figure 5.2: Manufactured STT specimens <strong>and</strong> a drawing <strong>of</strong> STT specimens including<br />
dimensions (mm).<br />
At the centre <strong>of</strong> the specimens steel plates were glued to the top <strong>and</strong> bottom face sheets with<br />
epoxy. Using the steel plates the top <strong>and</strong> bottom faces were fixed to the actuator <strong>of</strong> the testing<br />
machine <strong>and</strong> the test rig respectively by four bolts. The test rig consists <strong>of</strong> welded steel pr<strong>of</strong>iles<br />
<strong>of</strong> a wall thickness <strong>of</strong> 6 mm, see Figure 5.3. The wood reinforced ends <strong>of</strong> the specimens were<br />
clamped to the test rig by square section steel pr<strong>of</strong>iles using four bolts. Furthermore, a 4 Mpix<br />
Digital Image Correlation (DIC) measurement system (ARAMIS 4M) as shown in Figure 5.4<br />
was used to monitor 2D surface strains to locate the crack tip continuously during the<br />
experiments. The crack tip can be located by the strain concentration at the loaded crack tip,<br />
which is visible in the DIC strain contours. Finally, a servo-hydraulic Instron actuator with a<br />
maximum capacity <strong>of</strong> 100kN was used to load the STT specimens. However, a smaller 25 kN<br />
load cell was mounted on the actuator to increase the accuracy <strong>of</strong> the load measurements, see<br />
Figure 5.5.<br />
92<br />
1000<br />
860<br />
(Width 65mm)
(a)<br />
(b)<br />
Figure 5.3: Drawing <strong>of</strong> the STT test rig including a detailed drawing <strong>of</strong> connections.<br />
Test rig<br />
Figure 5.4: Layout <strong>of</strong> the experimental setup.<br />
93<br />
30 o
Figure 5.5: Test setup.<br />
Initially, to investigate the static behaviour <strong>and</strong> maximum load carrying capacity <strong>of</strong> the STT<br />
specimens, static tests were carried out on two specimens for each core density. Ramped<br />
displacement controlled loading with a piston displacement rate <strong>of</strong> 1 mm/min was applied to all<br />
tests. A sample rate <strong>of</strong> one image per second was used for the DIC measurements. Figure 5.6<br />
shows typical load vs. axial actuator displacement for the STT specimens, for additional results<br />
see Appendix C. The load initially increases linearly until face/core debond crack initiation<br />
occurs. After the first crack propagation the load drops, but as the crack propagates further the<br />
maximum load remains approximately constant. The maximum load in fatigue tests is chosen as<br />
a portion <strong>of</strong> the average <strong>of</strong> this mainly constant load. It is also seen that by increasing the core<br />
density, the crack initiation <strong>and</strong> propagation loads increase, which can be attributed to the larger<br />
fracture toughness <strong>of</strong> heavier cores.<br />
Force (kN)<br />
Measurement area<br />
1.2<br />
0.8<br />
0.4<br />
0<br />
H45 Specimen<br />
0 2 4 6 8 10<br />
Axial displacement (mm)<br />
Figure 5.6: Typical axial displacement <strong>of</strong> the actuator vs. force for specimens with H45, H100<br />
<strong>and</strong> H250 core densities.<br />
94<br />
Actuator piston<br />
Load cell<br />
H250 Specimen<br />
H100 Specimen<br />
H45
Crack growth paths for the STT specimens with H45, H100 <strong>and</strong> H250 cores from the static tests<br />
are shown in the following figures. For the specimens with H45 core, the crack kinks into the<br />
core up to 4-5 mm below the interface <strong>and</strong> then approaches the face/core interface as the crack<br />
propagates further. However, since the fracture toughness <strong>of</strong> the H45 core is low compared to<br />
that <strong>of</strong> the face/core interface, the crack never kinks into the interface <strong>and</strong> continues to propagate<br />
in the core just below the resin-rich region <strong>of</strong> the core, see Figure 5.7. For the specimens with<br />
H100 core, the crack initially kinks into the core <strong>and</strong> continues to propagate 2-3 mm below the<br />
interface. After 45-55 mm <strong>of</strong> crack growth it eventually kinks into the face/core interface <strong>and</strong><br />
subsequently into the face sheet, which leads to large-scale fibre bridging, see Figures 5.8 <strong>and</strong><br />
5.9. For the specimens with H250 core, the crack starts to propagate in the face/core interface.<br />
Subsequently, it kinks into the face sheet after 25-35 mm propagation <strong>and</strong> continues to propagate<br />
in the face sheet, resulting in large-scale fibre bridging, see Figure 5.10. The static crack<br />
initiation <strong>and</strong> propagation loads are listed in Table 5.2. It is seen that the mainly constant crack<br />
propagation load is much lower that the crack initiation load, which can be attributed to the<br />
initial resistance <strong>of</strong> the crack due to the accumulation <strong>of</strong> resin at the crack tip during the<br />
manufacturing process at the predefined face/core crack.<br />
H45 Specimen<br />
Figure 5.7: Static crack growth path for an STT specimen with H45 core at the beginning <strong>and</strong><br />
end <strong>of</strong> the test.<br />
95
H100 Specimen<br />
Fibre bridging<br />
Figure 5.8: Static crack growth path for an STT specimen with H100 core at the beginning<br />
<strong>and</strong> end <strong>of</strong> the test.<br />
Figure 5.9: Fibre bridging in an STT specimen with H100 core.<br />
96
H250 Specimen<br />
Fibre bridging<br />
Figure 5.10: Static crack growth path for an STT specimen with H250 core at the beginning<br />
<strong>and</strong> end <strong>of</strong> the test.<br />
Table 5.2: Static crack initiation <strong>and</strong> propagation load.<br />
STT Specimen Static crack initiation load (kN) Static crack propagation load (kN)<br />
H250 core 1.08±0.07 0.63±0.06<br />
H100 core 1.05±0.06 0.56±0.09<br />
H45 core 0.45±0.09 0.31±0.04<br />
Using the static tests results <strong>and</strong> a few trial specimens, reasonable load levels for the fatigue tests<br />
were designated to have a stable crack propagation. 80% <strong>of</strong> the static propagation load <strong>of</strong> the<br />
STT specimens was used as the maximum fatigue load with a loading ratio <strong>of</strong> R=Fmin/Fmax=0.1<br />
<strong>and</strong> frequency <strong>of</strong> 2 Hz. Load controlled fatigue tests were conducted on the STT specimens <strong>and</strong><br />
two specimens <strong>of</strong> each core type were tested. To break the initial resin accumulation at the predefined<br />
crack tip, pre-cracking was performed on the specimens. A cyclic load, at approximately<br />
50-60% <strong>of</strong> the static crack propagation load, was applied to the specimens to break the blunt<br />
crack tip, which resulted in approximately 5-10 mm crack propagation. When all the specimens<br />
were pre-cracked, the crack tip was located underneath the face/core interface in the core. The<br />
following crack growth paths were observed in the fatigue experiments:<br />
1. For the specimens with the H45 core, unstable crack growth occurs initially <strong>and</strong> the crack<br />
propagates up to a length <strong>of</strong> 150 mm in a few cycles, see Figure 5.11. After the unstable<br />
97
propagation, the crack continues to propagate in the core underneath the resin rich-cells<br />
approaching the interface, which indicates the existence <strong>of</strong> negative mode-mixity at the<br />
crack tip. At negative mode-mixity the crack tends to kink towards the interface but since<br />
the interface is tougher than the H45 core, the crack is forced to remain in the core unable<br />
to penetrate through the resin-rich cells, see Figure 5.11.<br />
2. For the specimens with the H100 core, the crack propagates initially in the core up to a<br />
length <strong>of</strong> approximately 120 mm, but eventually kinks into the interface <strong>and</strong> continues to<br />
propagate directly in the interface, see Figure 5.12. It is seen that the static <strong>and</strong> the fatigue<br />
crack growth paths for H100 STT specimens are different. No fibre bridging is observed<br />
during the fatigue tests even though a similar mode-mixity exists at the crack tip for a<br />
given crack length for both static <strong>and</strong> fatigue experiments. The difference in the crack<br />
growth paths can be addressed to the smaller maximum fatigue load level compared to<br />
the critical static propagation load, which fails to provide enough energy at the crack tip<br />
to penetrate the first layer <strong>of</strong> the face sheet.<br />
3. For the specimens with the H250 core, the crack propagates initially in the core up to a<br />
length <strong>of</strong> 5-8 mm <strong>and</strong> then kinks into the interface. The interface crack eventually kinks<br />
into the face sheet, which results in large-scale fibre bridging, see Figure 5.13 <strong>and</strong> 14. As<br />
the crack continues to propagate in the face sheet, fibre bridging becomes more <strong>and</strong> more<br />
extensive, resisting the crack growth, <strong>and</strong> eventually results in crack growth seizure, see<br />
Figure 5.15.<br />
H45 Specimen<br />
Crack underneath the resin-rich<br />
Figure 5.11: Crack growth path in the specimens with H45 core.<br />
98
H100 Specimen<br />
Figure 5.12: Crack growth path in the specimens with H100 core.<br />
H250 Specimen<br />
Interface crack<br />
Fiber bridging<br />
Figure 5.13: Crack growth path in the specimens with H250 core.<br />
99
Figure 5.14: Kinking <strong>of</strong> the crack into the face sheet in an STT specimen with H250 core.<br />
Figure 5.15: Fiber bridging in the rear side <strong>of</strong> an STT specimen with H250 core.<br />
A 4 Mpix Digital Image Correlation (DIC) measurement system (ARAMIS 4M) was utilized to<br />
monitor 2D surface major strains <strong>and</strong> locate the crack tip position by the strain concentration at<br />
the crack tip in the measured 2D strain contours. To ensure the accuracy <strong>of</strong> the measurement a<br />
tape ruler was glued to the bottom side <strong>of</strong> the specimens to locate the crack tip as well <strong>and</strong><br />
measure the crack length by a calliper with an accuracy <strong>of</strong> ±0.05 mm. Figure 5.16 shows a<br />
majore strain contour from an STT specimen with H45 core used to locate the crack tip position<br />
by the DIC system.<br />
<strong>Fatigue</strong> crack growth length vs. load cycle diagrams for the STT specimens from both the visual<br />
measurements <strong>and</strong> the measurements using the DIC system are presented in Figure 5.17. The<br />
crack length measurements by the DIC system agree well with the physical crack measurements,<br />
as shown in Figure 5.17. Crack growth length vs. load cycle results from the two repetitions <strong>of</strong><br />
each type <strong>of</strong> STT specimens are shown in Figure 5.18. It is seen that for all core densities the<br />
crack initially grows fast, but the crack growth rate decreases as the crack propagates further.<br />
This can be attributed to increasing membrane forces <strong>and</strong> subsequent decreasing energy release<br />
rates for the H100 <strong>and</strong> H45 specimens <strong>and</strong> fully developed fibre bridging resisting the crack<br />
growth for the H250 specimens. For both STT specimens with H45 core, unstable crack<br />
propagation was observed during the initial load cycles where the crack propagated unstably<br />
100
around 150 mm. After the unstable crack propagation, the crack continued to propagate in a<br />
stable manner. A small deviation between the two test repetitions is observed for the H45 <strong>and</strong><br />
H100 specimens. However, Figure 5.18 (c) illustrates a large deviation between the two test<br />
repetitions for the STT specimens with H250 core, which can be attributed to the different scales<br />
<strong>of</strong> fibre bridging in H250 specimens.<br />
Crack length [mm]<br />
Figure 5.16: Surface major strain contour <strong>of</strong> the STT specimens from the DIC system.<br />
250<br />
200<br />
150<br />
100<br />
50<br />
0<br />
Strain concentration<br />
at the crack tip<br />
200<br />
(a) (b)<br />
0 20000 40000 60000 80000<br />
Cycles, N<br />
Visual<br />
DIC<br />
101<br />
Crack length [mm]<br />
160<br />
120<br />
80<br />
40<br />
0<br />
Visual<br />
DIC<br />
0 20000 40000 60000 80000 100000<br />
Cycles, N
Crack length [mm]<br />
Crack length [mm]<br />
150<br />
120<br />
90<br />
60<br />
30<br />
0<br />
0 20000 40000 60000 80000 100000<br />
Cycles, N<br />
Figure 5.17: <strong>Fatigue</strong> crack growth from the visual measurements <strong>and</strong> measurements using<br />
DIC vs. cycles for the STT specimens with (a) H45 (b) H100 <strong>and</strong> (c) H250 core.<br />
250<br />
200<br />
150<br />
100<br />
50<br />
0<br />
(c)<br />
Crack length [mm]<br />
200<br />
150<br />
100<br />
Figure 5.18: <strong>Fatigue</strong> crack growth vs. cycles for the STT specimens with (a) H45 (b) H100<br />
<strong>and</strong> (c) H250 core.<br />
5.2.2 <strong>Fatigue</strong> Characterisation <strong>of</strong> the Face/Core Interface<br />
Mixed Mode Bending (MMB) tests were conducted on pre-cracked MMB s<strong>and</strong>wich specimens,<br />
as introduced in Chapter 3, to characterise the fatigue behaviour <strong>of</strong> the face/core interface <strong>of</strong> the<br />
STT specimens, as shown in Figure 5.19. The MMB test rig allows a range <strong>of</strong> mode-mixities to<br />
be achieved at the crack tip for different lever arm distances, denoted as c in Figure 5.19. A<br />
servo-hydraulic MTS 858 testing machine with a maximum capacity <strong>of</strong> 100kN was used to load<br />
the MMB specimens. However, a smaller 25 kN load cell was mounted on the actuator to<br />
increase the accuracy <strong>of</strong> the load measurements.<br />
102<br />
Visual<br />
50<br />
STT H45-1<br />
STT H45-2<br />
50<br />
0<br />
STT H100-1<br />
STT H100-2<br />
0<br />
STT H250-1<br />
STT H250-2<br />
0 50000 100000 0 50000 100000 0 50000 100000<br />
Cycles, N<br />
Cycles, N<br />
Cycles, N<br />
(a) (b) (c)<br />
DIC<br />
Crack length [mm]<br />
150<br />
100
Since the observed large-scale fibre bridging in the STT specimens with H250 core violates the<br />
initial assumptions <strong>of</strong> linear elastic fracture mechanics in the developed numerical fatigue crack<br />
growth scheme, the H250 specimens were discarded <strong>and</strong> characterisation <strong>of</strong> the interface was<br />
only performed for the specimens with H100 <strong>and</strong> H45 core. MMB s<strong>and</strong>wich specimens <strong>of</strong> each<br />
core type were manufactured with 20 mm core <strong>and</strong> 2 mm face sheet thickness. An initial 20 mm<br />
long start crack was defined in the face/core interface <strong>of</strong> the MMB specimens by inserting a<br />
Teflon film, 30 m thick, during the manufacturing process. Similar face sheets, core materials<br />
<strong>and</strong> manufacturing processes as for the STT specimens were used in the manufacturing <strong>of</strong> the<br />
MMB specimens. The specimens were 35 mm wide with a span length (2L) <strong>of</strong> 160 mm.<br />
Figure 5.19: Mixed mode bending rig with the MMB s<strong>and</strong>wich specimen.<br />
To determine the mode-mixity at which the face/core interface fatigue behaviour should be<br />
characterised by MMB tests, the mode-mixity phase angle at the crack tip <strong>of</strong> the STT specimens<br />
was evaluated by the finite element method at a load corresponding to the maximum fatigue load<br />
in the STT fatigue tests (to be presented in the next section). In all the STT specimens the modemixity<br />
phase angle for different crack lengths is between -5 to -20 , which implies mode I<br />
dominant loading at the crack tip. The MMB lever arm distances (c) resulting in similar modemixities<br />
as those <strong>of</strong> the STT specimens were determined from the finite element model <strong>of</strong> the<br />
MMB specimen shown in Figure 5.20. The FE model was developed using PLANE42 elements<br />
in the commercial finite element code ANSYS. The phase angle <strong>and</strong> the energy release rate are<br />
determined from relative nodal pair displacements along the crack flanks obtained from the finite<br />
element analysis using the CSDE method as outlined in Chapter 1. The characteristic length h is<br />
arbitrarily chosen as the face sheet thickness. Figure 5.21 shows the variation <strong>of</strong> the mode-mixity<br />
phase angle vs. the lever arm distance (c) in the MMB specimens. At small level arm distances<br />
the mode-mixity phase angle increases significantly <strong>and</strong> mode II dominant loading is present at<br />
the crack tip. Increasing the c distance, the phase angle converges to around -20 for the present<br />
specimen geometry. It appears that with the current design <strong>of</strong> the test rig <strong>and</strong> the MMB specimen<br />
it is not possible to reach mode-mixity phase angles more than -20. Therefore, only a -20<br />
103
mode-mixity phase angle was chosen in the finite element model <strong>of</strong> the MMB specimen to<br />
determine the appropriate lever arm distance (c). It is assumed that because <strong>of</strong> the mode I<br />
dominant loading for phase angles more than -20, the characterisation <strong>of</strong> the face/core interface<br />
for only -20 phase angle <strong>and</strong> using the resulting crack growth rates for the simulation <strong>of</strong> STT<br />
specimens with slightly lower phase angle magnitudes (-20
Displacement controlled static tests with 1 mm/min loading rate were conducted on two MMB<br />
specimens <strong>of</strong> each core type to determine the static crack propagation load. Typical load vs.<br />
displacement curves from the static tests are presented in Figure 5.22. The point where the crack<br />
starts to propagate is marked with an open circle (“”). The critical failure load is marked<br />
according to the ASTM D6671/D 6671M-06 recommendation <strong>and</strong> complemented by visual<br />
inspection.<br />
Load (N)<br />
80<br />
60<br />
40<br />
20<br />
0<br />
0<br />
0 1 2 3<br />
0 2 4 6<br />
Displacement (mm)<br />
Displacement (mm)<br />
(a)<br />
(b)<br />
Figure 5.22: Typical load vs. displacement curves (“” onset <strong>of</strong> crack growth) for the MMB<br />
s<strong>and</strong>wich specimens with (a) H45 core <strong>and</strong> (b) H100 core.<br />
<strong>Fatigue</strong> tests in displacement control with sinusoidal wave form were conducted on three<br />
specimens <strong>of</strong> each core type at a frequency <strong>of</strong> 2 Hz <strong>and</strong> with a loading ratio R=0.1. Displacement<br />
controlled testing was chosen for better servo-hydraulic control <strong>of</strong> the loading <strong>and</strong> to avoid any<br />
unstable crack growth in the MMB specimens. To have a stable crack growth, 80% <strong>of</strong> the static<br />
crack propagation load was chosen as the maximum fatigue load after testing a few trial<br />
specimens. The crack length was determined every 50 cycles using the compliance <strong>of</strong> the MMB<br />
specimen as<br />
<br />
<br />
<br />
<br />
<br />
<br />
<br />
<br />
<br />
105<br />
( 5.1)<br />
Where c is the lever arm distance, L the half-span length, is the load partitioning parameter. C1,<br />
C2 <strong>and</strong> C3 are compliances <strong>of</strong> the sub-beams according to Quispitupa et al. (2009) as introduced<br />
in Chapter 3. For further details see Chapter 3. Moreover, visual crack length measurement was<br />
performed by a calliper with an accuracy <strong>of</strong> ±0.05 mm. The maximum fatigue load (Pmax) <strong>and</strong><br />
the corresponding displacement (max) were used to determine the compliance <strong>of</strong> the MMB<br />
specimens <strong>and</strong> subsequently the crack length. The MMB compliance in Equation (5.1) is a<br />
function <strong>of</strong> the crack length. Knowing the maximum load (Pmax) <strong>and</strong> displacement (max) from<br />
the testing machine, the compliance CMMB=/P can be calculated <strong>and</strong> subsequently the crack<br />
length can be determined, see Chapter 3. Furthermore, since the MMB test rig has several hinge<br />
connections <strong>and</strong> load introduction points, the deflections <strong>of</strong> the test rig during the fatigue tests<br />
Load (N)<br />
160<br />
120<br />
80<br />
40
should be taken into account for a realistic determination <strong>of</strong> the compliance <strong>of</strong> the MMB<br />
specimens. To consider the effect <strong>of</strong> test rig deformations, the compliance <strong>of</strong> the test rig was<br />
determined by use <strong>of</strong> a thick stiff steel beam <strong>of</strong> a thickness <strong>of</strong> 10 mm, width <strong>of</strong> 25 mm <strong>and</strong> length<br />
<strong>of</strong> 250 mm. To determine the compliance <strong>of</strong> the test rig, denoted as Crig in Equation (5.2), the<br />
compliance <strong>of</strong> the steel specimen, Csteel, was subtracted from the measured total compliance,<br />
Cmeasured.<br />
C C C<br />
( 5.2)<br />
rig<br />
measured<br />
steel<br />
The compliance <strong>of</strong> the steel specimen is calculated as<br />
C<br />
steel<br />
cL 2<br />
2L<br />
( 5.3)<br />
3<br />
E b t<br />
st<br />
s<br />
where bs is the width <strong>of</strong> the steel specimen, c is the lever arm distance, t is the thickness <strong>of</strong> the<br />
steel specimen, L is the span distance <strong>and</strong> Est is Young’s modulus <strong>of</strong> the steel specimen. Finally,<br />
the compliance <strong>of</strong> the MMB specimens is determined as<br />
C C C<br />
( 5.4)<br />
MMB<br />
Exp<br />
rig<br />
The MMB rig with the steel specimen was loaded in displacement control with 1 mm/min<br />
loading rate up to 100N for the different lever arm distances (c). The results <strong>of</strong> the compliance<br />
calibration are presented in Figure 5.23. It appears that the compliance <strong>of</strong> the test rig increases in<br />
a nearly linear fashion with increasing c values.<br />
Compliance <strong>of</strong> the test rig (m/N)<br />
0.8<br />
0.6<br />
0.4<br />
0.2<br />
0 20 40<br />
c (mm)<br />
60 80<br />
5.23: Compliance <strong>of</strong> the MMB test rig as a function <strong>of</strong> lever arm distances, c.<br />
To have an initial crack location for the MMB specimens similar to the initial crack location in<br />
the STT specimens, <strong>and</strong> to penetrate the resin blob at the crack tip, pre-cracking was conducted<br />
on the MMB specimens. A pre-cracking method proposed by Quispitupa et al. (2011) was used.<br />
The pre-cracking was conducted on a variant <strong>of</strong> a double cantilever beam configuration as shown<br />
in Figure 5.24. The specimen is clamped between two steel 20 mm thick blocks. A steel block is<br />
106
clamped approximately 5–10 mm from the crack tip to limit the crack extension <strong>and</strong> ensure a<br />
straight crack front during pre-cracking. The upper debonded face sheet was loaded using a<br />
sinusoidal cyclic loading with a load ratio <strong>of</strong> R=0.1 <strong>and</strong> frequency <strong>of</strong> 2 Hz. A maximum <strong>of</strong> 50-<br />
60% <strong>of</strong> the static crack initiation load was applied during the pre-cracking as the maximum<br />
fatigue load to the specimens to avoid large crack increments. During the pre-cracking the crack<br />
always kinked either to the face sheet or to the core. This can be attributed to the tougher<br />
face/core interface compared to the core <strong>and</strong> face sheet. As to the face sheets it is believed that<br />
the main reason for this is the polyester resin used as the matrix, making the face sheets less<br />
tough than the interface <strong>and</strong> prone to matrix cracking. To prevent the crack from kinking into the<br />
face sheet <strong>and</strong> resulting fibre bridging, a downward force is applied to the lower debonded part<br />
<strong>of</strong> the MMB specimens (core+ lower face sheet) by using a screw type configuration as shown in<br />
Figure 5.24. This small force provokes the crack to kink into the core from the interface by<br />
creating shear forces at the crack tip as shown in Figure 5.25. The crack location <strong>and</strong> growth was<br />
observed continuously using a calliper with an accuracy <strong>of</strong> ±0.05 mm during the cyclic loading.<br />
The pre-cracking was stopped after 5-10 mm <strong>of</strong> crack growth. During pre-cracking the<br />
predefined face/core debond kinked into the core in most <strong>of</strong> the specimens. However, in few<br />
specimens with H100 core the debond kinked into the face sheet <strong>and</strong> the specimens were<br />
discarded, see Figure 5.26.<br />
a<br />
<strong>Fatigue</strong> load<br />
Downward load<br />
a<br />
Figure 5.24: Pre-cracking test setup.<br />
107
Figure 5.25: Kinking <strong>of</strong> the crack into the core during pre-cracking for an MMB specimen<br />
with H100 core.<br />
Crack kinking into the face<br />
Figure 5.26: Kinking <strong>of</strong> the crack into the face sheet during pre-cracking for an MMB<br />
specimen with H100 core.<br />
After pre-cracking, fatigue tests were performed on the MMB specimens. <strong>Fatigue</strong> crack growth<br />
paths for the MMB specimens are shown in Figure 5.27. The crack propagates in both specimens<br />
just underneath the face/core interface <strong>and</strong> below the resin-rich cells. 10-12 mm stable crack<br />
growth was measured for all MMB specimens where the crack growth eventually seized.<br />
108
Figure 5.27: <strong>Fatigue</strong> crack growth path for H45 <strong>and</strong> H100 MMB specimens.<br />
The fatigue crack growth rates data are plotted against the energy release rate (G) obtained<br />
from the finite element analysis in Figure 5.28. As it was mentioned earlier, due to large-scale<br />
fibre bridging in the H250/GFRP interface, linear elastic fracture mechanics is not valid <strong>and</strong> no<br />
measurements were conducted for this interface. In the Paris regime, which corresponds to stable<br />
crack growth <strong>and</strong> exhibits a linear relation between the crack growth rates <strong>and</strong> the energy release<br />
rates, the crack growth rates can be written as a modification <strong>of</strong> the traditional Paris Law:<br />
<br />
<br />
Crack path underneath the face/core<br />
interface for typical H45 MMB specimens<br />
Crack path underneath the face/core<br />
interface for typical H100 MMB specimens<br />
109<br />
( 5.5)<br />
where m is the slope <strong>of</strong> the curve <strong>and</strong> G is the difference between maximum <strong>and</strong> minimum<br />
energy release rates at the crack tip in each cycle. The energy release rate is determined from the<br />
finite element analysis <strong>of</strong> the MMB specimens. Figure 5.28 illustrates the influence <strong>of</strong> core<br />
density on the crack growth rates. As seen in Figure 5.28 the scatter <strong>of</strong> the results for the<br />
H45/GFRP is larger than that for H100/GFRP, which can be attributed to a larger cell size <strong>and</strong><br />
increased brittleness <strong>of</strong> the H45 core. Furthermore, the magnitude <strong>of</strong> m is larger in the<br />
H45/GFRP than in the H100/GFRP interface, which indicates a faster crack growth rate due to<br />
the lower density <strong>and</strong> brittleness <strong>of</strong> the H45 core.
log (da/dN) (mm/cycle)<br />
10 log G (J/m 1000<br />
0.01<br />
2 )<br />
0.001<br />
0.0001<br />
H45<br />
=-20<br />
m=7.45<br />
C=1.08 10 -18<br />
Figure 5.28: Crack growth rates for the H45/GFRP <strong>and</strong> H100/GFRP interfaces. Each marker<br />
type presents an experiment.<br />
5.2.3 Finite Element Modelling <strong>of</strong> the STT Specimen<br />
A 2D finite element model <strong>of</strong> the STT specimen is developed in the commercial finite element<br />
code ANSYS. 4-node iso-parametric elements (PLANE42) are used in the finite element model.<br />
To simplify the model the bottom face sheet <strong>and</strong> the core in the half <strong>of</strong> the STT specimen where<br />
the face sheet is not glued to the core is not modelled. The finite element model consists <strong>of</strong> top<br />
face sheet <strong>and</strong> half <strong>of</strong> the core <strong>and</strong> bottom face sheet. Symmetry boundary conditions are<br />
imposed in the symmetry plane on the core <strong>and</strong> bottom face sheet. The finite element model <strong>of</strong><br />
the STT specimen is shown in Figure 5.29.<br />
Figure 5.29: Finite element model <strong>of</strong> the STT specimen. The smallest element size is 3.33 m.<br />
110<br />
Crack tip<br />
H100<br />
=-20<br />
m=6.15<br />
C=1. 5 10 -18<br />
x<br />
y
An accelerated simulation <strong>of</strong> fatigue crack growth (the cycle jump method) developed in the<br />
previous chapter is performed on the STT specimens. The energy release rate <strong>and</strong> mode-mixity<br />
phase angle are chosen as state variables in the cycle jump method. Figures 5.30 (a) <strong>and</strong> (b) show<br />
the strain energy release rate <strong>and</strong> phase angle diagrams as a function <strong>of</strong> crack length obtained<br />
from the finite element analysis <strong>of</strong> the STT specimens at maximum fatigue load in each cycle.<br />
G (J/m 2 )<br />
450<br />
350<br />
250<br />
150<br />
STT H100<br />
STT H45<br />
-20<br />
50<br />
20 40 60 80 100 120<br />
Crack length (mm)<br />
-25<br />
(a)<br />
(b)<br />
Figure 5.30: Energy release rate <strong>and</strong> phase angle as a function <strong>of</strong> crack length for the STT<br />
specimens.<br />
The energy release rate increases with increasing crack length up to 60 mm <strong>and</strong> then decreases<br />
due to the increasing membrane forces as the crack propagates. In smaller crack lengths with<br />
increasing crack length, because <strong>of</strong> small membrane forces, the deformations at the crack tip<br />
increase, which leads to higher energy release rate. However, as the crack propagates, resulting<br />
in at increasing membrane forces, a larger part <strong>of</strong> the strain energy is used to stretch the<br />
debonded face sheet rather than create new crack surfaces, decreasing energy release rate at the<br />
crack tip. Figure 5.30 (b) shows that the mode-mixity phase angle magnitude increases with<br />
increasing crack length, which indicates the existence <strong>of</strong> higher mode II loading at the crack tip<br />
at larger crack lengths. The negative phase angle illustrates the tendency <strong>of</strong> the crack to kink<br />
towards the face sheet. The fatigue crack propagation simulation was conducted on the STT<br />
specimens for 100000 cycles. In order to study the effect <strong>of</strong> the control parameters on the<br />
accuracy <strong>and</strong> speed <strong>of</strong> the simulation, simulations with different control parameters, qy, were<br />
carried out. Figures 5.31 (a) <strong>and</strong> (b) show the crack length as a function <strong>of</strong> cycles for four<br />
different control parameters qG=q=0.05, 0.1, 1.5 <strong>and</strong> 0.2. A significant dependency on the<br />
control parameters is seen in the simulations <strong>of</strong> the H45 specimens. Large deviations are<br />
observed between the simulations using 0.15 <strong>and</strong> 0.25 as control parameters. However, the<br />
simulation results converge at smaller control parameters. During the initial cycles the<br />
simulations using qG=q=0.15 <strong>and</strong> 0.25 control parameters show small differences but as an<br />
unstable crack growth zone is approached the deviations increase. This takes place due to the<br />
111<br />
Phase angle ()<br />
Crack length (mm)<br />
20 40 60 80 100 120<br />
-5<br />
-10<br />
-15<br />
STT H100<br />
STT H45
erroneous extrapolations in the transition from stable to unstable crack growth zone <strong>and</strong> the<br />
extreme non-linearity <strong>of</strong> this transition. With smaller control parameters smaller jumps occur <strong>and</strong><br />
the cycle jump scheme is able to extrapolate accurately the stable-unstable crack transition zone.<br />
H100 specimens due to slightly different crack growth rate relations <strong>and</strong> stable crack growth, as<br />
also observed in the fatigue experiments, show much less dependency on the control parameters.<br />
Additionally, with the chosen initial crack length, the H100 specimens have already passed the<br />
highly non-linear region <strong>of</strong> transition from very slow crack growth rates to much larger growth<br />
rates.<br />
200<br />
200 q=qG=0.05<br />
q=qG=0.15<br />
q=qG=0.25<br />
Crack length (mm)<br />
150<br />
100<br />
50<br />
0<br />
q=qG=0.01<br />
q=qG=0.05<br />
q=qG=0.15<br />
q=qG=0.25<br />
0 20000 40000 60000 80000 100000<br />
Cycles<br />
Cycles<br />
(a)<br />
(b)<br />
Figure 5.31: The effect <strong>of</strong> the control parameters on the simulation <strong>of</strong> (a) H45 <strong>and</strong> (b) H100<br />
STT specimens.<br />
In order to model the initial highly non-linear crack growth zone for the H100 STT specimens,<br />
simulations were conducted on the specimens with H100 core <strong>and</strong> 5 mm smaller initial crack<br />
length (20 mm crack length) for a range <strong>of</strong> different control parameters, see Figure 5.32.<br />
Deviations similar to those <strong>of</strong> the STT specimens with H45 core are seen this time for the<br />
qG=q=0.05, 0.15 <strong>and</strong> 0.25 control parameters, illustrating one <strong>of</strong> the main limitations <strong>of</strong> the<br />
developed cycle jump scheme. In the case <strong>of</strong> highly non-linear behaviour <strong>of</strong> the structure, the<br />
control parameters should be chosen carefully to be able to simulate the non-linear zone<br />
accurately. This limitation makes the sensitivity <strong>and</strong> convergence analysis an essential part <strong>of</strong><br />
incorporating the cycle jump method in the simulation <strong>of</strong> general fatigue crack growth in<br />
structural analysis. Simulation results using qG=q=0.05 control parameters are presented<br />
together with experimental results in Figure 5.33. The simulations <strong>of</strong> the specimens with H100<br />
core show fair accuracy compared to the experimental results. However, large deviations are<br />
seen between the simulations <strong>and</strong> experimental results for the specimens with H45 core. The<br />
deviations start at the beginning <strong>of</strong> the unstable crack growth <strong>and</strong> remains constant throughout<br />
the stable crack growth zone. The reason for this deviation can be found in the interface fatigue<br />
characterisation. Since the interface fatigue characterisation was only made for the stable linear<br />
part <strong>of</strong> the crack growth rate diagram (the Paris regime), the resulting da/dN vs. G relation is<br />
112<br />
Crack length (mm)<br />
150<br />
100<br />
50<br />
0<br />
1 mm<br />
0 20000 40000 60000 80000 100000
not valid for unstable crack growth <strong>and</strong> produces incorrect results. Utilising stable da/dN vs. G<br />
relations for unstable fatigue crack growth will result in smaller crack growth estimations, which<br />
is seen in Figure 5.33 (a).<br />
Crack length (mm)<br />
Figure 5.32: The effect <strong>of</strong> the control parameters on H100 specimens with an initial crack<br />
length <strong>of</strong> 20 mm.<br />
250<br />
200<br />
150<br />
100<br />
50<br />
0<br />
Crack length (mm)<br />
200<br />
150<br />
100<br />
50<br />
0<br />
Cycles<br />
(a)<br />
0 20000 40000 60000 80000 100000<br />
Test #1<br />
Test #2<br />
Simulation<br />
0 25000 50000 75000 100000<br />
Cycles<br />
113<br />
q=qG=0.05<br />
q=qG=0.15<br />
q=qG=0.25<br />
0 25000 50000<br />
Cycles<br />
(b)<br />
75000 100000<br />
Figure 5.33: Crack length vs. cycles for the STT specimens with (a) H45 <strong>and</strong> (b) H100 core<br />
from experiments <strong>and</strong> simulations.<br />
The number <strong>of</strong> simulated cycles <strong>and</strong> the computational efficiency are listed in Table 5.3. Results<br />
show that up to 98% <strong>of</strong> the simulation time can be saved by use <strong>of</strong> the cycle jump method with<br />
reasonable accuracy, which proves a significant computational efficiency. It is seen that<br />
Crack length (mm)<br />
200<br />
150<br />
100<br />
50<br />
0<br />
Test #1<br />
Test #2<br />
Simulation
compared to the 65% efficiency obtained for the simulation <strong>of</strong> fatigue crack growth in s<strong>and</strong>wich<br />
beams in Chapter 4, the computational efficiency is here more than 33% higher. This is due to a<br />
somewhat unrealistic <strong>and</strong> arbitrary choice <strong>of</strong> da/dN vs. G relations in the simulations in Chapter<br />
4, where the da/dN vs. G relations were chosen so that the crack reaches the end <strong>of</strong> the<br />
specimens in hundreds <strong>of</strong> cycles to make the reference simulation <strong>of</strong> all individual cycles<br />
possible. The use <strong>of</strong> realistic da/dN vs. G relations here makes the crack growth significantly<br />
smaller in every cycle <strong>and</strong> provides room for more cycle jumps in the simulation.<br />
Table 5.3: Computational efficiency <strong>of</strong> the simulations with different control parameters.<br />
Control parameter<br />
qG=q<br />
Number <strong>of</strong> simulated cycles<br />
H45 specimen Saved cycles (%) H100 specimen Saved cycles (%)<br />
0.05 1104 98.896 1096 98.904<br />
0.10 548 99.452 557 99.443<br />
0.15 411 99.589 381 99.619<br />
0.20 312 99.688 323 99.677<br />
0.25 243 99.757 188 99.812<br />
5.3 <strong>Fatigue</strong> Crack Growth in the Face/Core Interface <strong>of</strong><br />
S<strong>and</strong>wich Panels<br />
In this section the 3D fatigue crack growth scheme developed in Chapter 4 is used to simulate<br />
fatigue crack growth in debonded s<strong>and</strong>wich panels with a circular debond at the centre. The<br />
simulation results will be compared with fatigue experiments at the end <strong>of</strong> this section.<br />
5.3.1 <strong>Fatigue</strong> Experiments on Debonded Panels<br />
Five s<strong>and</strong>wich panels with a circular face/core debond at the centre were manufactured for<br />
fatigue experiments. The panel face sheets consist <strong>of</strong> three layers <strong>of</strong> Devold AMT DBLT 850<br />
quadraxial glass fibre mats <strong>of</strong> a total thickness <strong>of</strong> 2 mm, each with a dry density <strong>of</strong> 850g/m 2 . The<br />
core materials are H45 Divinycell PVC foam with nominal densities <strong>of</strong> 45 kg/m 3 . The core thickness<br />
is 50 mm. The properties <strong>of</strong> the core materials, taken from the manufacturers’ data sheets (DIAB),<br />
<strong>and</strong> the face materials are given in Table 5.4. Figure 5.34 presents a drawing <strong>of</strong> the panels, including<br />
the dimensions, <strong>and</strong> an image showing one <strong>of</strong> the manufactured panels.<br />
114
Figure 5.34: Drawing <strong>of</strong> debonded s<strong>and</strong>wich panels with an image <strong>of</strong> a manufactured panel.<br />
Table 5.4: Face <strong>and</strong> core material properties.<br />
Material E (MPa) G (MPa) <br />
Face sheet 19400 7400 0.31<br />
Core: H45 50 15 0.33<br />
All specimens were reinforced with wooden inserts at the edges to avoid crushing <strong>of</strong> the core.<br />
The debond was introduced before the resin infusion by inserting a piece <strong>of</strong> 0.025 mm thick<br />
Airtech release film on the core in the centre <strong>of</strong> the panels <strong>and</strong> sealing the edges with resin. The<br />
test rig consists <strong>of</strong> welded steel square pr<strong>of</strong>iles with a wall thickness <strong>of</strong> 3 mm. A 4 Mpix Digital<br />
Image Correlation (DIC) measurement system (ARAMIS 4M) was placed above the panels to<br />
monitor 2D surface strains <strong>and</strong> displacements in order to estimate the crack growth continuously<br />
during the experiments. The test rig was inserted in an MTS 810 servo-hydraulic testing machine<br />
with a maximum capacity <strong>of</strong> 100kN <strong>and</strong> an integrated T-slot table upon which the test rig was<br />
positioned <strong>and</strong> fixed. However, a smaller 25 kN load cell was used in the experiments to increase<br />
the accuracy <strong>of</strong> the load measurements, see Figure 5.35. To load the centre <strong>of</strong> the debond using<br />
the actuator <strong>of</strong> the testing machine a hole <strong>of</strong> a diameter <strong>of</strong> 6 mm was drilled at the centre through<br />
the entire thickness <strong>of</strong> the panels, <strong>and</strong> the centre <strong>of</strong> the debond was bolted to a long steel rod<br />
connected to the actuator piston, see Figure 5.37 <strong>and</strong> 5.38. The panels were fixed to the test rig<br />
by twelve steel clamps <strong>and</strong> four 6 mm thick steel plates as shown in Figure 5.37. To avoid<br />
harmful side forces on the testing machine actuator, which may be generated by an uneven<br />
debond growth during the fatigue loading, the setup in Figure 5.36 was used. The setup includes<br />
a lubricated bronze cylinder in which the actuator piston <strong>of</strong> the testing machine can move freely.<br />
The cylinder is connected to the four columns <strong>of</strong> the testing machine by adjustable steel arms. In<br />
115<br />
Wood inserts<br />
Debond
the case <strong>of</strong> uneven debond growth, the generated side forces will be taken by the cylinder <strong>and</strong><br />
transferred to the steel columns instead <strong>of</strong> the actuator. This will produce friction forces, which<br />
will make the load measurements inaccurate if the load cell is connected to the top <strong>of</strong> the<br />
actuator piston. To avoid this inaccuracy, a 25 kN load cell was connected to the bottom <strong>of</strong> the<br />
actuator piston as shown in Figure 5.35.<br />
Figure 5.35: Test setup.<br />
Figure 5.36: Actuator protection setup.<br />
116<br />
Force<br />
DIC cameras<br />
25 kN<br />
Load cell
Steel plates <strong>and</strong> clamps<br />
Figure 5.37: Centre <strong>of</strong> the debond connected to the actuator using a bolt.<br />
Figure 5.38: Schematic presentation <strong>of</strong> the connection between the debonded face sheet <strong>and</strong><br />
actuator.<br />
To determine the maximum static carrying capacity <strong>of</strong> the panels, static tests were performed on<br />
two panels. Ramp displacement controlled loading with a piston displacement rate <strong>of</strong> 1 mm/min<br />
was applied in both tests. Figure 5.39 shows the axial piston displacement vs. load curves from<br />
the static tests. It is seen that the load increases in a linear manner until the crack propagation. As<br />
the crack propagates, the load drops due to the displacement controlled loading.<br />
117<br />
Centre <strong>of</strong> the debond
Load (kN)<br />
2<br />
1.5<br />
1<br />
0.5<br />
0<br />
Panel 1<br />
Panel 2<br />
Crack propagation point<br />
0 1 2 3<br />
Displacement (mm)<br />
Figure 5.39: Axial piston displacement vs. load diagram from the static tests.<br />
To obtain stable crack growth 80% <strong>of</strong> the static crack propagation load was applied in the fatigue<br />
tests as maximum cyclic load with a loading ratio <strong>of</strong> R=0.1 <strong>and</strong> a frequency <strong>of</strong> 2 Hz. Load<br />
controlled fatigue tests were performed on the debonded panels <strong>and</strong> a DIC system was used to<br />
monitor the debond shape <strong>and</strong> the crack growth. Four images every second were captured from<br />
the surface <strong>of</strong> the panel every six hundred cycles by the DIC cameras. The debond front position<br />
was located using the out-<strong>of</strong>-plane displacement contour from the surface <strong>of</strong> the panels. Locating<br />
the debond front from the out-<strong>of</strong>-plane displacement <strong>of</strong> the debond is not as accurate as the<br />
method used in the previous section for the measurement <strong>of</strong> the crack growth in STT specimens,<br />
which was based on monitoring the crack tip <strong>and</strong> the strain concentration at the crack tip.<br />
However, since it was not possible to gain access to the crack tip due to closed debonding, the<br />
best possible option was to use the out-<strong>of</strong>-plane displacement contours <strong>and</strong> iso-surfaces to<br />
monitor the debond growth, as shown in Figure 5.40. Pre-cracking was performed to penetrate<br />
the resin accumulation at the predefined crack tip by loading the specimens up to 50-60% <strong>of</strong> the<br />
static crack propagation load by cyclic loading. Pre-cracking was stopped after approximately 5-<br />
7.5 mm crack growth. Following the pre-cracking the specimens were loaded up to 100000<br />
cycles until the debond reached the edges <strong>of</strong> the panels. <strong>Fatigue</strong> crack growth vs. cycle diagrams<br />
for the debonded specimens are presented in Figure 5.41. It is seen that initially the crack growth<br />
rate is large, but decreases as the crack propagates due to development <strong>of</strong> membrane forces<br />
resulting in a decreasing energy release rate at the crack tip.<br />
To investigate the crack growth paths after the panel tests, all tested panels were cut. Figure 5.43<br />
illustrates the crack growth path in the s<strong>and</strong>wich panels at zero <strong>and</strong> ninety degrees, as shown in<br />
Figure 5.42, along the debond front. During the pre-cracking <strong>and</strong> initial loading cycles the crack<br />
118
kinks into the core because <strong>of</strong> very low fracture toughness <strong>of</strong> the H45 core compared to the<br />
interface. It is observed that the crack continues to propagate in the core below the resin-rich<br />
cells after kinking.<br />
121 mm<br />
149 mm<br />
16000 cycles 70000 cycles<br />
Figure 5.40: Out-<strong>of</strong>-plane deflection <strong>of</strong> the debond from DIC measurements.<br />
Diameter (mm)<br />
160<br />
150<br />
140<br />
130<br />
120<br />
110<br />
100<br />
0 20000 40000 60000 80000 100000<br />
Figure 5.41: <strong>Fatigue</strong> crack growth vs. cycles.<br />
119<br />
Cycle<br />
Test #1<br />
Test #2<br />
Test #3
Figure 5.42: Zero <strong>and</strong> ninety degrees positions along the debond front.<br />
Initial crack<br />
0 debond section<br />
Initial crack<br />
90 debond section<br />
Crack growth path<br />
Crack growth path<br />
Figure 5.43: <strong>Fatigue</strong> crack growth paths in the tested s<strong>and</strong>wich panels.<br />
5.3.2 Finite Element Modelling <strong>of</strong> the Debonded Panels<br />
A 3D finite element model <strong>of</strong> the debonded panels is developed in the commercial finite element<br />
code ANSYS. 8-node iso-parametric elements (PLANE45) are exploited for finite element<br />
modelling. Because <strong>of</strong> geometrical <strong>and</strong> loading symmetry only a quarter <strong>of</strong> the panel is<br />
120<br />
90<br />
0
generated. Symmetry boundary conditions are imposed in the symmetry planes. The edges <strong>of</strong> the<br />
panels are clamped by imposing a zero displacement boundary condition. The finite element<br />
model <strong>of</strong> the debonded panel is shown in Figure 5.44. The accelerated fatigue crack growth<br />
simulation scheme (cycle jump method) developed in the previous chapter is used to simulate<br />
fatigue crack propagation in the s<strong>and</strong>wich panels. The energy release rate <strong>and</strong> mode-mixity phase<br />
angle are chosen as state variables in the cycle jump scheme. Figure 5.45 illustrates the<br />
distribution <strong>of</strong> the energy release rate <strong>and</strong> the related mode-mixity phase angle during the first<br />
cycle along the debond front using the maximum fatigue load amplitude. As expected the energy<br />
release rate <strong>and</strong> mode-mixity phase angle are evenly distributed along the debond front because<br />
<strong>of</strong> the circular shape <strong>of</strong> the debond <strong>and</strong> the large distance to the panel boundaries. Figure 5.46<br />
shows the energy release rate <strong>and</strong> mode-mixity phase angle vs. debond diameter using the<br />
maximum fatigue load amplitude.<br />
Debond<br />
Figure 5.44: Quarter finite element model <strong>of</strong> the debonded panels with a circular debond. The<br />
smallest element size is 10m.<br />
121<br />
Clamp B. C.<br />
Symmetry B. C.<br />
310 mm<br />
x<br />
y
G(J/m 2 )<br />
180<br />
150<br />
210<br />
120<br />
150<br />
100<br />
50<br />
0<br />
90<br />
60<br />
30<br />
0<br />
330<br />
240<br />
300<br />
240<br />
300<br />
270<br />
270<br />
Figure 5.45: The energy release rate <strong>and</strong> mode-mixity phase angle at the debond front during<br />
the first load cycle using the maximum fatigue load amplitude.<br />
Energy release rate (J/m 2 )<br />
120<br />
100<br />
80<br />
60<br />
100 120 140 160<br />
Debond diameter (mm)<br />
Figure 5.46: Energy release rate <strong>and</strong> phase angle as a function <strong>of</strong> debond diameter from the<br />
analysis <strong>of</strong> the debonded panels subjected to the maximum fatigue load amplitude.<br />
The energy release rate decreases with increasing debond diameter in a linear manner. This can<br />
be attributed to the increasing membrane forces as the debond propagates. The membrane forces<br />
increase with the debond propagation <strong>and</strong> a smaller part <strong>of</strong> the strain energy in the s<strong>and</strong>wich<br />
panel is available to create new surfaces <strong>and</strong> increase the debond, which results in a decreasing<br />
energy release rate at the crack tip. The mode-mixity phase angle magnitude initially increases<br />
with increasing debond diameter <strong>and</strong> decreases after 130 mm debond diameter. However, the<br />
variation <strong>of</strong> mode-mixity phase angle is very small, less than one degree, showing the<br />
122<br />
()<br />
Phase angle ()<br />
180<br />
150<br />
210<br />
-5.4<br />
-5.5<br />
-5.6<br />
120<br />
0<br />
-2<br />
-4<br />
-6<br />
-8<br />
-10<br />
90<br />
60<br />
Debond diameter (mm)<br />
30<br />
0<br />
330<br />
100 120 140 160<br />
-5.3
insensitivity <strong>of</strong> the mode-mixity to the debond diameter. The low mode-mixity phase angle<br />
illustrates the mode I dominant loading at the crack tip.<br />
The fatigue crack propagation simulation was carried out on the s<strong>and</strong>wich panels for 100000<br />
cycles. Because <strong>of</strong> similar material <strong>and</strong> interface properties the crack growth rates vs. the energy<br />
release rate relations determined in the previous section were used for the simulations. To choose<br />
the appropriate <strong>and</strong> most effective control parameter values in the cycle jump routine,<br />
simulations with different control parameters were carried out. Figure 5.47 shows the debond<br />
diameter vs. cycles for five different control parameters qG=q=0.4, 0.45, 0.5, 0.75 <strong>and</strong> 1. It is<br />
seen that the results <strong>of</strong> the simulations with the control parameters qG=q= 1 <strong>and</strong> 0.75 are very<br />
different due to large <strong>and</strong> inaccurate jumps, but decreasing the control parameter to 0.5 <strong>and</strong> 0.4<br />
leads to converging results <strong>and</strong> the deviation becomes smaller. Based on the results presented in<br />
Figure 5.47 the control parameter qG=q=0.4 was chosen for the simulation <strong>of</strong> debond growth in<br />
the tested s<strong>and</strong>wich panels.<br />
Diameter (mm)<br />
150<br />
140<br />
130<br />
120<br />
110<br />
q=qG=0.75 q=qG=1<br />
100<br />
q=qG=0.5<br />
q=qG=0.4<br />
q=qG=0.45<br />
0 20000 40000 60000 80000 100000<br />
Cycle<br />
Figure 5.47: The effect <strong>of</strong> the control parameter on the simulation <strong>of</strong> the debonded panels.<br />
Simulation results for the debond diameter vs. cycles using the control parameters qG=q=0.4 are<br />
shown together with the experimental results in Figure 5.48. The accuracy <strong>of</strong> the simulation is<br />
less compared to that <strong>of</strong> the STT specimen simulations presented in the previous sections in this<br />
chapter. Nevertheless, the deviation in the final debond diameter after 100000 cycles between the<br />
simulation <strong>and</strong> the experiments is less than 5 mm. The maximum deviation <strong>of</strong> approximately 7<br />
mm occurs around 70000 cycles. This inaccuracy can be attributed to the uncertainties in the<br />
debond diameter measurement using the DIC system during the experiments, as well as the<br />
observed scatter in the input crack growth rates data.<br />
123
110<br />
q=qG=0.4 Test #1<br />
100<br />
Test #2 Test #3<br />
0 20000 40000 60000 80000 100000<br />
Cycle<br />
Figure 5.48: Debond diameter vs. cycles for the simulation with the control parameters<br />
qG=q=0.4.<br />
The number <strong>of</strong> simulated cycles <strong>and</strong> the computational efficiency <strong>of</strong> the simulations with<br />
different control parameters are listed in Table 5.5. By application <strong>of</strong> the cycle jump method up<br />
to 94% <strong>of</strong> the simulation time has been saved with fair accuracy. Increasing the control<br />
parameters leads to increasing computational efficiency up to 96%, but the accuracy <strong>of</strong> the<br />
simulations is considerably lower.<br />
Table 5.5: Computational efficiency <strong>of</strong> solutions with different control parameters.<br />
Control parameter<br />
qG=q<br />
Diameter (mm)<br />
160<br />
150<br />
140<br />
130<br />
120<br />
Simulation <strong>of</strong> debonded s<strong>and</strong>wich panels<br />
Number <strong>of</strong> simulated cycles Saved simulation cycles (%)<br />
0.4 7121 92.879<br />
0.45 6087 93.913<br />
0. 5 5896 94.104<br />
0.75 5051 94.949<br />
1 3778 96.222<br />
5.4 Conclusion<br />
In this chapter the accelerated fatigue crack growth simulation scheme developed in Chapter 4<br />
was used to study interface fatigue crack growth in s<strong>and</strong>wich composites. Moreover, the<br />
accuracy <strong>and</strong> efficiency <strong>of</strong> the developed scheme were validated against fatigue experiments<br />
conducted on debond damaged s<strong>and</strong>wich beams <strong>and</strong> panels.<br />
124
S<strong>and</strong>wich Tear Test (STT) specimens with face/core debonding exposed to cyclic loading have<br />
been tested to study the fatigue behaviour <strong>of</strong> the interface cracked s<strong>and</strong>wich X-joints. <strong>Fatigue</strong><br />
tests were performed on the STT specimens with H45, H100 <strong>and</strong> H250 PVC cores <strong>and</strong><br />
glass/polyester face sheets. The following fatigue crack growth paths were observed during the<br />
experiments:<br />
For the specimens with H45 core, unstable crack growth took place initially. After the<br />
unstable propagation the crack propagated in the core underneath the resin-rich cell layer<br />
moving towards the interface. However, the crack never kinked into the interface due to<br />
low fracture toughness <strong>of</strong> the H45 core compared to the interface.<br />
For the specimens with H100 core, the crack propagated initially in the core <strong>and</strong> then<br />
kinked into the interface <strong>and</strong> continued to propagate in the interface.<br />
For the specimens with H250 core, the crack initially propagated in the core <strong>and</strong> kinked<br />
into the interface. The interface crack eventually kinked into the face sheet, resulting in<br />
large-scale fibre bridging.<br />
By application <strong>of</strong> the finite element method mode-mixity phase angles at the crack tip <strong>of</strong> the STT<br />
specimens were evaluated at different crack lengths using the maximum fatigue load amplitude.<br />
To characterise the fatigue response <strong>of</strong> the interface <strong>of</strong> the STT specimens, fatigue tests were<br />
performed on Mixed Mode Bending (MMB) specimens at similar mode-mixity phase angles.<br />
The da/dN vs. G relations measured by the MMB fatigue tests were used to simulate fatigue<br />
crack growth in the STT specimens by the finite element method. To accelerate the simulation,<br />
the cycle jump method was exploited. Control parameters were introduced to control the<br />
accuracy <strong>of</strong> the cycle jumps. Simulations with different control parameters <strong>and</strong> a convergence<br />
analysis were carried out to choose the most accurate <strong>and</strong> efficient control parameters.<br />
Simulations <strong>of</strong> the specimens with H100 core showed fair accuracy compared to the fatigue<br />
experiments. However, the simulation <strong>of</strong> H45 specimens was found to be less accurate due to<br />
unstable crack growth observed in the fatigue experiments <strong>of</strong> the H45 STT specimens. This<br />
inaccuracy can be attributed to the interface fatigue characterisation. Since the interface fatigue<br />
characterisation was only performed for the stable linear part <strong>of</strong> the crack growth rate diagram<br />
(the Paris regime), the resulting da/dN vs. G relation is not valid for unstable crack growth <strong>and</strong><br />
produces incorrect results.<br />
The numerical scheme developed in Chapter 4 to simulate 3D fatigue crack growth in bimaterial<br />
interfaces was used to simulate fatigue crack growth in s<strong>and</strong>wich panels with a circular debond.<br />
<strong>Fatigue</strong> experiments were conducted on debonded s<strong>and</strong>wich panels to validate the numerical<br />
scheme. S<strong>and</strong>wich panels with a circular face/core debond at the panel centre were exposed to<br />
cyclic loading. <strong>Fatigue</strong> tests were performed on the debonded panels with H45 PVC core <strong>and</strong><br />
glass/polyester face sheets. It was observed that the debond initially kinked into the core <strong>and</strong><br />
continued to propagate underneath the resin-rich cell layer <strong>of</strong> the core. Using the finite element<br />
method, the energy release rate <strong>and</strong> mode-mixity phase angle at the crack tip <strong>of</strong> the debonded<br />
125
panels were determined for different debond diameters for the maximum applied fatigue load. It<br />
was shown that the mode-mixity phase angle is not sensitive to the debond diameter <strong>and</strong> is<br />
around -5. Since no strong dependency between the mode-mixity <strong>and</strong> crack growth rate is<br />
expected at low manitudes <strong>of</strong> mode-mixity phase angles <strong>and</strong> the loading is predominantly mode<br />
I, the crack growth rate relations for the mode-mixity phase angle -20, measured using the<br />
MMB specimen, were used for the simulation <strong>of</strong> the debonded panels. To accelerate the<br />
simulation the cycle jump method outlined in Chapter 4 was exploited. A convergence analysis<br />
was carried out for different control parameter values to choose appropriate control parameters.<br />
Simulations <strong>of</strong> the debonded s<strong>and</strong>wich panels showed fair accuracy compared to the fatigue<br />
experiments with a maximum deviation <strong>of</strong> 7 mm in debond diameter estimations. The observed<br />
deviation can be attributed to the crude crack length measurement technique using the DIC<br />
technique, which was based on out-<strong>of</strong>-plane deflections <strong>of</strong> the debond <strong>and</strong> scatter <strong>of</strong> the input<br />
crack growth rate data.<br />
The presented 2D <strong>and</strong> 3D fatigue crack growth schemes <strong>and</strong> the cycle jump method proved to be<br />
reliable tools for simulation <strong>of</strong> stable fatigue crack growth, but in highly non-linear cases the<br />
presented method should be used carefully. To mitigate inaccuracies <strong>and</strong> uncertainties<br />
concerning simulation <strong>of</strong> highly non-linear problems, a convergence sensitivity analysis must be<br />
carried out due to strong dependency <strong>of</strong> the accuracy <strong>of</strong> the cycle jump method on the control<br />
parameters. However, for complete validation <strong>of</strong> the developed numerical scheme, simulations<br />
should be compared with fatigue tests on more complicated loading scenarios <strong>and</strong> debond<br />
geometries.<br />
126
This page is intentionally left blank.<br />
127
Chapter 6<br />
Conclusion <strong>and</strong> Future Work<br />
6.1 Face/Core Debond Propagation in S<strong>and</strong>wich<br />
Structures under Static Loading<br />
In the first chapters <strong>of</strong> this thesis a methodology for the estimation <strong>of</strong> face/core debond<br />
propagation load in s<strong>and</strong>wich structures under static loading was developed <strong>and</strong> validated against<br />
experiments. The developed finite element scheme involves three overall steps:<br />
1) Generating a global model <strong>of</strong> cracked structures, <strong>and</strong> estimating the global response <strong>of</strong><br />
the structures with a coarse mesh around the crack tip.<br />
2) Generating a sub model <strong>of</strong> the crack tip (front) with a very fine mesh, interpolating the<br />
boundary conditions in the cutting boundaries <strong>of</strong> the submodel <strong>and</strong> solving the detailed<br />
finite element model <strong>of</strong> the debond front for the interpolated boundary conditions.<br />
3) Extracting the energy release rate <strong>and</strong> mode-mixity at the crack tip from the submodel<br />
using the Crack Surface Displacement Extrapolation (CSDE) method (Berggreen et al,<br />
2005).<br />
By application <strong>of</strong> the developed scheme, debond initiation loads were predicted in debonded<br />
s<strong>and</strong>wich columns <strong>and</strong> panels.<br />
Initially, the compressive failure <strong>of</strong> foam cored s<strong>and</strong>wich columns containing a face/core debond<br />
was investigated using the developed scheme. Compression tests were performed on s<strong>and</strong>wich<br />
columns to validate the finite element model. S<strong>and</strong>wich columns with glass/epoxy face sheets<br />
<strong>and</strong> H45, H100 <strong>and</strong> H200 PVC foam cores with different debond lengths were tested under static<br />
compressive loading. It was observed that most <strong>of</strong> the debonded columns failed by unstable<br />
debond propagation at the face/core interface towards the column ends. However, face sheet<br />
compression failure was observed in all columns with H200 core <strong>and</strong> smallest debond length,<br />
128
due to the proximity <strong>of</strong> the debond propagation load <strong>and</strong> the compression failure load <strong>of</strong> the face<br />
sheets. Bifurcation type buckling <strong>of</strong> the debonded face sheet was not observed <strong>and</strong> the debond<br />
opening occurred gradually, which can be attributed to large initial imperfections. Slight kinking<br />
<strong>of</strong> the debond into the core was observed in the columns with a low-density H45 <strong>and</strong> H100 core.<br />
Modified Tilted S<strong>and</strong>wich Debond (TSD) specimens were tested under different tilt angles to<br />
measure the fracture toughness <strong>of</strong> the interface at the calculated mode-mixity phase angles for<br />
the column specimens associated with the debond propagation.<br />
The measured interface fracture toughness was used to determine crack propagation loads from<br />
the finite element model <strong>of</strong> the columns. Instability <strong>and</strong> crack propagation loads <strong>of</strong> the columns<br />
were predicted on the basis <strong>of</strong> a geometrically non-linear finite element analysis <strong>and</strong> linear<br />
elastic fracture mechanics. Fair agreement was achieved for the comparison <strong>of</strong> the measured out<strong>of</strong>-plane<br />
deflection, instability, <strong>and</strong> debond propagation loads from the experiments <strong>and</strong> the finite<br />
element analysis. For most <strong>of</strong> the investigated column specimens, it was shown that the<br />
instability <strong>and</strong> debond propagation loads are very reasonable estimates <strong>of</strong> the ultimate failure<br />
load, unless the other failure mechanisms occur prior to buckling instability.<br />
To examine the accuracy <strong>of</strong> the developed scheme in case <strong>of</strong> s<strong>and</strong>wich panels, debond<br />
propagation in s<strong>and</strong>wich panels with a circular debond at the centre was modelled. To validate<br />
the finite element model <strong>of</strong> the debonded panels, intact <strong>and</strong> debonded s<strong>and</strong>wich panels with<br />
glass/polyester face sheets <strong>and</strong> H130, H250 <strong>and</strong> PMI foam cores were tested under static inplane<br />
compressive loading. The following damage mechanisms were observed during the<br />
experiments:<br />
1) All debonded panels failed by the propagation <strong>of</strong> the debond to the edges <strong>of</strong> the panels.<br />
2) All intact panels with H130 <strong>and</strong> H250 core failed by the compressive failure <strong>of</strong> a face<br />
sheet very close to the wooden inserts, which can be attributed to additional peeling<br />
stresses arising due to the junction between the wooden insert <strong>and</strong> the core <strong>and</strong> to a slight<br />
unintentional mismatch between the core <strong>and</strong> the thicknesses <strong>of</strong> the insert.<br />
3) Intact panels with PMI core failed by a combination <strong>of</strong> shear crimping <strong>and</strong> global<br />
buckling.<br />
This time instead <strong>of</strong> using the TSD specimen, characterisation tests were performed on Mixed<br />
Mode Bending (MMB) specimens to measure the fracture toughness <strong>of</strong> the face/core interface<br />
for a span <strong>of</strong> mode-mixity phase angles. As expected it was shown that the fracture toughness is<br />
increasing with increasing magnitude <strong>of</strong> the mode-mixity phase angle. The obtained fracture<br />
toughness data was used to determine the crack propagation load in the debonded s<strong>and</strong>wich<br />
panels. Instability <strong>and</strong> crack propagation loads <strong>of</strong> the panels were estimated on the basis <strong>of</strong><br />
geometrically non-linear finite element analysis <strong>and</strong> linear elastic fracture mechanics. It was<br />
shown that the FEA predictions in few cases are much higher than the experimental ones (a<br />
maximum deviation <strong>of</strong> 46%), which can be attributed to the large scatter in the measured fracture<br />
129
toughness using MMB fracture toughness results <strong>and</strong> differing crack tip details between the<br />
panels <strong>and</strong> the MMB specimens due to mechanical releasing <strong>of</strong> the debonded area in the panels.<br />
However, in most cases an acceptable deviation (a minimum deviation <strong>of</strong> 9%) was obtained. It<br />
was observed that in the panels <strong>and</strong> the MMB specimens with H130 <strong>and</strong> PMI cores the debond<br />
initially kinks into the core <strong>and</strong> propagates beneath the face/core interface, but in the panels <strong>and</strong><br />
the MMB specimens with H250 core the debond propagates directly in the interface. Finally,<br />
based on experimental <strong>and</strong> numerical results, the strength reduction factor Rl was plotted against<br />
the debond diameter. The plot is tentative because <strong>of</strong> the uncertainties regarding the intact<br />
strengths as well as the differences between test <strong>and</strong> analysis results.<br />
6.2 <strong>Fatigue</strong> Crack Growth in Bimaterial Interfaces<br />
After developing a methodology for analysis <strong>of</strong> interface crack propagation in s<strong>and</strong>wich<br />
structures exposed to quasi-static loading, it was applied to simulation <strong>of</strong> fatigue crack growth in<br />
bimaterial interfaces. However, in order to achieve acceptable computational efficiency, the<br />
problem <strong>of</strong> very high computational time due to simulation <strong>of</strong> many cycles <strong>and</strong> the need for a<br />
heavy element mesh density at the crack tip (front) must first be solved.<br />
To overcome the above-mentioned problem a cycle jump method for accelerating the simulation<br />
<strong>of</strong> fatigue crack growth in a bimaterial interface was developed. The proposed method is based<br />
on finite element analysis for a set <strong>of</strong> cycles to establish a trend line, extrapolating the trend line<br />
spanning many cycles, <strong>and</strong> use the extrapolated state as an initial state for additional finite<br />
element simulations. Two finite element routines were developed in order to simulate fatigue<br />
crack growth in bimaterial interfaces. The first routine is suitable for 2D crack growth <strong>and</strong> the<br />
second is applicable to any 3D fatigue crack growth simulation with an arbitrary crack front<br />
shape. To examine the computational efficiency <strong>and</strong> accuracy <strong>of</strong> the developed numerical<br />
schemes, they were applied to simulation <strong>of</strong> face/core interface fatigue crack growth in s<strong>and</strong>wich<br />
beams (2D) <strong>and</strong> s<strong>and</strong>wich panels (3D). The results <strong>of</strong> the simulations were compared with<br />
reference analyses simulating all individual cycles.<br />
Using the cycle jump method, fatigue crack growth in the interface <strong>of</strong> a s<strong>and</strong>wich beam was<br />
simulated for 500 cycles <strong>and</strong> verified against a reference analysis. The computational efficiency<br />
<strong>and</strong> accuracy <strong>of</strong> the cycle jump method were discussed on the basis <strong>of</strong> three parameters: crack<br />
length, difference between maximum <strong>and</strong> minimum energy release rate in a cycle (G), <strong>and</strong><br />
mode-mixity phase angle. The effect <strong>of</strong> the control parameters governing the computational<br />
efficiency <strong>and</strong> accuracy <strong>of</strong> the developed cycle jump method was studied. The results suggest<br />
that the computational efficiency <strong>of</strong> the simulations increases considerably by increasing the<br />
control parameters. However, the accuracy <strong>of</strong> the simulations decreases. It was shown that with<br />
an appropriate choice <strong>of</strong> control parameters more than 65% savings in computational time can be<br />
achieved with reasonably good accuracy.<br />
130
<strong>Fatigue</strong> debond propagation in s<strong>and</strong>wich panels with an elliptical face/core debond at the centre<br />
<strong>of</strong> the panels was simulated by means <strong>of</strong> the second finite element routine (3D). The distribution<br />
<strong>of</strong> the mode III energy release rate, GIII, along the crack front was studied for different elliptical<br />
debonds. However, only mode I <strong>and</strong> II components <strong>of</strong> the strain energy release rate were used in<br />
the crack growth routine due to the present lack <strong>of</strong> experimental methods for characterisation <strong>of</strong><br />
the effect <strong>of</strong> GIII on fatigue crack growth. Results show that the mode III crack tip loading is<br />
significant close to the longer radius <strong>of</strong> the ellipse for an elliptical debond with large a/b radius<br />
ratios.<br />
A reference simulation, simulating all individual cycles, <strong>and</strong> simulations exploiting the cycle<br />
jump method with different control parameters were performed to examine the accuracy <strong>and</strong><br />
computational efficiency <strong>of</strong> the developed 3D cycle jump method. Use <strong>of</strong> the cycle jump method<br />
shows good accuracy <strong>and</strong> leads to a reduction in computational time <strong>of</strong> more than 70%.<br />
6.3 Face/Core Interface <strong>Fatigue</strong> Crack Growth in<br />
S<strong>and</strong>wich Structures<br />
After the initial analysis <strong>of</strong> the developed accelerated fatigue crack growth simulation scheme, it<br />
was validated in the last chapter <strong>of</strong> this thesis against experimental testing <strong>and</strong> used to study<br />
interface fatigue crack growth in s<strong>and</strong>wich composites.<br />
The first finite element routine (2D) was utilised to study face/core fatigue crack growth in<br />
cracked s<strong>and</strong>wich X-joints. S<strong>and</strong>wich Tear Test (STT) specimens with a face/core debond<br />
representing a cracked s<strong>and</strong>wich X-joint, were tested under cyclic loading. <strong>Fatigue</strong> tests were<br />
conducted on STT specimens with H45, H100 <strong>and</strong> H250 PVC cores <strong>and</strong> glass/polyester face<br />
sheets. Digital Image Correlation (DIC) technique was used to locate the crack tip <strong>and</strong> monitor<br />
the crack growth. Different fatigue crack growth paths were observed during the fatigue<br />
experiments:<br />
For the specimens with H45 core the crack grew unstably in the beginning up to a length<br />
<strong>of</strong> 150 mm in a few cycles. The crack initially propagated unstably in the core underneath<br />
the resin-rich cells. After the unstable crack growth, stable crack growth was observed in<br />
all specimens. During the stable crack growth the growing crack approached the<br />
interface, but never kinked into the interface. This can be attributed to the very low<br />
fracture toughness <strong>of</strong> H45 core compared to the interface.<br />
For the specimens with H100 core, the crack initially propagated in the core in a stable<br />
manner <strong>and</strong> then kinked into the interface. The kinked crack continued to propagate in<br />
the interface until the end <strong>of</strong> the experiments where the crack growth eventually stopped<br />
due to decreasing energy release rate at the crack tip.<br />
131
For the specimens with H250 core the crack first propagated in the core due to the initial<br />
crack location after pre-cracking. The crack consequently kinked into the interface due to<br />
the presence <strong>of</strong> negative mode-mixity phase angle <strong>and</strong> large fracture toughness <strong>of</strong> the<br />
H250 core. The interface crack eventually kinked into the face sheet, which resulted in<br />
large-scale fibre bridging.<br />
A 2D finite element model <strong>of</strong> the STT specimen was developed to determine the mode-mixity<br />
phase angle <strong>and</strong> the energy release rate at the crack tip <strong>of</strong> the STT specimens. To characterise the<br />
interface fatigue behaviour <strong>of</strong> the STT specimens, fatigue tests were conducted on Mixed Mode<br />
Bending (MMB) specimens at a mode-mixity phase angle similar to that <strong>of</strong> the STT specimens.<br />
The resulting da/dN vs. G relations generated by the MMB fatigue tests were utilised in the<br />
developed crack growth finite element routine to simulate fatigue crack growth in the STT<br />
specimens. To choose appropriate control parameters, simulations with different control<br />
parameters were performed. A convergence analysis was conducted <strong>and</strong> an appropriate control<br />
parameter was chosen. Simulations <strong>of</strong> the H45 STT specimens showed a very high dependency<br />
on the control parameters. During the initial cycles, simulations using different control<br />
parameters showed small differences, but as the unstable crack growth zone was approached the<br />
deviation became larger. This dependency is attributed to the extrapolations in the transition<br />
from stable to unstable crack growth zone <strong>and</strong> the extreme non-linearity <strong>of</strong> this transition, which<br />
implies the importance <strong>of</strong> appropriate choice <strong>of</strong> control parameters in the case <strong>of</strong> highly nonlinear<br />
problems. With smaller control parameters the crack growth diagrams converged to one<br />
diagram since the cycle jump scheme was able to extrapolate accurately the stable-unstable crack<br />
transition zone by performing small or no jumps. H100 specimens, due to less non-linearity <strong>and</strong><br />
stable crack growth, showed much less dependency to the control parameters. The developed<br />
finite element models were validated against the conducted fatigue tests. Simulations <strong>of</strong> the<br />
specimens with H100 core showed fair accuracy compared to the fatigue experiments. However,<br />
the simulation <strong>of</strong> the H45 specimens was much less accurate due to unstable crack growth<br />
observed in the fatigue experiments <strong>of</strong> the H45 STT specimens. Since the interface fatigue<br />
characterisation using the MMB specimens was only conducted for the stable linear part <strong>of</strong> the<br />
crack growth rates diagram (Paris’ regime), the resulting da/dN vs. G relation was not valid for<br />
unstable crack growth observed during the experiment <strong>of</strong> the H45 STT specimens <strong>and</strong> produced<br />
incorrect results.<br />
To validate the 3D fatigue crack growth numerical scheme, it was used to simulate fatigue crack<br />
growth in s<strong>and</strong>wich panels with a circular debond. <strong>Fatigue</strong> tests were carried out on a limited<br />
number <strong>of</strong> debonded s<strong>and</strong>wich panel specimens with a circular face/core debond at the centre<br />
with H45 PVC core <strong>and</strong> glass/polyester face sheets. It was observed that the crack initially kinks<br />
into the core <strong>and</strong> continues to propagate below the resin-rich core cells at the core. Because <strong>of</strong> a<br />
similar mode-mixity at the crack tip <strong>and</strong> similar face/core materials, da/dN vs. G relations from<br />
the MMB tests obtained previously were employed as input to the crack growth routine. A<br />
convergence analysis was conducted for different control parameter values to choose appropriate<br />
132
control parameters. Simulations <strong>of</strong> the debonded s<strong>and</strong>wich panels showed fair accuracy<br />
compared to the fatigue experiments with a maximum deviation <strong>of</strong> 7 mm in determination <strong>of</strong> the<br />
debond diameter. This deviation can be attributed to the crude crack length measurement<br />
technique using the DIC technique, which was based on out-<strong>of</strong>-plane deflections <strong>of</strong> the debond<br />
<strong>and</strong> scatter <strong>of</strong> the input crack growth rates data.<br />
The presented 2D <strong>and</strong> 3D accelerated fatigue crack growth schemes proved to be reliable tools<br />
for the simulation <strong>of</strong> stable fatigue crack growth. However, for highly non-linear problems the<br />
presented method should be used more carefully. To reduce the uncertainties concerning the<br />
simulation <strong>of</strong> highly non-linear problems, a convergence sensitivity analysis must be carried out<br />
due to a strong dependency <strong>of</strong> the accuracy <strong>of</strong> the cycle jump method on the control parameters.<br />
6.4 Future Works<br />
This thesis was an effort to develop different methodologies for studying with the residual<br />
strength <strong>and</strong> fatigue lifetime <strong>of</strong> debonded s<strong>and</strong>wich composites. The study was carried out at two<br />
main levels:<br />
1) A material level by characterisation <strong>of</strong> face/core interface behaviour <strong>of</strong> foam cored<br />
s<strong>and</strong>wich composites under static or cyclic loading.<br />
2) A structural level by finite element modelling <strong>and</strong> testing <strong>of</strong> debonded s<strong>and</strong>wich<br />
columns, panels, <strong>and</strong> X-joints.<br />
At the material level different types <strong>of</strong> PVC foam/GFRP interfaces were characterised under<br />
static or cyclic loading at different mode-mixities. The fracture toughness <strong>of</strong> different<br />
foam/GFRP interfaces was determined by use <strong>of</strong> TSD <strong>and</strong> MMB specimens for a full range <strong>of</strong><br />
negative mode-mixity phase angles. However, the fatigue characterisation <strong>of</strong> the face/core<br />
interface was only conducted for one negative mode-mixity phase angle. A full fatigue<br />
characterisation <strong>of</strong> a face/core interface for a large range <strong>of</strong> mode-mixities is necessary for a<br />
general use <strong>of</strong> the proposed fatigue crack growth simulation scheme. Furthermore, in this thesis<br />
only linear elastic fracture mechanics was employed for determination <strong>of</strong> fracture parameters,<br />
which is not valid where the fracture process zone is large compared to the dimensions <strong>of</strong> the<br />
specimen, e.g. when fibre bridging occurs, which was <strong>of</strong>ten observed in the testing <strong>of</strong> interfaces<br />
with heavier foams. Cohesive zone modelling utilising cohesive laws along with a kinking<br />
criterion can be incorporated in the developed fatigue crack growth scheme to simulate kinking<br />
<strong>and</strong> fatigue crack growth in the presence <strong>of</strong> fibre bridging.<br />
In Chapter 4 a very short analysis <strong>of</strong> the distribution <strong>of</strong> the mode III energy release along the<br />
debond front in debonded s<strong>and</strong>wich panels was presented. Results showed that in some cases the<br />
mode III effects are significant <strong>and</strong> need to be taken into account. However, there have not been<br />
many studies addressing the mode III loading problem at the crack tip in a bimaterial interface.<br />
133
Development <strong>of</strong> testing methods for measuring the effect <strong>of</strong> mode III loading at the crack tip on<br />
fracture toughness <strong>and</strong> fatigue crack growth rates, is necessary for the development <strong>of</strong> accurate<br />
damage assessment tools for analysis <strong>of</strong> the residual strength <strong>and</strong> lifetime <strong>of</strong> debonded s<strong>and</strong>wich<br />
composites.<br />
In the last chapters <strong>of</strong> the thesis, fatigue experiments were conducted on s<strong>and</strong>wich panels with a<br />
circular debond to validate the developed 3D numerical scheme. However, to fully examine the<br />
effectiveness <strong>of</strong> the developed numerical scheme <strong>and</strong> its limitations, more experiments on more<br />
complex geometries like curved structures <strong>and</strong> loading conditions, such as e.g. lateral pressure<br />
<strong>and</strong> in-plane compression, should be conducted. Additionally, since direct access to the crack in<br />
debonded panels is not possible, methods <strong>of</strong> measurement such as FBG sensors or ultra-sonics<br />
should be used instead <strong>of</strong> DIC technique to obtain better measurement <strong>of</strong> the debond growth.<br />
Different finite element based models have been put forward in this thesis based on fracture<br />
mechanics tools. However, all these models are limited to very simple, small geometries due to<br />
the need for high-density mesh at the crack tip (front) <strong>and</strong> practical/geometrical limitations<br />
regarding the generation <strong>of</strong> 3D finite element models in complex large geometries. In summary,<br />
in the case <strong>of</strong> damage assessment <strong>of</strong> large structures the global response <strong>of</strong> the structure should<br />
be accounted for in these models making the resulting finite element model extremely<br />
computationally heavy. An important step in further development <strong>of</strong> the devised damage<br />
assessment schemes is to develop new methodologies for the analysis <strong>of</strong> delamination/debonding<br />
in composite structures, taking into account the global response <strong>of</strong> the structures. The<br />
submodelling concept, as used in Chapters 2 <strong>and</strong> 3 <strong>of</strong> this thesis, can be used in a new way which<br />
allows for coupling between the global response <strong>of</strong> the structure <strong>and</strong> the local effects <strong>of</strong> the<br />
damage. As schematically described in Figure 6.1, an iterative procedure may be devised which<br />
couples the global complete model <strong>of</strong> structures <strong>and</strong> a detailed model <strong>of</strong> the damaged region as<br />
developed in this thesis. The global stiffness properties <strong>and</strong> behaviour <strong>of</strong> a structure, e.g. a wind<br />
turbine blade, can be determined using finite element modelling <strong>of</strong> the blade by shell elements as<br />
the first step. By reducing the stiffness <strong>of</strong> the elements in the damaged zone the effect <strong>of</strong> initial<br />
damage on the global behaviour <strong>of</strong> the structure can be estimated. The displacement boundary<br />
conditions <strong>of</strong> the 3D submodel, detailing the damaged zone <strong>of</strong> the structure, are subsequently<br />
updated on the basis <strong>of</strong> the results from the global shell finite element model by shell to solid<br />
submodelling technique, which is available in most <strong>of</strong> the commercial finite element s<strong>of</strong>tware<br />
like ANSYS. The detailed analysis <strong>of</strong> the damaged zone can be conducted by means <strong>of</strong> state-<strong>of</strong>the-art<br />
fracture mechanics tools developed in this thesis. In the case <strong>of</strong> cyclic loading by<br />
determining the debond growth at the end <strong>of</strong> each cycle (cycle jump), the geometry <strong>of</strong> the<br />
debond can be updated in the global shell model accordingly. Finally, the global shell FE model<br />
<strong>of</strong> the blade can be reconstructed once again <strong>and</strong> the procedure is repeated for the next iteration,<br />
e.g. loading cycle. Thus, it is possible to overcome the scale limitations <strong>and</strong> couple the local<br />
scale effects <strong>of</strong> the debond damage with the global scale response <strong>of</strong> the blade.<br />
134
As an alternative approach to modelling <strong>of</strong> the global structure using shell elements, which may<br />
be computationally expensive, beam cross sectional analysis, see e.g. Blasques et al. (2011), may<br />
be applied to analysis <strong>of</strong> the global response <strong>of</strong> the structure <strong>and</strong> extraction <strong>of</strong> interpolated<br />
boundary conditions in the cutting boundaries <strong>of</strong> the detailed submodel. Moreover, the cross<br />
section stiffness properties <strong>of</strong> the beam are then recomputed based on a 2D finite element<br />
representation <strong>of</strong> the cross section where the shape <strong>of</strong> the debonded area has been updated.<br />
Figure 6.1: Schematic presentation <strong>of</strong> the suggested multi-scale approach to the analysis <strong>of</strong><br />
debond damaged s<strong>and</strong>wich structures.<br />
135
This page is intentionally left blank.<br />
136
References<br />
Avery J. L., <strong>and</strong> Sankar B. V. (2000), Compressive Failure <strong>of</strong> S<strong>and</strong>wich Beams with Debonded<br />
Face Sheets, Journal <strong>of</strong> Composite Materials, 34: 1176-1199.<br />
Avilés F. <strong>and</strong> Carlsson L. A. (2007), Post-Buckling <strong>and</strong> Debond Propagation in Panels Subjected<br />
to In-Plane Loading, Engineering Fracture <strong>Mechanics</strong>, 74: 794-806.<br />
Avilés F. <strong>and</strong> Carlsson L. A. (2008), Analysis <strong>of</strong> the S<strong>and</strong>wich DCB Specimens for Debond<br />
Characterization, Engineering Fracture <strong>Mechanics</strong>, 75:153–68.<br />
Aviles, F. <strong>and</strong> Carlsson, L. A. (2006), Experimental Study <strong>of</strong> Debonded S<strong>and</strong>wich Panels under<br />
Compressive Loading, Journal <strong>of</strong> S<strong>and</strong>wich Structures & Materials, 8(1): 7-31.<br />
Berggreen C. <strong>and</strong> Carlsson L. A. (2010), A Modified TSD Specimen for Fracture Toughness<br />
Characterization - Fracture <strong>Mechanics</strong> Analysis <strong>and</strong> Design, Journal <strong>of</strong> Composite Materials,<br />
44(15): 1893-1912.<br />
Berggreen C. <strong>and</strong> Simonsen B. (2005), Non-Uniform Compressive <strong>Strength</strong> <strong>of</strong> Debonded<br />
S<strong>and</strong>wich Panels - II. Fracture <strong>Mechanics</strong> Investigation, Journal <strong>of</strong> S<strong>and</strong>wich Structures <strong>and</strong><br />
Materials, 7(6): 483-517.<br />
Berggreen C., Simonsen B. <strong>and</strong> Borum K. (2007), Experimental <strong>and</strong> Numerical Study <strong>of</strong><br />
Interface Crack Propagation in Foam-Cored S<strong>and</strong>wich Beams, Journal <strong>of</strong> Composite Materials,<br />
41: 493-520.<br />
Berkowitz K. C. <strong>and</strong> Johnson W. (2005), Fracture <strong>and</strong> <strong>Fatigue</strong> Tests <strong>and</strong> Analysis <strong>of</strong> Composite<br />
S<strong>and</strong>wich Structure, Journal <strong>of</strong> Composite Materials, 39(16): 1417-1431.<br />
Beuth J. L. (1996), Separation <strong>of</strong> Crack Extension Modes in Orthotropic Delamination Models,<br />
International Journal <strong>of</strong> Fracture, 77: 305-321.<br />
Bezazi A., Mahi A. E., Berthelot J. M. <strong>and</strong> Bezzazi B. (2007), Experimental Analysis <strong>of</strong><br />
Behavior <strong>and</strong> Damage <strong>of</strong> S<strong>and</strong>wich Composite Materials in Three-Point Bending Part 1: Static<br />
Tests <strong>and</strong> Stiffness Degradation at Failure Studies, <strong>Strength</strong> <strong>of</strong> Materials, 39(2): 170-177.<br />
137
Bezazi A., Mahi A. E., Berthelot J. M. <strong>and</strong> Bezzazi B. (2009), Experimental Analysis <strong>of</strong><br />
Behavior <strong>and</strong> Damage <strong>of</strong> S<strong>and</strong>wich Composite Materials in Three-Point Bending Part 2: <strong>Fatigue</strong><br />
Test Results <strong>and</strong> Damage Mechanisms, <strong>Strength</strong> <strong>of</strong> Materials, 41(3): 257-267.<br />
Billardon R. (1989), Etude de la rupture par la mecanique de I’endommagement, These de<br />
Doctorat es Sciences, Universite Paris 6.<br />
Blasques, J. P., Stolpe, M. (2011), Multi-Material Topology Optimization <strong>of</strong> Laminated<br />
Composite Beam Cross Sections, International Journal for Numerical Methods in Engineering,<br />
(submitted).<br />
Boisse P., Bussy P. <strong>and</strong> Ladeveze P. (1990), A New Approach in Nonlinear <strong>Mechanics</strong> – the<br />
Large Time Increment Method, International Journal <strong>of</strong> Numerical Methods in Engineering, 29:<br />
647–663.<br />
Bozhevolnaya E., Jakobsen J. <strong>and</strong> Thomsen O. T. (2009), <strong>Fatigue</strong> Performance <strong>of</strong> S<strong>and</strong>wich<br />
Beams With Peel Stoppers, Strain, 45: 349–357.<br />
Burman M. <strong>and</strong> Zenkert D. (1997), <strong>Fatigue</strong> <strong>of</strong> Foam Core S<strong>and</strong>wich Beams, Part I: Undamaged<br />
Specimens, International Journal <strong>of</strong> <strong>Fatigue</strong>, 19: 551–561.<br />
Burman M. <strong>and</strong> Zenkert D. (1997), <strong>Fatigue</strong> <strong>of</strong> Foam Core S<strong>and</strong>wich Beams, Part II: Effect <strong>of</strong><br />
Initial Damages, International Journal <strong>of</strong> <strong>Fatigue</strong>, 19: 563–578.<br />
Burman M. <strong>and</strong> Zenkert D. (2000), <strong>Fatigue</strong> <strong>of</strong> Undamaged <strong>and</strong> Damaged Honeycomb S<strong>and</strong>wich<br />
Beams, Journal <strong>of</strong> S<strong>and</strong>wich Structures <strong>and</strong> Materials, 2: 50-74.<br />
Burman, M. (1998), <strong>Fatigue</strong> Crack Initiation <strong>and</strong> Propagation in S<strong>and</strong>wich Structures, Doctoral<br />
Thesis, Department <strong>of</strong> Aeronautics, Royal Institute <strong>of</strong> Technology.<br />
Cantwell W. J. <strong>and</strong> Davies P. (1994), A Test Technique for Assessing Core-Skin Adhesion in<br />
Composite S<strong>and</strong>wich Structures, Journal <strong>of</strong> Material Science Letters, 13: 203–205.<br />
Cantwell W. J. <strong>and</strong> Davies P. (1996), A Study <strong>of</strong> Skin-Core Adhesion in Composite S<strong>and</strong>wich<br />
Materials, Advanced Composite Materials, 3: 407-420.<br />
Cantwell W. J., Scudamore R., Ratcliffe J. <strong>and</strong> Davies P. (1999), Interfacial Fracture in<br />
S<strong>and</strong>wich Laminates, Composites Science <strong>and</strong> Technology, 59: 2079–2085.<br />
Carlsson L. A, Sendlein L. S, <strong>and</strong> Merry S. L. (1991), Characterization <strong>of</strong> Face/Core Shear<br />
Fracture <strong>of</strong> Composite S<strong>and</strong>wich Beams, Journal <strong>of</strong> Composite Materials, 25(1):101–16.<br />
Chen H. <strong>and</strong> Bai, R. (2002), Postbuckling Behavior <strong>of</strong> Face/Core Debonded Composite<br />
S<strong>and</strong>wich Plate Considering Matrix Crack <strong>and</strong> Contact Effect, Composite structures, 57: 305-<br />
313.<br />
138
Cognard J. Y., Ladeveze P. <strong>and</strong> Talbot P. (1999), A Large Time Increment Approach for<br />
Thermo-Mechanical Problems, Advances in Engineering S<strong>of</strong>tware, 30: 583–93.<br />
Cojocaru D. <strong>and</strong> Karlsson A. M. (2006), A Simple Numerical Method <strong>of</strong> Cycle Jumps for<br />
Cyclically Loaded Structures, International Journal <strong>of</strong> <strong>Fatigue</strong>, 28: 1677–1689.<br />
DIAB, Divinycell H Technical Data, Laholm. From: http://www.diabgroup.com.<br />
Engl<strong>and</strong> A. H. (1965), A Crack Between Dissimilar Media, Journal <strong>of</strong> Applied <strong>Mechanics</strong>, (32)<br />
400-402.<br />
Erdogan F. (1963), Stress Distribution in a Nonhomogeneous Elastic Plane with Cracks, Journal<br />
<strong>of</strong> Applied <strong>Mechanics</strong>, 30: 232-237.<br />
Fish J. <strong>and</strong> Yu Q. (2002), Computational <strong>Mechanics</strong> <strong>of</strong> <strong>Fatigue</strong> <strong>and</strong> Life Predictions for<br />
Composite Materials <strong>and</strong> Structures, Computational Methods in Applied Mechanical<br />
Engineering, 191: 4827–4849.<br />
Gaudenzi P., Perugini P. <strong>and</strong> Riccio A. (2001), Post-buckling Behavior <strong>of</strong> Composite Panels in<br />
the Presence <strong>of</strong> Unstable Delaminations, Composite Structures, 51(3): 301-309.<br />
Hayman B., Berggreen C., Lundsgaard-Larsen C., Karlsen K. <strong>and</strong> Jenstrup C. (2007), Design <strong>of</strong><br />
X-joints in S<strong>and</strong>wich Structures for Naval Vessels, 10th International Symposium on Practical<br />
Design <strong>of</strong> Ships <strong>and</strong> Other Floating Structures, Houston, USA.<br />
Hayman B. (2007), Approaches to Damage Assessment <strong>and</strong> Damage Tolerance for FRP<br />
S<strong>and</strong>wich Structures, Journal <strong>of</strong> S<strong>and</strong>wich Structures & Materials, 9(6): 571-596.<br />
Hayman B., Berggreen C. <strong>and</strong> Petterson R. (2007), Tests <strong>and</strong> Analyses <strong>of</strong> FRP S<strong>and</strong>wich<br />
Structures with Face Sheet Wrinkles, Journal <strong>of</strong> S<strong>and</strong>wich Structures <strong>and</strong> Materials, 9(4): 377-<br />
404.<br />
He M. And Hutchinson, J. W. (1989), Kinking <strong>of</strong> a Crack out <strong>of</strong> an Interface, Transactions <strong>of</strong> the<br />
ASME, 54:270-278.<br />
Hellen T.K. (1975), On the Method <strong>of</strong> Virtual Crack Extensions, International Journal <strong>of</strong><br />
Numerical Methods in Engineering, 9: 187-207.<br />
H<strong>of</strong>f N. J. <strong>and</strong> Mautner S. E. (1945), The Buckling <strong>of</strong> S<strong>and</strong>wich-type Panels, Journal <strong>of</strong> the<br />
Aeronautical Sciences, 12: 285–297.<br />
Hohe J. <strong>and</strong> Becker W. (2001), Assessment <strong>of</strong> The Delamination Hazard <strong>of</strong> the Core Face Sheet<br />
Bond in Structural S<strong>and</strong>wich Panels, International Journal <strong>of</strong> Fracture, 109: 413-432.<br />
Hutchinson J. W. <strong>and</strong> Suo Z. (1992), Mixed Mode Cracking in Layered Materials, Advances<br />
in Applied <strong>Mechanics</strong>, 29: 63-191.<br />
Jolma P., Segercrantz S. <strong>and</strong> Berggreen C. (2007), Ultimate Failure <strong>of</strong> Debond Damaged<br />
S<strong>and</strong>wich Panels Loaded with Lateral Pressure - An Experimental <strong>and</strong> Fracture <strong>Mechanics</strong><br />
Study, Journal <strong>of</strong> S<strong>and</strong>wich Structures <strong>and</strong> Materials, 9 (2): 167-196.<br />
139
Kanny K. <strong>and</strong> Mahfuz H. (2005), Flexural <strong>Fatigue</strong> Characteristics <strong>of</strong> S<strong>and</strong>wich Structures at<br />
Different Loading Frequencies, Composite Structures, 67: 403–410.<br />
Kanny K., Mahfuz H., Carlsson L. A., Thomas T. <strong>and</strong> Jeelani S. (2002), Dynamic Mechanical<br />
Analyses <strong>and</strong> Flexural <strong>Fatigue</strong> <strong>of</strong> PVC Foams, Composite Structures, 58(2): 175-183.<br />
Kardomateas G. A., Huang H. (2003), The Initial Postbuckling Behavior <strong>of</strong> Face sheet<br />
Delaminations in S<strong>and</strong>wich Composites, Journal <strong>of</strong> Applied <strong>Mechanics</strong> (ASME), 70: 191-199.<br />
Kiewel H., Aktaa J. <strong>and</strong> Munz D. (2000), Application <strong>of</strong> an Extrapolation Method in Thermocyclic<br />
Failure Analysis, Computational Methods in Applied Mechanical Engineering, 182: 55–<br />
71.<br />
Kiyak Y., Fedelich B., May T. <strong>and</strong> Pfennig A. (2008), Simulation <strong>of</strong> Crack Growth Under Low<br />
Cycle <strong>Fatigue</strong> at High Temperature in a Single Crystal Superalloy, Engineering Fracture<br />
<strong>Mechanics</strong>, 75 (8): 2418-2443.<br />
Kulkarni N., Mahfuz H., Jeelani S. <strong>and</strong> Carlsson L. A. (2003), <strong>Fatigue</strong> Crack Growth <strong>and</strong> Life<br />
Prediction <strong>of</strong> Foam Core S<strong>and</strong>wich Composites under Flexural Loading, Composite Structures,<br />
59: 499–505.<br />
Li X. <strong>and</strong> Carlsson L. A. (1999), The Tilted S<strong>and</strong>wich Debond (TSD) Specimen for Face/Core<br />
Interface Fracture Characterization, Journal <strong>of</strong> S<strong>and</strong>wich Structures <strong>and</strong> Materials, 1: 60-75.<br />
Li X. <strong>and</strong> Carlsson L. A. (2001), Fracture <strong>Mechanics</strong> Analysis <strong>of</strong> the Tilted S<strong>and</strong>wich Debond<br />
(TSD) Specimen, Journal <strong>of</strong> Composite Materials, 35(23):2145–68.<br />
Liechti, K. M. <strong>and</strong> Chai Y. S. (1992), Asymmetric Shielding in Interfacial Fracture Under Inplane<br />
Shear, Journal <strong>of</strong> Applied <strong>Mechanics</strong>, 59(2):295-305.<br />
Liu L. <strong>and</strong> Holmes J. W. (2007), Experimental Investigation <strong>of</strong> <strong>Fatigue</strong> Crack Growth in Thin-<br />
Foil Ni-Base S<strong>and</strong>wich Structures, International Journal <strong>of</strong> <strong>Fatigue</strong>, 29(8): 1452–1464.<br />
Lundsgaard-Larsen C., Berggreen C. <strong>and</strong> Carlsson L. A. (2010), Tailoring S<strong>and</strong>wich Face/Core<br />
Interfaces for Improved Damage Tolerance: Part I: Finite Element Analysis, Applied Composite<br />
Materials, 17(6): 609-619.<br />
Lundsgaard-Larsen C., Berggreen C. <strong>and</strong> Carlsson L. A. (2010), Tailoring S<strong>and</strong>wich Face/Core<br />
Interfaces for Improved Damage Tolerance: Part II: Experiments, Applied Composite Materials,<br />
17(6): 621-637.<br />
Lundsgaard-Larsen C., Sørensen B. F., Berggreen C. <strong>and</strong> Østergaard R. C. (2008), A Modified<br />
DCB S<strong>and</strong>wich Specimen for Measuring Mixed-Mode Cohesive Laws, Engineering Fracture<br />
<strong>Mechanics</strong>, 75(8): 2514-2530.<br />
Mahi A. E., Khawar M., Sahraoui S. <strong>and</strong> Bezazi A. (2004), Modeling the Flexural Behavior <strong>of</strong><br />
S<strong>and</strong>wich Composite Materials under Cyclic <strong>Fatigue</strong>, Materials <strong>and</strong> Design, 25(3): 199–208.<br />
140
Maziere M. <strong>and</strong> Fedelich, B. (2010), Simulation <strong>of</strong> <strong>Fatigue</strong> Crack Growth by Crack Tip Plastic<br />
Blunting Using Cohesive Zone Elements, Procedia Engineering, 2 (1): 2055-2064.<br />
Nøkkentved A., Lundsgaard-Larsen C. <strong>and</strong> Berggreen C. (2005), Non-Uniform Compressive<br />
<strong>Strength</strong> <strong>of</strong> Debonded S<strong>and</strong>wich Panels - I. Experimental Investigation, Journal <strong>of</strong> S<strong>and</strong>wich<br />
Structures <strong>and</strong> Materials, 7(6): 461-482.<br />
Østergaard R. C. (2008), Buckling Driven Debonding in S<strong>and</strong>wich Columns, International<br />
Journal <strong>of</strong> solids <strong>and</strong> structures, 45: 1264-1282.<br />
Østergaard R. C., Sørensen B. F. <strong>and</strong> Brøndsted P. (2007), Measurement <strong>of</strong> Interface Fracture<br />
Toughness <strong>of</strong> S<strong>and</strong>wich Structures under Mixed Mode Loadings, Journal <strong>of</strong> S<strong>and</strong>wich Structures<br />
<strong>and</strong> Materials, 9 (5): 445-466.<br />
Ozdil F. <strong>and</strong> Carlsson L. A. (2000), Characterization <strong>of</strong> Mixed Mode Delamination Growth in<br />
Glass/Epoxy Composite Cylinders, Journal <strong>of</strong> Composite Material, 34(05):420–41.<br />
Parks D. M. (1974), A Stiffness derivative Finite Element Technique for Determination <strong>of</strong> Crack<br />
Tip Stress Intensity Factors, International Journal <strong>of</strong> Fracture., 10: 487-502.<br />
Prasad S. <strong>and</strong> Carlsson L. A. (1994), Debonding <strong>and</strong> Crack Kinking in Foam Core S<strong>and</strong>wich<br />
Beam-I, Analysis <strong>of</strong> Fracture Specimens, Engineering Fracture <strong>Mechanics</strong>, 47:813–24.<br />
Prasad S. <strong>and</strong> Carlsson L. A. (1994), Debonding <strong>and</strong> Crack Kinking in Foam Core S<strong>and</strong>wich<br />
Beam-II: Experimental Investigation, Engineering Fracture <strong>Mechanics</strong>, 47:825–41.<br />
Quispitupa A. <strong>and</strong> Shafiq B. (2006), <strong>Fatigue</strong> Characteristics <strong>of</strong> Foam Core S<strong>and</strong>wich<br />
Composites, International Journal <strong>of</strong> <strong>Fatigue</strong>, 28(1): 96–102.<br />
Quispitupa A., Berggreen C. <strong>and</strong> Carlsson L. A. (2008), <strong>Fatigue</strong> Debond Growth in S<strong>and</strong>wich<br />
Structures Loaded in Mixed Mode Bending, 13th European Conference on Composite Materials<br />
ECCM-13, June 2-5, Stockholm, Sweden.<br />
Quispitupa A., Berggreen C. <strong>and</strong> Carlsson L. A. (2009), On the Analysis <strong>of</strong> a Mixed Mode<br />
Bending S<strong>and</strong>wich Specimen for Debond Fracture Characterization, Engineering Fracture<br />
<strong>Mechanics</strong>, 76(4): 594–613.<br />
Quispitupa A., Berggreen C. <strong>and</strong> Carlsson L. A. (2010), Design Analysis <strong>of</strong> the Mixed Mode<br />
Bending S<strong>and</strong>wich Specimen, Journal <strong>of</strong> S<strong>and</strong>wich Structures, 12(2): 253-272.<br />
Quispitupa A., Berggreen C. And Carlsson L. A. (2011), Face/core Interface Fracture<br />
Characterization <strong>of</strong> Mixed Mode Bending S<strong>and</strong>wich Specimens, <strong>Fatigue</strong> & Fracture<br />
<strong>of</strong>Engineering Materials & Structures, 1–15<br />
Ramanujam N., Vaddadi P., Nakamura T. <strong>and</strong> Singh P. (2008), Interlaminar <strong>Fatigue</strong> Crack<br />
Growth <strong>of</strong> Cross-Ply Composites Under Thermal Cycles, Composite Structures, 85: 175–187.<br />
141
Ratcliffe J. <strong>and</strong> Cantwell W. J. (2001), Center Notched Flexure S<strong>and</strong>wich Geometry for<br />
Characterizing Skin–Core Adhesion in Thin-Skinned S<strong>and</strong>wich Structures, Journal <strong>of</strong><br />
Reinforced Plastics <strong>and</strong> Composites, 20(11): 945–70.<br />
Reeder J. <strong>and</strong> Crews J. H. (1990), Mixed-Mode Bending Method for Delamination Testing,<br />
AIAA Journal, 28(7):1270–6.<br />
Riccio A., Perugini P. <strong>and</strong> Scaramuzzino F. (2001), Embedded Delamination Growth in<br />
Composite Panels under Compressive Load, Composites Part B – Engineering, 32(3): 209-218.<br />
Sallam S. <strong>and</strong> Simitses G. J. (1985), Delamination Buckling <strong>and</strong> Growth <strong>of</strong> Flat, Cross/ply<br />
Laminates, Composite Structures, 4(4): 361-381.<br />
Sankar B. V. <strong>and</strong> Narayan M. (2001), Finite Element Analysis <strong>of</strong> Debonded S<strong>and</strong>wich Beams<br />
Under Axial Compression, Journal <strong>of</strong> s<strong>and</strong>wich structures <strong>and</strong> materials, 3: 197-219.<br />
Shen F., Lee K. <strong>and</strong> Tay T. (2001), Modeling Delamination Growth in Laminated Composites,<br />
Composite Science <strong>and</strong> Technology, 61: 1239–1251.<br />
Shenoi R. A., Clark S. D. <strong>and</strong> Allen H. G. (1995), <strong>Fatigue</strong> Behavior <strong>of</strong> Polymer Composite<br />
S<strong>and</strong>wich Beams, Journal <strong>of</strong> Composite Materials, 29: 2423–2445.<br />
Shi Z. <strong>and</strong> Zhang R. (2009), Numerical Simulation <strong>of</strong> Interfacial Crack Growth Under <strong>Fatigue</strong><br />
Load, <strong>Fatigue</strong> Fracture in Engineering Materials & Structures, 32: 26–32.<br />
Shipsha A. <strong>and</strong> Zenkert D. (2003), <strong>Fatigue</strong> Behaviour <strong>of</strong> Foam Core S<strong>and</strong>wich Beams with Sub-<br />
Interface Impact Damage, Journal <strong>of</strong> S<strong>and</strong>wich Structures <strong>and</strong> Materials, 5(1): 147-160.<br />
Shipsha A., Burman M. <strong>and</strong> Zenkert D. (1999), Interfacial <strong>Fatigue</strong> Crack Growth in Foam Core<br />
S<strong>and</strong>wich Structures, <strong>Fatigue</strong> <strong>and</strong> Fracture <strong>of</strong> Engineering Materials <strong>and</strong> Structures, 22: 123-<br />
131.<br />
Shipsha, A., Burman, M. <strong>and</strong> Zenkert, D. (2000), On Mode I <strong>Fatigue</strong> Crack Growth in Foam<br />
Core Materials for S<strong>and</strong>wich Structures, Journal <strong>of</strong> S<strong>and</strong>wich Structures & Materials, 2(2): 103-<br />
116.<br />
Sou Z. (1990), Singularities, Interfaces <strong>and</strong> Cracks in Dissimilar Anisotropic Media,<br />
Proceedings <strong>of</strong> the Royal Society <strong>of</strong> London, 427: 331-358.<br />
Southwell R. (1932), On the Analysis <strong>of</strong> Experimental Observations in Problems <strong>of</strong> Elastic<br />
Stability, Proceedings <strong>of</strong> the Royal Society <strong>of</strong> London, 601–616.<br />
Suo, Z. (1989), Singularities Interacting with Interface <strong>and</strong> Cracks. International Journal <strong>of</strong><br />
<strong>Solid</strong>s <strong>and</strong> Structures, 25: 1133-1142.<br />
142
Suo, Z. (1990), Singularities, Interfaces <strong>and</strong> Cracks in Dissimilar Anisotropic Media, Proc.<br />
Royal Society <strong>of</strong> London, A(427): 331-358.<br />
Vadakke V. <strong>and</strong> Carlsson L. A. (2004), Experimental Investigation <strong>of</strong> Compression Failure <strong>of</strong><br />
S<strong>and</strong>wich Specimens with Face/Core Debond, Composites Part B: Engineering, 35: 583-590.<br />
Van Paepegem W., Degrieck J. <strong>and</strong> De Baets P. (2001), Finite Element Approach for Modeling<br />
<strong>Fatigue</strong> Damage in Fiber-Reinforced Composite Materials, Composites Part B – Engineering,<br />
32: 575–88.<br />
Veedu V. <strong>and</strong> Carlsson L. A. (2005), Finite Element Buckling Analysis <strong>of</strong> S<strong>and</strong>wich Columns<br />
Containing a Face/Core Debond, Composite Structures, 69(2): 143–148.<br />
Williams M. L. (1959), The Stresses Around a Fault or Crack in Dissimilar Media, Bull.<br />
Seismological Sot. America, 49: 199-404.<br />
Xie Z. <strong>and</strong> Vizzini A. J. (2005), Damage Propagation in a Composite S<strong>and</strong>wich Panel Subjected<br />
to Increasing Uniaxial Compression after Low-Velocity Impact, Journal <strong>of</strong> s<strong>and</strong>wich structures<br />
<strong>and</strong> materials, 7: 269-290.<br />
Zenkert D, Burman M. (2008), Tension, Compression <strong>and</strong> Shear <strong>Fatigue</strong> <strong>of</strong> a Closed Foam,<br />
Composite Science <strong>and</strong> Technology, 69: 785–92.<br />
Zenkert D. (1997), An Introduction to S<strong>and</strong>wich Construction, London: EMAS.<br />
Zenkert D. And Burman M. (2010), <strong>Fatigue</strong> <strong>of</strong> Closed Cell Foams in Compression, Journal <strong>of</strong><br />
S<strong>and</strong>wich Structures <strong>and</strong> Materials, 13(4): 467-478.<br />
Zenkert D. <strong>and</strong> Burman M. (2011), Failure Mode Shifts During Constant Amplitude <strong>Fatigue</strong><br />
Loading <strong>of</strong> GFRP/Foam Core S<strong>and</strong>wich Beams, International Journal <strong>of</strong> <strong>Fatigue</strong>, 33: 217–222.<br />
143
This page is intentionally left blank.<br />
144
Appendix A<br />
Additional Results from the Column Compression Tests<br />
In this appendix additional results from the compression tests performed on debonded columns<br />
studied in Chapter 2 are presented.<br />
A.1 Debonded Columns with H45 Core<br />
In this section the axial displacement vs. load <strong>and</strong> load vs. out-<strong>of</strong>-plane displacement curves <strong>of</strong><br />
the columns with H45 core are presented. The out-<strong>of</strong>-plane deflection refers to the centre <strong>of</strong> the<br />
debond.<br />
Load (kN)<br />
16<br />
12<br />
8<br />
4<br />
0<br />
12<br />
8<br />
(a) (b) (c)<br />
Column 1<br />
Column 2<br />
Column 3<br />
0 0.5 1 1.5 2<br />
Axial Displacement (mm)<br />
Load (kN)<br />
8<br />
4<br />
0<br />
0 0.5 1 1.5 2<br />
Axial Displacement (mm)<br />
Figure A.1: Axial displacement vs. load for the H45 columns with a debond length <strong>of</strong> (a) 25.4<br />
mm, (b) 38.1 mm <strong>and</strong> (c) 50.8 mm.<br />
145<br />
Column 1<br />
Column 2<br />
Column 3<br />
Load (kN)<br />
6<br />
4<br />
2<br />
0<br />
Column 1<br />
Column 2<br />
0 0.2 0.4 0.6<br />
Axial Displacement (mm)
Out-<strong>of</strong>-plane displacement (mm)<br />
1<br />
0.8<br />
0.6<br />
0.4<br />
0.2<br />
0<br />
3<br />
3<br />
(a) (b) (c)<br />
Column 1<br />
Column 2<br />
Column 3<br />
0 4 8 12 16<br />
Load (kN)<br />
Out-<strong>of</strong>-plane displacement (mm)<br />
Figure A.2: Load vs. out-<strong>of</strong>-plane displacement for the H45 columns with a debond length <strong>of</strong><br />
(a) 25.4 mm, (b) 38.1 mm <strong>and</strong> (c) 50.8 mm.<br />
A.2 Debonded Columns with H100 Core<br />
2<br />
1<br />
0<br />
Column 1<br />
Column 2<br />
Column 3<br />
0 3 6 9 12<br />
Load (kN)<br />
In this section the axial displacement vs. load <strong>and</strong> load vs. out-<strong>of</strong>-plane displacement curves <strong>of</strong><br />
the columns with H100 core are presented. The out-<strong>of</strong>-plane deflection refers to the centre <strong>of</strong> the<br />
debond.<br />
Load (kN)<br />
16<br />
12<br />
8<br />
4<br />
0<br />
12<br />
10<br />
(a) (b) (c)<br />
Column 1<br />
Column 2<br />
Column 3<br />
0 0.3 0.6 0.9 1.2<br />
Axial Displacement (mm)<br />
Load (kN)<br />
9<br />
6<br />
3<br />
0<br />
Figure A.3: Axial displacement vs. load for the H100 columns with a debond length <strong>of</strong> (a)<br />
25.4 mm, (b) 38.1 mm <strong>and</strong> (c) 50.8 mm.<br />
146<br />
Column 1<br />
Column 2<br />
Column 3<br />
0 0.3 0.6 0.9 1.2<br />
Axial Displacement (mm)<br />
Out-<strong>of</strong>-plane displacement (mm)<br />
Load (kN)<br />
2.4<br />
1.8<br />
1.2<br />
0.6<br />
8<br />
6<br />
4<br />
2<br />
0<br />
0<br />
Column 1<br />
Column 2<br />
0 2 4<br />
Load (kN)<br />
6<br />
Column 1<br />
Column 2<br />
0 0.3 0.6 0.9 1.2<br />
Axial Displacement (mm)
Out-<strong>of</strong>-plane displacement (mm)<br />
3<br />
2<br />
1<br />
0<br />
3<br />
3<br />
(a) (b) (c)<br />
Column1<br />
Column2<br />
0 4 8<br />
Load (kN)<br />
12 16<br />
Out-<strong>of</strong>-plane displacement (mm)<br />
Figure A.4: Load vs. out-<strong>of</strong>-plane displacement for the H100 columns with a debond length <strong>of</strong><br />
(a) 25.4 mm, (b) 38.1 mm <strong>and</strong> (c) 50.8 mm.<br />
A.3 Debonded Columns with H200 Core<br />
2<br />
1<br />
0<br />
Column1<br />
Column2<br />
Column3<br />
0 3 6 9 12<br />
Load (kN)<br />
In this section the axial displacement vs. load <strong>and</strong> load vs. out-<strong>of</strong>-plane displacement curves <strong>of</strong><br />
the columns with H200 core are presented. The out-<strong>of</strong>-plane deflection refers to the centre <strong>of</strong> the<br />
debond.<br />
Load (kN)<br />
10<br />
8<br />
6<br />
4<br />
2<br />
0<br />
16<br />
10<br />
(a) (b) (c)<br />
Column 1<br />
Column 2<br />
Column 3<br />
0 0.2 0.4 0.6 0.8 1<br />
Axial Displacement (mm)<br />
Load (kN)<br />
12<br />
8<br />
4<br />
0<br />
Figure A.5: Axial displacement vs. load for the H200 columns with a debond length <strong>of</strong> (a) 25.4<br />
mm, (b) 38.1 mm <strong>and</strong> (c) 50.8 mm.<br />
147<br />
Column 1<br />
Column 2<br />
Column 3<br />
0 0.4 0.8 1.2 1.6<br />
Axial Displacement (mm)<br />
Out-<strong>of</strong>-plane displacement (mm)<br />
Load (kN)<br />
2<br />
1<br />
0<br />
8<br />
6<br />
4<br />
2<br />
0<br />
Column1<br />
Column2<br />
Column3<br />
0 3 6 9<br />
Load (kN)<br />
Column 1<br />
Column 2<br />
Column 3<br />
0 0.2 0.4 0.6 0.8 1<br />
Axial Displacement (mm)
Out-<strong>of</strong>-plane displacement (mm)<br />
3<br />
2<br />
1<br />
0<br />
2<br />
(a) (b)<br />
Column1<br />
Column2<br />
Column3<br />
0 5 10<br />
Load (kN)<br />
15<br />
Figure A.6: Load vs. out-<strong>of</strong>-plane displacement for the H200 columns with a debond length <strong>of</strong><br />
(a) 38.1 mm <strong>and</strong> (b) 50.8 mm.<br />
A.4 Initial Imperfections in Debonded Columns<br />
In this section DIC images <strong>of</strong> initial out-<strong>of</strong>-plane imperfections in columns with H45, H100 <strong>and</strong><br />
H200 core are shown.<br />
Figure A.7: Initial imperfections in columns with H45 core <strong>and</strong> a debond length <strong>of</strong> (a) 25.4<br />
mm, (b) 38.1 mm <strong>and</strong> (c) 50.8 mm.<br />
148<br />
Out-<strong>of</strong>-plane displacement (mm)<br />
1.5<br />
1<br />
0.5<br />
(a) (b)<br />
0<br />
Column1<br />
Column2<br />
Column3<br />
0 3 6<br />
Load (KN)<br />
9<br />
(c)
(a) (b) (c)<br />
Figure A.8: Initial imperfections in columns with H100 core <strong>and</strong> a debond length <strong>of</strong> (a) 25.4<br />
mm, (b) 38.1 mm <strong>and</strong> (c) 50.8 mm.<br />
(a) (b) (c)<br />
Figure A.9: Initial imperfections in columns with H200 core <strong>and</strong> a debond length <strong>of</strong> (a) 25.4<br />
mm, (b) 38.1 mm <strong>and</strong> (c) 50.8 mm.<br />
149
A.5 Out-<strong>of</strong>-plane deflection <strong>of</strong> Debonded Columns<br />
In this section DIC images <strong>of</strong> out-<strong>of</strong>-plane deflection <strong>of</strong> columns with H45, H100 <strong>and</strong> H200 core<br />
are shown before <strong>and</strong> right after debond propagation or face sheet compression failure.<br />
(a)<br />
Figure A.10: Out-<strong>of</strong>-plane deflection from DIC measurements <strong>of</strong> a column with H45 core <strong>and</strong><br />
a debond length <strong>of</strong> 25.4 mm, (a) prior to propagation <strong>and</strong> (b) after propagation.<br />
(a)<br />
Figure A.11: Out-<strong>of</strong>-plane deflection from DIC measurements <strong>of</strong> a column with H45 core <strong>and</strong><br />
a debond length <strong>of</strong> 38.1 mm, (a) prior to propagation <strong>and</strong> (b) after propagation.<br />
150<br />
(b)<br />
(b)
(a)<br />
Figure A.12: Out-<strong>of</strong>-plane deflection from DIC measurements <strong>of</strong> a column with H45 core <strong>and</strong><br />
a debond length <strong>of</strong> 50.8 mm, (a) prior to propagation <strong>and</strong> (b) after propagation.<br />
(a)<br />
Figure A.13: Out-<strong>of</strong>-plane deflection from DIC measurements <strong>of</strong> a column with H100 core<br />
<strong>and</strong> a debond length <strong>of</strong> 25.4 mm, (a) prior to propagation <strong>and</strong> (b) after propagation.<br />
151<br />
(b)<br />
(b)
(a)<br />
Figure A.14: Out-<strong>of</strong>-plane deflection from DIC measurements <strong>of</strong> a column with H100 core<br />
<strong>and</strong> a debond length <strong>of</strong> 38.1 mm, (a) prior to propagation <strong>and</strong> (b) after propagation.<br />
(a)<br />
Figure A.15: Out-<strong>of</strong>-plane deflection from DIC measurements <strong>of</strong> a column with H100 core<br />
<strong>and</strong> a debond length <strong>of</strong> 50.8 mm, (a) prior to propagation <strong>and</strong> (b) after propagation.<br />
152<br />
(b)<br />
(b)
(a)<br />
Figure A.16: Out-<strong>of</strong>-plane deflection from DIC measurements <strong>of</strong> a column with H200 core<br />
<strong>and</strong> a debond length <strong>of</strong> 25.4 mm, (a) prior to face sheet compression failure <strong>and</strong> (b) after face<br />
sheet compression failure.<br />
Figure A.17: Out-<strong>of</strong>-plane deflection from DIC measurements <strong>of</strong> a column with H200 core<br />
<strong>and</strong> a debond length <strong>of</strong> 38.1 mm, (a) prior to propagation <strong>and</strong> (b) after propagation.<br />
153<br />
(b)<br />
(a) (b)
(a) (b)<br />
Figure A.18: Out-<strong>of</strong>-plane deflection from DIC measurements <strong>of</strong> a column with H200 core<br />
<strong>and</strong> a debond length <strong>of</strong> 50.8 mm, (a) prior to propagation <strong>and</strong> (b) after propagation.<br />
154
Appendix B<br />
Additional Results from the Panel Compression Tests<br />
In this appendix additional results from the compression tests performed on debonded s<strong>and</strong>wich<br />
panels studied in Chapter 3 are presented.<br />
B.1 Load vs. In-plane Displacement Curves<br />
In this section load vs. in-plane displacement curves for the tested panels are presented.<br />
Load (kN)<br />
150<br />
100<br />
50<br />
0<br />
200<br />
200<br />
(a) (b) (c)<br />
Panel 1<br />
Panel 2<br />
Panel 3<br />
0 1 2 3 4 5<br />
Displacement (mm)<br />
Load (kN)<br />
150<br />
100<br />
50<br />
0<br />
Panel 1<br />
Panel 2<br />
Panel 3<br />
0 1 2 3 4 5<br />
Displacement (mm)<br />
Figure B.1: Displacement vs. load for panels with PMI core <strong>and</strong> a debond diameter <strong>of</strong> (a) 100<br />
mm, (b) 200 mm <strong>and</strong> (c) 300 mm.<br />
155<br />
Load (kN)<br />
150<br />
100<br />
50<br />
0<br />
Panel 1<br />
Panel 2<br />
Panel 3<br />
0 1 2 3 4 5<br />
Displacement (mm)
Load (kN)<br />
250<br />
200<br />
150<br />
100<br />
50<br />
250<br />
300<br />
(a) (b) (c)<br />
Panel 1<br />
Panel 2<br />
Load (kN)<br />
200<br />
150<br />
100<br />
50<br />
Panel 1<br />
Panel 2<br />
0<br />
0<br />
0<br />
0 2 4 6 0 2 4 6 0 2 4 6 8<br />
Displacement (mm)<br />
Displacement (mm)<br />
Displacement (mm)<br />
Figure B.2: Displacement vs. load for panels with H130 core <strong>and</strong> a debond diameter <strong>of</strong> (a) 100<br />
mm, (b) 200 mm <strong>and</strong> (c) 300 mm.<br />
250<br />
(a)<br />
250<br />
(b)<br />
250<br />
(c)<br />
Load (kN)<br />
200<br />
150<br />
100<br />
50<br />
Panel 1<br />
Panel 2<br />
Load (kN)<br />
200<br />
150<br />
100<br />
50<br />
Panel 1<br />
Panel 2<br />
0<br />
0<br />
0<br />
0 2 4 6 8 0 2 4 6 0 2 4 6<br />
Displacement (mm)<br />
Displacement (mm)<br />
Displacement (mm)<br />
Figure B.3: Displacement vs. load for panels with H250 core <strong>and</strong> a debond diameter <strong>of</strong> (a) 100<br />
mm, (b) 200 mm <strong>and</strong> (c) 300 mm.<br />
350<br />
(a)<br />
400<br />
(b)<br />
400<br />
(c)<br />
Load (kN)<br />
300<br />
250<br />
200<br />
150<br />
100<br />
50<br />
Panel 1<br />
Panel 2<br />
Panel 3<br />
Load (kN)<br />
300<br />
200<br />
100<br />
Panel 1<br />
Panel 2<br />
Panel 3<br />
0<br />
0<br />
0<br />
0 2 4 6 0 2 4 6 8 10 0 2 4 6 8 10<br />
Displacement (mm)<br />
Displacement (mm)<br />
Displacement (mm)<br />
Figure B.4: Displacement vs. load for the intact panels with (a) PMI, (b) H130 <strong>and</strong> (c) H250<br />
core.<br />
156<br />
Load (kN)<br />
Load (kN)<br />
Load (kN)<br />
250<br />
200<br />
150<br />
100<br />
50<br />
200<br />
150<br />
100<br />
50<br />
300<br />
200<br />
100<br />
Panel 1<br />
Panel 2<br />
Panel 1<br />
Panel 2<br />
Panel 1<br />
Panel 2<br />
Panel 3
B.2 Out-<strong>of</strong>-plane Deflection vs. Load Curves<br />
In this section out-<strong>of</strong>-plane displacement vs. load curves <strong>of</strong> the tested panels are presented. The<br />
out-<strong>of</strong>-plane deflection refers to the centre <strong>of</strong> the debond.<br />
Displacement (mm)<br />
Displacement (mm)<br />
8<br />
6<br />
4<br />
2<br />
0<br />
6<br />
6<br />
(a) (b) (c)<br />
Panel 1<br />
Panel 2<br />
Panel 3<br />
0 30 60 90 120<br />
Load (kN)<br />
Displacement (mm)<br />
4<br />
2<br />
0<br />
Panel 1<br />
Panel 2<br />
Panel 3<br />
0 20 40<br />
Load (kN)<br />
60 80<br />
Figure B.5: Load vs. out-<strong>of</strong>-plane displacement for the panels with PMI core <strong>and</strong> a debond<br />
diameter <strong>of</strong> (a) 100 mm, (b) 200 mm <strong>and</strong> (c) 300 mm.<br />
8<br />
6<br />
4<br />
2<br />
0<br />
8<br />
8<br />
(a) (b) (c)<br />
Panel 1<br />
Panel 2<br />
0 50 100 150 200<br />
Load (kN)<br />
Displacement (mm)<br />
6<br />
4<br />
2<br />
0<br />
Panel 1<br />
Panel 2<br />
0 30 60 90 120<br />
Load (kN)<br />
Figure B.6: Load vs. out-<strong>of</strong>-plane displacement for the panels with H130 core <strong>and</strong> a debond<br />
diameter <strong>of</strong> (a) 100 mm, (b) 200 mm <strong>and</strong> (c) 300 mm.<br />
157<br />
Displacement (mm)<br />
Displacement (mm)<br />
4<br />
2<br />
0<br />
6<br />
4<br />
2<br />
0<br />
Panel 1<br />
Panel 2<br />
Panel 3<br />
0 20 40 60<br />
Load (kN)<br />
Panel 1<br />
Panel 2<br />
0 25 50 75 100<br />
Load (kN)
Displacement (mm)<br />
4<br />
3<br />
2<br />
1<br />
0<br />
8<br />
9<br />
(a) (b) (c)<br />
Panel 1<br />
Panel 2<br />
0 50 100 150 200<br />
Load (kN)<br />
Displacement (mm)<br />
6<br />
4<br />
2<br />
0<br />
Panel 1<br />
Panel 2<br />
0 50 100 150<br />
Load (kN)<br />
Figure B.7: Load vs. out-<strong>of</strong>-plane displacement for the panels with H250 core <strong>and</strong> a debond<br />
diameter <strong>of</strong> (a) 100 mm, (b) 200 mm <strong>and</strong> (c) 300 mm.<br />
B.3 Out-<strong>of</strong>-plane Deflection <strong>of</strong> the Debonded Panels<br />
In this section DIC images <strong>of</strong> out-<strong>of</strong>-plane deflection <strong>of</strong> panels with PMI, H130 <strong>and</strong> H250 core<br />
are shown before <strong>and</strong> right after debond propagation.<br />
(a)<br />
Figure B.8: Out-<strong>of</strong>-plane deflection from DIC measurements <strong>of</strong> a panel with PMI core <strong>and</strong> a<br />
debond diameter <strong>of</strong> 100 mm, (a) prior to propagation <strong>and</strong> (b) after propagation.<br />
158<br />
(b)<br />
Displacement (mm)<br />
6<br />
3<br />
0<br />
Panel 1<br />
0 50 100 150<br />
Load (kN)
(a) (b)<br />
Figure B.9: Out-<strong>of</strong>-plane deflection from DIC measurements <strong>of</strong> a panel with PMI core <strong>and</strong> a<br />
debond diameter <strong>of</strong> 200 mm, (a) prior to propagation <strong>and</strong> (b) after propagation.<br />
(a)<br />
Figure B.10: Out-<strong>of</strong>-plane deflection from DIC measurements <strong>of</strong> a panel with PMI core <strong>and</strong> a<br />
debond diameter <strong>of</strong> 300 mm, (a) prior to propagation <strong>and</strong> (b) after propagation.<br />
159<br />
(b)
(a) (b)<br />
Figure B.11: Out-<strong>of</strong>-plane deflection from DIC measurements <strong>of</strong> a panel with H130 core <strong>and</strong><br />
a debond diameter <strong>of</strong> 100 mm, (a) prior to propagation <strong>and</strong> (b) after propagation.<br />
(a) (b)<br />
Figure B.12: Out-<strong>of</strong>-plane deflection from DIC measurements <strong>of</strong> a panel with H130 core <strong>and</strong><br />
a debond diameter <strong>of</strong> 200 mm, (a) prior to propagation <strong>and</strong> (b) after propagation.<br />
160
(a) (b)<br />
Figure B.13: Out-<strong>of</strong>-plane deflection from DIC measurements <strong>of</strong> a panel with H130 core <strong>and</strong><br />
a debond diameter <strong>of</strong> 300 mm, (a) prior to propagation <strong>and</strong> (b) after propagation.<br />
(a) (b)<br />
Figure B.14: Out-<strong>of</strong>-plane deflection from DIC measurements <strong>of</strong> a panel with H250 core <strong>and</strong><br />
a debond diameter <strong>of</strong> 100 mm, (a) prior to propagation <strong>and</strong> (b) after propagation.<br />
161
(a) (b)<br />
Figure B.15: Out-<strong>of</strong>-plane deflection from DIC measurements <strong>of</strong> a panel with H250 core <strong>and</strong><br />
a debond diameter <strong>of</strong> 200 mm, (a) prior to propagation <strong>and</strong> (b) after propagation.<br />
(a) (b)<br />
Figure B.16: Out-<strong>of</strong>-plane deflection from DIC measurements <strong>of</strong> a panel with H250 core <strong>and</strong><br />
a debond diameter <strong>of</strong> 300 mm, (a) prior to propagation <strong>and</strong> (b) after propagation.<br />
162
Appendix C<br />
Additional Results from the Tests on the STT Specimens<br />
In this appendix additional results from the static <strong>and</strong> fatigue tests performed on STT specimens<br />
studied in Chapter 5 are presented.<br />
C.1 Axial Displacement vs. Force Curves from the Static<br />
Tests<br />
In this section axial displacement vs. force curves for the STT specimens with H45, H100 <strong>and</strong><br />
H250 are presented.<br />
Force (kN)<br />
0.6<br />
0.4<br />
0.2<br />
0<br />
(a) 1.2 (b) 1.2 (c)<br />
Specimen 1<br />
Specimen 2<br />
0 0.5 1 1.5<br />
Axial displacement (mm)<br />
Force (kN)<br />
0.8<br />
0.4<br />
0<br />
0 1 2 3<br />
Axial displacement (mm)<br />
Figure C.1: Axial displacement vs. force for STT specimens with (a) H45, (b) H100 <strong>and</strong> (c)<br />
H250 core.<br />
163<br />
Specimen 1<br />
Specimen 2<br />
Force (kN)<br />
0.8<br />
0.4<br />
0<br />
Specimen 1<br />
Specimen 2<br />
0 1 2 3<br />
Axial displacement (mm)
DTU Mechanical Engineering<br />
Section <strong>of</strong> Coastal, Maritime <strong>and</strong> Structural Engineering<br />
Technical University <strong>of</strong> Denmark<br />
Nils Koppels Allé, Bld. 403<br />
DK- 2800 Kgs. Lyngby<br />
Denmark<br />
Phone (+45) 45 25 13 60<br />
Fax (+45) 45 88 43 25<br />
www.mek.dtu.dk<br />
ISBN: 978-87-90416-42-3<br />
DCAMM<br />
Danish Center for Applied Mathematics <strong>and</strong> <strong>Mechanics</strong><br />
Nils Koppels Allé, Bld. 404<br />
DK-2800 Kgs. Lyngby<br />
Denmark<br />
Phone (+45) 4525 4250<br />
Fax (+45) 4593 1475<br />
www.dcamm.dk<br />
ISSN: 0903-1685