General instructions for installation, use and maintenance - fagor
General instructions for installation, use and maintenance - fagor
General instructions for installation, use and maintenance - fagor

You also want an ePaper? Increase the reach of your titles
YUMPU automatically turns print PDFs into web optimized ePapers that Google loves.
<strong>General</strong> <strong>instructions</strong> <strong>for</strong> <strong>installation</strong>, <strong>use</strong> <strong>and</strong><br />
<strong>maintenance</strong><br />
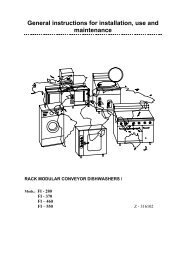
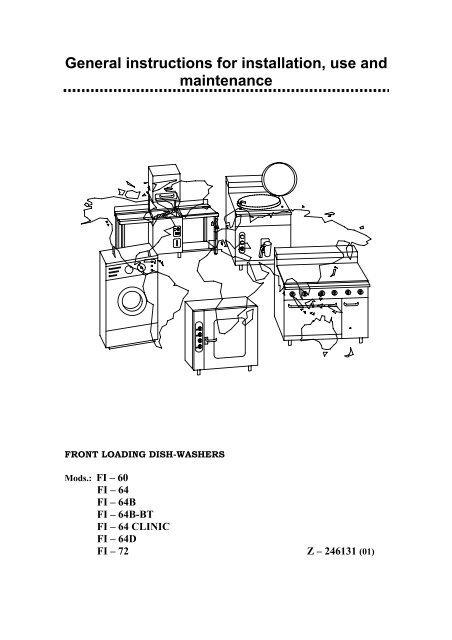
FRONT LOADING DISH-WASHERS<br />
Mods.: FI – 60<br />
FI – 64<br />
FI – 64B<br />
FI – 64B-BT<br />
FI – 64 CLINIC<br />
FI – 64D<br />
FI – 72 Z – 246131 (01)
FI – 60 ; FI - 64; FI - 64B; FI – 64D<br />
FI - 72<br />
Fig. 1<br />
A= Toma de agua D= Manguera Desagüe E= Manguera eléctrica R= Regleta conexión<br />
Prise d’eau Tuyau vidange Gaine électrique Réglette raccordement<br />
Water inlet Drain hose Electric s. Cable Connection strip Wasseranschluß<br />
Schlauch Wasserauslauf Kabelschlauch Anschlußleiste<br />
Presa d’acqua Tubo di scarico Cavo elettrico Morsettiera<br />
1<br />
FI-64 CLINIC<br />
FI-64 B-BT<br />
Instalación con Motobomba desagüe<br />
Installation avec Motopompe vidange<br />
Installation with drainage motor pump<br />
Installation mit motorbetätigter Abfußpumpe<br />
Impianto con motopompa di scarico
Fig. 3 Fig. 4<br />
MODELO 380-415V-3N~ 220V-3~ 220-240V-1N~<br />
FI-60<br />
FI-64<br />
FI-64B<br />
FI-64B-BT<br />
FI-64 CLINIC<br />
FI-64D<br />
FI-72<br />
am/ve<br />
Tensión<br />
Tensión<br />
Voltage<br />
Spannung<br />
Tensione<br />
380-415V-3N~<br />
220V-3~<br />
220-240-1N~<br />
MODELO<br />
MODELE<br />
MODEL<br />
MODELL<br />
MODELLO<br />
FI - 60<br />
FI - 64<br />
FI - 64B<br />
FI - 64B-BT<br />
FI – 64 CLINIC<br />
FI – 64D<br />
FI - 72<br />
FI - 64<br />
FI - 64B<br />
FI – 64 CLINIC<br />
FI - 72<br />
FI - 64<br />
FI - 64B<br />
FI - 72<br />
Fig. 2<br />
S = Llave de corte–Robinet d´arret-Stopcock-Absperrhahn-Rubinetto di regolazione<br />
E = Electroválvula-Electrovanne-Electrovalve-Electroventil-Elettrovalvola<br />
F = Filtro-Filtre-Filter-Filter-Filtro<br />
B = Electrobomba–Electropompe-Electropump-Druckehöhungspumpe-Elettropompa<br />
H = Manguera-Tuyau-Hose-Schlauch-Tubo<br />
Fig. 5<br />
a n m g<br />
N T S R<br />
a<br />
n m g<br />
a<br />
am/ve<br />
T S R<br />
n m g<br />
a<br />
Manguera=M<br />
Gaine=M<br />
S.cable=M<br />
Kabelschlauch=M<br />
Cavo=M<br />
C=Cubeta desagüe/Bac vidange/Drain collector/<br />
Abflußschale/Vaschetta di scarico<br />
D=Cubeta desagüe/Tuyan vidange/Drain hose/<br />
Kabelschlauch Wasserauslauf/Tubo di scarico<br />
am/ve<br />
a n m g<br />
Fig. 6<br />
2<br />
Fusibles=F<br />
Fusibles=F<br />
F<strong>use</strong>s=F<br />
Sicherungen=F<br />
Fusibili=F<br />
4x2.5mm 2 +T 20 A<br />
3x2.5 mm 2 +T 25 A<br />
2x6 mm 2 +T 40 A<br />
a<br />
Fig. 7<br />
N R<br />
n m g<br />
am/ve=amarillo/verde-jaune/vert-<br />
yellow/green-geb/grün-giallo/verde<br />
a=azul-bleu-blue-blau-blu<br />
m=marrón-marron-brown-braun-marrone<br />
r=rojo-rouge-red-rot-rosso<br />
n=negro-noir-black-schwarz-nero<br />
M=Manguera alimentación-Interrupteur général-<br />
Power cable-Kabelschlauch<br />
Spannungsversorgung-Cavo alimentazione<br />
Conexión red<br />
Racordement secteur<br />
Mains connection<br />
NetzanschluB<br />
Connessione a rete
FI - 60<br />
2 3 4 1<br />
Fig. 8<br />
FI – 64<br />
2 3 1 4<br />
Fig. 9<br />
FI – 64 B<br />
2 3 1 4<br />
Fig. 10<br />
FI – 64 D<br />
2 3 1 5 4<br />
Fig. 11<br />
3<br />
90<br />
90
1<br />
2<br />
Fig. 14<br />
Oº 220º<br />
3<br />
4<br />
Fig.16<br />
5<br />
7<br />
6<br />
FI - 72<br />
2 4 3 1 5<br />
Fig. 12<br />
FI-48B-BT / FI-48 CLINIC<br />
2 4 3 1 5<br />
Fig. 13<br />
4<br />
l./h.<br />
1 0<br />
2 0,25<br />
3 0,75<br />
4 1,5<br />
5 2<br />
6 2,5<br />
7 3<br />
Fig. 15
1.- INSTALLATION<br />
1.1.- Installation diagrams<br />
See Fig.1.<br />
1.2.- Positioning<br />
Level <strong>and</strong> adjust the height of the appliance. (Fig. 2)<br />
1.3.- Water connection<br />
To be done as shown in figures 3 <strong>and</strong> 4.<br />
Dynamic pressure necessary during rinsing: 2 - 4 Kg/cm 2 With mains pressures of less than 2 Kg/cm 2 ,<br />
install an electrical pressure pump. (Fig. 4).<br />
When the water hardness level is above 10º dF, a water softener should be installed.<br />
1.4.- Drainage<br />
a) Fix the drain hose as shown in Fig.5.<br />
b) Fit a siphon pipe to prevent bad smells.<br />
1.5.- Technical specifications<br />
MODEL<br />
Water<br />
inlet<br />
pressure<br />
Drain<br />
hose<br />
Supply<br />
voltage<br />
Power (Kw)<br />
H. element Max<br />
Dru Tub absorb.<br />
Square<br />
basket<br />
(mm)<br />
Cycle<br />
duration<br />
Tub<br />
capacity<br />
(l)<br />
Rinse<br />
water<br />
consumption(l)<br />
Peso<br />
neto<br />
(Kg)<br />
FI - 60 6,65 4´ REG: 54<br />
FI - 64 2÷4 Kg./cm²<br />
6,65 60<br />
(28÷56 psi)<br />
FI - 64B<br />
FI - 64B-BT<br />
ø30xø25<br />
6 2,8 6,72 500x500 66<br />
FI – 64 CLINIC<br />
90” 25 2,7<br />
4÷5 Kg./cm²<br />
180”<br />
FI – 64D<br />
65<br />
(56÷70 psi)<br />
6,65<br />
2÷4 Kg./cm²<br />
FI - 72<br />
69<br />
(28÷56 psi)<br />
1.6.- Electrical connection<br />
380-415V-3N<br />
220V-3<br />
220-240V-1N<br />
(50/60Hz)<br />
− For access to the connection strip (R), (Fig. 1 <strong>and</strong> Fig. 6), remove the cover (T) <strong>and</strong> the rear panel<br />
(P). Fix the sheathed cable to (E) leaving enough cable <strong>for</strong> the electrical panel to be removed from<br />
the front.<br />
− Connect the strip as shown in figure 6.<br />
− Fit a general switch (I) (Fig. 7) independent of the appliance with a distance between contacts equal<br />
to or more than 3 mm.<br />
− The machine must be earthen.<br />
5
2.- USE<br />
FI - 60<br />
− When the main switch is activated (1), Fig. 8, it lights up. The rinse water <strong>and</strong> then the wash water<br />
begin to fill <strong>and</strong> heat up.<br />
− The cycle can be adjusted to last up to a maximum of 4 minutes. Set the control (4) to the time<br />
required, the pilot light will come on (3).<br />
− When the pilot light (2) comes on, the machine is ready.<br />
FI - 64; FI - 64B; FI – 64D<br />
− Set the switch (1) (Fig. 9 <strong>and</strong> 10) to the 90” or 180” programme. The pilot light will come on (2),<br />
the rinse <strong>and</strong> wash water will start to fill <strong>and</strong> heat up. When the pilot light comes on (3) the machine<br />
is ready.<br />
− The cycle is started by pressing (4).<br />
− The FI-64B drains automatically in each cycle. To completely empty the tub, remove the antioverflow<br />
device (A) (fig. 15), set the switch (1) to the setting <strong>and</strong> press the button (4)<br />
(Fig.10).<br />
− At the end of the day set the switch (1) to the 0 setting.<br />
FI – 72; FI – 64B-BT; FI – 64 CLINIC<br />
− The machine is started in the same way as <strong>for</strong> the FI - 64. The thermometer (3) indicates the rinse<br />
temperature <strong>and</strong> the (4) wash temperature. The machine is ready when the thermometer (3)<br />
indicates 85 - 90ºC <strong>and</strong> the thermometer (4) 55 - 60ºC (except from the FI - 64 CLINIC : > 71ºC).<br />
The cycle is started by pressing (5).<br />
− The FI-64B-BT <strong>and</strong> FI-64 CLINIC drains automatically in each cycle. To completely empty the<br />
tub, remove the anti-overflow device (A) (fig. 15), set the switch (1) to the setting <strong>and</strong> press<br />
the button (5) (Fig. 13).<br />
− At the end of the day set the switch (1) to the 0 setting.<br />
2.1.- Advice on how to wash correctly<br />
− Put the amount of detergent indicated by the manufacturer into the tub (Fig. 16).<br />
− Control <strong>and</strong> maintain the rinse aid level in the <strong>and</strong> the pipe with its filter submerged.<br />
Preparing the crockery<br />
− Remove the biggest bits of food from the crockery be<strong>for</strong>e putting it into the baskets.<br />
− Wash glassware first.<br />
− Put the plates in the racks, but not on top of each other.(Fig. 14).<br />
− Put cups <strong>and</strong> glasses in upside down.<br />
− Put the cutlery in the cutlery baskets with the h<strong>and</strong>le at the bottom. Mix spoons with knives <strong>and</strong><br />
<strong>for</strong>ks.<br />
− Put the special cutlery holders in the base baskets or in the baskets with 16 spaces.<br />
2.2.- Regeneration of the water softener<br />
Model FI-64D, have a water softener which should be regenerated at the end of the day. To do this,<br />
carry out the following operations:<br />
− Set the switch (1) (Fig. 11) to<br />
− Remove the anti-overflow device (A) (Fig. 15).<br />
− Press the switch (5) (Fig. 11) <strong>for</strong> a few seconds until the pilot light comes on (4).<br />
− After about 20 minutes the pilot light go off (4) (Fig. 11) indicating that the regeneration cycle is<br />
complete.<br />
− Fill the tank each week with common salt, hermetically closing the lid (T) (Fig. 15).<br />
6
3.- MAINTENANCE<br />
− Control the rinse aid tank level.<br />
− Every day clean the filter-trays(B), <strong>and</strong> the suction filter (F). To do this release the anti-overflow<br />
device (A), turn (F) anticlockwise <strong>and</strong> lift it up. Then, position (F) <strong>and</strong> fix (A) into place (Fig. 15).<br />
− If the machine is not going to be <strong>use</strong>d <strong>for</strong> a long time, cover its surfaces with a coating of petroleum<br />
jelly.<br />
− Use soap <strong>and</strong> water <strong>for</strong> cleaning purposes, not abrasive detergents. Do not <strong>use</strong> jets of water to clean<br />
the outside of the machine.<br />
3.1.- Electrical <strong>and</strong> mechanical problems<br />
Be<strong>for</strong>e calling <strong>for</strong> service, check;<br />
− If the machine is plugged into the power supply.<br />
− The voltage coincides with that of the machine.<br />
− If the water connection or the start up take too long:<br />
Check the water supply.<br />
Check if the filter (F) in the electrovalve (Fig. 4).<br />
If it does not rinse properly, check;<br />
− That the arms rotate properly <strong>and</strong> the nozzles are not blocked. Wash the rinsing arm releasing the<br />
screw in the axis. To release <strong>and</strong> tie up the screw <strong>use</strong> a coin.<br />
− The rinse aid liquid level.<br />
In FI-60; FI-64; FI-64B; FI-64D <strong>and</strong> FI-72:<br />
That the mains water pressure is between 2 - 4 Kg/cm 2 (28 - 56 psi).<br />
That the water inlet filter (F) is not blocked. (Fig. 4)<br />
In FI-64B-BT <strong>and</strong> FI-64 CLINIC:<br />
Check the operation of the rinsing motor pump. (Rear access).<br />
If it does not wash properly, check;<br />
− That the wash arms rotate properly <strong>and</strong> the injectors are not blocked.<br />
− That the suction filter is not blocked <strong>and</strong> is properly in place.<br />
− Verify that the detergent dose is the correct one.<br />
3.2.- Optional accessories<br />
The following optional accessories are available <strong>and</strong> can be fitted to the machine.<br />
− Descaling kit<br />
− Electrical pressure pump<br />
− Liquid detergent dispenser<br />
− Anti-return valve<br />
NOTE.- THE FINAL HOLDER OF THE CONTAINER WASTE IS<br />
RESPONSIBLE FOR ITS MANAGEMENT.<br />
7