RGB 580xi AAP Guide 4-fold Rev-C.PMD - Extron Electronics
RGB 580xi AAP Guide 4-fold Rev-C.PMD - Extron Electronics
RGB 580xi AAP Guide 4-fold Rev-C.PMD - Extron Electronics

Create successful ePaper yourself
Turn your PDF publications into a flip-book with our unique Google optimized e-Paper software.
Specifications<br />
Video input — <strong>RGB</strong> <strong>580xi</strong> xi xi xi xi <strong>AAP</strong> / CCS <strong>AAP</strong> / CCSI <strong>AAP</strong><br />
Number/signal type .......................... 1 analog <strong>RGB</strong>HV, <strong>RGB</strong>S, RGsB, RsGsBs<br />
Connectors ........................................... 1 15-pin HD female<br />
Video output — <strong>RGB</strong> <strong>580xi</strong> xi xi xi xi <strong>AAP</strong> / CCS <strong>AAP</strong> / CCSI <strong>AAP</strong><br />
Number/signal type .......................... 1 analog <strong>RGB</strong>HV, <strong>RGB</strong>S, RGsB<br />
Connectors ........................................... 1 15-pin HD female<br />
General<br />
Temperature/humidity ..................... Storage -40° to +158°F (-40° to +70°C) / 10%<br />
to 90%, non-condensing<br />
Operating +32° to +122°F (0° to +50°C) / 10%<br />
to 90%, non-condensing<br />
Enclosure dimensions<br />
<strong>RGB</strong> <strong>580xi</strong> <strong>AAP</strong>/Cable Cubby <strong>AAP</strong> models (double-height plates)<br />
Faceplate ................................ 1.4" H x 3.5" W (3.6 cm H x 8.9 cm W)<br />
Circuit board ......................... 1.3" H x 2.5" W x 0.9" D<br />
(3.3 cm H x 6.4 cm W x 2.3 cm D) Depth<br />
excludes connectors and knobs.<br />
Shipping weight .................................. <strong>AAP</strong> models . 1 lb (0.5 kg)<br />
Vibration .............................................. ISTA/NSTA 1A in carton (International Safe<br />
Transit Association)<br />
Approvals ............................................ UL, CUL, CE, FCC Class A<br />
MTBF .................................................... 30,000 hours<br />
Warranty .............................................. 3 years parts and labor<br />
www.extron.com<br />
<strong>Extron</strong> <strong>Electronics</strong>, USA<br />
1230 South Lewis Street<br />
Anaheim, CA 92805<br />
USA<br />
714.491.1500<br />
Fax 714.491.1517<br />
Specifications are subject to change without notice.<br />
<strong>Extron</strong> <strong>Electronics</strong>, Europe<br />
Beeldschermweg 6C<br />
3821 AH Amersfoort<br />
The Netherlands<br />
+31.33.453.4040<br />
Fax +31.33.453.4050<br />
<strong>Extron</strong> <strong>Electronics</strong>, Asia<br />
135 Joo Seng Road, #04-01<br />
PM Industrial Building<br />
Singapore 368363<br />
+65.6383.4400<br />
Fax +65.6383.4664<br />
© 2006 <strong>Extron</strong> <strong>Electronics</strong>. All rights reserved.<br />
<strong>Extron</strong> <strong>Electronics</strong>, Japan<br />
Kyodo Building<br />
16 Ichibancho<br />
Chiyoda-ku, Tokyo 102-0082 Japan<br />
+81.3.3511.7655<br />
Fax +81.3.3511.7656<br />
○ ○ ○ ○ ○ ○ ○ ○ ○ ○ ○ ○ ○ ○ ○ ○ ○ ○ ○ ○ ○ ○ ○ ○ ○ ○ ○ ○ ○ ○ ○ ○ ○ ○ ○ ○ ○ ○ ○ ○ ○ ○ ○ ○ ○ ○ ○ ○ ○ ○ ○ ○ ○ ○ ○ ○ ○ ○ ○ ○ ○ ○ ○ ○ ○ ○ ○ ○ ○ ○ ○ ○ ○ ○ ○ ○ ○ ○<br />
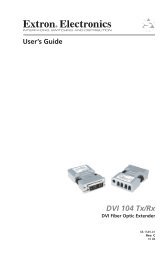
User’s <strong>Guide</strong><br />
<strong>RGB</strong> <strong>580xi</strong> xi xi xi xi <strong>AAP</strong>/CC <strong>AAP</strong> Series<br />
<strong>RGB</strong> <strong>580xi</strong> xi <strong>AAP</strong>, <strong>RGB</strong> <strong>580xi</strong> xi S/CCS <strong>AAP</strong>,<br />
<strong>RGB</strong> <strong>580xi</strong> xi SI/CCSI <strong>AAP</strong><br />
68-537-01 <strong>Rev</strong>. C<br />
03 06
Installation and Operation<br />
2<br />
<strong>Extron</strong>’s <strong>RGB</strong> <strong>580xi</strong> <strong>AAP</strong> double-space devices are designed to<br />
complement the <strong>RGB</strong> <strong>580xi</strong> remote interface. They may be<br />
mounted to any <strong>Extron</strong> product which has an <strong>AAP</strong> faceplate or to<br />
an <strong>AAP</strong> wallplate. See the “<strong>AAP</strong> Device Part Numbers” and the<br />
“Cable Cubby <strong>AAP</strong> Device Part Numbers” sections for <strong>AAP</strong>/CC<br />
<strong>AAP</strong> part numbers.<br />
<strong>RGB</strong> <strong>580xi</strong> xi xi <strong>AAP</strong>/CC <strong>AAP</strong> Series Features<br />
3<br />
4<br />
3<br />
<strong>RGB</strong> <strong>580xi</strong> <strong>AAP</strong> <strong>RGB</strong> <strong>580xi</strong> S <strong>AAP</strong><br />
1<br />
4<br />
SHIFT<br />
AUDIO IN<br />
COMPUTER IN<br />
<strong>RGB</strong> <strong>580xi</strong><br />
1 2<br />
1<br />
<strong>RGB</strong> <strong>580xi</strong><br />
<strong>RGB</strong> <strong>580xi</strong> xi <strong>AAP</strong> Installation and Operation<br />
SHIFT<br />
4<br />
SHIFT<br />
2<br />
1 5 2<br />
AUDIO IN<br />
COMPUTER IN<br />
3<br />
SELECT AUDIO IN<br />
SHIFT<br />
COMPUTER IN<br />
INPUT<br />
SELECT<br />
<strong>RGB</strong> <strong>580xi</strong><br />
<strong>RGB</strong> <strong>580xi</strong> SI <strong>AAP</strong><br />
<strong>RGB</strong> <strong>580xi</strong><br />
4<br />
<strong>RGB</strong> <strong>580xi</strong> CCS <strong>AAP</strong> <strong>RGB</strong> <strong>580xi</strong> CCSI <strong>AAP</strong><br />
1 Power/signal LED — This LED lights<br />
amber to indicate that the <strong>AAP</strong> device is receiving<br />
power.<br />
green to indicate that an active sync signal is present at<br />
the input and the <strong>AAP</strong> device is receiving power.<br />
The LED will flash green whenever the minimum and<br />
maximum limits of the horizontal shift control (H. shift)<br />
have been reached.<br />
2 Computer video input connector — Attach a cable from<br />
the computer source to this 15-pin HD female connector.<br />
3 Audio input connector — Plug a 3.5 mm stereo plug into<br />
this jack for unbalanced audio input. Wire the male plug as<br />
shown in the following illustration.<br />
1<br />
5<br />
<strong>RGB</strong> <strong>580xi</strong><br />
○ ○ ○ ○ ○ ○ ○ ○ ○ ○ ○ ○ ○ ○ ○ ○ ○ ○ ○ ○ ○ ○ ○ ○ ○ ○ ○ ○ ○ ○ ○ ○ ○ ○ ○ ○ ○ ○ ○ ○ ○ ○ ○ ○ ○ ○ ○ ○ ○ ○ ○ ○ ○ ○ ○ ○ ○ ○ ○ ○ ○ ○ ○ ○ ○ ○ ○ ○ ○ ○ ○ ○ ○ ○ ○ ○ ○<br />
Installation and Operation<br />
Tip (L) Sleeve (GND)<br />
Ring (R)<br />
Tip (L)<br />
Sleeve (GND)<br />
Audio input wiring<br />
4 Horizontal shift control knob — While viewing the<br />
displayed image, rotate this control to move the image to<br />
the right or left on the screen. The power/signal LED will<br />
flash green whenever the minimum and maximum limits<br />
of this control are reached.<br />
5 Input select button — Pressing this button will result in<br />
contact closure between pins A and B of the contact closure<br />
control connector on the front panel of the <strong>RGB</strong> <strong>580xi</strong><br />
remote interface. This button can also be used for direct<br />
control of any <strong>Extron</strong> contact closure-controlled switcher,<br />
or as a direct connection to an external control system.<br />
Mounting the <strong>RGB</strong> <strong>580xi</strong> xi xi <strong>AAP</strong> Device<br />
The <strong>AAP</strong> device should be cabled before attaching the <strong>AAP</strong><br />
device to a faceplate or wallplate. The screws needed for<br />
installing an <strong>AAP</strong> device are built into its front panel, so no<br />
additional screws will be needed.<br />
CAUTION Installation and service must be performed by<br />
authorized personnel only.<br />
1. Connect the output cables to the <strong>AAP</strong> device’s rear<br />
connectors. See the section “Cabling the <strong>AAP</strong>/Cable Cubby<br />
<strong>AAP</strong> Device Rear Connectors” in this user’s guide.<br />
2. Insert the <strong>AAP</strong> device’s screws through the holes in the <strong>AAP</strong><br />
double-space faceplate, the <strong>AAP</strong> wallplate, or the Cable<br />
Cubby <strong>AAP</strong> shelf bracket. Secure the <strong>AAP</strong> device to the<br />
faceplate/wallplate/shelf bracket with the provided captive<br />
washers and #4-40 nuts.<br />
<strong>RGB</strong> <strong>580xi</strong> xi xi <strong>AAP</strong> Installation and Operation<br />
3<br />
○ ○ ○ ○ ○ ○ ○ ○ ○ ○ ○ ○ ○ ○ ○ ○ ○ ○ ○ ○ ○ ○ ○ ○ ○ ○ ○ ○ ○ ○ ○ ○ ○ ○ ○ ○ ○ ○ ○ ○ ○ ○ ○ ○ ○ ○ ○ ○ ○ ○ ○ ○ ○ ○ ○ ○ ○ ○ ○ ○ ○ ○ ○ ○ ○ ○ ○ ○ ○ ○ ○ ○ ○ ○ ○ ○ ○ ○ ○ ○ ○ ○ ○ ○ ○ ○ ○ ○ ○ ○ ○ ○ ○ ○ ○ ○ ○ ○ ○ ○
Installation and Operation<br />
4<br />
Cable<br />
Clamp<br />
#4-40 Nut w/ Captive<br />
Washer<br />
Example of mounting an <strong>AAP</strong> device to a wallplate<br />
Cabling the <strong>AAP</strong>/Cable Cubby <strong>AAP</strong> Device<br />
Rear Connectors<br />
<strong>Extron</strong>’s various <strong>AAP</strong>/Cable Cubby <strong>AAP</strong> devices for the<br />
<strong>RGB</strong> <strong>580xi</strong> may come with several rear connectors that may<br />
require cabling.<br />
Although the control cable, LED, and audio assemblies<br />
will come prewired (<strong>AAP</strong> only) to the captive screw<br />
connectors, any subsequent cable assembly replacement<br />
will require the following cabling instructions.<br />
Red<br />
Black<br />
White<br />
Yellow<br />
Pink<br />
Orange<br />
<strong>AAP</strong> 102<br />
3<br />
J3<br />
Lt. Blue<br />
Green<br />
Purple<br />
Gray<br />
Brown<br />
<strong>AAP</strong> 102<br />
Cable<br />
Example of <strong>AAP</strong> device rear connectors<br />
H SHIFT<br />
INPUT<br />
SELECT<br />
1<br />
COMPUTER<br />
AUDIO<br />
<strong>RGB</strong> <strong>580xi</strong> SI <strong>AAP</strong><br />
<strong>RGB</strong> <strong>580xi</strong> SI <strong>AAP</strong><br />
J4 J2<br />
J4 J2<br />
2<br />
1 2<br />
Example of Cable Cubby <strong>AAP</strong> device rear connectors<br />
○ ○ ○ ○ ○ ○ ○ ○ ○ ○ ○ ○ ○ ○ ○ ○ ○ ○ ○ ○ ○ ○ ○ ○ ○ ○ ○ ○ ○ ○ ○ ○ ○ ○ ○ ○ ○ ○ ○ ○ ○ ○ ○ ○ ○ ○ ○ ○ ○ ○ ○ ○ ○ ○ ○ ○ ○ ○ ○ ○ ○ ○ ○ ○ ○ ○ ○ ○ ○ ○ ○ ○ ○ ○ ○ ○ ○<br />
Installation and Operation<br />
To cable the captive screw connectors, please refer to the<br />
following diagrams and orient the wires according to the view<br />
angle of the captive screws. When using <strong>Extron</strong>’s VGA and<br />
control cable assembly (see the “Cables” section for part<br />
numbers), refer to the color of each wire for signal identification.<br />
1 Control connector (J4) — Insert wires into and tighten the<br />
screws on this 3.5 mm, 5-pole captive screw connector.<br />
This connector is used for contact closure and horizontal<br />
shift signals. Wire the connector as shown below.<br />
Horizontal shift + (green)<br />
Horizontal shift ground (gray)<br />
Horizontal shift – (brown)<br />
Contact closure + (light blue)<br />
Contact closure – (purple)<br />
2 LED connector (J2) — Insert wires into and tighten the<br />
screws on this 3.5 mm, 3-pole captive screw connector.<br />
This connector is used for powering the green/amber LED.<br />
Wire the connector as shown below.<br />
Green LED (pink)<br />
LED ground (yellow)<br />
Amber LED (orange)<br />
3 Audio output connector (J3) — Insert wires into and<br />
tighten the screws on this 3.5 mm, 3-pole captive screw<br />
connector. This connector is used for unbalanced stereo<br />
audio output. Wire the connector as shown below.<br />
On Cable Cubby <strong>AAP</strong> models, the VGA and audio cable<br />
assemblies will be routed through the Cable Cubby. Refer<br />
to the Cable Cubby User’s Manual (part #68-701-01) for<br />
Cable Cubby installation instructions.<br />
<strong>RGB</strong> <strong>580xi</strong> CCSI <strong>AAP</strong><br />
Cable Cubby<br />
CC <strong>AAP</strong> VGA connector<br />
CC <strong>AAP</strong> Audio connector<br />
<strong>RGB</strong> <strong>580xi</strong> xi <strong>AAP</strong> Installation and Operation <strong>RGB</strong> <strong>580xi</strong> xi <strong>AAP</strong> Installation and Operation 5<br />
○ ○ ○ ○ ○ ○ ○ ○ ○ ○ ○ ○ ○ ○ ○ ○ ○ ○ ○ ○ ○ ○ ○ ○ ○ ○ ○ ○ ○ ○ ○ ○ ○ ○ ○ ○ ○ ○ ○ ○ ○ ○ ○ ○ ○ ○ ○ ○ ○ ○ ○ ○ ○ ○ ○ ○ ○ ○ ○ ○ ○ ○ ○ ○ ○ ○ ○ ○ ○ ○ ○ ○ ○ ○ ○ ○ ○ ○ ○ ○ ○ ○ ○ ○ ○ ○ ○ ○ ○ ○ ○ ○ ○ ○ ○ ○ ○ ○ ○<br />
Audio<br />
1 2 3<br />
R+ L+<br />
H. SHIFT<br />
INPUT<br />
SELECT<br />
Control<br />
1 2 3 4 5<br />
LED<br />
1 2 3<br />
Audio right (red)<br />
Audio ground (black)<br />
Audio left (white)
Part Numbers<br />
6<br />
<strong>AAP</strong> Devices<br />
Description Part number<br />
<strong>RGB</strong> <strong>580xi</strong> <strong>AAP</strong> 3' (black, white,<br />
RAL9010 white) 70-128-02, -03, -05<br />
<strong>RGB</strong> <strong>580xi</strong> <strong>AAP</strong> 6' (black, white,<br />
RAL9010 white) 70-129-02, -03, -05<br />
<strong>RGB</strong> <strong>580xi</strong> S <strong>AAP</strong> 3' (black, white,<br />
RAL9010 white) 70-134-02, -03, -05<br />
<strong>RGB</strong> <strong>580xi</strong> S <strong>AAP</strong> 6' (black, white,<br />
RAL9010 white) 70-135-02, -03, -05<br />
<strong>RGB</strong> <strong>580xi</strong> SI <strong>AAP</strong> 3' (black, white,<br />
RAL9010 white) 70-137-02, -03, -05<br />
<strong>RGB</strong> <strong>580xi</strong> SI <strong>AAP</strong> 6' (black, white,<br />
RAL9010 white) 70-138-02, -03, -05<br />
Cable Cubby <strong>AAP</strong> Devices<br />
Description Part number<br />
<strong>RGB</strong> <strong>580xi</strong> CCS <strong>AAP</strong> 9' (black) 70-254-02<br />
<strong>RGB</strong> <strong>580xi</strong> CCS <strong>AAP</strong> 12' (black) 70-255-02<br />
<strong>RGB</strong> <strong>580xi</strong> CCSI <strong>AAP</strong> 9' (black) 70-256-02<br />
<strong>RGB</strong> <strong>580xi</strong> CCSI <strong>AAP</strong> 12' (black) 70-257-02<br />
○ ○ ○ ○ ○ ○ ○ ○ ○ ○ ○ ○ ○ ○ ○ ○ ○ ○ ○ ○ ○ ○ ○ ○ ○ ○ ○ ○ ○ ○ ○ ○ ○ ○ ○ ○ ○ ○ ○ ○ ○ ○ ○ ○ ○ ○ ○ ○ ○ ○ ○ ○ ○ ○ ○ ○ ○ ○ ○ ○ ○ ○ ○ ○ ○ ○ ○ ○ ○ ○ ○ ○ ○ ○ ○ ○ ○ ○<br />
Part Numbers<br />
Optional <strong>RGB</strong> <strong>580xi</strong> <strong>AAP</strong> Extension Cables<br />
These cables only apply to the <strong>RGB</strong> <strong>580xi</strong> <strong>AAP</strong>,<br />
<strong>RGB</strong> <strong>580xi</strong> S <strong>AAP</strong>, and <strong>RGB</strong> <strong>580xi</strong> SI <strong>AAP</strong>, they do<br />
not apply to the <strong>RGB</strong> <strong>580xi</strong> CCS <strong>AAP</strong> or <strong>RGB</strong> <strong>580xi</strong><br />
CCSI <strong>AAP</strong>.<br />
VGA and control cable assembly Part number<br />
VGA and control cable 3' (0.9 m) 26-521-01<br />
VGA and control cable 6' (1.8 m) 26-521-02<br />
VGA and control cable 12' (3.6 m) 26-521-03<br />
VGA and control cable 25' (7.6 m) 26-521-04<br />
VGA and control cable 35' (10.6 m) 26-521-05<br />
VGA and control cable 50' (15.2 m) 26-521-06<br />
<strong>RGB</strong> <strong>580xi</strong> xi xi <strong>AAP</strong> Installation and Operation <strong>RGB</strong> <strong>580xi</strong> xi <strong>AAP</strong> Installation and Operation 7