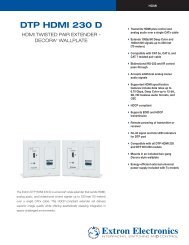
68-757-01, rev. D, full manual - Extron Electronics
68-757-01, rev. D, full manual - Extron Electronics
68-757-01, rev. D, full manual - Extron Electronics

Create successful ePaper yourself
Turn your PDF publications into a flip-book with our unique Google optimized e-Paper software.
Installation and Operation, cont’d<br />
2-8<br />
Tip (Signal)<br />
Sleeve (Gnd )<br />
Audio RCA connector color.eps<br />
Tip (+)<br />
Sleeve ( )<br />
Right Channel<br />
(Red Jacket)<br />
Left Channel<br />
(White Jacket)<br />
RCA connector wiring for DAS1<strong>01</strong>CM-3,-04 audio input<br />
Adjusting Sharpness (DAV Modules)<br />
The longer the cable being used, the<br />
greater the signal loss. The DAV1<strong>01</strong>CMs<br />
have an adjustable sharpness/peaking<br />
control that equalizes the video signal<br />
to compensate for signal losses. The<br />
DAV1<strong>01</strong>CM can drive signals for up<br />
to 150 feet of <strong>Extron</strong> mini HR cable or<br />
250 feet of <strong>Extron</strong> SHR cable.<br />
While viewing the output image,<br />
use a small screwdriver to rotate this<br />
potentiometer to select the setting that<br />
gives the clearest pictures.<br />
C Using a larger screwdriver<br />
can break the potentiometer.<br />
Mounting the Modules<br />
Test the system. Adjust the sharpness (see "Adjusting<br />
Sharpness") or disconnect the power and correct any cabling or<br />
wiring errors before mounting the modules.<br />
C To avoid the risk of electrical shock, disconnect power<br />
from the DAV or DAS module before mounting it.<br />
For all installations, place the DAV’s or DAS’s faceplate (or the<br />
mounting frame it is attached to) onto/against the mounting<br />
surface and secure it with the provided screws or bolts. Be<br />
careful not to damage the cables.<br />
DAV1<strong>01</strong>CM, DAS1<strong>01</strong>CM • Installation and Operation<br />
PEAKING<br />
DAV1<strong>01</strong>CM VGA LINE DRIVER<br />
VIDEO INPUT<br />
Peaking<br />
POWER