68-757-01, rev. D, full manual - Extron Electronics
68-757-01, rev. D, full manual - Extron Electronics
68-757-01, rev. D, full manual - Extron Electronics

You also want an ePaper? Increase the reach of your titles
YUMPU automatically turns print PDFs into web optimized ePapers that Google loves.
Installation and Operation<br />
2-2<br />
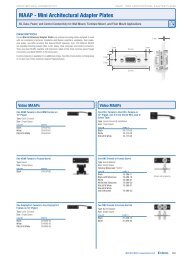
The DAV/DAS1<strong>01</strong>CM modules can be attached to a CPM<br />
mini architectural adapter plate (MAAP) mounting frame and<br />
mounted in a wall or furniture using either a one-gang wall<br />
box or a wall bracket. Alternatively they can be mounted in<br />
the chassis of a device (such as a CIA Series interface) that<br />
accommodates connector modules, or attached to a CPM Series<br />
rack-mountable frame for mounting in a standard equipment rack.<br />
Installing a Wall Box or Wall Bracket<br />
For wall and furniture mounting installations, the installation<br />
site must be deep enough for both the wall box (or the DAV/<br />
DAS, if using a wall bracket) and the cables. The box should be<br />
at least 2.5" (6.4 cm) deep. Install cables into the wall, furniture,<br />
or conduits before installing a wall box or bracket.<br />
1. Place the wall box or mounting bracket against the<br />
installation surface; mark the guidelines for the opening on<br />
the wall or furniture.<br />
2. Cut out the material from the marked area.<br />
3. Insert the wall box/bracket to check the opening’s size and<br />
fit. Enlarge or smooth the edges of the opening if needed.<br />
4. Feed cables through the wall box’s punch-out holes,<br />
ground shields, and<br />
secure cables with<br />
cable clamps to<br />
provide strain relief.<br />
Grounding shields<br />
}<br />
W To p<strong>rev</strong>ent<br />
short circuits, the<br />
Screw<br />
Braided<br />
Shield<br />
Cable<br />
Clamp<br />
Install<br />
Cable<br />
Foil Shield<br />
outer foil shield can be cut<br />
back to the point where the cable exits the cable clamp.<br />
Connect both braided and foil shields to an equipment<br />
ground at the other end of the cable. Insulate any<br />
exposed shields with heat shrink<br />
5. Insert the wall box or wall bracket into the opening, and<br />
attach it to the wall, stud, or furniture, leaving the front<br />
edge flush with the outer wall or furniture surface.<br />
To attach a wall box to wood, use four #8 or #10 screws or<br />
10-penny nails. A minimum of 1/2 inch (1.3 cm) of screw<br />
threads must penetrate the wood.<br />
To attach a wall box to metal, use four #8 or #10 self-tapping<br />
sheet metal screws or machine bolts with matching nuts.<br />
DAV1<strong>01</strong>CM, DAS1<strong>01</strong>CM • Installation and Operation<br />
Metal<br />
Wall<br />
Box