- Page 1 and 2: Instruction Manual EDR810H/EDR810M
- Page 3: Federal Communication Commission In
- Page 6 and 7: 4.2 SCHEDULE RECORDING SETUP.......
- Page 8 and 9: Safety Warning WARNING TO REDUCE RI
- Page 10 and 11: Safety Precautions Read Instructio
- Page 12 and 13: 1.2 Specifications Video format NTS
- Page 14 and 15: 9 FULL: Press this key and channel
- Page 16 and 17: 1.4 Back Panel Connections Back pan
- Page 18 and 19: LAN 7 LAN Connector: RJ-45 network
- Page 20 and 21: 1 Channel tag: A channel tag indica
- Page 22 and 23: 3. Event The current/last event tha
- Page 24 and 25: 2.1 Basic Wiring Instructions Pleas
- Page 26 and 27: 2.2 Hard Disk Drive Installation Th
- Page 30 and 31: Possible Installation Locations Ins
- Page 32 and 33: 3. DVR Menu Setup Assuming you have
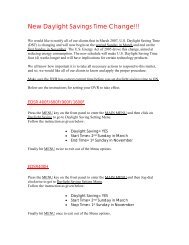
- Page 34 and 35: 5. DAYLIGHT SAVING: This field repr
- Page 36 and 37: Alaska Standard Time subtract 9 hou
- Page 38 and 39: 4. SEQ (MAIN/CALL): Set the number
- Page 40 and 41: 7. SUMMARY: Diagram 3.5 Dial Jog to
- Page 42 and 43: 4. WATER MARK: ON: Recording is ove
- Page 44 and 45: 3. LOG: ON: Select ON if you wish t
- Page 46 and 47: 3.5 Motion Setup Menu Diagram 3.8 D
- Page 48 and 49: To edit a MOTION AREA, enter a desi
- Page 50 and 51: 5. ALARM EMAIL: Select “YES” fo
- Page 52 and 53: 2. IP Address This field shows the
- Page 54 and 55: 3.7.2 ALARM NETWORK DVR can send ou
- Page 56 and 57: 7. SENDER EMAIL ADDR Input sender
- Page 58 and 59: Shared: need shared key. WEP: uses
- Page 60 and 61: 3.7.7 DDNS In DDNS of the NETWORK S
- Page 62 and 63: 3.7.8 GPS In GPS of the NETWORK SET
- Page 64 and 65: 3. END: This field is used to set t
- Page 66 and 67: 2. THERMOMETRIC SCALE: Select CELSI
- Page 68 and 69: RS485: 5. RS485 Baud Rate: This fie
- Page 70 and 71: 4. NETWORK ALARM: YES: To enable ne
- Page 72 and 73: 3.11.3 NO HDD In NO HDD, we define:
- Page 74 and 75: 4. NETWORK ALARM: YES: To enable ne
- Page 76 and 77: 4. UPDATE SYSTEM SOFTWARE: Turn the
- Page 78 and 79:
4. Recording Overview Before contin
- Page 80 and 81:
4.3 Event Recording Setup We will d
- Page 82 and 83:
Note: 1. If you only want to record
- Page 84 and 85:
(3) Fast Forward/Reverse Playback P
- Page 86 and 87:
5.2 Search Playback SEARCH Press th
- Page 88 and 89:
The event types and number show on
- Page 90 and 91:
In the COPY MENU, we define: Diagra
- Page 92 and 93:
7. Call Overview This chapter will
- Page 94 and 95:
When turning SHARPNESS OFF, the ima
- Page 96 and 97:
09 10. Networking Overview This cha
- Page 98 and 99:
Note: Everfocus suggests having a m
- Page 100 and 101:
10.7 Simple One to One Connection C
- Page 105 and 106:
Once you have reached this point cl
- Page 107 and 108:
Now Log into the EverFocus DVR menu
- Page 109 and 110:
Connection Procedure: The First st
- Page 111 and 112:
11. Linksys Port Forwarding Chapter
- Page 113 and 114:
application. Enable - Click the Ena
- Page 115 and 116:
12. D-Link Port Forwarding Chapter
- Page 117 and 118:
Name - Enter the name referencing t
- Page 119 and 120:
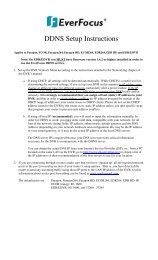
13. EverFocus DDNS Setup Note: You
- Page 121 and 122:
14. Viewing through Internet Explor
- Page 123 and 124:
Click the Security tab at the top,
- Page 125 and 126:
The followings are a brief descript
- Page 127 and 128:
14.1 SEARCH 14.1.1 Search by Time T
- Page 129 and 130:
14.2 PTZ control 1. Select the PTZ
- Page 131 and 132:
1) Press on the M button to change
- Page 133 and 134:
III. Open the DVRViewer.exe for loa
- Page 135 and 136:
14.4 Remote Configuration Click on
- Page 137 and 138:
CAMERA setup menu RECORD setup menu
- Page 139 and 140:
NETWORK 1 setup menu The Network Co
- Page 141 and 142:
WARNING setup menu SYSTEM setup men
- Page 143 and 144:
15.2 Remote Control Protocol A comp
- Page 145 and 146:
0x23 CH8 0x24 (reserve) 0x25 (reser
- Page 147 and 148:
Appendix B: Alarm Board Configurati
- Page 149 and 150:
Troubleshooting If you have difficu