
You also want an ePaper? Increase the reach of your titles
YUMPU automatically turns print PDFs into web optimized ePapers that Google loves.
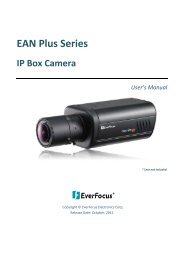
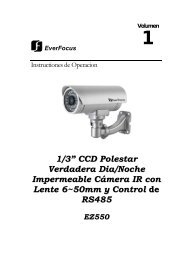
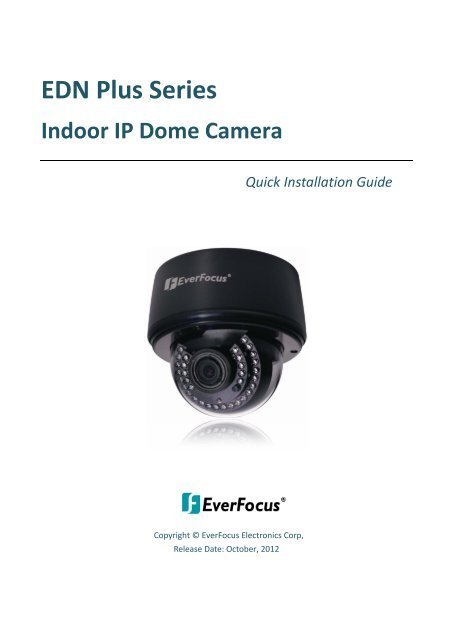
EDN Plus Series<br />
Indoor IP Dome Camera<br />
Copyright © EverFocus Electronics Corp,<br />
Release Date: October, 2012<br />
<strong>Quick</strong> Installation <strong>Guide</strong>
1. Overview<br />
1<br />
EDN Plus Series<br />
The EDN Plus series IP dome is designed for indoor use. The series comes in three models: EDN3160<br />
Plus / 3260 Plus / 3340 Plus.<br />
Model Name Megapixel P-Iris WDR<br />
EDN3160 Plus 1.3 MP Yes Yes<br />
EDN3260 Plus 2 MP Yes Yes<br />
EDN3340 Plus 3 MP Yes No<br />
1<br />
2<br />
3<br />
4 6 7<br />
5<br />
No. Item Name Descriptions<br />
Camera Body<br />
1 IR LEDs 33 IR LEDs for infrared illumination in night vision applications.<br />
2 Light Sensor Detects lights.<br />
3 Lens Varifocal lens with P-Iris control.<br />
4 5-Pin Data Cable<br />
Provides connections for power, TV-out, video input / output and<br />
alarm input / output. See 5-Pin Data Cable later in this <strong>Quick</strong><br />
Installation guide.<br />
5 LAN / PoE Cable Connects to a 10/100 Ethernet or PoE.<br />
6 Micro SD / SDHC Slot For inserting a micro SD / SDHC card.<br />
7 Reset Button Resets all configurations to the factory default settings.
System Requirement<br />
Before installing, please check that your computer meets this system requirement.<br />
• Operating System: Microsoft Windows XP / Vista (32-bit) / 7 (32-bit)<br />
• Microsoft Internet Explorer 7 or above<br />
Packing List<br />
• EDN Plus Series Camera x 1 • Terminal Block x 1<br />
• Long Screw x 4 • RJ-45 Connector x 1<br />
• Screw Anchor x 4 • Mounting Template x 1<br />
• Hexagon Screwdriver x 1 • Software CD x 1<br />
• Power Pigtail Cable x 1 • <strong>Quick</strong> Installation <strong>Guide</strong> x 1<br />
• Circle Plate x 1<br />
2<br />
EDN Plus Series<br />
Note: Contact the shipper if any items appear to have been damaged in the shipping process. If<br />
any items are missing, notify your EverFocus Electronics Corp. Sales Representative or Customer<br />
Service Branch. Please also keep the shipping carton for possible future use.<br />
2. 5-Pin Data Cable<br />
The 5-Pin Data Cable provides connections for power, TV-out, video input / output and alarm input<br />
/ output. The wires are illustrated and defined below. Please note that microphones with external<br />
power supplies are required.<br />
Pin Assignment for Alarm Input / Output<br />
4 3 2 1<br />
Pin 1: Alarm In<br />
Pin 2: Alarm GND<br />
Pin3: Alarm Out-<br />
Pin4: Alarm Out+<br />
Alarm Input / Output<br />
Audio Input (Pink)<br />
Audio Output (Green)<br />
TV Output (BNC)<br />
12V DC Input
3. Installation<br />
3<br />
EDN Plus Series<br />
There are two ways to mount the EDN Plus IP Dome: Wall-Surface Mount and In-Ceiling Mount.<br />
Wall-Surface Mount:<br />
1. Paste the supplied mounting template onto a desired location on the wall. Drill the four red<br />
cross marks, and the red circle mark only if you wish to run the wires into the wall.<br />
Note: The minimum recommended thickness of the wall is 1 cm.<br />
2. Push the four supplied anchors into the four holes on the wall.<br />
3. Unscrew the three screws by using the supplied hex screwdriver and remove the cover.
4. Unscrew the three screws and take out the camera body.<br />
4<br />
EDN Plus Series<br />
5. Thread the cables on the side of the camera case. If you want to wire the cables through the<br />
wall, run the cables through the hole at the bottom.<br />
Side Hole<br />
Bottom Hole<br />
6. If you run the cables through the bottom hole in Step 5, screw the circle plate on the side hole<br />
for waterproofing. You can simply tighten the circle plate using a coin.<br />
Circle Plate<br />
7. Secure the camera case to the wall using the supplied four long screws.
8. Place and screw the camera body back to the camera case.<br />
5<br />
EDN Plus Series<br />
9. Connect the network, power and other cables to the camera. Refer to 2. 5-Pin Data Cable.<br />
10. Optionally insert a micro SD / SDHC card to the card slot. See No.5 in 1. Overview.<br />
11. Access the camera live view. See 5. Assigning an IP Address. Or using the TV-out cable to<br />
connect a monitor to the camera for setting image aim and focus.<br />
12. Adjust camera lens and angles.<br />
a. Use the Zoom / Focus screws to adjust camera lens.<br />
Focus Screw<br />
Zoom Screw<br />
b. To adjust the camera to a desired angle:<br />
Pan Adjustment: Simply turn left / right of the top camera body.<br />
360°
Rotational Adjustment: Using the rotate screw.<br />
180°<br />
Tilt Adjustment: Using the two tilt screws.<br />
64°<br />
13. Secure the cover back to the camera.<br />
In-Ceiling Mount:<br />
6<br />
EDN Plus Series<br />
1. Paste the supplied mounting template onto a desired location on the wall. Cut a circle on the<br />
ceiling along the circle edge of the mounting template.<br />
2. Follow Steps 3 to 6 in Wall-Surface Mount to take out the camera body and run the cables.<br />
3. Place the camera body into the ceiling opening.
7<br />
EDN Plus Series<br />
4. On the back side, make sure the black plastic clips are slightly above the ceiling board and<br />
pointing outward.<br />
5. Tighten the bracket screws from the front side of the camera.<br />
6. Connect the network, power and other cables to the camera. Refer to 2. 5-Pin Data Cable.<br />
7. Optionally insert a micro SD / SDHC card to the card slot. See No.5 in 1. Overview.<br />
8. Access the camera live view. See 5. Assigning an IP Address. Or using the TV-out cable to<br />
connect a monitor to the camera for setting image aim and focus.<br />
9. Adjust camera lens and angles. See Step 11 in Wall-Surface Mount.<br />
10. Secure the cover back to the camera.
4. Accessing the Camera<br />
8<br />
EDN Plus Series<br />
You have to assign an IP address for your camera to be accessible. To assign an IP address to the<br />
camera, use the IP Utility (IPU) software included in the software CD. Please connect the camera in<br />
the same LAN of your computer.<br />
1. Install and then start the IPU program . The following dialog box appears.<br />
2. Click Find Devices to search the cameras connected in the LAN. The default network values of<br />
the cameras will be displayed. By default, the network protocol of the camera is DHCP.<br />
3. To configure the network settings, select a camera and then click Login/Multi Login to log in.<br />
4. Type the user ID and password. Click OK.<br />
Note:<br />
1. The default user ID is user1 and the default password is 11111111.<br />
2. If you select more than one camera that has the same user ID / password, you will be able<br />
to log in several cameras at once.
9<br />
EDN Plus Series<br />
5. To change the IP address, double-click the IP Address of the camera. Type a new IP address and<br />
then click Set IP Address to save the settings.<br />
You can also change the other settings by double-clicking the values. After configuring the<br />
values, click Save Configuration.<br />
Note: Most networks uses DHCP to assign IP address, if you are unsure of your network<br />
settings, please consult your network administrators for configuration details.<br />
6. To access the camera, highlight the camera and click Connect to Selected IP. The Internet<br />
Explorer window pops up.<br />
7. Type the user ID and password to log in. The Live View window of the camera appears.<br />
Note:<br />
1. You might be required to download ActiveX for viewing the camera feed. If asked, click Yes.<br />
2. To enable Remove Live View, Firmware Upgrade and ActiveX Prompt on Internet Explorer,<br />
some settings have to be complete. Please refer to 5.2 Settings for Microsoft Internet<br />
Explorer in the User’s Manual.
5. Network Connections<br />
You can use one of the methods below to connect the camera to the network.<br />
10<br />
EDN Plus Series<br />
Router or LAN Connection<br />
This is the most common connection in which the IP camera is connected to a router and allows<br />
multiple users on and off site to see the IP camera on a LAN/WAN (Internet). The camera must be<br />
assigned an IP address that is compatible with its LAN. By setting up port forwarding on the router,<br />
you can remotely access the cameras from outside of the LAN via the Internet. To remotely access<br />
the Web interface of the IP camera, please refer to 7.3.2 DDNS in the User’s Manual. To set up port<br />
forwarding, please consult the manual of the router.<br />
Right: Pinout of a straight-through cable.<br />
Straight-through LAN patch cable
11<br />
EDN Plus Series<br />
Direct High-Speed Connection<br />
In a Direct High-Speed Connection, the camera connects directly to a modem without the need for a<br />
router. You need to set the static or dynamic WAN IP address assigned by your ISP (Internet Service<br />
Provider) in the camera’s configuration web pages. To access the camera, just type “http://xxx”,<br />
where xxx is the IP address given by your ISP. If you have a dynamic IP address, this connection may<br />
require that you use DDNS for a reliable connection. Please refer to 7.3.2 DDNS in the User’s<br />
Manual.<br />
One-to-One Connection (Directly from PC to IP Camera)<br />
You can connect directly without using a switch, router or modem. However, only the PC connected<br />
to the camera will be able to view the IP camera. You will also have to manually assign a compatible<br />
IP address to both the computer and the IP camera. Unless the PC has another network connection,<br />
the IP camera will be the only network device visible to the PC. See the diagram below:<br />
Pinout of straight patch cable<br />
Assign IP Address<br />
Right: Pinout of a crossed-over cable.
6. Upgrading Firmware<br />
12<br />
EDN Plus Series<br />
You can upgrade camera’s firmware using the IP Utility software, which is included in the software<br />
CD.<br />
1. Follow Step 1 to Step 4 in 5. Assigning an IP Address to log in the camera.<br />
2. Highlight the camera and then click Upgrade Firmware. A browsing window appears.<br />
3. Select the firmware file (.evb) and then click Open. The IP Utility will automatically upgrade the<br />
firmware.<br />
The camera will reboot once the update is complete. Click Find Devices, the new firmware version<br />
should be displayed in the last part of the Machine Name.
EverFocus Electronics Corp.<br />
EverFocus Taiwan:<br />
12F, No.79, Sec. 1, Shin-Tai Wu Road,<br />
Hsi-Chih, Taipei, Taiwan<br />
TEL: +886 2 2698 2334<br />
FAX: +886 2 2698 2380<br />
www.everfocus.com.tw<br />
marketing@everfocus.com.tw<br />
EverFocus China - Beijing:<br />
Room 609, Technology Trade Building,<br />
Shangdi Information Industry Base,<br />
Haidian District, Beijing 100085, China<br />
TEL: +86 10 6297 3336~39<br />
FAX: +86 10 6297 1423<br />
www.everfocus.com.cn<br />
marketing@everfocus.com.cn<br />
EverFocus USA - California:<br />
1801 Highland Avenue, Unit A, Duarte, CA 91010, USA<br />
TEL: +1 626 844 8888<br />
FAX: +1 626 844 8838<br />
www.everfocus.com<br />
sales@everfocus.com<br />
EverFocus Japan:<br />
5F, Kinshicho City Building, 2-13-4<br />
Koto-Bashi,Sumida-Ku, Tokyo, 130-0022, Japan<br />
TEL: +81 3 5625 8188<br />
FAX: +81 3 5625 8189<br />
www.everfocus.co.jp<br />
info@everfocus.co.jp<br />
EverFocus India:<br />
Suite 803, Housefin Bhavan, C-21,<br />
Bandra Kurla Complex, Bandra (East),<br />
Mumbai 400051, India<br />
TEL: +91 22 6128 8700<br />
FAX: +91 22 6128 8705<br />
www.everfocus.in<br />
sales@everfocus.in<br />
Your EverFocus product is designed<br />
and manufactured with high quality<br />
materials and components which can<br />
be recycled and reused.<br />
This symbol means that electrical and<br />
electronic equipment, at their<br />
end-of-life, should be disposed of<br />
separately from your household waste.<br />
Please, dispose of this equipment at<br />
your local community waste<br />
collection/recycling centre.<br />
In the European Union there are<br />
separate collection systems for used<br />
electrical and electronic product.<br />
Please, help us to conserve the<br />
environment we live in!<br />
Ihr EverFocus Produkt wurde entwickelt<br />
und hergestellt mit qualitativ<br />
hochwertigen Materialien und<br />
Komponenten, die recycelt und wieder<br />
verwendet werden können.<br />
Dieses Symbol bedeutet, dass<br />
elektrische und elektronische Geräte am<br />
Ende ihrer Nutzungsdauer vom<br />
Hausmüll getrennt entsorgt werden<br />
sollen.<br />
Bitte entsorgen Sie dieses Gerät bei<br />
Ihrer örtlichen kommunalen<br />
Sammelstelle oder im Recycling Centre.<br />
Helfen Sie uns bitte, die Umwelt zu<br />
erhalten, in der wir leben!<br />
EverFocus Europe - Germany:<br />
Albert-Einstein-Strasse 1, D-46446<br />
Emmerich, Germany<br />
TEL: +49 2822 93940<br />
FAX: +49 2822 939495<br />
www.everfocus.de<br />
info@everfocus.de<br />
EverFocus China - Shenzhen:<br />
4F, No. 2, D4 Building, Wan Yelong<br />
Industrial Park, Tangtou Road, Shiyan,<br />
Baoan, Shenzhen, Guangdong 518101, China<br />
TEL: +86 755 2765 1313<br />
FAX: +86 755 2765 0337<br />
www.everfocus.com.cn<br />
marketing@everfocus.com.cn<br />
EverFocus USA - New York:<br />
415 Oser Avenue, Unit S, Hauppauge, NY 11788, USA<br />
TEL: +1 631 436 5070<br />
FAX: +1 631 436 5027<br />
www.everfocus.com<br />
sales@everfocus.com<br />
EverFocus Europe - UK:<br />
Unit 12, Spitfire Business Park,<br />
Hawker Road, Croydon Surrey, CR0 4WD, UK<br />
TEL: +44 20 8649 9757 / +44 845 430 9999<br />
FAX: +44 20 8649 9907<br />
www.everfocusuk.co.uk<br />
salesuk@everfocus.com<br />
P/N: 4605PD3340B010A-Ver.B