Create successful ePaper yourself
Turn your PDF publications into a flip-book with our unique Google optimized e-Paper software.
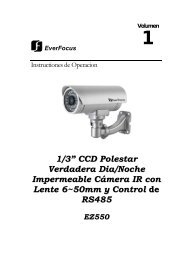
EVERFOCUS<br />
560 TVL True Day/Night Indoor<br />
Vandal Color Camera<br />
Operation Instructions<br />
Model No. <strong>ED550</strong><br />
Please read this manual first for correct installation and operation. This manual should be retained for future<br />
reference. The information in this manual was current when published. The manufacturer reserves the right to<br />
revise and improve its products. All specifications are therefore subject to change without notice.<br />
PRECAUTIONS<br />
1. Do not install the camera near electric or magnetic fields.<br />
Install the camera away from TV, radio transmitter, magnet, electric motor, transformer, audio speakers<br />
since the magnetic fields generate from above devices will distort the video image.<br />
2. Never disassemble the camera nor put impurities in it.<br />
Disassembly or impurities may result in trouble or fire.<br />
3. Never face the camera toward the sun.<br />
Direct sunlight or severe ray may cause fatal damage to sensor and internal circuit.<br />
4. Keep the power cord away from wet and never touch the power cord with wet hands.<br />
Touching the wet power cord with hands or touching the power cord with wet hands may result in electric<br />
shock.<br />
5. Never install the camera in areas exposed to water, oil or gas.<br />
Water, oil or gas may result in failure, electric shock or file.<br />
6. Cleaning<br />
Do not touch the surface of sensor by hand directly. Use a soft cloth to remove the dirt from the camera<br />
body. Use lens tissue or a cotton tipped applicator and ethanol to clean the sensor and the camera lens.<br />
7. Do not operate the camera beyond the specified temperature, humidity or power source ratings.<br />
Use the camera at temperatures within 0℃ ~ 40℃ (32℉ ~ 104℉) and 20%~80% Humidity. The input<br />
power source is 12VDC/24VAC.
TABLE OF CONTENTS<br />
1. PRODUCT OVERVIEW ...................................................................................................... 4<br />
1.1 Main Features ............................................................................................................................................. 4<br />
1.2 Package Contents ....................................................................................................................................... 4<br />
1.3 Specifications ............................................................................................................................................. 5<br />
1.4 Dimensions ................................................................................................................................................. 6<br />
2. NAMES AND FUNCTIONS OF PARTS ............................................................................. 6<br />
2.1 Front Panel ................................................................................................................................................. 6<br />
2.2 Back Panel .................................................................................................................................................. 8<br />
3. INSTALLATION ................................................................................................................... 9<br />
4. CAMERA SETUP OPERATIONS ..................................................................................... 10<br />
4.1 Setup Button ............................................................................................................................................. 10<br />
4.2 Display/Close the user setup menu screen ............................................................................................... 11<br />
5. USER SETUP ....................................................................................................................... 12<br />
5.1 Lens .......................................................................................................................................................... 12<br />
5.2 Shutter ...................................................................................................................................................... 12<br />
5.3 White Balance Control ............................................................................................................................. 14<br />
5.4 Backlight .................................................................................................................................................. 15<br />
5.5 AGC (Auto Gain Control) ........................................................................................................................ 15<br />
5.6 DNR (Dynamic Noise Reduction) ........................................................................................................... 16<br />
5.7 SENS-UP .................................................................................................................................................. 16<br />
5.8 Special ...................................................................................................................................................... 17<br />
5.8.1 CAMERA ID ......................................................................................................................................... 18<br />
5.8.2 COLOR ADJ ......................................................................................................................................... 19<br />
5.8.3 SYNC .................................................................................................................................................... 19<br />
5.8.4 MOTION DETECTION........................................................................................................................ 19<br />
5.8.5 PRIVACY .............................................................................................................................................. 22<br />
5.8.6 MIRROR ............................................................................................................................................... 24<br />
- 2 -
5.8.7 SHARPNESS ........................................................................................................................................ 24<br />
5.8.8 RESET ................................................................................................................................................... 24<br />
5.8.9 RETURN ............................................................................................................................................... 25<br />
5.9 Exit ........................................................................................................................................................... 25<br />
- 3 -
1. PRODUCT OVERVIEW<br />
The new <strong>ED550</strong> camera is designed with advanced new generation 16-bit DSP which has<br />
powerful processing capability to show over 560TVL horizontal resolution. Built-in<br />
DNR (Dynamic Noise Reduction) function, the camera performs clear & crisper image in<br />
low light and substantial disk-saving effect. In addition, designed with SENS-UP slow<br />
shutter technology, the starlight super-high sensitivity of 0.002 Lux is achieved. There<br />
are two models, one is Day/Night model, the other one is True Day/Night with ICR<br />
module.<br />
1.1 Main Features<br />
Excellent super high resolution technology with 560 TVL<br />
Advanced 16-bit Digital Signal Processor (DSP) delivers excellent picture quality<br />
and performance<br />
True Day/Night function with IR cut filter (<strong>ED550</strong>T)<br />
Day/Night function (<strong>ED550</strong>D)<br />
Built-in DNR (Dynamic Noise Reduction) for noise reduction and a 70% saving of<br />
disk storage<br />
The starlight Super-high sensitivity of 0.002 lux/F=1.2 is achieved by setting<br />
SENS-UP Shutter X128<br />
Vandal proof to withstand the impact of a 10 lbs sledgehammer<br />
Support Motion Detection and Privacy function<br />
1.2 Package Contents<br />
Standard accessories<br />
Camera Unit x 1<br />
Accessory Pack includes:<br />
- Screws x 3<br />
- Expanding Screws x 3<br />
- Hexagon wrench x 1<br />
Manual x 1<br />
Optional accessory<br />
Wall Mount bracket (BA-EDMS)<br />
- 4 -
1.3 Specifications<br />
Pickup Device 1/3'' SONY Super HAD CCD<br />
Video Format NTSC or PAL<br />
Scanning System<br />
NTSC: 525 TV lines, 60 fields/sec<br />
PAL: 625 TV lines, 50 fields/sec<br />
Picture Elements 768 x 494 (NTSC) ; 752 x 582 (PAL)<br />
Horizontal Resolution 560 TVL<br />
Sensitivity 0.002Lux (SEN-UP 128x) ; 0.25Lux/ F=1.2<br />
S/N Ratio Over 50dB (AGC off)<br />
Electronic Shutter 1/50(1/60)~1/100,000<br />
Vari-focal lens, Auto Iris<br />
Lens Type<br />
f=2.9~10mm, F=1.2<br />
f=9~22mm, F=1.6<br />
*Lens models and availability vary in different regions<br />
True Day/Night: Yes (Auto IR cut filter and B/W Sensitivity Enhanced)<br />
Back Light Comp. Yes, Off/Low/Middle/High selectable<br />
Auto Gain Control Yes, Off/Low/Middle/High selectable<br />
DNR Yes, Off/Low/Middle/High selectable<br />
Auto White Balance ATW(2500~8300 °k)/AWC/Manual<br />
Gamma Correction 0.45<br />
Flickerless Yes<br />
2 video outputs<br />
Video Output<br />
BNC 1.0Vp-p, 75ohm<br />
Additional testing video output 1.0Vp-p, 75ohm<br />
Sync. Mode Line Lock/Internal sync<br />
Motion Detection: Off/On (4-zone, position/size/tone)<br />
Privacy Feature: Off/On (4-zone, position/size/tone)<br />
H-Mirror Yes<br />
OSD Menu Yes<br />
Vandal Resistant Yes<br />
Power Source 12VDC/24VAC<br />
Power Consumption<br />
24VAC: 2.5W max<br />
12VDC: 3.5W max<br />
Dimensions 120mm(O.D.) x 100mm(H); 4.7"(O.D.) x 3.9"(H)<br />
Weight 0.7 kg ; 1.5 lbs<br />
Operating Temperature 0°C~40°C ; 32°F~104°F (20%~80% Humidity)<br />
Certifications FCC/CE<br />
- 5 -
1.4 Dimensions<br />
2. NAMES AND FUNCTIONS OF PARTS<br />
2.1 Front Panel<br />
Internal Sensor<br />
Note: Internal Sensor is a Day/Night Switch Sensor.<br />
- 6 -
- 7 -
2.2 Back Panel<br />
(1) (2) (3) (4)<br />
(1) Power Input Terminal & Video Output Connector<br />
Connect to the appropriate power to each model. Video Output connector is for connecting<br />
the video output of the camera to a color monitor or other video devices through a 75 Ohm<br />
type coaxial cable with BNC female connector at backside of the camera.<br />
(2) Second Video Output Connector<br />
When installing the camera, you can use second video connector to connect a portable<br />
monitor, this will allow you to easily adjust camera’ angle.<br />
(3) Adjust the Switch to Left direction<br />
(4) Adjust the Switch to Down direction<br />
(5) Adjust the Switch to Right direction<br />
(6) Adjust the Switch to Up direction<br />
(7)<br />
(6)<br />
(5)<br />
(7) Press the button for on-screen setting menu<br />
- 8 -
3. INSTALLATION<br />
Take off camera's cover first. Fix 3 screws of the bracket firmly to wall or ceiling. Adjust the<br />
camera to best angle for viewing. Use the tact switcher at the back panel to make any<br />
adjustment if needed. Finally, place the cover back to the camera.<br />
Ceiling Mount<br />
Wall Mount<br />
- 9 -
4. CAMERA SETUP OPERATIONS<br />
This camera utilizes an On Screen Display (OSD) user setup menu.<br />
4.1 Setup Button<br />
To set items on the user setup menu, use the following switch on the back panel.<br />
Up: Adjust the switch to move the cursor upwards. This is used to select the item<br />
need to be set.<br />
Down: Adjust the switch to move the cursor downwards. This is used to select the<br />
item need to be set.<br />
Right: Adjust the switch to right direction. This is used to select or adjust the<br />
parameters of the selected item.<br />
Left: Adjust the switch to left direction. This is used to select or adjust the<br />
parameters of the selected item.<br />
Set button: This button is used to enter setup menu. If the item has its own<br />
setting menu (sign ), press this button again to display the setup menu.<br />
- 10 -
4.2 Display/Close the user setup menu screen<br />
Set button<br />
I. Press the SET button<br />
The menu screen will appear on the monitor as the block shown above.<br />
II. Using the cursor switch<br />
Adjust the switch or to move the cursor up or down. Move the switch or<br />
to adjust the mode or parameter of settings.<br />
III. Switch to sub-menu screens<br />
When the item with sub-menu is selected, press the SET button to switch to the<br />
sub-menu for further settings. Please refer to the figure below.<br />
SETUP<br />
> LENS DC
5. USER SETUP<br />
5.1 Lens<br />
1. When the SETUP menu is displayed on the screen, please direct the arrow to point to<br />
“LENS” by adjusting the switch to UP or DOWN direction.<br />
2. Please press SET button if you would like to return to the previous menu.<br />
5.2 Shutter<br />
SETUP<br />
> LENS DC
SETUP<br />
LENS <strong>MANUAL</strong><br />
> SHUTTER FLK<br />
WHITE BAL. ATW<br />
BACKLIGHT OFF<br />
AGC MIDDLE<br />
DNR LOW<br />
SENS-UP ___<br />
SPECIAL SHUTTER ESC
5.3 White Balance Control<br />
The screen color can be adjusted by using the WHITE BALANCE function.<br />
1. Please direct the arrow to point to “WHITE BAL” on the SETUP menu by adjusting the<br />
switch to UP or DOWN direction.<br />
2. Please select the mode you would like to operate by adjusting the switch to LEFT or<br />
RIGHT direction.<br />
Please select one of the 3 modes below:<br />
ATW (Auto Tracking White Balance): This mode can be used within the color<br />
temperature range from 2,500°K to 8,300°K (eg, fluorescent light, outdoor, sodium<br />
vapor lamp or inside tunnels).<br />
AWC (Auto White Balance Control): Press the SET button while the camera is<br />
directed at a piece of white paper to get the optimum state under the present<br />
illumination. If the environment and the light source are changed, you need to adjust the<br />
white balance again.<br />
<strong>MANUAL</strong>: The manual adjustment mode enables a more precise adjustment. Please<br />
select ATW or AWC first. Then change to manual adjustment mode and press the SET<br />
button. Set the suitable color temperature, and increase or decrease the red and blue<br />
color values at the same time while checking the color changes of the object.<br />
NOTE:<br />
SETUP<br />
LENS DC WHITE BAL. <strong>MANUAL</strong>
5.4 Backlight<br />
Even there is a massive backlight behind the object, bright images of the background and the<br />
object can still be obtained by using the BACKLIGHT function.<br />
1. Please direct the arrow to point to “BACKLIGHT” on the SETUP menu by adjusting the<br />
switch to UP or DOWN direction.<br />
2. Select the mode you would like to operate by adjusting the switch to LEFT or RIGHT<br />
direction.<br />
SETUP<br />
LENS DC BACKLIGHT OFF<br />
AGC MIDDLE<br />
DNR LOW<br />
SENS-UP AUTO
5.6 DNR (Dynamic Noise Reduction)<br />
Dynamic Noise Reduction in video images has the following effects.<br />
1. Images are brighter and sharper.<br />
2. When the level of noise is reduced, the performance of a camera can apparently be<br />
improved.<br />
3. When it is recorded digitally, reduced noise can reduce image file size.<br />
As the level of gain changes, the background noise in the low light level automatically<br />
decreases.<br />
1. Please direct the arrow to point to “DNR” on the SETUP menu by adjusting the switch to<br />
UP or DOWN direction.<br />
2. Select the mode you would like to operate by adjusting the switch to LEFT or RIGHT<br />
direction.<br />
OFF: No reduction in noise level.<br />
LOW: Little reduction in noise level with nearly no ghost image. Default value is<br />
LOW.<br />
MIDDLE: Just enough reduction in noise levels without causing much ghost<br />
imaging.<br />
HIGH: Huge reduction in noise level, which may cause much ghost imaging.<br />
5.7 SENS-UP<br />
SETUP<br />
LENS DC DNR LOW<br />
SENS-UP AUTO
OFF: The function is disabled.<br />
2. Press SET button when you finish all the settings.<br />
5.8 Special<br />
SETUP<br />
LENS DC SENS-UP AUTO
SPECIAL<br />
> CAMERA ID OFF<br />
COLOR ADJ.
5.8.2 COLOR ADJ<br />
Adjust the Color Gain from 0 ~ 15<br />
SPECIAL<br />
CAMERA ID OFF<br />
> COLOR ADJ.
SPECIAL<br />
CAMERA ID OFF<br />
COLOR ADJ. MOTIION DET ON
2. Increase DOWN scale value by 20. AREA1 position after change is: TOP: 10, DOWN:<br />
45, LEFT: 20 and RIGHT: 40.<br />
AREA1<br />
3. Increase TOP scale value by 20. AREA1 position after change is: TOP: 30, DOWN: 45,<br />
LEFT: 20 and RIGHT: 40.<br />
AREA1<br />
4. Increase RIGHT scale value by 20. AREA1 position after change is: TOP: 30, DOWN:<br />
45, LEFT: 20 and RIGHT: 60.<br />
AREA1<br />
5. Increase LEFT scale value by 20. AREA1 position after change is: TOP: 30, DOWN: 45,<br />
LEFT: 40 and RIGHT: 60.<br />
AREA1<br />
In order to save the changes and complete the setting, press the SET button. This<br />
allows you to return to the previous menu.<br />
- 21 -
5.8.5 PRIVACY<br />
This mode covers the areas you do not want to see on the screen.<br />
1) Please direct the arrow to point to “PRIVACY” by adjusting the switch to UP or<br />
DOWN direction.<br />
2) Select “ON” by adjusting the switch to LEFT or RIGHT direction.<br />
3) Press SET button.<br />
SPECIAL<br />
CAMERA ID OFF<br />
COLOR ADJ. PRIVACY ON
1. The original position of AREA1 was TOP: 10, DOWN: 25, LEFT: 20 and RIGHT: 40.<br />
AREA1<br />
2. Increase DOWN scale value by 20. AREA1 position after change is: TOP: 10, DOWN:<br />
45, LEFT: 20 and RIGHT: 40.<br />
AREA1<br />
3. Increase TOP scale value by 20. AREA1 position after change is: TOP: 30, DOWN: 45,<br />
LEFT: 20 and RIGHT: 40.<br />
AREA1<br />
4. Increase RIGHT scale value by 20. AREA1 position after change is: TOP: 30, DOWN:<br />
45, LEFT: 20 and RIGHT: 60.<br />
AREA1<br />
5. Increase LEFT scale value by 20. AREA1 position after change is: TOP: 30, DOWN: 45,<br />
LEFT: 40 and RIGHT: 60.<br />
AREA1<br />
- 23 -
In order to save the changes and complete the setting, press the SET button. This<br />
allows you to return to the previous menu.<br />
5.8.6 MIRROR<br />
-ON: Sets a horizontal image inversion.<br />
-OFF: Disable the inversion.<br />
SPECIAL<br />
CAMERA ID OFF<br />
COLOR ADJ. MIRROR OFF<br />
SHARPNESS ON
5.8.9 RETURN<br />
It saves all settings in SPECIAL menu and returns to the SETUP menu.<br />
5.9 Exit<br />
SPECIAL<br />
CAMERA ID OFF<br />
COLOR ADJ.
EverFocus Electronics Corp.<br />
Head Office:<br />
12F, No.79 Sec. 1 Shin-Tai Wu Road,<br />
Hsi-Chih, Taipei, Taiwan<br />
TEL: +886-2-26982334<br />
FAX: +886-2-26982380<br />
www.everfocus.com.tw<br />
USA L.A. Office:<br />
1801 Highland Ave. Unit A<br />
Duarte, CA 91010, U.S.A.<br />
TEL: +1-626-844-8888<br />
FAX: +1-626-844-8838<br />
www.everfocus.com<br />
USA N.Y. Office:<br />
415 Oser Avenue Unit S<br />
Hauppauge, NY 11788<br />
TEL: 631-436-5070<br />
FAX: 631-436-5027<br />
www.everfocus.com<br />
Your EverFocus product is designed and<br />
manufactured with high quality materials and<br />
components which can be recycled and reused.<br />
This symbol means that electrical and electronic<br />
equipment, at their end-of-life, should be<br />
disposed of separately from your household<br />
waste.<br />
Please, dispose of this equipment at your local<br />
community waste collection/recycling centre.<br />
In the European Union there are separate<br />
collection systems for used electrical and<br />
electronic product.<br />
Please, help us to conserve the environment we<br />
live in!<br />
- 26 -<br />
Europe Office:<br />
Albert-Einstein-Strasse 1<br />
D-46446 Emmerich, Germany<br />
TEL: 49-2822-9394-0<br />
www.everfocus.de<br />
China Office:<br />
Room B-05D-1, KESHI PLAZA, Shangdi<br />
Information Industry Base,<br />
Haidian District, Beijing China 100085<br />
TEL: +86-10-62973336/37/38/39<br />
FAX: +86-10-62971423<br />
www.everfocus.com.cn<br />
Japan Office:<br />
1809 WBG MARIBU East 18F,<br />
2-6 Nakase.Mihama-ku.<br />
Chiba city 261-7118, Japan<br />
TEL: +81-43-212-8188<br />
FAX: +81-43-297-0081<br />
www.everfocus.com<br />
Ihr EverFocus Produkt wurde entwickelt und<br />
hergestellt mit qualitativ hochwertigen<br />
Materialien und Komponenten, die recycelt und<br />
wieder verwendet werden können.<br />
Dieses Symbol bedeutet, dass elektrische und<br />
elektronische Geräte am Ende ihrer<br />
Nutzungsdauer vom Hausmüll getrennt<br />
entsorgt werden sollen.<br />
Bitte entsorgen Sie dieses Gerät bei Ihrer<br />
örtlichen kommunalen Sammelstelle oder im<br />
Recycling Centre.<br />
Helfen Sie uns bitte, die Umwelt zu erhalten, in<br />
der wir leben!<br />
P/N: MED5G00500_Ver. B