Piccolo Plus - Mikroskop Technik Rathenow Gmbh
Piccolo Plus - Mikroskop Technik Rathenow Gmbh
Piccolo Plus - Mikroskop Technik Rathenow Gmbh

Create successful ePaper yourself
Turn your PDF publications into a flip-book with our unique Google optimized e-Paper software.
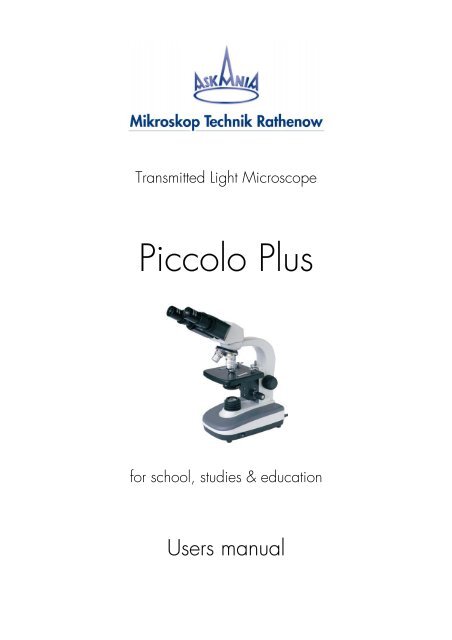
Transmitted Light Microscope<br />
<strong>Piccolo</strong> <strong>Plus</strong><br />
for school, studies & education<br />
Users manual
For your Safety!<br />
WARNING! Read the following information before using the unit and its supplemental<br />
equipment !<br />
1. This unit was constructed and checked according to the safety regulations for electronic measuring<br />
devices of publication IEC 348 and VDE 041, and was delivered in a secure fashion. This user’s<br />
manual contains information and warning notices that should be heeded by the operator.<br />
2. The unit is a light microscope, drafted according to the newest scientific and technical knowledge for<br />
the visual, micro photographic and video-technical investigation of microscopic objects. The unit<br />
should only be used for the designated purpose. All other uses (also the insertion of single<br />
components not designated by the manufacturer) constitute a misuse of the product. We are not<br />
liable for any damages caused by this misuse. This unit is not meant for unattended continuous<br />
operation.<br />
3. The microscope does not have any special safeguards against samples with caustic toxic,<br />
radioactive or other hazardous materials. The allowed sample amount may not be exceeded.<br />
4. The unit may only be operated on the voltages indicated on the unit. Please heed the instructions in<br />
the user’s manual! We are not liable for any damages caused by the disregard of these instructions.<br />
5. The following regulation apply to units of Safety Class II with the symbol…. . The plug has no<br />
grounded wire and man be inserted in an underground outlet. The safety measures are guaranteed<br />
as long as the unit is unopened and none of the isolation coverings are damaged or have been<br />
removed.<br />
6. If the unit is connected to voltage, contact clamps can lead to dangerous voltages and opening the<br />
coverings or removing parts can uncover a piece under a dangerous voltage. The unit must be<br />
disconnected from power before it can be opened for adjustments, replacements, servicing or<br />
repairs.<br />
7. Existing ventilation slits should not be obstructed. This also applies for ventilation slits on the bottom of<br />
the unit. No tools, loose objects or liquids should enter the unit through ventilation slits or other<br />
openings in the unit.<br />
Do not touch ventilation slits or light cases when operating the unit as these tend to become<br />
extremely hot. This is especially true for the lamp and surrounding area of open lights. When<br />
changing lamps, allow the lights to first cool to room temperature.<br />
8. Only fuses with the required nominal current may be used as substitutes for the prescribed use. It is<br />
prohibited to use makeshift fuses or short-circuit the fuse support.<br />
9. If safety is endangered , the unit must be removed from use and secured against unattended<br />
operation. The unit should then be sent to the production factory or a competent service technician.<br />
10. Before switching on the unit, set the controller for the illumination intensity to the rear position in<br />
order to prevent blinding.<br />
2
Overview:<br />
nosepiece<br />
objective<br />
stage<br />
condenser with iris<br />
diaphragm & filter<br />
base<br />
eyepiece<br />
binocular tube<br />
coarse<br />
fine coarse<br />
power switch<br />
3
Binocular transmitted light microscope: <strong>Piccolo</strong> <strong>Plus</strong><br />
Applications:<br />
This microscope is widely used in biological, pathological, pharmaceutical research and<br />
clinic examination, and is most suitable for school teaching, education and studies.<br />
Specifications:<br />
1. mechanical tube length............................. 160 mm<br />
2. eyepiece – correction length.......................10 mm<br />
3. achromatic objectives:<br />
4. eyepieces:<br />
magnification N.A. working distance (mm) correction<br />
4x 0.1 19 0,17<br />
10x 0.25 6,5 0,17<br />
40x 0.65 0.5 0,17<br />
100x Oil 1.25 0.2 0,17 Oil<br />
magnification diameter of field (mm)<br />
10x Ø 18<br />
16x Ø 11<br />
5. Abbe – condenser................................... N.A. 1.25 with iris diaphragm & filter<br />
6. focusing range.....................................… 10 mm<br />
7. plain stage…................................…….... 120 mm x 125 mm<br />
8. separate coarse & fine adjustment<br />
9. interpupillary distance............................... 55mm – 75mm<br />
10. illumination, adjustable............................ halogen bulb 6V/20W G4<br />
11. wall power supply ..........................……. 220V/50Hz<br />
12. weight............................................…… app. 4 kg<br />
4
Operation Instructions:<br />
1. Put the binocular tube into the bended arm’s seat and tighten the lock screw.<br />
2. Screw objectives into nosepiece, from low-magnification to high magnification.<br />
3. Put a specimen into the fastening unit on mechanical stage.<br />
4. Turn on light. (Power switch is on the right side of the microscope)<br />
5. Turn the condenser to elevate the condenser. By seeing the iris diaphragms image in the<br />
binocular tube (without eyepieces) you turn the condenser as long as the diaphragms<br />
image is finally clear and coincide with the aperture of the objective.<br />
6. Insert the pair of eyepieces into the binocular tube.<br />
7. To focus:<br />
Chose the objective 10x and observe with the right eye. Turn the coarse focusing knob<br />
until a image is seen and turn the fine focusing knob until the image is sharp and clear.<br />
Afterwards adjust the dioptre ring of left eyepiece until the image appears as clear as<br />
in the right eyepiece.<br />
8. Adjust the interpupillary distance to meet your eyes, thus the specimen’s image is clear in<br />
both of your eyes.<br />
9. To meet special demand for magnification, you can turn the nosepiece and<br />
select the needed objective.<br />
10. To reach a optimal image adjust the:<br />
- condenser,<br />
- iris diaphragm,<br />
- illumination intensity,<br />
- and dioptre ring<br />
11. By using the objective “100x Oil” put a little bit of cedar oil between the condenser<br />
and the objective. For an optimal image put the same oil between the condenser and<br />
the object slide. (After work clean all parts with oil on the surface)<br />
12. To avoid danger to the object slide the upper elevating height is limited by an<br />
adjusting screw. (already adjusted)<br />
5
Total magnification, object field and resolution (eyepieces: 10x and 16x):<br />
objective total magnification Ø object field (mm) resolution (µm)<br />
4x 40x / 64x 4,5 / 2,8 3,39<br />
10x 100x / 160x 1,8 / 1,1 1,35<br />
40x 400x / 640x 0,45 / 0,28 0,52<br />
100x Oil 1000x / 1600x 0,18 / 0,11 0,27<br />
Complete set of the instrument:<br />
Parts Info Qty<br />
stand 1<br />
plain stage 120 x 125 mm 1<br />
binocular tube 1<br />
objective 4x 1<br />
objective 10x 1<br />
objective 40x 1<br />
objective 100x Oil 1<br />
eyepieces WF 10x/18 2<br />
condenser N.A.:1,25 1<br />
dust cover 1<br />
spare bulb 6V/10W G4 1<br />
wall power supply 220V/50Hz 1<br />
mirror 1<br />
users manual 1<br />
6
Maintenance:<br />
1. Keep the instrument in dry and cool place, and keep away from acid or alkali.<br />
Put a dust cover over the instrument when it is not used.<br />
2. Keep lenses clear, and wipe the lenses with soft brush if there is dust or dirt on it.<br />
3. Before the exchange of a bulb let it cool down and pull the power plug. Turn the<br />
microscope to the side and open the black case at the bottom by loosing the lock<br />
screw. Exchange the bulb very carefully and close the case. Don’t touch the new bulb<br />
with your fingers. Fingerprints & dirt on the glass bulb obstruct the light performance and<br />
significantly decrease the life of the lamp.<br />
7
<strong>Mikroskop</strong> <strong>Technik</strong> <strong>Rathenow</strong> GmbH<br />
Grünauer Fenn 40<br />
D-14712 <strong>Rathenow</strong> Germany<br />
Telephon: +49 3385 53710<br />
Telefax: +49 3385 537122<br />
Internet: www.askania.de<br />
e-mail: mikro.ra@askania.de