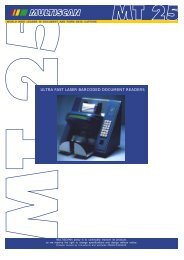
Z-3051BT Datasheet - Electronic Reading Systems Ltd.
Z-3051BT Datasheet - Electronic Reading Systems Ltd.
Z-3051BT Datasheet - Electronic Reading Systems Ltd.

You also want an ePaper? Increase the reach of your titles
YUMPU automatically turns print PDFs into web optimized ePapers that Google loves.
Radio Notice<br />
This equipment generates uses and can radiate radio frequency energy. If not installed and used in<br />
accordance with the instructions in this manual, it may cause interference to radio communications.<br />
The equipment has been tested and found to comply with the limits for a Class A computing device<br />
pursuant to EN55022 and 47 CFR, Part 2 and Part 15 of the FCC rules. These specifications are<br />
designed to provide reasonable protection against interference when operated in a commercial<br />
environment.<br />
Radio and Television Interference<br />
Operation of this equipment in a residential area can cause interference to radio or television<br />
reception. This can be determined by turning the equipment off and on. The user is encouraged<br />
to try to correct the interference by one or more of the following measures:<br />
Reorient the receiving antenna.<br />
Relocate the device with respect to the receiver.<br />
Move the device away from the receiver.<br />
Plug the device into a different outlet so that the device and the receiver are on different branch<br />
circuits.<br />
If necessary the user may consult the manufacturer, and authorized dealer, or experienced<br />
radio/television technician for additional suggestions. The user may find the following booklet<br />
prepared by the Federal Communications Commission helpful: “How to Identify and Resolve<br />
Radio-TV Interference Problems.” This booklet is available from the U.S. Government Printing<br />
Office, Washington, DC 20402 U.S.A., Stock No. 004000003454.<br />
For CE-countries<br />
This scanner is in conformity with CE standards. Please note that an approved, CE-marked power<br />
supply unit should be used in order to maintain CE conformance.<br />
Laser Safety<br />
The laser scanner complies with safety standard IEC 60825 -1for a Class I laser produce. It also<br />
complies with CDRH as applicable to a Class IIa laser product. Avoid long term staring into direct<br />
laser light.<br />
Radiant Energy: The laser scanner uses one low-power visible laser diodes operating at 650nm in<br />
an opto-mechanical scanner resulting in less than 3.9μW radiated power as observed through a<br />
7mm aperture and averaged over 10 seconds.<br />
Do not attempt to remove the protective housing of the scanner, as unprotected laser light with a<br />
peak output up to 0.8mW would be accessible inside.<br />
Laser Light Viewing: The scan window is the only aperture through which laser light may be<br />
observed from this product. A failure of the scanner motor, while the laser diode continues to emit a<br />
laser beam, may cause emission levels to exceed those for safe operation. The scanner has<br />
safeguards to prevent this occurrence. If, however, a stationary laser beam is emitted, the failing<br />
scanner should be disconnected from its power source immediately.<br />
Adjustments: Do not attempt any adjustments or alteration of this product. Do not remove the<br />
protective housing of the scanner. There are no user-serviceable parts inside.<br />
Caution: Use of controls or adjustments or performance of procedures other than those specified<br />
herein may result in hazardous laser light exposure.<br />
Optical: The use of optical instruments with this product will increase the eye hazard. Optical<br />
instruments include binoculars, magnifying glasses, and microscopes but do not include normal eye<br />
glasses worn by the user.<br />
No warranty of any kind is made in regard to this material, including, but not limited to, implied<br />
warranties of merchantability or fitness for a particular purpose. We are not liable for any errors<br />
contained herein or incidental or consequential damages in connection with furnishing, performance<br />
or use of this material.<br />
No part of this document may be reproduced, transmitted, stored in a retrieval system, transcribed,<br />
or translated into any language or computer language in any form or by any means electronic,<br />
mechanical, magnetic, optical, chemical, manual or otherwise, without express written consent and<br />
authorization.<br />
We reserve the right to make changes in product design without reservation and without notification.<br />
The material in this guide is for information only and is subject to change without notice.<br />
All trademarks mentioned herein, registered or otherwise, are the properties of their various<br />
respective owners.<br />
Copyright © 2007. All rights reserved.<br />
Introduction<br />
This scanner is well featured with Bluetooth® wireless technology, enabling working<br />
efficiency for simultaneous data transfer when scanning as well as working portability<br />
as not being constrained by short of cable length. Working places as shipping industry,<br />
cargo warehouses, superstores, pharmacies, and many more open-space or<br />
large-scale manufacturing sites are delighted to enjoy this move-around freedom.<br />
The cradle, a Bluetooth® dongle or any device with Bluetooth® wireless technology<br />
can be the host of this scanner. As far as 100-meter connection range, all scanned<br />
data are instantly transferred to the connected host. As if out of connection range, the<br />
embedded 32KB flash memory provides sufficient data space to store up to 500 sets<br />
of data.<br />
Either scanning in the handheld or stand mode, this scanner always offers a<br />
high-accuracy and reliable scanning ability. This scanner would be your trusted tool<br />
scanning partner.<br />
Unpacking<br />
This scanner package contains:<br />
1 ea. Wireless Single-Line Laser Scanner<br />
1 ea. Charging Cradle or Cradle with Radio<br />
Communication<br />
1 ea. DC 9V Power Adapter<br />
2 ea. Ni-MH AA Recharge Battery<br />
1 ea. Interface Cable (only for the cradle with radio<br />
communication)<br />
1 ea. Hand stripe<br />
1 ea. User’s Manual<br />
If any contents are damaged or missing, please contact your dealer immediately.<br />
Please leave this user’s manual within easy access of person using the scanner.<br />
Scanner Outline<br />
Cradle Host Outline
Installing and Charging Scanner Batteries<br />
Installing Batteries<br />
The rechargeable batteries are packed individually for shipping safety.<br />
Please follow the steps below to install the batteries.<br />
Caution:<br />
Always use the rechargeable batteries provided by the manufacturer to avoid any<br />
non-compatible danger or void the warranty.<br />
1. Loose the two screws enough to remove the battery cover. (It would not be<br />
necessary to remove the screws otherwise may result in losing them.)<br />
2. Insert the batteries into the scanner one by one. (positive pole to positive pole,<br />
negative pole to negative pole)<br />
3. Put back the battery cover, and tighten both screws.<br />
Charging Batteries<br />
For users with the charging cradle, you can connect the charging cradle with power<br />
adapter and the scanner is now in charging.<br />
For cradle host users, you can connect the cradle with the power adapter first, then<br />
place the scanner into the cradle in a 30° angle and press down to make it seat tight<br />
into the cradle; a clear and short beep is heard when position correctly into the cradle.<br />
Once the scanner is well situated in the cradle, press down any one of the small<br />
buttons at the side of LED lamp to start charging (Shown as Below).<br />
The LED light in RED as in charge, and light in BLUE when full charged.<br />
We call this “Smart Charge”, as battery life is well depended on the charging number<br />
of times, so only charge the batteries when necessary by following the<br />
abovementioned procedures to prolong your battery life.<br />
You may also set up auto-charging as every time the scanner is placed into the<br />
cradle. Follow and scan the appropriate barcode symbols to set up from<br />
programming section of this booklet.<br />
Note:<br />
For first charging, always charge the batteries over 5 hours continuously<br />
to prolong your battery life.<br />
After every full charge, you may use the scanner for 8 hours continuously.<br />
Recommended charging environment is temperature in 0°C~35°C<br />
(32°F~95°F).<br />
Connecting the Cradle<br />
There are two types of cradle to select for this scanner.<br />
Charging Cradle<br />
Cradle Host<br />
Press Down Here<br />
Charging Cradle<br />
This cradle designs for battery charging only, it does not support radio<br />
communication. Simply connect the external DC-9V9W power adapter into it and<br />
place scanner into cradle to start charging.<br />
Cradle Host<br />
The cradle host features with Bluetooth® wireless technology and designs to support<br />
radio communication to the scanner. It the same has charging functionality.<br />
Connection on Cradle Host<br />
The scanner pairs with the cradle, when the scanner scans barcode data and passes<br />
to cradle via radio communication, the cradle sends data to host by its interface cable.<br />
Steps to connect the cradle to host as follows:<br />
1. Take the desirable interface cable and insert the RJ-45 connector to cradle<br />
cable box until you hear a clear and short “click” sound, then connect the<br />
other end to the host.<br />
2. When using Keyboard wedge and USB interface for radio communication, it<br />
is not necessary to have an external power adapter if host has sufficient<br />
power. But these interfaces need external power adapter when charging<br />
batteries.<br />
Note: When external power adapter (9V) is available, the cradle will disregard the<br />
power supply from host (5V).<br />
3. If using RS-232 interface, it is necessary to plug an external power adapter<br />
always. Plug the power adapter into the DC-Jack of cradle cable box.<br />
(Shown as Below)<br />
4. Once cradle powers up, its LED lamp lights RED for one second then turns to<br />
flashes BLUE light. The BLUE LED means the cradle is waiting to be<br />
connected. If the scanner pairs with this cradle, they are connected, and<br />
BLUE LED light is always on.<br />
Detach the Interface Cable<br />
There is a hole on cradle cable box, and use a sharp pin to push down the hole while<br />
using another hand gently pull out the interface cable to release it slowly.<br />
Pairing Scanner and Cradle Host<br />
This scanner supports three radio communication types,<br />
Cradle Host,<br />
SPP (Serial Protocol Profile) Slave<br />
SPP (Serial Protocol Profile) Master.<br />
Refer to User’s Manual for detailed description.<br />
Paging the Scanner<br />
Paging the scanner often happens when you have two or more pairs of scanners and<br />
communication cradles, and can not find which scanner pairs with its cradle.<br />
Press any key on cradle, and it sends out a signal to its paired scanner, this scanner<br />
beeps 3 beeps and lights BLUE LED 3 times. But if the scanner is out of its<br />
receiving range, then it won’t react to the cradle.<br />
Scanning<br />
There are two ways to scan with this device.<br />
Handheld scanning<br />
Hands-free scanning<br />
Handheld Scanning<br />
In the handheld scanning, hand held the scanner and simply aim at a barcode label<br />
and push the scanner trigger to scan. Avoid aim vertically to the barcode label as a<br />
total reflection might effect the scanning performance.<br />
Hands-free Scanning<br />
Put the scanner into the cradle for hands-free scanning, and move the barcode label<br />
approach the scanner scanning zone.<br />
Maintenance<br />
This device provides reliable and efficient operation with a minimum of care. Any<br />
visibly dirty, or scratch on the scanner window will degrade reading performance,<br />
therefore do not use abrasive wipes or tissues on the window. When the scanner is<br />
not operating, use a soft cloth or lens tissue and gently wipe the scanning window<br />
lens.<br />
Do not spread liquid or submerge into liquid in any circumstance.<br />
To know more about Pairing or Programming of this scanner, please refer to<br />
User’s Manual or contact your sales distributor for detail set up procedures.