Owner's GuIDe - White's Metal Detectors
Owner's GuIDe - White's Metal Detectors
Owner's GuIDe - White's Metal Detectors
You also want an ePaper? Increase the reach of your titles
YUMPU automatically turns print PDFs into web optimized ePapers that Google loves.
®<br />
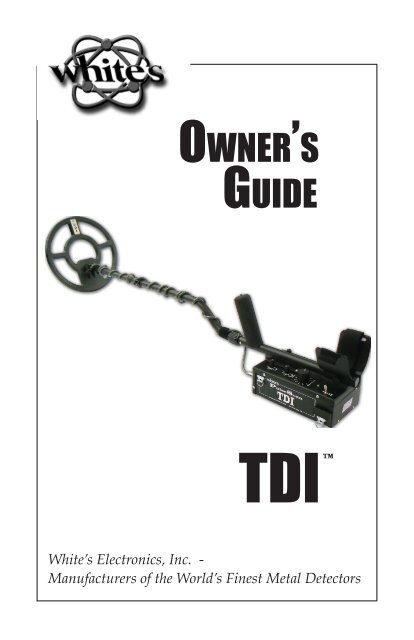
PulseScan TDI Owner’s Guide<br />
Owner’s<br />
<strong>GuIDe</strong><br />
TDI<br />
<br />
White’s Electronics, Inc. -<br />
Manufacturers of the World’s Finest <strong>Metal</strong> <strong>Detectors</strong>
PulseScan TDI Owner’s Guide
CONTENTS -<br />
PulseScan TDI Owner’s Guide<br />
Assembly .....................................................................................................................4<br />
Engineering Description .....................................................................................7<br />
Charging Systems and Batteries ................................................................... 8<br />
CONTROLS ......................................................................................................... 0<br />
Power .......................................................................................................................... 0<br />
Threshold ..................................................................................................................<br />
Target Conductivity ............................................................................................<br />
Frequency ................................................................................................................. 6<br />
Pulse Delay ............................................................................................................... 7<br />
Gain.............................................................................................................................. 9<br />
Ground Balance ....................................................................................................<br />
INITIAL SET-UP ........................................................................................................ 5<br />
More Variable Audio ........................................................................................... 8<br />
More Pulse Delay.................................................................................................. 0<br />
White’s Warranty .................................................................................................<br />
White’s Warranty UK .......................................................................................... 5<br />
White’s Warranty Service Centers ............................................................. 8
4 PulseScan TDI Owner’s Guide<br />
ASSEMBLY -<br />
õ<br />
õ õ<br />
Clevis Lower Rod<br />
S-rod<br />
Loop Connector<br />
õ<br />
Control Box<br />
HIP MOUNTABLE<br />
õ<br />
Washers between each<br />
loop ear & clevis<br />
Search Coil<br />
Cable Retainer<br />
õ<br />
õ õ<br />
Camlock<br />
õ<br />
Battery<br />
Compartment<br />
Door<br />
õ<br />
Headphone<br />
Jack<br />
õ<br />
Battery<br />
Compartment<br />
Latches
ASSEMBLY INSTRUCTIONS -<br />
PulseScan TDI Owner’s Guide 5<br />
. Remove all parts from the shipping carton and check assembly page to<br />
make sure all parts are present.<br />
. Install black rubber washers on fiber clevis/lower rod, insert clevis lower rod<br />
onto loop ears. Use only nonmetallic washers, fiber bolt, and fiber thumbnut to<br />
secure loop/search coil to clevis/lower fiber rod.<br />
. Unlock “S” rod cam-lock and insert clevis/lower rod into curved “S” rod so<br />
that stainless steel spring clip buttons line up and lock into one of the adjustment<br />
holes in the curved “S” rod. Turn cam-lock to secure. The second or third<br />
adjustment holes are suitable for average sized adults. Individuals six feet or<br />
taller should use fully extended position. Individuals well oversix feet tall should<br />
purchase the optional Tall Man Rod accessory.<br />
4. Unravel loop cable and wind the cable around the clevis and rod assembly,<br />
first revolution over the top of the rod. Wind cable all the way to the top of the<br />
curved “S” rod, about five revolutions. Use the black cable retainers, one near<br />
the loop, and one near the top of the curved “S” rod, to hold the loop cable in<br />
place.<br />
5. Unlock control box rod cam-lock and insert curved “S” rod so that stainless<br />
steel spring clip buttons line up and lock into the rod on top of the control box.<br />
The “S” rod is designed to curve up towards the display. However those who<br />
prefer to sweep the loop close to their feet may desire to assemble the “S” rod to<br />
curve down towards the ground. Turn cam-lock to secure. Plug loop connector<br />
into control box, screw lock ring to secure.<br />
6. Grip the instrument by the handle, with your arm in the elbow cup with strap<br />
and sweep the loop/search coil over the floor. If the instrument fit feels uncomfortable,<br />
readjust clevis/lower rod length with spring clip button and cam-lock so<br />
that search coil can be held near the floor without requiring stooping over.<br />
7. Remove the protective paper from the two black arm cup foam pads.<br />
Carefully align pads on the inside of the elbow cup, one on each side of the<br />
center rod, and press firmly into place.
6 PulseScan TDI Owner’s Guide<br />
8. Adjust the elbow cup strap so that it is loose enough for you to slide<br />
your arm in and out without loosening each time you want to set the detector<br />
down. The elbow cup strap provides extra leverage and control. However,<br />
some prefer not to use it.<br />
9. Install battery as described in next section.<br />
0. It should be noted at this point that the detector may not work as expected<br />
indoors due to the high degree of metal used in modern construction. It is best to<br />
tune and practice out-of-doors to ensure stable, predictable results. Additionally,<br />
freshly buried targets will rarely produce the normal depth results of targets that<br />
have been naturally lost and settled in undisturbed ground. Due to the abnormality<br />
caused by digging a hole in the ground matrix, and the lack of the normal<br />
target to soil reactions, it may take a number of years for freshly-buried targets to<br />
respond at true depths. The best way to determine true detection depth is in real<br />
search conditions.<br />
. Hip Or Chest Mounting -<br />
a) On top of the control box, the rod-to-case mounting plate has four<br />
Phillips head screws. Remove these four screws and remove the rod/loop/arm<br />
cup assembly from the top of the control box. To prevent moister/dirt from<br />
entering the control box, replace the four screws on top the control box (sink all<br />
the way) without the rod or mounting plate.<br />
b) Adjust/unravel enough loop cable wrapped around the rod, to allow<br />
slack to sweep the rod/loop and connection with the control box. Use two velcro<br />
straps provided to secure loop cable around rod.<br />
c) The control box can be worn on ones chest, hip, or waist based on<br />
personal preference. Belt hook provided on bottom of control box as well as<br />
four “D” rings to attach camera/dog leash connector type straps.
ENGINEERING DESCRIPTION -<br />
PulseScan TDI Owner’s Guide 7<br />
Although the new Pulsescan TDI was designed with the Gold Prospector<br />
in mind, its features and performance will be just as valuable to Beach & Relic<br />
Hunters.<br />
During the development of the PulsescanTDI, we kept in mind the<br />
comfort of the user by designing an instrument which would be as light as possible,<br />
and easy to operate in addition to producing outstanding performance at an<br />
affordable price.<br />
The Pulsescan TDI is a deep searching, very sensitive pulse induction<br />
metal detector which incorporates a true user controlled manual ground<br />
balancing feature, a byproduct of which is the ability to produce an audio tone,<br />
for possible identification of the detected target. User controlled manual balancing<br />
of the ground has the additional benefit of giving the user the option of fine<br />
tweaking for different situations, thus increasing the probability of hearing the<br />
faint signals of small or deep targets. The Manual Ground Balance feature of<br />
the Pulsescan TDI can be turned off if the ground mineralization is not severe<br />
enough to require it, as then the pulse circuitry itself is able to ignore most<br />
ground mineralization by its very nature. In this situation, with the Ground<br />
Balance toggle off, there is no audio tone variation - all metal targets will sound<br />
alike, and additional depth can be attained.<br />
White’s is proud to have been able to work with Eric Foster, of Oxford,<br />
England, who enjoys the world wide reputation of being the “Father of Pulse<br />
Technology”.
8 PulseScan TDI Owner’s Guide<br />
CHARGING SYSTEMS, BATTERIES AND BATTERY CONDITION -<br />
Batteries and Charger<br />
The PulsescanTDI uses a rechargeable Lithium Ion battery pack as the power<br />
source. This type of battery can supply the high current levels required by the<br />
detector and weights much less than other battery packs that have the same<br />
power characteristics. It supplies a nominal voltage of 14.4 volts and approximately<br />
500ma of current to the detector during operation.<br />
RED YELLOW<br />
ò<br />
GREEN<br />
ò ò<br />
OPERATIONAL RANGE<br />
õ õ õ<br />
ò ò CAUTION - Low Battery<br />
ò TURN DETECTOR OFF,<br />
AND RECHARGE<br />
The Smart Charger (Part Number 509-0040) used for recharging the Lithium Ion<br />
batteries is supplied with the detector. It has two internal lights that indicate the<br />
status of the charge cycle.
To recharge the battery:<br />
PulseScan TDI Owner’s Guide 9<br />
) Connect the battery pack to the charger and plug the<br />
charger into the A.C. outlet.<br />
) The light in the charger will flash RED-GREEN-RED-<br />
GREEN. This is a self check that indicates the charger is<br />
operating correctly.<br />
) The RED light then comes on to indicate the battery is<br />
charging.<br />
4) When the battery reaches full charge, a minimum of seven<br />
hours, the light will turn GREEN indicating that the battery is<br />
ready to use.<br />
5) If the battery is left connected the light will start to cycle<br />
between RED and GREEN. Unplug the charger and disconnect<br />
the battery.<br />
6) Only use the charger indoors. It is not weatherproof.<br />
7) Do not cover the charger.<br />
8) Do not use the charger in an ambient temperature greater<br />
than 140 degrees Fahrenheit or 40 degrees Celsius.<br />
9) Remove the charger from the AC outlet before<br />
disconnecting battery.<br />
0) Charger or battery may get very warm during charging.<br />
This is normal.<br />
If the battery has not been used for a long period of time, it is a good idea to<br />
recharge before use in the detector.
0 PulseScan TDI Owner’s Guide<br />
POWER -<br />
CONTROLS<br />
What it does<br />
This traditional control turns on or off the POWER from the internal, chargeable,<br />
Lithium Ion battery pack. The toggle switch incorporates a locking device to<br />
prevent accidental movement off or on.<br />
How to use it<br />
The locking mechanism prevents this toggle from accidentaly being bumped.<br />
This is particularly valuable while operating the various control knobs. Just lift the<br />
spring loaded toggle to release the lock and move the toggle.<br />
IMPORTANT -<br />
You must LIFT the Power Switch to release the lock, and move the<br />
toggle.
THRESHOLD -<br />
PulseScan TDI Owner’s Guide<br />
What it does<br />
This control adjusts the threshold of the unit. This is the faint background hum<br />
which is present during the normal operation of the Pulsescan TDI. This hum,<br />
which is always present, is increased when the knob is turned clockwise.<br />
How to use it<br />
In most detectors, including the Pulsescan TDI, the threshold is adjusted to a<br />
faintly audible level by turning the knob clockwise. Unique to the Pulsescan TDI,<br />
it is best to adjust the threshold past the chatter point, so that the sound is reasonably<br />
continuous. Then adjust the headphone volume to a comfortable level.
PulseScan TDI Owner’s Guide<br />
THRESHOLD LEVELS ...<br />
Threshold<br />
Level<br />
Noise<br />
Threshold<br />
Level<br />
Noise<br />
➟<br />
➟<br />
➟<br />
➟<br />
NOT RECOMMENDED<br />
Chatter can be heard in Threshold<br />
IDEAL<br />
Threshold set above chatter so chatter is not<br />
heard. Reduce volume with headphones
TARGET CONDUCTIVITY -<br />
PulseScan TDI Owner’s Guide<br />
What it does<br />
This control allows the user to select whether he wishes to hear only low-<br />
conductive targets, only high-conductive targets, or both low and high conductive<br />
targets. Low-conductive targets, like small-to-medium sized gold nuggets<br />
will make a high-tone sound. High-conductive targets like coins, except nickels,<br />
will make a low-tone sound. This feature only works if the Gnd Bal toggle is in<br />
the on position. When ground balance toggle is off, the switch must be set to All<br />
or Low, and all signals will sound the same.<br />
How to use it<br />
Set to low for low-conductive metals only, including small to medium-sized<br />
gold nuggets, most small to large specimen gold in quartz, small gold rings, very<br />
small silver rings and small gold coins, nickels, small thin hammered silver coins,<br />
small bronze Roman coins, small boot tacks, lead bird shot, tiny broken bits of<br />
iron, aluminum pull tabs, foil and bits and tips of small nails, etc.<br />
Set to high for high-conductive metalsonly, including all U.S.coins (except<br />
nickels), most silver rings, silver U.S. coins, very large gold rings, large gold<br />
nuggets, very high content gold nuggets (not common), U.S. gold coins above<br />
2.5 dollars, 24 K gold bullion (e.g. Canadian Maple leaf), small to large nails
4 PulseScan TDI Owner’s Guide<br />
➟<br />
ALL<br />
Both<br />
High and Low Conductivity Targets<br />
RESPOND<br />
➟<br />
➟<br />
HIGH<br />
Only<br />
High Conductivity Targets<br />
RESPOND<br />
LOW<br />
Only<br />
Low Conductivity Targets<br />
RESPOND
PulseScan TDI Owner’s Guide 5<br />
when laying flat in the ground and large pieces of iron, large pieces of lead, lead<br />
mini balls, lead musket balls, lead loom weights, bronze buckles, bronze weights,<br />
bronze artifacts, etc.<br />
NOTE: Mineralization, coil size, and ground balance settings can also<br />
reverse the readings. Some low-conductive metals could make a low tone,<br />
and/or some high-conductive metals could make a high tone. Set to ALL<br />
for both high and low-conductive metals. As long as Gnd Bal is turned on,<br />
both high and low tones wil be heard.<br />
When prospecting for gold, it is possible to reject a large nugget when<br />
selecting to only hear low-conductive metals. The size where a nugget can<br />
be classified as large is not exact as its shape and configuration can also be<br />
a factor. However, most all small-to-medium sized gold nuggets will fall in the<br />
low-conductive category. Prospectors should possibly opt to search while<br />
hearing both high and low-conductive metals until a determination is made<br />
as to how targets, including trash, are responding. If the gold in the area<br />
being searched is predominately small to medium sized, then searching in low<br />
conductivity only will find most gold, and eliminate most iron trash.<br />
Coin hunters can avoid digging pull tabs, foil and small bits of iron trash by using<br />
high conductive only. Relic and beach hunters will ultimately find a way to make<br />
use of this innovative feature. There is much to be learned by extensive field<br />
use, but the possibilities appear to be endless.<br />
MORE about Target Conductivity is listed under VARIABLE AUDIO on page<br />
28 of this guide.<br />
IMPORTANT -<br />
The Conductivity Toggle only functions when the Ground Balance<br />
Toggle is ON. If the Ground Balance Toggle is in the OFF position,<br />
you must set the Conductivitiy Toggle to either ALL or LOW. If the<br />
toggle is set to HIGH with Ground Balance OFF, there will be NO<br />
SOUND on any target.
6 PulseScan TDI Owner’s Guide<br />
FREQUENCY -<br />
What it does<br />
This control makes small adjustments up or down to the transmitter pulse<br />
frequency or rate. This is used to counteract any interference which might be<br />
due to outside electromagnetic sources, such as radio stations, microwave, short<br />
wave, electric fences, power lines, lightening, electrical storms, or other metal<br />
detectors being used nearby. This interference is recognized by a warbling or<br />
pulsing of the audio threshold in a repetitive way, and can mask target signals.<br />
The Pulsescan TDI has a frequency range of 3.25 kHz to 3.37 kHz pulses per<br />
second.<br />
How to use it<br />
Electrical interference is not exclusive to urban areas, where power line harmonics,<br />
local radio transmissions, or microwave transmissions can raise havoc with<br />
the audio threshold. Getting too close to other metal detectors being operated<br />
will also cause this problem. A slight adjustment of the frequency control can<br />
help make the audio more stable.
PULSE DELAY -<br />
PulseScan TDI Owner’s Guide 7<br />
What it is<br />
The Pulsescan TDI transmits a pulse and then after a time delay, samples the<br />
received signal. This is the control knob for adjusting the sample pulse delay. It<br />
alters the time between the end of each transmitter pulse, and the start of the<br />
receiver sampling period.<br />
How to use it<br />
PULSE DELAY is measured in micro seconds (uS). 10 uS is the lowest setting,<br />
which samples as close as possible to end of the transmitter pulse. This setting<br />
gives the highest sensitivity to all objects regardless of conductivity. However,<br />
raising the pulse delay toward 25 uS is used to maximize the signal to highconductive<br />
metals such as silver or larger targets by supressing the signal from<br />
low conductivity targets. This setting can be set anywhere between 10 uS and 25<br />
uS depending on the circumstances to enhance performance.<br />
If you wish to concentrate on detecting low-conductive targets you would<br />
want to set your Pulse Delay as close to 10 uS as possible to avoid reducing or<br />
losing the signal from your target. Low-conductive targets would include small to
8 PulseScan TDI Owner’s Guide<br />
medium gold nuggets, small or thin gold rings, and chains as well as very thin,<br />
small hammered silver coins. If you were detecting for thin gold rings at a beach,<br />
this would also be the proper setting to achieve the most sensitivity. Of course,<br />
at 10 uS you will also hear small bits of iron trash, bits of foil, boot tacks and bits<br />
of nails, and very small pieces of lead like bird shot. You may hear nails when<br />
swept across the broadside, but not when sweeping from tip to tip. Aluminum<br />
pulltabs will also be heard. Very low pulse delays can also result in the detection<br />
of conductive salt water when detecting along beaches.<br />
If you were primarily looking for high conductive metals, such as silver,<br />
increase the Pulse Delay toward the maximum setting of 25 uSeconds,<br />
thus reducing the signals from very small trash items such as small iron and foil.<br />
Large iron usually falls into the category of silver, and gives a stronger signal at<br />
higher pulse delays as well.<br />
One important thing to remember is that whenever you change your Pulse Delay,<br />
you should check and readjust your ground balance if necessary.<br />
MORE about Pulse Delay is listed under PULSE DELAY on page 30 of this<br />
Guide.
GAIN -<br />
PulseScan TDI Owner’s Guide 9<br />
What it does<br />
Gain controls the sensitivity of the detector, and the range at which the detector<br />
will hear a given target. It increases or decreases the amplification of the receive<br />
signal. In other words, it determines how deep the detector will hear a target.<br />
How to use it<br />
Ground mineralization gets in the way of hearing target signals. This so-called<br />
bad ground can be balanced out by a ground balance procedure (a form of<br />
filtering) so that targets can be heard clearly. This process can be accomplished<br />
more easily and effectively if the gain is set at an appropriate level.<br />
Never assume that the higher gain is set, the deeper the detector will go.<br />
Although environmental noise EMI (electromagnetic interference) can affect the<br />
level of gain that can be used, the ground mineralization has the most influence<br />
on how high the gain can be set for optimum performance.<br />
By attempting to use more gain than the ground minerals will allow, the detector<br />
circuit can go into overload, and at that setting will not be able to operate<br />
properly. In this situation, reducing the gain will allow the detector to be ground<br />
balanced, and thus operate correctly.
0 PulseScan TDI Owner’s Guide<br />
You must operate with a threshold which is as smooth as possible, so you can<br />
hear the clarity of a true signal, and not be confused by false signals, chatter,<br />
or blanking out of the threshold hum. Keeping the detector ground balanced is<br />
important, but one of the best ways to keep a smooth operation is to apply the<br />
appropriate amount of gain.<br />
The threshold will let you know if the gain is set too high. If it is erratic, jumping<br />
around, falsing, noisy, gasping - turn down the gain.
GROUND BALANCE ON/OFF - TOGGLE<br />
PulseScan TDI Owner’s Guide<br />
What it does<br />
The Toggle Switch, located below the Ground Balance knob, is used to either<br />
enable or disable the ground balancing function (along with the Variable Audio<br />
Tone feature). In the ON position, the Manual Ground Balance and the Audio<br />
Tone feature are functional.<br />
In the OFF position, the detector reverts to a straight pulse induction detector<br />
which hears all metal targets without audio differentiation, and has no manual<br />
ground balance control.<br />
How to use it<br />
This toggle must be kept in the On position when you are able to find a<br />
ground balance point. In this instance, you have both Manual Ground<br />
Balance and Audio Tone. If you can find a setting on the ground balance control<br />
where the ground noises go away, then you must leave the Gnd BalToggle on,<br />
and select a conductivity option. If you are not able to find a ground<br />
balance point, and the detector operates quietly without interference no matter<br />
where the control is set, it means that the ground is not mineralized enough to<br />
require ground balancing. This means the Pulsescan TDI circuitry can handle<br />
the ground without manual ground balancing, and the Gnd Bal toggle could be<br />
turned off. In this case there are two options -
PulseScan TDI Owner’s Guide<br />
Option #<br />
You may switch the toggle to Off. This eliminates the Ground Balance control,<br />
the Audio Tone feature, and the selectable conductivity feature allowing the<br />
Pulsescan TDI circuitry to handle the ground mineralization. All targets will<br />
sound alike, but you will get better depth.<br />
Option #<br />
Switch the toggle to On. This activates the Ground Balance, and Audio Tone<br />
feature. Then set the Ground Balance as noted in Chart A -<br />
Chart A<br />
Mandatory settings if you cannot find the ground balance point,<br />
and wish to activate the variable Audio Feature.<br />
# - If you have set the Pulse Delay at 10 uS, which is<br />
recommended for average size gold, set the Ground Balance<br />
control at approximately 8.<br />
# - If you have set the Pulse Delay midway, set the Ground<br />
Balance at approximately 6.<br />
# - If you have set the Pulse Delay at 25 uS, which is<br />
suggested for beaches, relics, or very large targets, set the<br />
Ground Balance at approximately 2.
GROUND BALANCE - KNOB<br />
PulseScan TDI Owner’s Guide<br />
What it does<br />
This control adjusts or balances the interference from ground mineralization. It is<br />
only operative when the Ground Balance toggle switch is in the On position.<br />
How to use it<br />
To ground balance Pulsescan TDI, the search coil is pumped slowly up and down<br />
from one inch near the ground to 6 or 8 inches above the ground while listening<br />
for a change in sound. This process must be done with the Target Conductivity<br />
control set to All.<br />
Start this process with the Gnd Bal Control set at 6 (12 O’ clock). Begin pumping<br />
the coil slowly up and down toward the ground. You will hear the high tone of<br />
low-conductive metal as you approach the ground. Now start turning the Ground<br />
Balance knob slowly clockwise as you continue this pumping process. The high<br />
tone will usually continue with each pump toward the ground for a short period of<br />
time, and then start to fade to no tone other than the threshold hum. Continue<br />
the process of pumping slowly, and turning the knob clockwise past the quiet<br />
zone. You will begin to hear the low tone as you approach the ground. If the<br />
ground has moderate mineralization you may not hear the low tone. At this point,<br />
continue with the pumping process, but start to turn the ground balance knob<br />
back counter clockwise until you enter the quiet zone again. This area of quiet
4 PulseScan TDI Owner’s Guide<br />
where you hear only the faint hum of the threshold is where the Pulsescan TDI is<br />
balanced to the ground. You will have to turn the knob very slowly in very small<br />
increments to reach the most exacting point for eliminating ground minerals. At<br />
this point, you will most likely notice that the Ground Balance knob is usually<br />
between 8 and 9 on the scale.<br />
If you change the setting on the Gain or the Pulse Delay, you should adjust the<br />
Ground Balance setting if needed. In addition, if you begin to hear ground noises<br />
(false signals) you should also adjust the ground balance. Of course, the Gnd<br />
Bal toggle must be On to use the Gnd Bal control.<br />
If the Pulsescan TDI does not require ground balancing, there is another<br />
option. The Pulsescan TDI can be operated as a standard pulse detector with no<br />
variable audio by switching the Gnd Bal toggle OFF. All targets will now sound<br />
the same. The upside of this is that the detector will detect deeper. Downside is<br />
you dig everything.<br />
If the Pulsescan does achieve ground balance, the Gnd Bal toggle must be<br />
kept On, and both Gnd Bal and the Variable Audio feature will be active. This<br />
situation indicates that there is enough iron mineralization to balance.
INITIAL SET-UP -<br />
PulseScan TDI Owner’s Guide 5<br />
To get started, set the controls to a mid-range position. For now, the main concern<br />
is setting the threshold, and adjusting the settings for the other controls.<br />
# - Set the controls to mid-range as follows -<br />
Ground Balance 6<br />
Conductivity All<br />
Freq.Adj. 12 noon<br />
Pulse Delay 10 uS<br />
Gain 6<br />
Gnd.Bal. toggle OFF<br />
Check your Battery LED for charge level<br />
(will only be active when Gnd.Bal.<br />
toggle is ON)<br />
(If there is interference<br />
select a quiet frequency)
6 PulseScan TDI Owner’s Guide<br />
# - TURN ON AND ADJUST THRESHOLD<br />
Turn the power switch On and adjust the threshold to a faint hum, as noted<br />
under “Description of Controls”. The threshold hum should be set just above the<br />
chatter point so that the hum is reasonably continuous - faint, but steady.<br />
# - GET FAMILIAR WITH A TARGET SOUND<br />
Put a target on the ground to become familiar with the response of the detector.<br />
Use a nickel or a gold nugget. Please note that the Pulsescan TDI is a motion<br />
detector which means that as the search coil passes over the target you hear a<br />
response only when the search coil is kept in motion. Stopping over the target,<br />
the signal will disappear and you only hear the threshold hum.<br />
Be sure to use a reasonably sized target, so that you can get a better idea of<br />
what a target sounds like. Note that the target audio will get louder, and the pitch<br />
will rise as the search coil passes over the target. Now is a good time to adjust<br />
the volume on the headphones so that you can hear a good response from the<br />
target while being able to hear the continuous hum of the threshold when no<br />
target is present.<br />
Sweep the search coil from sideto-side<br />
overlapping each pass.<br />
Keep the search coil flat to the<br />
ground as you are sweeping<br />
from side-to-side.
PulseScan TDI Owner’s Guide 7<br />
#4 - DETERMINE IF GROUND BALANCE IS NECESSARY<br />
(With Gnd. Bal. Toggle OFF as on Chart A.)<br />
At this point it is important to find out if there is enough mineralization in the<br />
ground to require the Ground Balance control to be activated. Since in the<br />
initial setting recommended above, the Gnd.Bal. toggle is set to off there is no<br />
active ground balance, and the Pulsescan TDI has only its inherent ground<br />
rejection ability working for it.<br />
When the search coil is swept over the ground and there is no ground noise, (the<br />
detector runs quietly and smoothly) then there is probably not enough ground to<br />
balance. At this point you have two options as already described on Page 22.<br />
a) You may leave the Gnd Bal toggle in the Off position and operate<br />
the Pulsescan TDI with no Variable Audio as a straight pulse detector, and dig all<br />
targets, or ...<br />
b) If you wish to detect with Variable Audio active, you may switch the<br />
Gnd Bal toggle to the On position and activate this capability, and set ground<br />
balance according to Chart on page 22.<br />
FINAL ADJUSTMENTS AND YOU ARE ON YOUR WAY<br />
If all has gone well to this point, you might see if you can increase the Gain in<br />
small stages. An increase in Gain is desirable in order to increase the depth of<br />
detection. Never increase Gain at the expense of the inability to handle ground<br />
minerals or environmental interference. As with the operation of all metal detectors,<br />
too much Gain will not increase but decrease depth, and the ability to hear<br />
targets. It will be up to you to find the proper setting.<br />
If you change the Pulse Delay or the Gain, and you are operating with Gnd Bal<br />
toggle on, you must readjust the Ground Balance.
8 PulseScan TDI Owner’s Guide<br />
MORE ON VARIABLE AUDIO (low/high tone)<br />
Only if the Gnd Bal toggle is set in the on position will this Variable Audio feature<br />
be active. You may then select the type of conductivity feature you wish to use.<br />
Either low, high or both low and high. Dependability varies with the size, shape,<br />
conductivity, and metal content of the target as well as the type of ground mineralization.<br />
In prospecting even the form of the gold (placer, sponge, crystalline<br />
etc.) varies, and can make the ability to identify the target difficult as well.<br />
When used for beach hunting and relic hunting, where the occurrence of certain<br />
targets can be more predictable, the value of this feature might be more useful.<br />
In any case the user should experiment in different locations or applications to<br />
determine the level of predictability to be expected.<br />
With some prospecting units on the market, this function is touted as an IRON ID<br />
feature. This is not a true description of what is happening, and is why we will call<br />
this feature Variable Audio, as that more correctly describes it. What is<br />
really going on, is the audio responses heard are a by-product of the ground<br />
balancing system, and are actually responding in a particular way to the speed at<br />
which the signal from the target decays as the search coil passes over it.<br />
Having tuned out the ground signal, the decay from metallic targets is either<br />
faster or slower and does not balance out. Where it falls depends on its size,<br />
shape, and conductivity not just whether it is gold or iron. Small to medium gold<br />
and nickel coins (which decay faster) can react with a high-pitch tone, while large<br />
gold, most silver and copper coins, and most iron (which decay slower) can react<br />
with a low pitch. If you depend on this feature to always tell you that the target is<br />
gold or iron, you could go wrong. Most smaller gold reacts in a predictable way,<br />
but very large gold can react like iron. In addition, very small nails can react like a<br />
small nugget.<br />
The Variable Audio feature can be interpreted by the tone which it produces when<br />
going over a target. As the search coil passes over a detected target, the signal<br />
will get louder as it gets closer to the center of the coil, but the tone will rise or fall<br />
depending on the decay speed.
PulseScan TDI Owner’s Guide 9<br />
Therefore, on a low-conductive target (small to medium gold, nickel coins, and<br />
small iron) the pitch of the audio tone might rise.<br />
When the search coil goes over a high-conductive target (large gold, most silver<br />
and copper coins and most large iron) the pitch of the audio tone might fall.<br />
It might be noted that the low tone heard over large non-iron targets is usually<br />
smoother than the low tone heard over iron targets which can be irregular. In<br />
addition, flat iron or steel objects, such as tin lids and flat sided cans can give<br />
a mixed response. This can sound like low tone, high tone, low tone as coil<br />
passes over the target. The sweep will have to be slower to notice this. The<br />
high-tone response is usually stronger and longer, but with time and practice this<br />
can be helpful to identify flat iron.<br />
With practice, you will be better able to use your low tone and high tone to help<br />
you get an idea of what kind of target you are detecting and help to eliminate<br />
some trash items. However, it is always better in a new area to dig everything<br />
until you get an idea of what you are likely to find. Keep in mind that no system<br />
is perfect, and when in doubt DIG!
0 PulseScan TDI Owner’s Guide<br />
MORE ON PULSE DELAY<br />
Sampling as close as possible to the end of the transmitted pulse gives the<br />
highest sensitivity to all metal targets regardless of their content or conductivity.<br />
The best signal from all targets is obtained when using a short (10 uS) delay.<br />
However, increasing the Pulse Delay beyond 10 uS toward 25 uS will minimize<br />
or eliminate the signal from low-conductive targets, so that high-conductors<br />
stand out more even though they are giving out less of a signal because they are<br />
sampled further down the decay curve. For maximum sensitivity to all targets, you<br />
would want to set the Pulse Delay as close to 10 uS as possible. Thus, when<br />
positioning the Conductivity Toggle at “ALL”, you will hear the familiar high tone if<br />
the target is seen as low conductive, and the corresponding low tone if it is seen<br />
as high conductive.<br />
As you would expect, a nickel would fall into the same category as gold and will<br />
be heard at 10 uS as a high tone, but larger silver and clad coins will produce<br />
the low tone. With alloyed gold, the conductivity can vary, so the optimum pulse<br />
delay can vary as well. Generally speaking, alloyed gold will be seen as low<br />
conductive, so will be seen best at a lower pulse delay (10 uS ). 10k or 14k<br />
rings will usually react as low conductive, whereas a purer gold ring, ( 22 k), may<br />
react as high conductive . This can also be the case with very pure or large gold<br />
coins and gold nuggets. A solid US $5, $10 or $20 gold coin will usually read as<br />
high conductive, whereas, a $2 1/2 gold coin will read low conductive. Pure gold<br />
Bullion (24k) like a one ounce Canadian Maple Leaf will read as high conductive<br />
as well. This can be the case with a very large gold nugget or a very pure or high<br />
gold content nugget, Fortunately, most gold nuggets are of mixed alloy and fall<br />
into the low conductive category. Most U.S. gold nuggets readi as low conductive,<br />
thus producing the familiar high tone. However, most Alaska and Austrlian<br />
gold which is over 90% gold will read as high conductive with a low sound.<br />
The size and shape (surface area) of the target, not just the type or conductivity<br />
of the metal, continues to have a bearing on the optimum setting for the Pulse<br />
Delay. It would be a good idea to experiment with different targets at different<br />
Pulse Delay settings. This is best done with the Ground Balance switched to<br />
off, so that all targets sound the same, and the sensitivity to the target can be<br />
observed. In this way, you can observe what happens to certain targets as the<br />
Pulse Delay is advanced up from 10 uS. Setting pulse delays can be an important<br />
part of operating the Pulsescan TDI. After you have seen how the Pulse
PulseScan TDI Owner’s Guide<br />
Delay affects the signal, you can try the same tests with the Ground Balance<br />
on and the Conductivity Toggle to all. At this time you can observe whether the<br />
target produces a high tone or a low tone. You can then choose either the low<br />
or high settings to observe how the Conductivity Toggle setting can eliminate or<br />
accept a target.<br />
The important thing is that you do have control over the Pulse Delay, and<br />
therefore over the optimization of the sensitivity of the detector to certain desired<br />
targets. The rule of thumb would be to set the Pulse Delay at 10 uS when<br />
prospecting for small to moderate gold nuggets, and set it closer to 25 uS when<br />
hunting on beaches for coins or relic hunting for iron and more conductive metals<br />
such as brass.<br />
Since the Pulse Delay setting does affect the Ground Balance process, you will<br />
find that you have to ground balance after changing the level of pulse delay. In<br />
addition, the level of pulse delay will have an affect on the ability to ground balance.<br />
This was found out during our initial testing of the Pulsescan TDI on an extremely<br />
black sand salt water beach. The Pulse Delay was initially set at 10 uS. At once,<br />
we found that we had trouble achieving a clear ground balance point as the<br />
extreme negative black sand and salt were too reactive. The audio was too<br />
noisy to operate. Lowering the GAIN helped a little, but increasing the Pulse<br />
Delay closer to mid-range (around 17.5 uS) rendered the threshold smooth, and<br />
we achieved a clear ground balance point. Even though a Pulse Rate of 10 uS<br />
would have been ideal for detecting for low conductive metals like gold, in this<br />
instance, the higher pulse rate allowed for balancing the extreme black sand<br />
which was our first concern. Even at the higher pulse rate, our first target was a<br />
nickel coin over 12 inches, which has low conductivity just like gold.
PulseScan TDI Owner’s Guide<br />
WHITE’S WARRANTY<br />
If within two years (24 months) from the original date of purchase, your White’s<br />
detector fails due to defects in either material or workmanship, White’s will repair<br />
or replace at its option, all necessary parts without charge for parts or labor.<br />
Simply return the complete detector to the Dealer where you purchased it, or<br />
to your nearest Authorized Service Center. The unit must be accompanied by a<br />
detailed explanation of the symptoms of the failure. You must provide proof of<br />
date-of-purchase before the unit is serviced.<br />
This is a transferable manufacturer warranty, which covers the instrument two<br />
years from the original purchase date, regardless of the owner.<br />
Items excluded from the warranty are batteries, accessories that are not standard<br />
equipment, shipping/handling costs outside the continental USA, Special<br />
Delivery costs (Air Freight, Next Day, 2nd Day, Packaging Services, etc.) and all<br />
shipping/handling costs inside the continental USA 90 days after purchase.<br />
White’s registers your purchase only if the Sales Registration Card is filled out<br />
and returned to the factory address by your dealer soon after original purchase.<br />
The purpose of recording this information is to keep you up-to-date regarding<br />
White’s ongoing research & development.<br />
The warranty does not cover damage caused by accident, misuse, neglect,<br />
alterations, modifications, unauthorized service, or prolonged exposure to corrosive<br />
compounds, including salt.<br />
Duration of any implied warranty (e.g., merchantability and fitness for a particular<br />
purpose) shall not be longer than the stated warranty. Neither the manufacturer<br />
or the retailer shall be liable for any incidental or consequential damages. Some<br />
states however, do not allow the limitation on the length of implied warranties,<br />
or the exclusion of incidental or consequential damages. Therefore, the above<br />
limitations may not apply to you.<br />
In addition, the stated warranty gives you specific legal rights, and you may have<br />
other rights which vary from state to state.
PulseScan TDI Owner’s Guide<br />
The foregoing is the only warranty provided by White’s as the manufacturer of<br />
your metal detector. Any “extended warranty” period beyond two years, which<br />
may be provided by a Dealer or other third party on your detector, may be<br />
without White’s authority, involvement and consent, and might not be honored by<br />
White’s Electronics, Inc.
4 PulseScan TDI Owner’s Guide<br />
WHITE’S WARRANTY TRANSFER USA<br />
If for any reason you should sell your Pulsescan TDI prior to the date the<br />
warranty expires, the remaining warranty is transferable. This transfer is<br />
authorized by calling 1-800-547-6911, and getting an Authorization Number.<br />
Simply fill out the following information, including the Authorization<br />
Number, seal it in a stamped envelope, and send it to White’s Electronics,<br />
1011 Pleasant Valley Road, Sweet Home, Oregon 97386. The remaining<br />
warranty period will then be available to the new owner.<br />
The Warranty Statement applies to both the original owner as well as any<br />
secondary owners.<br />
✂<br />
WARRANTY TRANSFER<br />
Original Owner -<br />
Name: _________________________________________<br />
Address: (Which appears on the original warranty card):<br />
______________________________________________<br />
________ ______________________________________<br />
_______________________________________________<br />
Imstrument Serial # ______________________________<br />
Original Purchase Date:____________________________<br />
NEW OWNER -<br />
Name: _________________________________________<br />
Address: ________________________________________<br />
_______________________________________________<br />
_______________________________________________<br />
Comments: _____________________________________<br />
_______________________________________________
WHITE’S ELECTRONICS (UK) LTD.<br />
After Sales Service - Limited Warranty<br />
PulseScan TDI Owner’s Guide 5<br />
The serial number which is unique to your unit is on a white label inside<br />
the battery compartment. Please quote this number on any correspondence<br />
regading your detector.<br />
White’s Electronics has always been concerned with the absolute quality<br />
of their mineral/metal detectors. Service after the sales is of extreme<br />
importance to us and we always do our utmost to ensure that customers<br />
are satisfied with our units. If your unit should require servicing or repair,<br />
simply return it to us at the factory in Inverness, and we shall carry out the<br />
necessary work for you.<br />
ANY WORK CARRIED OUT BY UNAUTHORIZED PERSONS WILL AUTO-<br />
MATICALLY NULLIFY THE WARRANTY.<br />
If within two years (24 months) from the original date of purchase, your<br />
White’s detector fails due to defects in either material or workmanship,<br />
White’s Electronics (UK) Ltd. will repair or replace at its option, all necessary<br />
parts without charge for parts or labor.<br />
Simply return the detector to our factory in Inverness, Scotland, giving<br />
details of the faults.<br />
Items excluded from the warranty are non-rechargeable batteries and<br />
other accessories.<br />
The warranty is not valid unless the Warranty Registration Card is returned<br />
to the factory address within 10 days of the original purchase for<br />
the purpose of recording that date, which is the actual commencement<br />
date of the warranty.
6 PulseScan TDI Owner’s Guide<br />
WHITE’S WARRANTY TRANSFER UK<br />
If for any reason you should sell your Pulsescan TDI prior to the date the<br />
warranty expires, the remaining warranty is transferable.<br />
Simply fill out the following information, including the Authorization Number,<br />
seal it in a stamped envelope, and send it to<br />
White’s Electronics, (UK) Ltd.<br />
5 Harbour Road<br />
Inverness, Scotland, IV UA.<br />
White’s will then advise you what, if any Warranty is available.<br />
The Warranty Statement must be completed with Serial number and<br />
information on previous and new owners.<br />
✂<br />
WARRANTY TRANSFER<br />
Original Owner -<br />
Name: _________________________________________<br />
Address: (Which appears on the original warranty card):<br />
______________________________________________<br />
________ ______________________________________<br />
_______________________________________________<br />
Imstrument Serial # ______________________________<br />
Original Purchase Date:____________________________<br />
NEW OWNER -<br />
Name: _________________________________________<br />
Address: ________________________________________<br />
_______________________________________________<br />
_______________________________________________<br />
Comments: _____________________________________
PulseScan TDI Owner’s Guide 7<br />
This warranty does not cover damage to the detector caused by accident,<br />
misuse, neglect, alterations, modifications or unauthorized service.<br />
Duration of any implied warranties (e.g., merchantability and fitness for a<br />
particular purpose) shall not be longer than the stated warranty.<br />
Neither the manufacturer nor the retailer shall be liable for any incidental<br />
or consequential damages resulting from defects or failures of the instrument<br />
to perform.<br />
This warranty does not affect your statutory legal rights.<br />
White’s Electronics (UK) ltd.<br />
35 harbour Road - Inverness, Scotland - IV1 1UA<br />
Telephone: (01463) 223456 - Fax: (01463) 224048<br />
e-mail: sales@whelects.demon.co.uk.<br />
Web site: www.whites.co.uk
8 PulseScan TDI Owner’s Guide<br />
WHITE’S WARRANTY SERVICE CENTERS<br />
In the unlikely event your detector requires service please note our following<br />
Authorized Service Centers -<br />
USA, ALL OF AMERICAS, PACIFIC RIM<br />
. Centerville Electronics<br />
9859 Fairview Ave. Manassas, VA 20110<br />
Toll Free: 888-645-0202, Or Toll: 703-367-7999<br />
Fax: 703-367-0868 • E-Mail: bob@cwrelics.com<br />
. Electronic Exploration<br />
575 West Harrison Lombard, IL 60148<br />
Toll Free: 800-392-3223, Or Toll: 630-620-0618<br />
Fax: 630-620-1005 • E-Mail: tony@ee-il.com<br />
. White’s Electronics, Inc.<br />
1011 Pleasant Valley Road<br />
Sweet Home, OR 97386<br />
Toll: 541-367-6121 Extension 128<br />
E-Mail: tmarshall@whiteselectronics.com<br />
Web Site: www.whiteselectronics.com
White’s UK Ltd.<br />
35J Harbour Road<br />
Inverness, Scotland IV1 1UA<br />
Telephone: (011)441-463-223-456<br />
Fax: 441-463-224-048<br />
E-Mail: sales@whelects.demon.co.uk<br />
Web Site: www.whites.co.uk<br />
PulseScan TDI Owner’s Guide 9<br />
UK, EUROPE, NORTHERN ASIA, AFRICA, NEAR EAST, MID EAST
40 PulseScan TDI Owner’s Guide<br />
White’s Electronics, Inc.<br />
1011 Pleasant Valley Road<br />
Sweet Home, Oregon 97386 USA<br />
541-367-6121<br />
www.whiteselectronics.com<br />
Edited by:<br />
Jimmy “Sierra” Normandi<br />
Mary Hand<br />
Steve Howard<br />
Part Number 621-0504


