Manual EN - Caliber Europe
Manual EN - Caliber Europe
Manual EN - Caliber Europe

Create successful ePaper yourself
Turn your PDF publications into a flip-book with our unique Google optimized e-Paper software.
Thank you for purchasing the<br />
RMD602BT<br />
MP3/USB/SD/MMC Player,<br />
with FM/MW Tuner<br />
Operating Instructions
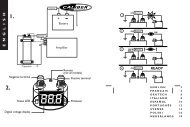
Safety Precautions<br />
Thank you for purchasing this product.<br />
Please read through these operating<br />
instructions so you will know how to operate<br />
your model properly. After you have finished<br />
reading the instructions, keep this manual in<br />
a safe place for future reference.<br />
Only connect the unit to a 12-volt power<br />
supply with negative grounding.<br />
Never install this unit where the operation &<br />
condition for safety driving is restrained.<br />
Never use the video display function in the<br />
front when driving to prevent the violation of<br />
laws & regulations and also to reduce the<br />
risk of traffic accident except using for rear<br />
view video camera.<br />
To ensure safe driving, please adjust the<br />
volume to a safe & comfort level in case of<br />
emergency situations.<br />
1<br />
Never expose this unit, amplifier, and<br />
speakers to moisture or water for preventing<br />
electric sparks or fires.<br />
Please don't change the fuse on the power<br />
cord without professional guidance, using<br />
improper fuse may cause damage to this unit<br />
or even cause fire.<br />
OK<br />
Please power off this unit at once and send it<br />
back to the after-sales service center or the<br />
dealer/distributor you purchased from if one<br />
of the following symptoms is found:<br />
MUTE<br />
OK<br />
MUTE<br />
OK<br />
OK<br />
MUTE<br />
(a). No audio output;<br />
(b). No image output;<br />
(c). Water or other obstacle enters the unit;<br />
(d). Smoking;<br />
(e). Peculiar smell.<br />
MUTE<br />
MUTE<br />
MUTE<br />
OK<br />
OK<br />
MUTE<br />
OK<br />
To provide a clear demonstration and an<br />
alternative for easy understanding of the<br />
operation of this unit, graphic illustration<br />
was used. However, this illustration is not<br />
necessary printed as the actual image found<br />
on the unit.<br />
OK
Contents<br />
Safety Precautions .........................................1<br />
Contents .........................................................2<br />
Features .........................................................3<br />
Panel Controls ................................................4<br />
Remote Controls ............................................5<br />
Basic Operations ............................................6<br />
Rotary Knob Menu ......................................7-9<br />
Radio Mode ..................................................10<br />
USB/SD/MMC/MP3 Playback .................11-15<br />
Bluetooth Mode .......................................15-17<br />
Device Connections ................................18-20<br />
Installation Guide.....................................20-22<br />
Anti-Theft System ........................................22<br />
Troubleshooting ............................................23<br />
Specifications ...............................................24<br />
2
Features<br />
WMA and MP3 Compatibility<br />
It is possible to playback WMA and MP3 files.<br />
About WMA<br />
The unit can playback WMA data.<br />
Windows Media and the Windows logo are<br />
trade marks or registered trademarks of<br />
Microsoft Corporation in the United States<br />
and/or other countries.<br />
This unit may not operate correctly depending<br />
on the application used to encode WMA files.<br />
About MP3<br />
Supply of this product only conveys a license<br />
for private, non-commercial use and does not<br />
convey a license nor imply any right to use<br />
this product in any commercial (i.e.revenuegenerating)<br />
realtime broadcasting (terrestrial,<br />
satellite, cable and/or any other media),<br />
broad-casting/streaming via internet, intranets<br />
and/or other networks or in other electronic<br />
content distribution systems, such as payaudio<br />
or audio-on-dem and applications.<br />
An independent license for such use is<br />
required. For details, please visit http://www.<br />
mp3licensing.com.<br />
Press the button to open the<br />
panel.<br />
3<br />
Button Operation Explanations<br />
Some frequent operations<br />
1) Move cursor<br />
Note:<br />
In Setting mode, the VOL knob has the same<br />
function as the / button to select setting<br />
items.<br />
2) Confirm
Panel Controls<br />
Power on/off: Press to turn on/off the unit.<br />
/<br />
1. - Short press to select playing mode:<br />
• Radio<br />
• USB (when USB inserted)<br />
• SD (when SD/MMC inserted)<br />
• AV (front audio & video input. External<br />
peripheral devices can be connected with<br />
the unit.)<br />
- Long press to return to main source menu<br />
when in any mode, then use navigate<br />
button to select the desired mode, and<br />
press OK button to confirm.<br />
2. Cancel source select menu and return to<br />
previous menu<br />
3. - Press to navigate up among option items<br />
(in MP3/WMA mode)<br />
- Play the previous preset radio station (in<br />
Radio mode)<br />
4. - Press to navigate down among option<br />
items (in MP3/WMA mode)<br />
- Play the next preset radio station (in<br />
Radio mode)<br />
5. - Power on/off (press and hold more than 2<br />
seconds)<br />
- Mute<br />
6. 3 inch TFT display<br />
7. SD card slot<br />
8. USB port<br />
9. - Rotate the knob to adjust volume level<br />
- Press to select audio/video Setting, and<br />
rotate the knob to adjust level.<br />
- Press more than 2 seconds to Setting<br />
menu.<br />
10. Panel open<br />
11. - Play/Pause (in MP3/WMA modes)<br />
- Band switch: FM1-FM2-FM3-MW1-MW2<br />
(in Radio mode)<br />
/<br />
4<br />
- Dial/Receive call (press briefly, in BT<br />
mode)<br />
12. - Preset scan (press briefly, in Radio mode)<br />
- Auto preset (press more than 2 seconds,<br />
in Radio mode)<br />
- Stop (in MP3/WMA mode)<br />
- Terminate call (in BT mode)<br />
13. - Search the previous station manually,<br />
and each press to seek step by step<br />
(press briefly, in Radio mode).<br />
- Search the previous station automatically<br />
(press more than 2 seconds, in Radio<br />
mode).<br />
- Press to search the previous track or<br />
chapter (in MP3/WMA mode).<br />
- Fast backward by 2, 4, 8, 20 step (press<br />
more than 2 seconds, in MP3/WMA mode).<br />
- Press to navigate left among option items<br />
14. - Search the next station manually, and<br />
each press to seek step by step (press<br />
briefly, in Radio mode).<br />
- Search the next station automatically<br />
(press more than 2 seconds, in Radio<br />
mode).<br />
- Search the next track or chapter (in MP3 /<br />
WMA mode).<br />
- Fast forward by 2, 4, 8, 20 step (press<br />
more than 2 seconds,in MP3/WMA mode).<br />
- Press to navigate right among option<br />
items<br />
15. - Confirm operation<br />
- Stop auto seeking (in Radio mode).<br />
16. Remote sensor<br />
17. AV in
Remote Controls<br />
Press to turn on/off the unit.<br />
1. Power on/off<br />
2. Setup<br />
3. Menu cursor<br />
4. Enter<br />
5. Program<br />
6. Digit area<br />
7. Select Audio/Video Setting, then rotate the<br />
knob to adjust level.<br />
8. Volume<br />
9. - Radio tune<br />
- Track skip/seek<br />
10. Source switch<br />
11. - Zoom<br />
- Terminate call (in BT mode)<br />
12. Repeat<br />
13. Repeat A-B<br />
14. Stop/Return<br />
15. Play/Pause<br />
16. Goto search<br />
17. - OSD: On screen display<br />
- AMS: Search and store stations automatically<br />
18. - DISP: Display time/clock (Video mode)<br />
- ESC: Return to previous menu<br />
19. - Video system PAL/NTSC/AUTO<br />
- Radio band (in Radio mode)<br />
- Dial/Receive call (in BT mode)<br />
20. Mute<br />
5<br />
Remote Control Operating Range<br />
The remote control can operate within a<br />
distance of 3~5m.<br />
Replacing the lithium battery<br />
When the range of operation of the card<br />
remote control becomes short or no function,<br />
replace the lithium battery with a new one.<br />
Make sure the battery polarity replacement is<br />
correct.<br />
1. Pull out the battery holder while pressing<br />
the stopper.<br />
2. Insert the button-type lithium battery with<br />
the (+) mark facing upward. Insert the battery<br />
holder into the remote control.<br />
1 2<br />
(CR 2025)<br />
Warning<br />
• Store the battery where children cannot<br />
reach. If a child accidentally swallows the<br />
battery, consult a doctor immediately.<br />
• Do not recharge, short, disassemble or heat<br />
the battery or dispose it in a fire.<br />
• Do not leave the battery with other metallic<br />
materials. Otherwise, the battery may start<br />
to give off heat, crack or catch fire.<br />
• When throwing away or saving the battery,<br />
wrap it in tape and insulate.
Basic Operations<br />
Turn on/off the Power<br />
1. Press to turn on the unit.<br />
The unit goes back to the last status after<br />
power on.<br />
2. Press more than two secnonds to power<br />
off.<br />
Mute<br />
Press the button to cut the sound.<br />
Note:<br />
• Doing the operation above again or<br />
adjusting volume will release muting.<br />
• Mute icon appears on the TFT during<br />
muting.<br />
Adjust the Volume<br />
Rotate the knob on the panel or press VOL +/-<br />
on the remote control to increase or decrease<br />
the volume.<br />
The adjustable range of volume is 0 to 39.<br />
Playing Source Selection<br />
Method 1<br />
Short press the SRC button on the panel<br />
or remote control to cycle through all the<br />
available sources.<br />
Method 2<br />
In any mode, long press the SRC button on<br />
the panel or remote control to enter main<br />
source menu, then use navigate button to<br />
select the desired mode, and press OK to<br />
confirm.<br />
6<br />
Note:<br />
• When some devices are not ready, they<br />
cannot be selected.<br />
• You should stop switching when the playing<br />
source you desired has been selected and<br />
wait for some seconds, the unit will auto<br />
enter the playing source mode you have<br />
selected.<br />
When Parking Brake Applied<br />
1. If 'PRK SW' cable is connected to hand<br />
brake switch, the video display of the TFT<br />
monitor will be controlled by driving status,<br />
system setup and input video sources.<br />
2. When the car is moving ahead, if the<br />
video file is played, the screen appears<br />
“WARNING: Engage Parking Brake to View<br />
Video”. The above warning screen will<br />
prevent the driver watching images. The<br />
passengers at the rear seats can watch<br />
normally.<br />
When Reverse Driving<br />
If the rear view video camera is connected,<br />
the unit automatically switches to CAMERA<br />
source during reverse driving. The unit returns<br />
to the original work mode after the reverse<br />
driving is done.
Rotary Knob Menu<br />
1. Rotate the knob to adjust volume level.<br />
2. Short press to access the Audio & Video<br />
Setting menu.<br />
.<br />
.<br />
.<br />
Each press the knob to change the AUDIO<br />
mode: EQ/Bass/Treble/Balance/Fader, and<br />
rotate the knob to adjust level.<br />
Each press the knob to change the VIDEO<br />
mode: Bright/Contrast/Saturation, and rotate<br />
the knob to adjust level.<br />
EQ: USER/FLAT/POP/ROCK/CLASSIC/<br />
JAZZ<br />
The Equalizer function applies preset sound<br />
effects to the unit’s audio output signal. Turn<br />
the rotary encoder to select from the following<br />
equalizer options: USER, FLAT, POPULAR,<br />
ROCK, CLASSIC, JAZZ. With the equalizer<br />
function activated, if bass or treble is adjusted,<br />
the EQ Mode will revert to “USER”. When<br />
the equalizer function is activated, the most<br />
recently selected bass/treble levels cannot be<br />
adjusted. When the equalizer function is not<br />
active, the unit will return to the most recently<br />
selected bass and treble levels.<br />
3. Press the knob more than 2 seconds to<br />
enter Setting mode, then Use , /<br />
and OK key to select setting items.<br />
7<br />
General Setting<br />
BEEP: ON/ OFF<br />
The beep tone feature allows the selection of<br />
an audible beep tone to be heard each time<br />
the menu is accessed.<br />
LOUDNESS: ON/OFF<br />
When listening to music at low volumes, this<br />
feature will selectively boost certain bass and<br />
treble frequencies.<br />
TIME MODE<br />
12 HOUR MODE: the clock displays in the<br />
type of 12 hours such as 11:18 AM.<br />
24 HOUR MODE: the clock displays in the<br />
type of 24 hours such as 20:18.<br />
TIME ADJUST<br />
Press / or / key to set hour and minute.<br />
Each time you press / to select one<br />
segment of the clock display:<br />
Hour-Minute<br />
As you select segments of the clock display<br />
the segment selected will be highlighted. Then<br />
you can press / to put a clock right.<br />
PARKING: ON/OFF (optional)<br />
When it is in Parking “On” mode, if you play<br />
the video file, the screen will show “WARNING:<br />
Engage Parking Brake to View Video”.<br />
MIRROR: ON/OFF<br />
This option allows for selection of a mirror<br />
image view when a rear view backup camera<br />
(sold separately) is connected to the CAMERA<br />
IN input on the back of the radio. Turn the<br />
rotary encoder to select “On” or “Off”.
Rotary Knob Menu<br />
Video Setting<br />
TV SYSTEM: NTSC/PAL/AUTO<br />
Select the TV system in the setting menu.<br />
TV TYPE: 4:3PS/4:3LB/16:9<br />
Select TV type to watch wide screen movies.<br />
4:3 Pan Scan: For 4:3 TV, left and right edges<br />
will be cut.<br />
4:3 Letter Box: For 4:3 TV, black bars will<br />
appear on top and bottom.<br />
16:9: For 16:9 wide screen TV.<br />
DEFAULT: RESTORE<br />
If this item is selected, the unit will return to<br />
original setting.<br />
BRIGHTNESS<br />
Set the brightness of the video output with<br />
from 00 to 16.<br />
CONTRAST<br />
Set the contrast of the video output with<br />
from 00 to 16.<br />
HUE<br />
Set the hue of the video output with from 00<br />
to 16.<br />
SATURATION<br />
Set the saturation of the video output with<br />
from 00 to 16.<br />
8<br />
Language Setting<br />
OSD LANGUAGE<br />
Select one language that you are familiar with<br />
to display system menu.<br />
Radio Setting<br />
LOC_DX: LOC/DX<br />
Choose radio distant or local.<br />
DX: Stations with strong and weak<br />
signals can be broadcast.<br />
LOCAL: Only station with strong signal can be<br />
broadcast.<br />
STEREO_MONO: STEREO/MONO<br />
Choose FM mono/stereo.
Rotary Knob Menu<br />
BT Setting<br />
PAIR: ON/OFF<br />
Set pairing ON/OFF. If select ON, to return to<br />
BT main menu.<br />
AUTO CONNECT: ON/OFF<br />
After disconnecting with your mobile phone,<br />
the built-in Bluetooth will send connection<br />
order automatically in 20s if you have set the<br />
'AUTO CONNECT' to 'ON'.<br />
AUTO ANSWER: ON/OFF<br />
The built-in Bluetooth changes the work mode<br />
to phone mode automatically and displays the<br />
calling number when one call is coming in.<br />
The built-in Bluetooth will put through the<br />
call automatically if you have set the ‘AUTO<br />
ANSWER’ option to ‘ON’, whereas you should<br />
put through the call manually.<br />
RESET: ON<br />
Clear the system and return the unit to default<br />
operation.<br />
VERSION<br />
Display the BT software version.<br />
9
Radio Mode<br />
Accessing Radio Mode<br />
Press the SRC button on the front panel or<br />
remote control to switch to the Radio source.<br />
4<br />
5<br />
6<br />
Selecting a Band<br />
Press BAND once or more to select FM1-<br />
FM2 - FM3 - AM1 - AM2.<br />
Display shows wave band, frequency, and<br />
preset station number if already stored.<br />
Selecting a Station<br />
Press the or tuning button to tune to<br />
another station.<br />
Tuning<br />
- AUTO SEEK<br />
Press the or buttons to seek the next/<br />
previous station automatically.<br />
- MANUAL SEEK<br />
Press and hold the or buttons to enter<br />
manual tuning mode. Press the buttons again<br />
to move the radio frequency number up or<br />
down one step.<br />
Note:<br />
2<br />
1 3<br />
During manual seeking, if the pause between<br />
two operating steps is longer than 5 seconds,<br />
press the or buttons, the unit will enter<br />
auto seeking.<br />
Preset Mode<br />
Six numbered preset buttons store and recall<br />
stations for each band. The stored stations<br />
(P1-P6) for the current band can be viewed on<br />
the screen.<br />
10<br />
1. Source Indicator<br />
2. Current Preset Channels<br />
3. Time/Clock<br />
4. AM/FM Band<br />
5. Radio Station Frequency<br />
6. EQ Indicator<br />
Storing Stations<br />
- Auto storing<br />
1. Select a band (if needed).<br />
2. Press AMS briefly to scan the preset station<br />
P1 - P6 for 5 seconds each.<br />
3. Hold AMS more than 2 seconds, the<br />
6 strongest available stations will be<br />
automatically saved in the preset button<br />
(numbers 1-6).<br />
- <strong>Manual</strong> Storing<br />
1. Select a band (if needed), then select a<br />
station.<br />
2. Press and hold a preset button (numbers<br />
1-6) on the front panel or remote control.<br />
3. The preset number and station is displayed<br />
and highlighted.<br />
Recalling a Station<br />
1. Select a band (if needed).<br />
2. Press a front panel or remote control<br />
preset button (numbers 1-6) to select the<br />
corresponding stored station.
USB/SD/MMC/MP3 Playback<br />
1. Load SD/MMC Card<br />
Insert the SD/MMC card into the slot, with<br />
the front side at left.<br />
The unit will play the music automatically<br />
and the LCD will show CARD.<br />
2. Take out SD/MMC Card<br />
Press SRC button and switch to non CARD<br />
mode, slightly press SD/MMC card, take<br />
out the card when it pops out.<br />
3. Load USB Equipment<br />
Open the rubber cap, insert the USB into<br />
the connector and the unit will play the<br />
music in the USB storer automatically, and<br />
the LCD will show USB.<br />
4. Take out USB Equipment<br />
Press SRC button and switch to non USB<br />
mode, then take off the USB stick, close<br />
the rubber cap.<br />
11<br />
USB/SD/MMC Notes<br />
USB functions (flash memory type) MP3<br />
music play<br />
1. SD/MMC card support<br />
2. USB flash memory 2 in 1 (SD/MMC)<br />
support<br />
3. FAT 12/FAT 16, FAT 32 is possible<br />
- FAT 12/16 (dir: 180 support, file: 1500<br />
support)<br />
- FAT 32 (dir: 180 support, file: 1500<br />
support)<br />
4. Tag (id3 tag ver 2.0)<br />
- Title/artist/album: 30 byte support<br />
5. Multi card reader not support<br />
6. USB 1.1 support<br />
USB 2.0 support<br />
(it can not support USB 2.0 speed. Just, get<br />
the same speed with USB 1.1)<br />
Note:<br />
Not all kinds of USB devices are compatible<br />
with the unit.
USB/SD/MMC/MP3 Playback<br />
Accessing USB/SD Card Mode<br />
To play files from an SD or USB that is already<br />
inserted, choose the CARD or USB source.<br />
The playback screen is indicated below:<br />
4<br />
5<br />
6<br />
1 2 3<br />
File Type Supported<br />
Audio file: MP3(*.mp3), WMA(*.wma)<br />
Video file:<br />
MP4 (*.avi, DIVX3.11/4.0/5.0/6.0)<br />
MPEG 1 (*.dat)<br />
Picture file: JPEG (*.jpg)<br />
MP3 file:<br />
ISO 9660 or ISO 9660 + Joliet format - Max.<br />
30 characters.<br />
Max. nested directory is 8 levels.<br />
The max. album number is 99.<br />
The max. length of each track is 99 minutes<br />
59 seconds.<br />
Supported sampling frequency for MP3: 8KHz<br />
to 48KHz (44.1KHz preferably).<br />
Supported bit-rates of MP3 are: 32 - 320 kbps<br />
(128 kbps preferably).<br />
File NOT Supported<br />
*.AAC, *.DLF, *.M3U, *.PLS, MP3 PRO files<br />
and files with DRM.<br />
12<br />
1. Source Indicator<br />
2. Current Track/Total Track<br />
3. Name of the Song Display<br />
4. Audio Folder<br />
5. Picture Folder<br />
6. Video Folder<br />
Audio/Picture/Video File Playback<br />
When AUDIO/PICTURE/VIDEO file is played,<br />
Category/Folder/File list will be displayed on<br />
the screen, and file/folder name being played<br />
will be displayed on top. Current selected item<br />
will be highlighted.<br />
The list lets you see the list of track titles or<br />
folder names. If you select a folder on the list,<br />
you can view its contents.<br />
For Audio Files<br />
1. Press ESC to return to playlist menu.<br />
2. Use / to select AUDIO folders.<br />
3. Press OK, on the front panel or <strong>EN</strong>TER<br />
on the remote control to display all available<br />
audio file folders.<br />
4. Use / to enter file list and use / to<br />
select desired file, press OK, on the<br />
front panel or <strong>EN</strong>TER on the remote control<br />
to start play.<br />
5. During the file playing, press will enter<br />
power on logo, then press to return.
USB/SD/MMC/MP3 Playback<br />
For Picture files<br />
1. Press ESC to return to playlist menu.<br />
2. Use / to select PICTURE folders.<br />
3. Press OK, on the front panel or <strong>EN</strong>TER<br />
on the remote control to display all available<br />
picture file folders.<br />
4. Use / to enter file list and use / to<br />
select desired file, press OK, on the<br />
front panel or <strong>EN</strong>TER on the remote control<br />
to slide show the pictures, and press PROG<br />
to select picture showing style.<br />
5. During the file playing, press to stop and<br />
return to the sub-root.<br />
For Video files<br />
1. Press ESC to return to playlist menu.<br />
2. Use / to select VIDEO folders.<br />
3. Press OK, on the front panel or <strong>EN</strong>TER<br />
on the remote control to display all available<br />
video file folders.<br />
4. Use / to enter file list and use / to<br />
select desired file, press OK, on the<br />
front panel or <strong>EN</strong>TER on the remote control<br />
to start play.<br />
5. During the file playing, press to stop and<br />
return to the sub-root.<br />
Note:<br />
1. If the selected folder does not contain<br />
any playable track, the track list is not<br />
displayed.<br />
2. During the folder selecting, press ESC<br />
to the upper folder (parent folder). If the<br />
uppermost folder is listed, ESC cannot be<br />
used.<br />
MP3/WMA Notes<br />
MP3 and WMA (Windows Media Audio) music<br />
files are digital audio files that are compressed<br />
to allow more files to be stored. This unit can<br />
play MP3/WMA and video directly from files<br />
contained on a SD card or USB Device. Many<br />
types of software are available for converting<br />
audio files into MP3/WMA formats. This unit<br />
can play MP3 (MPEG1, 2, 2.5 Audio Layer<br />
3). However, the MP3 recording media and<br />
accepted formats are limited.<br />
13<br />
Entering ID3 Tag<br />
This unit supports ID3 tag version 2.0.<br />
For character codes, refer to the table to the<br />
below.<br />
Entering File and Folder Names<br />
Names using the code list characters are the<br />
only file names and folder names that can<br />
be entered and displayed. Using any other<br />
character will cause the file and folder<br />
names to be displayed incorrectly. The unit<br />
recognizes and plays only files with the MP3/<br />
WMA extension.<br />
Note:<br />
A file name entered with characters not on the<br />
code list may not play correctly.
USB/SD/MMC/MP3 Playback<br />
MP3 Playing Order<br />
When selected for play, files and folders<br />
(Folder Search, File Search or Folder Select)<br />
are accessed in the order in which they were<br />
written to the media. As a result, the order in<br />
which they are expected to be played may<br />
not match the order in which they are actually<br />
played. You may be able to set the order in<br />
which MP3/WMA files are to be played by<br />
assigning file names beginning with play<br />
sequence numbers such as "01" to "99". For<br />
example, a medium with the following folder/<br />
file hierarchy is subject to Folder Search, File<br />
Search or Folder Select as shown below.<br />
() 0<br />
1<br />
6<br />
2<br />
3<br />
5<br />
7<br />
♪①<br />
♪②<br />
♪③<br />
4 ♪④<br />
♪⑤<br />
♪⑦<br />
♪⑧<br />
♪⑨<br />
♪⑥<br />
Layer1 Layer 2 Layer 3 Layer 4 Layer5<br />
○ Root Folder<br />
Folder<br />
♪ File<br />
The player will only recognize three folder<br />
levels and does not display folders containing<br />
only other folders. In the example above, the<br />
unit will display folders 3, 4, 6, and 8, but not 2<br />
and 7 since they do not contain since they do<br />
not contain any tracks directly. Folder 5 is not<br />
recognized at all since it is at the fourth level.<br />
Electronic Shock Protection<br />
• >45 seconds for MP3 recorded at 44.1kHz,<br />
128kbps<br />
• >90 seconds for WMA recorded at 44.1kHz,<br />
128kbps<br />
14<br />
Stop Playback Temporarily<br />
- During playback, press to pause<br />
playback.<br />
- The sound will be muted.<br />
- Display "PAUSE" in the TV screen.<br />
Press again to continue playback.<br />
To resume normal play, repeat the operation.<br />
Stop Playback Entirely<br />
During MP3 playback:<br />
1. Press key once stopping the playback<br />
and the relevant location is saved, press<br />
to resume the playback from the saved<br />
location.<br />
2. Press twice to cease the playback. Press<br />
to start the playback from the very<br />
beginning the Title page.<br />
Select Desired Track<br />
- Press or to skip to the next track.<br />
- Use 1-9 and 0, 10+ buttons on the remote<br />
control to select desired track number.<br />
Fast Forward/Backward During<br />
Playback<br />
Press or for more than 2 seconds once<br />
or more to select X2, X4, X8, X20, to fast<br />
backward or forward track during playback.<br />
- During the fast forward or backward<br />
operation, press briefly to playback<br />
again.<br />
- During the fast forward or backward<br />
operation, the volume will be muted.<br />
Repeat<br />
During playback, press REPEAT once or<br />
more.<br />
- RPT icon will appear on the display.<br />
- For File: Display appears RPT ONE RPT<br />
DIR RPT ALL RPT OFF<br />
Note:<br />
If you do not select RPT on, when the entire<br />
playback has finished, the system will stop. If<br />
no other control, after 5 minutes the unit will<br />
turn into standby mode.
USB/SD/MMC/MP3 Playback<br />
Repeat A B<br />
Select desired passage to repeat playback.<br />
- Press A B once to select starting point.<br />
Display shows REPEAT A.<br />
- Press A B again to select ending point.<br />
Display shows REPEAT A B, and selected<br />
passage start to replay.<br />
- Press A B once again to exit. Display<br />
shows A B CANCEL.<br />
GOTO<br />
Goto desired track/chapter or time point<br />
directly.<br />
Press GOTO button on the remote control,<br />
track and time display on top of the screen.<br />
Current item is highlighted. Use / to<br />
select desired item. Use digit button to select<br />
number. Press <strong>EN</strong>TER to confirm.<br />
Program<br />
- Press PROG to enter program list. Use<br />
/ or / cursor and digit button to enter<br />
number.<br />
- Press to play, or move the cursor to<br />
select "PLAY" and press <strong>EN</strong>TER to play.<br />
- If you want to delete the list, move the<br />
cursor to "CLEAR", press <strong>EN</strong>TER to delete<br />
all the list set before.<br />
- Press PROG again to exit program play.<br />
Picture Mirror<br />
When you view a picture, press repeatly<br />
to mirror the picture vertically, and press<br />
repeatly to mirror the picture horizontally.<br />
ZOOM<br />
Press ZOOM button, the picture will be<br />
zoomed accordingly.<br />
15<br />
Bluetooth Mode<br />
Accessing Bluetooth Mode<br />
Press the SRC button on the front panel or<br />
remote control to switch to the Bluetooth<br />
source.<br />
Note:<br />
For your safety, avoid talking on the phone as<br />
much as possible while driving.<br />
Bluetooth is a wireless transmission way<br />
for short distance. The built-in Bluetooth<br />
can connect with the mobile phones having<br />
Bluetooth function.<br />
After connecting, you can control your mobile<br />
phone through the unit.<br />
Pairing<br />
Use this function to establish a connection<br />
between the unit and your mobile phone.<br />
Press the knob more than 2 seconds to enter<br />
Setting mode, then Use key to select BT<br />
setting item, and use / , key to switch<br />
the PAIR: ON/OFF options to ON.<br />
Press ESC to return to Bluetooth main menu.<br />
“WAITING FOR PAIRING” will appear on the<br />
screen.<br />
Turn on Bluetooth function of your mobile<br />
phone, keep phone within 3 meters to the unit<br />
and start to search for Bluetooth devices.<br />
After the name of the Bluetooth module<br />
“CALIBER” appears on the pairing list on<br />
your mobile phone, you should select it. At<br />
this time, a pairing code is required. Enter<br />
the pairing code (“1234” by default) and the<br />
Bluetooth pairing will process automatically.<br />
Some mobile phones may instruct you to<br />
select connecting or disconnecting, please<br />
select connecting.
Bluetooth Mode<br />
Stop Pairing<br />
You can stop pairing or disconnecting in this<br />
following way:<br />
Enter BT Setting menu, switch the PAIR: ON/<br />
OFF options to OFF, then press ESC to return<br />
to Bluetooth main menu. After disconnecting,<br />
“NO DEVICE” will appear on the screen and<br />
the Bluetooth icon will disappear.<br />
Incoming Phone Waiting (if the mobile<br />
phone has this function depending on the type<br />
of mobile phone)<br />
In the mode of communication or BT AUDIO<br />
(MUSIC PLAYING), if there is a call coming<br />
in, the TFT screen will appear "PHONE<br />
NUMBER ANSWER?". If you press key<br />
to stop communication you are making, and<br />
receiving the incoming phone. If you press<br />
key on to reject the incoming call, and resume<br />
the former communication.<br />
Voice Transfer<br />
During talking, press key to transfer audio<br />
from the unit to your mobile phone, and press<br />
key again to transfer audio from your<br />
mobile phone to the unit.<br />
Note:<br />
Some mobile phones will transfer audio from<br />
the unit to themselves once the incoming call<br />
is answered.<br />
BT Audio (if the mobile phone has the<br />
A2DP & AVRCP functions)<br />
After pairing successfully, in the mode of<br />
Bluetooth main menu, open the audio player<br />
of your mobile phone and set the transmit<br />
mode to Bluetooth. At this time, the unit<br />
screen will appear “MUSIC PLAYING”, and<br />
the audio will be transferred from the mobile<br />
phone to the unit. Some mobile phones may<br />
instruct to connect with the unit. After found<br />
the Bluetooth device name “SUN-BMA19” on<br />
mobile phone, you should select to connect<br />
it, and then input the pairing code (“1234”<br />
by default). When music playback, you can<br />
press on the remote control to switch to<br />
play/pause, and press the / key on the<br />
16<br />
front panel and remote control (if the options<br />
are available).<br />
LOG<br />
After pairing successfully, in the mode of<br />
Bluetooth main menu, press key to select<br />
dialling history.<br />
1. Missed Call<br />
Making a phone call using missed call history.<br />
Press / button to search for desired record<br />
on the list.<br />
2. Dialed Call<br />
Making a phone call using the dialled number<br />
history.<br />
Press / button to search for desired record<br />
on the list.<br />
3. Received Call<br />
Making a phone call using the received call<br />
history.<br />
Press / button to search for desired record<br />
on the list.<br />
Music Mode<br />
A2DP<br />
A2DP is short for Advanced Audio Distribution<br />
Profile. The mobile phones supporting this<br />
function can transmit stereo audio, whereas<br />
the ones not supporting this function can<br />
transmit mono audio only.<br />
AVRCP<br />
AVRCP is short for Audio/Video Remote<br />
Control Profile. The mobile phones supporting<br />
this function can control the playback of a<br />
Bluetooth audio player.
Bluetooth Mode<br />
In the mode of the music player working, if<br />
you want to make a phone call, you can press<br />
the number keys on the mobile phone or on<br />
the remote control, then press to dial. At<br />
the same time the music player will stop. The<br />
TFT screen will appear “DIALLING”, after the<br />
call received, the voice will be transferred<br />
to the unit. When the call ends, the TFT<br />
screen will appear “MUSIC PLAYING”. Some<br />
mobile phone may instruct whether resume to<br />
playback.<br />
If there is an incoming phone call, the music<br />
player will stop, and the TFT screen will<br />
appear “PHONE NUMBER ANSWER?”. When<br />
the call ends, the TFT screen will appear<br />
“MUSIC PLAYER”. Some mobile phone may<br />
instruct whether resume to playback.<br />
General Notes for Bluetooth<br />
1. For N7X, N9X, PHILIPS, Sony Ericssion,<br />
SAMSUNG mobile phones, during our test,<br />
after the mobile phones appear connection<br />
successful, the unit still appear waiting for<br />
pairing. At this time you must find the unit’s<br />
Bluetooth module name “SUN-BMA19” on<br />
the pairing list on your mobile phone and<br />
select it. In the submenu, select connecting,<br />
then the unit will appear pair OK.<br />
Otherwise, there is no voice coming out<br />
when communicating, though the mobile<br />
phone has already displayed pair OK.<br />
Some mobile phones, such as PHILIPS,<br />
when it playbacks A2DP, you must in its<br />
playbacking mode, find the unit’s “SUN-<br />
BMA19” and reconnect (check your mobile<br />
phone whether has the A2DP & AVRCP<br />
functions).<br />
2. When pairing, some types of mobile<br />
phone can instruct you how to operate,<br />
for example, when you make a phone call<br />
with the unit, but no voice comes out, it is<br />
because the mobile phone voice doesn’t<br />
be transferred to the unit. The SAMSUNG<br />
mobile phone can instruct voice should be<br />
transferred to Bluetooth device.<br />
3. Depending on the mobile phone, if private<br />
mode is selected, when you make a<br />
phone call with the unit, when received,<br />
the voice can be transferred to the mobile<br />
phone. But sometime the Bluetooth maybe<br />
17<br />
disconnect till the communication ends, and<br />
connects your mobile phone and the unit<br />
automatically. Some mobile phones maybe<br />
require you to perform again the pairing<br />
operation.<br />
4. For mobile phone, the Bluetooth device<br />
name must be primary symbols or<br />
numbers. Otherwise, some unpredictable<br />
issues may occur during the Bluetooth<br />
devices connecting and making phone call.<br />
5. After paired OK, if no sound produced,<br />
please check the Bluetooth stereo audio<br />
whether is switched to ON.
Device Connections<br />
Notes of connection<br />
• To avoid short circuit in the electrical<br />
system, ensure that the negative battery<br />
cable is disconnected before installation.<br />
• To prevent short circuit in the wiring and<br />
damaging to this unit, secure all wirings<br />
with cable clamp or adhesive tape. Route<br />
the wirings in a secured, out of heating<br />
place without touching any moving parts<br />
such as gear shift, handbrake, and seat<br />
rails to prevent the wiring insulation being<br />
melted / wore off.<br />
• Never pass the yellow power cord through<br />
the installation hole into the engine<br />
compartment and connect to the car<br />
battery. Otherwise, a high possibility of<br />
serious short circuit to the electrical system<br />
may be occurred.<br />
• Replacing a new fuse with 15A rating<br />
when the old one is broken, using no<br />
fuse or fuse with improper rating may<br />
cause damage to this unit or even fires.<br />
Parking Brake Cable Connections<br />
Reverse Driving Cable Connections<br />
18<br />
If a proper fuse is installed and electrical<br />
problems still occur, please contact with<br />
any professional car shops for inquiry.<br />
• DO NOT connect other equipments with the<br />
car battery to avoid battery overheating.<br />
• Please make sure all the wiring connections<br />
& the cables of the Speakers are wellinsulated.<br />
Otherwise, this unit may be<br />
damaged by short circuit.<br />
• If there is no ACC available, please connect<br />
ACC lead to the power supply with a switch.<br />
• If an external power amplifier is connected,<br />
please don't connect P.CONT lead to the<br />
power lead of the external power amplifier,<br />
otherwise, electric spark or other damage<br />
may be resulted.<br />
• Never ground the speaker output to prevent<br />
the damage to the built-in power amplifier.<br />
• The minimum rating of the speakers<br />
connected to this unit is 50W with 4 to 8Ω<br />
impedance.
Device Connections<br />
Wiring Diagram<br />
(Yellow)<br />
Video-out<br />
(Yellow)<br />
Camera-in<br />
Bluetooth microphone<br />
(Black)<br />
Radio Antenna<br />
Fuse 15A<br />
Reverse<br />
(Active high level input)<br />
(Pink)<br />
Connector<br />
Parking SW<br />
(Active low level input)<br />
(Green/<br />
White)<br />
Amplifier<br />
L(White)<br />
R(Red)<br />
Rear Line-out(Gray)<br />
ISO Connector<br />
19
Device Connections<br />
Using the ISO Connector<br />
1. If your car is equipped with the ISO<br />
connector, then connect the ISO connectors<br />
as illustrated.<br />
2. For connections without the ISO<br />
connectors, check the wiring in the vehicle<br />
carefully before connecting, incorrect<br />
connection may cause serious damage to<br />
this unit.<br />
Cut the connector, connect the colored<br />
leads of the power cord to the car battery,<br />
as shown in the colour code table below for<br />
speaker and power cable connections.<br />
Location<br />
1<br />
2<br />
3<br />
4<br />
5<br />
Function<br />
Connector A Connector B<br />
Battery 12V(+)/Yellow<br />
ANT/Amp control<br />
/Blue<br />
6<br />
7 ACC+/Red<br />
8<br />
Ground/Black<br />
Rear Right (+) - Purple<br />
Rear Right (-) - Purple /<br />
Black Stripe<br />
Front Right (+) - Gray<br />
Front Right (-) - Gray /<br />
Black Stripe<br />
Front Left(+) - White<br />
Front Left(-) - White /<br />
Black Stripe<br />
Rear Left (+) - Green<br />
Rear Left (-) - Green/<br />
Black Stripe<br />
20<br />
Installation Guide<br />
Preparation<br />
1. Disconnect battery<br />
Before you begin, always disconnect the<br />
battery negative terminal.<br />
Note:<br />
If the unit is to be installed in a car equipped<br />
with an on-board drive or navigation computer,<br />
do not disconnect the battery cable. If the<br />
cable is disconnected, the computer memory<br />
may be lost. Under these conditions, use extra<br />
caution during installation to avoid causing a<br />
short circuit.<br />
2. Remove unit from sleeve<br />
Lift latches on both sides of sleeve to remove<br />
half-sleeve from the unit.<br />
Mounting Sleeve Installation<br />
1. Slide the mounting sleeve off the chassis.<br />
If it is locked into position, use the removal<br />
tools (supplied) to disengage it.<br />
2. Check the dashboard opening size by<br />
sliding the mounting sleeve into it.<br />
If the opening is too small, carefully cut or<br />
file as necessary until the sleeve easily<br />
slides into the opening. Do not force the<br />
sleeve into the opening or cause it to bend<br />
or bow. Check for sufficient space behind<br />
the dashboard for the unit chassis.<br />
This unit can be installed in any dashboard<br />
with a suitable 183 mm (W) x 52 mm (H)<br />
opening as shown above. The dashboard<br />
should be 4.75 mm - 5.56 mm thick in order<br />
to be able to support the unit.<br />
3. Locate the series of bend tabs along the<br />
top, bottom, and sides of the mounting<br />
sleeve. With the sleeve fully inserted into<br />
the dashboard opening, bend as many of<br />
the tabs outward as necessary to firmly<br />
secure the sleeve to the dashboard.<br />
4. Place the unit in front of the dashboard<br />
opening so the wiring can be brought<br />
through the mounting sleeve. Follow the<br />
wiring diagram carefully and make certain
Installation Guide<br />
all connections are secure and insulated<br />
with wire nuts or electrical tape. After<br />
completing the wiring connections, turn the<br />
unit on to confirm operation (vehicle ignition<br />
must be on). If the unit does not operate,<br />
re-check all wiring until the problem is<br />
corrected.<br />
5. Make sure the radio is right-side up, then<br />
carefully slide the radio into the mounting<br />
sleeve until it is fully seated and the spring<br />
clips lock it into place.<br />
6. Secure the rear of the unit to the car<br />
body using the mounting bolt and rubber<br />
cushion.<br />
7. Test the unit using the “Operation”<br />
instructions that follow.<br />
Kit Installation<br />
If your vehicle requires the use of an<br />
installation kit to mount this unit, follow the<br />
instructions included with the installation kit to<br />
attach the unit to the mounting plate supplied<br />
with the kit.<br />
1. Wire and test the unit as outlined in the<br />
Mounting Sleeve Installation instructions.<br />
2. Install the radio/mounting plate assembly<br />
to the sub-dashboard according to the<br />
instructions in the installation kit.<br />
3. Replace the dashboard trim panel.<br />
21<br />
ISO Installation<br />
This unit has threaded holes in the chassis<br />
side panels which may be used with the<br />
original factory mounting brackets of some<br />
vehicles to mount the radio to the dashboard.<br />
Please consult with your local car stereo shop<br />
for assistance on this type of installation.<br />
1. Remove the existing factory radio from the<br />
dashboard or center console mounting.<br />
Save all hardware and brackets as they will<br />
be used to mount the new radio.<br />
2. Carefully unsnap the plastic frame from the<br />
front of the new unit chassis. Remove and<br />
discard the frame.<br />
3. Remove the factory mounting brackets and<br />
hardware from the existing unit and attach<br />
them to the new unit. Do not exceed M5 x<br />
9mm maximum screw size. Longer screws<br />
may damage components inside the<br />
chassis.<br />
4. Wire the new unit as outlined in the<br />
Mounting Sleeve Installation instructions.<br />
5. Mount the new unit assembly to the<br />
dashboard or center console using the<br />
reverse procedure of step 1.
Installation Guide<br />
Reset<br />
The RESET button is located behind the front<br />
panel and can only be accessed with the front<br />
panel opened. Resetting the unit will erase<br />
the time and preset memories. It should only<br />
be activated upon initial installation after all<br />
wiring is complete, or if there is a malfunction<br />
of any of the switches on the unit. In these<br />
circumstances, pressing the RESET button<br />
will clear the system and return the unit to<br />
default operation.<br />
Fuse<br />
When replacing a fuse, make sure the new<br />
fuse is the correct type and amperage. Using<br />
an incorrect fuse could damage the radio.<br />
Reconnect Battery<br />
When wiring is complete, reconnect the<br />
battery negative terminal.<br />
22<br />
Anti-Theft System<br />
This unit is equipped with a detachable panel.<br />
Panel can be detached and taken with you,<br />
helping to deter theft.<br />
Removing the Panel<br />
1. Switch off the power of the unit.<br />
2. Press button to flip down the panel.<br />
3. At an angle hold the panel to pull it out.<br />
4. Place the panel into the case and take it<br />
with you when you leave the car.<br />
Installing the Panel<br />
1. Hold the panel and ensure the panel faces<br />
toward you, and set the right side of the<br />
panel in the panel bracket.<br />
2. Press the left side of the panel until it locks.<br />
Removing the Unit<br />
1. Remove the panel and the trim plate.<br />
2. Remove the trim ring by firmly grasping one<br />
side and pulling.<br />
3. Insert the removal keys straight back until<br />
they lock, then pull the radio out. If the<br />
removal keys are inserted at an angle, they<br />
will not lock properly and will not release the<br />
unit.
Troubleshooting<br />
If you suspect something is wrong, immediately switch power off. Immediately stop using it and<br />
call the store where you purchased it. Never try to repair the unit yourself because it is dangerous<br />
to do so.<br />
Problem<br />
General<br />
Possible cause Solution<br />
Car ignition is not on. Turn your car key in the ignition.<br />
The unit will not switch Cable is not properly Check cable connection.<br />
on.<br />
connected.<br />
Replace fuse with a new fuse of the<br />
Fuse is burnt.<br />
same capacity.<br />
No sound<br />
Volume is set at minimum or Check the volume or switch the mute<br />
the mute function is on. function off.<br />
The unit or screen does<br />
The unit system is unstable.<br />
not function normally.<br />
TUNER mode<br />
Press the RESET button.<br />
Unable to receive The antenna is not connected<br />
Connect the antenna properly.<br />
stations.<br />
properly.<br />
Poor quality reception of The antenna is not fully Fully extend the antenna and if<br />
radio station.<br />
extended or it is broken. broken, replace it with a new one.<br />
Preset stations are lost.<br />
USB/SD/MMC mode<br />
Connect the permanent live on the<br />
The battery cable is not<br />
unit to the permanent live on the<br />
properly connected.<br />
vehicle.<br />
The memory card or USB<br />
Unable to insert USB<br />
device has been inserted the Insert it the other way around.<br />
device or SD/MMC card.<br />
wrong way round.<br />
Check that the USB/SD/MMC file<br />
The USB device or SD/<br />
system is in FAT or FAT32 format.<br />
MMC card cannot be NTFS format is not supported. Due to different formats, some models<br />
read.<br />
Remote control<br />
of USB storage devices or MP3<br />
players may not be read.<br />
The remote control is<br />
The batteries are low or<br />
not working or does not<br />
Change the batteries.<br />
empty.<br />
work properly<br />
23
Specifications<br />
General<br />
Power supply: 12VDC (11V-16V), Test voltage 14.4V, negative ground<br />
Maximum power output: 75W x 4 channels<br />
Continuous power output: 20W x 4 channels (4 10% T.H.D.)<br />
Suitable speaker impedance: 4-8ohm<br />
Pre-Amp output voltage: 2.0V (Play mode: 1KHz, 0dB, 10K load)<br />
Fuse: 15A<br />
Dimensions (WxHxD): 178 x 50 x 166mm<br />
Weight: 1.7kg<br />
Aux-in level: 500mV<br />
3 Inch (4:3) TFT LCD<br />
Display resolution (dot) 960(W)×240(H)<br />
Active area (mm) 60.00×45.00<br />
Screen size (inch) 3.0 (Diagonal)<br />
Dot pitch (mm) 0.0625 x 0.1875<br />
Contrast ratio 300<br />
Brightness 350nits<br />
FM Stereo Radio<br />
Frequency range: 87.5-108.0MHz (<strong>Europe</strong>)<br />
87.5-107.9MHz (America)<br />
Usable sensitivity: 8dB μ<br />
Frequency response: 30Hz-15KHz<br />
Stereo separation: 30dB(1KHz)<br />
Image response ratio: 50dB<br />
IF response ratio: 70dB<br />
Signal/noise ratio: >55dB<br />
AM(MW) Radio<br />
Frequency range 522-1620KHz (<strong>Europe</strong>)<br />
530-1710KHz (America)<br />
Usable sensitivity (S/N=20dB) 30dBμ<br />
Components<br />
Mounting sleeve 1<br />
Machine screws M5x6 mm 4<br />
Mounting bolt (50 mm) 1<br />
Wire connector 1<br />
Removable face plate case 1<br />
Trim plate 1<br />
Removal key 2<br />
Operating Instructions 1<br />
Rubber cushion 1<br />
Remote control 1<br />
24<br />
Note:<br />
Specifications and the design are subject to<br />
change without notice due to improvements.