User Manuals - VTech Communications
User Manuals - VTech Communications
User Manuals - VTech Communications

You also want an ePaper? Increase the reach of your titles
YUMPU automatically turns print PDFs into web optimized ePapers that Google loves.
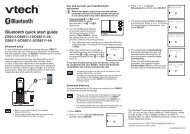
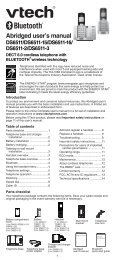
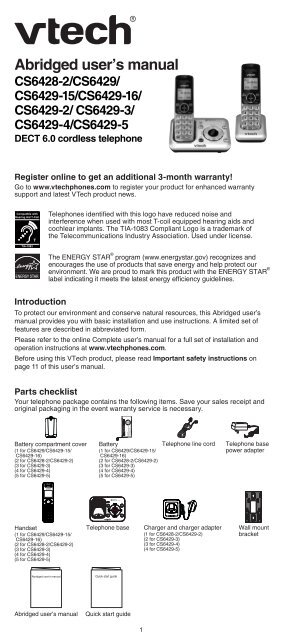
Abridged user’s manual<br />
CS6428-2/CS6429/<br />
CS6429-15/CS6429-16/<br />
CS6429-2/ CS6429-3/<br />
CS6429-4/CS6429-5<br />
DECT 6.0 cordless telephone<br />
Register online to get an additional 3-month warranty!<br />
Go to www.vtechphones.com to register your product for enhanced warranty<br />
support and latest <strong>VTech</strong> product news.<br />
Compatible with<br />
Hearing Aid T-Coil<br />
TIA-1083<br />
T<br />
Introduction<br />
Telephones identified with this logo have reduced noise and<br />
interference when used with most T-coil equipped hearing aids and<br />
cochlear implants. The TIA- 083 Compliant Logo is a trademark of<br />
the Telecommunications Industry Association. Used under license.<br />
The ENERGY STAR ® program (www.energystar.gov) recognizes and<br />
encourages the use of products that save energy and help protect our<br />
environment. We are proud to mark this product with the ENERGY STAR ®<br />
label indicating it meets the latest energy efficiency guidelines.<br />
To protect our environment and conserve natural resources, this Abridged user’s<br />
manual provides you with basic installation and use instructions. A limited set of<br />
features are described in abbreviated form.<br />
Please refer to the online Complete user’s manual for a full set of installation and<br />
operation instructions at www.vtechphones.com.<br />
Before using this <strong>VTech</strong> product, please read Important safety instructions on<br />
page of this user’s manual.<br />
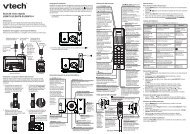
Parts checklist<br />
Your telephone package contains the following items. Save your sales receipt and<br />
original packaging in the event warranty service is necessary.<br />
Battery compartment cover<br />
( for CS6429/CS6429- 5/<br />
CS6429- 6)<br />
(2 for CS6428-2/CS6429-2)<br />
(3 for CS6429-3)<br />
(4 for CS6429-4)<br />
(5 for CS6429-5)<br />
Handset<br />
( for CS6429/CS6429- 5/<br />
CS6429- 6)<br />
(2 for CS6428-2/CS6429-2)<br />
(3 for CS6429-3)<br />
(4 for CS6429-4)<br />
(5 for CS6429-5)<br />
Abridged user’s manual<br />
Telephone base<br />
Abridged user’s manual Quick start guide<br />
Battery<br />
( for CS6429/CS6429- 5/<br />
CS6429- 6)<br />
(2 for CS6428-2/CS6429-2)<br />
(3 for CS6429-3)<br />
(4 for CS6429-4)<br />
(5 for CS6429-5)<br />
Quick start guide<br />
Telephone line cord<br />
Charger and charger adapter<br />
( for CS6428-2/CS6429-2)<br />
(2 for CS6429-3)<br />
(3 for CS6429-4)<br />
(4 for CS6429-5)<br />
Telephone base<br />
power adapter<br />
Wall mount<br />
bracket
Telephone base and charger installation<br />
Install the telephone base and charger as shown below.<br />
Telephone base<br />
power adapter<br />
Telephone wall jack<br />
Charger adapter<br />
Electrical outlet<br />
not controlled<br />
A DSL filter (not included)<br />
is required if you have DSL<br />
high-speed Internet service<br />
by a wall switch Electrical outlet<br />
not controlled<br />
by a wall switch<br />
•<br />
•<br />
•<br />
Telephone base<br />
Telephone line cord<br />
2<br />
Charger<br />
Use only the power adapter and battery supplied with this product. To order a<br />
replacement, visit our website at www.vtechphones.com or call (800) 595-95 .<br />
In Canada, go to www.vtechcanada.com or call (800) 267-7377.<br />
The power adapter is intended to be correctly oriented in a vertical or floor mount<br />
position. The prongs are not designed to hold the plug in place if it is plugged into<br />
a ceiling, under-the-table or cabinet outlet.<br />
If you subscribe to telephone service from a cable company or a VoIP service<br />
provider, plug the telephone line cord into the modem/router/terminal adapter<br />
provided by your cable/VoIP service provider. Contact your cable/VoIP service<br />
provider if you have any difficulties in installation.<br />
Battery installation<br />
Install the battery as shown below.<br />
. 2. Place the battery with the label<br />
Plug the battery connector<br />
securely into the socket.<br />
THIS SIDE UP facing up and the wires<br />
inside the battery compartment.<br />
3. Slide the battery compartment 4. Place the handset in the telephone<br />
cover towards the center of the<br />
handset until it clicks into place.<br />
base or charger to charge.<br />
•<br />
CHARGE light<br />
remains on<br />
when charging.<br />
If the handset will not be used for a long time, disconnect and remove the battery to<br />
prevent possible leakage.<br />
IMPORTANT:<br />
Check for a dial tone by pressing . If you hear a dial tone, the installation<br />
is successful.<br />
If you do not hear a dial tone:<br />
•<br />
•<br />
Make sure the installation procedures described above are properly done.<br />
It may be a wiring problem. If you have changed your telephone service to<br />
digital service from a cable company or a VoIP service provider, the telephone<br />
line may need to be rewired to allow all existing telephone jacks to work. Refer<br />
to Rewiring of telephone line for cable/VoIP service users on page 9 for<br />
more information.
Battery charging<br />
Once you have installed the battery, the screen indicates the battery status (see<br />
the table below). For best performance, keep the handset in the telephone base or<br />
charger when not in use. The battery is fully charged after 0 hours of continuous<br />
charging. Refer to the online user’s manual for battery operating times.<br />
Battery indicators Battery status Action<br />
The screen is blank,<br />
or shows PLACE IN<br />
CHARGER and flashes.<br />
The screen shows<br />
LOW BATTERY and<br />
flashes.<br />
The screen shows<br />
HANDSET X.<br />
•<br />
If you place the handset in the telephone base or charger without plugging in the<br />
battery, the screen displays NO BATTERY.<br />
Tabletop to wall mount installation<br />
The telephone comes ready for tabletop use. Follow the steps below to mount your<br />
telephone on a wall.<br />
. Plug one end of the telephone line<br />
cord into the TEL LINE jack at the<br />
bottom of the telephone base and<br />
the base power adapter into the<br />
POWER jack.<br />
The battery has no charge<br />
or very little charge. The<br />
handset cannot be used.<br />
3. Route the telephone line cord 4. Align the holes on the bracket with<br />
through the hole on the wall mount the standard wall plate and slide the<br />
bracket and plug it into the telephone bracket down until it locks securely.<br />
wall jack. Route the power cord out Bundle the telephone line cord<br />
of the telephone base and plug it into and power adapter cord neatly<br />
an electrical outlet not controlled by a<br />
wall switch.<br />
with twist ties.<br />
Telephone base overview<br />
IN USE light<br />
Flashes when there is an<br />
incoming call, or another<br />
telephone sharing the same<br />
line is in use.<br />
On when the handset is in<br />
use, or the answering system<br />
is answering a call.<br />
/FIND HANDSET<br />
Press once and then release<br />
to page all system handsets.<br />
/ANS ON/OFF<br />
Turn the answering system<br />
on or off.<br />
/REPEAT<br />
Press to repeat a message or press<br />
twice to play the previous message.<br />
/PLAY/STOP<br />
Play or stop playing messages.<br />
The battery has enough<br />
charge to be used for a<br />
short time.<br />
3<br />
Charge without interruption<br />
(at least 30 minutes).<br />
Charge without interruption<br />
(at least 30 minutes).<br />
The battery is charged. To keep the battery<br />
charged, place it in the<br />
telephone base or charger<br />
when not in use.<br />
2. Position the telephone base against<br />
the wall mount bracket as shown.<br />
Insert the extended tabs marked B<br />
on the wall mount bracket into the<br />
slots marked B on the back of the<br />
telephone base. Push the telephone<br />
base down until it clicks securely.<br />
Message window<br />
Shows the number of messages and other<br />
answering system information.<br />
/SKIP<br />
X/DELETE<br />
Delete the playing<br />
message.<br />
Press twice to delete<br />
all previously reviewed<br />
messages when the<br />
phone is not in use.<br />
/VOL and /VOL<br />
Adjust the volume during<br />
message playback.<br />
Adjust the telephone<br />
base ringer volume when<br />
the phone is not in use.<br />
Skip to the next message.
Handset overview<br />
CHARGE light<br />
On when the handset is charging.<br />
MUTE/DELETE<br />
Mute the microphone during a call.<br />
Delete digits or characters while<br />
using the dialling keys.<br />
Silence the ringer temporarily<br />
while the handset is ringing.<br />
Delete the displayed entry while in<br />
the directory, call log or redial list.<br />
Using the handset menu<br />
.<br />
2.<br />
3.<br />
•<br />
•<br />
/FLASH<br />
Make or answer a call.<br />
Answer another incoming call<br />
during a call.<br />
TONE<br />
/VOLUME<br />
Review the directory when the<br />
phone is not in use.<br />
Increase the listening volume<br />
during a call or message playback.<br />
Scroll up while in a menu, or in the<br />
directory, call log or redial list.<br />
Move the cursor to the right when<br />
entering numbers or names.<br />
1<br />
Press repeatedly to add or<br />
remove 1 in front of the call log<br />
entry before dialing or saving it<br />
to the directory.<br />
Switch to tone dialing<br />
temporarily during a call.<br />
(speakerphone)<br />
Make or answer a call using the<br />
handset speakerphone.<br />
During a call, press to switch between<br />
the speakerphone and the handset.<br />
Press MENU when the phone is not in use.<br />
Press or until the screen displays the desired feature menu.<br />
Press SELECT to enter that menu.<br />
To return to the previous menu, press CANCEL.<br />
To return to idle mode, press and hold CANCEL.<br />
Telephone settings<br />
Default settings are indicated by asterisks (*).<br />
Screen display Function Options<br />
LCD LANGUAGE Set the screen display language. ENGLISH*<br />
FRANÇAIS<br />
ESPAÑOL<br />
CLR VOICEMAIL Turn off the voicemail indicators. TURN OFF<br />
INDICATOR?<br />
KEY TONE Turn an audible beep on or off whenever a key<br />
is pressed.<br />
SET DATE/TIME Set the date and time shown on<br />
the handset.<br />
HOME AREA CODE Enter your home area code if you dial only seven<br />
digits for local calls.<br />
DIAL MODE Set the telephone to be tone or<br />
pulse dialing.<br />
4<br />
CID /VOLUME<br />
Review the call log when the phone is<br />
not in use.<br />
Decrease the listening volume during<br />
a call or message playback.<br />
Scroll down while in a menu, or in the<br />
directory, call log or redial list.<br />
Move the cursor to the left when<br />
entering numbers or names.<br />
REDIAL/PAUSE<br />
MENU/SELECT<br />
Show the menu.<br />
While in a menu, press to<br />
select an item, or save an entry<br />
or setting.<br />
OFF/CANCEL<br />
Hang up a call.<br />
Silence the ringer temporarily<br />
while the handset is ringing.<br />
Press and hold to erase the<br />
missed call indicator while the<br />
phone is not in use.<br />
Press to return to the previous<br />
menu, or press and hold to<br />
return to idle mode, without<br />
making changes.<br />
Dialing keys<br />
Enter numbers or characters.<br />
# (pound key)<br />
Press repeatedly to show other<br />
dialing options when reviewing<br />
a call log entry.<br />
INT (intercom)<br />
Start an intercom conversation or<br />
transfer a call (for multi-handset<br />
models only).<br />
Press repeatedly to review the redial list.<br />
Press and hold to insert a dialing pause<br />
while entering numbers.<br />
ON*<br />
OFF<br />
-:-- --/--<br />
_ _ _<br />
TONE*<br />
PULSE<br />
The following are some of the telephone features you may wish to set. Refer to<br />
Telephone settings in the online Complete user’s manual for detailed instructions<br />
on setting all telephone features.
Ringer volume (handset)<br />
You can adjust the ringer volume level, or turn the ringer off.<br />
. Press MENU when the handset is not in use.<br />
2. Scroll to >RINGERS then press SELECT twice.<br />
3. Press or to adjust the volume, then press SELECT to save.<br />
If the handset ringer volume is set to off, that handset is silenced for all incoming<br />
calls except paging tone.<br />
The ringer volume also determines the ringer volume of the intercom calls and<br />
the volume of the paging tone.<br />
Set date and time<br />
If you subscribe to caller ID service, the day, month and time are set automatically<br />
with each incoming call. You can also set the date and time manually.<br />
.<br />
2.<br />
3.<br />
4.<br />
5.<br />
6.<br />
Press MENU when the handset is not in use.<br />
Scroll to select >SETTINGS, then press SELECT.<br />
Scroll to select >SET DATE/TIME, then press SELECT.<br />
Use the dialing keys (0-9) to enter the month, date and year, then press SELECT.<br />
Use the dialing keys (0-9) to enter the hour and minute.<br />
Press or to choose AM or PM, or press 2 for AM or 7 for PM. Press<br />
SELECT to save.<br />
Voicemail indicators<br />
If you subscribe to voicemail service offered by your telephone service provider,<br />
NEW VOICEMAIL and appear on the handset when you have new voicemail<br />
messages. Contact your telephone service provider for more information and<br />
assistance about using your voicemail service. Refer to Clear voicemail indicators<br />
in the online Complete user’s manual on how to clear the voicemail indicators.<br />
Telephone operation<br />
Make a call<br />
•<br />
Press or then dial the telephone number.<br />
Answer a call<br />
•<br />
Press , or any dialing key.<br />
End a call<br />
•<br />
Press OFF or put the handset to the telephone base or charger.<br />
Speakerphone<br />
• During a call, press to switch between speakerphone and normal handset use.<br />
Volume<br />
•<br />
•<br />
•<br />
During a call, press /VOLUME or /VOLUME to adjust the listening volume.<br />
The handset earpiece volume setting and speakerphone volume setting<br />
are independent.<br />
Mute<br />
The mute function allows you to hear the other party but the other<br />
party cannot hear you.<br />
.<br />
2.<br />
During a call, press MUTE. The handset displays MUTE.<br />
Press MUTE again to resume the conversation.<br />
Call waiting<br />
When you subscribe to call waiting service from your telephone service provider,<br />
you hear an alert tone if there is an incoming call while you are on another call.<br />
•<br />
•<br />
Press FLASH to put the current call on hold and take the new call.<br />
Press FLASH at any time to switch back and forth between calls.<br />
Temporary ringer silencing<br />
When the telephone is ringing, you can temporarily silence the ringer of the handset<br />
without disconnecting the call. The next call rings normally at the preset volume.<br />
• To silence the handset ringer, press OFF or MUTE on the handset.<br />
RINGER MUTED and display.<br />
Temporary tone dialing<br />
If you have pulse (rotary) service only, you can switch from pulse to tone dialing<br />
temporarily during a call.<br />
.<br />
2.<br />
3.<br />
During a call, press TONE .<br />
Use the dialing keys to enter the relevant number. The<br />
telephone sends touch-tone signals.<br />
The telephone automatically returns to pulse dialing mode after<br />
you end the call.<br />
5
Find handset<br />
Use this feature to find all system handsets.<br />
To start paging:<br />
• Press /FIND HANDSET on the telephone base once and<br />
then release. All idle handsets ring and their screens show<br />
** PAGING **.<br />
To end paging:<br />
• Press /FIND HANDSET again on the telephone base once<br />
and then release.<br />
• Press , or any dialing key on the handset.<br />
• Place the handset in the telephone base or charger.<br />
Do not press and hold /FIND HANDSET for more than four seconds. It may lead<br />
to handset deregistration.<br />
Redial list<br />
Each handset stores the last 0 telephone numbers dialed.<br />
To review and dial a number from the redial list:<br />
. Press REDIAL when the handset is not in use.<br />
2. Press , , or REDIAL repeatedly until the desired entry<br />
displays.<br />
3. Press to dial.<br />
To delete a redial entry:<br />
When the desired redial entry displays, press DELETE.<br />
Join a call in progress<br />
You can use up to four system handsets at a time on an outside call. You can buy<br />
additional expansion handsets (CS6409) for this telephone base. You can register<br />
up to five handsets to the telephone base.<br />
•<br />
•<br />
When a handset is on a call, press or on another handset to join the call.<br />
Press OFF to exit the call. The call continues until all handsets hang up.<br />
Intercom<br />
Use the intercom features for conversations between two handsets.<br />
. Press INT on your handset when not in use. When you have three or more<br />
handsets, use the dialing keys to enter a destination handset number.<br />
2. To answer the intercom call, press , , INT or any dialing key on the<br />
destination handset.<br />
3. To end an intercom call, press OFF or place the handset back in the telephone<br />
base or charger.<br />
Answer an incoming call during an intercom call<br />
If you receive an outside call during an intercom call, there is an alert tone.<br />
• To answer the outside call, press . The intercom call ends automatically.<br />
• To end the intercom call without answering the outside call, press OFF. The<br />
intercom call ends and the telephone continues to ring.<br />
Call transfer using intercom<br />
Use the intercom feature to transfer an outside call to another system handset.<br />
. During a call, press INT. When you have three or more handsets, use the<br />
dialing keys to enter a destination handset number.<br />
2. To answer the intercom call, press , , INT or any dialing key on the<br />
destination handset. The outside call is now on hold and both handsets show<br />
INTERCOM. You can have a private conversation with the destination handset.<br />
3. From this intercom call, you have the following options:<br />
• You can let the destination handset join you on the outside call in a three-way<br />
conversation. Press and hold INT on the original handset.<br />
• You can transfer the call. Press OFF, or place your handset back<br />
in the telephone base or charger. Your handset screen shows<br />
CALL TRANSFERRED. The destination handset then automatically<br />
connects to the outside call.<br />
• You can press INT to switch between the outside call (OUTSIDE CALL<br />
displays) and the intercom call (INTERCOM displays).<br />
•<br />
The destination handset can end the intercom call by pressing OFF, or by<br />
placing the handset back in the telephone base or charger. The outside call<br />
continues with the original system handset.<br />
6
Directory<br />
The directory can store up to 50 entries and are shared by all system handsets.<br />
To add a directory entry:<br />
. Press MENU/SELECT twice.<br />
2. Scroll to >ADD CONTACT then press SELECT.<br />
• Use the dialing keys to enter the number (up to 30 digits).<br />
-OR-<br />
• Copy a number from the redial list by pressing REDIAL and then press<br />
or REDIAL repeatedly to select a number. Press SELECT.<br />
,<br />
3.<br />
4.<br />
5.<br />
Press SELECT to move to the name.<br />
Use the dialing keys to enter the name (up to 5 characters). Additional key presses<br />
show other characters of that particular key.<br />
Press SELECT to save.<br />
While entering names and numbers, you can:<br />
•<br />
•<br />
•<br />
•<br />
•<br />
Press DELETE to backspace and erase a digit or character.<br />
Press and hold DELETE to erase the entire entry.<br />
Press and hold PAUSE to insert a dialing pause (for entering phone numbers only).<br />
Press or to move the cursor to the left or right.<br />
Press 0 to add a space (for entering names only).<br />
To review and dial from the directory:<br />
Entries are sorted alphabetically.<br />
. Press when the handset is not in use.<br />
2. Scroll to browse through the directory, or use the dialing keys to start a<br />
name search.<br />
3. When the desired entry appears, press or to dial.<br />
To edit a directory entry:<br />
.<br />
2.<br />
3.<br />
When the desired entry displays, press SELECT.<br />
Use the dialing keys to edit the number, then press SELECT.<br />
Use the dialing keys to edit the name, then press SELECT to save.<br />
To delete a directory entry:<br />
.<br />
2.<br />
When the desired entry displays, press DELETE.<br />
When the screen displays DELETE CONTACT?, press SELECT.<br />
Speed dial<br />
You can copy up to 0 directory entries into the speed dial locations so that you<br />
can dial these numbers using fewer keys than usual.<br />
To store a speed dial entry:<br />
.<br />
2.<br />
3.<br />
4.<br />
Press MENU/SELECT twice when the handset is not in use.<br />
Scroll to >SPEED DIAL, then press SELECT.<br />
Scroll to a desired speed dial location, then press SELECT.<br />
Scroll to a desired directory entry, then press SELECT to save.<br />
To dial a speed dial entry:<br />
. Press and hold a dialing key (0-9) to display the desired speed dial entry when<br />
the handset is not in use.<br />
2. Press or to dial the displayed phone number.<br />
To delete a speed dial entry:<br />
When the desired entry displays, press DELETE.<br />
Caller ID<br />
This product supports caller ID services provided by most telephone service<br />
providers. Depending on your service subscription, you may see the caller’s name,<br />
number, date and time of calls that are sent by your telephone service provider after<br />
the first or second ring.<br />
Call log<br />
The call log stores up to 50 entries. If you answer a call before the caller<br />
information appears, it will not be saved in the call log.<br />
• The handset displays XX MISSED CALLS when there are calls that have not<br />
been reviewed in the call log.<br />
• If you want to erase the missed call indicator, press and hold CANCEL on the<br />
idle handset.<br />
To review and dial a number in the call log:<br />
. Press CID when the handset is not in use.<br />
2. Scroll to browse through the call log. When the desired entry appears:<br />
• Press # (pound key) repeatedly to show different dialing options.<br />
• Press 1 repeatedly if you need to add or remove in front of the<br />
phone number.<br />
3.<br />
Press to dial the displayed number.<br />
7
To save a call log entry to the directory:<br />
.<br />
2.<br />
3.<br />
When the desired call log entry displays, press SELECT.<br />
Use the dialing keys to modify the number, then press SELECT.<br />
Use the dialing keys to modify the name, then press SELECT to save.<br />
To delete one call log entry:<br />
• When the desired call log entry displays, press DELETE.<br />
To delete all call log entries:<br />
• Press MENU when the handset is not in use. Scroll to >CALL LOG and then<br />
press SELECT. Scroll to >DEL ALL CALLS and then press SELECT twice.<br />
About the answering system<br />
The answering system can record up to 99 messages, depending on the length of<br />
each message. The total recording time is approximately 4 minutes.<br />
Answering system settings<br />
Default settings are indicated by asterisks (*).<br />
Screen display Function Options<br />
CALL SCREENING Set whether you hear the callers while they are<br />
leaving messages to you.<br />
# OF RINGS Set the number of times the telephone rings before<br />
the answering system answers.<br />
REMOTE CODE Set a two-digit security code to access the<br />
answering system remotely from any touch-tone<br />
telephone.<br />
8<br />
ON*<br />
OFF<br />
MSG ALERT TONE Set to alert you when you have new messages. ON<br />
OFF*<br />
6; 5; 4; 3*; 2;<br />
TOLL SAVER<br />
RECORDING TIME Set the recording time for each incoming message. 3 MINUTES*<br />
2 MINUTES<br />
1 MINUTE<br />
Number of rings<br />
You can set the answering system to answer an incoming call after 2, 3, 4, 5 or 6 rings;<br />
or toll saver. If you choose toll saver, the answering system answers a call after 2 rings<br />
when you have new messages, or after 4 rings when you have no new messages.<br />
.<br />
2.<br />
3.<br />
4.<br />
5.<br />
Press MENU when the handset is not in use.<br />
Scroll to >ANSWERING SYS then press SELECT.<br />
Scroll to >ANS SYS SETUP then press SELECT.<br />
Scroll to ># OF RINGS then press SELECT.<br />
Press or to choose 2, 3, 4, 5, 6 or TOLL SAVER and then press SELECT.<br />
Answering system operation<br />
Turn the answering system on or off<br />
The answering system must be turned on to answer and record messages.<br />
• Press /ANS ON/OFF on the telephone base to turn the built-in answering<br />
system on or off.<br />
Record your own announcement with a handset<br />
You can use the preset announcement to answer calls, or replace it with your own<br />
recorded announcement. It can be up to 90 seconds in length.<br />
.<br />
2.<br />
3.<br />
4.<br />
5.<br />
Press MENU when the handset is not in use.<br />
Scroll to >ANSWERING SYS and then press SELECT twice.<br />
The handset announces, “To play, press 2. To record, press 7.” Press 7 to record.<br />
The handset announces, “Record after the tone. Press 5 when you are done.”<br />
After the tone, speak towards the handset microphone. Press 5 when done.<br />
The answering system automatically plays back the newly recorded announcement.<br />
Press 5 to stop the playback at any time; 2 to replay the recorded announcement;<br />
3 to delete the recorded announcement; or 7 to record again if desired.<br />
Message playback at the telephone base<br />
Press /PLAY/STOP when the phone is not in use.<br />
Options during playback:<br />
•<br />
•<br />
•<br />
•<br />
•<br />
Press VOL or VOL to adjust the speaker volume.<br />
Press /SKIP to skip to the next message.<br />
Press /REPEAT to repeat the message currently playing. Press /REPEAT<br />
twice to listen to the previous message.<br />
Press X/DELETE to delete the playing message. The system advances to the<br />
next message.<br />
Press /PLAY/STOP to stop.<br />
Delete all messages at the telephone base<br />
Press X/DELETE twice when the phone is not in use.<br />
19*
Call screening at the telephone base<br />
If the answering system and call screening are on, the announcement and the<br />
incoming message broadcast at the telephone base when a call is answered by<br />
the answering system.<br />
Options while recording a message:<br />
•<br />
•<br />
•<br />
Press VOL or VOL on the telephone base to adjust the call screening volume.<br />
Press /PLAY/STOP to temporarily turn on or off call screening.<br />
Press VOL to temporarily turn on call screening when it is set to off.<br />
Call intercept<br />
If you want to talk to the person whose message is being recorded, press or<br />
on the handset.<br />
Add and register a handset<br />
The handsets provided with your telephone system are already registered. Each<br />
handset is assigned a number that displays on the handset. Additional handsets<br />
registered to the telephone system are assigned numbers in the sequential order.<br />
This telephone system accommodates up to five handsets.<br />
You can add new handsets (CS6409, purchased separately) to your telephone<br />
system. Each handset must be registered with the telephone base before use.<br />
When first purchased and properly charged, each expansion handset shows<br />
1.PRESS FIND HS ON BASE 4 SEC and 2.THEN PRESS # ON HANDSET<br />
alternately. Charge the handset before registering it to the telephone base.<br />
To register a handset:<br />
.<br />
2.<br />
3.<br />
Place the non-registered handset in the telephone base or charger.<br />
On the telephone base, press and hold /FIND HANDSET for about<br />
four seconds until the red IN USE light turns on.<br />
On the handset, press # (pound key) then the handset shows REGISTERING.....<br />
PLEASE WAIT. Then the handset shows HANDSET REGISTERED and you<br />
hear a beep when the registration process completes. The registration process<br />
takes about 60 seconds to complete.<br />
Replace a handset<br />
If you want to replace a handset or reassign the designated handset number of a<br />
registered handset, you must deregister all handsets and then individually register<br />
each handset.<br />
To deregister all handsets:<br />
. Press and hold /FIND HANDSET on the telephone base for about 0 seconds<br />
until the IN USE light on the telephone base turns on and starts flashing.<br />
2. Press and release /FIND HANDSET again. You must press /FIND HANDSET<br />
while the IN USE light is still flashing. The IN USE light flashes for approximately<br />
five seconds.<br />
3. All handsets show 1.PRESS FIND HS ON BASE 4 SEC and<br />
2.THEN PRESS # ON HANDSET alternately when the deregistration process<br />
completes. The deregistration process takes about 0 seconds to complete.<br />
Rewiring of telephone line for cable/VoIP service users<br />
If you have changed to cable/VoIP service through a modem/router/terminal<br />
adapter to establish telephone connection, the existing telephone jacks in your<br />
home may no longer work. Your cable/VoIP service provider uses a separate cable<br />
connecting from the main line to the modem installed in your home.<br />
To allow all existing telephone jacks to work, rewiring of the telephone line (as<br />
indicated by the dotted line in the illustration below) may be needed. Rewiring<br />
requires professional installation (fees may apply). Contact your cable/VoIP service<br />
provider for more information.<br />
OLD<br />
Main<br />
landline<br />
NEW<br />
Main cable<br />
line<br />
Conventional<br />
telephone line jack<br />
Modem/Router/<br />
Terminal adapter<br />
9
Troubleshooting<br />
If you have difficulty with your telephone, please try the suggestions below. For<br />
customer service, visit our website at www.vtechphones.com or call (800) 595-95 .<br />
In Canada, go to www.vtechcanada.com or call (800) 267-7377.<br />
My telephone does not work at all.<br />
• Make sure the battery is installed and charged correctly. For optimum daily performance,<br />
return the handset to the telephone base or charger after use.<br />
• Make sure the power adapter is securely plugged into an outlet not controlled by a wall switch.<br />
• Make sure the telephone line cord is plugged firmly into the telephone base and the wall jack.<br />
• Unplug the electrical power to the telephone base. Wait for approximately 5 seconds,<br />
then plug it back in. Allow up to one minute for the cordless handset and telephone base to<br />
synchronize.<br />
• Charge the battery in the handset for up to 0 hours.<br />
• If the battery is completely depleted, it may take up to 30 minutes to charge the handset<br />
before LOW BATTERY appears on the screen.<br />
• Remove and install the battery again. If that still does not work, it may be necessary to<br />
purchase a new battery.<br />
• Disconnect the telephone base from the telephone wall jack and plug in a working<br />
telephone. If the other telephone does not work, the problem is probably in the wiring or<br />
telephone service. Contact your telephone service provider.<br />
There is no dial tone.<br />
•<br />
•<br />
•<br />
•<br />
•<br />
Try all the above suggestions.<br />
Move the handset closer to the telephone base. It may be out of range.<br />
The telephone line cord may be defective. Install a new telephone line cord.<br />
Disconnect the telephone base from the telephone wall jack and connect a different telephone.<br />
If there is no dial tone on this telephone either, the problem is in your wiring or telephone<br />
service. Contact your telephone service provider.<br />
If you have changed your telephone service to digital service from a cable company or<br />
a VoIP service provider, the telephone line may need to be rewired to allow all existing<br />
telephone jacks to work. Contact your service provider for more information.<br />
I cannot dial out.<br />
•<br />
•<br />
•<br />
•<br />
Try all the above suggestions.<br />
Make sure there is a dial tone before dialing. It is normal if the handset takes a second or<br />
two to synchronize with the telephone base before producing a dial tone. Wait an extra<br />
second before dialing.<br />
If other telephones in your home are having the same problem, the problem is in the wiring<br />
or telephone service. Contact your telephone service provider (charges may apply).<br />
Eliminate any background noise. Mute the cordless handset before dialing, or dial from<br />
another room in your home with less background noise.<br />
The answering system does not answer after correct number of rings.<br />
• Make sure the answering system is on. When the answering system is on, ANS ON should<br />
show on the handset and the /ANSWER ON/OFF light is lit on the telephone base.<br />
• If toll saver is selected, the number of rings changes to two when there are new messages.<br />
• If the memory is full or the answering system is off, the answering system answers after 0<br />
rings. In some cases, the answering system is affected by the ringing system used by the<br />
telephone service provider.<br />
• If you subscribe to voicemail service, change the number of rings so that your answering<br />
system answers before your voicemail answers. To get help with your voicemail settings,<br />
contact your telephone service provider.<br />
• If there is a fax machine connected to the same telephone line, try disconnecting the fax<br />
machine. If that solves the problem, consult your fax machine documentation for information<br />
on compatibility with answering systems.<br />
The answering system does not record messages.<br />
•<br />
•<br />
•<br />
•<br />
Make sure the answering system is on.<br />
Make sure the memory of the answering system is not full. When the answering machine<br />
memory is full, it does not record new messages until some old messages are deleted.<br />
If you subscribe to voicemail service, change the number of ring so that your answering<br />
system answers before your voicemail answers. To determine how many rings activate your<br />
voicemail, contact your telephone service provider.<br />
If there is a fax machine connected to the same telephone line, try disconnecting the fax<br />
machine. If that solves the problem, consult your fax machine documentation for information<br />
on compatibility with answering systems.<br />
The messages on the answering system are incomplete.<br />
• If a caller leaves a very long message, part of it may be lost when the answering system<br />
disconnects the call after the preset recording time.<br />
• If the memory on the answering system becomes full during a message, the answering<br />
system stops recording and disconnects the call.<br />
• If the caller’s voice is very soft, the answering system may stop recording and disconnect<br />
the call.<br />
Common cure for electronic equipment.<br />
•<br />
If the telephone is not responding normally, put the cordless handset in the telephone base.<br />
If this does not fix the problem, do the following (in the order listed):<br />
. Disconnect the power to the telephone base.<br />
2. Disconnect the battery on the cordless handset.<br />
3. Wait a few minutes before connecting power to the telephone base.<br />
4. Install the battery again and place the cordless handset in the telephone base .<br />
5. Wait for the cordless handset to synchronize with the telephone base. Allow up one<br />
minute for this to take place.<br />
0
Important safety instructions<br />
When using your telephone equipment, basic safety precautions should always be followed to reduce<br />
the risk of fire, electric shock and injury, including the following:<br />
.<br />
2.<br />
3.<br />
4.<br />
5.<br />
6.<br />
7.<br />
8.<br />
9.<br />
Read and understand all instructions.<br />
Follow all warnings and instructions marked on the product.<br />
Unplug this product from the wall outlet before cleaning. Do not use liquid or aerosol cleaners. Use a<br />
damp cloth for cleaning.<br />
Do not use this product near water such as near a bath tub, wash bowl, kitchen sink, laundry tub or<br />
swimming pool, or in a wet basement or shower.<br />
Do not place this product on an unstable table, shelf, stand or other unstable surfaces.<br />
Slots and openings in the back or bottom of the telephone base and handset are provided for ventilation.<br />
To protect them from overheating, these openings must not be blocked by placing the product on a soft<br />
surface such as a bed, sofa or rug. This product should never be placed near or over a radiator or heat<br />
register. This product should not be placed in any area where proper ventilation is not provided.<br />
This product should be operated only from the type of power source indicated on the marking label. If you<br />
are not sure of the type of power supply in your home or office, consult your dealer or local power company.<br />
Do not allow anything to rest on the power cord. Do not install this product where the cord may be<br />
walked on.<br />
Never push objects of any kind into this product through the slots in the telephone base or handset<br />
because they may touch dangerous voltage points or create a short circuit. Never spill liquid of any<br />
kind on the product.<br />
0. To reduce the risk of electric shock, do not disassemble this product, but take it to an authorized<br />
service facility. Opening or removing parts of the telephone base or handset other than specified<br />
access doors may expose you to dangerous voltages or other risks. Incorrect reassembling can<br />
cause electric shock when the product is subsequently used.<br />
. Do not overload wall outlets and extension cords.<br />
2. Unplug this product from the wall outlet and refer servicing to an authorized service facility under the<br />
following conditions:<br />
A. When the power supply cord or plug is damaged or frayed.<br />
B. If liquid has been spilled onto the product.<br />
C. If the product has been exposed to rain or water.<br />
D. If the product does not operate normally by following the operating instructions. Adjust only those<br />
controls that are covered by the operation instructions. Improper adjustment of other controls may<br />
result in damage and often requires extensive work by an authorized technician to restore the<br />
product to normal operation.<br />
E. If the product has been dropped and the telephone base and/or handset has been damaged.<br />
F. If the product exhibits a distinct change in performance.<br />
3. Avoid using a telephone (other than cordless) during an electrical storm. There is a remote risk of<br />
electric shock from lightning.<br />
4. Do not use the telephone to report a gas leak in the vicinity of the leak. Under certain<br />
circumstances, a spark may be created when the adapter is plugged into the power outlet, or<br />
when the handset is replaced in its cradle. This is a common event associated with the closing of<br />
any electrical circuit. The user should not plug the phone into a power outlet, and should not put a<br />
charged handset into the cradle, if the phone is located in an environment containing concentrations<br />
of flammable or flame-supporting gases, unless there is adequate ventilation. A spark in such an<br />
environment could create a fire or explosion. Such environments might include: medical use of<br />
oxygen without adequate ventilation; industrial gases (cleaning solvents; gasoline vapors; etc.); a<br />
leak of natural gas; etc.<br />
5. Only put the handset of your telephone next to your ear when it is in normal talk mode.<br />
6. The power adapters are intended to be correctly oriented in a vertical or floor mount position. The<br />
prongs are not designed to hold the plug in place if it is plugged into a ceiling, under-the-table or<br />
cabinet outlet.<br />
SAVE THESE INSTRUCTIONS<br />
Precautions for users of implanted cardiac pacemakers<br />
Cardiac pacemakers (applies only to digital cordless telephones):<br />
Wireless Technology Research, LLC (WTR), an independent research entity, led a multidisciplinary evaluation<br />
of the interference between portable wireless telephones and implanted cardiac pacemakers. Supported by<br />
the U.S. Food and Drug Administration, WTR recommends to physicians that:<br />
Pacemaker patients<br />
•<br />
•<br />
•<br />
Should keep wireless telephones at least six inches from the pacemaker.<br />
Should NOT place wireless telephones directly over the pacemaker, such as in a breast pocket, when it<br />
is turned ON.<br />
Should use the wireless telephone at the ear opposite the pacemaker. WTR’s evaluation did not identify<br />
any risk to bystanders with pacemakers from other persons using wireless telephones.<br />
Operating range<br />
This cordless telephone operates with the maximum power allowed by the Federal <strong>Communications</strong> Commission<br />
(FCC). Even so, this handset and telephone base can communicate over only a certain distance - which can vary<br />
with the locations of the telephone base and handset, the weather, and the layout of your home or office.<br />
When the handset is out of range, the handset displays OUT OF RANGE OR NO PWR AT BASE.<br />
If there is a call while the handset is out of range, it may not ring, or if it does ring, the call may not connect well<br />
when you press . Move closer to the telephone base, then press to answer the call.<br />
If the handset moves out of range during a telephone conversation, there may be interference. To improve<br />
reception, move closer to the telephone base.<br />
Maintenance<br />
Taking care of your telephone<br />
Your cordless telephone contains sophisticated electronic parts, so it must be treated with care.<br />
Avoid rough treatment<br />
Place the handset down gently. Save the original packing materials to protect your telephone if you ever need<br />
to ship it.<br />
Avoid water<br />
Your telephone can be damaged if it gets wet. Do not use the handset outdoors in the rain, or handle it with<br />
wet hands. Do not install the telephone base near a sink, bathtub or shower.<br />
Electrical storms<br />
Electrical storms can sometimes cause power surges harmful to electronic equipment. For your own safety,<br />
take caution when using electrical appliances during storms.<br />
Cleaning your telephone<br />
Your telephone has a durable plastic casing that should retain its luster for many years. Clean it only with a soft<br />
cloth slightly dampened with water or mild soap. Do not use excess water or cleaning solvents of any kind.<br />
Remember that electrical appliances can cause serious injury if used when you are wet or standing in<br />
water. If the telephone base should fall into water, DO NOT RETRIEVE IT UNTIL YOU UNPLUG THE<br />
POWER CORD AND TELEPHONE LINE CORD FROM THE WALL. Then remove the telephone by the<br />
unplugged cords.
About cordless telephones<br />
•<br />
•<br />
•<br />
•<br />
•<br />
Privacy: The same features that make a cordless telephone convenient create some limitations.<br />
Telephone calls are transmitted between the telephone base and the cordless handset by radio waves,<br />
so there is a possibility that the cordless telephone conversations could be intercepted by radio receiving<br />
equipment within range of the cordless handset. For this reason, you should not think of cordless telephone<br />
conversations as being as private as those on corded telephones.<br />
Electrical power: The telephone base of this cordless telephone must be connected to a working electrical<br />
outlet. The electrical outlet should not be controlled by a wall switch. Calls cannot be made from the<br />
cordless handset if the telephone base is unplugged, switched off or if the electrical power is interrupted.<br />
Potential TV interference: Some cordless telephones operate at frequencies that may cause interference<br />
to televisions and VCRs. To minimize or prevent such interference, do not place the telephone base of<br />
the cordless telephone near or on top of a TV or VCR. If interference is experienced, moving the cordless<br />
telephone farther away from the TV or VCR often reduces or eliminates the interference.<br />
Rechargeable batteries: Exercise care in handling batteries in order not to create a short circuit with<br />
conducting material such as rings, bracelets, and keys. The battery or conductor may overheat and cause<br />
harm. Observe proper polarity between the battery and the battery charger.<br />
Nickel-metal hydride rechargeable batteries: Dispose of these batteries in a safe manner. Do not burn<br />
or puncture the battery. Like other batteries of this type, if burned or punctured, they could release caustic<br />
material which could cause injury.<br />
The RBRC ® seal<br />
The RBRC ® seal on the nickel-metal hydride battery indicates that <strong>VTech</strong> <strong>Communications</strong>,<br />
Inc. is voluntarily participating in an industry program to collect and recycle these batteries at<br />
the end of their useful lives, when taken out of service within the United States and Canada.<br />
The RBRC ® program provides a convenient alternative to placing used nickel-metal hydride<br />
batteries into the trash or municipal waste, which may be illegal in your area.<br />
<strong>VTech</strong>’s participation in RBRC ® makes it easy for you to drop off the spent battery at local<br />
retailers participating in the RBRC ® program or at authorized <strong>VTech</strong> product service centers.<br />
Please call 1 (800) 8 BATTERY TM for information on Ni-MH battery recycling and disposal<br />
bans/restrictions in your area. <strong>VTech</strong>’s involvement in this program is part of its commitment<br />
to protecting our environment and conserving natural resources.<br />
RBRC ® is a registered trademark of Rechargeable Battery Recycling Corporation.<br />
Limited warranty<br />
What does this limited warranty cover?<br />
The manufacturer of this <strong>VTech</strong> Product warrants to the holder of a valid proof of purchase (“Consumer” or<br />
“you”) that the Product and all accessories provided in the sales package (“Product”) are free from defects in<br />
material and workmanship, pursuant to the following terms and conditions, when installed and used normally<br />
and in accordance with the Product operating instructions. This limited warranty extends only to the Consumer<br />
for Products purchased and used in the United States of America and Canada.<br />
What will <strong>VTech</strong> do if the Product is not free from defects in materials and workmanship during<br />
the limited warranty period (“Materially Defective Product”)?<br />
During the limited warranty period, <strong>VTech</strong>’s authorized service representative will repair or replace at<br />
<strong>VTech</strong>’s option, without charge, a Materially Defective Product. If we repair the Product, we may use new<br />
or refurbished replacement parts. If we choose to replace the Product, we may replace it with a new or<br />
refurbished Product of the same or similar design. We will retain defective parts, modules, or equipment.<br />
Repair or replacement of the Product, at <strong>VTech</strong>’s option, is your exclusive remedy. <strong>VTech</strong> will return the<br />
repaired or replacement Products to you in working condition. You should expect the repair or replacement to<br />
take approximately 30 days.<br />
How long is the limited warranty period?<br />
The limited warranty period for the Product extends for ONE ( ) YEAR from the date of purchase. If <strong>VTech</strong> repairs<br />
or replaces a Materially Defective Product under the terms of this limited warranty, this limited warranty also applies<br />
to the repaired or replacement Product for a period of either (a) 90 days from the date the repaired or replacement<br />
Product is shipped to you or (b) the time remaining on the original one-year warranty; whichever is longer.<br />
What is not covered by this limited warranty?<br />
This limited warranty does not cover:<br />
. Product that has been subjected to misuse, accident, shipping or other physical damage, improper<br />
installation, abnormal operation or handling, neglect, inundation, fire, water or other liquid intrusion; or<br />
2. Product that has been damaged due to repair, alteration or modification by anyone other than an<br />
authorized service representative of <strong>VTech</strong>; or<br />
3. Product to the extent that the problem experienced is caused by signal conditions, network reliability, or<br />
cable or antenna systems; or<br />
4. Product to the extent that the problem is caused by use with non-<strong>VTech</strong> accessories; or<br />
5. Product whose warranty/quality stickers, product serial number plates or electronic serial numbers have<br />
been removed, altered or rendered illegible; or<br />
6. Product purchased, used, serviced, or shipped for repair from outside the United States of America or<br />
Canada, or used for commercial or institutional purposes (including but not limited to Products used for<br />
rental purposes); or<br />
7. Product returned without a valid proof of purchase (see item 2 below); or<br />
8. Charges for installation or set up, adjustment of customer controls, and installation or repair of systems<br />
outside the unit.<br />
How do you get warranty service?<br />
To obtain warranty service in the USA, please visit our website at www.vtechphones.com or call<br />
(800) 595-95 . In Canada, go to www.vtechcanada.com or call (800) 267-7377.<br />
NOTE: Before calling for service, please review the user’s manual - a check of the Product’s controls and<br />
features may save you a service call.<br />
Except as provided by applicable law, you assume the risk of loss or damage during transit and transportation and<br />
are responsible for delivery or handling charges incurred in the transport of the Product(s) to the service location.<br />
<strong>VTech</strong> will return repaired or replaced Product under this limited warranty. Transportation, delivery or handling<br />
charges are prepaid. <strong>VTech</strong> assumes no risk for damage or loss of the Product in transit. If the Product failure is not<br />
covered by this limited warranty, or proof of purchase does not meet the terms of this limited warranty, <strong>VTech</strong> will<br />
notify you and will request that you authorize the cost of repair prior to any further repair activity. You must pay for<br />
the cost of repair and return shipping costs for the repair of Products that are not covered by this limited warranty.<br />
What must you return with the Product to get warranty service?<br />
. Return the entire original package and contents including the Product to the <strong>VTech</strong> service location<br />
along with a description of the malfunction or difficulty; and<br />
2. Include a “valid proof of purchase” (sales receipt) identifying the Product purchased (Product model)<br />
and the date of purchase or receipt; and<br />
3.<br />
Provide your name, complete and correct mailing address, and telephone number.<br />
2
Other limitations<br />
This warranty is the complete and exclusive agreement between you and <strong>VTech</strong>. It supersedes all other<br />
written or oral communications related to this Product. <strong>VTech</strong> provides no other warranties for this Product.<br />
The warranty exclusively describes all of <strong>VTech</strong>’s responsibilities regarding the Product. There are no other<br />
express warranties. No one is authorized to make modifications to this limited warranty and you should not<br />
rely on any such modification.<br />
State/Provincial Law Rights: This warranty gives you specific legal rights, and you may also have other rights,<br />
which vary from state to state or province to province.<br />
Limitations: Implied warranties, including those of fitness for a particular purpose and<br />
merchantability (an unwritten warranty that the Product is fit for ordinary use) are limited to one year from<br />
the date of purchase. Some states/provinces do not allow limitations on how long an implied warranty lasts,<br />
so the above limitation may not apply to you. In no event shall <strong>VTech</strong> be liable for any indirect, special,<br />
incidental, consequential, or similar damages (including, but not limited to lost profits or revenue, inability to<br />
use the Product or other associated equipment, the cost of substitute equipment, and claims by third parties)<br />
resulting from the use of this Product. Some states/provinces do not allow the exclusion or limitation of<br />
incidental or consequential damages, so the above limitation or exclusion may not apply to you.<br />
Please retain your original sales receipt as proof of purchase.<br />
FCC, ACTA and IC regulations<br />
FCC Part 15<br />
This equipment has been tested and found to comply with the requirements for a Class B digital device<br />
under Part 5 of the Federal <strong>Communications</strong> Commission (FCC) rules. These requirements are intended<br />
to provide reasonable protection against harmful interference in a residential installation. This equipment<br />
generates, uses and can radiate radio frequency energy and, if not installed and used in accordance with<br />
the instructions, may cause harmful interference to radio communications. However, there is no guarantee<br />
that interference will not occur in a particular installation. If this equipment does cause harmful interference<br />
to radio or television reception, which can be determined by turning the equipment off and on, the user is<br />
encouraged to try to correct the interference by one or more of the following measures:<br />
•<br />
•<br />
•<br />
•<br />
Reorient or relocate the receiving antenna.<br />
Increase the separation between the equipment and receiver.<br />
Connect the equipment into an outlet on a circuit different from that to which the receiver is connected.<br />
Consult the dealer or an experienced radio/TV technician for help.<br />
Changes or modifications to this equipment not expressly approved by the party responsible for compliance<br />
could void the user’s authority to operate the equipment.<br />
This device complies with Part 5 of the FCC rules. Operation is subject to the following two conditions: ( )<br />
this device may not cause harmful interference, and (2) this device must accept any interference received,<br />
including interference that may cause undesired operation. Privacy of communications may not be ensured<br />
when using this telephone.<br />
To ensure safety of users, the FCC has established criteria for the amount of radio frequency energy that can<br />
be safely absorbed by a user or bystander according to the intended usage of the product. This product has<br />
been tested and found to comply with the FCC criteria. The handset may be safely held against the ear of the<br />
user. The telephone base shall be installed and used such that parts of the user’s body other than the hands<br />
are maintained at a distance of approximately 20 cm (8 inches) or more.<br />
This Class B digital apparatus complies with Canadian ICES-003.<br />
FCC Part 68 and ACTA<br />
This equipment complies with Part 68 of the FCC rules and with technical requirements adopted by the<br />
Administrative Council for Terminal Attachments (ACTA). The label on the back or bottom of this equipment<br />
contains, among other things, a product identifier in the format US:AAAEQ##TXXXX. This identifier must be<br />
provided to your telephone service provider upon request.<br />
The plug and jack used to connect this equipment to premises wiring and the telephone network must comply<br />
with applicable Part 68 rules and technical requirements adopted by ACTA. A compliant telephone cord and<br />
modular plug is provided with this product. It is designed to be connected to a compatible modular jack that is<br />
also compliant. An RJ jack should normally be used for connecting to a single line and an RJ 4 jack for two<br />
lines. See the installation instructions in the user’s manual.<br />
The Ringer Equivalence Number (REN) is used to determine how many devices you may connect to your<br />
telephone line and still have them ring when you are called. The REN for this product is encoded as the 6th<br />
and 7th characters following the US: in the product identifier (e.g., if ## is 03, the REN is 0.3). In most, but<br />
not all areas, the sum of all RENs should be five (5.0) or less. For more information, please contact your<br />
telephone service provider.<br />
This equipment may not be used with Party Lines. If you have specially wired alarm dialing equipment connected<br />
to your telephone line, ensure the connection of this equipment does not disable your alarm equipment. If you have<br />
questions about what will disable alarm equipment, consult your telephone service provider or a qualified installer.<br />
If this equipment is malfunctioning, it must be unplugged from the modular jack until the problem has been<br />
corrected. Repairs to this telephone equipment can only be made by the manufacturer or its authorized agents.<br />
For repair procedures, follow the instructions outlined under the Limited warranty.<br />
If this equipment is causing harm to the telephone network, the telephone service provider may temporarily<br />
discontinue your telephone service. The telephone service provider is required to notify you before<br />
interrupting service. If advance notice is not practical, you will be notified as soon as possible. You will be<br />
given the opportunity to correct the problem and the telephone service provider is required to inform you of<br />
your right to file a complaint with the FCC. Your telephone service provider may make changes in its facilities,<br />
equipment, operation, or procedures that could affect the proper functioning of this product. The telephone<br />
service provider is required to notify you if such changes are planned.<br />
If this product is equipped with a corded or cordless handset, it is hearing aid compatible.<br />
If this product has memory dialing locations, you may choose to store emergency telephone numbers (e.g.,<br />
police, fire, medical) in these locations. If you do store or test emergency numbers, please:<br />
Remain on the line and briefly explain the reason for the call before hanging up.<br />
Perform such activities in off-peak hours, such as early morning or late evening.<br />
Industry Canada<br />
Operation is subject to the following two conditions: ( ) this device may not cause harmful interference, and<br />
(2) this device must accept any interference, including interference that may cause undesired operation.<br />
The term ‘’IC:‘’ before the certification/registration number only signifies that the Industry Canada technical<br />
specifications were met.<br />
The Ringer Equivalence Number (REN) for this terminal equipment is 0. . The REN is an indication of<br />
the maximum number of devices allowed to be connected to a telephone interface. The termination on an<br />
interface may consist of any combination of devices subject only to the requirement that the sum of the RENs<br />
of all the devices does not exceed five.<br />
This product meets the applicable Industry Canada technical specifications.<br />
3
Technical specifications<br />
Transmit frequency Handset: 92 .536- 928.448 MHz<br />
Telephone base: 92 .536- 928.448 MHz<br />
Channels 5<br />
Nominal effective range Maximum power allowed by FCC and IC. Actual operating<br />
range may vary according to environment conditions at the<br />
time of use.<br />
Power requirements Handset: 2.4V Ni-MH battery<br />
Telephone base: 6V DC @ 400mA<br />
Charger: 6V AC @ 300mA<br />
Memory Handset directory:<br />
50 memory locations; up to 30 digits and 5 characters<br />
Handset call log:<br />
50 memory locations; up to 24 digits and 5 characters<br />
VTECH TELECOMMUNICATIONS LTD.<br />
A member of THE VTECH GROUP OF COMPANIES.<br />
Distributed in the U.S.A. by <strong>VTech</strong> <strong>Communications</strong>, Inc., Beaverton, Oregon 97008.<br />
Distributed in Canada by <strong>VTech</strong> Technologies Canada Ltd., Richmond, B.C. V6W L5.<br />
<strong>VTech</strong> is the registered trademark of <strong>VTech</strong> Holdings Limited.<br />
Copyright © 20 2 for VTECH TELECOMMUNICATIONS LTD.<br />
All rights reserved. Printed in China.<br />
9 -004644-030- 00<br />
4