
Create successful ePaper yourself
Turn your PDF publications into a flip-book with our unique Google optimized e-Paper software.
ENGLISH<br />
LCD HDTV<br />
Owner’s <strong>Manual</strong><br />
Table of Contents . . . . 4<br />
ESPAÑOL<br />
TV de LCD HDTV<br />
<strong>Manual</strong> de Instrucciones<br />
Contenido . . . . . . . . . 21<br />
FRANÇAIS<br />
TVHD ACL<br />
Manuel d’instructions<br />
Table des matières . . 37<br />
Need assistance?<br />
Visit our Web site at<br />
www.sanyoctv.com<br />
or call toll free<br />
1-800-877-5032<br />
We can Help!<br />
© 2008 <strong>Sanyo</strong> Manufacturing Corporation<br />
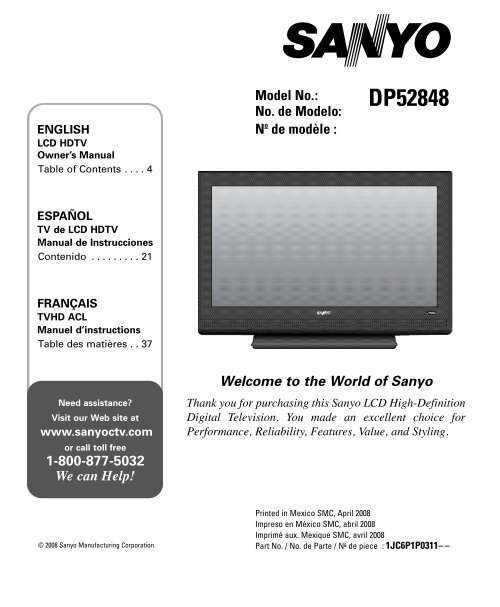
Model No.:<br />
No. de Modelo:<br />
N o de modèle :<br />
<strong>DP52848</strong><br />
Welcome to the World of <strong>Sanyo</strong><br />
Thank you for purchasing this <strong>Sanyo</strong> LCD High-Definition<br />
Digital Television. You made an excellent choice for<br />
Performance, Reliability, Features, Value, and Styling.<br />
Printed in Mexico SMC, April 2008<br />
Impreso en México SMC, abril 2008<br />
Imprimé aux. Mexique SMC, avril 2008<br />
Part No. / No. de Parte / N o de piece : 1JC6P1P0311– –
2<br />
CAUTION<br />
RISK OF ELECTRIC SHOCK DO NOT OPEN<br />
CAUTION: TO REDUCE THE RISK OF ELECTRIC SHOCK, DO NOT REMOVE COVER (OR<br />
BACK). NO USER-SERVICEABLE PARTS INSIDE. REFER SERVICING TO QUALIFIED SER-<br />
VICE PERSONNEL.<br />
Important Safety Instructions for LCD HDTV<br />
1. Read these instructions.<br />
2. Keep these instructions.<br />
3. Heed all warnings.<br />
4. Follow all instructions.<br />
5. Do not use this apparatus near water.<br />
6. Clean only with dry cloth.<br />
7. Do not block any ventilation openings. Install in<br />
accordance with the manufacturer’s instructions.<br />
8. Do not install near any heat sources such as radiators,<br />
heat registers, stoves, or other apparatus (including<br />
amplifiers) that produce heat.<br />
9. Do not defeat the safety purpose of the polarized or<br />
grounding-type plug. A polarized plug has two blades with<br />
one wider than the other. A grounding-type plug has two<br />
blades and a third grounding prong. The wide blade or the<br />
third prong are provided for your safety. If the provided<br />
plug does not fit fully into your outlet, consult an electrician<br />
for replacement of the obsolete outlet.<br />
10. Protect the power cord from being walked on or<br />
pinched particularly at plugs, convenience receptacles,<br />
and the point where they exit from the apparatus.<br />
11. Only use attachments/accessories specified by the<br />
manufacturer.<br />
12. Use only with the cart, stand, tripod,<br />
bracket, or table specified by the manufacturer,<br />
or sold with the apparatus.<br />
When a cart is used, use caution<br />
when moving the cart/apparatus combination<br />
to avoid injury from tip-over.<br />
13. Unplug this apparatus during lightning storms or when<br />
unused for long periods of time.<br />
14. Refer all servicing to qualified service personnel.<br />
Servicing is required when the apparatus has been<br />
damaged in any way, such as power-supply cord or<br />
plug is damaged, liquid has been spilled or objects have<br />
fallen into the apparatus, the apparatus has been<br />
exposed to rain or moisture, does not operate normally,<br />
or has been dropped.<br />
Need help? Visit our Web site at www.sanyoctv.com or Call 1-800-877-5032<br />
THIS SYMBOL INDICATES THAT DANGEROUS VOLTAGE CONSTITUTING A<br />
RISK OF ELECTRIC SHOCK IS PRESENT WITHIN THIS UNIT.<br />
THIS SYMBOL INDICATES THAT THERE ARE IMPORTANT OPERATING AND<br />
MAINTENANCE INSTRUCTIONS IN THE LITERATURE ACCOMPANYING THIS<br />
UNIT.<br />
WARNING: TO REDUCE THE RISK OF FIRE OR ELECTRIC SHOCK, DO NOT EXPOSE THIS APPLIANCE TO<br />
RAIN OR MOISTURE.<br />
IMPORTANT SAFETY INSTRUCTIONS<br />
15. If an outside antenna is connected to the television<br />
equipment, be sure the antenna system is grounded so<br />
as to provide some protection against voltage surges<br />
and built up static charges. In the U.S. Selection 810-21<br />
of the National Electrical Code provides information with<br />
respect to proper grounding of the mast and supporting<br />
structure, grounding of the lead-in wire to an antenna<br />
discharge unit, size of grounding conductors, location of<br />
antenna discharge unit, connection to grounding electrodes,<br />
and requirements for the grounding electrodes.<br />
16. An outside antenna system should not be located in the<br />
vicinity of overhead power lines or other electrical light<br />
or power circuits, or where it can fall into such power<br />
lines or circuits. When installing an outside antenna<br />
system, extreme care should be taken to keep from<br />
touching such power lines or circuits as contact with<br />
them might be fatal.<br />
EXAMPLE OF ANTENNA GROUNDING ACCORDING<br />
TO NATIONAL ELECTRICAL CODE,ANSI/NFPA 70<br />
“Note to CATV system installer:<br />
This reminder is provided to call the CATV system installer’s<br />
attention to Article 820-40 of the NEC that provides guidelines for<br />
proper grounding and, in particular, specifies that the cable<br />
ground shall be connected to the grounding system of the building,<br />
as close to the point of cable entry as practical.”<br />
17. Wall or Ceiling Mounting—The product should be<br />
mounted to a wall or ceiling only as recommended by<br />
the manufacturer.<br />
18. "Apparatus shall not be exposed to dripping or splashing<br />
and no objects filled with liquids, such as vases, shall be<br />
placed on the apparatus."<br />
19. When the MAINS plug is used as the disconnect device,<br />
the disconnect device shall remain readily operable.
FCC INFORMATION<br />
This equipment has been tested and found to comply with the limits for a Class B digital device, pursuant<br />
to Part 15 of the FCC Rules. These limits are designed to provide reasonable protection against<br />
harmful interference in a residential installation. This equipment generates, uses and can radiate radio<br />
frequency energy and, if not installed and used in accordance with the instructions, may cause harmful<br />
interference to radio communications. However, there is no guarantee that interference will not occur<br />
in a particular installation. If this equipment does cause harmful interference to radio or television<br />
reception, which can be determined by turning the equipment off and on, the user is encouraged to try<br />
to correct the interference by one or more of the following measures:<br />
– Reorient or relocate the receiving antenna.<br />
– Increase the separation between the equipment and receiver.<br />
– Connect the equipment into an outlet on a circuit different from that to which the receiver is connected.<br />
– Consult the dealer or an experienced radio/TV technician for help.<br />
CAUTION: FCC Regulations state that improper modifications or unauthorized changes to this unit may<br />
void the user’s authority to operate the unit.<br />
TRADEMARKS<br />
Manufactured under license from Dolby<br />
Laboratories. “Dolby” is a trademark of Dolby<br />
Laboratories.<br />
“As an Energy Star® Partner, <strong>Sanyo</strong><br />
Manufacturing Corporation has determined<br />
that this product meets the<br />
Energy Star® guidelines for energy<br />
efficiency.”<br />
SPECIFICATIONS<br />
This symbol on the nameplate<br />
means the product is Listed by<br />
Underwriters’ Laboratories Inc. It is<br />
designed and manufactured to<br />
meet rigid U.L. safety standards<br />
against risk of fire, casualty and<br />
electrical hazards.<br />
Power Requirement: Source: AC 120V, 60Hz<br />
AC Power Consumption (average): 330 watts<br />
PROTECTING THE LCD<br />
SCREEN<br />
The screen can be damaged if it<br />
is not maintained properly. Do<br />
not use hard objects such as hard<br />
cloth or paper. Do not use excessive<br />
pressure when cleaning the<br />
screen; excessive pressure can<br />
cause permanent discoloration<br />
or dark spots.<br />
NEVER spray liquids on the screen.<br />
HANDLING PRECAUTIONS<br />
• Handle by the cabinet only. Never touch the<br />
screen when handling.<br />
• Excessive pressure on the screen can cause<br />
permanent discoloration or dark spots.<br />
• Handling damage is not covered under warranty.<br />
CONTAINS MERCURY LAMPS,<br />
DISPOSE OF PROPERLY<br />
Need help? Visit our Web site at www.sanyoctv.com or Call 1-800-877-5032<br />
3
CONTENTS<br />
IMPORTANT SAFETY INSTRUCTIONS . . . . . . . . . . . . . . . 2<br />
FCC INFORMATION . . . . . . . . . . . . . . . . . . . . . . . . . . . . . . . .3<br />
TRADEMARKS . . . . . . . . . . . . . . . . . . . . . . . . . . . . . . . . . . . .3<br />
PROTECTING THE LCD SCREEN . . . . . . . . . . . . . . . . . . . . .3<br />
PRECAUTIONS—<br />
Handling . . . . . . . . . . . . . . . . . . . . . . . . . . . . . . . . . . . . . . .3<br />
Disposal . . . . . . . . . . . . . . . . . . . . . . . . . . . . . . . . . . . . . . . .3<br />
SPECIFICATIONS . . . . . . . . . . . . . . . . . . . . . . . . . . . . . . . . . .3<br />
CONTENTS . . . . . . . . . . . . . . . . . . . . . . . . . . . . . . . . . . . . . . .4<br />
INSTALLATION—<br />
Positioning the LCD HDTV . . . . . . . . . . . . . . . . . . . . . . . .4<br />
Wall Mounting (Optional) . . . . . . . . . . . . . . . . . . . . . . . . .5<br />
Detaching the TV stand . . . . . . . . . . . . . . . . . . . . . . . . . .5<br />
GETTING STARTED—<br />
Precautions . . . . . . . . . . . . . . . . . . . . . . . . . . . . . . . . . . . .5<br />
Battery Installation . . . . . . . . . . . . . . . . . . . . . . . . . . . . . .5<br />
Antenna Connections to off-air or cable . . . . . . . . . . . .5<br />
Controls and jacks . . . . . . . . . . . . . . . . . . . . . . . . . . . . . . .6<br />
Remote Control Operation . . . . . . . . . . . . . . . . . . . . . . . .7<br />
Connections . . . . . . . . . . . . . . . . . . . . . . . . . . . . . . . . . . . .8<br />
Power Connection / Initial Channel Search . . . . . . . . .9<br />
AV Search . . . . . . . . . . . . . . . . . . . . . . . . . . . . . . . . . . . . . .9<br />
ADVANCED AV CONNECTIONS—<br />
HDMI1/2/3 . . . . . . . . . . . . . . . . . . . . . . . . . . . . . . . . . . . . .10<br />
DVI to HDMI . . . . . . . . . . . . . . . . . . . . . . . . . . . . . . . . . . .10<br />
Digital Audio . . . . . . . . . . . . . . . . . . . . . . . . . . . . . . . . . . .10<br />
Audio Out Jacks (Fixed Analog) . . . . . . . . . . . . . . . . .10<br />
ON-SCREEN MENU OPERATION—<br />
Menu Navigation Map . . . . . . . . . . . . . . . . . . . . . . . . . .11<br />
<strong>Manual</strong> Channel Search . . . . . . . . . . . . . . . . . . . . . . . .11<br />
Channel Scan Memory . . . . . . . . . . . . . . . . . . . . . . . . . .12<br />
Adding Channels to Scan Memory . . . . . . . . . . . . .12<br />
Deleting Channels from Scan Memory . . . . . . . . . .12<br />
Digital Caption . . . . . . . . . . . . . . . . . . . . . . . . . . . . . . . . .13<br />
Menu Language . . . . . . . . . . . . . . . . . . . . . . . . . . . . . . . .13<br />
Energy (power) Saver . . . . . . . . . . . . . . . . . . . . . . . . . . .13<br />
V-Guide (Parental Control)<br />
V-Guide Operation (Standard) . . . . . . . . . . . . . . . . .14<br />
V-Guide Operation (Advanced) . . . . . . . . . . . . . . . .15<br />
Picture / Sound Adjustment<br />
Adjusting the Picture / Sound <strong>Manual</strong>ly . . . . . . . . .16<br />
Advanced Picture / Sound Adjustments . . . . . . . . .16<br />
HELPFUL HINTS–Problems/Solutions . . . . . . . . . . . . . . .17<br />
WARRANTY . . . . . . . . . . . . . . . . . . . . . . . . . . . . . . . . . . . . . .18<br />
4<br />
Need help? Visit our Web site at www.sanyoctv.com or Call 1-800-877-5032<br />
Hello! I’m your new <strong>Sanyo</strong> Wide-screen<br />
LCD HDTV. Don’t plug me in just yet! Please<br />
read this manual carefully so you can learn<br />
about my many features, such as, my integrated<br />
HD Tuner, V-Guide control, Digital<br />
Channels, and many more...<br />
POSITIONING THE LCD HDTV<br />
Always use a firm-flat surface when positioning<br />
your HDTV. Do not position the unit in a<br />
confined area. Allow adequate space for proper<br />
ventilation.<br />
<strong>DP52848</strong><br />
NOTE: All dimensions are in inches.
INSTALLATION GETTING STARTED<br />
DETACHING THE TV STAND<br />
Tools Needed: Phillips screwdriver<br />
Important Note: Place HDTV face down on a<br />
padded or cushioned surface to protect the<br />
screen and finish.<br />
1 Remove<br />
2 Carefully<br />
the six (6) screws securing the foot<br />
stand. CAUTION: Hold the stand firmly as<br />
you remove the last screw (save the screws<br />
for wall mounting).<br />
remove the HDTV stand.<br />
WALL MOUNTING (OPTIONAL)<br />
Use the screws you removed when dettaching the<br />
stand to secure the HDTV to a wall mounting kit.<br />
NOTE:Wall Mounting kit is not supplied.<br />
VESA standard interface:<br />
400 x 400<br />
Mounting screws measurements:<br />
M6 Diameter, Length—14mm (min.); 16mm (max.)<br />
Wall Mounting<br />
Inserts<br />
1 Install<br />
2 Antenna<br />
supplied batteries in the Remote.<br />
(2 ”AAA” eneloop Ni-MH rechargeable batteries)<br />
PRECAUTIONS<br />
Do not use rechargeables together with<br />
dry cells, other types, mixed new and old,<br />
or batteries with different charge levels.<br />
Do not expose the Remote or batteries<br />
to moisture or heat.<br />
Match the “+” and “–” signs on the batteries with marks<br />
inside the Remote Control.<br />
For eneloop battery recharging, please refer to your<br />
battery charger’s instructions (battery charger not included).<br />
Please recycle used up rechargeable batteries.<br />
For more information visit: www.eneloopusa.com<br />
Connection for off-air signals.<br />
ANTENNA<br />
OR<br />
CABLE<br />
THE TUNER IN THIS HDTV CAN RECEIVE :<br />
ANALOG / DIGITAL<br />
ANTENNA IN<br />
a. Digital and Analog off-air signals from an<br />
antenna.<br />
OR<br />
b. Analog or ClearQAM cable channels from a<br />
direct Cable TV connection.<br />
NOTES: You must use the on-screen MENU to<br />
Search for ClearQAM Cable channels. See<br />
page 11.<br />
For the best picture, connect your Cable box<br />
or Satellite receiver to HDMI1, 2, 3, or component<br />
jacks (Video2 or 3).<br />
This HDTV can receive ANY unscrambled RF<br />
signal being broadcast.<br />
Need help? Visit our Web site at www.sanyoctv.com or Call 1-800-877-5032<br />
5
GETTING STARTED—CONTROLS AND JACKS<br />
6<br />
RIGHT-SIDE<br />
PANEL<br />
Power<br />
key<br />
Volume<br />
– + keys<br />
Channel<br />
▼▲ keys<br />
➀ S-Video Input (VIDEO1), PAGE 8—To enhance<br />
video detail use the S-Video jack instead of the<br />
Video jack, if available on your external equipment.<br />
(An S-Video connection will override a<br />
connection to the Video1 input jack.)<br />
➁ Digital Audio Output, PAGE 10—Use a Phono-<br />
Type (Coaxial) Digital Audio Out Cable to connect<br />
Digital Audio Output to an advanced<br />
stereo home theater system equipped with<br />
Dolby® Digital 5.1.<br />
➂ Component Video Input (VIDEO2 or VIDEO3),<br />
PAGE 8—Connect digital video equipment to<br />
the Video Green (Y), Blue (Pb), Red (Pr) jacks,<br />
and matching Audio White (L ) and Red (R)<br />
jacks. These jacks will automatically detect<br />
the type of signal being received.<br />
➃ Analog Audio Out (L/R) Jacks, PAGE 10—<br />
Connect stereo audio equipment to these jacks.<br />
➄ Analog / Digital Antenna Input, PAGE 5—<br />
Connect an RF antenna or Analog Cable system<br />
to this jack.<br />
➀<br />
➁<br />
➂<br />
➃<br />
➄<br />
Need help? Visit our Web site at www.sanyoctv.com or Call 1-800-877-5032<br />
LEFT-SIDE PANEL<br />
➅<br />
➆<br />
➅ AV Input (VIDEO1), PAGE 8—Connect analog<br />
video equipment here.<br />
➆ HDMI Input (INPUT 1, 2, or 3), PAGE 10—An<br />
all digital AV interface that accepts 1080p<br />
uncompressed video signals for the very best<br />
picture possible. HDMI supports HDCP copy<br />
protection, allowing transmission of copyprotected<br />
digital content. The signal can also<br />
include Dolby ® Digital or PCM audio, when<br />
available.
REMOTE CONTROL OPERATION<br />
➀PIX Shape Key—Press to choose between<br />
options Pix1 ~ Pix4. Available options depend<br />
on the signal and the broadcast’s aspect ratio.<br />
➁Input Key—Press to select the source to<br />
view: Analog RF, Digital RF, Video 1, Video 2,<br />
Video 3, HDMI 1, HDMI 2, or HDMI 3.<br />
➂Info Key—Press to display Channel Banner<br />
information.<br />
Digital Antenna Banner may contain: Tuner<br />
ID, Channel Number, Station ID, Program<br />
Rating, Signal Strength, Detailed Program<br />
Info, Audio Information, & Program Title.<br />
Analog Antenna Banner may contain: Tuner<br />
ID, Channel Number, Station ID, Program<br />
Rating, & Audio Information.<br />
Cable Banner may contain: Tuner ID,<br />
Channel Number, Station ID (analog only),<br />
Program Rating, Signal Strength, & Audio<br />
Information.<br />
➃Reset Key—Press this key twice to restore factory<br />
settings. The TV will automatically start<br />
Channel Search and clear customized settings.<br />
NOTE:The Channel Scan Memory database will be<br />
replaced.<br />
➄Number Keys—Press two keys to select a<br />
channel. Example: Press 0 then 6 to select<br />
channel 6. (See #13.)<br />
➅Channel Scanning (CH ▲▼) Keys—Press to<br />
scan through the channels in memory.<br />
➆Recall Key—Press to switch between the last<br />
two channels selected.<br />
➇Menu Navigational Keys:<br />
Menu—Press to display on-screen menu.<br />
Cursor ▲ (up) ▼ (down) keys—Press these<br />
keys to move the cursor up and down.<br />
Cursor < (left) > (right) keys—Press these<br />
keys to move the cursor left and right.<br />
Enter Key—Press to select an option from<br />
the menu system, when required.<br />
Exit Key—Press to exit from the menu.<br />
➈Audio Key—Press to select the desired audio<br />
mode, if available.<br />
➉Sleep Key—Press SLEEP then “0” to set the<br />
Off Timer. Off time can be set in 30-minute<br />
increments up to 3 hours.<br />
NOTE:The Off Timer cancels if the TV is turned off or if<br />
a power failure occurs.<br />
11 Caption Key—Press to select mode options:<br />
Digital CC1 ~ CC6, or Analog CC1 ~ CC4,<br />
QuikCap, or OFF. (QuikCap turns captions on<br />
or off with the Mute function.) Digital Captions<br />
can be changed using the menu settings.<br />
12 Volume Keys—Press VOL – + to increase or<br />
decrease the audio volume.<br />
13<br />
14<br />
➀<br />
➁<br />
➂<br />
➃<br />
➄<br />
➅<br />
➆<br />
➇<br />
➠<br />
Point<br />
towards HDTV<br />
1– – Key—For Cable channels above 99, press<br />
this key, then press the other two numbers.<br />
Mute Key—Press to mute or restore the sound.<br />
Need help? Visit our Web site at www.sanyoctv.com or Call 1-800-877-5032<br />
➈<br />
➉<br />
11<br />
12<br />
13<br />
14<br />
7
GETTING STARTED—CONNECTIONS<br />
3<br />
Analog Signal Connections—<br />
Video1 (optional)<br />
Connect an analog device, such as, an Analog<br />
Cable Box, Satellite Receiver, or VCR<br />
Composite connectors are included on your<br />
new HDTV to provide continued compatibility<br />
with older analog devices, such as a VCR. The<br />
S-Video connector will provide the best analog<br />
resolution. If you have an S-Video connector<br />
on your old analog equipment, you should use<br />
it instead of the standard video connector.<br />
(Cables are not supplied.)<br />
1. Connect an AV cable to the VIDEO 1 jacks on<br />
the HDTV and to your analog AV equipment,<br />
as shown. Match the connector colors to<br />
jack colors.<br />
8<br />
2. Press the INPUT key to step through the<br />
signal inputs to select Video 1.<br />
ANALOG DEVICE<br />
INPUT KEY<br />
4 Digital<br />
Need help? Visit our Web site at www.sanyoctv.com or Call 1-800-877-5032<br />
Signal Connections—<br />
Video2 & Video3 (optional)<br />
Connect Digital devices, such as an HD Cable<br />
Box, HD Satellite Receiver, DVD Player, and<br />
Game System<br />
The Component jacks on this HDTV will accept<br />
HDTV, EDTV, and SDTV video signals, making<br />
Component a great choice when connecting<br />
your compatible external devices.<br />
1. Connect a COMPONENT cable to a set of<br />
Green, Blue, and Red video jacks (Video2 or<br />
Video3) on the HDTV and to your digital<br />
device, as shown. (Cable is not supplied.)<br />
2. Connect an AUDIO cable to the matching<br />
set of White and Red audio jacks, as shown.<br />
(Cable is not supplied.)<br />
3. Press the INPUT key to step through the<br />
signal inputs to select Video 2 or Video 3.<br />
DVD PLAYER<br />
SATELLITE RECEIVER
GETTING STARTED—POWER CONNECTION / CHANNEL SEARCH<br />
POWER CONNECTION<br />
5<br />
Plug<br />
6<br />
Press<br />
INITIAL CHANNEL SEARCH<br />
7 Press<br />
in AC power cord<br />
(120V AC, 60 Hz).<br />
the POWER key.<br />
(Follow the on-screen<br />
instructions.)<br />
To 120V AC outlet.<br />
the CHANNEL ▲ (Up) key to search<br />
for signals connected to the Antenna<br />
terminal.<br />
Channel Search will check for Antenna and<br />
Cable signals. If Antenna signals are detected,<br />
the HDTV searches for both analog and digital<br />
off-air channels. If Cable signals are detected,<br />
the HDTV will search for analog Cable channels.<br />
Channels are stored in Channel Memory and<br />
can be scanned using the CHANNEL ▲ (Up)<br />
and ▼ (Down) keys.<br />
If no Antenna signals are detected, the HDTV<br />
will begin an AV search.<br />
If neither of these searches detected a valid<br />
signal, the HDTV will tune to input Video1.<br />
INITIAL DISPLAY<br />
AV SEARCH<br />
NOTE:Be sure all the external video devices you connected<br />
to the HDTV are powered ON before<br />
you begin an AV Search.<br />
8 Press<br />
CHANNEL SEARCH DISPLAY<br />
the CHANNEL ▼ (Down) key to<br />
search for signals from devices you connected<br />
to the AV input jacks (Initial Display).<br />
AV Search will begin checking the AV inputs for<br />
valid signals, beginning with input Video1.<br />
When a valid signal is detected, the search<br />
process ends and the HDTV tunes to that input<br />
source.<br />
If a valid signal is not detected on any of the AV<br />
inputs, the HDTV will tune to input Video1.<br />
AV SIGNAL SEARCH DISPLAY<br />
Need help? Visit our Web site at www.sanyoctv.com or Call 1-800-877-5032<br />
9
ADVANCED AV CONNECTIONS<br />
ADVANCED DIGITAL SIGNAL<br />
CONNECTIONS—HDMI TO HDMI<br />
Connect compatible Digital devices, such as,<br />
an HD Cable Box, HD Satellite Receiver, DVD<br />
Player, and Game System<br />
HDMI—High-Definition Multimedia Interface<br />
An all digital AV interface that accepts uncompressed<br />
video signals for the very best picture<br />
possible. It supports HDCP copy protection,<br />
allowing transmission of copy-protected digital<br />
content. The signal can also include Dolby ®<br />
Digital or PCM audio, when available.<br />
1 Connect<br />
an HDMI cable to one of the<br />
HDTV’s HDMI inputs and to your external<br />
device. (Cable is not supplied.)<br />
NOTE:Press the INPUT key to step through the signal<br />
inputs to select HDMI 1, HDMI 2, or HDMI 3.<br />
DVI TO HDMI<br />
1<br />
Use<br />
2<br />
Connect<br />
an adapter (not supplied) to connect a<br />
DVI device to an HDMI input jack.<br />
the device’s audio out to the<br />
VIDEO3 Audio In L/R.<br />
NOTE:Audio is available only when using HDMI1.<br />
DVD PLAYER<br />
SATELLITE<br />
RECEIVER<br />
BACK VIEW OF HDTV<br />
DIGITAL AUDIO<br />
10 Need help? Visit our Web site at www.sanyoctv.com or Call 1-800-877-5032<br />
1 Connect<br />
AUDIO OUT JACKS (FIXED ANALOG)<br />
1 Connect<br />
the HDTV Digital Audio Output to<br />
a Multichannel Receiver, as shown.<br />
NOTE:Dolby ® Digital 5.1 audio is available at the<br />
Digital Audio Output only when received as<br />
part of a Digital Antenna signal being viewed<br />
on the screen.<br />
PHONO-TYPE<br />
DIGITAL AUDIO<br />
CABLE<br />
(Not supplied)<br />
MULTICHANNEL<br />
RECEIVER<br />
LEFT-SIDE<br />
VIEW OF<br />
HDTV BACK<br />
the HDTV Audio Out jacks to a<br />
Stereo Amplifier, as shown.<br />
NOTE:Do not connect external speakers directly to<br />
the HDTV.<br />
BACK VIEW OF HDTV<br />
STEREO<br />
AMPLIFIER
ON-SCREEN MENU OPERATION<br />
MENU NAVIGATION MAP<br />
MAIN MENU SUB-MENU OPTIONS<br />
NOTE:“Not available” will appear on the screen<br />
when an option is unavailable.<br />
TUNING MODE UNAVAILABLE MENU OPTION(S)<br />
Analog RF Digital Caption<br />
Digital RF None (all Menu options available)<br />
Video 1 <strong>Manual</strong> Channel Search, Channel Scan<br />
Memory, Digital Caption<br />
Video 2/3 and <strong>Manual</strong> Channel Search, Channel Scan<br />
HDMI 1/2/3<br />
Memory, Digital Caption, V-Guide<br />
IMPORTANT FACT: This HDTV maintains only one database<br />
of digital channels. Therefore, when you search for<br />
cable channels, the database of antenna digital channels<br />
will be deleted. You will only be able to receive those<br />
ClearQAM channels your cable company provides.<br />
MANUAL CHANNEL SEARCH<br />
MANUAL CHANNEL SEARCH HAS THREE CATEGORIES<br />
• Cable • Air (Antenna) • Digital Add-On<br />
Cable Search looks for analog cable channels and<br />
unscrambled (ClearQAM) digital cable channels.<br />
This search may take several minutes. After the<br />
search is complete, the HDTV will tune to the lowest<br />
ClearQAM channel, if available. Otherwise, the<br />
HDTV will tune to the lowest analog cable channel.<br />
Air(Antenna) Search will search for analog and<br />
digital channels that are broadcast over-the-air.<br />
After the search is complete, the HDTV will tune to<br />
the lowest Digital channel or the lowest analog<br />
channel. If no digital or analog channels were<br />
found, the HDTV will tune to Video 1.<br />
Digital Add-On Search adds any new digital channels<br />
that are found to the Channel Scan Database.<br />
1<br />
Press the MENU key on the remote control to<br />
display the Main menu. (See page 7.)<br />
2<br />
Use the CURSOR ▲▼ keys to highlight<br />
<strong>Manual</strong> Channel Search. Press ENTER.<br />
3<br />
Use the CURSOR ▲▼ keys to select Cable,<br />
Air (Antenna), or Digital Add-On.<br />
After the search is complete, the HDTV will exit<br />
the menu system and return to normal viewing.<br />
<strong>Manual</strong> Search Screen<br />
(Menu operations continued on page 12.)<br />
Need help? Visit our Web site at www.sanyoctv.com or Call 1-800-877-5032<br />
11
ON-SCREEN MENU OPERATION (CONTINUED)<br />
CHANNEL SCAN MEMORY<br />
DELETING CHANNELS FROM SCAN MEMORY<br />
3 Channel Scan Memory is a database of active Use the CHANNEL ▲▼ or NUMBER keys to<br />
channels you scan using the CHANNEL ▲▼ keys. select the channel you want to Delete.<br />
Customize it by deleting or adding channels. NOTE: Use the 1– – key to select cable channels<br />
1<br />
above 99.<br />
Press the MENU key on the remote control to<br />
4 display the Main menu. (See page 7.)<br />
Press ENTER to Delete the channel from<br />
2<br />
Channel Scan Memory.<br />
Use the CURSOR ▲▼ keys to highlight<br />
5 Channel Scan Memory. Press ENTER.<br />
Press EXIT to return to normal TV viewing.<br />
ADDING CHANNELS TO SCAN MEMORY<br />
3<br />
Use the CHANNEL ▲▼ or NUMBER keys to<br />
select the channel you want to Add.<br />
NOTE: Use the 1– – key to select cable channels<br />
above 99.<br />
4<br />
Press ENTER to Add the channel to Channel<br />
Scan Memory.<br />
Channel Scan<br />
Memory Screens<br />
This Display<br />
appears after<br />
you press<br />
ENTER.<br />
After 3 seconds the TV screen will display “Delete?”<br />
This Display<br />
appears after<br />
you press<br />
ENTER.<br />
12 Need help? Visit our Web site at www.sanyoctv.com or Call 1-800-877-5032<br />
After 3 seconds the TV screen will display “Add?”<br />
IMPORTANT FACTS: When a digital channel is deleted,<br />
all of that channel’s sub-channels are deleted as well.<br />
Only previously deleted digital channels can be added<br />
back to the Channel Scan Memory.<br />
Tune to “deleted” channels using the number keys.<br />
If one digital sub-channel is added back to the Channel<br />
Scan Memory list, all of that channel’s sub-channels will<br />
be added back.
DIGITAL CAPTIONING<br />
Captioning is textual information transmitted<br />
along with the picture and sound. Turning<br />
Captioning ON causes the HDTV to open these<br />
captions (digital or analog) and superimpose<br />
them on the screen. (Local broadcasters decide<br />
which caption signals to transmit.)<br />
Digital Captions can be changed using the menu<br />
settings as shown.<br />
1<br />
Use the CURSOR ▲▼ keys to highlight<br />
Digital Caption. Press ENTER.<br />
2<br />
Use<br />
3<br />
Use<br />
the CURSOR ▲▼ keys to select the<br />
option you want to adjust.<br />
the CURSOR keys to adjust the<br />
value.<br />
NOTES: If Background Opacity is set to transparent,<br />
captions may be difficult to see. x<br />
Only true EIA 708B Digital Closed-Captions<br />
are affected by all of these settings.<br />
MENU LANGUAGE<br />
1<br />
Use<br />
2<br />
Use<br />
the CURSOR ▲▼ keys to highlight Menu<br />
Language. Press ENTER.<br />
the CURSOR ▲▼ keys to select English,<br />
Español, or Français. Press EXIT.<br />
ENERGY (POWER) SAVER<br />
This power saving feature reduces the backlight<br />
brightness level. The options are:<br />
• OFF—the feature is off and the power consumption<br />
is normal.<br />
• LOW—power saving level is low and the backlight<br />
brightness level is lower than normal.<br />
• HIGH—power saving level is high and the backlight<br />
brightness is set to the lowest level.<br />
1<br />
Use<br />
2<br />
Use<br />
the CURSOR ▲▼ keys to highlight<br />
Energy Saver. Press ENTER.<br />
the CURSOR ▲▼ keys to select Off, Low,<br />
or High.<br />
NOTE:The Energy Saver settings level varies<br />
with the Picture / Sound mode.<br />
(Menu operations continued on page 14.)<br />
Need help? Visit our Web site at www.sanyoctv.com or Call 1-800-877-5032<br />
13
ON-SCREEN MENU OPERATION (CONTINUED)<br />
V-GUIDE (PARENTAL CONTROL)<br />
NOTE: THIS FEATURE IS DESIGNED TO COMPLY<br />
WITH THE UNITED STATES OF AMERICA’S FCC<br />
V-CHIP REGULATIONS. THEREFORE, IT MAY<br />
NOT FUNCTION WITH BROADCASTS THAT<br />
ORIGINATE IN OTHER COUNTRIES.<br />
This <strong>Sanyo</strong> television is equipped with an electronic<br />
V-Chip to interpret MPAA (Motion Picture<br />
Association of America) and TV Parental<br />
Guidelines rating codes. When these codes are<br />
detected, the HDTV will automatically display or<br />
block the program, depending upon choices you<br />
make when setting up the V-Guide system.<br />
Use this feature to automatically block programs<br />
with content you deem as inappropriate for your<br />
children to view.<br />
MORE INFORMATION<br />
Additional information about MPAA and V-Chip<br />
rating can be found at: www.mpaa.org and<br />
www.v-chip.org, respectively.<br />
V-GUIDE OPERATION<br />
1<br />
2<br />
3<br />
Use the CURSOR ▲▼ keys to highlight<br />
V-Guide in the Main menu. Press ENTER.<br />
Use the CURSOR ▲▼ keys to highlight On,<br />
in the V-Guide menu. Press ENTER.<br />
Use the CURSOR ▲▼ keys to highlight<br />
Adjust. Press ENTER.<br />
➠<br />
14 Need help? Visit our Web site at www.sanyoctv.com or Call 1-800-877-5032<br />
4<br />
Use the CURSOR ▲▼ and < > keys to select<br />
MOVIE, TV, or Content Ratings.<br />
NOTE:Content ratings are under the letters FV, D, L,<br />
S, and V.<br />
5<br />
Press the ENTER key to Block or Unblock<br />
selected rating. A lock symbol will appear<br />
beside the selected rating option indicating<br />
that it is blocked.<br />
OPERATING TIPS<br />
■ V-Guide settings are effective for Analog<br />
channels, Digital channels and Video1 signals.<br />
■ You can block portions of a TV rating by<br />
choosing one or more of the Content ratings<br />
(D, L, S, and V). By blocking just the L and S<br />
content ratings of TV-14, for example, TV-14<br />
rated programs with a D and/or V content rating<br />
could still be viewed.<br />
STANDARD V-GUIDE RATINGS—AT-A-GLANCE<br />
MPAA (Movie) RATING<br />
BLOCKED RATINGS<br />
(Lock symbol)<br />
TV RATING CONTENT RATING
REGIONAL V-GUIDE RATINGS (ADVANCED)<br />
V-Chip Regional Ratings 5 (RRT5) is an advanced<br />
V-Chip ratings system for digital channels that<br />
are received with an antenna. Your new <strong>Sanyo</strong><br />
HDTV supports this alternative system.<br />
When the HDTV detects compatible RRT5 data, it<br />
is downloaded and stored in memory and the<br />
menu is modified to include an advanced adjustment<br />
option.<br />
When the Adjust (Advanced) setup option is<br />
selected the Advanced Rating screen appears.<br />
Use the CURSOR ▲▼ keys to highlight<br />
1 V-Guide in the Main menu. Press ENTER.<br />
2<br />
3<br />
4<br />
Use the CURSOR ▲▼ keys to highlight On,<br />
in the V-Guide control menu. Press ENTER.<br />
Use the CURSOR ▲▼ keys to highlight<br />
Adjust (Advanced). Press ENTER.<br />
Use the CURSOR ▲▼ and < > keys to select<br />
a rating.<br />
➠<br />
HINT: There may be more ratings than can be displayed<br />
on one screen. When vertical scroll bars appear,<br />
use the CURSOR ▲▼ keys to gain access to the<br />
additional ratings.<br />
5<br />
Press the ENTER key to Block or Unblock<br />
selected rating. A Lock symbol will appear<br />
beside the selected rating option indicating<br />
that it is blocked.<br />
The advanced rating table will reflect previous<br />
choices you may have made.<br />
NOTE:If the HDTV is reset to factory defaults or if a<br />
<strong>Manual</strong> Cable Search is performed, only the<br />
Adjust option will appear in the menu. The<br />
Adjust (Advanced) option will reappear when the<br />
HDTV again detects RRT5 data.<br />
The V-Guide ratings screen below is just an<br />
example. Actual rating options will vary by<br />
region. For example, the RRT5 ratings for San<br />
Francisco, California may differ from those in<br />
Little Rock, Arkansas.<br />
Need help? Visit our Web site at www.sanyoctv.com or Call 1-800-877-5032<br />
15
ON-SCREEN MENU OPERATION (CONTINUED)<br />
PICTURE / SOUND ADJUSTMENT<br />
Choose Auto to accept predetermined values for<br />
each parameter.<br />
Choose <strong>Manual</strong> to adjust Picture / Sound values<br />
individually to suit your personal preferences.<br />
ADJUSTING THE PICTURE / SOUND MANUALLY<br />
1<br />
Use the CURSOR ▲▼ keys to highlight<br />
Picture / Sound. Press ENTER.<br />
2<br />
Use the CURSOR ▲▼ keys to highlight<br />
<strong>Manual</strong>. Press ENTER.<br />
ADJUSTING THE PICTURE / SOUND LEVELS<br />
3<br />
Use the CURSOR ▲▼ keys to highlight Color,<br />
Tint, Contrast, Brightness, Sharpness, or Tone.<br />
4<br />
Use the CURSOR < > keys to adjust the levels.<br />
16 Need help? Visit our Web site at www.sanyoctv.com or Call 1-800-877-5032<br />
ADVANCED PICTURE / SOUND ADJUSTMENTS<br />
3<br />
Use the CURSOR ▲▼ keys to highlight Digital<br />
Noise Reduction, Dynamic Contrast, or Loud<br />
Sound Suppressor.<br />
4<br />
Press the right CURSOR > key for options.<br />
5<br />
Use the ▲▼ keys to highlight On or Off. Press<br />
ENTER.<br />
6<br />
Press EXIT to return to normal TV viewing.
HELPFUL HINTS—Problems/Solutions<br />
If you are having problems with your HDTV,<br />
check this trouble shooting chart to find one<br />
or more possible solutions.<br />
Before returning your HDTV, please visit our<br />
website at www.sanyoctv.com or call us<br />
toll free at 1.800.877.5032. We can Help!<br />
Problem: Check these Conditions: Try these Solutions: Page No.<br />
No picture, sound<br />
(Digital Picture)<br />
● Check antenna/external connections<br />
● May be station trouble, NO signal<br />
broadcast.<br />
● MUTE function may be ON.<br />
No Captioning ● Check if station is broadcasting a<br />
Closed-Caption signal.<br />
● Select another channel.<br />
Cannot customize<br />
Caption<br />
Cannot display picture<br />
on a full screen<br />
Poor Picture/Sound<br />
(watching Analog)<br />
“No Signal”<br />
message appears<br />
on screen<br />
Pixilation of Digital<br />
image<br />
Cannot select or<br />
scan some channels<br />
No Cable channels<br />
above number 13<br />
Remote Control<br />
will not operate TV<br />
Cabinet makes<br />
popping sound.<br />
● Digital Caption signal is not being<br />
broadcast.<br />
● Check if program is in color.<br />
● Check antenna/external connections.<br />
● Color or Tint misadjusted.<br />
● May be station trouble.<br />
● Maybe MUTE function is ON.<br />
● Check Audio / Video connections.<br />
● Check external equipment<br />
connections.<br />
● Check external equipment setting.<br />
● Check antenna connection.<br />
● Press INFO and check signal<br />
strength.<br />
● Channel may be removed from memory.<br />
● Check antenna connections.<br />
● No digital signal being broadcast.<br />
● V-Guide is set to block programming.<br />
● Weak Signal.<br />
● Cable Channel Indicator C should<br />
appear next to channel number.<br />
● Check batteries.<br />
● Check if TV is plugged in.<br />
● This is a normal condition during<br />
warm-up and cool down of the plastic<br />
cabinet parts.<br />
● Adjust antenna.<br />
● Try a different channel.<br />
● Press RESET twice to restart channel<br />
search (All customized settings will be<br />
cancelled.)<br />
● Adjust Volume.<br />
5, 7<br />
16<br />
● Press CAPTION to select<br />
captioning mode. 7, 13<br />
● Press CAPTION to select Analog<br />
captioning.<br />
● Press PIX SHAPE to change<br />
setting.<br />
7, 13<br />
● Try a different channel.<br />
● Adjust antenna.<br />
● Press RESET twice to restart channel 7, 16<br />
search.<br />
● Adjust Volume.<br />
● Press INPUT.<br />
● Switch on external equipment.<br />
● Turn antenna, install signal booster.<br />
● Set external equipment output<br />
connections to match input connections.<br />
● Turn antenna, install signal booster.<br />
● Install outdoor Digital antenna. 5, 7<br />
● Select Channel Scan Memory to add<br />
channels or start channel search.<br />
● Set V-Guide to “ALLOW ALL” or press<br />
RESET twice to clear all settings and<br />
restart channel search.<br />
● Turn antenna, install signal booster.<br />
● Search for Cable channels using <strong>Manual</strong><br />
Channel Search.<br />
7<br />
5 ~ 7<br />
8 ~ 10<br />
7, 12<br />
14, 15<br />
11<br />
● Replace batteries.<br />
● Aim remote control at front of TV. 5, 7, 9<br />
Need help? Visit our Web site at www.sanyoctv.com or Call 1-800-877-5032<br />
17
ONE-YEAR LIMITED PARTS AND LABOR WARRANTY<br />
THIS LIMITED PARTS AND LABOR WARRANTY IS VALID ONLY ON SANYO TELEVISIONS PURCHASED AND USED IN<br />
THE UNITED STATES OF AMERICA, CANADA, AND PUERTO RICO, EXCLUDING ALL OTHER U.S. TERRITORIES AND<br />
PROTECTORATES. THIS LIMITED WARRANTY APPLIES ONLY TO THE ORIGINAL RETAIL PURCHASER, AND DOES NOT<br />
APPLY TO PRODUCTS USED FOR INDUSTRIAL OR COMMERCIAL PURPOSES.<br />
WARRANTY APPLICATION<br />
FOR ONE YEAR from the date of original retail purchase <strong>Sanyo</strong> Manufacturing Corporation (SMC) warrants this TV to<br />
be free from manufacturing defects in materials and workmanship under normal use and conditions for parts and labor.<br />
For the FIRST 90 DAYS from the date of original retail purchase, <strong>Sanyo</strong> Manufacturing Corporation will replace any<br />
defective TV via exchange at the retailer. To ensure proper warranty application, keep the original-dated-sales receipt<br />
for evidence of purchase. Return the defective TV to the retailer along with the receipt and the included accessories,<br />
such as the remote control. The defective TV will be exchanged for the same model, or a replacement model of equal<br />
value, if necessary. Replacement model will be contingent on availability and at the sole discretion of <strong>Sanyo</strong><br />
Manufacturing Corporation.<br />
THE FOREGOING WARRANTY IS EXCLUSIVE AND IN LIEU OF ALL OTHER WARRANTIES OF MERCHANTABILITY OR<br />
FITNESS FOR A PARTICULAR PURPOSE.<br />
OBLIGATIONS<br />
For one year from the date of purchase, <strong>Sanyo</strong> Manufacturing Corporation warrants this product to be free from<br />
defects in material and workmanship under normal use and conditions. During the first 90 days under this warranty<br />
for any manufacturing defect or malfunction <strong>Sanyo</strong> Manufacturing Corporation will provide a new TV via exchange at<br />
the retailer.<br />
HOW TO MAKE A CLAIM UNDER THIS WARRANTY<br />
Please call 1-800-877-5032. Please be prepared to give us the television’s model number and serial number when you<br />
call. The model number and serial number are printed on a label attached to the back of the unit.<br />
For customer assistance, call toll free 1-800-877-5032.<br />
Weekdays 7:30 AM – 7:00 PM Central Time<br />
Saturday 7:30 AM – 4:00 PM Central Time<br />
This warranty expresses specific contractual rights; retail purchasers may have additional statutory rights which vary<br />
from state to state.<br />
(EFFECTIVE: March 1, 2007)<br />
For your protection in the event of theft or loss of this product, please fill in the information requested<br />
below and KEEP IN A SAFE PLACE FOR YOUR OWN PERSONAL RECORDS.<br />
Model No.______________________________ Date of Purchase _________________________<br />
Serial No.______________________________ Purchase Price ___________________________<br />
(Located on back of unit) Where Purchased_________________________<br />
<strong>Sanyo</strong> Manufacturing Corp.<br />
3333 <strong>Sanyo</strong> Road, Forrest City, AR 72335<br />
US1-H 52-N6ME GXBJ [This manual printed with Soy Ink.]