Operating manual - Fujitsu UK
Operating manual - Fujitsu UK
Operating manual - Fujitsu UK

Create successful ePaper yourself
Turn your PDF publications into a flip-book with our unique Google optimized e-Paper software.
answers<br />
2<br />
<strong>Operating</strong> <strong>manual</strong><br />
CELSIUS R630 / V810<br />
English
Are there ...<br />
... any technical problems or other questions which you would like to be clarified?<br />
Please contact:<br />
● your sales partner<br />
● your sales outlet<br />
Further information can be found in the "Safety", "Ergonomics" and "Warranty" <strong>manual</strong>s.<br />
The latest information on our products, tips, updates, etc., can be found on the internet under:<br />
http://www.fujitsu-siemens.com
Herausgegeben von/Published by<br />
<strong>Fujitsu</strong> Siemens Computers GmbH<br />
Printed in the Federal Republic of Germany<br />
AG 0704 07/04<br />
Ausgabe/Edition 1<br />
Bestell-Nr./Order No.:<br />
A26361-K680-Z122-1-7619
CELSIUS R630 / V810<br />
<strong>Operating</strong> <strong>manual</strong><br />
July 2004 edition<br />
Introduction<br />
Important notes<br />
Preparing for use<br />
Operation<br />
Troubleshooting<br />
and tips<br />
System expansions<br />
Technical data<br />
Index
CELSIUS is a registered trademark of <strong>Fujitsu</strong> Siemens Computers GmbH.<br />
Microsoft, MS, MS-DOS, Windows, and Windows NT are registered trademarks of Microsoft<br />
Corporation.<br />
VESA and DPMS are trademarks of Video Electronics Standards Association.<br />
PS/2 is a registered trademark of International Business Machines, Inc.<br />
Pentium is a registered trademark of Intel Corporation, USA.<br />
Kensington Lock and MicroSaver are registered trademarks of ACCO World Corporation.<br />
All other trademarks referenced are trademarks or registered trademarks of their respective<br />
owners, whose protected rights are acknowledged.<br />
Copyright © <strong>Fujitsu</strong> Siemens Computers GmbH 2004<br />
All rights, including rights of translation, reproduction by printing, copying or similar methods,<br />
in part or in whole, are reserved.<br />
Offenders will be liable for damages.<br />
All rights, including rights created by patent grant or registration of a utility model or design,<br />
are reserved.<br />
Delivery subject to availability. Right of technical modification reserved.<br />
This <strong>manual</strong> was produced by<br />
cognitas. Gesellschaft für Technik-Dokumentation mbH<br />
www.cognitas.de
Contents<br />
Your CELSIUS R/CELSIUS V...........................................................................................................1<br />
Notational conventions ......................................................................................................................2<br />
Important notes ...............................................................................................................................3<br />
Safety notes ......................................................................................................................................3<br />
Energy saving, disposal and recycling .......................................................................................3<br />
CE marking................................................................................................................................3<br />
FCC Class B Compliance Statement.................................................................................................4<br />
Transporting the PC...........................................................................................................................4<br />
Cleaning the workstation....................................................................................................................4<br />
Preparing for use.............................................................................................................................5<br />
Unpacking and checking the delivery.................................................................................................5<br />
Steps for initial setup .........................................................................................................................5<br />
Setting up the workstation .................................................................................................................6<br />
Connect the monitor, mouse and keyboard .......................................................................................6<br />
Connecting the monitor..............................................................................................................7<br />
Connecting the mouse...............................................................................................................8<br />
Connecting a keyboard ..............................................................................................................8<br />
Connecting the workstation to the mains voltage...............................................................................9<br />
Initial switch-on: Software will be installed .........................................................................................9<br />
Switching on monitor and workstation......................................................................................10<br />
Installing the software ..............................................................................................................11<br />
Connecting external devices............................................................................................................11<br />
Connections on the workstation...............................................................................................12<br />
Connecting external devices to the serial port..........................................................................13<br />
Connecting external devices to the parallel port.......................................................................13<br />
Connecting external devices to the USB ports .........................................................................14<br />
Operation .......................................................................................................................................15<br />
Switching the workstation on....................................................................................................15<br />
Switching off the workstation ...................................................................................................15<br />
Indicators on the workstation ...........................................................................................................16<br />
Keyboard .........................................................................................................................................18<br />
Important keys and key combinations......................................................................................19<br />
Working with floppy disks ................................................................................................................20<br />
Settings in BIOS Setup....................................................................................................................21<br />
Property and data protection............................................................................................................21<br />
Anti-theft protection..................................................................................................................21<br />
Access authorisation via SmartCard........................................................................................21<br />
Troubleshooting and tips..............................................................................................................23<br />
Installing new software ....................................................................................................................23<br />
Power-on indicator remains unlit after you have switched on your device........................................23<br />
The screen stays blank....................................................................................................................24<br />
No mouse pointer displayed on the screen......................................................................................25<br />
The floppy disk cannot be read or written ........................................................................................25<br />
Time and/or date is not correct ........................................................................................................26<br />
Error messages on the screen.........................................................................................................26<br />
Restoring the hard disk contents .....................................................................................................26<br />
Tips ................................................................................................................................................26<br />
A26361-K680-Z122-1-7619, Edition 1
Contents<br />
System expansions....................................................................................................................... 27<br />
Information about boards ........................................................................................................27<br />
Opening the casing ......................................................................................................................... 28<br />
Closing the casing........................................................................................................................... 29<br />
Installing and removing a board ...................................................................................................... 30<br />
Installing board with screw ...................................................................................................... 30<br />
Removing board with screw .................................................................................................... 32<br />
Installing board with clip .......................................................................................................... 33<br />
Removing board with clips.......................................................................................................35<br />
Installing and removing drives......................................................................................................... 37<br />
Removing the front panel ........................................................................................................37<br />
Attaching the front panel ......................................................................................................... 38<br />
Installing an accessible drive................................................................................................... 39<br />
Removing an accessible drive................................................................................................. 41<br />
Changing the floppy disk drive ................................................................................................ 43<br />
Installing or removing the hard disk drive ................................................................................ 45<br />
Installing and removing SmartCard reader ...................................................................................... 48<br />
Installing and removing front USB or USB audio ports .................................................................... 51<br />
Extensions to the mainboard........................................................................................................... 55<br />
Removing ventilation duct .......................................................................................................55<br />
Installing ventilation duct ......................................................................................................... 56<br />
Upgrading main memory......................................................................................................... 58<br />
Replacing processor................................................................................................................ 58<br />
Installing second processor.....................................................................................................59<br />
Removing second processor................................................................................................... 60<br />
Replacing lithium battery......................................................................................................... 61<br />
Technical data ............................................................................................................................... 63<br />
Index .............................................................................................................................................. 65<br />
A26361-K680-Z122-1-7619, Edition 1
Your CELSIUS R/CELSIUS V...<br />
...is available with various configuration levels with different hardware and software. In addition, you<br />
can install accessible drives (e.g. DVD drive), hard disks and other boards.<br />
This operating <strong>manual</strong> tells you how to put your workstation into operation and how to operate it in<br />
daily use. This description applies for all configuration levels. Depending on the configuration level<br />
chosen some of the hardware components described may not be available on your PC. Please<br />
observe the notes on your operating system.<br />
Depending on the configuration selected, the operating system is preinstalled on your hard disk (e.g.<br />
Windows XP).<br />
Your workstation has a number of security features to ensure that no unauthorised persons can<br />
access your data. The security functions in the BIOS Setup also allow you to protect your data by<br />
means of passwords. In addition, you can also mechanically lock your workstation. Systems with a<br />
SmartCard reader offer additional protection.<br />
DeskUpdate allows you under some operating systems to easily and quickly install the latest drivers<br />
and operating system extensions with a few mouse clicks. DeskUpdate is contained on the<br />
"Drivers & Utilities" CD.<br />
Additional information on this workstation is also contained in:<br />
● in the "Getting Started" <strong>manual</strong><br />
● in the "Safety" <strong>manual</strong><br />
● in the "Ergonomics" <strong>manual</strong><br />
● in the "Warranty" <strong>manual</strong><br />
● in the operating <strong>manual</strong> for the monitor<br />
● in the technical <strong>manual</strong> for the mainboard<br />
● in the "BIOS Setup" <strong>manual</strong><br />
● in your operating system documentation<br />
● in the information files (e.g. *.TXT, *.DOC, *.WRI, *.HLP)<br />
i<br />
You will find an electronic version of some of the listed <strong>manual</strong>s on the "User<br />
Documentation" or "Drivers & Utilities" CD.<br />
You can access and view the required information using the Acrobat Reader program,<br />
which is also on the CD. If necessary, you can also make a print version of the <strong>manual</strong>.<br />
A26361-K680-Z122-1-7619, Edition 1 1
Your CELSIUS R/CELSIUS V...<br />
Notational conventions<br />
The meanings of the symbols and fonts used in this <strong>manual</strong> are as follows:<br />
!<br />
i<br />
indicates information which is important for your health or for preventing physical damage.<br />
indicates important information which is required to use the system properly.<br />
► Text which follows this symbol describes activities that must be performed in the order shown.<br />
Text in italics indicates commands or menu items.<br />
"Quotation marks" indicate names of chapters or terms.<br />
2 A26361-K680-Z122-1-7619, Edition 1
Important notes<br />
In this chapter you will find information regarding safety which it is essential to take note of when<br />
working with your workstation.<br />
Safety notes<br />
!<br />
Pay attention to the information provided in the "Safety" <strong>manual</strong> and in the following safety<br />
notes.<br />
During installation and before operating the device, please observe the instructions on<br />
environmental conditions in the "Technical data" chapter as well as the instructions in the<br />
"Preparing for use" chapter.<br />
You may only operate the device, if the voltage for the device is set to the local mains<br />
voltage (see chapter "Technical data").<br />
The main switch (if present) and the ON/OFF switch do not disconnect the workstation<br />
from the mains voltage. To completely disconnect the mains voltage, remove the power<br />
plug from the grounded mains outlet.<br />
Remove the power plug before opening the device.<br />
Replace the lithium battery on the mainboard in accordance with the instructions in the<br />
"Extensions to the mainboard" - "Replacing lithium battery" section.<br />
Caution, components in the system can get very hot.<br />
Energy saving, disposal and recycling<br />
Further information can be found on the "User Documentation" or "Drivers & Utilities" CD provided<br />
with your computer.<br />
CE marking<br />
The shipped version of this device complies with the requirements of the EEC directives<br />
89/336/EEC "Electromagnetic compatibility" and 73/23/EEC "Low voltage directive".<br />
A26361-K680-Z122-1-7619, Edition 1 3
Important notes<br />
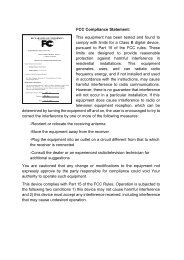
FCC Class B Compliance Statement<br />
The following statement applies to the products covered in this <strong>manual</strong>, unless otherwise specified<br />
herein. The statement for other products will appear in the accompanying documentation.<br />
NOTE:<br />
This equipment has been tested and found to comply with the limits for a "Class B" digital device,<br />
pursuant to Part 15 of the FCC rules and meets all requirements of the Canadian Interference-<br />
Causing Equipment Standard ICES-003 for digital apparatus. These limits are designed to provide<br />
reasonable protection against harmful interference in a residential installation. This equipment<br />
generates, uses and can radiate radio frequency energy and, if not installed and used in strict<br />
accordance with the instructions, may cause harmful interference to radio communications.<br />
However, there is no guarantee that interference will not occur in a particular installation. If this<br />
equipment does cause harmful interference to radio or television reception, which can be<br />
determined by turning the equipment off and on, the user is encouraged to try to correct the<br />
interference by one or more of the following measures:<br />
● Reorient or relocate the receiving antenna.<br />
● Increase the separation between equipment and the receiver.<br />
● Connect the equipment into an outlet on a circuit different from that to which the receiver is<br />
connected.<br />
● Consult the dealer or an experienced radio/TV technician for help.<br />
<strong>Fujitsu</strong> Siemens Computers GmbH is not responsible for any radio or television interference caused<br />
by unauthorised modifications of this equipment or the substitution or attachment of connecting<br />
cables and equipment other than those specified by <strong>Fujitsu</strong> Siemens Computers GmbH. The<br />
correction of interferences caused by such unauthorised modification, substitution or attachment will<br />
be the responsibility of the user.<br />
The use of shielded I/O cables is required when connecting this equipment to any and all optional<br />
peripheral or host devices. Failure to do so may violate FCC and ICES rules.<br />
Transporting the workstation<br />
!<br />
Transport all parts separately in their original packaging or in a packaging which protects<br />
them from knocks and jolts, to the new site. Do not unpack them until all transportation<br />
manoeuvres are completed.<br />
Cleaning the workstation<br />
!<br />
Turn off all power and equipment switches and pull the power plug out of the grounded<br />
mains outlets.<br />
The inside of the workstation casing may only be cleaned by authorised, specially trained<br />
personnel.<br />
Do not use any cleaning agents that contain abrasives or may corrode plastic.<br />
Ensure that no liquid enters the system.<br />
Wipe the casing with a dry cloth. If particularly dirty, use a cloth that has been moistened in mild<br />
domestic detergent and then carefully wrung out. Use disinfectant wipes to clean the keyboard and<br />
the mouse.<br />
4 A26361-K680-Z122-1-7619, Edition 1
Preparing for use<br />
! Please take note of the safety information in the "Important notes" chapter.<br />
Unpacking and checking the delivery<br />
It is recommended not to throw away the original packaging material! It may be required for<br />
reshipment at some later date.<br />
► Unpack all the individual parts.<br />
► Check the delivery for damage incurred during transportation.<br />
► Check whether the delivery agrees with the details in the delivery note.<br />
Should you discover that the delivery does not correspond to the delivery note, notify your local<br />
sales outlet immediately.<br />
Steps for initial setup<br />
Only a few steps are necessary to put your new workstation into operation for the first time:<br />
– Select location for workstation and set up workstation<br />
– Connect the monitor, mouse and keyboard<br />
– Check the voltage at the mains outlet and connect the workstation to an electrical outlet<br />
– Enable Workstation<br />
You will learn more about the individual steps in the following sections.<br />
i<br />
External devices<br />
If you have received other devices in addition to your workstation (e.g. a printer or a<br />
modem), do not connect these until after the initial installation. The following sections<br />
contain a description of how to connect these external devices: "Connecting external<br />
devices to the serial port" and "Connecting external devices to the parallel port".<br />
Drives and boards<br />
If you have received drives or boards with your Workstation, please do not install them<br />
until after initial installation. How to install drives and boards is described in the "System<br />
expansions" chapter.<br />
A26361-K680-Z122-1-7619, Edition 1 5
Preparing for use<br />
Setting up the workstation<br />
!<br />
When installing your workstation, give consideration to the recommendations and safety<br />
notes in the "Safety" booklet.<br />
Set up the workstation only in its correct orientation. The points to observe are illustrated<br />
on the following pages.<br />
We recommend that you place your device on a surface with good anti-slip qualities. In<br />
view of the multitude of different finishes and varnishes used on furniture, it is possible<br />
that the rubber feet will mark the surface they stand on.<br />
Do not expose the workstation to extreme environmental conditions (see "Technical data"<br />
chapter).<br />
Provide at least 200 mm of clearance in front of and behind the fan area of the casing to<br />
ensure adequate ventilation. In order to avoid overheating, do not cover the ventilation<br />
area of the monitor or the workstation.<br />
Do not place several workstations one above the other.<br />
Connect the monitor, mouse and keyboard<br />
The ports for the monitor, mouse, and keyboard are on the rear and front (USB ports, optional) of<br />
the workstation.<br />
Keyboard port / purple<br />
Monitor port / blue<br />
PS/2 mouse port / green<br />
USB port / black<br />
6 A26361-K680-Z122-1-7619, Edition 1
Connecting the monitor<br />
Preparing for use<br />
► Follow the instructions contained in the monitor <strong>manual</strong> to prepare the monitor for operation<br />
(e.g. connecting cables).<br />
► Plug the data cable into the monitor port of the workstation.<br />
► Depending on the connector, plug the monitor power cable into either the monitor socket of the<br />
workstation (1) or the grounded mains outlet (2).<br />
i<br />
!<br />
i<br />
We recommend to connect the monitor power cable to the monitor socket of the<br />
workstation. The monitor is then switched off automatically when you switch the<br />
workstation off.<br />
The monitor power cable may only be connected to the monitor socket if the monitor<br />
current consumption is smaller than 1,5 A with 230 V or 3 A with 115 V. The values for the<br />
monitor current consumption can be found in the technical data on the monitor or in the<br />
operating <strong>manual</strong> for the monitor.<br />
The monitor will not be switched off together with the system. Switch off the monitor with<br />
ist own ON/OFF switch.<br />
A26361-K680-Z122-1-7619, Edition 1 7<br />
1<br />
2
Preparing for use<br />
Connecting the mouse<br />
Depending on the equipment level selected, your workstation will be supplied with a PS/2 mouse or<br />
a USB mouse.<br />
Connecting a PS/2 mouse<br />
► Connect the PS/2 mouse to the PS/2 mouse port on the workstation.<br />
Connecting USB mouse<br />
► Connect the USB mouse to the USB port on the workstation.<br />
i<br />
If you do not attach a mouse at the PS/2 mouse port, you can disable the mouse<br />
controller in the BIOS Setup in order to free the IRQ12 for a different application.<br />
Connecting a keyboard<br />
Depending on the selected equipment level, your workstation will be supplied with a standard<br />
keyboard or a USB keyboard.<br />
Connecting standard keyboard<br />
Use the supplied keyboard cable only.<br />
► Plug the other end of the keyboard cable (square plug) into the socket on the underside of the<br />
keyboard.<br />
► Plug the round plug of the keyboard cable into the keyboard port on the workstation.<br />
Connecting USB keyboard<br />
Use the supplied keyboard cable only.<br />
► Plug the other end of the keyboard cable (square plug) into the socket on the underside of the<br />
keyboard.<br />
► Insert the rectangular USB plug of the keyboard cable into the USB port<br />
workstation.<br />
on the<br />
8 A26361-K680-Z122-1-7619, Edition 1
Preparing for use<br />
Connecting the workstation to the mains voltage<br />
Your workstation sets itself automatically to the local rated voltage.<br />
► Plug the power cable into the workstation (1).<br />
► Plug the power plug into the grounded mains outlet (2).<br />
Initial switch-on: Software will be installed<br />
If the workstation is integrated into a network, the user and server details as well as the network<br />
protocol are required. Contact your network administrator if you have any questions about these<br />
settings.<br />
When you switch on your workstation for the first time the supplied software is installed and<br />
configured. You should plan some time for this, as this process must not be interrupted.<br />
!<br />
Once the installation has been started the workstation must not be switched off!<br />
During installation the workstation may only be rebooted when you are requested to do<br />
so!<br />
Otherwise the installation will not be performed correctly. If a fault occurs during the<br />
installation, the contents of the hard disk must be completely restored.<br />
You may require the Windows licence number during installation. This number is located on a<br />
sticker on your workstation.<br />
A26361-K680-Z122-1-7619, Edition 1 9<br />
1<br />
2
Preparing for use<br />
Switching on monitor and workstation<br />
► Switch the monitor on (see the operating <strong>manual</strong> for the monitor).<br />
► Switch on the workstation. To do this, follow the instructions below.<br />
1 = Main power switch<br />
2 = ON/OFF switch<br />
3 = LCD display<br />
1<br />
I<br />
0<br />
0 = Workstation is switched off<br />
I = Workstation is ready-to-operate<br />
► Press the main switch (1) on the back of the workstation.<br />
► Press the ON/OFF switch (2) on the front of the workstation.<br />
The LCD lights up: The workstation is on. Up to seven symbols are displayed, depending on the<br />
operating state (see chapter "Indicators on the workstation").<br />
10 A26361-K680-Z122-1-7619, Edition 1<br />
3<br />
2
Installing the software<br />
Preparing for use<br />
► During installation, follow the instructions on screen.<br />
Consult the operating system <strong>manual</strong> if there is anything unclear about the requested input data.<br />
i<br />
You will find further information about the system, drivers, utilities, updates, <strong>manual</strong>s etc.<br />
on the "Drivers & Utilities" CD supplied.<br />
Connecting external devices<br />
!<br />
Read the documentation on the external device before connecting it. The power plug must<br />
be removed before connecting external devices, apart from USB devices.<br />
Do not either connect or disconnect cables during storms.<br />
Always take hold of the actual plug. Never unplug a cable by pulling the cable itself.<br />
Connect and disconnect the cables in the order described below.<br />
Connecting cables<br />
● Turn off all power and equipment switches.<br />
● Remove all power plugs from the mains outlets.<br />
● Connect all cables at the workstation and peripherals. Under all circumstances, please<br />
observe the safety notes provided in the "Important notes" chapter.<br />
● Plug all data communication cables into the utility sockets.<br />
● Plug all power cables into the grounded mains outlets.<br />
Disconnecting cables<br />
● Turn off all power and equipment switches.<br />
● Remove all power plugs from the mains outlets.<br />
● Unplug all data communication cables from the utility sockets.<br />
● Disconnect all cables from the workstation and peripherals.<br />
i<br />
USB devices are hot-pluggable. This allows cables from USB devices to be connected<br />
and disconnected with the system switched on.<br />
Additional information can be found in the "Connecting external devices to the USB ports"<br />
section and in the documentation for the USB devices.<br />
A26361-K680-Z122-1-7619, Edition 1 11
Preparing for use<br />
Connections on the workstation<br />
The ports for external devices are on the rear and on the front of the workstation. The ports available<br />
on your workstation depend on the configuration level you have selected. The standard ports are<br />
marked with the symbols shown below (or similar). Exact details of the position of the ports are<br />
supplied in the technical <strong>manual</strong>s for the boards.<br />
i<br />
1<br />
Keyboard port, purple<br />
Serial port 1, teal or turquoise<br />
Monitor port, blue<br />
Headphones port, orange or light<br />
green<br />
Audio output (Line out), light green<br />
Game port, gold<br />
USB - Universal Serial Bus, black<br />
IEEE 1394 FireWire<br />
PS/2 mouse port, green<br />
12 A26361-K680-Z122-1-7619, Edition 1<br />
2<br />
digital<br />
out<br />
Serial port 2, teal or turquoise<br />
Parallel port/Printer, burgundy<br />
Microphone jack, pink or red<br />
Audio input (Line in), light blue<br />
SCSI connection<br />
LAN connector<br />
Digital audio line output, yellow<br />
Some of the devices that you connect require special drivers (see the operating system<br />
and device documentation).
Connecting external devices to the serial port<br />
Preparing for use<br />
External devices can be connected to the serial port (e.g. a modem).<br />
► Connect the data cable to the external device.<br />
► Connect the data cable to the serial port .<br />
For an exact description of how to connect external devices to the serial port, please refer to the<br />
device documentation.<br />
i<br />
Settings of the serial port<br />
If you need to change the settings of the serial port (e.g. address, interrupt), you can do<br />
so in the BIOS Setup. The settings for the port are described in the technical <strong>manual</strong> for<br />
the mainboard or in the "BIOS Setup" <strong>manual</strong>.<br />
Device drivers<br />
The devices connected to the serial port require drivers. Your operating system already<br />
includes many drivers. Nevertheless, if the driver you need is not on the hard disk, please<br />
install it from the data carrier supplied with the device or with the application programme.<br />
Connecting external devices to the parallel port<br />
External devices can be connected to the parallel port (e.g. a printer).<br />
► Connect the data cable to the external device.<br />
► Connect the data cable to the parallel port .<br />
For an exact description of how to connect external devices to the parallel port, please see the<br />
device documentation.<br />
i<br />
Settings of the parallel port<br />
If you need to change the settings of the parallel port (e.g. address, interrupt), you can do<br />
so in the BIOS Setup. The settings for the port are described in the technical <strong>manual</strong> for<br />
the mainboard or in the "BIOS Setup" <strong>manual</strong>.<br />
Device drivers<br />
The devices connected to the parallel port require drivers. Your operating system already<br />
includes many drivers. Nevertheless, if the driver you need is not on the hard disk, please<br />
install it from the data carrier supplied with the device or with the application programme.<br />
A26361-K680-Z122-1-7619, Edition 1 13
Preparing for use<br />
Connecting external devices to the USB ports<br />
You can connect a wide range of external devices to the USB port (e.g. printer, scanner, modem or<br />
keyboard).<br />
i<br />
USB devices are hot-pluggable. This allows cables from USB devices to be connected<br />
and disconnected with the system switched on.<br />
Additional information can be found in the documentation for the USB devices.<br />
► Connect the data cable to the external device.<br />
► Connect the data cable to the USB port .<br />
i<br />
Device drivers<br />
The devices you connect to the USB ports usually require no driver of their own, as the<br />
required software is already included in the operating system. However, if the USB device<br />
requires its own software, please install it from the data carrier provided with the USB<br />
device.<br />
14 A26361-K680-Z122-1-7619, Edition 1
Operation<br />
Switching the workstation on<br />
► If necessary, switch the monitor on (see the operating <strong>manual</strong> for the monitor).<br />
► Press the ON/OFF switch on the front of the workstation.<br />
The corresponding indication appears on the LCD (see chapter "Indicators on the workstation") or<br />
the operating indicator lights, the workstation starts up.<br />
Switching off the workstation<br />
► Shut down the operating system properly. For Windows: select Shut Down from the Start menu.<br />
► If the operating system does not automatically switch the workstation off, turn the workstation<br />
ready-to-use when requested to do so by pressing the ON/OFF switch.<br />
If the workstation is ready-to-use, the workstation consumes very little power.<br />
!<br />
The ON/OFF switch does not separate the workstation from the mains voltage. To<br />
completely disconnect the mains voltage, remove the power plug from the socket.<br />
► If necessary, switch the monitor off (see the operating <strong>manual</strong> for the monitor).<br />
Placing a workstation (with soft power off function) in a ready-to-operate state by means of<br />
software<br />
With the soft power off function the workstation automatically switches off (standby) or switches into<br />
the energy-saving mode after the operating system is shut down. Requirements: Your system must<br />
support switching off with software and this functionality must be enabled in BIOS Setup. The soft<br />
power off software may also need to be installed on Windows NT systems.<br />
You can also switch your workstation into the standby mode via the DeskView software with the<br />
DeskOff programme.<br />
A26361-K680-Z122-1-7619, Edition 1 15
Operation<br />
Indicators on the workstation<br />
The indicators are on the front of the workstation. Which indicators are available on your workstation<br />
depends on the configuration level you have selected.<br />
1 = LCD / status indicator panel<br />
2 = SmartCard reader indicator<br />
16 A26361-K680-Z122-1-7619, Edition 1<br />
1<br />
3 = CD-ROM indicator<br />
4 = Floppy disk indicator<br />
1 - LCD / status indicator panel<br />
The LCD lights up as soon as the workstation is switched on. Up to seven symbols are displayed,<br />
depending on the operating state.<br />
Power on<br />
appears on the LCD as soon as the workstation is switched on.<br />
Standby/ Energy saving mode<br />
appears on the LCD as soon as the workstation is in energy saving mode. The<br />
workstation can be switched on with the ON/OFF switch.<br />
Hard disk<br />
appears on the LCD as soon as the hard disk is accessed.<br />
2<br />
3<br />
4
X<br />
?<br />
Operation<br />
Error<br />
appears on the LCD if there is a hardware error in the workstation or if a critical<br />
hardware state is reached (e.g. fan failure, high temperature). You can use<br />
DeskView to get detailed information on the problem that occurred. If in any doubt,<br />
consult your administrator.<br />
LAN connection<br />
appears on the LCD as soon as the workstation is connected to a LAN.<br />
LAN access<br />
appears on the LCD as soon as the workstation sends or receives data over the<br />
LAN.<br />
Message<br />
when software that supports this function is used, the appearance of this symbol on<br />
the display indicates that an incoming message (mail, fax) is waiting.<br />
Reserved<br />
is reserved for future use.<br />
2 - SmartCard reader indicator<br />
The indicator lights up if a SmartCard is inserted.<br />
The indicator flashes if no SmartCard is inserted.<br />
3 - CD-ROM indicator<br />
The indicator lights up when the CD-ROM drive of the workstation is accessed. You may only<br />
remove the CD when the indicator is dark.<br />
4 - Floppy disk indicator<br />
The indicator lights up when the floppy disk drive of the workstation is accessed. You may only<br />
remove the floppy disk when the indicator is unlit.<br />
A26361-K680-Z122-1-7619, Edition 1 17
Operation<br />
Keyboard<br />
1 = Function keys<br />
2 = Power button (optional)<br />
3 = Alphanumeric keypad<br />
i<br />
1<br />
3 4 5<br />
4 = Cursor keys<br />
5 = Numeric keypad (calculator keypad)<br />
The illustrated keyboard is an example and may differ from the model you use.<br />
18 A26361-K680-Z122-1-7619, Edition 1<br />
2
Important keys and key combinations<br />
Operation<br />
The following description of keys and key combinations refers to MS Windows. Details of other keys<br />
and key combinations can be found in the documentation of the relevant application programme.<br />
Alt Gr<br />
Num<br />
Lock<br />
Ctrl<br />
ON/OFF switch (optional)<br />
Depending on the setting in the BIOS Setup, the system can be switched on, off, or<br />
on and off with this button. Some operating systems allow you to configure<br />
additional functions of the ON/OFF switch in the Control Panel.<br />
On some keyboards the ON/OFF switch can only be used with ACPI. Otherwise the<br />
key is inoperative. The mainboard must support this function.<br />
Enter key<br />
confirms the marked selection. The enter key is also referred to as the "Return" key.<br />
Start key<br />
calls up the Windows START menu.<br />
Menu key<br />
invokes the menu for the marked item (Windows).<br />
Shift key<br />
enables upper-case letters and the upper key symbols to be used.<br />
Alt Gr (e.g. German keyboard)<br />
produces a character shown on the right-hand side of a key (e.g. the character @<br />
on the key Q ).<br />
Num key<br />
Switches the numeric key pad between the number ("Num" indicator lights up) and<br />
the editing modes ("Num" indicator does not light up).<br />
When the Num Lock indicator is lit the digit and comma keys are active.<br />
When the Num Lock indicator is not lit the cursor control functions are active in the<br />
Numeric keypad.<br />
Ctrl key<br />
starts key combination actions. The Ctrl key is also called "Ctrl", "Control" or<br />
"Control key".<br />
Ctrl Alt Del<br />
Warm boot<br />
restarts the workstation. Press simultaneously the keys Ctrl ,<br />
Alt + Del . Under some operating systems the Task Manager<br />
appears first. Then you must press all three keys again to reboot.<br />
A26361-K680-Z122-1-7619, Edition 1 19
Operation<br />
Working with floppy disks<br />
i<br />
Follow the instructions supplied by the vendor of the floppy disks.<br />
Never clean the floppy disk drives with cleaning disks. Any attempt would destroy the<br />
read/write head in the disk drive within 20 seconds.<br />
1<br />
2<br />
3<br />
5<br />
1 = Insertion direction<br />
2 = Label area<br />
3 = Write protection tab for a 1.44 Mbyte floppy disk<br />
4 = Identification of a 1.44 MB floppy disk or write protect switch on a 120 MB floppy disk<br />
5 = Eject button for inserted floppy disks<br />
6 = Disk is write-protected<br />
7 = Disk is not write-protected<br />
To insert a diskette<br />
► Push the floppy disk into the drive in the insertion direction (1) until it engages. The label<br />
should be facing upward.<br />
To remove a diskette<br />
► Push the eject button (5).<br />
Protect the floppy disk against being overwritten or erased<br />
► Slide the write-protect slider into position (6). The hole is now visible.<br />
Deactivate write protection<br />
► Slide the write-protect slider into position (7). The hole is now covered.<br />
20 A26361-K680-Z122-1-7619, Edition 1<br />
4<br />
6<br />
7
Settings in BIOS Setup<br />
Operation<br />
The BIOS Setup menu allows you to set your hardware configuration and system functions of the<br />
workstation. When the PC is delivered, the default entries are valid (see "BIOS Setup" <strong>manual</strong> and if<br />
necessary technical <strong>manual</strong> for the mainboard). You may customise these settings to your<br />
requirements in the BIOS Setup.<br />
Property and data protection<br />
Software functions and mechanical locking offer a broad range of functions for protecting your<br />
workstation and your personal data from unauthorised access. You can also combine these<br />
functions.<br />
Anti-theft protection<br />
You can also use this eye (1) to anchor the casing.<br />
Access authorisation via SmartCard<br />
1<br />
1 = Large eye<br />
In systems equipped with a SmartCard reader, access can be restricted to those users who have a<br />
corresponding SmartCard.<br />
A26361-K680-Z122-1-7619, Edition 1 21
Troubleshooting and tips<br />
!<br />
Take note of the safety notes in the "Safety" <strong>manual</strong> and in the "Preparing for use"<br />
chapter, when you connect or disconnect cables.<br />
If a fault occurs, try to correct it as described in the following places:<br />
● in this chapter<br />
● in the documentation of the connected devices<br />
● in the help systems of the software used<br />
● in the documentation of your operating system<br />
If you fail to correct the problem, proceed as follows:<br />
► Switch off the workstation.<br />
► Make a note of the steps and the circumstances that led to the fault.<br />
► Make a note of any error messages displayed.<br />
► Note the ID number of your device. This number can be found on the type rating plate on the<br />
back of the casing.<br />
► Contact your sales outlet or our customer service centre.<br />
Installing new software<br />
When installing programmes or drivers, important files may be overwritten and modified. To be able<br />
to access the original data in the event of any problems following installation, you should backup<br />
your hard disk prior to installation.<br />
Power-on indicator remains unlit after you have<br />
switched on your device<br />
This may be due to the following:<br />
The mains voltage supply is faulty<br />
► Check that the power cable is plugged properly into the workstation and grounded mains<br />
outlet.<br />
► Switch on the workstation.<br />
Internal power supply overloaded<br />
► Disconnect the power plug of the workstation from the grounded mains outlet.<br />
► Wait for a moment.<br />
► Plug the power plug into the grounded mains outlet again.<br />
► Switch on the workstation.<br />
A26361-K680-Z122-1-7619, Edition 1 23
Troubleshooting and tips<br />
The screen stays blank<br />
If your screen remains blank this may be due to the following:<br />
Monitor is switched off<br />
► Switch your monitor on.<br />
Power saving has been activated (screen is blank)<br />
► Press any key on the keyboard.<br />
or<br />
► Deactivate the screen saver. Enter the appropriate password.<br />
Brightness control is set to dark<br />
► Adjust the brightness control. For detailed information, please refer to the operating <strong>manual</strong><br />
supplied with your monitor.<br />
Power cable not connected<br />
► Switch off the monitor and the workstation.<br />
► Check whether the power cable of the monitor is properly connected to the monitor and to the<br />
mains outlet.<br />
► Check that the power cable of the workstation is plugged properly into the workstation and<br />
grounded mains outlet.<br />
► Switch on the monitor and the workstation.<br />
Monitor cable not connected<br />
► Switch off the monitor and the workstation.<br />
► Check that the monitor cable is properly connected to the workstation and monitor.<br />
► Switch on the monitor and the workstation.<br />
Wrong monitor has been set under Windows 2000<br />
► Restart the workstation.<br />
► If the message Starting Windows appears, press function key F8<br />
The Windows 2000 Advanced Options Menu appears.<br />
► Select Safe Mode or Safe Mode with Network.<br />
► Set the correct values for the attached monitor as described in the operating <strong>manual</strong> of the<br />
monitor by selecting Start - Settings - Control Panel - Display - Settings.<br />
24 A26361-K680-Z122-1-7619, Edition 1
Wrong monitor has been set under Window XP<br />
► Restart the workstation.<br />
► Press F8 while the system is booting.<br />
Troubleshooting and tips<br />
Either the Windows Advanced Start Options menu or the menu for selecting the operating system<br />
appears.<br />
► If the menu for selecting the operating system appears, press F8 .<br />
► Select Safe Mode or Safe Mode with Network.<br />
► Set the correct values for the attached monitor as described in the operating <strong>manual</strong> of the<br />
monitor by selecting Start - Settings - Control Panel - Display and then the Appearance, Themes,<br />
Settings tabs.<br />
The wrong RAM modules have been inserted<br />
See the technical <strong>manual</strong> for the mainboard for information on which memory modules can be used.<br />
No mouse pointer displayed on the screen<br />
► Shut down the operating system properly.<br />
► Switch off the workstation.<br />
► Check that the mouse cable is properly connected to the system unit.<br />
If you use an adapter or extension lead with the mouse cable, check the connections.<br />
► Make sure that only one mouse is connected.<br />
► Switch on the workstation.<br />
The mouse controller must be enabled if you use a PS/2 mouse on the PS/2 mouse port .<br />
► Check in the BIOS Setup that the mouse controller is Enabled.<br />
► Check that the mouse driver is properly installed and is present when the application<br />
programme is started. Detailed information can be found in the user guide for the mouse and<br />
application programme.<br />
The floppy disk cannot be read or written<br />
► Check that the write protection of the floppy disk or the floppy disk drive is activated (refer to<br />
the "BIOS Setup" <strong>manual</strong> and if necessary to the technical <strong>manual</strong> for the mainboard).<br />
► Check the entry for Diskette A: in the Main menu of the BIOS Setup.<br />
► Check that the floppy disk drive controller is enabled (also refer to the technical <strong>manual</strong> for the<br />
mainboard or to the "BIOS Setup" <strong>manual</strong>).<br />
► Check that the cables of the floppy disk drive are properly connected (refer to "Changing the<br />
floppy disk drive" chapter).<br />
A26361-K680-Z122-1-7619, Edition 1 25
Troubleshooting and tips<br />
Time and/or date is not correct<br />
You can set the time and date in the BIOS Setup or in the operating system.<br />
► Set the time and date.<br />
i<br />
If the time and date are repeatedly wrong when you switch on your PC, the on-board<br />
battery is flat. Change the lithium battery as described in the "Extensions to the<br />
mainboard" - "Replacing lithium battery" chapter.<br />
Error messages on the screen<br />
Error messages and their explanation are contained:<br />
● in the technical <strong>manual</strong> for the mainboard<br />
● in the "BIOS Setup" <strong>manual</strong><br />
● in the documentation for the programmes used<br />
Restoring the hard disk contents<br />
Should you need to restore your hard disk, the instructions are provided on the case of the<br />
"Recovery CD" (delivered with your system).<br />
Tips<br />
The workstation cannot be switched off with the ON/OFF switch<br />
Cause: The workstation has not been switched on with the ON/OFF switch.<br />
► Press the ON/OFF switch again.<br />
Cause: System crash<br />
► Press and hold the power button for at least four seconds until the workstation switches off.<br />
Out of system resources<br />
If you have too many applications running at once, you may experience problems due to a lack of<br />
system resources. In this case you should:<br />
► close unnecessary applications<br />
or<br />
► run the applications in a different order<br />
Other <strong>manual</strong>s<br />
Other <strong>manual</strong>s are contained on the "User Documentation" or "Drivers & Utilities" CD.<br />
26 A26361-K680-Z122-1-7619, Edition 1
System expansions<br />
!<br />
As the PC has to be shut down in order to install/deinstall system hardware components,<br />
it is a good idea to print out the relevant sections of this chapter.<br />
It may be necessary to update the BIOS when carrying out a system expansion or<br />
hardware upgrade. Additional information is contained in the "BIOS Setup" <strong>manual</strong> or<br />
possibly in the technical <strong>manual</strong> for the mainboard.<br />
When installing components that become very hot, make sure that the maximum<br />
permissible temperatures of the individual components are not exceeded.<br />
The workstation must be switched off when installing/removing the system expansions<br />
and may not be in the energy-saving mode.<br />
Remove the power plug before opening the workstation.<br />
This chapter describes all the activities required to modify your workstation hardware (e.g. installing<br />
boards or drives).<br />
Read the supplied documentation before installing new drives and/or boards.<br />
Refer to the technical <strong>manual</strong> for the mainboard before making any extensions to the mainboard.<br />
Information about boards<br />
Take care with the locking mechanisms (catches and centring pins) when you are replacing boards<br />
or components on boards.<br />
To prevent damage to the board or the components and conductors on it, please take care when<br />
you insert or remove boards. Make sure expansion boards are inserted straightly.<br />
Never use sharp objects (screwdrivers) for leverage.<br />
Boards with electrostatic sensitive devices (ESD) are identifiable by the<br />
label shown.<br />
When you handle boards fitted with ESDs, you must, under all<br />
circumstances, observe the following points:<br />
● You must statically discharge yourself before working with boards (e.g.<br />
by touching a grounded object).<br />
● The equipment and tools you use must be free of static charges.<br />
● Pull out the power plug before inserting or removing boards.<br />
● Always hold boards with ESDs by their edges.<br />
● Never touch pins or conductors on boards fitted with ESDs.<br />
A26361-K680-Z122-1-7619, Edition 1 27
System expansions<br />
Opening the casing<br />
► Switch off the workstation. The workstation must not be in the energy-saving mode.<br />
!<br />
Please take note of the safety information in the "Important notes" chapter.<br />
Pull the power plug out of the mains outlet.<br />
Only insert the power plug after you have closed the casing.<br />
► Remove any connected cables in the unit that obstruct you.<br />
► Place the device in a convenient working position.<br />
a<br />
1<br />
1<br />
► Unscrew the two knurled screws (1) on<br />
the back of the casing.<br />
► Slide the side cover approximately 2 cm (a) in the direction of the arrow (1), until the stop.<br />
► Unhook the upper edge of the side cover from the casing.<br />
► Pull the side cover in the direction of the arrow of the casing.<br />
28 A26361-K680-Z122-1-7619, Edition 1
Closing the casing<br />
a<br />
System expansions<br />
► Hook the side cover into the lower guide trail in the casing (1). Make sure that the side cover is<br />
offset by approximately 2 cm (a).<br />
► Engage the top edge of the side cover on the casing.<br />
► Push the side cover as far as it will go in the direction of the arrow (2).<br />
1<br />
2<br />
2<br />
► Press the side cover onto the casing (1)<br />
at the rear and tighten the two knurled<br />
screws (2) with the other hand.<br />
A26361-K680-Z122-1-7619, Edition 1 29
System expansions<br />
Installing and removing a board<br />
! Please take note of the section "Information about boards".<br />
The number, position and arrangement of the board slots on the mainboard can be found in the<br />
technical <strong>manual</strong> for the mainboard. Boards may already be installed when the device is shipped.<br />
You can fix boards in two ways:<br />
● with screws<br />
● with the clip<br />
Installing board with screw<br />
► Open the casing (see "Opening the casing" chapter).<br />
1<br />
► Loosen the screw (1).<br />
► Remove the rear slot cover plate from the slot (2).<br />
!<br />
2<br />
Do not dispose of the cover plate. For cooling, protection against fire and in order to<br />
comply with EMC regulations, you must refit the cover plate if you remove the board.<br />
► Make the required settings for the board.<br />
30 A26361-K680-Z122-1-7619, Edition 1
2<br />
1<br />
► Push the board up to its slot (1) as far as the stop.<br />
► Press the board into the slot so that it engages.<br />
► Fasten the board into place with the screw (2).<br />
► If necessary, connect the cables.<br />
► Close the casing (see "Closing the casing" chapter).<br />
i<br />
System expansions<br />
If you have installed or removed a PCI board, please check the relevant PCI slot settings<br />
in the BIOS Setup. If necessary, change the settings. Further information is provided in the<br />
PCI board documentation.<br />
A26361-K680-Z122-1-7619, Edition 1 31
System expansions<br />
Removing board with screw<br />
► Open the casing (see "Opening the casing" chapter).<br />
► Disconnect the cables connected to the board.<br />
1<br />
► Loosen the screw (1).<br />
► Remove the board from the casing (2).<br />
!<br />
2<br />
2<br />
For cooling, protection against fire, and in order to comply with EMC (electromagnetic<br />
compatibility) regulations, you must refit the cover plate.<br />
1<br />
► Push the rear slot cover plate into the slot (1). Ensure that the point of the cover engages on<br />
the outside of the casing.<br />
► Fasten the rear slot cover plate with the screw (2).<br />
32 A26361-K680-Z122-1-7619, Edition 1
► Close the casing (see "Closing the casing" chapter).<br />
i<br />
System expansions<br />
If you have installed or removed a PCI board, please check the relevant PCI slot settings<br />
in the BIOS Setup. If necessary, change the settings. Further information is provided in the<br />
PCI board documentation.<br />
Installing board with clip<br />
► Open the casing (see "Opening the casing" chapter).<br />
1<br />
2<br />
► Press on the clip (1) in the direction of the arrow and unhook it.<br />
► Pull off the clip (2).<br />
► Remove the rear slot cover plate from the slot (2).<br />
!<br />
2<br />
Do not dispose of the cover plate. For cooling, protection against fire and in order to<br />
comply with EMC regulations, you must refit the cover plate if you remove the board.<br />
► Make the required settings for the board.<br />
A26361-K680-Z122-1-7619, Edition 1 33
System expansions<br />
2<br />
a<br />
1<br />
► Push the board up to its slot (1) as far as the stop.<br />
► Press the board into the slot so that it engages.<br />
► Put the clip on. Make sure that the pin (a) is inserted into the screw hole.<br />
► Press the clip in the direction of the arrow (2). Make sure that the clip engages when released.<br />
► If necessary, connect the cables.<br />
► Close the casing (see "Closing the casing" chapter).<br />
i<br />
If you have installed or removed a PCI board, please check the relevant PCI slot settings<br />
in the BIOS Setup. If necessary, change the settings. Further information is provided in the<br />
PCI board documentation.<br />
34 A26361-K680-Z122-1-7619, Edition 1
Removing board with clips<br />
► Open the casing (see "Opening the casing" chapter).<br />
► Disconnect the cables connected to the board.<br />
1<br />
2<br />
3<br />
► Press the clip in the direction of the arrow (1) and unhook it.<br />
► Pull off the clip (2).<br />
► Remove the board from the casing (3).<br />
!<br />
System expansions<br />
For cooling, protection against fire, and in order to comply with EMC (electromagnetic<br />
compatibility) regulations, you must refit the cover plate.<br />
A26361-K680-Z122-1-7619, Edition 1 35
System expansions<br />
2<br />
a<br />
1<br />
► Push the rear slot cover plate into the slot (1). Ensure that the point of the cover engages on<br />
the outside of the casing.<br />
► Put the clip on. Make sure that the pin (a) is inserted into the screw hole.<br />
► Press the clip in the direction of the arrow (2). Make sure that the clip engages when released.<br />
► Close the casing (see "Closing the casing" chapter).<br />
i<br />
If you have installed or removed a PCI board, please check the relevant PCI slot settings<br />
in the BIOS Setup. If necessary, change the settings. Further information is provided in the<br />
PCI board documentation.<br />
36 A26361-K680-Z122-1-7619, Edition 1
Installing and removing drives<br />
System expansions<br />
The PC casing can accommodate a total of eight drives:<br />
● four accessible drives<br />
(three 5¼" drives and one 3½" drive)<br />
● four non-accessible drives<br />
(3½" drives)<br />
"Accessible drives" are e.g. DVD or CD ROM drives, into which a data carrier can be inserted from<br />
outside. Non-accessible drives are e.g. hard disk drives.<br />
IDE drives<br />
Four IDE drives are supported as standard equipment. Ideally, hard disks are connected to IDE<br />
interface 1 and other drives to IDE interface 2 (see also the technical <strong>manual</strong> for the mainboard).<br />
SCSI drives<br />
If you want to install a SCSI drive, you require a SCSI controller and a SCSI cable. Details are<br />
provided in the <strong>manual</strong>s on the SCSI controller.<br />
Removing the front panel<br />
► Open the casing (see "Opening the casing" chapter).<br />
► Detach the three locking tabs on the left side of the front panel (1).<br />
► Open the left side of the front panel approximately 2-3 cm (a).<br />
A26361-K680-Z122-1-7619, Edition 1 37<br />
a
System expansions<br />
► Pull the front panel off in the direction of the arrow. If you pull too firmly, the LCD cable may be<br />
pulled off the Celsius V or damaged.<br />
i<br />
In a system with an LCD, the cable is long enough so that you can carefully place it to one<br />
side with the front panel. You do not need to unplug the cable before removing the front<br />
panel.<br />
Attaching the front panel<br />
► Engage the three hinges on the right side of the front panel (1).<br />
► Close the front panel on the casing so that the three locking tabs on the left side of the front<br />
panel engage (2). On the CelsiusV you must make sure that the LCD cable is not pinched.<br />
► Close the casing (see "Closing the casing" chapter).<br />
38 A26361-K680-Z122-1-7619, Edition 1
Installing an accessible drive<br />
► Open the casing (see "Opening the casing" chapter).<br />
► Remove the front (see "Removing the front panel" chapter).<br />
1<br />
2<br />
1<br />
► Loosen the screws (1).<br />
► Remove the rails from the cover (2).<br />
i<br />
System expansions<br />
► Pull the empty slide-in module out of the<br />
casing.<br />
A26361-K680-Z122-1-7619, Edition 1 39<br />
1<br />
2<br />
Do not throw away the cover of the empty slide-in module. For cooling, protection against<br />
fire, and in order to comply with EMC regulations, you must refit the empty slide-in module<br />
if you remove the drive again later.<br />
► Take the new drive out of its packaging.<br />
► Adjust the required settings on the drive (if necessary, on already-installed drives as well).<br />
1
System expansions<br />
2<br />
1<br />
2<br />
► Lay the rails onto the drive such that the holes in them align with the screw holes (1).<br />
► Fasten the rails with the screws (2).<br />
► Slide the accessible drive into the casing.<br />
► Plug the data and the power supply connectors into the drive. Make sure the polarity is correct.<br />
► Attach the front panel (see "Attaching the front panel" chapter).<br />
► Close the casing (see "Closing the casing" chapter).<br />
i<br />
It may be necessary to modify the entry for the drive in the BIOS Setup.<br />
40 A26361-K680-Z122-1-7619, Edition 1<br />
1<br />
2<br />
2
Removing an accessible drive<br />
► Open the casing (see "Opening the casing" chapter).<br />
► Remove the front (see "Removing the front panel" chapter).<br />
► Pull the data and the power supply connectors from the desired drive.<br />
System expansions<br />
► Pull the drive out of the casing.<br />
► If necessary, make the required settings on the remaining hard disk drive.<br />
1<br />
2<br />
1<br />
► Loosen the screws (1).<br />
► Remove the rails from the drive (2).<br />
A26361-K680-Z122-1-7619, Edition 1 41<br />
1<br />
2<br />
1
System expansions<br />
2<br />
2<br />
1<br />
2<br />
1 2<br />
► Lay the rails onto the blanking plate such that the holes in them align with the screw holes (1).<br />
► Fasten the rails with the screws (2).<br />
► Attach the front panel (see "Attaching the front panel" chapter).<br />
► Close the casing (see "Closing the casing" chapter).<br />
i<br />
► Slide the empty slide-in module into the<br />
casing.<br />
It may be necessary to modify the entry for the remaining drives in the BIOS Setup.<br />
42 A26361-K680-Z122-1-7619, Edition 1
Changing the floppy disk drive<br />
System expansions<br />
► Open the casing (see "Opening the casing" chapter).<br />
► Remove the front (see "Removing the front panel" chapter).<br />
► Disconnect the cables connected to the floppy disk drive.<br />
► If it is present, pull the cable of the front USB or USB-audio interface from the mainboard (see<br />
also the technical <strong>manual</strong> for the mainboard).<br />
Removing the floppy disk drive<br />
► Loosen the screws (1).<br />
► Pull the slide-in module out of the casing (2).<br />
A26361-K680-Z122-1-7619, Edition 1 43<br />
2<br />
1
System expansions<br />
1<br />
► Remove the screws (1) on both sides of the drive.<br />
► Pull the disk drive out of the slide-in module (2).<br />
Installing the floppy disk drive<br />
► Take the new floppy disk drive out of its packaging.<br />
2<br />
2<br />
1<br />
► If necessary, feed the cables for the USB or USB audio ports through the slide-in module slot<br />
into the inside of the unit.<br />
► Slide the floppy disk drive into the slide-in module (1).<br />
► Fasten the floppy disk drive with the screws (2) on both sides of the drive.<br />
44 A26361-K680-Z122-1-7619, Edition 1<br />
1<br />
2
System expansions<br />
► Slide the slide-in module into the casing (1).<br />
► Secure the slide-in module with the screws (2).<br />
► Fit the data and power supply connectors to the floppy disk drive.<br />
► If it is present, pull the cable of the front USB or USB-audio interface from the mainboard (see<br />
also the technical <strong>manual</strong> for the mainboard).<br />
► Attach the front panel (see "Attaching the front panel" chapter).<br />
► Close the casing (see "Closing the casing" chapter).<br />
i<br />
It may be necessary to modify the entry for the drive in the BIOS Setup.<br />
Installing or removing the hard disk drive<br />
► Open the casing (see "Opening the casing" chapter).<br />
► Remove the front (see "Removing the front panel" chapter).<br />
A26361-K680-Z122-1-7619, Edition 1 45<br />
1<br />
2
System expansions<br />
Installing a hard disk drive<br />
► Take the new hard disk drive out of its packaging.<br />
► Make the required settings (e.g. master-slave settings) on the drive.<br />
1<br />
► Secure the EasyChange rails on the side of<br />
the hard disk by inserting the upper pins of<br />
the EasyChange rail in the corresponding<br />
holes of the hard disk.<br />
► Push the hard disk drive into the casing (1) until the EasyChange rails engage.<br />
► Connect the data and power supply cables to the hard disk drive or to the hard disk drives.<br />
i<br />
Connect the blue plug of the data cable to the connection on the mainboard. Connect the<br />
plug on the other end to the hard disk drive.<br />
► Attach the front panel (see "Attaching the front panel" chapter).<br />
► Close the casing (see "Closing the casing" chapter).<br />
i<br />
It may be necessary to modify the entry for the drive in the BIOS Setup.<br />
46 A26361-K680-Z122-1-7619, Edition 1
Removing a hard disk drive<br />
► Disconnect all cables connected to the drive (data cable, power supply cable).<br />
1<br />
2<br />
► Press the EasyChange rails in the direction of the arrows (1).<br />
► Pull the hard disk drive out of the carrier (2).<br />
► Attach the front panel (see "Attaching the front panel" chapter).<br />
► Close the casing (see "Closing the casing" chapter).<br />
i<br />
1<br />
System expansions<br />
► Pull the EasyChange rails off the hard disk<br />
drive.<br />
► If necessary, make the required settings on<br />
the remaining hard disk drive.<br />
It may be necessary to modify the entry for the drive in the BIOS Setup.<br />
A26361-K680-Z122-1-7619, Edition 1 47
System expansions<br />
Installing and removing SmartCard reader<br />
In systems equipped with a SmartCard reader, access can be restricted to those users who have a<br />
corresponding SmartCard.<br />
Installing a SmartCard reader for the first time<br />
► Open the casing (see "Opening the casing" chapter).<br />
► Remove the front (see "Removing the front panel" chapter).<br />
► Pull the empty slide-in module out of the<br />
casing.<br />
On the inside of the slide-in module, the slot for the SmartCard is protected with a plastic bar on<br />
delivery.<br />
► Break off the plastic (a) tag.<br />
48 A26361-K680-Z122-1-7619, Edition 1<br />
a
Installing a SmartCard reader<br />
► Open the casing (see "Opening the casing" chapter).<br />
► Remove the front (see "Removing the front panel" chapter).<br />
1<br />
2<br />
System expansions<br />
► Pull the slide-in module out of the casing.<br />
► Push the SmartCard reader - with the component side facing downwards - in the direction of<br />
the arrow (1) into the guide (a).<br />
► Screw the SmartCard reader to the carrier (2).<br />
A26361-K680-Z122-1-7619, Edition 1 49<br />
2<br />
a<br />
a
System expansions<br />
► Push the SmartCard reader as far as<br />
possible into the casing in the direction of<br />
the arrow.<br />
► Attach the SmartCard reader cable to the mainboard connector (see the technical <strong>manual</strong> for<br />
the mainboard).<br />
► Attach the front panel (see "Attaching the front panel" chapter).<br />
► Close the casing (see "Closing the casing" chapter).<br />
Removing a SmartCard reader<br />
► Open the casing (see "Opening the casing" chapter).<br />
► Remove the front (see "Removing the front panel" chapter).<br />
► Disconnect the plug of the SmartCard data cable from the mainboard (see the technical<br />
<strong>manual</strong> for the mainboard).<br />
► Pull the SmartCard reader out of the casing in the direction of the arrow (1) (see "Installing a<br />
SmartCard reader" chapter).<br />
2<br />
1<br />
1<br />
► Loosen the screws (1).<br />
► Pull the SmartCard reader out of the<br />
carrier in the direction of the arrow (2).<br />
► If you do not want to install a new SmartCard reader, push the slide-in module into the casing<br />
again (see "Installing a SmartCard reader" chapter).<br />
► Attach the front panel (see "Attaching the front panel" chapter).<br />
► Close the casing (see "Closing the casing" chapter).<br />
50 A26361-K680-Z122-1-7619, Edition 1
System expansions<br />
Installing and removing front USB or USB audio<br />
ports<br />
In the gap beside the floppy disk drive, two USB ports or one USB port combined with two audio<br />
ports can be installed (headphone out, microphone in).<br />
Installing front USB or USB audio ports<br />
► Open the casing (see "Opening the casing" chapter).<br />
► Remove the front (see "Removing the front panel" chapter).<br />
► Pull the cables from the floppy disk drive.<br />
► Loosen the screws (1).<br />
► Pull the slide-in module out of the casing (2).<br />
A26361-K680-Z122-1-7619, Edition 1 51<br />
2<br />
1
System expansions<br />
► First engage the tab (1).<br />
► Fasten the USB or USB audio ports with the screw (2).<br />
► Feed the cables for the USB or USB audio ports through the slide-in module slot into the inside<br />
of the unit.<br />
► Slide the floppy disk drive into the slide-in module (1).<br />
► Fasten the floppy disk drive with the screws (2) on both sides of the drive.<br />
► Fit the data and power supply connectors to the floppy disk drive.<br />
► Connect the USB cable and, if necessary, the audio cable to the corresponding connector on<br />
the mainboard (see also the technical <strong>manual</strong> for the mainboard).<br />
► Remove the blanking plate for the USB or USB audio ports from the front panel.<br />
52 A26361-K680-Z122-1-7619, Edition 1<br />
1<br />
1<br />
2<br />
2
System expansions<br />
► Insert the appropriate ports frame for the USB or USB audio ports into the front panel.<br />
i<br />
The USB interface and the USB-audio interface each have a separate interface frame.<br />
► Attach the front panel (see "Attaching the front panel" chapter).<br />
► Close the casing (see "Closing the casing" chapter).<br />
Removing front USB or USB audio ports<br />
► Open the casing (see "Opening the casing" chapter).<br />
► Remove the front (see "Removing the front panel" chapter).<br />
► Detach the USB data cable and, if present, the audio data cable from the mainboard (see the<br />
technical <strong>manual</strong> for the mainboard).<br />
► Pull the cables from the floppy disk drive.<br />
► Loosen the screws (1).<br />
► Pull the slide-in module out of the casing (2).<br />
A26361-K680-Z122-1-7619, Edition 1 53<br />
2<br />
1
System expansions<br />
► Remove the screw (1) and then remove the USB or USB-audio interface (2).<br />
► Slide the floppy disk drive into the slide-in module (1).<br />
► Fasten the floppy disk drive with the screws (2) on both sides of the drive.<br />
► Fit the data and power supply connectors to the floppy disk drive.<br />
► Remove the ports frame for the USB or USB audio ports from the front panel.<br />
► Insert the blanking plate for the USB or USB audio ports into the front panel.<br />
► Attach the front panel (see "Attaching the front panel" chapter).<br />
► Close the casing (see "Closing the casing" chapter).<br />
54 A26361-K680-Z122-1-7619, Edition 1<br />
1<br />
2<br />
2<br />
1
Extensions to the mainboard<br />
System expansions<br />
Details on whether you can upgrade the main memory or the processor are provided in the technical<br />
<strong>manual</strong> for the mainboard.<br />
► Open the casing (see "Opening the casing" chapter).<br />
Removing ventilation duct<br />
Before you can upgrade the main memory or the processor, or before you can replace the processor<br />
or the lithium battery, you must remove the ventilation duct.<br />
i<br />
2<br />
2<br />
The ventilation duct is permanently connected to the fan.<br />
2<br />
2<br />
► Press the locking lugs (1) in the direction of the arrow and unhook them.<br />
The hooks (2) on the back of the casing release.<br />
► Carefully unhook the hooks (2).<br />
A26361-K680-Z122-1-7619, Edition 1 55<br />
1<br />
1
System expansions<br />
2<br />
1<br />
► Pull the ventilation duct and the fan a few millimetres in the direction of the arrow (1) to pull the<br />
hooks at the back of the casing out of the casing.<br />
► Remove the ventilation duct and the fan from the casing in the direction of the arrow (2).<br />
i<br />
When lifting out the ventilation duct, the fan cable detaches itself from the mainboard.<br />
When removing the ventilation duct, be careful not to damage the processor cooler(s) on<br />
the mainboard.<br />
Installing ventilation duct<br />
► Pull the fan cable off the fan before the ventilation duct is installed in the device installing the<br />
ventilation duct in the device.<br />
► Connect the fan cable to the corresponding connector on the mainboard (also see the<br />
technical <strong>manual</strong> for the mainboard).<br />
i<br />
When laying the fan cable, make sure that it is not kinked or pinched.<br />
When fitting the ventilation duct, be careful not to damage the processor cooler(s) on the<br />
mainboard.<br />
56 A26361-K680-Z122-1-7619, Edition 1
1<br />
2<br />
System expansions<br />
► Place the ventilation duct and the fan in the casing at a slight angle in the direction of the<br />
arrow (1). When doing so, the hooks of the ventilation duct must hook into the openings<br />
provided in the back of the casing.<br />
► Push bothersome cables aside if necessary.<br />
► Press the ventilation duct and the fan into the casing in the direction of the arrow (2) so that<br />
the locking lugs are felt to engage.<br />
1<br />
The fan is properly engaged when the locking lug (1) protrudes slightly at the back of the casing.<br />
► Connect the fan cable to the fan.<br />
A26361-K680-Z122-1-7619, Edition 1 57
System expansions<br />
► Press the locking lug (1) of the ventilation duct in to the casing in the direction of the arrow so<br />
that the locking lug (1) hooks in.<br />
► Close the casing (see "Closing the casing" chapter).<br />
Upgrading main memory<br />
► Remove the ventilation duct (see the section "Removing ventilation duct").<br />
► Upgrade the memory according to the description in the technical <strong>manual</strong> for the mainboard.<br />
► Refit the ventilation duct (see section "Installing ventilation duct").<br />
► Close the casing (see "Closing the casing" chapter).<br />
Replacing processor<br />
► Remove the ventilation duct (see the section "Removing ventilation duct").<br />
► Upgrade the processor according to the description in the technical <strong>manual</strong> for the mainboard.<br />
► Refit the ventilation duct (see section "Installing ventilation duct").<br />
► Close the casing (see "Closing the casing" chapter).<br />
58 A26361-K680-Z122-1-7619, Edition 1<br />
1
Installing second processor<br />
System expansions<br />
The mainboard can be upgraded by a second processor if it is inserted into the slot for the second<br />
processor.<br />
► Remove the ventilation duct (see the section "Removing ventilation duct").<br />
i<br />
1<br />
► Open the tab (1) on the underside of the<br />
ventilation duct.<br />
► Remove the blind cover of the ventilation<br />
duct in the direction of the arrow.<br />
Do not throw away the blind cover. For cooling and protection against fire you must refit<br />
the cover if you remove the processor again later.<br />
► Install the second processor as described in the technical <strong>manual</strong> for the mainboard.<br />
► Refit the ventilation duct (see section "Installing ventilation duct").<br />
► Close the casing (see "Closing the casing" chapter).<br />
A26361-K680-Z122-1-7619, Edition 1 59
System expansions<br />
Removing second processor<br />
► Remove the ventilation duct (see the section "Removing ventilation duct").<br />
2<br />
1<br />
1<br />
► Hook the blind cover into the notches (1)<br />
of the ventilation duct.<br />
► Fold the blind cover downward in the<br />
direction of the arrow (2).<br />
► Press in the tab firmly.<br />
► Remove the second processor as described in the technical <strong>manual</strong> for the mainboard.<br />
► Refit the ventilation duct (see section "Installing ventilation duct").<br />
► Close the casing (see "Closing the casing" chapter).<br />
60 A26361-K680-Z122-1-7619, Edition 1
Replacing lithium battery<br />
System expansions<br />
In order to permanently save the system information, a lithium battery is installed to provide the<br />
CMOS-memory with a current. A corresponding error message notifies the user when the charge is<br />
too low or the battery is empty. The lithium battery must then be replaced.<br />
!<br />
Incorrect replacement of the lithium battery may lead to a risk of explosion!<br />
The lithium battery may be replaced only with an identical battery or with a type<br />
recommended by the manufacturer.<br />
Do not throw lithium batteries into the household waste. They must be disposed of in<br />
accordance with local regulations concerning special waste.<br />
Make sure that you insert the battery the right way round. The plus pole must be on the<br />
top!<br />
The lithium battery holder exists in different designs that function in the same way.<br />
1<br />
2<br />
2 3<br />
► Remove the ventilation duct (see the section "Removing ventilation duct").<br />
► Press the locking lug in the direction of the arrow; the battery jumps somewhat out of the<br />
holder (1).<br />
► Remove the battery (2).<br />
► Push the new lithium battery of the identical type into the holder (3) and press it downward until<br />
it engages (4).<br />
► Refit the ventilation duct (see section "Installing ventilation duct").<br />
► Close the casing (see "Closing the casing" chapter).<br />
A26361-K680-Z122-1-7619, Edition 1 61<br />
4<br />
3
Technical data<br />
Electrical data<br />
Regulations complied with:<br />
Protection class:<br />
Rated voltage range:<br />
Frequency:<br />
Max. rated current:<br />
Dimensions<br />
Width/depth/height:<br />
Weight<br />
with the basic configuration<br />
Environmental conditions<br />
Environment class (3K2)<br />
Environment class (2K2)<br />
Temperature:<br />
● <strong>Operating</strong> (3K2)<br />
● Transport (2K2)<br />
Condensation in operating must be avoided.<br />
Clearance required to ensure adequate ventilation<br />
● front<br />
● rear<br />
EN60950/VDE0805, UL 1950, CSA 22.2<br />
No. 950<br />
A26361-K680-Z122-1-7619, Edition 1 63<br />
I<br />
100 V -240 V<br />
50 - 60 Hz<br />
100 V -127 V: 6 A<br />
200 V - 240 V: 3 A<br />
205 mm x 560 mm x 445 mm<br />
approx. 25 kg<br />
DIN IEC 721 part 3-3<br />
DIN IEC 721 part 3-2<br />
15 °C .... 35 °C<br />
-25 °C .... 60 °C<br />
200 mm<br />
200 mm
Index<br />
3 1/2-inch drive 37<br />
5 1/4-inch drive 37<br />
A<br />
Access permission, SmartCard 21<br />
Alt Gr key 19<br />
Anti-theft protection 21<br />
Audio input 12<br />
Audio output 12<br />
B<br />
Battery 61<br />
BIOS Setup 21<br />
system settings 21<br />
Board 27<br />
installing 30<br />
installing with clip 33<br />
installing with screw 30<br />
removing 30<br />
removing with clip 35<br />
removing with screw 32<br />
Button<br />
ON/OFF switch 19<br />
C<br />
Cable<br />
connecting 11<br />
disconnecting 11<br />
Casing<br />
closing 29<br />
opening 28<br />
CD-ROM<br />
indicator 17<br />
CD-ROM drive<br />
installing 37, 38, 39<br />
removing 41<br />
CE certificate 3<br />
Chain 21<br />
Class B Compliance Statement 4<br />
Clearance 63<br />
Configuration, BIOS Setup 21<br />
Contents of delivery 5<br />
Control key 19<br />
Courier 2<br />
Ctrl key 19<br />
Ctrl+Alt+Del 19<br />
Cursor keys 18<br />
D<br />
Data<br />
dimensions 63<br />
environmental 63<br />
weight 63<br />
Data protection 21<br />
Date<br />
not correct 26<br />
Device drivers<br />
parallel port 13<br />
serial port 13<br />
USB 14<br />
Devices<br />
connecting 11, 13, 14<br />
ports 12<br />
Digital audio output 12<br />
Dimensions 63<br />
Drive 37<br />
accessible 37<br />
installing 37, 38, 39<br />
non-accessible drive 37<br />
removing 37, 41<br />
E<br />
Electromagnetic compatibility 3<br />
Energy saving 3<br />
Enter key 19<br />
Environmental conditions 63<br />
Environmental data 63<br />
Ergonomics 6<br />
Error<br />
date 26<br />
floppy disk 25<br />
mouse 25<br />
screen 24<br />
time 26<br />
workstation 23<br />
Error message 26<br />
ESD 27<br />
Extensions<br />
mainboard 55<br />
workstation 27<br />
External devices<br />
connecting 11, 13, 14<br />
ports 12<br />
F<br />
FCC statement 4<br />
FireWire 12<br />
A26361-K680-Z122-1-7619, Edition 1 65
Index<br />
Floppy disk<br />
cannot read 25<br />
cannot write 25<br />
inserting 20<br />
removing 20<br />
working with 20<br />
write-protection 20, 25<br />
write-protection, disabling 20<br />
Floppy disk drive<br />
changing 43<br />
indicator 17<br />
installing 44<br />
removing 43<br />
Floppy disk indicator 17<br />
Function keys 18<br />
G<br />
Game port 12<br />
H<br />
Hard disk contents, restoring 26<br />
Hard disk drive<br />
installing 45, 46<br />
removing 45, 47<br />
replacing 45<br />
Headphones, port 12<br />
I<br />
IDE drive 37<br />
Installation<br />
switching on for the first time 9<br />
Installing<br />
accessible drive 37, 38<br />
CD-ROM drive 37<br />
software 9, 11<br />
Interfaces 12<br />
Italics 2<br />
K<br />
Key<br />
Alt Gr 19<br />
Control key 19<br />
Ctrl 19<br />
Ctrl key 19<br />
Ctrl+Alt+Del 19<br />
Enter key 19<br />
Menu key 19<br />
Num Lock 19<br />
Return key 19<br />
Shift 19<br />
Shift key 19<br />
Start key 19<br />
Key combination 19<br />
Keyboard 18<br />
connecting 8<br />
important keys 19<br />
port 12<br />
Keyboard port 6, 8<br />
Keypad<br />
alphanumeric 18<br />
L<br />
LAN port 12<br />
LCD 16<br />
Line in 12<br />
Line out 12<br />
Lithium battery 55<br />
replacing 61<br />
M<br />
Main memory 55<br />
upgrading 58<br />
Mainboard, extensions 55<br />
Manuals, further 26<br />
Memory<br />
insufficient 26<br />
not enough 26<br />
Menu key 19<br />
Microphone jack 12<br />
Monitor<br />
connecting 7<br />
remains blank 24<br />
transporting 4<br />
Monitor port 6<br />
Monitor screen<br />
no screen display 24<br />
Mouse<br />
connecting 8<br />
error 25<br />
port 12<br />
Mouse pointer 25<br />
Mouse port 6<br />
N<br />
New installation, software 23<br />
New software, installing 23<br />
Notational conventions 2<br />
Note<br />
boards 27<br />
CE certificate 3<br />
energy saving 3<br />
important 3<br />
safety 3<br />
Num Lock key 19<br />
Numeric keypad 18<br />
66 A26361-K680-Z122-1-7619, Edition 1
O<br />
ON/OFF switch 10, 19<br />
P<br />
Packing material 5<br />
unpacking 5<br />
Parallel port 12, 13<br />
connecting devices 13<br />
settings 13<br />
Port<br />
audio input 12<br />
audio output 12<br />
game port 12<br />
headphones 12<br />
keyboard 12<br />
line in 12<br />
line out 12<br />
microphone 12<br />
monitor 12<br />
mouse 12<br />
parallel port 12<br />
printer 12<br />
PS/2 mouse 12<br />
SCSI 12<br />
serial port 12<br />
USB 12<br />
Power-on indicator 10<br />
dark 23<br />
fails to light 23<br />
Preparing for first use, overview 5<br />
Preparing for use 5<br />
overview 5<br />
Printer 12<br />
Processor 55<br />
replacing 58<br />
Property protection 21<br />
Protection<br />
property and data 21<br />
PS/2 mouse<br />
connecting 8<br />
port 12<br />
PS/2 mouse port 6, 8<br />
R<br />
Ready-to-operate 10<br />
Return key 19<br />
S<br />
Safety 3<br />
SCSI drive 37<br />
SCSI port 12<br />
Second processor 55<br />
Security functions<br />
SmartCard 21<br />
Serial port 12, 13<br />
connecting devices 13<br />
port 12<br />
settings 13<br />
Setup, see BIOS Setup<br />
Shift key 19<br />
Signs and symbols 2<br />
SmartCard reader 48<br />
indicator 17<br />
installing 48, 49<br />
removing 48, 50<br />
Soft power off 15<br />
Software<br />
installing 9, 11<br />
new installation 23<br />
Standard keyboard, connecting 8<br />
Start key 19<br />
Streamer<br />
installing 37, 38, 39<br />
removing 41<br />
Summer time 26<br />
Surface 63<br />
System expansion 27<br />
System settings, BIOS Setup 21<br />
T<br />
Technical data 63<br />
Time<br />
not correct 26<br />
Time, daylight savings 26<br />
Tips 23, 26<br />
Transport 4<br />
Trouble<br />
floppy disk 25<br />
mouse 25<br />
screen 24<br />
workstation 23<br />
Troubleshooting 23<br />
Index<br />
A26361-K680-Z122-1-7619, Edition 1 67
Index<br />
U<br />
USB 6<br />
USB devices<br />
connecting 14<br />
software 14<br />
USB keyboard, connecting 8<br />
USB mouse, connecting 8<br />
USB port 8, 14<br />
connecting devices 14<br />
USB ports<br />
installing 51<br />
removing 53<br />
USB, port 12<br />
V<br />
Ventilation area 6, 63<br />
Ventilation duct 55<br />
installing 55<br />
removing 55<br />
Video workstation 6<br />
W<br />
Warm boot 19<br />
Weight 63<br />
Workstation<br />
anti-theft protection 21<br />
cabling 11<br />
cannot boot 23<br />
checking rated voltage 9<br />
cleaning 4<br />
closing 29<br />
connecting 9<br />
connecting devices 11<br />
extensions 27<br />
indicators 16<br />
opening 28<br />
ports 12<br />
ready-to-operate 15<br />
setting up 6<br />
soft power off 15<br />
switching off 15<br />
devices with main power<br />
switch 15<br />
switching on 10, 15<br />
transporting 4<br />
Write protection, floppy disk 20, 25<br />
68 A26361-K680-Z122-1-7619, Edition 1