Manual - Fujitsu UK
Manual - Fujitsu UK
Manual - Fujitsu UK

Create successful ePaper yourself
Turn your PDF publications into a flip-book with our unique Google optimized e-Paper software.
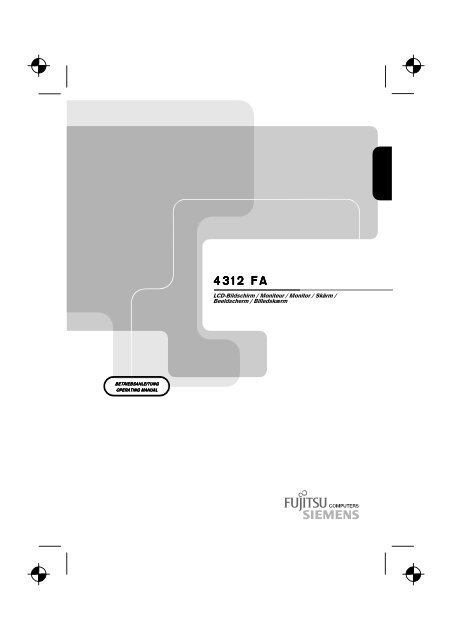
BETRIEBSANLEITUNG<br />
BETRIEBSANLEITUNG<br />
BETRIEBSANLEITUNG<br />
OPERATING OPERATING MANUAL<br />
MANUAL<br />
4312 4312 FA FA<br />
FA<br />
LCD-Bildschirm / Moniteur / Monitor / Skärm /<br />
Beeldscherm / Billedskærm
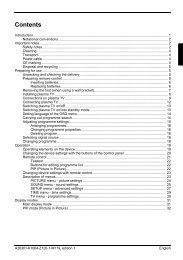
Contents<br />
Introduction........................................................................................................................................1<br />
Notational conventions ..............................................................................................................2<br />
Important notes .................................................................................................................................2<br />
Safety ........................................................................................................................................2<br />
Cleaning notes...........................................................................................................................3<br />
Transport notes .........................................................................................................................3<br />
Manufacturer’s notes .................................................................................................................4<br />
FCC Class B Compliance Statement .........................................................................................4<br />
Important note on power cable ..................................................................................................5<br />
Declaration of Conformity ..........................................................................................................5<br />
Disposal and recycling...............................................................................................................6<br />
Checking the contents of the consignment ........................................................................................6<br />
Installing an ergonomic video workstation .........................................................................................7<br />
Height adjustment and ability to turn..........................................................................................8<br />
Connecting the monitor......................................................................................................................9<br />
Operation of the monitor..................................................................................................................10<br />
Switching the monitor on/off ....................................................................................................11<br />
Notes on power management..................................................................................................11<br />
Changing the monitor settings .................................................................................................12<br />
Notes on ergonomic colour adjustment............................................................................................17<br />
Technical data .................................................................................................................................18<br />
VESA-DDC-compatible VGA interface.....................................................................................19<br />
Preset operating modes...........................................................................................................19<br />
Power supply plug ...................................................................................................................19<br />
Pin assignment D-SUB ............................................................................................................20<br />
Trouble shooting..............................................................................................................................20<br />
S26361-K841-V150-1-5E19 English
Introduction<br />
Your new LCD (Liquid Crystal Display) monitor 4312 FA offers numerous features and functions, for<br />
example:<br />
• TFT display (Thin Film Transistor; active matrix)<br />
• minimal space requirements thanks to slim housing<br />
• height adjustment and ability to turn (portrait mode)<br />
• optimum ergonomic characteristics (totally distortion-free, excellent picture definition and colour<br />
purity right into the corners)<br />
• high degree of brightness and good contrast<br />
• high resolution (1280x1024) for displaying the information content of a conventional 19-inch<br />
screen with CRT (Cathode Ray Tube)<br />
• presentation of up to 16.7 million colours (in conjunction with an appropriate screen controller)<br />
• automatic scanning of all horizontal frequencies from 31 to 80 kHz and all refresh rates (vertical<br />
frequencies) from 55 to 75 Hz (all absolutely flicker-free)<br />
• digital screen controller with microprocessor for storing 20 different display modes<br />
• freely adjustable colour alignment for matching the screen colours to the colours of various<br />
input and output devices<br />
• convenient operation via integrated OSD (On-Screen-Display) menu<br />
• VESA-DDC compatibility<br />
• VESA-FPMPMI compatibility (Flat Panel Monitor Physical Mounting Interface, mechanical<br />
interface to swivel arm and wall bracket)<br />
• plug&play capability<br />
• power management for reducing power consumption when the PC system is not in use<br />
• compliance with the recommendations in accordance with TCO ’99<br />
This Operating <strong>Manual</strong> contains important information you require to start up and run your LCD<br />
monitor.<br />
A screen controller with VGA interface is required to control the 4312 FA LCD monitor. The monitor<br />
processes the data supplied to it by the screen controller. The screen controller/the associated<br />
driver software is responsible for setting the modes (resolution and refresh rate).<br />
When putting the monitor into operation for the first time, the screen display should be optimally<br />
adapted to the screen controller used and adjusted in accordance with your needs (see section<br />
"Changing the monitor settings" in chapter "Operation of the monitor").<br />
Target group<br />
You don't need to be an "expert" to perform the operations described here. Do, however, read the<br />
chapter with the "Important notes" in the Operating <strong>Manual</strong> of the system unit and in this Operating<br />
<strong>Manual</strong>.<br />
In the event of any problems occurring, please contact your sales outlet or our customer service<br />
centre.<br />
Further information<br />
Details of how you set the resolution and refresh rate are provided in the documentation on your<br />
screen controller/the associated driver software.<br />
S26361-K841-V150-1-5E19 English - 1
Colour monitor 4312 FA<br />
Notational conventions<br />
The meanings of the symbols and fonts used in this manual are as follows:<br />
!<br />
Pay particular attention to text marked with this symbol. Failure to observe this warning<br />
endangers your life, destroys the device, or may lead to loss of data.<br />
i Supplementary information, remarks, and tips follow this symbol.<br />
Ê Text which follows this symbol describes activities that must be performed in the order shown.<br />
"Quotation marks" indicate names of chapters or terms.<br />
Important notes<br />
!<br />
Safety<br />
In this chapter you will find information regarding safety which is essential to take note of<br />
with your monitor.<br />
This device complies with the relevant safety regulations for data processing equipment, including<br />
electronic office machines for use in an office environment. If you have any questions, contact your<br />
sales outlet or our customer service centre.<br />
• The display surface of the LCD monitor is sensitive to pressure and scratches. You should<br />
therefore be careful with the display surface so as to avoid lasting damage (Newton rings,<br />
scratches).<br />
• If the device is brought into the installation site from a cold environment, condensation can<br />
form. Before operating the device, wait until it is absolutely dry and has reached approximately<br />
the same temperature as the installation site.<br />
• During installation and before operating the device, please observe the instructions on<br />
environmental conditions in the chapter entitled "Technical data" as well as the instructions in<br />
the chapter "Installing an ergonomic video workstation".<br />
• To ensure adequate ventilation the monitor may only be operated with the monitor foot<br />
installed.<br />
• Only the power adapter supplied may be used for the LCD monitor's power supply.<br />
• Do not cover the power adapter when it is operational. Do not place the power adapter on heatsensitive<br />
material.<br />
• The power adapter automatically sets itself to a mains voltage in the range of 100 V to 240 V.<br />
Ensure that the local mains voltage lies within these limits.<br />
• Ensure that the power socket on the power adapter or the grounded mains outlet is freely<br />
accessible.<br />
• The ON/OFF switch does not disconnect the device from the mains voltage. To completely<br />
disconnect the mains voltage, remove the power plug from the socket.<br />
2 - English S26361-K841-V150-1-5E19
Colour monitor 4312 FA<br />
• Lay all cables so that nobody can stand on them or trip over them. When attaching the device,<br />
observe the relevant notes in the chapter "Connecting the monitor".<br />
• No data transmission cable should be connected or disconnected during a thunderstorm.<br />
• Please ensure that no objects (e.g. necklaces, paperclips etc.) or liquids can get into the<br />
interior of the device (this may cause an electrical shock or short circuit).<br />
• In emergencies (e.g. damaged casing, elements or cables, penetration of liquids or foreign<br />
matter), switch off the unit, disconnect the power plug and contact your sales outlet or our<br />
customer service centre.<br />
• The screen background lighting contains mercury. You must observe the applicable handling<br />
and disposal safety regulations for fluorescent tubes.<br />
• If the LCD monitor is damaged (for example the glass is broken), avoid letting any liquids that<br />
may escape coming into contact with any part of your body (skin, mouth, nose) or foodstuffs.<br />
Clean parts of the body and clothing that have already come into contact with such liquids with<br />
plenty of soap and water.<br />
Do not breathe in any of the escaping vapours. You should contact your doctor if you have<br />
breathed in fumes or come into contact with the liquid.<br />
• Only qualified technicians should repair the device. Unauthorised opening and incorrect repair<br />
may greatly endanger the user (electric shock, fire risk).<br />
• The power adapter may only be opened by authorised specialist personnel.<br />
• You may set only those resolutions and refresh rates specified in the "Technical data" chapter.<br />
Otherwise you may damage your monitor. If you are in any doubt, contact your sales outlet or<br />
customer service centre.<br />
• Keep this operating manual together with your device. If you pass on the device to third parties,<br />
you should include this manual.<br />
Cleaning notes<br />
• Always pull out the power plug before you clean the monitor.<br />
• Do not clean any interior parts yourself, leave this job to a service technician.<br />
• Do not use any cleaning agents that contain abrasives or may corrode plastic.<br />
• Ensure that no liquid will run into the system.<br />
• Ensure that the ventilation areas of the monitor are free.<br />
• The display surface of the LCD monitor is sensitive to pressure and scratches. Clean it only<br />
using a soft, slightly moistened cloth.<br />
Wipe the monitor housing with a dry cloth. If the monitor is particularly dirty, use a cloth which has<br />
been moistened in mild domestic detergent and then carefully wrung out.<br />
Transport notes<br />
• Transport the monitor with care and only in its original packaging or another corresponding<br />
packaging fit to protect it against knocks and jolts.<br />
• Never drop the LCD monitor (danger of glass breakage).<br />
S26361-K841-V150-1-5E19 English - 3
Colour monitor 4312 FA<br />
Manufacturer’s notes<br />
Energy Star<br />
The <strong>Fujitsu</strong> Siemens LCD colour monitor 4312 FA is designed to conserve<br />
electricity by dropping to less than 5 W when it goes into standby,<br />
suspend and OFF mode. With this new power management the 4312 FA<br />
qualifies for the U.S. Environmental Protection Agency's (EPA) Energy<br />
Star Computers award.<br />
The EPA estimates that computer equipment uses 5% percent of all business electricity and that<br />
this is growing rapidly. If all desktop PCs and peripherals enter a low-power mode when not in use,<br />
the overall savings in electricity could amount to $ 2 milliard annually. These savings could also<br />
prevent the emission of 20 million tons of carbon dioxide into the atmosphere - the equivalent of 5<br />
million automobiles.<br />
As an Energy Star Partner, <strong>Fujitsu</strong> Siemens Computers GmbH has determined that this product<br />
meets the Energy Star guidelines for energy efficiency.<br />
CE marking<br />
The shipped version of this device complies with the requirements of the EEC<br />
directives 89/336/EEC "Electromagnetic compatibility" and 73/23/EEC "Low voltage<br />
directive".<br />
FCC Class B Compliance Statement<br />
The following statement applies to the products covered in this manual, unless otherwise specified<br />
herein. The statement for other products will appear in the accompanying documentation.<br />
NOTE:<br />
This equipment has been tested and found to comply with the limits for a "Class B" digital device,<br />
pursuant to Part 15 of the FCC rules and meets all requirements of the Canadian Interference-<br />
Causing Equipment Regulations. These limits are designed to provide reasonable protection against<br />
harmful interference in a residential installation. This equipment generates, uses and can radiate<br />
radio frequency energy and, if not installed and used in strict accordance with the instructions, may<br />
cause harmful interference to radio communications. However, there is no guarantee that<br />
interference will not occur in a particular installation. If this equipment does cause harmful<br />
interference to radio or television reception, which can be determined by turning the equipment off<br />
and on, the user is encouraged to try to correct the interference by one or more of the following<br />
measures:<br />
• Reorient or relocate the receiving antenna.<br />
• Increase the separation between equipment and the receiver.<br />
• Connect the equipment into an outlet on a circuit different from that to which the receiver is<br />
connected.<br />
• Consult the dealer or an experienced radio/TV technician for help.<br />
The manufacturer is not responsible for any radio or television interference caused by unauthorised<br />
modifications of this equipment or the substitution or attachment of connecting cables and<br />
equipment other than those specified by the manufacturer. The correction of interference caused by<br />
such unauthorised modification, substitution or attachment will be the responsibility of the user.<br />
The use of shielded I/O cables is required when connecting this equipment to any and all optional<br />
peripheral or host devices. Failure to do so may violate FCC rules.<br />
4 - English S26361-K841-V150-1-5E19
Important note on power cable<br />
Colour monitor 4312 FA<br />
To guarantee safe operation, use the cable supplied. Use the following guidelines if it is necessary<br />
to replace the original cable set.<br />
• The female/male receptacles of the cord set must meet CEE-22 requirements.<br />
• The cable has to be HAR-certified or VDE-certified. The mark HAR or VDE will appear on the<br />
outer sheath or on the insulation of one of the inner conductors.<br />
• For devices which are mounted on a desk or table, type SVT or SJT cable sets may be used.<br />
For devices which sit on the floor, only SJT type cable sets may be used.<br />
• The cable set must be selected according to the rated current for your device.<br />
Declaration of Conformity<br />
This device complies with Part 15 of the FCC Rules. Operation is subject to the following two<br />
conditions: (1) this device may not cause harmful interference, and (2) this device must accept any<br />
interference received, including interference that may cause undesired operation.<br />
Product Name: Color LCD Monitor<br />
Trade Name: <strong>Fujitsu</strong> Siemens Computers<br />
Model Number(s): 4312 FA<br />
Name of Responsible Party: Siemens Information and Communication<br />
Products LLC<br />
3860 N. First Street<br />
San Jose, CA 95134-1702<br />
U.S.A.<br />
Contact Person: Mike Fitzner<br />
Phone No.: (408) 428-8918<br />
Fax No.: (408) 428-7290<br />
We, Siemens Information and Communication Products LLC, hereby declare that the equipment<br />
bearing the trade name and model number specified above was tested confirming to the applicable<br />
FCC Rules under the most accurate measurement standards possible, and that all the necessary<br />
steps have been taken and are in force to assure that production units of the same equipment will<br />
continue to comply with the Commissions requirements.<br />
S26361-K841-V150-1-5E19 English - 5
Colour monitor 4312 FA<br />
Disposal and recycling<br />
This device has been manufactured to the highest possible degree from materials which can be<br />
recycled or disposed of in a manner that is not environmentally damaging.<br />
The device may be taken back after use to be recycled, provided that it is returned in a condition<br />
that is the result of normal use. Any components not reclaimed will be disposed of in an<br />
environmentally acceptable manner.<br />
If you have any questions about disposal of the batteries or system, please contact your local sales<br />
outlet or:<br />
<strong>Fujitsu</strong> Siemens Computers GmbH<br />
Recyclingcenter<br />
D-33106 Paderborn<br />
Tel.: ++ 49 5251 - 818 010/ Fax: ++ 49 5251 - 818 015<br />
Checking the contents of the consignment<br />
Ê Unpack all the individual parts.<br />
Ê Check the delivery for damage incurred during transportation.<br />
Ê Check whether the delivery agrees with the details in the delivery note.<br />
The complete LCD monitor package includes:<br />
− one monitor<br />
− one data cable (D-SUB)<br />
− one power cable<br />
− a power adapter with power adapter cable<br />
− one floppy disk<br />
− this Operating <strong>Manual</strong><br />
Should you discover that the delivery does not correspond to the delivery note, notify your local<br />
sales outlet immediately.<br />
i<br />
It is recommended not to throw away the original packing material. Keep it for future<br />
transportation.<br />
6 - English S26361-K841-V150-1-5E19
Installing an ergonomic video workstation<br />
Colour monitor 4312 FA<br />
Before you set up your equipment, you should select a suitable position for working at the monitor.<br />
Please observe the following advises when installing a video workstation.<br />
Window<br />
Avoid direct and reflected glare. Avoid glare from electric<br />
lighting.<br />
preferable viewing sector<br />
0°<br />
65°<br />
30°<br />
60°<br />
30°<br />
permissible<br />
65°<br />
viewing sector<br />
permissible viewing sector<br />
Position the monitor for<br />
optimum viewing. The viewing<br />
distance to the monitor should<br />
be approximately 50 cm.<br />
edge of desk<br />
permissible<br />
reaching sector<br />
600 mm<br />
permissible<br />
reaching sector<br />
600 mm<br />
Position the keyboard where it<br />
is easiest to reach.<br />
approx. 90°<br />
and more<br />
approx. 90°<br />
Keep ventilated areas clear. Remember to maintain correct<br />
posture.<br />
S26361-K841-V150-1-5E19 English - 7
Colour monitor 4312 FA<br />
Height adjustment and ability to turn<br />
3<br />
2<br />
1<br />
You can conveniently adjust the height of your monitor by first removing the transport lock (1) and<br />
then slightly lifting the display (2). In addition, you can also turn the display by 90° into the vertical<br />
position (portrait mode). To do this you must slightly lift the display (2) and turn it clockwise (3).<br />
i<br />
You must use corresponding software (pivot software) so that the screen display is also<br />
shown in the portrait mode. This software is available from specialised dealers.<br />
8 - English S26361-K841-V150-1-5E19
Connecting the monitor<br />
Colour monitor 4312 FA<br />
See your system unit's operating manual for details of the connectors and interfaces on the system<br />
unit.<br />
!<br />
Please note the information provided in the "Safety" section in the chapter "Important<br />
notes" at the beginning of this manual.<br />
Do not cover the ventilation openings of the monitor.<br />
5<br />
4<br />
Ê Be sure that the monitor and the system unit are switched off.<br />
! The system unit's power plug must be pulled out!<br />
3<br />
1<br />
The data cable supplied has two 15-pin D-SUB connectors for connection to the monitor and to the<br />
system unit.<br />
Ê Connect one of the connectors of the data cable to the D-SUB connector on the monitor (1)<br />
and secure the plug-in connection by tightening the safety screws.<br />
Ê Connect the other connector of the data cable to the (active) monitor port on the system unit<br />
and secure the plug-in connection by tightening the safety screws (2).<br />
S26361-K841-V150-1-5E19 English - 9<br />
2
Colour monitor 4312 FA<br />
i<br />
If your system unit has two monitor ports ("onboard" screen controller and separate<br />
graphics card), the monitor port for the separate graphics card is usually active.<br />
Ê Plug the power adapter cable into the power connector (3) of the monitor. Ensure that it snaps<br />
firmly in place.<br />
Ê Connect the female receptacle of the power cable supplied to the power adapter (4). Ensure<br />
that it snaps firmly in place.<br />
Ê Connect the male receptacle of the power cable supplied to the monitor socket of the system<br />
unit (5). Ensure that it snaps firmly in place.<br />
Ê Plug the power connector of the system unit into a properly grounded mains outlet.<br />
i<br />
When you start working with your monitor for the first time you should install the<br />
appropriate graphics drivers for your application software. Details of how to do this are<br />
provided in the documentation on your screen controller/the associated driver software.<br />
Operation of the monitor<br />
AUTO EXIT<br />
1 = Power button 2 = Power indicator<br />
A<br />
B<br />
MENU<br />
10 - English S26361-K841-V150-1-5E19<br />
2<br />
1
Switching the monitor on/off<br />
Colour monitor 4312 FA<br />
The ON/OFF switch (2) is used for switching the monitor on and off.<br />
The power indicator (1) glows green when the monitor and system unit are switched on. The power<br />
indicator glows green and flashes when the monitor does not receive any video signal or is in the<br />
energy-saving mode. The power indicator goes off when the monitor is switched off.<br />
When you switch on the PC system, you must proceed in the following order:<br />
Ê First switch the LCD monitor on with the ON/OFF switch (2).<br />
Ê Then switch on the system unit.<br />
i<br />
If your PC has a power management function (energy-saving mode), you should read the<br />
"Notes on power management" of the monitor in this chapter.<br />
Notes on power management<br />
If your PC is equipped with power management, the monitor can support this function fully. The<br />
monitor has a four-stage power management system.<br />
Stage ON Standby mode Suspend mode OFF mode<br />
Power indicator glows green flashes green (1 s) flashes green (1 s) flashes green (1 s)<br />
Function Monitor<br />
Monitor<br />
Monitor<br />
Monitor<br />
operating<br />
normally<br />
is dark<br />
is dark<br />
is dark<br />
Power<br />
consumption<br />
normal<br />
Colour monitor 4312 FA<br />
Changing the monitor settings<br />
When putting the monitor into operation for the first time, the screen display should be optimally<br />
adapted to the screen controller used and adjusted in accordance with your needs.<br />
Basic monitor settings with the floppy disk supplied<br />
If one of the operating systems Windows for Workgroups, Windows 95/98, Windows NT or OS/2<br />
(with Windows emulation installed) is used, the basic monitor settings can be set with the floppy disk<br />
supplied.<br />
Ê Insert the supplied floppy disk into the floppy disk drive.<br />
Ê Open the Readme file on the floppy disk and follow the instructions in the file.<br />
Your monitor should now already be properly adjusted. If none of the above operating systems is<br />
used or minor corrections are to be made to the screen display, then change the monitor settings<br />
with the OSD menu.<br />
Monitor settings using the OSD menu<br />
You can use the buttons on the control panel to set the screen display via an integrated OSD menu<br />
(On-Screen-Display).<br />
i<br />
The OSD menu is available in five languages (default setting: English). How you set a<br />
different language for the OSD menu is described in the section "Setting the language for<br />
the OSD menu".<br />
A<br />
B<br />
AUTO EXIT<br />
MENU<br />
1 = Power button 2 = Power indicator<br />
The MENU button switches the OSD menu on and selects the displayed function (Symbol or<br />
submenu).<br />
You use the - or + buttons to mark the symbol for a function and can then make the settings for the<br />
selected function.<br />
Press the EXIT button to quit a submenu or to hide the OSD menu. (The OSD menu is automatically<br />
closed if no button is pressed for some time.)<br />
With the OSD menu concealed, you can make the following settings directly:<br />
• Adjust the brightness with the - or + button (Brightness).<br />
• Start auto-adjustment of the monitor with the AUTO button (Auto adjustment).<br />
• Select the video signal source (analogue (A) or digital (B)) with the EXIT button.<br />
12 - English S26361-K841-V150-1-5E19<br />
2<br />
1
Colour monitor 4312 FA<br />
Carry out auto-adjustment of the monitor for the current resolution<br />
With the AUTO button you can start the auto-adjustment for the current resolution. During the autoadjustment<br />
the display Auto adjustment is shown.<br />
During auto-adjustment the functions Fine, Coarse and Position are carried out (see Image Lock,<br />
Horizontal and Vertical adjustment window). For this purpose a screen display must be present<br />
which has a few light dots in the first and last column and in the first line. The Windows desktop<br />
usually fulfills this condition.<br />
When changing the monitor controller to a mode (resolution and refresh rate) in which the monitor<br />
has not been operated up until then, the monitor automatically executes the Auto adjustment function.<br />
i<br />
Should you be dissatisfied with the results of the auto adjust function, then set the basic<br />
setting of the monitor with the floppy disk provided.<br />
Monitor settings using the OSD menu<br />
To set the OSD menu, perform the following steps:<br />
Ê Press the MENU button to activate the OSD menu.<br />
The main menu appears on the screen with icons for the setting functions.<br />
The last icon set is marked (in this case<br />
Brightness). At the same time, the corresponding<br />
K setting window appears.<br />
i<br />
Ê If necessary, use the - or + button to mark<br />
another icon, e.g. Contrast.<br />
Brightness<br />
The displayed setting window changes when<br />
80<br />
changing from one symbol to another.<br />
Ê Press the MENU button to activate the<br />
highlighted icon.<br />
Ê Use the buttons - or + (in accordance with<br />
the displays in the menu) to make<br />
changes.<br />
S26361-K841-V150-1-5E19 English - 13
Colour monitor 4312 FA<br />
Depending on the function (in this case Contrast), additional adjustment functions are offered.<br />
Ê Press the MENU button to select from the<br />
K<br />
displayed adjustment possibilities (in this<br />
case Bright Colors and Dark Colors).<br />
i<br />
Ê Use the - or + button to make the desired<br />
Bright Colors<br />
0<br />
Ê<br />
setting.<br />
Press the EXIT button twice to exit the<br />
OSD menu.<br />
Dark Colors<br />
All changes are stored immediately.<br />
0<br />
All modifications are automatically stored if no button is pressed in an active setting window for<br />
approx. 3 seconds.<br />
Adjusting the brightness<br />
Adjusting the contrast<br />
Setting the brightness of the display (Brightness)<br />
Calling the Contrast setting window<br />
Setting picture definition and eliminating picture interference<br />
Fine<br />
Coarse<br />
Calling the Image Lock setting window. This function adapts the monitor to the<br />
screen controller of your PC.<br />
Eliminate picture noise or horizontal lines<br />
Eliminate vertical bars<br />
Adjusting the horizontal position<br />
Calling the Position setting window<br />
Shifting the picture to the left<br />
Shifting the picture to the right<br />
14 - English S26361-K841-V150-1-5E19
Adjusting the vertical position<br />
Calling the Position setting window<br />
Shifting the picture down<br />
Shifting the picture up<br />
Colour monitor 4312 FA<br />
Activating the factory settings<br />
Factory settings are available for Image Lock, picture position and colours in the preset operating<br />
modes (see table in the chapter "Technical data".<br />
Geometry Reset<br />
- NO YES +<br />
Color Reset<br />
- NO YES +<br />
!<br />
Calling the Reset setting window<br />
- = The user settings for picture definition and picture position are retained.<br />
+ = The factory settings are activated.<br />
- = The user settings for the colours are retained.<br />
+ = The factory settings are activated.<br />
If you press down the EXIT button for about 5 seconds, all the settings will be reset to<br />
factory settings!<br />
You can use this function when you connect your monitor to another PC or to another<br />
monitor controller (graphics card). The monitor then carries out the Auto adjustment feature<br />
for each new mode.<br />
Setting colour ratios<br />
K<br />
User Adjusted...<br />
Reddish<br />
Calling the Color Temperature setting window<br />
Setting user-defined colours:<br />
With the submenus R (Red), G (Green) and B (Blue) you can increase or<br />
decrease the corresponding colour ratios (Red, Green, Blue).<br />
Selecting reddish colour setting<br />
Bluish Selecting bluish colour setting<br />
S26361-K841-V150-1-5E19 English - 15
Colour monitor 4312 FA<br />
Switching full-screen mode on or off<br />
Setting language for the OSD menu<br />
Setting transparency for the OSD menu<br />
Setting position for the OSD menu<br />
Setting display time for the OSD menu<br />
Displaying the monitor settings<br />
i<br />
Selecting video signal source<br />
A<br />
B<br />
Calling the Image Size setting window (activate with MENU button).<br />
If your graphic card is only capable of displaying a resolution lower than<br />
1280 x 1024, the scaling process of the monitor can extend the addressability<br />
to 1280 x 1024 pixels by determining intermediate values (with interpolation).<br />
(Expand1) (Expand2)<br />
Calling Language setting window (activate with MENU button).<br />
You can choose from English (default setting), German, French, Italian and<br />
Spanish.<br />
Transparency for the OSD menu (Halftone)<br />
Off = The normal screen display is covered by the OSD menu.<br />
On = The OSD menu is transparent.<br />
Calling the Menu Position setting window<br />
With Horizontal you can move the OSD menu horizontally, and with Vertical<br />
vertically on the screen.<br />
Calling the Display Time setting window<br />
You can select between 5, 10, 20 and 200 seconds. If the adjusted time has<br />
run out without the settings being saved, the OSD menu is automatically<br />
closed.<br />
Displaying horizontal frequency, refresh rate and resolution of the current<br />
monitor setting<br />
With the OSD menu hidden you can make the following settings with the<br />
EXIT button:<br />
A: switch on the analogue mode. The monitor processes the signals of the<br />
analogue port (VGA/D-SUB).<br />
Or<br />
B: switch on the digital mode. The monitor processes the signals of the<br />
digital port (DVI-D).<br />
16 - English S26361-K841-V150-1-5E19
Colour monitor 4312 FA<br />
Locking menu items of OSD menu<br />
All menu items of the OSD menu except brightness and contrast can be locked to prevent<br />
accidental or unauthorised changes to the monitor settings.<br />
Ê Press the MENU button of the control panel for at least 5 seconds until the OSD menu<br />
disappears.<br />
Locked menu items in the OSD menu are marked with the icon . In the digital mode some<br />
applications are locked, e.g.: Contrast, Image Lock, Position, Reset, Color.<br />
Releasing locked menu items of OSD menu<br />
Ê Press the MENU button of the control panel for at least 5 seconds until the OSD menu<br />
disappears.<br />
The icon disappears.<br />
Notes on ergonomic colour adjustment<br />
If you select colours for the display in your application programmes, take note of the information<br />
below.<br />
The primary colours blue and red on a dark background do not produce the minimum required<br />
contrast of 3:1 and are therefore not suitable for continuous text and data entry.<br />
When using several colours for characters and background and giving the primary colours full<br />
modulation, you can obtain very suitable colour combinations (see the following table):<br />
Background Characters<br />
black white purple blue cyan green yellow red<br />
black + + - + + + -<br />
white + + + - - - +<br />
purple + + - - - - -<br />
blue - + - + - + -<br />
cyan + - - + - - -<br />
green + - - + - - -<br />
yellow + - + + - - +<br />
red - + - - - - +<br />
+ Colour combination very suitable<br />
- Colour combination not suitable because colour locations are too close together, thin<br />
characters are not identifiable or rigorous focusing is demanded of the human eye.<br />
S26361-K841-V150-1-5E19 English - 17
Colour monitor 4312 FA<br />
Technical data<br />
Dimensions and weight (LCD monitor)<br />
Visible diagonals: 43 cm<br />
Dot pitch: 0,264 mm<br />
Screen size: 338 3 mm x 270 3mm<br />
Maximal resolution: 1280 x 1024 pixels<br />
Dimensions (W xHxD): Monitor<br />
incl. Monitor base: 414 mm x 457 mm x 206,9 mm<br />
Box:<br />
507 mm x 270 mm x 532 mm<br />
Weight: Monitor<br />
incl. Monitor base: 6kg<br />
Box:<br />
8,6 kg<br />
Accessories: Power cable (1.8 m)<br />
D-SUB data cable (1.8 m)<br />
Power adapter<br />
Storable display modes: 20 (10 of which are preset)<br />
Power adapter<br />
Input data<br />
Rated mains voltage:<br />
Frequency:<br />
Output data<br />
Rated voltage:<br />
Output current:<br />
100V-240V(10 %)<br />
50Hz-60Hz(5 %)<br />
14,0 V (5 %)<br />
≤3 A<br />
Electrical data<br />
Video: analogue, positive, 0.7 Vpp ,75Ω<br />
Synchronisation: Separate Sync. TTL, positive or negative<br />
Horizontal frequency: 31 kHz .... 80 kHz (multi-scanning)<br />
Refresh rate: 56 Hz .... 75 Hz<br />
Maximum pixel rate: 135 MHz<br />
Power supply: 14,0 V (5 %)<br />
Total power consumption (incl. 42 W (maximum), 36 W (nominal)<br />
power adapter):<br />
< 5 W in the energy-saving mode (standby mode, suspend<br />
mode and OFF mode)<br />
Environmental conditions<br />
Environment class 3K2, IEC 721<br />
Rated range of operation:<br />
Humidity:<br />
Limit range of operation:<br />
Humidity:<br />
Condensation must be avoided.<br />
15 °C .... 35 °C<br />
20 % .... 85 %<br />
5 °C .... 35 °C<br />
20 % .... 85 %<br />
18 - English S26361-K841-V150-1-5E19
VESA-DDC-compatible VGA interface<br />
Colour monitor 4312 FA<br />
Your monitor is equipped with a VESA-DDC-compatible VGA interface. VESA-DDC (Video<br />
Electronics Standard Association, Display Data Channel) is used as the communications interface<br />
between the monitor and the PC. If your computer is equipped with a VESA-DDC-compatible VGA<br />
interface, it can automatically read the data for ensuring optimum operation from your monitor and<br />
select the appropriate settings.<br />
i<br />
If the monitor 4312 FA is not yet displayed in the list of monitors, you can select the<br />
following monitor instead:<br />
Siemens or Siemens Nixdorf 4311 FA, 4611 FA 4612 FA or 461 V<br />
Preset operating modes<br />
i<br />
The picture position and size have been set to optimum values at the factory for the<br />
operating modes listed above. Depending on the screen controller used, it may be<br />
necessary to adjust the display position and size. In this case, you can change and save<br />
the settings (see "Operation of the monitor").<br />
Horizontal frequency Refresh rate Screen resolution<br />
31,47 kHz<br />
31,47 kHz<br />
31,47 kHz<br />
37,50 kHz<br />
37,88 kHz<br />
46,87 kHz<br />
48,36 kHz<br />
60,02 kHz<br />
60,00 kHz<br />
79,98 kHz<br />
70.00 Hz<br />
70.00 Hz<br />
60.00 Hz<br />
75.00 Hz<br />
60.30 Hz<br />
75.00 Hz<br />
60.00 Hz<br />
75.00 Hz<br />
60.00 Hz<br />
75.00 Hz<br />
640 x 350<br />
720 x 400<br />
640 x 480<br />
640 x 480<br />
800 x 600<br />
800 x 600<br />
1024 x 768<br />
1024 x 768<br />
1280 x 1024<br />
1280 x 1024<br />
For ergonomic reasons, a screen resolution of 1024 x 768 pixels is recommended. Because of the<br />
technology used (active matrix) an LCD monitor provides a totally flicker-free picture even with a<br />
refresh rate of 60 Hz.<br />
i<br />
Because of the technology used (active matrix) an LCD monitor provides a totally flickerfree<br />
picture even with a refresh rate of 60 Hz.<br />
Power supply plug<br />
0V<br />
+14VDC<br />
S26361-K841-V150-1-5E19 English - 19
Colour monitor 4312 FA<br />
Pin assignment D-SUB<br />
10<br />
Pin Meaning Pin Meaning<br />
1 Video input red 9 no pin<br />
2 Video input green 10 Sync. ground<br />
3 Video input blue 11 Ground<br />
4 Ground 12 DDC-Data<br />
5 DDC ground 13 H. sync<br />
6 Red video ground 14 V. sync<br />
7 Green video ground 15 DDC Clock<br />
8 Blue video ground<br />
Trouble shooting<br />
5<br />
15<br />
Should an error occur, first check the following points. If the distortion is still not eliminated, the<br />
monitor should, if possible, be checked on another PC and/or with another data cable.<br />
If you cannot solve the problem, contact our customer service centre.<br />
The display is too small or not centred<br />
The monitor recognises an undefined mode (see "Technical data").<br />
Ê Adjust the position and the size of the display and save your settings (see "Operation of the<br />
monitor").<br />
No display (power indicator does not light)<br />
Ê Check whether the monitor is switched on.<br />
Ê Check whether the power cable is connected properly to the power adapter and to the system<br />
unit and whether the power adapter cable is connected properly to the monitor.<br />
Ê Check whether the mains socket is live.<br />
20 - English S26361-K841-V150-1-5E19<br />
1<br />
11<br />
6
No display (power indicator lights)<br />
Colour monitor 4312 FA<br />
Ê Check whether the system unit is switched on.<br />
Ê Check whether the data cable for the monitor is correctly attached to the monitor and the<br />
monitor port on the system unit.<br />
Ê Press any key on the PC keyboard - the PC may be in energy saving mode.<br />
Ê Alter the brightness and/or contrast until you get a picture.<br />
Picture disturbances (vertical and horizontal lines, picture noise)<br />
Ê First in the Image Lock setting window, set the Coarse function to remove any vertical bars.<br />
Ê Then set the Fine function in the Image Lock setting window to eliminate the picture noise or the<br />
horizontal lines.<br />
i<br />
If one of the operating systems Windows for Workgroups, Windows 95/98, Windows NT<br />
or OS/2 (with Windows emulation installed) is used, the monitor can be adjusted with the<br />
floppy disk supplied.<br />
Permanently unlit or lit pixels<br />
The standard of production techniques today cannot guarantee an absolutely fault-free screen<br />
display. A few isolated constant lit or unlit pixels may be present. The maximum permitted number<br />
of pixels faults is stipulated in the stringent international standard ISO 13406-2 (Class II).<br />
Example: a 17" flat-screen monitor with a resolution of 1024 x 1280 has 1024 x 1280 = 1310720<br />
pixels. Each pixel consists of three subpixels (red, green and blue), so there are about 4 million dots<br />
in total.<br />
According to ISO 13406-2 (Class II), a maximum of 6 pixels and 7 subpixels may be defective, i. e.<br />
a total of 25 faulted dots. This corresponds to approx. 0,00062 % of the entire screen surface!<br />
The flat screen monitors from <strong>Fujitsu</strong> Siemens Computers are typically considerably better than<br />
requirements defined in this standard.<br />
The screen becomes darker<br />
The background lighting has a limited lifetime. If your monitor display should become too dark, the<br />
background lighting will have to be exchanged. Please contact our customer service centre.<br />
S26361-K841-V150-1-5E19 English - 21
TCO'99<br />
Congratulations<br />
You have just purchased a TCO'99 approved and labelled product!<br />
Your choice has provided you with a product developed for<br />
professional use. Your purchase has also contributed to reducing<br />
the burden on the environment and also to the further development<br />
of environmentally adapted electronics products.<br />
Why do we have environmentally labelled computers?<br />
In many countries, environmental labelling has become an established method for encouraging the<br />
adaptation of goods and services to the environment. The main problem, as far as computers and<br />
other electronics equipment are concerned, is that environmentally harmful substances are used<br />
both in the products and during their manufacture. Since it is not so far possible to satisfactorily<br />
recycle the majority of electronics equipment, most of these potentially damaging substances<br />
sooner or later enter nature.<br />
There are also other characteristics of a computer, such as energy consumption levels, that are<br />
important from the viewpoints of both the work (internal) and natural (external) environments. Since<br />
all methods of electricity generation have a negative effect on the environment (e.g. acidic and<br />
climate-influencing emissions, radioactive waste), it is vital to save energy. Electronics equipment in<br />
offices is often left running continuously and thereby consumes a lot of energy.<br />
What does labelling involve?<br />
This product meets the requirements for the TCO'99 scheme which provides for international and<br />
environmental labelling of personal computers. The labelling scheme was developed as a joint effort<br />
by the TCO (The Swedish Confederation of Professional Employees), Svenska<br />
Naturskyddsforeningen (The Swedish Society for Nature Conservation) and Statens<br />
Energimyndighet (The Swedish National Energy Administration).<br />
Approval requirements cover a wide range of issues: environment, ergonomics, usability, emission<br />
of electric and magnetic fields, energy consumption and electrical and fire safety.<br />
The environmental demands impose restrictions on the presence and use of heavy metals,<br />
brominated and chlorinated flame retardants, CFCs (freons) and chlorinated solvents, among other<br />
things. The product must be prepared for recycling and the manufacturer is obliged to have an<br />
environmental policy which must be adhered to in each country where the company implements its<br />
operational policy.<br />
The energy requirements include a demand that the computer and/or display, after a certain period<br />
of inactivity, shall reduce its power consumption to a lower level in one or more stages. The length<br />
of time to reactivate the computer shall be reasonable for the user.<br />
Labelled products must meet strict environmental demands, for example, in respect of the reduction<br />
of electric and magnetic fields, physical and visual ergonomics and good usability.<br />
TCO'99 - 1
TCO'99<br />
Below you will find a brief summary of the environmental requirements met by this product. The<br />
complete environmental criteria document may be ordered from:<br />
TCO Development<br />
SE-114 94 Stockholm, Sweden<br />
Fax: +46 8 782 92 07<br />
Email (Internet): development@tco.se<br />
Current information regarding TCO'99 approved and labelled products may also be obtained via the<br />
Internet, using the address: http://www.tco-info.com/<br />
Environmental requirements<br />
Flame retardants<br />
Flame retardants are present in printed circuit boards, cables, wires, casings and housings. Their<br />
purpose is to prevent, or at least to delay the spread of fire. Up to 30% of the plastic in a computer<br />
casing can consist of flame retardant substances. Most flame retardants contain bromine or<br />
chloride, and those flame retardants are chemically related to another group of environmental toxins,<br />
PCBs. Both the flame retardants containing bromine or chloride and the PCBs are suspected of<br />
giving rise to severe health effects, including reproductive damage in fish-eating birds and<br />
mammals, due to the bio-accumulative 1) processes. Flame retardants have been found in human<br />
blood and researchers fear that disturbances in foetus development may occur.<br />
The relevant TCO'99 demand requires that plastic components weighing more than 25 grams must<br />
not contain flame retardants with organically bound bromine or chlorine. Flame retardants are<br />
allowed in the printed circuit boards since no substitutes are available.<br />
Cadmium 2)<br />
Cadmium is present in rechargeable batteries and in the colour-generating layers of certain<br />
computer displays. Cadmium damages the nervous system and is toxic in high doses. The relevant<br />
TCO'99 requirement states that batteries, the colour-generating layers of display screens and the<br />
electrical or electronics components must not contain any cadmium.<br />
Mercury 2)<br />
Mercury is sometimes found in batteries, relays and switches. It damages the nervous system and<br />
is toxic in high doses. The relevant TCO'99 requirement states that batteries may not contain any<br />
mercury. It also demands that mercury is not present in any of the electrical or electronics<br />
components associated with the labelled unit.<br />
CFCs (freons)<br />
The relevant TCO'99 requirement states that neither CFCs nor HCFCs may be used during the<br />
manufacture and assembly of the product. CFCs (freons) are sometimes used for washing printed<br />
circuit boards. CFCs break down ozone and thereby damage the ozone layer in the stratosphere,<br />
causing increased reception on earth of ultraviolet light with e.g. increased risks of skin cancer<br />
(malignant melanoma) as a consequence.<br />
Lead 2)<br />
Lead can be found in picture tubes, display screens, solders and capacitors. Lead damages the<br />
nervous system and in higher doses, causes lead poisoning. The relevant TCO´99 requirement<br />
permits the inclusion of lead since no replacement has yet been developed.<br />
1) Bio-accumulative is defined as substances which accumulate within living organisms.<br />
2) Lead, Cadmium and Mercury are heavy metals which are Bio-accumulative.<br />
2 - TCO'99