Oyster - Vision III (Version: 03/2013 | 171 KB) - ten Haaft GmbH
Oyster - Vision III (Version: 03/2013 | 171 KB) - ten Haaft GmbH
Oyster - Vision III (Version: 03/2013 | 171 KB) - ten Haaft GmbH
Create successful ePaper yourself
Turn your PDF publications into a flip-book with our unique Google optimized e-Paper software.
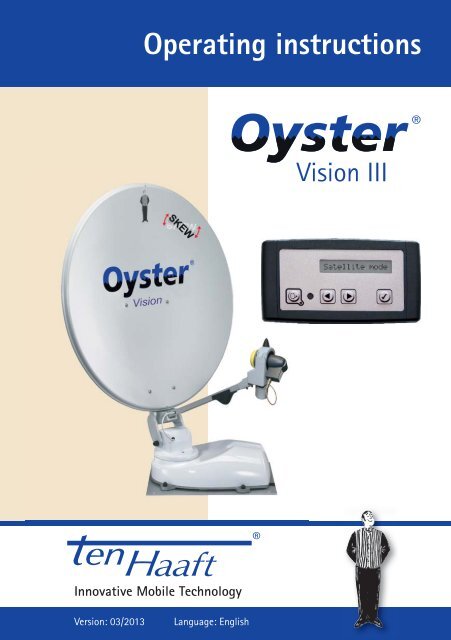
Operating instructions<br />
Innovative Mobile Technology<br />
<strong>Version</strong>: <strong>03</strong>/<strong>2013</strong> Language: English<br />
<strong>Vision</strong> <strong>III</strong>
Table of con<strong>ten</strong>ts<br />
General information<br />
Introduction 3<br />
Proper use and operation 4<br />
Safety instructions<br />
Controls<br />
5<br />
The fi rst steps 7<br />
Switching ON / switching OFF 8<br />
Menu operation<br />
Operating the system<br />
9<br />
Menu tree 10<br />
Automatic search 11<br />
SAT mode 12<br />
Entering the position 12<br />
Manual search 12<br />
Main menu – Settings 14<br />
Restarting the system<br />
General settings<br />
14<br />
Receiver control 15<br />
Language 16<br />
Dimmer 16<br />
Service INFO 16<br />
AUX relay – switched terminal for TV set<br />
Satellite settings<br />
17<br />
Search satellite 18<br />
DiSEqC programming<br />
Appendix<br />
18<br />
What is DiSEqC? 21<br />
Notes on protection of the environment 22<br />
Contact and Service 22<br />
2
Introduction<br />
These instructions describe the functions and operation of the automatic satellite<br />
system. Installation instructions can be found in the installation manual supplied<br />
with the system.<br />
Correct and safe operation of the system can only be ensured by following the two<br />
sets of instructions, both for installation and operation.<br />
Your automatic satellite system is an intelligent satellite-TV reception system which<br />
can align itself towards a preset satellite automatically as long as the system is<br />
located within the footprint of this satellite.<br />
Scope of supply: Control device; control unit; exterior unit with an<strong>ten</strong>na - with<br />
optional SKEW pivoting unit for optimised reception;<br />
Please ensure that the system always has a clear view to the south. In Europe,<br />
all satellites are in an approximate position in the south.<br />
If the satellite‘s signal beam is interrupted by obstacles such as mountains,<br />
buildings or trees, the automatic aiming will not function and no TV signal will<br />
be received.<br />
The fi rst few pages of these instructions contain information about using the<br />
general functions of your system, followed by an explanation of all the adjustment<br />
options.<br />
3
Proper use and operation<br />
This product has been designed for use in a fi xed installation on mobile homes<br />
or camper trailers with maximum speeds of 130 km/h.<br />
It is designed to automatically aim a parabolic an<strong>ten</strong>na mounted on a stationary<br />
vehicle at geostationary television satellites transmitting directly to Europe.<br />
Power to the system is supplied by a standard vehicle electric system with a<br />
rated voltage of 12/24 Volt DC. Switching-mode power supplies must not be<br />
used for the installation of the system in camper trailers. Use of the equipment<br />
for any other purpose than the one specifi ed is not permitted.<br />
Please also note the following instructions from the manufacturer:<br />
The equipment must only be installed on hard vehicle roofs which are<br />
suffi ciently strong and inherently stable. All of the relevant and approved<br />
guidelines of the automotive industry must be observed and complied with.<br />
The product does not require any regular main<strong>ten</strong>ance. The housings and<br />
enclosures must not be opened. Inspection and main<strong>ten</strong>ance may only be<br />
performed by a qualifi ed professional.<br />
Do not clean your mobile home with the mounted satellite system in a<br />
single-bay or drive-through car wash or with a high-pressure cleaner.<br />
It is not permitted to change the overall device by removing or adding<br />
individual components.<br />
It is not permitted to use other parabolic an<strong>ten</strong>nas or LNBs than those<br />
installed originally at the equipment.<br />
Installation must only be performed by suffi ciently qualifi ed personnel. All<br />
instructions in the supplied Installation Instructions, which form part of the<br />
Operating Instructions, must be carefully followed. In the event of any<br />
problems, or if you are unsure about anything, please contact the<br />
manufacturer directly or a specialist workshop which is approved by the<br />
manufacturer.<br />
Retract the system during periods of strong wind or storm.<br />
4
Safety instructions<br />
In order to ensure that your <strong>Vision</strong> system works properly, you must<br />
ensure that it is correctly connected to the ignition of your vehicle<br />
(see Installation Instructions).<br />
When it is correctly installed, the an<strong>ten</strong>na automatically returns to the park position<br />
when the ignition is switched on and locks itself there. If the system cannot fully<br />
retract or cannot retract at all due to a fault, then it is your responsibility as the<br />
driver of the vehicle to check that the an<strong>ten</strong>na is safely and properly stowed.<br />
The driver of the vehicle must inspect the external unit before driving<br />
off to ensure that it is fully retracted.<br />
Please note also that different legal requirements apply to the operation of electrical<br />
and electronic equipment in different countries. As the user of this equipment,<br />
you yourself are responsible for ensuring compliance with the relevant laws and<br />
regulations.<br />
Your <strong>Vision</strong> system is approved by the manufacturer for connection to standard<br />
commercially available rechargeable lead batteries with a rated voltage of<br />
12V/24V DC and a rated capacity of at least 50Ah.<br />
Connection to any other type of battery system can lead to irreparable damage<br />
to the battery system or the <strong>Vision</strong> system or to the release of fl ammable or toxic<br />
gases or to the self-ignition of the unsuitable battery system.<br />
The manufacturer accepts no liability for direct or indirect damage or for consequential<br />
damage to the system itself, to battery systems, motor vehicles or other<br />
equipment or goods resulting from the connection of unsuitable battery systems or<br />
installation/wiring errors.<br />
5
Safety instructions<br />
Note on Safety - <strong>Oyster</strong> <strong>Vision</strong> <strong>III</strong><br />
Stop function via the control device and the remove of the power supply<br />
during main<strong>ten</strong>ance.<br />
Press the Selection button on the keypad on the control device to stop the movement<br />
of the an<strong>ten</strong>na. In this stop mode no receiver DiSEqC control commands are<br />
executed more.<br />
To abolished the stop function scroll via on the keypad to select „Auto<br />
Search“ and pressing the Selection button . Or by press the the On / Off button<br />
, which causes that enters the an<strong>ten</strong>na.<br />
During main<strong>ten</strong>ance on the an<strong>ten</strong>na system it is essential, that the operating voltage<br />
of the complete system, receiver and VISION <strong>III</strong> control box, are off.<br />
If the system is reconnected to power, the display of the control panel „activate“.<br />
Only after pressing the On / Off button on the control panel, the an<strong>ten</strong>na can<br />
ex<strong>ten</strong>d again. Please note that commercial receivers depending on the type can take<br />
up to 90 seconds to initialize.<br />
6
The first steps<br />
All controls are handled via the control device.<br />
<strong>Vision</strong><br />
All controls are handled via the control device.<br />
You may choose any location you like to install the control device, but please bear<br />
in mind that it is not waterproof. You may still need to remove the protective fi lm<br />
from the display.<br />
The display of the control device will show the various current operating modes of<br />
the system. We recommend that the control device is positioned in an accessible<br />
location where it is easy to see this information.<br />
The display is illuminated, so it is not a problem if it is installed in a very dark location.<br />
To ensure safe and reliable operation of the system, please make sure the external unit<br />
is in rest mode before disconnecting the control device. Check that no text is displayed<br />
on the control device – this is an indication that the system is in rest mode.<br />
7<br />
On / Off<br />
We have produced a separate manual – the „Installation Instructions“ – which<br />
covers the installation, wiring and initial taking into operation of your <strong>Vision</strong><br />
system.<br />
In its supplied state, a search satellite for the automatic search is already confi -<br />
gured in your <strong>Vision</strong> system‘s control unit.<br />
A satellite swap is performed by changing the search satellite or via the DiSEqC<br />
signals of the receiver. The signal or DiSEqC ID of the receiver must comply with<br />
the ID list saved in the control unit of your <strong>Vision</strong> system.<br />
See section: Satellite settings / DiSEqC ID.
Switching ON / switching OFF<br />
There are two ways of switching the <strong>Vision</strong> <strong>III</strong> an<strong>ten</strong>na system on and off:<br />
After switching on the system, the an<strong>ten</strong>na unfolds and returns to the last position<br />
in which a satellite was received.<br />
If the vehicle position has changed since, the system will not receive any signals<br />
and the automatic search is started.*<br />
To switch the system off, press button again to retract the system and send it<br />
into rest mode.<br />
If you would like to stop the movement of the an<strong>ten</strong>na while it is opening or closing,<br />
simply press to instantly stop the an<strong>ten</strong>na.<br />
Notes<br />
<strong>Vision</strong><br />
On / Off -<br />
System starts search from last position<br />
The system can always be switched on and off via the button on the control<br />
device or by switching the receiver on and off. If you want the system to respond<br />
when switching the receiver on or off, then menu item „Receiver control“ must<br />
be enabled. See section „Receiver control“.<br />
Please remember to switch on your TV receiver and your TV set or fl at-screen<br />
display.<br />
If the message „Manual search“ is displayed after the an<strong>ten</strong>na has opened, and<br />
if the system does not commence the search automatically, then the system<br />
was being operated in manual mode when it was last switched off.<br />
Please refer to sections „Automatic search“ and „Manual search“.<br />
8
Menu operation<br />
<strong>Vision</strong><br />
On / Off Selection button Scroll<br />
The arrow keys and are used to navigate through all levels of the menu.<br />
Using these keys, select a submenu, function or setting.<br />
Press to enable the displayed menu item. Within the settings, you can change<br />
the displayed values within the set limits by pressing the arrow keys and .<br />
Then press to accept the set value and return to the higher-level menu.<br />
Use button to return to the selection level without saving the data.<br />
By selecting menu option „Return“ and by pressing you can go back up one level<br />
in the menu layout.<br />
9
Menu tree<br />
The functions of the keys are explained in section „Menu operation“.<br />
Menu item display<br />
Automatic search<br />
SAT mode<br />
Selection of position<br />
Manual search<br />
Main menu<br />
General settings<br />
Language<br />
Dimmer<br />
Receiver control<br />
Service INFO<br />
Back<br />
Satellite settings<br />
Search satellite<br />
DiSEqC DiSEqC on/off ein/aus *<br />
DiSEqC on < > *<br />
DiSEqC V3-ID *<br />
e.g. ASTRA 1 *<br />
DiSEqC V3: *<br />
DiSEqC Rec-ID *<br />
DiSEqC Rec: 001 *<br />
DiSEqC Data *<br />
D: 00 00 00 00 *<br />
Back<br />
Function<br />
Press to start the automatic search for the satellite specifi ed in menu option „Search satellite“<br />
Press to display the search satellite of the automatic search<br />
Selection of a position from a list; speeds up the fi nding of the search satellite<br />
Manual control of the an<strong>ten</strong>na dish Signal optimisation<br />
Press to access the settings levels<br />
Press to access the submenu options of the General settings<br />
Language menu<br />
Display lighting<br />
Receiver-controlled an<strong>ten</strong>na start: „Auto off“; „Standby“; „Sleep“<br />
Serial number, an<strong>ten</strong>na type, revision no. and error state<br />
Press to return to main menu<br />
Press to access the submenu options of the „Satellite settings“ level<br />
Specifi cation of the search satellite for the automatic search<br />
View DiSEqC function on/off. Satellite change via receiver<br />
DiSEqC function on / off<br />
Viewing or assigning a <strong>Vision</strong><strong>III</strong> DiSEqC ID to a specifi c satellite,<br />
Select satellite<br />
Setting the DiSEqC ID number<br />
Receiving the receiver DiSEqC ID<br />
Display of receiver DiSEqC ID<br />
DiSEqC transfer protocol<br />
Display of the DiSEqC transfer protocol<br />
Press to return to main menu<br />
10<br />
* These settings must only be made<br />
when commissioning the system.<br />
No changes are required when<br />
using the an<strong>ten</strong>na system.
Automatic search<br />
After switching on the system with button , the an<strong>ten</strong>na opens and moves into<br />
the position in which a satellite was last received.<br />
If no satellite is found, the system starts the automated search for the selected<br />
satellite.<br />
If you wish to select another satellite, please refer to section „Search Satellite“:<br />
Selecting a satellite for automatic search and Satellite swap<br />
When the search satellite is found, the search function stops and the TV signal is<br />
looped through. A satellite search usually takes approx. 30 seconds, but the search<br />
may take longer depending on the position of the parked vehicle.<br />
If a reference transponder on the satellite fails or if it cannot be received at your<br />
current location, the system will start a teach-in routine that may once take 15 -<br />
25 minutes.<br />
If no TV picture appears after this ex<strong>ten</strong>ded search period, you are most likely located<br />
in an area in which the selected satellite cannot be received or the signal beam<br />
is obstructed.<br />
In this case, the message „No satellite found“ appears in the display of the control<br />
device.<br />
The automatic search function always assumes that your vehicle is perfectly level. If<br />
this is not the case, then the search period may be ex<strong>ten</strong>ded.<br />
If the an<strong>ten</strong>na is already open, the automatic search function is started as follows:<br />
Press until the message „Automat. search“ appears in the display.<br />
Press .<br />
In general, the satellite receiver must not be connected or switched on to perform a<br />
satellite search. However, if no receiver is switched on when the automatic search<br />
ends, a corresponding message is shown in the display to alert you that no image or<br />
sound signals are received.<br />
11
SAT mode<br />
SAT mode<br />
Entering the position<br />
Manual satellite search<br />
The manual search is usually used to fi ne-tune the an<strong>ten</strong>na to a found satellite in<br />
case of adverse reception conditions.<br />
If you wish to receive signals from a new satellite that is not yet stored as a search<br />
satellite in the control unit, the manual search function can be used to tune the<br />
system to this satellite.<br />
Firstly, switch your receiver to a preset station that is transmitted by the satellite<br />
selected.<br />
At the control device, press repeatedly until the message<br />
„Manual search“ appears in the display.<br />
Programming sequence for function Manual search:<br />
Level 1 Sub-level A Sub-level B<br />
Manual search<br />
Press to access sub-level A<br />
and select an option.<br />
Note:<br />
Press the sat button to go<br />
back one level.<br />
This display indicates that the system is in signal reception mode.<br />
Press to display the currently received satellite.<br />
„Entering the position“ is a selectable option of the main menu. Press to access<br />
a list of countries, and use the buttons to scroll the list and use to select<br />
your location. This speeds up the satellite search.<br />
The an<strong>ten</strong>na is then optimally adjusted for the satellite search from your current<br />
position (LNB and inclination angle).<br />
Press or to select an<br />
option.<br />
12<br />
Press or to edit the<br />
option.
Level 1 Sub-level A Sub-level B<br />
Elevation „up / down“<br />
Press to edit the option.<br />
Azimuth „left / right“<br />
Press to edit the option.<br />
SKEW „LNB Grad“<br />
Press to edit the option.<br />
Save „store < > exit“<br />
Press to save the settings<br />
and return to sat mode<br />
(level 1).<br />
Tilt angle<br />
Press or to edit the data.<br />
Press to return to sub-level A.<br />
Pan angle<br />
Press or to edit the data.<br />
Press to return to sub-level A.<br />
LNB skew angle<br />
Press or to edit the data.<br />
Press to return to sub-level A.<br />
Using the arrow keys, adjust both system axes and the skew angle to the strongest<br />
receivable signal.<br />
After setting the an<strong>ten</strong>na to an optimal reception, select the „store“ function of<br />
option „store < > exit“ and press again to store this position for the current<br />
location.<br />
The stored position will then be resumed the next time the system is switched back<br />
on. Even if no satellite signal is received in this position, the automatic search will<br />
not be started if you have stored a manually set position before.<br />
If you wish to carry out an automatic search, start it via the general menu.<br />
If the „Manual search“ is cancelled by pressing , then the current position is not<br />
stored. The system returns to the default position.<br />
13
Main menu – Access to settings<br />
The „Main menu“ is a selectable option of the general menu. Press in the option<br />
Main menu to access the settings levels.<br />
These levels provide the options „Settings“ (General information)“ and „Satellite<br />
settings“. Please refer to the corresponding sections.<br />
Restarting the system<br />
As with any other computer-controlled device, it is possible for the software in<br />
your <strong>Vision</strong> system to “crash”. This may be caused by external infl uences, e.g. strong<br />
electromagnetic interference, or previously undetected software errors.<br />
If you think that your <strong>Vision</strong> system responds incorrectly or if it does not respond<br />
at all, then we recommend restarting the microprocessor. This can be done in two<br />
different ways and in any state of the system:<br />
If the fuse in the wiring harness is easily accessible, remove the fuse and<br />
re-install it after a few seconds.<br />
RESET function:<br />
To reset the <strong>Vision</strong> <strong>III</strong> control unit and the an<strong>ten</strong>na, press all four buttons<br />
(sat key , both arrow keys and the OK key ) simultaneously for<br />
approx. 2 seconds until the revision number (e.g. „Rev: EU 1.02 2“) is<br />
displayed.<br />
In both cases described above, your <strong>Vision</strong> system will perform an internal restart.<br />
If the system is open, it will now close. After restarting, the system is in rest mode<br />
and can be started in the usual way using button .<br />
14
Receiver control<br />
Access via level 1 „Main menu“ and and „Settings“<br />
Receiver control: With this menu option you can confi gure the optional settings<br />
for the system control by the receiver. By selecting the mode, you can determine if<br />
and how the system is started by the receiver.<br />
Mode 1 „Auto off“ (default setting)<br />
This mode is recommended for receivers that never switch off the LNB<br />
voltage, or if you wish that the receiver shall not control the an<strong>ten</strong>na.<br />
The system can then be switched on and off only at the Sat button of the<br />
control device.<br />
Mode 2 „Auto Stby“<br />
This mode is recommended if the LNB voltage is switched off when the<br />
receiver is in standby mode.<br />
The system can be switched on and off via the satellite receiver and at the<br />
Sat button of the control device.<br />
The receiver is switched on. Depending on the model, a receiver may need<br />
up to three minutes to boot. The an<strong>ten</strong>na will open only after this boot<br />
period to search for the satellite.<br />
The receiver is switched off: The an<strong>ten</strong>na closes and switches into standby<br />
mode.<br />
Mode 3 „Auto Sleep“<br />
This mode is recommended if the receiver does not provide voltage to the LNB<br />
when in standby mode.<br />
The system can be switched on and off via the satellite receiver and at the<br />
Sat button of the control device.<br />
The receiver is switched on: If the an<strong>ten</strong>na was closed, it will open and<br />
search for the satellite selected. If the an<strong>ten</strong>na was already open, it will<br />
remain in this position. If no signal is received in this position, the system<br />
will search for the satellite selected.<br />
The receiver is switched off: The system switches into standby mode with<br />
the an<strong>ten</strong>na remaining in its current position (sleep mode).<br />
In „Auto Sleep“ mode the an<strong>ten</strong>na can be closed by pressing the Sat button<br />
of the control device.<br />
15
Language<br />
Note! The vehicle‘s switched ignition voltage via terminal 15 has<br />
ultimate priority. When the ignition is switched on or if the engine<br />
is started, the an<strong>ten</strong>na will always close and can only be operated<br />
again after the ignition has been switched off.<br />
Selection of the language for the texts displayed on the control device.<br />
Dimmer<br />
Backlighting:<br />
The backlighting can be adjusted in 16 increments between off (dark) and maximum<br />
brightness.<br />
The lighting period cannot be adjusted, and the backlighting switches off after<br />
approx. 1.5 minutes to save power. The display remains active. The backlighting is<br />
switched on with every time a button is pressed or is ex<strong>ten</strong>ded by the fi xed period.<br />
Service info<br />
This menu item provides information that is relevant for servicing purposes.<br />
Revision no.<br />
System type<br />
Error state<br />
e.g. „E*1--------“<br />
16
AUX relay – switched terminal for TV set<br />
The <strong>Vision</strong> <strong>III</strong> control unit provides a switched terminal that can be used to switch<br />
the TV set‘s power supply on and off.<br />
This switched terminal is always closed when the <strong>Vision</strong> system is in operation and<br />
opens when the system is switched off (standby or sleep).<br />
The TV set is then always disconnected from the on-board electric system when the<br />
<strong>Vision</strong> system is not in operation, thereby saving standby power.<br />
Caution:<br />
The switched terminal does not represent a power supply! The TV set must be<br />
supplied with power via a separated cable. Never branch the power for the<br />
TV set off the <strong>Vision</strong> system‘s power supply! (Be sure to observe the<br />
installation instructions!)<br />
Some TV sets are fi tted with an integrated satellite receiver. If such a receiver<br />
supplies LNB voltage to control the an<strong>ten</strong>na (see receiver control mode 2 or<br />
mode 3), this device should not be connected to the switched terminal.<br />
Wiring example:<br />
Battery<br />
<strong>Vision</strong> <strong>III</strong><br />
Control<br />
unit<br />
17<br />
TV set
Search satellite<br />
Access via level 1 „Main menu“ and and „Satellite settings“<br />
See menu tree.<br />
Search satellite for automatic search<br />
In its supplied state, a search satellite for the automatic search is already confi gured<br />
in your <strong>Vision</strong> system‘s control unit.<br />
Select the satellite transmitting your preferred channel and that is receivable at<br />
your current location.<br />
To receive English-language programmes in Europe, „Astra II“ is recommended in<br />
most cases.<br />
Select „Astra 1“, „Hotbird“ or any other satellite (see satellite list).<br />
DiSEqC programming<br />
DiSEqC-ID settings<br />
General procedure:<br />
Press the OK button to change to the data selection level and use the<br />
arrow buttons to set the data. Press the OK button to confi rm.<br />
Then you can set further programming options or exit the data programming and<br />
return to the programming option.<br />
18
Satellite settings / DiSEqC: on / off<br />
Satellites are changed using the receiver‘s DiSEqC signals. The signals or the<br />
DiSEqC ID of the receiver must comply with the ID list saved in the control unit of<br />
your <strong>Vision</strong> system.<br />
16 satellites with a DiSEqC ID number are preset in your <strong>Vision</strong> system<br />
(see table).<br />
The DiSEqC function is active when the DiSEqC option has been enabled or if<br />
„DiSEqC“ is set to On with the <strong>Vision</strong> <strong>III</strong> control unit being on!<br />
No. Satellite name DiSEqC ID<br />
1 Astra 1 19.2° East 1<br />
2 Astra 2 28.2° East 5<br />
3 Astra 3 23.5° East 3<br />
4 HotBird 13.0° East 2<br />
5 Eutelsat 5 West 5.0° West 4<br />
6 Thor/Intel 10-02 1.0° West 7<br />
7 Astra 4 5.0° East 6<br />
8 Eutelsat 16 16.0° East 15<br />
9 Eutelsat 7 7.0° East 9<br />
10 Amos 2/3 4.0° West 13<br />
11 Hispasat 30.0° West 21<br />
12 Telstar 12 15.0° West 17<br />
13 Eutelsat 9 9.0° East 18<br />
14 Eutelsat 33 33.0° East 24<br />
15 Hellas Sat 2 39.0° East 10<br />
16 Türksat 2/3 42.0° East 11<br />
Here you can adopt the default settings of the <strong>Vision</strong> system into your satellite<br />
receiver. Please refer to the manual of your receiver.<br />
Important:<br />
Further DiSEqC functions (DiSEqC V3-ID, DiSEqC Rec-ID, DiSEqC Data) are only<br />
accessible if „DiSEqC: on/off“ is set to „on“ !<br />
19
Satellite settings / DiSEqC V3-ID<br />
This function allows you to display and edit a DiSEqC ID number from the list stored<br />
in the <strong>Vision</strong> system‘s DiSEqC ID list.<br />
Select a satellite and press the OK button to confi rm. The DiSEqC ID number<br />
is displayed. At this point you can set the DiSEqC ID number that your receiver is<br />
sending for this satellite.<br />
Satellite settings / DiSEqC Rec-ID<br />
Each time a programme is changed, a DiSEqC-capable receiver sends a unique DiSEqC<br />
ID number assigned to the satellite transmitting this programme.<br />
You can view the DiSEqC ID sent by the receiver if you enable the function „DiSEqC<br />
Rec-ID“ by pressing the OK button .<br />
Now select at the receiver a programme transmitted by the specifi ed satellite. After<br />
a short delay, this satellite‘s DiSEqC ID will be displayed at the control device.<br />
Now you must assign this number to the same satellite in the <strong>Vision</strong> system.<br />
Program or edit this DiSEqC ID number as described under „Satellite settings / DiSEqC<br />
V3-ID“.<br />
Satellite settings / DiSEqC Data<br />
These data are displayed after the system is switched on by pressing the OK button<br />
and after the receiver has sent the DiSEqC signal to the <strong>Vision</strong> system.<br />
The information is actually in<strong>ten</strong>ded for professional users. It represents a complete<br />
DiSEqC-ID transfer protocol and is displayed with four data bytes, allowing the<br />
identifi cation of any deviations.<br />
20
What is DiSEqC?<br />
The increasing number of TV satellites gave rise to the demand of being able to<br />
receive channels from different satellites.<br />
To facilitate the switching between different satellites, the DiSEqC system has been<br />
developed. This system is incorporated in the receiver and generates a switching<br />
signal that allows the user to view channels of several satellites by simply changing<br />
the TV channel.<br />
The system was initially designed for permanently installed home systems. In such<br />
installations, the individual reception units (satellite dishes) were connected to a<br />
DiSEqC-capable multi-switch (located under the building roof for obvious reasons)<br />
to which the satellite receiver was connected as well.<br />
When the receiver sends a DiSEqC signal to the multi-switch, the switch connects<br />
the receiver to the system aimed at the respective satellite.<br />
The DiSEqC signals are standardized and are generated by almost all state-of-theart<br />
(DVB-S) satellite receivers.<br />
The <strong>Vision</strong> system uses this DiSEqC signal to automatically move the an<strong>ten</strong>na into<br />
anyone of the up to 16 preset satellite positions. Please mind that the initial confi<br />
guration of a DiSEqC system is relatively complex and can be a challenge even to<br />
experienced users.<br />
When in doubt, have the system confi gured by a qualifi ed expert. The system will of<br />
course only function properly if the preset satellites are actually receivable at your<br />
current location.<br />
* DiSEqC (Digital Satellite Equipment Control) is a registered trademark of the<br />
satellite operator EUTELSAT.<br />
21
Notes on the protection of the environment<br />
At the end of its lifecycle, this product must not be disposed of<br />
with your normal waste, but instead must be returned to a recycling<br />
facility for electric and electronic devices.<br />
This is indicated by the symbol on the product, the operating<br />
manual or the packaging.<br />
The materials can be reused in accordance with their identifi cation. By reusing or<br />
recycling old equipment or making use of it in other ways you are making an important<br />
contribution to protecting our environment.<br />
Please contact your local council to fi nd out where your nearest disposal facility is.<br />
EC End-of-Life Vehicle Directive<br />
The an<strong>ten</strong>na system is certifi ed and in<strong>ten</strong>ded for use as an accessory of a motor<br />
vehicle. The system may be disposed of together with the vehicle in accordance<br />
with the End-of-Life Vehicle Directive ELV, 2000/53/EC. The an<strong>ten</strong>na system does<br />
not contain any materials rated as hazardous to the environment according to the<br />
directive.<br />
Contact & Service<br />
If you have any questions about using your <strong>Vision</strong> system, please feel free to call us:<br />
Telephone: +49 (0) 72 37 / 48 55– 0 or send an e-mail to: info@<strong>ten</strong>-haaft.de<br />
Offi ce hours: Monday to Friday from 08 a.m. – 12 p.m. and from 01 p.m. – 04.30 p.m.<br />
We hope you get a lot of enjoyment out of your <strong>Vision</strong> system.<br />
<strong>ten</strong> <strong>Haaft</strong> <strong>GmbH</strong><br />
22
<strong>ten</strong> <strong>Haaft</strong> <strong>GmbH</strong><br />
Oberer Strietweg 8<br />
75245 Neulingen-Göbrichen<br />
GERMANY<br />
Telephone + 49 (0) 72 37 / 48 55– 0<br />
Telefax + 49 (0) 72 37 / 48 55– 50<br />
E-mail: info@<strong>ten</strong>-haaft.com<br />
Office hours:<br />
Monday to Friday 8:00 a.m. – 12:00 a.m.<br />
1:00 p.m. – 4:30 p.m.<br />
www.<strong>ten</strong>-haaft.com<br />
18


