I, Zombie - Two Hour Wargames
I, Zombie - Two Hour Wargames
I, Zombie - Two Hour Wargames

You also want an ePaper? Increase the reach of your titles
YUMPU automatically turns print PDFs into web optimized ePapers that Google loves.
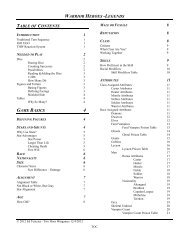
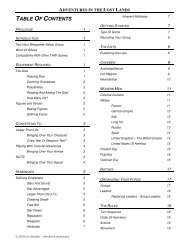
TABLE OF CONTENTS<br />
Prologue 1<br />
Introduction 1<br />
The 5 "W"s 1<br />
Who 1<br />
What 1<br />
Where 2<br />
When 2<br />
Why 2<br />
What's Inside? 2<br />
Words of Advice 2<br />
Rule Changes 2<br />
Alternative Stars 2<br />
New Fast Move 2<br />
Personalized Reaction Tests 2<br />
Modified In Sight Test 3<br />
Drawing Down 3<br />
No LOS Draw Downs 4<br />
Getting the Drop on the Opponent 4<br />
Received Fire 4<br />
Cover or Concealment 5<br />
Cover In Woods and Buildings 5<br />
Modified Retire 5<br />
Vehicles 5<br />
Characters and Vehicles 5<br />
Movement 5<br />
On The Table Movement 6<br />
Reversing Direction 6<br />
Turning 6<br />
Idling 6<br />
Encumbrance 6<br />
Consequences of Greed 6<br />
Full Pack Jack 6<br />
Vehicle Encumbrance 6<br />
Horse Encumbrance 7<br />
Shopping Cart 7<br />
But Wait, There's More! 7<br />
Other Stuff 7<br />
New Rules 7<br />
Phobias & Quirks 7<br />
Using Phobias & Quirks 7<br />
How Do You Get Them? 8<br />
Phobias & Quirks Table 8<br />
Phobias 8<br />
Social Quirks 10<br />
Personality Quirks 11<br />
Technical Quirks 12<br />
General Quirks 13<br />
Panic Attacks 14<br />
© 2010 ED TEIXEIRA – TWO HOUR WARGAMES<br />
I, ZOMBIE<br />
TOC<br />
Motivation 15<br />
Fame & Fortune 15<br />
Words 15<br />
Wealth 15<br />
Deeds 15<br />
Using Fame & Fortune Points 16<br />
Zero FFP 16<br />
Buildings Expanded 16<br />
Getting Started 17<br />
Changeable Floor Plan 17<br />
Laying Out the Buildings 17<br />
Choose the Type of Building 17<br />
Layout the Grid 17<br />
Label the Sections 18<br />
Place Exterior Access Points 18<br />
Place Windows 18<br />
Place Interior Access Points 18<br />
Populate the Building 19<br />
Second Stories 19<br />
Smaller & Larger Buildings 20<br />
Joined Sections 20<br />
Figures Inside Buildings 21<br />
Shooting Inside Buildings 21<br />
Moving Inside Buildings 21<br />
Moving Through Access Points 21<br />
Sample Battle in a Building 22<br />
Floor Plans 25<br />
Apartment 25<br />
Bar 25<br />
Diner 25<br />
Gas Station 25<br />
"No-Tell" Motel 26<br />
Store 26<br />
Safe Houses 26<br />
Parting Shot 28<br />
Bicycles 28<br />
Boats 28<br />
Groups 28<br />
Power Boats 28<br />
Types of Boats 29<br />
Defining the Boat 29<br />
Movement 29<br />
Casting Off and Mooring 29<br />
Drifting 29<br />
Starting and Stopping 29<br />
Reversing Direction 29<br />
Turning 30<br />
Getting In And Out Of Boats 30<br />
Boats in Combat 30<br />
Running Over Swimmers 30<br />
Ramming Boats 30<br />
Boat Bashing 31<br />
Shooting and Boats 31<br />
Shooting At Boats 32<br />
Attracting <strong>Zombie</strong>s 32<br />
Swimming 32<br />
Horses 33<br />
Generating Horse Rep 33
Movement 33<br />
Fast Move 33<br />
Mounting and Dismounting 33<br />
Loose or Tied 33<br />
Skittish 33<br />
Mounted Tests 34<br />
Are You A Horseman? 34<br />
Damage to Horses 34<br />
<strong>Two</strong> Riders 34<br />
Mounted Combat 34<br />
Charging 34<br />
Shooting When Mounted 35<br />
Mounted Figures as Targets 35<br />
Feeding the Horse 35<br />
Breakage 35<br />
Lack of Sleep 35<br />
Meet & Greet Table 36<br />
Barter 36<br />
Lazarus Project 36<br />
Side Effects of the Lazarus Agent 36<br />
Ragers 36<br />
Defining Ragers 37<br />
Reputation 37<br />
Weapons 37<br />
How Ragers Appear 37<br />
Placing the Ragers 37<br />
Ragers One Big Family 37<br />
Actions 38<br />
Raging 38<br />
Movement 38<br />
Reactions 39<br />
Shooting 39<br />
Line Of Sight 39<br />
Determining Damage 39<br />
Auto-Kill 39<br />
Melee 39<br />
Hand-To - Hand Weapons 39<br />
How to Melee 39<br />
“Harry, Chill Man!” 40<br />
After The Battle 40<br />
Using Ragers 40<br />
Smart <strong>Zombie</strong>s 41<br />
Defining Smarties 41<br />
Reputation 41<br />
Weapons 41<br />
How Smart <strong>Zombie</strong>s Appear 41<br />
Placing Smart <strong>Zombie</strong>s 41<br />
Shaking the Tree 41<br />
<strong>Zombie</strong> Feasting 41<br />
Actions 41<br />
Movement 41<br />
Shooting 42<br />
Reloading 42<br />
Hand-To - Hand Weapons 42<br />
How to Melee 42<br />
Damage 42<br />
After The Battle 42<br />
© 2010 ED TEIXEIRA – TWO HOUR WARGAMES<br />
I, ZOMBIE<br />
TOC<br />
Using Smart <strong>Zombie</strong>s 43<br />
Worms, BA Worms 43<br />
Defining BA Worms 43<br />
Reputation 43<br />
Weapons 43<br />
How BA Worms Appear 43<br />
Placing the BA Worm 44<br />
BA Worm Activation 44<br />
Actions 44<br />
Movement 44<br />
Reactions 45<br />
Shooting 45<br />
Line Of Sight 45<br />
Determining Damage 45<br />
Melee 45<br />
How to Melee 45<br />
BA, BA, Go Away! 46<br />
Outrunning the BA Worm 46<br />
After The Battle 47<br />
Using BA Worms 47<br />
PSY 47<br />
How Prevalent is Psy 47<br />
How Accepted is Psy 47<br />
Wanted Psychics - Dead or Alive? 47<br />
Where Found 47<br />
Playing Psychics 47<br />
Ganger, Survivor, or What? 47<br />
Psy Energy 48<br />
Using Psy-Energy 48<br />
Limits of Psy-Energy 48<br />
The Psy-Gamma Task 48<br />
Performing a Psy Gamma Task 48<br />
Voluntary Targets 48<br />
Empathy 49<br />
Establishing the Connection 49<br />
Probing 49<br />
Block Out 49<br />
Seek 49<br />
Suggestion 49<br />
Closing the Link 49<br />
Psy - Gamma: Putting It All Together 50<br />
The Psy-Kappa Task 50<br />
Performing a Psy Kappa Task 50<br />
Combining Tasks 51<br />
Push Object 51<br />
Manipulate 51<br />
Levitate 51<br />
Fun with Levitated Objects 51<br />
Force Task 51<br />
Spontaneous Combustion 51<br />
Psy Blast 52<br />
Spent Test 52<br />
Performing Psy-Tasks in Reaction 52<br />
Premonition 52<br />
Getting Noticed by Others 52<br />
Encounters 53<br />
The 5 P's 53
Setting Up the Encounter 53<br />
Voluntary or Involuntary 53<br />
Types of Encounters 53<br />
Determining the Area 54<br />
Setting Up Terrain 54<br />
Table Size 54<br />
The 3X3 Table 54<br />
The 4x6 Table 54<br />
Dividing the Table 54<br />
Encounter Area and Terrain 55<br />
Placing the Terrain 55<br />
Roads & Streets 56<br />
Determine the Day Part 56<br />
Characters in the Encounter 56<br />
PEFs 56<br />
Generating PEFs 56<br />
Optional PEF Generation 57<br />
PEF Movement 57<br />
Resolving PEFs 57<br />
What Happens Now? 58<br />
Encounter Awareness Test 58<br />
Taking the Encounter Awareness Test 58<br />
How Many NPCs 59<br />
What Are They? 59<br />
Special Instructions 59<br />
Deploying Characters 59<br />
Placing NPCs 59<br />
Placing NPCs Inside Buildings 60<br />
Lacking Sleep 60<br />
Begin the Game 60<br />
Hunting 60<br />
Hunting Limitation 60<br />
Are You A Hunter? 60<br />
What's Out There? 61<br />
Explaining the Available Game 61<br />
Tracking the Prey 61<br />
Unforeseen Circumstances 62<br />
Attracting <strong>Zombie</strong>s 63<br />
The Campaign 63<br />
Character Journal 63<br />
Campaign Area 64<br />
Where Do I Start? 64<br />
Getting Around the Area 64<br />
Random Road Encounters 65<br />
Destination Encounters 69<br />
Buildings - Occupied or Not? 69<br />
Placing Occupants 70<br />
Knock, Knock, Who's There? 70<br />
Looting the Landscape 70<br />
Number of Encounters 71<br />
Involuntary Encounters 71<br />
Lake Havasu City 72<br />
Background: 72<br />
Location & Geography: 72<br />
Size: 72<br />
Land: 72<br />
Sections: 72<br />
© 2010 ED TEIXEIRA – TWO HOUR WARGAMES<br />
I, ZOMBIE<br />
TOC<br />
Water: 73<br />
Terrain: 73<br />
Climate: 73<br />
Power: 73<br />
People: 73<br />
Population: 73<br />
Language: 73<br />
Government: 73<br />
Legal System: 73<br />
Political Power: 73<br />
Weapons Policy: 73<br />
Papers 73<br />
Holstered Weapon Policy: 74<br />
Economy: 74<br />
Bartering: 74<br />
Communication: 74<br />
Transportation: 74<br />
River Borne: 74<br />
Militia: 74<br />
Patrols: 74<br />
<strong>Zombie</strong> Threat: 75<br />
Crime and Punishment: 75<br />
NPCs 76<br />
Havasu Area NPCs 76<br />
Governor Newness 76<br />
Police 76<br />
Hanger ons 76<br />
Residents 76<br />
Travelers 77<br />
Cassandra 77<br />
Havasu Area People Table 77<br />
Havasu People Lists 78<br />
Police 78<br />
Residents 78<br />
Travelers 79<br />
NPC Expansion 79<br />
NPC Movement & Actions 79<br />
Why the NPC M&A Table 79<br />
Using the NPC M&A Table 79<br />
Checking By Groups - Before Shooting 80<br />
Checking By Groups - After Shooting 80<br />
Interacting With NPCs 80<br />
When to Interact 80<br />
How to Interact 81<br />
Joining Groups 81<br />
How Much Interaction 81<br />
I Got Your Back 81<br />
Party Favors 81<br />
Types of Party Favors 81<br />
Using Party Favors 81<br />
Consequences of Party Favors 82<br />
Drug Party Favors 82<br />
Extended Example 82
Havasu Encounters 86<br />
Coming and Going 86<br />
Chillin' 87<br />
Bartering 87<br />
Recruiting 88<br />
Residency 89<br />
Police 90<br />
Calling the Cops 90<br />
How Many Cops 90<br />
Getting Arrested 91<br />
Police Called In 91<br />
On the Spot 91<br />
To Cooperate or Not 91<br />
Run For It 92<br />
Jail Time 92<br />
Going Before the Judge 92<br />
Disturbing the Peace 92<br />
Brandishing a Weapon 92<br />
Endangerment 92<br />
Stealing 92<br />
Kidnapping 92<br />
Sedition 93<br />
Mayhem 93<br />
Treason 93<br />
Murder 93<br />
Multiple Charges 93<br />
Your Day in Court 93<br />
Sentencing 94<br />
The List 95<br />
Being a Fugitive 95<br />
Attempt to Escape 95<br />
Chase 95<br />
The Show 96<br />
<strong>Zombie</strong> Wrangling 97<br />
<strong>Zombie</strong> Wranglers 97<br />
Finding <strong>Zombie</strong>s 97<br />
Capturing <strong>Zombie</strong>s 97<br />
Other Ways to Capture 97<br />
Transferring 98<br />
Capturing Ragers 98<br />
Selling <strong>Zombie</strong>s & Ragers 98<br />
Market Price 99<br />
The Zed Pits 99<br />
Pit Fighting - Zeds and Ragers 99<br />
How to Pit Fight Against Zeds or Ragers 100<br />
Pit Fighting - Humans 101<br />
<strong>Zombie</strong> Racing 102<br />
Rock Stars of the Apocalypse - Baiters 102<br />
<strong>Zombie</strong> Racing – How To 102<br />
Setting Up to Play 102<br />
Choosing the Zeds and Baiters 102<br />
Set the Odds 102<br />
Baiter Pay Day 102<br />
The Track 103<br />
At The Start 103<br />
How a Race Is Run 103<br />
Contact! Jammy Dodgers 103<br />
Redirecting a Zed 104<br />
© 2010 ED TEIXEIRA – TWO HOUR WARGAMES<br />
I, ZOMBIE<br />
TOC<br />
What's On the Schedule Tonight 104<br />
Putting It All Together 105<br />
Final Thoughts 110<br />
After The Horsemen 110<br />
Character Journal 111<br />
Psy Tables 112<br />
All Things <strong>Zombie</strong> Table 115<br />
Encounter Awareness Table 115<br />
Pit Fighter Table 116<br />
Campaign Turn Sequence 116<br />
NPC Interaction Table 117<br />
Draw Down Table 119<br />
Havasu Barter Table 120<br />
NPC Movement & Action Table 121<br />
Special Thanks To:<br />
Paul Kime for the cover artwork<br />
Rod Campbell for editing<br />
The THW Yahoo group for the great ideas they<br />
keep coming up with.<br />
Lil for keeping it real!