
Create successful ePaper yourself
Turn your PDF publications into a flip-book with our unique Google optimized e-Paper software.
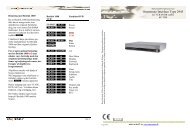
Beo4 and Beolink 1000 are remote control terminals from Bang & Olufsen. <strong>OneRemote</strong> supplies interface modules<br />
that allow third party equipment to be operated via a Bang & Olufsen remote control system.<br />
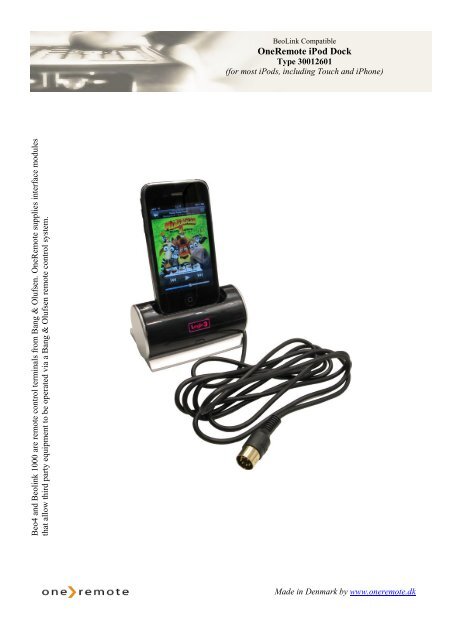
BeoLink Compatible<br />
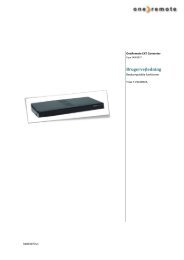
<strong>OneRemote</strong> <strong>iPod</strong> <strong>Dock</strong><br />
Type 30012601<br />
(for most <strong>iPod</strong>s, including Touch and iPhone)<br />
Made in Denmark by www.oneremote.dk
Control with Beo4 or Beo5<br />
oo Select<br />
o A<br />
o S<br />
Menu<br />
Menu fw<br />
A/ S Rew/ FF*1<br />
D / F Up/ down<br />
E/ R<br />
Menu – select *2<br />
q Play/ pause<br />
o Play/ pause<br />
(Press for 2 secs)*3<br />
By selecting the correct source on the Bang &<br />
Olufsen remotecontrol terminal, the <strong>OneRemote</strong><br />
<strong>iPod</strong> <strong>Dock</strong> is automatically turned on.<br />
Note !<br />
When your <strong>iPod</strong> is inserted into the dock,<br />
it is operable after exchanging data with<br />
the dock within 10-15 secs.<br />
*1<br />
Prev./next track when playing music.<br />
*2<br />
The coloured button functionality is always available<br />
in the Direct Mode, but not in the CableLink Mode in<br />
all Bang & Olufsen equipment.<br />
*3<br />
This functionality is only available with Beo4 with<br />
SW 3.0 or higher.<br />
2<br />
Control with Beolink1000<br />
pp Select<br />
p Z Menu<br />
p X<br />
Menu fw<br />
Z/ X Rew/ FF*1<br />
C/ V Up/ down<br />
q Play/ pause
List of Contents<br />
Getting Started .......................................................................... page 4<br />
Direct Mode or CableLink Mode .............................................. page 4<br />
Factory Settings ........................................................................ page 4<br />
Installation ................................................................................ page 5<br />
Examples of Bang & Olufsen Set Ups ..................................... page 5<br />
Setting Up the <strong>iPod</strong> <strong>Dock</strong> ......................................................... page 6<br />
Option Programming ................................................................ page 6<br />
Source and Option Selection .................................................... page 7<br />
Setting Up the <strong>iPod</strong> <strong>Dock</strong> ......................................................... page 12<br />
Setting Up for Video Output .................................................... page 12<br />
Connecting as an AV Source .................................................... page 13<br />
Specifications ........................................................................... page 13<br />
3
Getting Started<br />
This <strong>OneRemote</strong> <strong>iPod</strong> <strong>Dock</strong> has been re-designed for operation in a Bang & Olufsen<br />
remote control system allowing full control with a Bang & Olufsen remote control<br />
terminal either directly or via connection to Bang & Olufsen equipment.<br />
Thus the dock is BeoLink compatible.<br />
With an <strong>iPod</strong> or iPhone inserted in the dock it can be operated and charged at the same<br />
time. When the dock is connected to a Bang & Olufsen audio- or videosystem the dock’s<br />
<strong>iPod</strong> and the audio-videosystem may be controlled with the same remote control, Beolink<br />
1000, Beo4 or Beo5.<br />
If the Bang & Olufsen system comprises one or more linkrooms in a BeoLink System<br />
sound may be distributed to these rooms, and in some cases – see below – the docked<br />
device might even be controlled from there.<br />
Connect the <strong>OneRemote</strong> <strong>iPod</strong> <strong>Dock</strong> to a Bang & Olufsen audio- or videosystem as any<br />
vacant audio- or AV input source. Setting up Bang & Olufsen systems may vary, and this<br />
user guide describes how.<br />
Direct Mode or CableLink Mode<br />
The <strong>OneRemote</strong> <strong>iPod</strong> <strong>Dock</strong> is always connected to Bang & Olufsen equipment with the 7pin<br />
DIN-cable, but through option programming it may be controlled as follows:<br />
1. Via the dock’s built in IR-receiver,”Direct Mode”<br />
Direct Mode is used when connection to an input with control data is not<br />
possible.<br />
2. Via the cable connected Bang & Olufsen equipment,”CableLink Mode”<br />
CableLink Mode is used when connection to an input with control data is<br />
possible.<br />
Factory Settings<br />
The factory setting is for control is “Direct Mode”.<br />
The factory setting for input socket and selected source is:<br />
Beo4 og Beo5 N.MUSIC, A.MEM2 or.TAPE2<br />
Beolink 1000 SHIFT A.TAPE<br />
If the <strong>OneRemote</strong> <strong>iPod</strong> <strong>Dock</strong> is connected to a different input, the option should be<br />
programmed accordingly. See page 6 for Option Programming<br />
4
Installation<br />
________________________________________________________________________<br />
Select option and complete option programming, if required<br />
Connect the <strong>OneRemote</strong> <strong>iPod</strong> <strong>Dock</strong> to the correct input socket<br />
Connect power supply to the dock<br />
Select the source on the remote control terminal<br />
By selecting the correct source on the Bang & Olufsen remote<br />
control terminal, the <strong>OneRemote</strong> <strong>iPod</strong> <strong>Dock</strong> is automatically turned on.<br />
Examples of Bang & Olufsen Set Ups<br />
Set Up for Direct Control<br />
The Bang & Olufsen remote terminal controls both the<br />
<strong>OneRemote</strong> <strong>iPod</strong> <strong>Dock</strong> and the Bang & Olufsen audio<br />
equipment.<br />
When selecting the dock connected source with the Bang<br />
& Olufsen remote the corresponding input socket is<br />
opened, and the dock is turned on simultaneously.<br />
The docked <strong>iPod</strong> may be listened to in any connected<br />
linkroom, but not controlled from there.<br />
Set Up for CableLink Control<br />
The <strong>OneRemote</strong> <strong>iPod</strong> <strong>Dock</strong> is connected as an AV source<br />
to an AV input in a Bang & Olufsen TV.<br />
When selecting the dock connected source with the Bang<br />
& Olufsen remote terminal the corresponding AV input<br />
socket is opened, control data transmitted via the<br />
connection cable and the dock is turned on.<br />
A <strong>OneRemote</strong> <strong>iPod</strong> <strong>Dock</strong> connected via CableLink may be<br />
controlled from any connected linkroom.<br />
Set Up for CableLink Control.<br />
The Bang & Olufsen remote terminal controls the <strong>OneRemote</strong><br />
<strong>iPod</strong> <strong>Dock</strong> via the Bang & Olufsen audio equipment that is<br />
transmitting control data via the 7-pin DIN connection cable.<br />
When selecting the dock connected source with the Bang &<br />
Olufsen remote terminal the corresponding input socket is<br />
opened, control data transmitted via the connection cable and<br />
the dock is turned on.<br />
Control data is only available via some input sockets in<br />
various Bang & Olufsen audio equipment.<br />
A <strong>OneRemote</strong> <strong>iPod</strong> <strong>Dock</strong> connected via CableLink may be<br />
controlled from any connected linkroom.<br />
Set Up for Direct Control<br />
A <strong>OneRemote</strong> <strong>iPod</strong> <strong>Dock</strong> may be connected to any TV, and<br />
with a dock in each room individual program selection is<br />
possible- and every docked <strong>iPod</strong> is always fully charged.<br />
5
Setting up the <strong>OneRemote</strong> <strong>iPod</strong> <strong>Dock</strong> for the Direct Mode<br />
- using a Bang & Olufsen Remote Control<br />
In the Direct Mode the Bang & Olufsen<br />
remote control signal controls both the<br />
<strong>OneRemote</strong> <strong>iPod</strong> <strong>Dock</strong> and the Bang &<br />
Olufsen equipment at the same time.<br />
Thus the dock must be programmed to<br />
respond to the correct signals.<br />
6<br />
In the Direct Mode the docked <strong>iPod</strong> may be listened<br />
to from any linkroom, but can not be controlled from<br />
there.<br />
The Direct Mode will work in any setup, but the dock’s IR-receiver is NOT plasma-safe. If there is a plasma<br />
panel in the room, an external plasma-safe IR-receiver has to be used.<br />
Option Programming<br />
Option programming is required only when installing dock. The programming is<br />
performed with a Bang & Olufsen remote control terminal by pressing a 5 button<br />
sequence within 4 seconds after powering up the dock.<br />
When powering up the dock the red control lights up for 4 seconds, and the programming<br />
has to take place before the control turns blue. If not successful the operation may be<br />
repeated.<br />
Programming starts by pressing LIGHT and ends by pressing STOP. All options have 3<br />
digits to be entered in between.<br />
Option 106 is entered like this:<br />
LIGHT – 1 – 0 – 6 – STOP<br />
Note:<br />
Ipod docks manufactured before aug. 2011 was programmed with a software version earlier than 8.<br />
These docks must be option programmed using STOP – 1 – 0 – 6 –Record.
Source & Option Selection<br />
The following tables show the available input sockets in various Bang & Olufsen audio<br />
and video products, how to select them using a remote control terminal and what the<br />
corresponding option program of the One Remote <strong>iPod</strong> <strong>Dock</strong> should be.<br />
The <strong>OneRemote</strong> <strong>iPod</strong> <strong>Dock</strong> has to be programmed with the right option to operate<br />
correctly. See page 5 and 6.<br />
Input Socket Selected Source Direct CableLink Remarks<br />
Option Option<br />
BeoCenter 2 AUX-IN A.AUX<br />
SHIFT RADIO<br />
100 - *2<br />
Input Socket Selected Source Direct CableLink Remarks<br />
Option Option<br />
BeoSound 4 AUX A.AUX<br />
SHIFT RADIO<br />
100 - *2<br />
Input Socket Selected Source Direct CableLink Remarks<br />
Option Option<br />
BeoSound 1 AUX A.AUX<br />
SHIFT RADIO<br />
100 - *3<br />
AUX A.MEM,<br />
ATAPE<br />
102 - *3<br />
Input Socket Selected Source Direct CableLink Remarks<br />
Option Option<br />
BeoSound Century AUX N.MUSIC<br />
A.MEM2<br />
SHIFT ATAPE<br />
103 - *3<br />
AUX N.RADIO<br />
PHONO<br />
106 - *3<br />
AUX A.AUX<br />
SHIFT RADIO<br />
100 - *3<br />
*1 Input with control data via cable<br />
*2 RCA in/ out<br />
*3 DIN in/ out<br />
*4 No numeric data via cable. The Direct Mode option is recommended as an alternative.<br />
7
Input Socket Selected Source Direct CableLink Remarks<br />
Option Option<br />
BeoSound 9000 AUX A.AUX<br />
SHIFT RADIO<br />
100 - *3<br />
AUX A.MEM<br />
ATAPE<br />
102 - *3<br />
BeoSound 3000<br />
BeoSound 3200<br />
BeoSound Ouverture<br />
Input Socket Selected Source Direct CableLink Remarks<br />
Option Option<br />
AUX A.AUX<br />
SHIFT RADIO<br />
100 - *3<br />
AUX A.MEM<br />
ATAPE<br />
102 - *3<br />
AUX N.MUSIC<br />
A.MEM2<br />
SHIFT ATAPE<br />
103 - *3<br />
AUX N.RADIO<br />
PHONO<br />
106 - *3<br />
Input Socket Selected Source Direct CableLink Remarks<br />
Option Option<br />
AUX N.MUSIC<br />
A.MEM2<br />
SHIFT ATAPE<br />
103 302 *1 *4<br />
AUX N.RADIO<br />
PHONO<br />
106 206 *1 *4<br />
AUX A.AUX<br />
SHIFT RADIO<br />
100 - *1 *4<br />
Input Socket Selected Source Direct CableLink Remarks<br />
Option Option<br />
BeoSystem 2500 AUX A.AUX<br />
SHIFT RADIO<br />
100 - *1 *4<br />
AUX N.MUSIC<br />
A.MEM2<br />
SHIFT ATAPE<br />
103 302 *1 *4<br />
AUX N.RADIO<br />
PHONO<br />
106 206 *1 *4<br />
*1 Input with control data via cable<br />
*2 RCA in/ out<br />
*3 DIN in/ out<br />
*4 No numeric data via cable. The Direct Mode option is recommended as an alternative.<br />
8
Input Socket Selected Source Direct CableLink Remarks<br />
Option Option<br />
BeoCenter 2300 AUX A.AUX<br />
SHIFT RADIO<br />
100 - *1 *4<br />
AUX A.MEM<br />
ATAPE<br />
102 302 *1 *4<br />
AUX N.MUSIC<br />
A.MEM2<br />
SHIFT ATAPE<br />
103 302 *1 *4<br />
AUX N.RADIO<br />
PHONO<br />
106 206 *1 *4<br />
AUX V.TAPE<br />
V.MEM<br />
110 - *5<br />
AUX DTV – SAT 116 - *5<br />
AUX DVD 114 - *5<br />
BeoMaster 3500<br />
BeoMaster 4500<br />
BeoMaster 6500<br />
BeoMaster 7000<br />
BeoMaster 3300<br />
BeoMaster 5500<br />
Input Socket Selected Source Direct CableLink Remarks<br />
Option Option<br />
TP1 A.MEM<br />
ATAPE<br />
102 302 *1<br />
CD CD 104 204 *1<br />
TP2 N.MUSIC<br />
A.MEM2<br />
SHIFT ATAPE<br />
103 302 *1<br />
PHONO N.RADIO<br />
PHONO<br />
106 206 *1<br />
AUX A.AUX 100 -<br />
Input Socket Selected Source Direct CableLink Remarks<br />
Option Option<br />
TP A.MEM<br />
A.TAPE<br />
102 302 *1 *4<br />
CD CD 104 204 *1 *4<br />
*1 Input with control data via cable<br />
*2 RCA in/ out<br />
*3 DIN in/ out<br />
*4 No numeric data via cable. The Direct Mode option is recommended as an alternative.<br />
*5 Audiomaster in option2<br />
9
BeoCenter 8000<br />
BeoCenter 8500<br />
BeoCenter 9000<br />
BeoCenter 9500<br />
BeoCenter 9300<br />
Input Socket Selected Source Direct CableLink Remarks<br />
Option Option<br />
TAPE2 N.MUSIC<br />
A.MEM2<br />
SHIFT A.TAPE<br />
103 302 *1 *4<br />
Input Socket Selected Source Direct CableLink Remarks<br />
Option Option<br />
TAPE2 N.MUSIC<br />
A.MEM2<br />
SHIFT A.TAPE<br />
103 302 *1 *4<br />
AUX A.AUX 100 -<br />
Input Socket Selected Source Direct CableLink Remarks<br />
Option Option<br />
PHONO N.RADIO<br />
PHONO<br />
106 206 *1 *4<br />
TAPE2 N.MUSIC<br />
A.MEM2<br />
SHIFT A.TAPE<br />
103 302 *1 *4<br />
AUX A.AUX 100 -<br />
*1 Input with control data via cable<br />
*2 RCA in/ out<br />
*3 DIN in/ out<br />
*4 No numeric data via cable. The Direct Mode option is recommended as an alternative.<br />
10
LX 2502<br />
LX 2802<br />
L4500<br />
LS 4500<br />
LX 4500<br />
L5000<br />
LS 5000<br />
LX 5000<br />
L5500<br />
LS 5500<br />
LX 5500<br />
L6000<br />
LS 6000<br />
LX 6000<br />
LE 6000<br />
MX 1500<br />
MX 3000<br />
MX 3500<br />
MX 4000<br />
MX 4002<br />
MX 4500<br />
MX 5000<br />
MX 5500<br />
ME 6000<br />
MS 6000<br />
MX 6000<br />
MX 7000<br />
MX 4200<br />
MX 8000<br />
AVANT all models<br />
All newer TV-models may<br />
be connected via the AV<br />
input sockets<br />
too……………<br />
Input<br />
Socket<br />
Scart<br />
AV1<br />
AV2<br />
….<br />
Not decoder<br />
Socket.<br />
Selected Source Direct CableLink Remarks<br />
Option Option<br />
V.MEM<br />
V.TAPE<br />
110 410 *9<br />
V.MEM2<br />
V.TAPE2<br />
SHIFT V.TAPE<br />
110 410 *9<br />
DTV<br />
SAT<br />
116 416 *9<br />
V.AUX 112 412 *9<br />
DVD 114 414 *9<br />
*9 connection to an AV input on the TV using the <strong>OneRemote</strong> Adaptor, type 39207496.<br />
Check the TV user guide for setting up the AV inputs.<br />
11
Setting Up the <strong>OneRemote</strong> <strong>iPod</strong> <strong>Dock</strong><br />
Setting Up for Video Output<br />
12<br />
The attached 7-pin DINcable<br />
includes audio and<br />
control data connections<br />
allowing for control of the<br />
<strong>iPod</strong> via Bang & Olufsen<br />
audio or video equipment.<br />
Insert the appropriate cradle<br />
(supplied with your iPhone/<br />
<strong>iPod</strong>) into the dock.<br />
NOTE for iPhone 3G the<br />
cradle is supplied with the<br />
dock<br />
iPhone/ iPhone3G, <strong>iPod</strong> Touch, Touch 2G, <strong>iPod</strong> Classic, <strong>iPod</strong> Nano 3G/ 4G and <strong>iPod</strong> 5G<br />
have video output and are able to show videos on a screen.<br />
Appropriate but not included cables have to be used to show video signals.<br />
This <strong>OneRemote</strong> <strong>iPod</strong> <strong>Dock</strong> has both RGB and Composite Video outputs.<br />
<strong>OneRemote</strong> Adaptor, type 39207495
Connecting as an AV (scart) Source<br />
Connect the dock as an AV source to any Bang & Olufsen TV, using a <strong>OneRemote</strong><br />
Adaptor, type 39207495.<br />
The dock must be option programmed to the CableLink mode (page 6) and the source<br />
must be programmed, i.e. V.MEM or V.AUX (page 5).<br />
Specifications<br />
Video Out Resolution: 480 x 480 to 640 x 480 depending on <strong>iPod</strong> model.<br />
Provided Power Adaptor: 5VDC @ 650mA<br />
Sockets:<br />
USB mini: For sync function of the iPhone/ <strong>iPod</strong>.<br />
Attached 7-pin DIN-cable: 2 meter black, data & audio for Bang & Olufsen.<br />
Audio Output: For use with other equipment than Bang & Olufsen.<br />
C/V: TV Composite video out.<br />
Y/G, Pb/B, Pr/R: RGB Component video output.<br />
Video Output<br />
Compatible Devices: iPhone/ iPhone 3G: 640x480 pixels<br />
iPhone Touch/ Touch 2G: 640x480 pixels<br />
<strong>iPod</strong> Classic 640x480 pixels<br />
<strong>iPod</strong> Nano 3G/ 4G 640x840 pixels<br />
<strong>iPod</strong> 5G 480x480 pixels<br />
13
2601u8uk<br />
16