AUTOMATIC WASHER - Whirlpool Corporation
AUTOMATIC WASHER - Whirlpool Corporation
AUTOMATIC WASHER - Whirlpool Corporation

Create successful ePaper yourself
Turn your PDF publications into a flip-book with our unique Google optimized e-Paper software.
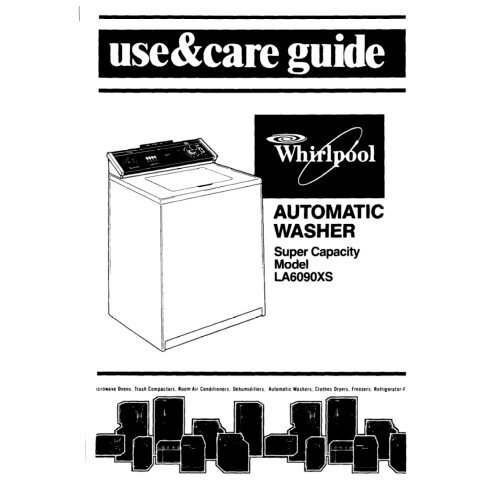
<strong>AUTOMATIC</strong><br />
<strong>WASHER</strong><br />
Super Capacity<br />
Model<br />
LA609OXS<br />
lcrowave Ovens. Trash Compactors, Room AM Conditioners. tlehum~d~fiers. Automatic Washers. Clothes Dryers, freezers. Relrlgerator-F
Contents Paae<br />
PARTS AND FEATURES 2<br />
IMPORTANT SAFETY<br />
INSTRUCTIONS. 3<br />
OPERATING INSTRUCTIONS.. 4<br />
Starting Your Washer 4<br />
What Happens in Each Cycle 6<br />
OTHER OPERATING<br />
INSTRUCTIONS.. 12<br />
EXTRA RINSE OPTION 12<br />
For a Rinse and Spin 12<br />
,61987 <strong>Whirlpool</strong> <strong>Corporation</strong><br />
Parts and features<br />
LOAD<br />
SIZE<br />
LAUNDRY<br />
INFORMATION<br />
CYCLE<br />
CONTROL<br />
For a Drain and Spin<br />
For a Soak or Pre-Wash<br />
Liquid Bleach Dispenser<br />
Fabric Softener Dispenser<br />
MAGIC CLEAN’” Lint Filter<br />
CARING FOR YOUR <strong>WASHER</strong><br />
Winterizing<br />
IF YOU NEED SERVICE OR<br />
ASSISTANCE .<br />
<strong>WASHER</strong> WARRANTY..<br />
EXTRA RINSE<br />
LIQUID FABRIC<br />
SOFlENER DISPENSER<br />
Page<br />
12<br />
13<br />
13<br />
14<br />
14<br />
15<br />
16<br />
:i<br />
MAGIC CLEAN @<br />
LINT FILTER<br />
(not shown]<br />
Remove the Consumer<br />
Buy Guide label. It will be<br />
easier to remove before the<br />
washer is used.<br />
You should wipe out the<br />
basket with a damp cloth<br />
before using to remove dust<br />
from storing or shipping.<br />
Copy your Model and Serial Numbers here<br />
When you need service or call with a<br />
question, have this information ready:<br />
1. Complete Model and Serial Numbers<br />
(from<br />
hinge].<br />
plate under the lid near the<br />
Model Number<br />
serio, Number<br />
2. Purchase date from sales slip.<br />
Copy this information in these spaces. PurchoseDate<br />
Keep this book, your”Laundry Guide” and<br />
sales slip in the Laundry Information<br />
Center.<br />
Service Company<br />
Phone Number<br />
Please complete and mail the Owner Registration Card furnished with<br />
this product.
Additional Safety Instructions and Your Responsibilities<br />
ALWAYS store detergent, laundry aids ALWAYS unplug the power supply<br />
and other materials in a cool, dry cord before attempting to service the<br />
place where children can’t reach washer.<br />
them- in a locked cabinet if possible. DO NOT machine wash glass fiber<br />
ALWAYS read and follow instructions materials. Small particles can stick to<br />
on packages of detergent and laun- fabrics washed in following loads<br />
dry aids - especially warnings and and cause skin irritation.<br />
precautions. You are personally responsible for<br />
HAZARDOUS FUMES can be formed if making sure that your washer:<br />
chlorine bleach is used in the same l is used only for jobs normally ex-<br />
wash as ammonia or acids such as petted of home automatic washers.<br />
vinegar or rust remover.<br />
l is not run by children or anyone un-<br />
able to operate it properly.<br />
3
Operating instructions<br />
Starting Your Washer<br />
Be sure to measure and add detergent, then place<br />
a sorted load in the washer before starting it.<br />
1 . Select a LOAD SIZE<br />
l Turn the knob to point at a setting<br />
that describes<br />
want to wash.<br />
the size of load you<br />
l Set the knob anywhere on or between<br />
EX SMALL (a few small items)<br />
and EX LARGE (a full load).<br />
l To change the water level after the<br />
washer has started to fill, turn the knob<br />
to RESET, then the desired water level.<br />
4<br />
LOAD SIZES AND WATER LEVELS<br />
For best cleaning results, the<br />
load must be able to move freely<br />
in the water. Too big a load or too<br />
little water can cause wear or 8<br />
tearing of load items.<br />
*Approximate<br />
fill with load.<br />
2 Select<br />
. WATER TEMPERATURES<br />
l Select wash and rinse water tem-<br />
peratures by pushing a button.<br />
l This drawing shows a warm wash<br />
(top temperature] and cold rinse<br />
(bottom temperature) selection.<br />
Recommended wash temperatures<br />
can be found in your “Laundry Guide:’<br />
CAUTION:<br />
DO NOT<br />
OVERLOAD <strong>WASHER</strong>.<br />
EX LARGE (21.7 gals./82.1 L)’<br />
MEDIUM (16.4 galsJ62.1 L)’<br />
EX SMALL (11.9 gals./450 L)’
3. Start the washer<br />
A. Push in the Control Knob and turn<br />
it to the right. It must be pushed in<br />
and turned only clockwise.<br />
C. Start the washer by pulling out<br />
the Control Knob. The washer will<br />
fill to the level you set with wash<br />
water of the selected temper-<br />
ature. After filling, the washer will<br />
agitate for the selected number<br />
of minutes.<br />
B. Stop on a number in the cycle<br />
you want. The numbers are min-<br />
utes of wash time. The drawing<br />
shows 10 minutes of agitation in<br />
the REGULAR NORMAL Cycle.<br />
D. To stop the washer at any time,<br />
push in the Control Knob. To<br />
restart the washer, pull out the<br />
Control Knob.
What Happens in Each Cycle*<br />
Each cycle has different agitation and spin speeds designed for different<br />
kinds of fabrics. Numbers on the dial in each cycle are the minutes of WASH<br />
agitation time.<br />
When the Cycle Control Knob is set to a number and pulled out, the washer fills<br />
before agitation and timing starts, After agitation starts, the knob turns clock-wise<br />
until it points to OFF and the cycle ends.<br />
REGULAR HEAVY Cycle<br />
A cycle for sturdily con-<br />
structed fabrics that are<br />
heavily soiled.<br />
REGULAR NORMAL Cycle<br />
A cycle for regular loads<br />
of fabrics that are moder-<br />
ately soiled.<br />
PERMANENT PRESS NORMAL Cycle<br />
A cycle designed for<br />
permanent press and<br />
some synthetic fabrics that<br />
are moderately soiled.<br />
The cool-down rinse<br />
helps keep wrinkles from<br />
setting into these items.<br />
6<br />
DRAIN<br />
No<br />
Agitation<br />
q<br />
REFILL<br />
COOL<br />
DOWN<br />
l-
NOTE: You may hear the sound of wafer spraying during the spin parts of some<br />
cycles. In some cycles, cold wafer is sprayed on the spinning load to help with<br />
the rinsing.<br />
Gentle Wash System<br />
For better fabric care in the REGULAR and PERMANENT PRESS cycles, the<br />
agitation speed is reduced during the last few minutes of wash time.<br />
rl<br />
WASH NOTE: Always use cold rinse water<br />
Low for permanent press fabrics.<br />
Speed
PERMANENT PRESS LIGHT Cycle<br />
A cycle designed for<br />
lightly soiled permanent<br />
press and some synthetic<br />
fabrics. The cool-down<br />
rinse helps keep wrinkles<br />
from setting info these items.<br />
1 Cycle<br />
pI$z&q,~<br />
~~~~~~~,<br />
El<br />
REFILL<br />
COOL<br />
DOWN<br />
A lndlcates the machine Is<br />
pausing for a brief soak<br />
A cycle that gently perlod.<br />
washes and spins moder-<br />
ately soiled delicate items<br />
and washable knits.<br />
KNITS/GENTLE LIGHT Cycle<br />
~~~~~@g<br />
A Indicates the machine is<br />
pauslng for a brief soak<br />
A cycle that gently period.<br />
washes and spins lightly<br />
soiled delicate items and<br />
washable knits.
L<br />
SPIN<br />
LOW<br />
1 Speed<br />
1 Spray<br />
Rinse<br />
n<br />
WASH NOTE: Always use cold rinse water<br />
Low for permanent press fabrics.<br />
Speed
SOAK and PRE-WASH Cycles<br />
10<br />
SUPER WASH Cycle<br />
Brief periods of agitation<br />
and soak time help remove<br />
heavy soils and certain<br />
stains that need extra<br />
pretreatment. Use recom-<br />
mended amount of<br />
detergent or presoak<br />
additive. The SOAK Cycle<br />
should always be fol-<br />
lowed by a Wash Cycle.<br />
Use for washing heavily<br />
soiled loads that require<br />
maximum soil removal.<br />
Double the amount of<br />
detergent recommended<br />
when using the SUPER<br />
WASH Cycle.<br />
n<br />
FILL<br />
to<br />
Selected<br />
Level<br />
WASH<br />
2<br />
Minutes<br />
High<br />
Speed<br />
WASH<br />
4<br />
Minutes<br />
High<br />
Speed
I<br />
Pre-wash setting begins here,<br />
[see page 12).<br />
Special care is needed when soaking or pre-washing laundry.<br />
See your “Laundry Guide” for proper use of this cycle.
Other operating instructions<br />
Extra rinse option<br />
(automatic)<br />
For an automatic extra rinse in the<br />
REGULAR HEAVY or REGULAR NORMAL<br />
Cycles:<br />
l Flip the Extra Rinse button to the “ON”<br />
position before the REGULAR Cycle<br />
starts. The washer will automatically<br />
proceed into the extra rinse and spin<br />
after the REGULAR Cycle.<br />
If no extra rinse and spin is wanted in<br />
For a rinse and spin<br />
(manual)<br />
You may need an extra rinse and<br />
spin for heavily soiled loads which<br />
need more detergent. (Extra detergent<br />
can require an extra rinse.)<br />
1. Push Control Knob in.<br />
2. Turn clockwise to any l on the dial.<br />
See above drawing.<br />
3. Pull Control Knob out. The washer<br />
will fill to selected level; agitate 2<br />
a REGULAR Cycle, make sure the button is minutes; drain and spin.<br />
in the “OFF” position. For an extra rinse in<br />
other cycles, see “For a rinse and spin:’<br />
For a drain and spin<br />
12<br />
For agitation and spin speeds in each cycle, see pages 6-11.
For a soak or pre-wash<br />
For best results, use warm water<br />
for soaking or pre-washing stained<br />
laundry. Hot water can set stains.<br />
1. Use recommended amount of<br />
detergent or pre-soak product.<br />
2. Push Control Knob in.<br />
3. Turn clockwise to point at a number<br />
in the SOAK Cycle. Use the 4 minute<br />
mark for a pre-wash?<br />
4. Pull Control Knob out. The washer<br />
will start.<br />
5. When the cycle is over, add<br />
detergent for the next selected<br />
wash cycle. The SOAK Cycle<br />
should always be followed by a<br />
Wash Cycle.<br />
Important: See additional care<br />
lntormation in your “Laundry<br />
Guide!’<br />
‘To start soak or pre-wash with agitation, the Control Knob<br />
must point to a number in the SOAK Cycle.<br />
Liquid bleach dispenser<br />
Always measure bleach. Do not<br />
guess. Never use more than 1 cup<br />
(250 ml) for a full load. Use less with<br />
lower water level settings. Follow<br />
directions on bottle for safe use. Use<br />
a cup with a pouring spout to avoid<br />
spilling.<br />
1.<br />
2.<br />
3.<br />
Load the washer first.<br />
Pour measured bleach carefully<br />
into dispenser. DO NOT let bleach<br />
splash, drip or run down into the<br />
washer basket. Undiluted bleach<br />
will damage any fabric it touches.<br />
Start the washer. Bleach will be<br />
diluted automatically during the<br />
wash part of the cycle.<br />
For more information on bleaching, see your “laundry Guide!’
Liquid fabric softener dispenser<br />
1. Add detergent and load to the<br />
basket.<br />
2. Add liquid fabric softener to the<br />
dispenser using the amount recom-<br />
mended on the bottle.<br />
3. Avoid dripping or spilling any fabric<br />
softener on the load.<br />
MAGIC CLEAN@ lint filter<br />
The lint filter in your washer cleans itself. Collected lint is<br />
drained away with the wash and rinse water.<br />
If your washer drains into a tub, remove any lint collected<br />
in the drain or strainer.<br />
14<br />
4. Dilute fabric softener with hot water.<br />
Add enough hot water to fill the dis-<br />
penser up to the opening.<br />
5. Start the washer, Diluted fabric<br />
softener will be added to the load<br />
during the deep rinse portion of<br />
the cycle. NOTE: Do not stop the<br />
washer during this time. If you do,<br />
the softener will mix with the remain-<br />
ing soapy wash water. This will<br />
cause stains. Do not put detergent<br />
in the liquid fabric softener<br />
dispenser.<br />
6. If dispenser needs cleaning, flush<br />
with hot water. NOTE: Do not wash<br />
clothes with dispenser removed.
Caring for your was ;her<br />
WHEN NOT WASHING, keep both<br />
water faucets turned off, this takes the<br />
pressure off the water inlet valve and<br />
hoses.<br />
REMOVE SHARP OBJECTS such as<br />
pins, buckles, etc., from clothes before<br />
washing. Close metal zippers.<br />
AFlER WASHING, use a soft dry cloth to<br />
wipe the outside and inside dry. Leave<br />
the lid up until the basket is dry. Wipe<br />
up spills right away. Spills can dull or<br />
damage the finish.<br />
SHARP OR HEAVY OBJECTS should<br />
never be put on or in the washer.<br />
Check pocket for bolts, nuts, tools, etc<br />
SOME PRETREATMENT PRODUCTS can<br />
damage washer and dryer dials, con-<br />
soles and finishes. Do not use these<br />
products on or near your washer or<br />
dryer.
Winterizing<br />
Because some water stays in the washer, freezing<br />
can cause a lot of damage. If your washer is<br />
stored or moved during the cold weather...<br />
8)<br />
,?. _’<br />
1. Shut off both water 2. Put a quart of 3. Set the washer for a<br />
faucets. Disconnect automotive-type DRAIN and SPIN<br />
and drain water antifreeze in the (see page 12). Let it<br />
inlet hoses. basket. run for about 30<br />
seconds to mix the<br />
antifreeze and<br />
water.<br />
To use the washer again...<br />
4. Run the washer<br />
through a complete<br />
cycle with<br />
one cup of deter-<br />
1. Flush water pipes and hoses. gent to clean out<br />
2. Connect hoses to the washer the antifreeze.<br />
3. Turn on the water faucets.
If you need service or assistance,<br />
we suggest you follow these five steps:<br />
1. Before calling for<br />
assistance...<br />
Performance problems often result<br />
from little things you can find and fix<br />
yourself without tools of any kind.<br />
If your washer does not fill:<br />
l Is the power supply cord plugged<br />
into a live circuit with the proper<br />
voltage? “-3 i<br />
l Are both water faucets open?<br />
l Have you checked your home’s<br />
main fuses or circuit breaker box?<br />
l Are the water supply hoses kinked?<br />
l Is the Cycle Control Knob set and<br />
pulled out?<br />
If your washer does not spin:<br />
l Is the lid closed?<br />
l Is the power supply cord plugged<br />
into a live circuit with the proper<br />
voltage?<br />
l Have you checked you home’s<br />
main fuses or circuit breaker box?<br />
If your washer stops during a cycle:<br />
l Remember, the washer pauses<br />
briefly at different times in each<br />
cycle. These pauses are normal.<br />
If your washer fills and drains<br />
without running:<br />
l Make sure that the Cycle Control<br />
Knob is pointing to a number in the<br />
cycle.<br />
Make sure the drain hose is higher<br />
than the water level in the washer.<br />
If it isnV:<br />
l The washer may seem to be drain-<br />
ing during wash and rinse cycles.<br />
l Water can siphon out. (See “lnstalla-<br />
tion Instructionsl’)
2. If you need<br />
assistance%.<br />
Call <strong>Whirlpool</strong> COOL-LINE? serv-<br />
Ice assistance telephone number.<br />
Dial free from anywhere in the U.S.:<br />
l-800-253-1301<br />
and talk with one of our trained Con-<br />
sultants. The Consultant can instruct<br />
you in how to obtain satisfactory<br />
operation from your appliance or, if<br />
service is necessary, recommend a<br />
qualified service company in your<br />
area.<br />
3. If you need service?..<br />
<strong>Whirlpool</strong> has a<br />
nationwide network<br />
of franchised TECH-<br />
CARE@ Service Com-<br />
panies, TECH-CARE<br />
service technicians<br />
are trained to fulfill the product<br />
warranty and provide after-warranty<br />
service, anywhere in the United States.<br />
To locate TECH-CARE service in your<br />
area, call our COOL-LINE service assis-<br />
tance telephone number [see Step 2) or<br />
look in your telephone directory Yellow<br />
Pages under:<br />
18<br />
4. If you have a<br />
problem?..<br />
Call our COOL-LINE service as-<br />
sistance telephone number (see Step<br />
2) and talk with one of our Consultants,<br />
or if you prefer, write to:<br />
Mr. Robert Stanley<br />
Division Vice President<br />
<strong>Whirlpool</strong> <strong>Corporation</strong><br />
2000 M-63<br />
Benton Harbor, Ml 49022<br />
5. If you need FSP”<br />
replacement parts? . .<br />
FSP is a registered trademark of<br />
<strong>Whirlpool</strong> <strong>Corporation</strong> for quality<br />
parts. Look for this symbol of quality<br />
whenever you need a replacement<br />
partforyour <strong>Whirlpool</strong> appliance. FSP<br />
replacement parts will fit right and<br />
work right, because they are made to<br />
the same exacting specifications<br />
used to build every new <strong>Whirlpool</strong><br />
appliance.<br />
‘If you must call or write, please pro-<br />
vide: model number, serial number,<br />
date of purchase, and a complete<br />
description of the problem. This infor-<br />
mation is needed in order to better<br />
respond to your request for<br />
assistance.
Notes
WHIRLPOOL” <strong>AUTOMATIC</strong> W-HER<br />
WARRANTY<br />
LENGTH OF WARRANTY<br />
FULL ONE-YEAR<br />
WARRANTY<br />
From Date of Purchase<br />
WHIRLPOOL WILL PAY FOR<br />
FSPX replacement parts and repair labor to<br />
correct defects in materials or workmanship.<br />
Service must be provided by a franchised<br />
TECH-CARE’ service company.<br />
LIMITED FIVE-YEAR FSP replacement parts for any part of gear-<br />
LARRANTY case assembly if defective in materials or<br />
From Date of Purchase workmanship.<br />
LIMITED TEN-YEAR<br />
WARRANTY<br />
From Date of Purchase<br />
WHIRLPOOL WILL NOT PAY FOR<br />
FSP replacement of outer tub should it crack,<br />
or fail to contain water, due to defective<br />
materials or workmanship.<br />
A. Service calls to:<br />
1. Correct the installation of the washer,<br />
2. Instruct you how to use the washer.<br />
3. Replace house fuses or correct house wiring or plumbing.<br />
B. Repairs when washer is used in other than normal, single-family<br />
household use.<br />
C. Pick up and delivery. This product is designed to be repaired in<br />
the home.<br />
D. Damage to washer caused by accident, misuse, fire, flood, acts<br />
of God or use of products not approved by <strong>Whirlpool</strong>.<br />
E. Anv labor costs durina the limited warranties.<br />
WHIRLPOOL CORPORATION SHALL NOT BE LIABLE FOR INCIDENTAL OR CONSE-<br />
QUENTIAL DAMAGES. Some states do not allow the exclusion or limitation of<br />
incidental or consequential damages so this limitation or exclusion may<br />
not apply to you. This warranty gives you specific legal rights, and you may<br />
also have other rights which vary from state to state.<br />
Outside the United States, a different warranty may apply. For details, please<br />
contact your franchised <strong>Whirlpool</strong> distributor or military exchange.<br />
Part No. 3349133<br />
01987 <strong>Whirlpool</strong> <strong>Corporation</strong> Printed in U.S.A.<br />
\utomatlc Washcrs. Clothes Dryers, Freezers. Relrlgerator-Freezers. Ice Makers. DIshwashers. Bult-In Ovens and Surface Units. Ranges.