UPGRADING REPAIRING PCs
UPGRADING REPAIRING PCs
UPGRADING REPAIRING PCs

Create successful ePaper yourself
Turn your PDF publications into a flip-book with our unique Google optimized e-Paper software.
How to Recover from a Failed BIOS Update Procedure 73<br />
If you are switching to a different brand of BIOS, you might need<br />
to re-enter this information.<br />
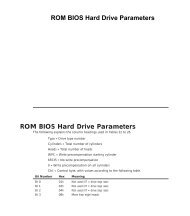
Record other non-standard BIOS settings, such as hard disk transfer<br />
rate settings, built-in serial and parallel port settings, and so on. A<br />
worksheet you can use as a guide is found later in this chapter.<br />
Read carefully and completely the information provided with the<br />
flash BIOS download or chip-type BIOS update kit. Check online or<br />
call the BIOS manufacturer if you have any questions before you<br />
ruin your BIOS.<br />
Check to see whether your system has a write-protect setting jumper<br />
on the motherboard that must be adjusted to allow a BIOS update<br />
to take place. Some motherboards disable BIOS updates by default<br />
to protect your system’s BIOS from unauthorized changes. Set your<br />
motherboard to allow the change before you install the flash BIOS<br />
update, and reset the protection after the update is complete.<br />
How to Recover from a Failed BIOS<br />
Update Procedure<br />
Most motherboards with soldered-in flash ROMs have a special<br />
BIOS Recovery procedure that can be performed. This hinges on a<br />
special unerasable part of the flash ROM that is reserved for this<br />
purpose.<br />
In the unlikely event that a flash upgrade is interrupted catastrophically,<br />
the BIOS might be left in an unusable state. Recovering from<br />
this condition requires the following steps. A minimum of a power<br />
supply, a speaker, and a floppy drive configured as drive A: should<br />
be attached to the motherboard for this procedure to work:<br />
1. Change the Flash Recovery jumper to the recovery mode<br />
position. Virtually all Intel motherboards and many thirdparty<br />
motherboards have a jumper or switch for BIOS recovery,<br />
which is normally labeled Recover/Normal.<br />
2. Install the bootable BIOS upgrade disk you previously created<br />
to perform the flash upgrade into drive A: and reboot the<br />
system.<br />
Because of the small amount of code available in the nonerasable<br />
flash boot block area, no video prompts are available<br />
to direct the procedure. In other words, you will see nothing<br />
onscreen. In fact, it is not even necessary for a video card to<br />
be connected for this procedure to work. The procedure can<br />
be monitored by listening to the speaker and looking at the